markocosic
-
Posts
979 -
Joined
-
Last visited
-
Days Won
1
Everything posted by markocosic
-
Shower, hot water options
markocosic replied to ash_scotland88's topic in Bathrooms, Ensuites & Wetrooms
Unvented cylinder with a BIG coil for fast reheat (fit a heat pump cylinder) and a system boiler. That's then future proof if you do go the heat pump route. Or a big combi for two showers and the emergency shower an instantaneous electric affair for when the combi breaks down. ATAGs have economisers / passive flue gas heat recovery to REALLY condense in hot water mode to give 16L/min at a 35C rise, which once blended to shower temperature gives you two simultaneous showers at ~9.5L/minute or three at a usable if uninspiring flowrate if you must. Don't do rain showers with that though and watch your pressure drops. (the pressure drop through combis is high compared to a UVC) Depends what you mean by a shower really! https://www.atagheating.co.uk/homeowner/products/boilers/combination-boilers#specification -
@MP1 Sounds like you're already committed there! Roof If you look at span tables linked a 4 metre span wants 195 mm deep beams @ 600 centres. Or 145 mm beams @ 600 centres that are a little bendy but hey who cares if there's enough fall to avoid ponding or on closer centres if you really want the roof to be more rigid. You've already got the 150x47s. Those on 400 or 450 centres with the 18 mm ply will be sturdy. Could have used 145x45s on 600 centres and 12 mm OSB if being cheap about it. Set the roof beams with a fall, put your air barrier/vapour retarder on the bottom of the beams, drop your insulation in between the beams (which is not as thick as the beams; say 100 mm or even 120 mm), then pop your roof deck ply / OSB on top of that. The space above the insulation becomes your ventilation and your buildup is perhaps 175 mm (5 mm membrane, 12 mm OSB/ply, 145 mm beams, ball hair of membrane, 12.5 mm plasterboard) Only if you wanted to drop to 95 mm beams, or wanted to use Kinsgpan type panels, to give more headroom under some height limit, would you need any support in the middle. Wall £ for £ (or mm for mm) the timber walls with 225 mm (or even just 145 mm) of mineral wool would be warmer than the block walls with 75 mm of insulation and I think faster / easier to finish. Given where you are already it'll be your final finish (render? cladding?) that dictates what you do here more than anything else. Floor IMO: Get a few samples. First thing I did was dropped them on the ground, stabbed them with kitchen knives, scraped a brick across them, then hit them with a hammer. Fancy finishes...look screwed. Brushed finishes...look much the same afterwards. Some brands had supporting ply made of cheese. Others offered good support to the veneer and were unmarked. You'll likely end up with random lengths if buying cheap. Unpack them, sort by size (and rejects), let them acclimatise. Plan your joints to ensure that you have lots of overlap. It's difficult if they give you a pack of short bits. You'll want a 3 mm notch trowel and MS polymer adhesive. Don't get it on the face of the boards or in your hair. That includes kneeling in it. Lay your boards, bed them, and don't walk on them until it has cured. When done scuff the boards up and use a commercial duty two pack satin lacquer over the whole lot to add protection for the surface and avoid the inevitable red wine spills staining the edges by sealing it all up. If a labrador does a "cartoon dog on ice" impression the lacquer will scratch. Magic sponges (slightly abrasive melamine sponges) polish this out and leave a similar finish to a satin lacquer. The finished item gives more of a "dull thud" than a solid piece of timber on joists. It has some compliance but it's not the "laminate laid on some sponge on top of a solid floor" type feel. Difficult to describe but not unwelcome. @Nickfromwales Logic on the fatter 'service cavity' rather than fatter wall studs for achieving a given level of insulation was: - Easier to raise the (lighter) 145 walls with 70 mm service cavity added later than say a 175 mm wall with 45 mm cavity or 195 mm wall with a 25 mm service cavity. - You can order all the insulation @ 70 mm thickness rather than having to order mixed thicknesses It isn't for fat services per se; though 204 x 60 rectangular ducting fits for ventilation at low velocities, rainwater pipe for ducting mini-spilt AC lines fits, and ; you're never short on depth for shower mixers, wall hung taps etc The vapour retarder / air barrier winds up a little closer to the middle of a wall that's likely to be heated (wants vapour retarder inside) as much as it's going to be air conditioned (want vapour retarder outside) too. 45 mm works, and has the advantage that you can rip down leftover x by 45 mm timber from building the walls/roof to use as the internal battening. 25 mm works too until you want waste pipes buried without having to have half in the service cavity and half "eaten into the plasterboard" or shoved into the structural wall a bit. The 70 suggestion was for maximising the performance per £ / mm within the "150 mm thermalite plus 75 mm" kinda thickness outlined. You could use diagonal 25x50 mm strapping on the outside for shat strength if you wanted to. For the purposes of a garden room / shed...sat on a raft...with a big roof diaphragm on top...and gets horizontal cladding to the outside of the studs...double plasterboard is more than just decorative and gives useful thermal mass. OSB behind plasterboard (attached to the battens attached to the studs) is more useful to you than OSB on the outside or OSB between the studs and the service risers...because you can then woodscrew things anywhere you like on that internal wall. It's there for screwing things to wall convenience in the same way as you might ply line parts of a wooden shed. Not really needed in that structure. For a pukka house that's not short and squat and it's be a different story. In this case it's all block anyway. Oodles of shear stiffness for the size. But more laborious to build/finish and not as well insulated once done.
- 27 replies
-
- 1
-

-
- outbuilding
- garden office
- (and 4 more)
-
Passing flue through wall / roof
markocosic replied to markocosic's topic in Stoves, Fires & Fireplaces
Thanks - hole dia +50mm through the OSB and wind barrier; seal the gap to the flue with those flashings then. They don't seem to sell those mineral wool sleeves any more ProDave - only the flashing collars that I linked above. I assume it's literally a hunk of mineral wool with a band around it; so little point in adding this if the flue is already passing through mineral wool (albeit one layer of rigid and one layer of squishy) I'll kick off the argument as to whether it goes through the wall or the roof next then ? -
+1 from me for air:air heat pump / air conditioner for an insulated outbuilding. Remember the condensate drain. Thinking out loud on build: I don't like the idea of trying to air-seal PIR foam to studs/joists using foil tape. It sounds like a monumental faff cutting and fitting and taping all that compared with using a dedicated air tightness/vapour retarder membrane on the inside then stuffing flexible insulation between the studs/joists. If you swap from block to timber frame then you've got 100+ mm extra depth available and won't need the high insulation values of the PIR. You probably want 195 mm joists for the roof for structural reasons so again don't need the high insulation values of the PIR. Walls Maybe don't build in blocks (slow, messy) then add a token amount of insulation externally. (and add a finish on top of that) Try: Inside: double plasterboard then horizontal battens to make 70 mm service cavity (lets you run cables, pipes inc waste pipes and A/C pipes, 205 x 60 mm ventilation ducts etc), mineral wool infill then an airtightness layer/vapour retarder membrane. (add extra horizontal battens where you want to attach really serious loads) Structure: 145x45 mm studs on 600 centres. 150 mm mineral wool infill. Outside: wind barrier membrane, vertical battens attached to studs, horizontal cladding The plasterboard provides your shear strength in this arrangement. Swap the airtightness layer/vapour retarder membrane for taped OSB if you need more shear strength. Or put an extra sheet of OSB behind single plasterboard to give shear strength and let you screw anything to any wall anywhere but note that this won't be an airtightness/vapour retarder due to all the socket holes etc. I'll be way faster, quite a bit warmer, and probably cheaper than building in block. A single storey frame that size goes up over a weekend with two blokes who know what they're doing. And when you realise that the bog drain is in the wrong place you've got enough room to sneak a bog pipe down through your wall at the expense of a little insulation. Sink drains run in the 70 mm service cavity. Roof If you do what you describe with the 6x2s, PIR, and plywood then your plywood is never going to dry. Why? Putting a sheet of plastic (air/vapour barrier) on top of grass gives you...moisture under the plastic from the moisture generating activities underneath. Do the same with your roof (EDPM or felt air/vapour barrier)...and it will rot. Your flat roof needs to be: - waterproof layer (EPDM better than felt) - support layer (OSB is fine) - VENTILATION gap - Insulated roof structure - Airtightness / vapour retarder It's fine to have an unventilated flat roof on a shed...because the entire shed is ventilated. It doesn't work for habitable buildings. For long life you probably want more like: - waterproof layer - 12 mm OSB (this is enough; go thicker if you'd like to spend more) - spacers (use 20x50 mm battens if you are creating the "fall" in the structure of the roof; use something fatter cut to an angle if you are laying the structure of the roof flat) - 195 mm C24 roof joists on 600 centres to span the full 4 metre width and avoid any beams inside (see span tables e.g. https://www.timberbeamcalculator.co.uk/span-table/flat-roof-joists?load=1&class=C16) - mineral wool between these - airtightness layer/vapour retarder (without holes through it) - plasterboard To save on height run all your cables and ventilation at high level in the walls, rather than in the ceiling. (anything that "crosses" joists should be run in the walls) Where they must go in the ceiling put them between the joists so that the plasterboard "pushes up" the membrane and the insulation slightly - fine for cables for lighting or alarms etc; don't try it for deep downlighters; and don't fit downlighters anyway wall washers will give you a nicer light) Alternative? Going for a shallower roof means a bigger fall (and letting it bend a lot) and/or internal structure (to support the shallower joists at midpoint). If you could tolerate a post where your "shelf wall" is, and making the partition wall between bathroom and gym structural, then you could have a "ridge beam" running from left to right and a very shallow dual-pitch roof with joists that are only 2 metre span. Then you're into C24 45x95s on 400 centres (or 600 centres if ok with it being bendy) rather than 45x195s. You could go with structural panels at that point; as they easily span 3 metres but are dubious at 4 metres unless you go for particularly fat ones. https://www.kingspan.com/gb/en-gb/products/insulated-panel-systems/insulated-wall-panels https://www.griffithsandson.co.uk/kingspan-insulated-seconds/66 They're fugly but if used in single pieces (no joints on the slope) you can go for a near flat roof that will outlast felt/EPDM, has U-value of between 0.15 and 0.5 (depending on which thickness you buy), and includes all the structure/airtightness that you need as part of the panel. Hide three sides from view by continuing your wall cladding up above the roofline. Either have the 4th side drain into a gutter on the non visible side or if you're braver build an EPDM box gutter on top of that 4th wall and again bring the wall cladding up to hide it. Sturctural Single sole plate and header plate on the walls. Line up your roof joists with the wall studs on 600 centres. Careful on BIG openings. You will need a structural header above the big door to carry the roof joists. Maybe 2x 195x45s in C24 - use something like this to check https://www.timberbeamcalculator.co.uk/) Push this to the TOP of the wall so that all the load is carried at high level by two pieces like this ||. Then have another piece of 145x45 mounted like this _ above your big door but don't put any vertical sticks between this and the roof. Why? These pieces || provide the roof strength. They will bend as the roof is loaded up. This piece _ provides the in/out strength for the door but has all the structure of we spaghetti in the vertical direction. By separating the loads you will avoid jamming the door or busting a window under a large opening in the timber frame. The other option is making a "solid" wall (with vertical sticks between your header and the the top of the window opening) then putting the window OUTSIDE the timber frame on an OSB or ply box. This way the wall can move under load, and the OSB/ply box will bend so that the window can stay the same size even as the size of the hole in the wall changes) (most fixed windows have 5; maybe 10 mm of movement between glass and frame before you run out of room and start loading up (breaking) the glass; most moving windows/doors can only allow 5 mm of outside frame movement before they stop opening/closing/sealing correctly; big timber frame openings will move more under load than you might expect; and not all window/door people that are used to selling to brick and steel constructions will give you the right mounting details for a timber frame) Floor If you have a raft already then gluing some foam and structure on top as nick suggests makes sense. If you're using an engineered wood finish (basically tongue and groove plywood with some veneer on top) and you glue this to 22 mm OSB (rather than gluing it to itself and floating it) then you have the equivalent of a 40 mm kitchen worktop to walk on. It won't move and saves the extra 22 mm OSB. Your bathroom might dictate otherwise. Are you going to have a drain in the floor there that you can hose down all the mud / sweat / human fur into? Does the steam shower need to drain into the floor rather than the wall?
- 27 replies
-
- 2
-
-
- outbuilding
- garden office
- (and 4 more)
-
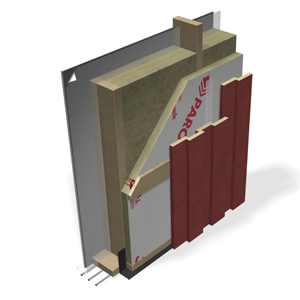
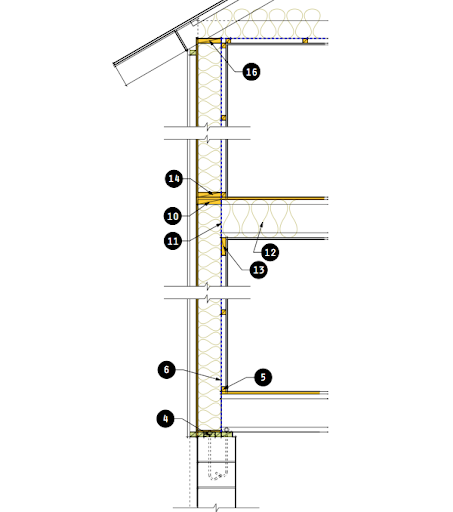
Hello, We have a wall / roof buildup as listed below. My wife insists that we some holes ( ? ) though the wall/roof for a little log burner. I assume this will be double wall stainless and would like it through the wall if possible. I'm sure she'll want a vertical chimney through the roof instead. Constructions are much the same though. How does one detail the air / water sealing on these? The plasterboard won't give a stuff The internal 12mm OSB is our airtightness and vapour retarder. The sticky tape used for taping those joints will turn to mush if used on a flue The mineral wool won't give a stuff The external wind barrier will likely melt if close to a flue The board on board cladding (rough cut pine) needs water directing away from the end grain but should otherwise be ok with double wall flue No building regs apply (summerhouse) but don't want to burn the place down or die either. These "liners" for sale seem to be mineral wool in a metal sleeve: https://www.topline.ie/plumbing-heating/plumbing/flue-pipe-accessories/flue-pipe-accessories/mi-flues/system-2/twin-wall-45-insulated-sleeve https://www.schiedel.com/uk/products/additional-ranges/ignis-protect/ As most of the wall is mineral wool do we think a hole in the OSB with one of these in, and a hole in the wind barrier (backed up with some 6 mm OSB )with one of these in, would be appropriate? https://www.flue-pipes.com/rubber-aluminium-flashing-184.html Do you need to worry about water running on the outside surface of the flue tracking past the EPDM? Photo examples of these through roofs and walls would be helpful! A metal flashing for the wood cladding to redirect the rain from "under" the uphill board to "on top" of the downhill boards should be enough for diverting bulk water around the flue. Buildup: - 25 mm (double layer) plasterboard - 45 mm service void with horizontal battens and soft mineral wool infill - 12 mm OSB - 195 (wall) / 245 (roof) mm stud/rafter with soft mineral wool infill - 45 mm rigid mineral wool overlay - 100 x 25 mm vertical wood strapping to hold mineral overlay - Wind barrier (Jutadach 85 from memory) - 50 x 25 mm vertical battens to hold wind barrier - 45 x 45 mm horizontal battens (to hold cladding) - 150 x 25 mm board on board cladding to roof/walls Heat loss calculator - Cabin.xlsx

-
+1 for pavingexpert site. Bounded edges. Geotextile. 150 mm sub base in two layers compacted "to refusal" with something big enough to settle it: https://www.speedyservices.com/18_0104-h-wacker-neuson-dpu2540h-400mm-reversible-plate-compactor-diesel-160kg Make sure the sub-base is level and create the falls in the sub base. Your sand layer (~40 mm loose raked/30 mm after one pass) will eventually compact "to refusal" with cars etc going over it. If it varies in thickness then your blocks will vary in height. Rake sand level and give it one pass with the compactor. Lay blocks. Run over these with the biggest thing that won't smash the blocks. One of these over a sheet of 6 mm OSB if you can't get a rubber mat: https://www.speedyservices.com/18_0112-h-altrad-belle-pclx320-streetworks-320mm-plate-compactor-petrol-65kg Then kiln dried sand in the gaps to lock the blocks in place with friction. Don't power wash it all out again. (that will let the blocks move) That won't then move.
-
The devil is in the detail... of hidden rainwater drainage
markocosic replied to DKR's topic in Introduce Yourself
That first one looks like ~500 mm standing seam on a 9-10m long "1.5 storey" building (left side full height) to my eye - scale it from the velux windows? Slate example attached:
-
The devil is in the detail... of hidden rainwater drainage
markocosic replied to DKR's topic in Introduce Yourself
What were the 5-year failure boards and how were they treated gc100? That's a short life even for noddy basic Wickes decking boards. Were they untreated softwood? "No treatment needed" larch panels? -
The devil is in the detail... of hidden rainwater drainage
markocosic replied to DKR's topic in Introduce Yourself
Cement boards are definitely a classic ? https://lemora.lt/stogo-danga-priedai/stogo-danga/siferis/3189-eternit-agrol Hardie plank is a safe option for a decorative open rain screen. It's heavy though. Not as pretty (looks plastic to my eye) but long lasting. The comments EPDM and not trapping moisture within the wall structure would still apply though. Standing seam - I suspect the first image that you attached looks messy because nothing lines up (roof vs walls) and the walls are covered in unnecessary seams. (that length can be made in one piece) Standing seam roofing can be premade zinc plated / powder coated steel too rather than made off the roll. Max off the shelf length on Rukki is 10 metres. It's ~€15/m2 in the baltics but how much it would be to import to the UK though. https://www.ruukki.com/roofing/products/roofing-sheets https://nordicroofing.co.uk/ "Architectural" panels have wider (~1m) spacing between seams if you want fewer of them: https://www.kingspan.com/gb/en-gb/products/insulated-panel-systems/insulated-wall-panels/quadcore-architectural-wall-panels-ks600-1000 You might want the opposite with MORE seams (or ridges) to make them less prominent rather than a hard seam every 500 / 1000 mm though? I think this looks clean because the seams between panels are much less visible, they're the same on the roof and the walls, and the gutter breaks any mismatch between roof and the wall: -
The devil is in the detail... of hidden rainwater drainage
markocosic replied to DKR's topic in Introduce Yourself
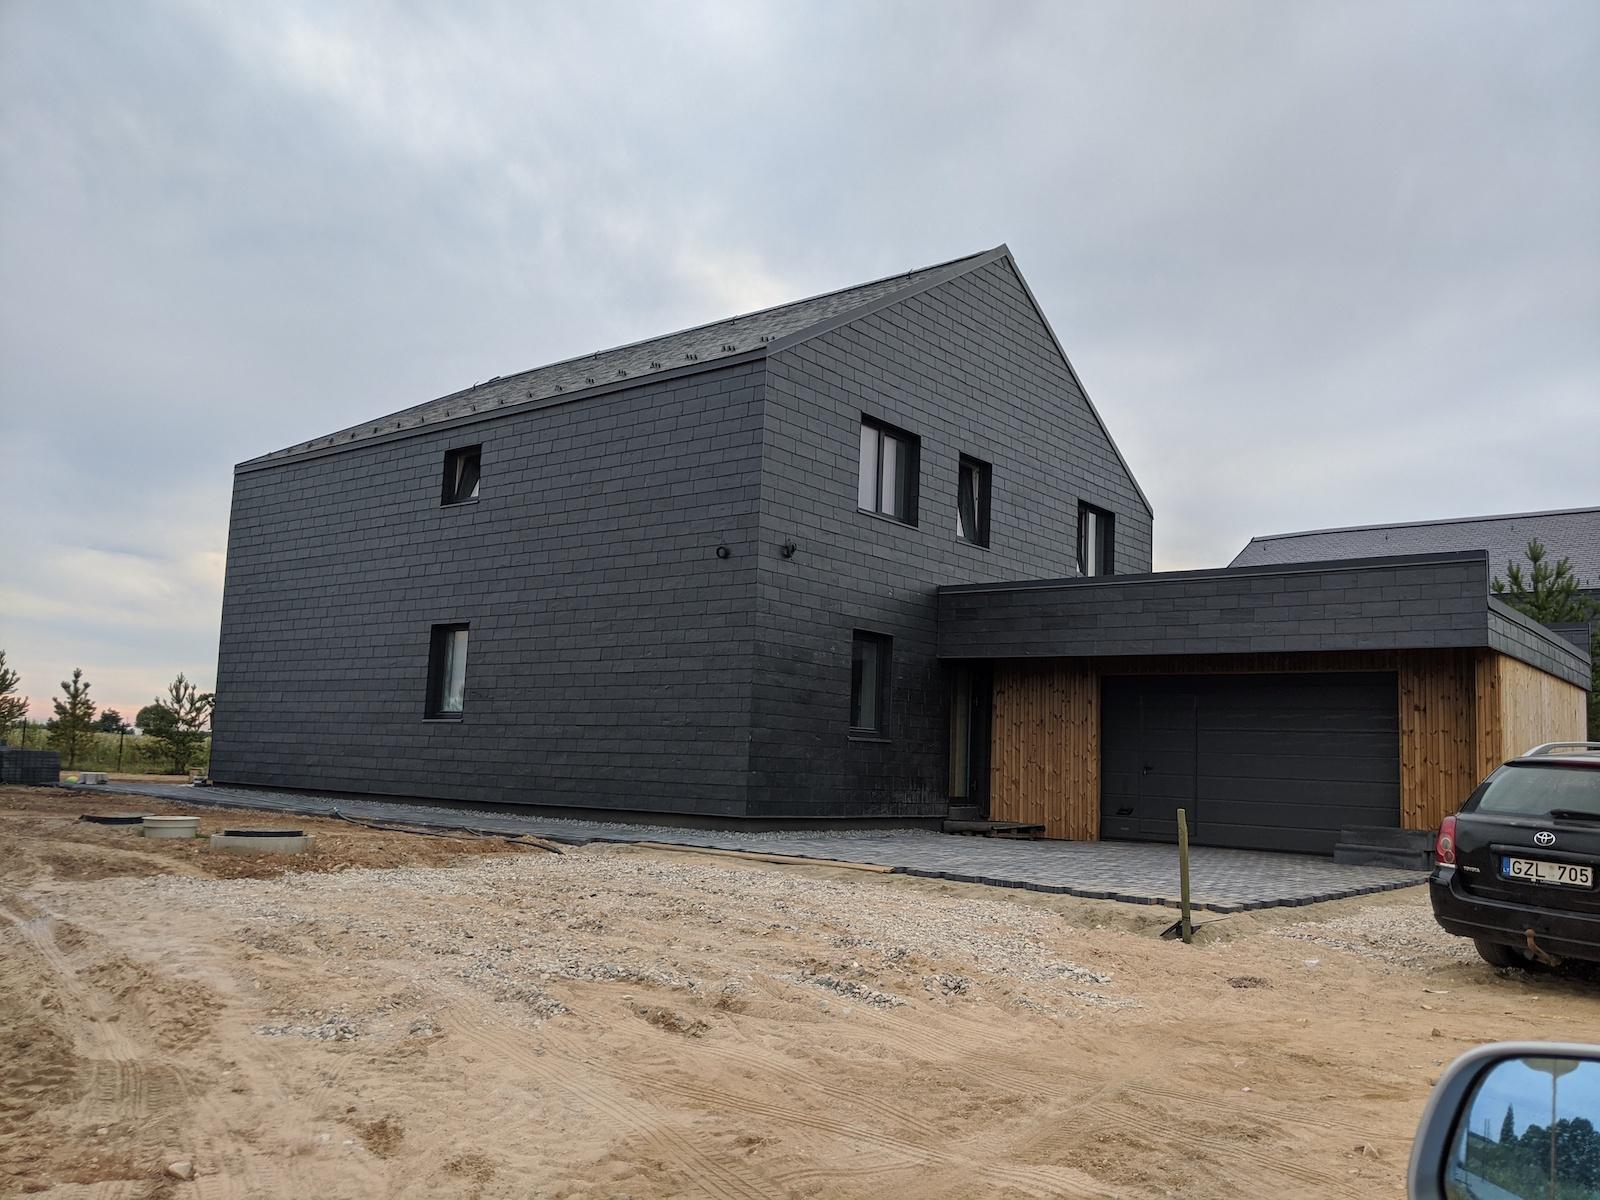
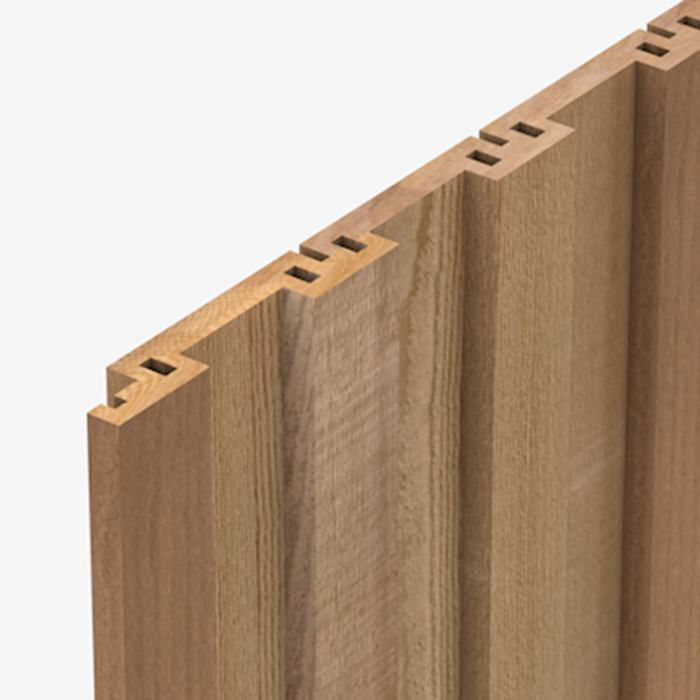
She she must be obeyed also liked that style. Monopoly house / plain barn in burned wood is very much in season at the moment I'm told. If you're prepared to do it in standing seam metal (e.g. Rukki roof) it's pretty easy. Water proof / air proof but vapour open membrane. Vertical then horizontal battens. Metal roof that turns into metal wall. No gutter. Lift the bottom of the house >0.5 metres off the floor to avoid backsplash. Ditto in slate or other doesn't really rot type material. In wood... You can have a decorative wooden cover over a metal roof. Use trapezoidal metal panels with horizontal battens fixed to the ridges. Attach your "open facade" to those. Expect the tops of your boards to rot quickly. You can have a decorative wooden cover on top of an EPDM roof. Drape the EPDM over the "vertical" battens so that you have the equivalent of trapezoidal metal panels but in EPDM. Attach horizontal battens to these ridges. Attach your "open facade" to those. Expect the tops of your boards to rot quickly. "Open facade" approach not ideal. Leaves and other debris will fill that drainage cavity over time (it isn't getting huge water flow or wind to clear it) then your battens start to rot...never mind the hidden gutter detail. Make the "vertical" battens enormous to avoid this. Vertical tongue and groove is closed...and great for trapping water and reducing your drying area / airflow. Putting a metal ridge on top helps. Sliding a metal strip in the roof-eaves jointline to deflect water off the top of the wall boards would help. An overhang helps. Closing the roof deck / facade helps. It's a disposable aesthetic cover on a building. Make the wood as resilient as possible and it'll take longer to fail. Less disposable is your timber frame. The EPDM should not enclose your wall/roof structure. (don't put a hard vapour barrier on the outside of your wall/roof and expect the wood not to rot - in a heating climate the hard vapour barrier is on the inside and the outside needs to be less vapour open; else you're doing the equivalent of putting a sheet of glass over grass in the sun and being surprised at all the warm condensation under it) Use breather membrane to close your wall/roof, then vertical battens as breathing (for the wall), then OSB and your EPDM. The second wall/roof detail is madness I think. After some research we're going to try this... Overlap boards. Very traditional with pine tar an 3-yearly re-treatment. Less traditional with alkyd/acrylate paints and 10-yearly re-treatment. But if detailed right / maintained is supposedly good for 30+ years. (the limit being how well it is maintained) - Timber frame w/mineral wool (fibreglass falls down cavities; rigid foams between studs hard to fit/detail) - Water and windproof but vapour open membrane that can be laid hard against insulation (not all can be) - 50x25 mm vertical battens / 50x50 mm horizontals (to give nail purchase) every 600 mm - Make from dried 150 x 25 mm boards - Impregnate the boards (rough cut stuff is usually just dipped rather than pressure treated) - Overlap by 25 mm (creates vertical ventilation grooves) - Rebate (10 x 8 mm) the centre of the overlap to create a drainage groove / ventilation groove for the overlap - Paint with good alkyd or acrylate paint... - ...and paint the tops and the areas of the boards that overlap... - ...but leave the backs that are exposed to the cavity and those 10x8 grooves unpainted to aid drying - 5+ cm overhang - Seal the walls to the eaves - Vent from the ground floor to the ridge - Cut the bottom of the wall boards at an angle to crate a drip edge - Make provision to avoid splashback UNDER the house No metal. No EPDM. Wind proof membrane underneath doesn't need to be UV stable. Can replace with metal or slate when you get bored with maintenance. Can decide that in 50 years time you'll be dead and not care. Maybe not the look that they're after. Depends how much fot eh future work they're going to do.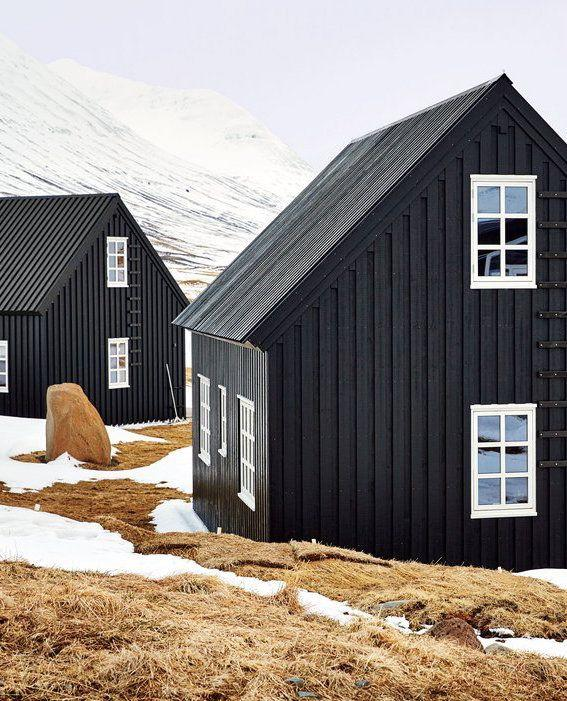

-
Apparently 47-52 dB(A) for the shoebox units - a bit louder than a combi / more like a dishwasher: https://www.kensaheatpumps.com/shoebox-ground-source-heat-pump/#Product-technical
-
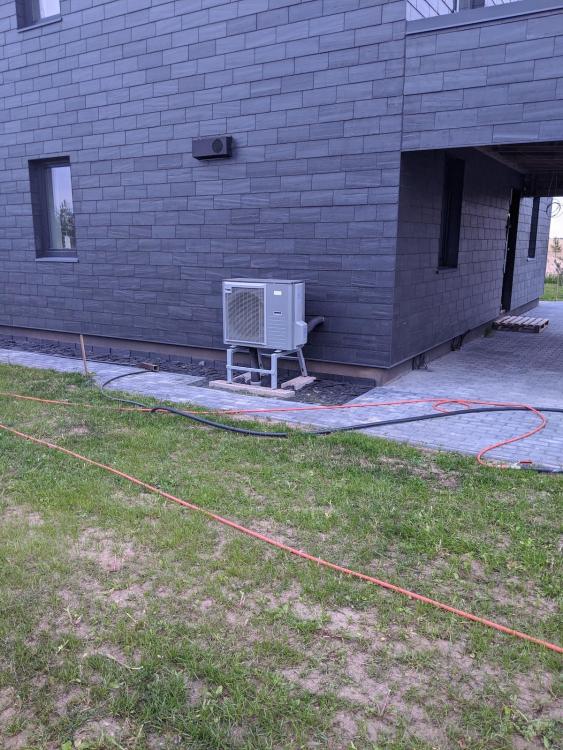
Brand new Panasonic Etherea inverter. Noisy AF before being dismantled and lousy insulation secured. Noisy afterwards. Not as noisy as children with windows open. But audible from about 3 doors down and the noisiest thing in the neighbourhood if operated at night. Fine in rural areas with screening / vegetation and no neighbours but I wouldn't want one on a city plot that you're trying to keep quiet. Bloody effective in heating mode during the shoulder season too (3.4 kW @ -7C but more like 5 kW+ >7C; soon reheats air in a modest building even if walls are cold...but you need higher setpoint for an equivalent thermal comfort due to all that air movement; say 23C on a mini split air handler equivalent to 20C on radiators). Absolute bliss when it's silly hot outside. ? 50 dB(A) is more offensive in person than on video. They high level wall mount then measuring the sound 0.8 metres below the unit for the brochure - real world will be noisier. https://www.saturnsales.co.uk/images/products/editor/CS-Z_Range.pdf That DHP-H 6 GSHP unit is nominal rated at 41 dB(A) and as a fixie (rather than inverter that varies its speed) I suspect it's easier to isolate the vibrations as they're at a set speed. Compressor sits on an isolating frame within the GSHP unit; 400 kg (full) GSHP unit sits on isolating feet (and that 200 kg of water as an integral part of the 100+ kg GSHP frame vs <20 kg compressor and frame helps with vibrations); flexible sold pipe connections withn GSHP unit from isolating frame to main body; flexis from main body to building pipework. We will probably enclose it. See what happens though - it's an experiment. My benchmark is an A+++ siemens fridge/freezer at 39 dB(A)...allegedly...when it's in the special "Volkswagen mode" for cheating the efficiency and no doubt noise tests rather than in regular operation and not counting door openings. Else definitely noisier. And a Vaillant Ecotec 824 combi at 46 dB(A)...which must be in some steady state mode rather than DHW production or the whirring it makes on startup / purging. Etherea noises (excuse unfinished mess background)
-
Sounds like a candidate for a solid ground floor to me. If going timber floor though...sit the walls on the footings; run the airtightness layer down the wall, then hang the joists off the wall or sit them on the footings? This is less of a cold bridge than running your joists through the wall. Ditto at first floor level with ledgers; flipping your airtightness layer over the top of the header plate (on the ground floor) and under the sole plate (on the first floor) to keep it contiguous. The platform framing approach (with joists sat on top of footings and wall sat on top of joists) was used before the days of structural screws / joist hangars / airtightness etc. http://blog.lamidesign.com/p/swedish-platform-framing-info.html
-
Leak testing kit
markocosic replied to markocosic's topic in Mechanical Ventilation with Heat Recovery (MVHR)
Thanks - any recommendations for anemometers? Apartment cabbage - agree but am surprised it doesn't draw through the MVHR unit in preference to the neighbours. (either the leak is decent or they've got a window open and the wind comes from that direction etc) -
All of the above SteamyTea ? Brookvent...will post and ask. GSHP... ...the base plan was a €1000 mini-split for space heating/cooing and an immersion cylinder. (there'll also be a wood burner for those days that are cold enough to warrant lighting it without risking immediate overheating) ...the experiment is the GSHP. Winter drops to -20C worst case so potable water stays indoors. For these GHSPs with built in hot water tanks you kinda have to put them indoors: https://assets.danfoss.com/documents/52352/BC006686463914en-010901.pdf I'd like to see how noisy these really are. And what the run hours to serve a DHW load (2 hr runtime?) and space heat load (naff all from and cycling a couple of times a day into a decent buffer tank?) are. Ground loops will be trenched as there is plenty of land that needs draining better via ditches and a digger is cheap vs a drilling rig. (we already have the bill for a 55 metre potable water borehole...no thanks to more of that) If too noisy it'll either get reverted to a glorified 4.5 kW immersion only unit (the original plan for DHW) with option to boost by 6kW if required; or moved into an outdoor shed built over the potable water borehole. (that wouldn't have windows and would need lots of insulation and probably heating but it wouldn't be a bad thing to keep the borehole head warm) These were spendy affairs when new and dear lord does it weigh enough (200 kg empty / 400 kg with water in) so I'm hoping that it's not as noisy as a those basic Kensa units sat on top of some loose floorboards in the airing cupboard between all the bedrooms made of single layer tissue paper partitions where it needs to run for hours to meet a high space heat load etc. I'm not too precious about it given the cost to experiment here (probably £1.5-£2k all in) vs on the final build. Folks do use ASHPs here. Dry winter and high enough off the ground for snow. Monoblocs need antifreeze in the system. All of them need external pan heaters to keep the oil/refrigerant in the compressor in the right place which is not ideal for occasional use. All of them are noisy (I have one on the first house) which spoils the outdoors and all of them need maintenance (twice a year clean) so I wouldn't want one of these again. Cheap; effective; but less than ideal.
-
Hello, I'd like to do some leak testing on an existing apartment (WHERE is that smell of the neighbour's pickled cabbage coming through the floor/wall...) and a new build (WHERE are the inevitable leaks that need attention) In the apartment I can generate pickled cabbage smell by waiting until dinnertime and dialling the cooker hood up to 11. I can smell the leak. The leak isn't big enough to feel or move a sheet of paper etc. I suspect it's the edge of the floor screed and diffused through the foam and coming form behind the skirting etc. They're renovating the heating system in the (stalin era) block this year (= smashing out all the old heating pipes) so it'll be a good time to hunt leaks/seal leaks. What are the options? Incense stick? Professional incense stick: https://www.bes.co.uk/the-smoke-stick-kit-3-sticks-17313/?ref=gs&gclid=CjwKCAjwvMqDBhB8EiwA2iSmPOE9X198w7xCDireUtOaJM8700fw19jUSediisUz0gPGrV2rw1giiRoCFQ0QAvD_BwE https://www.amazon.co.uk/Arctic-Hayes-ARC333113-333113-Smoke-Sticks/dp/B009BUDDHM/ref=sr_1_3?dchild=1&keywords=smoke+pencil&qid=1618131002&sr=8-3 Vape pen? Professional vape pen: https://cleverlysolved.com/products/smoke-pencil/?v=c65242dc6c2c&doing_wp_cron=1618186380.1039199829101562500000 Anybody played with these? I'm hesitant to buy fancy incense sticks if the vape widget works and hesitant to buy the vape widget unless somebody has tried similar. We're also building a cabin. Same again but this time I'll need to pressurise / depressurise. Car radiator fan + PWM control in a doorway is the current plan. (the £1200 BTS kit is nice but a little spendy for one off use) https://www.aliexpress.com/i/4000226020635.html Anybody done this? Or found an inexpensive calibrated fan where if you know the pressure difference and the speed you can work out the airflow?
-
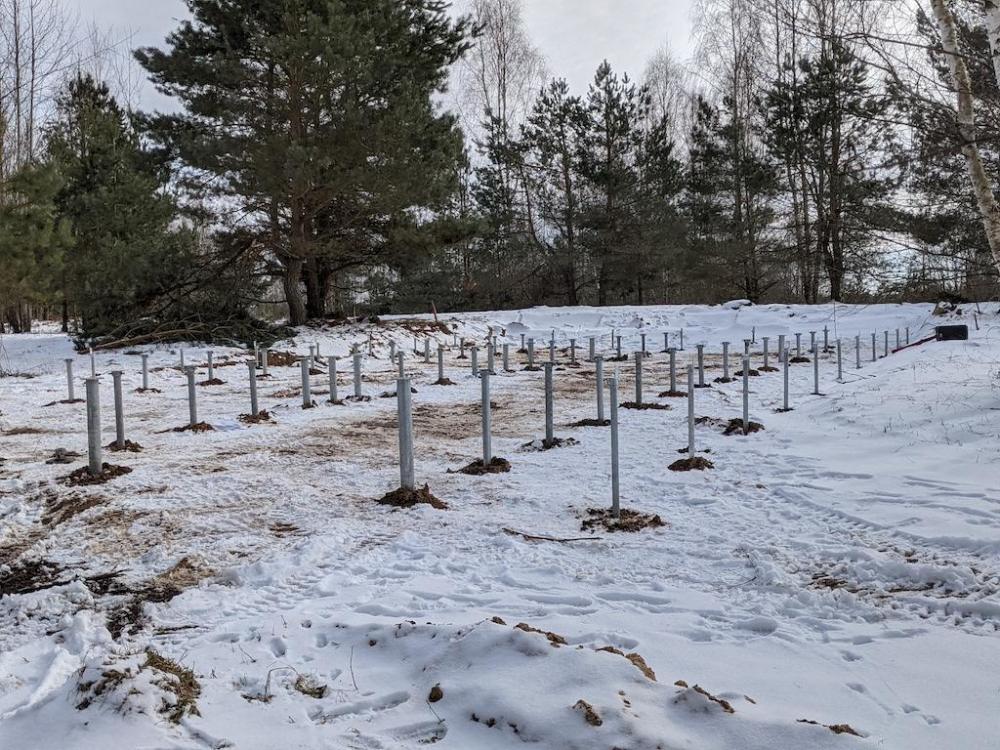
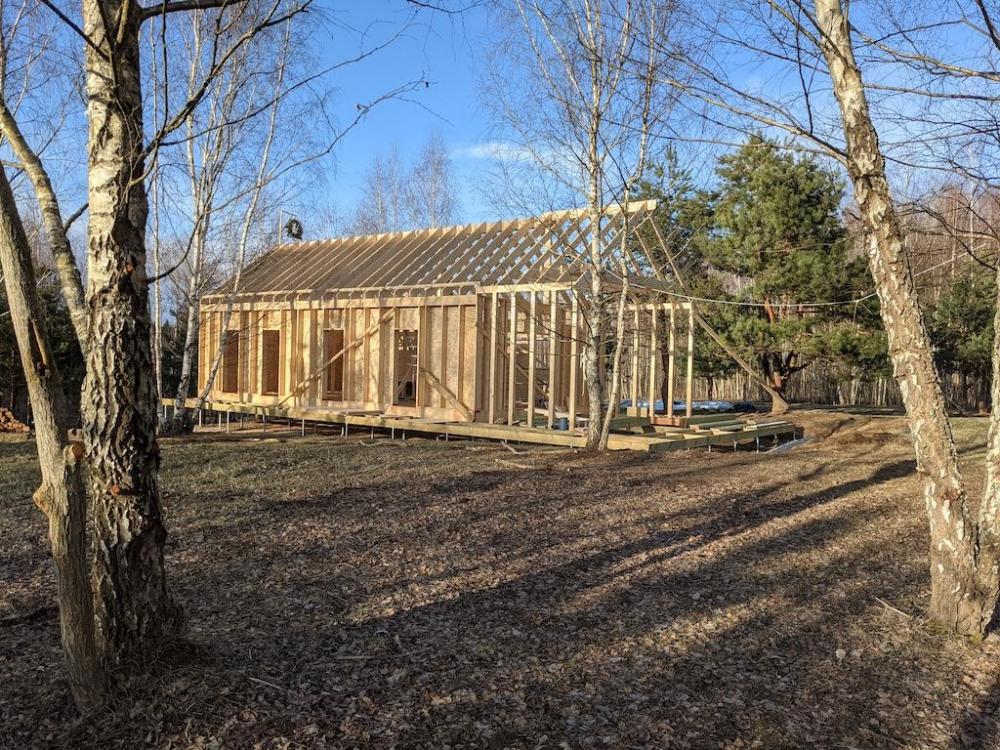
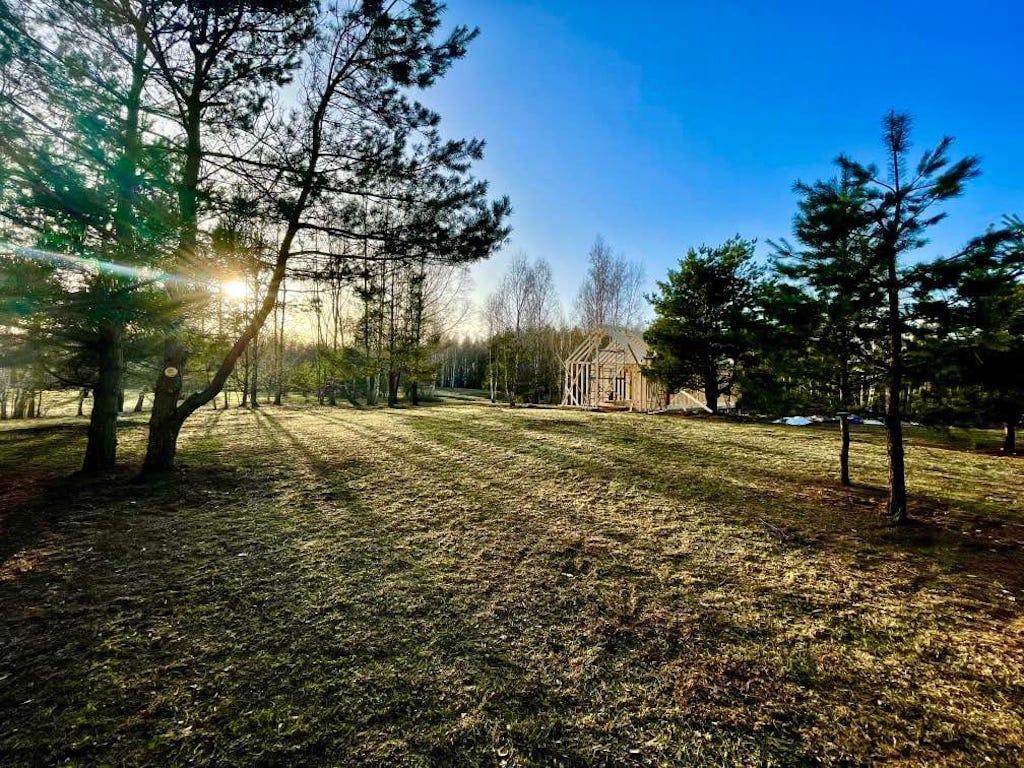
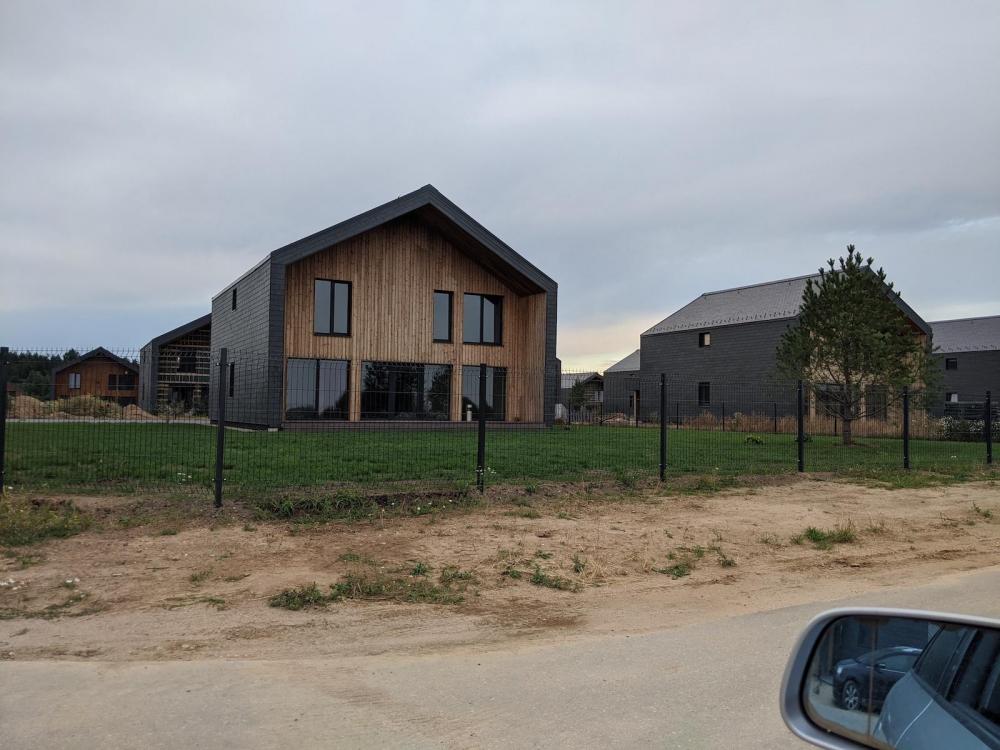
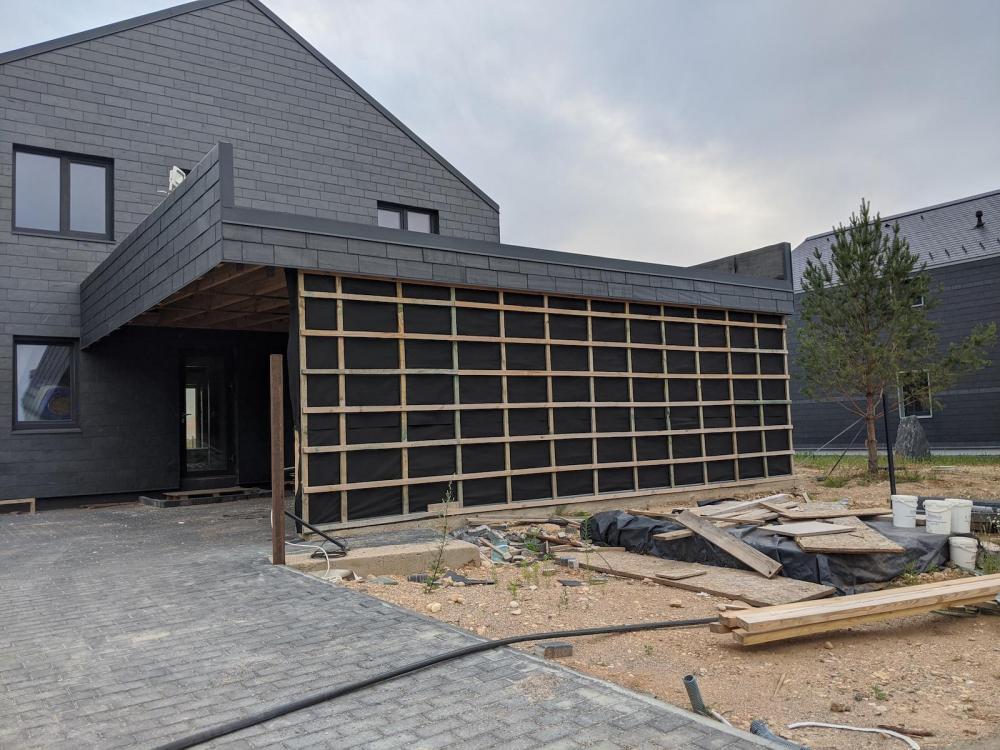
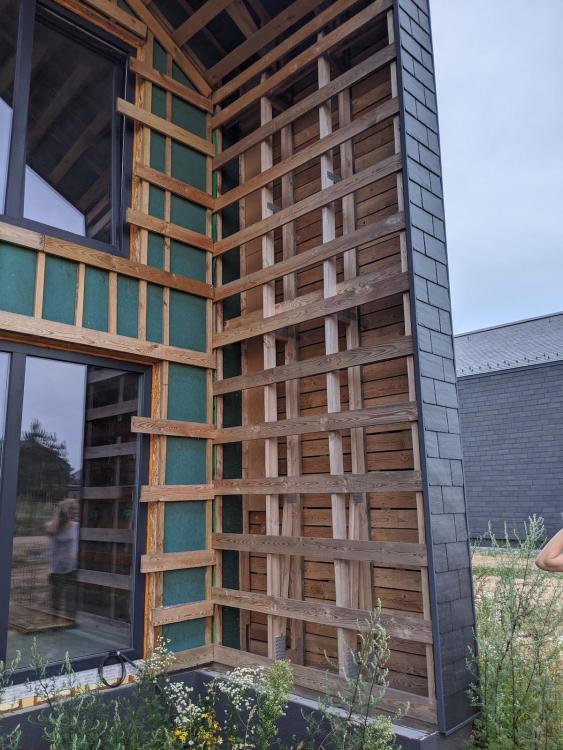
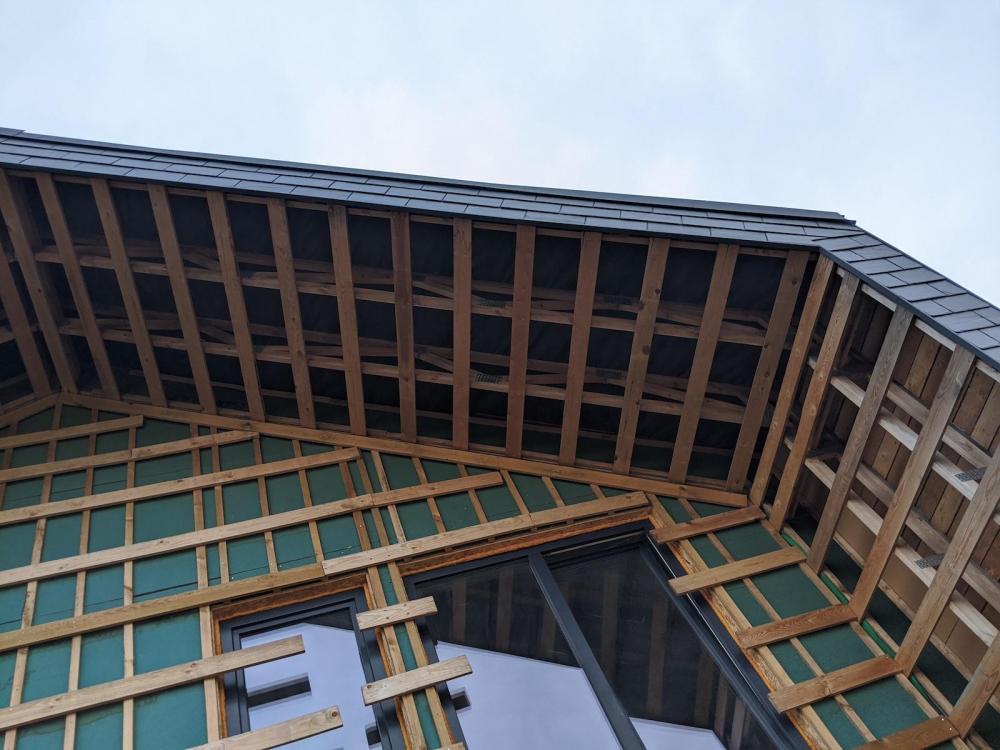
Hello, An Englishman with a Lithuanian wife here; building a "practice cabin" on some land she bought at auction whilst there was nothing else to do... There's a saying here (Lithuania) that the first house you build is for your enemy, he second is for sale, and the third is for yourself. As such: House 1: Bought an house that wasn't new. Fixed it up to the point that most of the population would think it great. Annoyed by various bits of it. Longer term We'll build in the back garden then sell the original house. 1970s ex local authority 2 bed terrace in Cambridge. Previous +1 owner was a handy andy carol smiley type. Wiring bodged. Plumbing bodged. Heating bodged. Porch bodged on the front. Attic converted by knocking out all the trusses and calling it good etc. Time (20+ years) says it wasn't going to fall down but flooding or fire were reasonably likely. I think my favourite was the cooker gas supply "sealed" by showing some tile adhesive in the end, bashing the end of the pipe flat and folding it over, then slapping some tiles over it. Stripped back to brick and joists internally; chimney removed down and joists replaced; french windows and larger kitchen window to rear elevation; ground floor open planned; roof jacked back up and steel purlins added; structural partitions on 1st floor to support attic floor. (i.e. sufficiently unbodged not to fall down) Re-wired, re-plumbed, insulated where practical mainly to reduce cold spots/for comfort rather than energy (450 mm loft rolls to the eaves; cut back the brick cavity closures and celotex-ed; 9 mm plasterboard with 25 mm foam to existing concrete window headers; 30 mm EPS between battens on existing ground subfloor w/18 mm chipboard and 14 mm engineered oak on top), MVHR to 1st floor bathroom/bedrooms (for forced ventilation - bedrooms are small, I take in lodgers so doors are shut, the house nowhere near airtight enough for MEV to work, and open windows are a poorly controlled) Biggest wins: MVHR is astounding; if switched on I wake up comfortable; if off I'll wake with did-i-eat-a-hamster throat from mouth-breathing at night due to high CO2 and the windows are moist with condensation. A little mini-split downstairs that bought during a fit of heat induced insomnia/rage is worth every penny for the week or two each year when it's >30C during the day and >25C at night. Works well for heating (the whole house) in the shoulder seasons too. Biggest frustration: mortgage providers won't let you knock down these pieces of rubbish and rebuild them; working around existing rubbish takes far longer, costs more, and achieves a worse result than starting from scratch; tradesmen serving the resi sector are in short supply, with far too many arrogant idiots that need as much supervision as children and come with 10x the back chat. Biggest regret: buying cheap double glazed doors and windows with the structural integrity of wet spaghetti and the airtightness of colander; not digging out the subfloor and throwing in an insulated one with UFH; not planning ahead for a mini-split A/C and running lines to the upstairs landing. (cold air falls / warm air rises so if it's cool bedrooms you're after then you really want that indoor unit on the upstairs landing) House 2: The practice cabin near Moletai (Lithuania). She bought some land at auction and we're building a timber frame "cabin" (12x6m and 1.5 storey/warm roof) as a practice run for building a timber frame house (~6x6m and 1.75 storey/warm roof) in the back garden in Cambridge. SWMBO bought 1 hectare between the highway and some high voltage power lines. It's prettier than it sounds (has trees and the region is just outside a national park) and crucially wasn't zoned as forest or national park. (she's 6' for some context on meadow/weed height!) Planning wise...if <80m2, <8.5m tall, and <6.5m wide, and not a principal residence...and not in the forest or national park...knock yourself out. Building regs...really quite tough if you'd like a resi building. The paperwork is the same for a single house as it is for an apartment building. GPS survey, aerial photo, soil survey, foundation design, structural design, energy modelling, drainage design, electrical design, you name it at €500-1,000 apiece. There isn't really the equivalent of a "deemed to comply" detail and it's the government that set the standards for things not falling on your head rather than the lenders setting the standards for things that won't fall on your head during the mortgage period. For an energy perspective: U-Values: Wall 0.1 Roof 0.08 Windows 0.7 +MVHR +RES (i.e. PV) to offset "most" of the energy consumption of the building https://epbd-ca.eu/ca-outcomes/outcomes-2015-2018/book-2018/countries/lithuania Personally I think this is a step too far. The A+ is ok. (eminently doable and cheap) A++ is getting silly. (probably viable for mid rise apartment buildings with a flat roof full of PV; but frankly you'd be better off spending that money on public renewables that generate in winter when that energy is actually needed) Building regs...if you'd like a non-resi building (a house <80 m2; i.e. a summerhouse / cabin)...are essentially zero though. So we're aiming for: A 12x6 metre "barn" style cabin on screw foundations (I dislike concrete and with no access road / the frost line here being a metre you'd need epic quantities); a variation on Swedish platform framing (sheathed internally with taped OSB as the air tight / vapour retarder layer; rather than solid PE); with posts/ridge beam/warm roof (not that I'd ever add a slightly cheeky mezzanine after it had been certified at 72 m^2 you understand); and insulation with mineral wool (cellulose requires trusting somebody else; fibreglass just falls to the bottom of any cavity and the mice love it; and for foam...you'd best like mice) http://blog.lamidesign.com/p/swedish-platform-framing-info.html https://www.paroc.com/applications/building-insulation/walls/timber-frame-walls Target U-Values: Wall 0.13 (paroc nordic wall = 25 double plasterbaord+50/45 insulated service+12 OSB+200/195 stud+50/45 overlay) Roof 0.1 (same as the wall but 250/245mm rafter and less bridging) Floor 0.1 (22 OSB+250/245 joist full fill+6 OSB+100 underlay) Windows nominal 0.7 (rehau euro 70 3g) Cladding (walls AND roof) to be vertical board on board in black in this style: This is where we're at: Plenty still to do. Joined to ask about air tightness testing techniques (the framers are contracted to get the shell up to the level of wind membrane on the outside, and the OSB on the inside, then it's up to us to do final taping/testing of that inside layer; fit doors/windows; do the external cladding; all the internal fit out) Services wise: Hot water and bathroom UFH / towel rail from a from GSHP (SWMBO thinks solar is ugly; I think air source units are noisy / fugly but mainly I would like to experiment with a GSHP / picked up a Danfoss DHP-H 6 with 1,000 run hours for £650 ). Will install an MVHR unit and bought one but got screwed over by Brookvent (refusing to supply spares for a 4-year old MVHR unit with a failed fan). Need to learn about aerobic sewage treatment plans and drain fields. Need to learn about land drainage. First need to get to a box weather tight enough to breathe and relax some without worrying about how drawings might get mis-interpreted next...