

Thedreamer
-
Posts
1485 -
Joined
-
Last visited
-
Days Won
9
Everything posted by Thedreamer
-
Is this the sort of job that is done despite the risk of damage? I.e you wouldn't lay blocks or pour concrete in bad conditions, so why do some jobs like this, not have the same risk assessment applied?
-

Floor plan — comments welcome
Thedreamer replied to Dreadnaught's topic in New House & Self Build Design
Any particular preference for having the utility room and bathroom that way round? It seems a bit crowded where the snug is, perhaps swapping this around with door now opening inward might be better? Also the roof lights above the snug, is it worth going for two large ones rather than four individual ones? Would probably save some installation time and allow more light to come through with less frames. Does the Verandah/outside sitting area have any privacy/view or is principal job to create a break between the parking and the building? -
I went with a membrane called Roofshield it was put down in the summer, so not the same conditions but has worked well to date.
-
Nice looking build. Are you getting involved in the labouring for the roofer? My roofer spent a bit of the first day grading the slates and then left me to take them up the ladder. We were able to get three pallets onto the scaffold which saved some time.
-
I was surprised at how much little it costs to upgrade the windows from double to triple. Cost around £800 for all our windows.
-
I like the fact that we have a few different insulation type. Each have different properties so they compliment each other. My self build is more out of necessity, then choice (a lack of affordable housing is present in my community) therefore my insulation levels are going to be less than others on here but should be vastly superior to local properties here. In order to get a self build mortgage I had to show a fairly cost effective build, but I have been increasing the spec as I have been progressing through the project e.g. triple glazing, thicker slates and this will continue as I progress. Also see @Crofter earlier comment about a 25mm service void difficulties.
-
Did you tape and seam the PIR boards to form the VCL/Airtightness layer or did you use Protect VC Foil Ultra or equivalent membrane?
-
The water would probably have done no harm, but was about 4 months before the blockwork could commence and they were the single most expensive item I have ever brought so was being a bit protective. I noticed on your build that your blockwork has already started, for my build I was told that usually slating/tiling occurs before the blockwork, but was never sure why? ?
-
@dpmiller Just looked at your latest post and saw those chimney blocks and I wondered how they were fitted and the pdf above answered my question. ?
-
No mention of the head flashing when I was ordering, but a day after the windows were fitted some water was coming over the top. Asked the joiner what could be done and he said he could fit some 9inch DPC over the top and he did this and no more water ever came in again. Yes that was the size we used. The cladding was batten out when I was at work and I think they had to add a bit more to it as I spotted some additional strips of wood which were need for them to fix the cladding. The windows firestops were attached to the window and these were against the membrane so I guess you could deduct the size of these battens from the windows thickness and that would be how much the window protrude from the membrane. Do you have any photos of your build?
-
@Crofter do you think that if the service void had been 35mm would that have done the job. What was your insulation make up? Mine is 140mm Frametherm 35 and 25mm Kingspan, but I now want to increase this to 140mm Frametherm 35 and 40mm Kingspan attached in front of the stud.
-
Anyone have the MBC open panel 140mm wall system?
Thedreamer replied to Dreadnaught's topic in Timber Frame
@Dreadnaught I used the sister product for the membrane on the OSB exterior, it held up reasonably well. Had to do some patching but this was mostly due to wear and tear rather than the quality of membrane. This one and the VCL layer are marketed as having thermal properties but do they actually offer much here? ? Does this form part of the thermal wall calculation? And I sometimes sit on my 'Quintherm sofa' and I don't hear any baa baa coming from the croft, so I'm glad I increased the spec and went for triple glazed windows. -
I've been spending the last few hours looking at average sizes of service voids and these appear to be 35mm by 35mm. My current insulation make up for the ground floor walls is 140mm Frametherm between the studs and then a layer of 25mm Kingspan (taped and seamed) with 45mm battens on top for the service void. I think what I might do is increase the Kingspan to 40mm and then drop the Batten size for the service void to 35mm.
-
Anyone have the MBC open panel 140mm wall system?
Thedreamer replied to Dreadnaught's topic in Timber Frame
Just going back to the opening post regarding Protect VC Foil Ultra. I've noticed that a few of the PIR manufacturers have suggested that if you tape the boards together you are effectively creating a VCL/airtight layer, prehaps useful on large areas like gable walls, but is this an inferior option compared to using a membrane like Protect VC Foil Ultra. -
Thanks @TerryE that makes sense. Prehaps looking to reduce the batten size will allow us to gain some space for a thicker kingspan board.
-
My plans show a service void made up of 45mm battens. How is this gap typically insulated? The pipe work is all on one side of the house and the other three sides would just be electrical cables running through. My specification show 45mm Knauff Metsud wool being filled in this gap where services allowed, anybody used this and could provide a link? Not considered this fully but is it possible to sneak another 45mm of Kingspan in between where the services (particularly the three sides that will just have electric cable) will run and then use expanding foam or prehaps cut to size some of my left over frametherm to cover these? Prehaps @ProDave you might know? My house is not huge and I want to ensure that any voids are not being wasted. Any comments would be appreciated.
-
Anyone have the MBC open panel 140mm wall system?
Thedreamer replied to Dreadnaught's topic in Timber Frame
What type of insulation will you fill the 140mm gap with? -
@Blob the Builder The dry verge was one of those areas I didn't think about until a decision was looming. I looked at the Kytun strip, one of the reason we didn't got for it was the size of the cupa heavies which are thicker than your average slates and where the three slates meet it can cause the strip to have bumps. Discussed here Dry Verge The thickness of strip we went for is the one designed for slates with battens rather than sarking boards and this provided some extra room. The bumps are not noticeable at all at ground level but if you stand on the scaffold you can see it. Windows were from Nordan and didn't come with a flashing at the top, but we did fit a plastic strip similar to what you have for the DPC course over the top and has kept the water from coming in. Not sure if different techniques exists for fitting windows in a timberframe house but our were attached to the firestops and then lifted into place. I've since seen the expanding foam tape looks like a good idea.
-
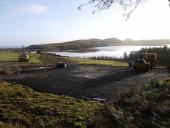
Our efforts in the latter part of 2018 was spent on getting the exterior properly wind & watertight. With just the render left to do, we could now concentrate on the insides. Starting to insulate the suspended timberfloor was the first job to do. We attached some little bits of timber to the underside of the joists, which will keep the insulation boards in place. Our primary insulation for the groundfloor is Quintherm 65mm (another two layers of insulation will be added later). Once ordered these were then cut to size using a piece of wood to score a mark and then cut with a handsaw. We left a bit of gap either side which will be filled with expanding foam to ensure a tight fit. The other insulation ordered at this stage was the Frametherm wool which is the primary insulation layer between the studs. But some will also be used to top up the gap left in the joists. The width is already in the correct size so it was just a cut for the required length and then you can pop into the studwork. Compared to the Quinntherm this is more quicker to fit. And that is that for 2018. Reflecting on the build process to date: We are exactly where I hoped we would be at this stage. A proper wind and watertight shell that can stand up to the Hebridean winter weather. Reviewing the finances we are about half way through our build budget. We have been fortunate no real issues. A problem with a wrong size velux flashing and the metal flashing provided for utility roof was provided at the incorrect angle, both were the suppliers fault! At the start of the build, I had visions of the concrete wagon sinking in the road, the windows being dropped on arrival and the trusses not being able to fit down the access. The lesson here is watch programmes like grand designs and building the dream, but don't let the drama put you off, self building, it is achievable by anybody!
-
Waterboard officialdom post builder's standpipe supply.
Thedreamer replied to epsilonGreedy's topic in Building Regulations
I put our toby and double check valve right next to the water main and then it was inspected and that was all sorted from their end. Strangely although I purchase a toby myself another one appeared from somewhere and I used this about 110 meters further down at the site with a tee for a temporary water supply and another supply going into the house. In Scotland your water rates are collected by your local authority, we therefore paid for 'building water' in 2015. I wonder if you didn't build for twenty years whether a mechanism exists to collect payment for the water, as we also have no meter? I think how complicated this process is, really depends upon the person who does the inspection. To be honest this can be applied through out the build process, although we have problems associated with delivery charges, if you are in a remote location the attitude is more relaxed. I think this can start to save you money over the course of the build. -
Would like to be living in our house by July/August. Then I can plan the really exciting stuff.
-
Probably best to have a look at my blog. Yes it's a timberframe with a mixture of single blockwork and timber cladding.
-
My timber frame kit is just block, dpc plastic strip then timber sole plate. I think that is just the standard approach.
-
"Hi-ho, hi-ho, it's off to work we go"
Thedreamer commented on Nelliekins's blog entry in Clancutt Lodge
Cripes, you wouldn't want somebody to take the ladder away if you were in that hole! Is that all clay, or did you hit something more solid at the bottom? -
I came across this chap, could be useful for anybody building double block with a block beam floor. I think his videos are pretty good at explaining the building method. https://www.youtube.com/channel/UCwws-NyIJiRlqVy_X3yugfA


