Search the Community
Showing results for tags 'layout'.
Found 6 results
-
Hello! Can anyone with a bit more knowledge than me guide me on this? We have a room that will be half tiled, and half floating floor - we are planning on having (water) UFH installed by using those panels that have the pre-channeled grooves into them for the pipes (similar to LoFlo Lite) Currently we have 22mm P5 Chipboard down, across the whole floor. My understanding is that, as per the instructions, if anywhere is to have tiles on top of the UFH, then those boards need to be structurally secured to the ground - as the above .pdf states: The P5 Chipboard won't take any adhesive, and so I imagine that's why the plywood needs to be laid down, so we can glue and screw the UFH panels down. I have two questions: 1. What I don't fully understand is why do we need to secure the UFH Panels down for the tiled area? What difference does it make if we don't? Is it to stop movement/cracking in the tiles? 2. How do I deal with the step from plywood to non plywood area? This transition will be in the same room (it's on open kitchen to living room) and the other side of the room will be a floating floor. I'm just trying to save some money by not having the whole area needing plywood. So if anyone can explain to me why the need of the Ply is there, that would be ace, and if there is any way of doing this with a transition between the two areas? Many thanks!
-
When I did my (2 week) tiling course, we were taught to: dry-lay the entire floor with spacers and all the cut edge tiles (working toward the door). remove some tiles to provide access to the other side. Remove a row or two of tiles, then apply adhesive and lay them, using the dry-laid tiles for alignment. Work backwards towards the door. I have found when using this approach that the tiles don't seem to go down with adhesive exactly where they were dry-laid, meaning that some cut tile no longer fit. For my conservatory (600x300mm porcelain tiles, staggered pattern) I'm thinking of cutting edge tiles for a couple of rows, laying those rows, then moving on to the next couple of rows (5.8m rows). With this approach, I could start along one long wall (lay a full row to get the alignment then the cut row), then work my way across the floor, Or I could lay a couple of rows across the middle of the room and work out from either side toward the two long walls. How do you experienced guys approach laying a floor?
-
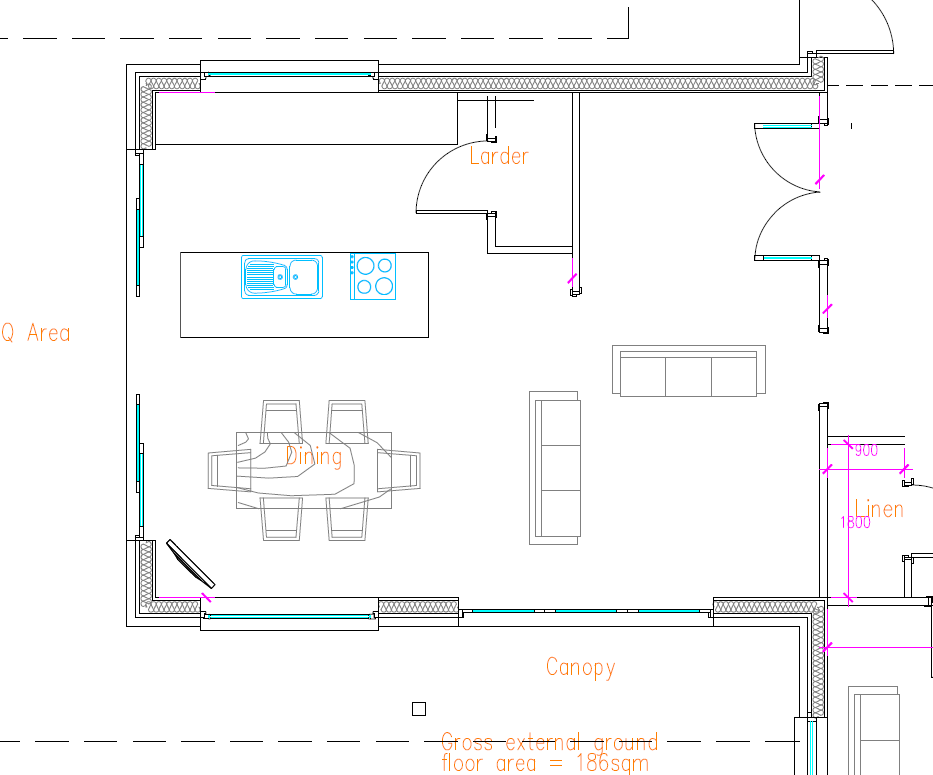
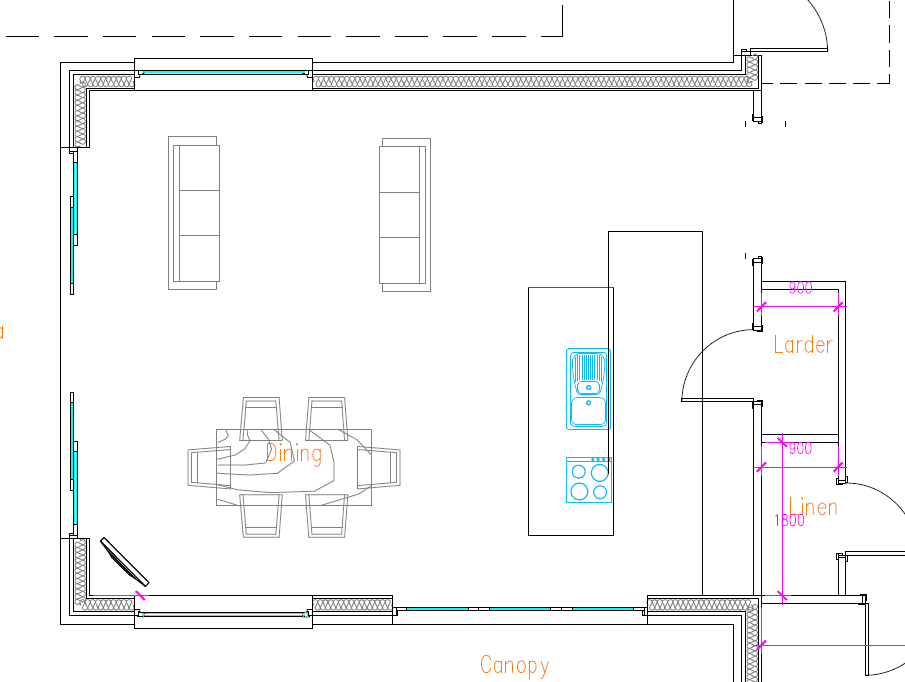
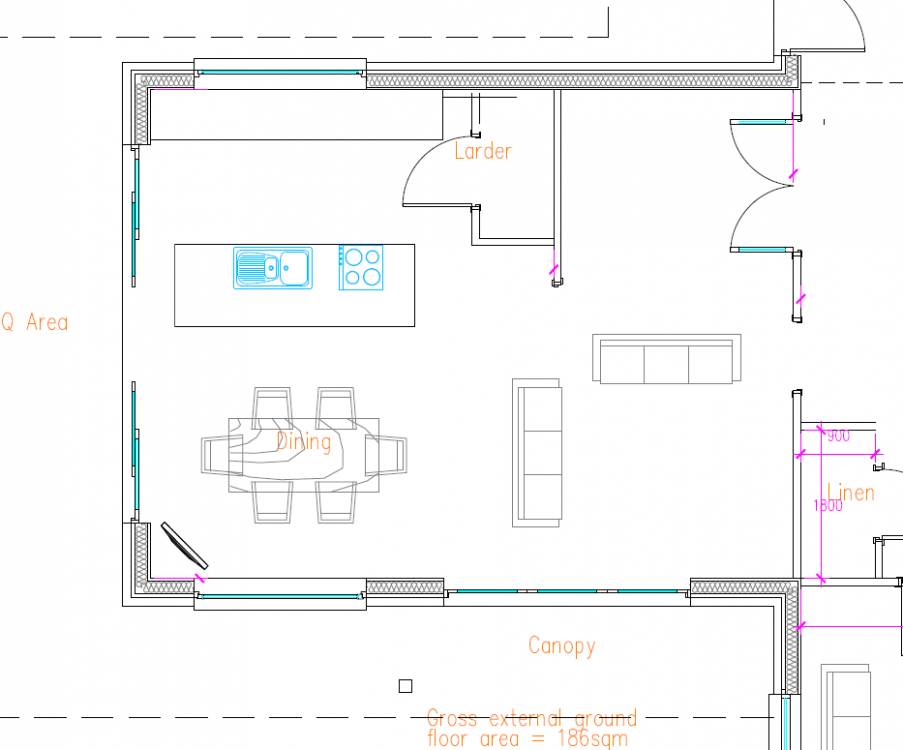
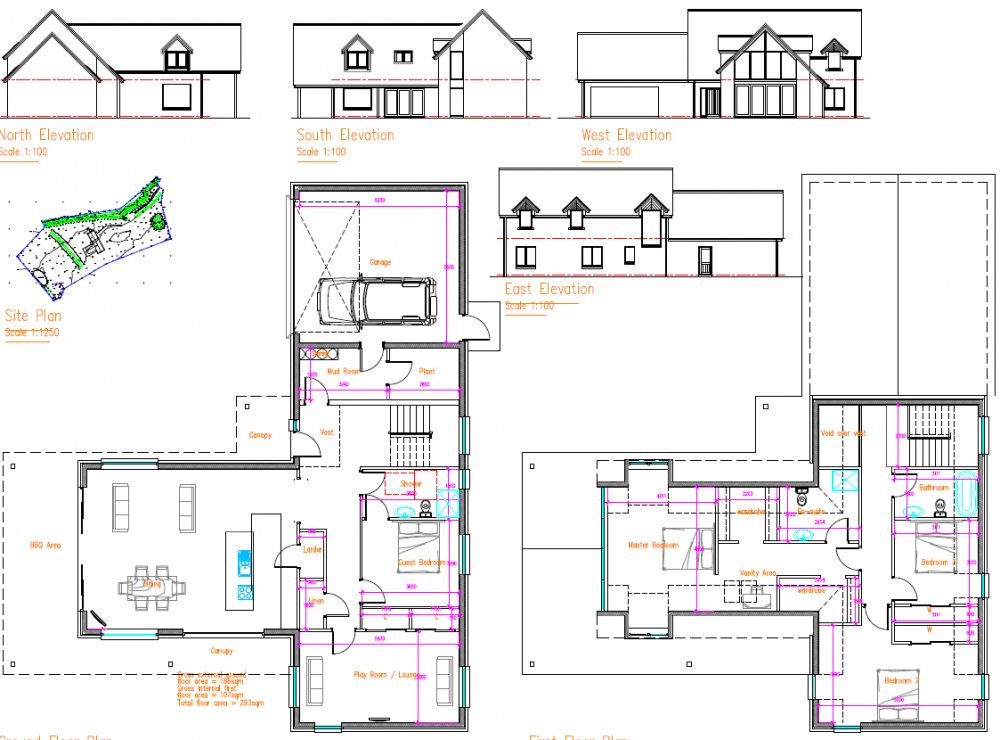
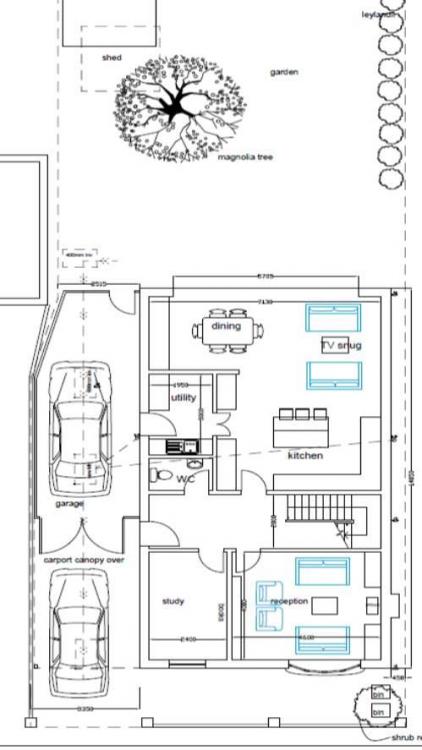
 We have the architect coming for a meeting on friday, he has done some initial designs and we are just going through iterations but currently facing a conundrum we are finding it hard to resolve. See layout below, we have a very large open plot and hence can position our house anywhere, layout also included below of house position on plot. We are ticking most boxes but we are struggling with our open plan area. The brief being - nice big open plan area, but when we are sitting in the living room area of the open plan area - we don't want to feel like we are in the kitchen. The First revision looks like below, which was not bad - but we want to modify it as I want the island located right next to a set of bi folds so I can float in and out while bbq'ing without feeling like I'm walking through the living room. I had completed this - see second and third layout, but still struggling a little getting it to feel right. We are trying to add a partition to mount a tv and split the room up slightly and zone the areas, as we feel this is what we need, but everywhere I put it seems like a hindrance. I can't make it bigger again as the house has already went from 200-260 m^2 (eek!) So I'm not really sure what I'm asking, possibly real world experiences of a completed build compared to when you were doing the design?. Will it still feel cosy if I don't zone the room up and we are worrying too much about it not feeling cosy and it'll be fine! any other advice? Other thing I should add is that the shape needs to stay as this annex gets sun all day in winter and summer and works really well for our view, its just a difficulty dividing it up. Hopefully once this is done I can get the full design up in a week or two and show you all. Also FYI, it's a standard height room so not double height or anything. Layout 2: Ignore weird line between the island and wall its a dimension between the island and the wall units (which stop just at larder door) Layout 3: Site layout: orientated to north, so annex points to SW (or SWW if you're really looking hard!) Overall design: Still some changes to be made, but pretty pleased with the architects work against my design brief so far.
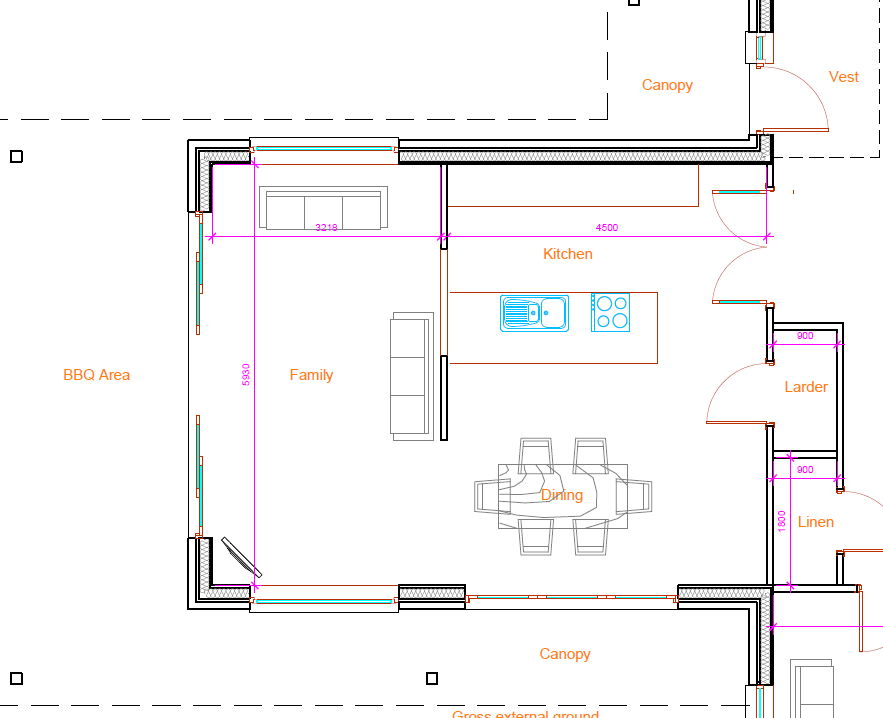

-
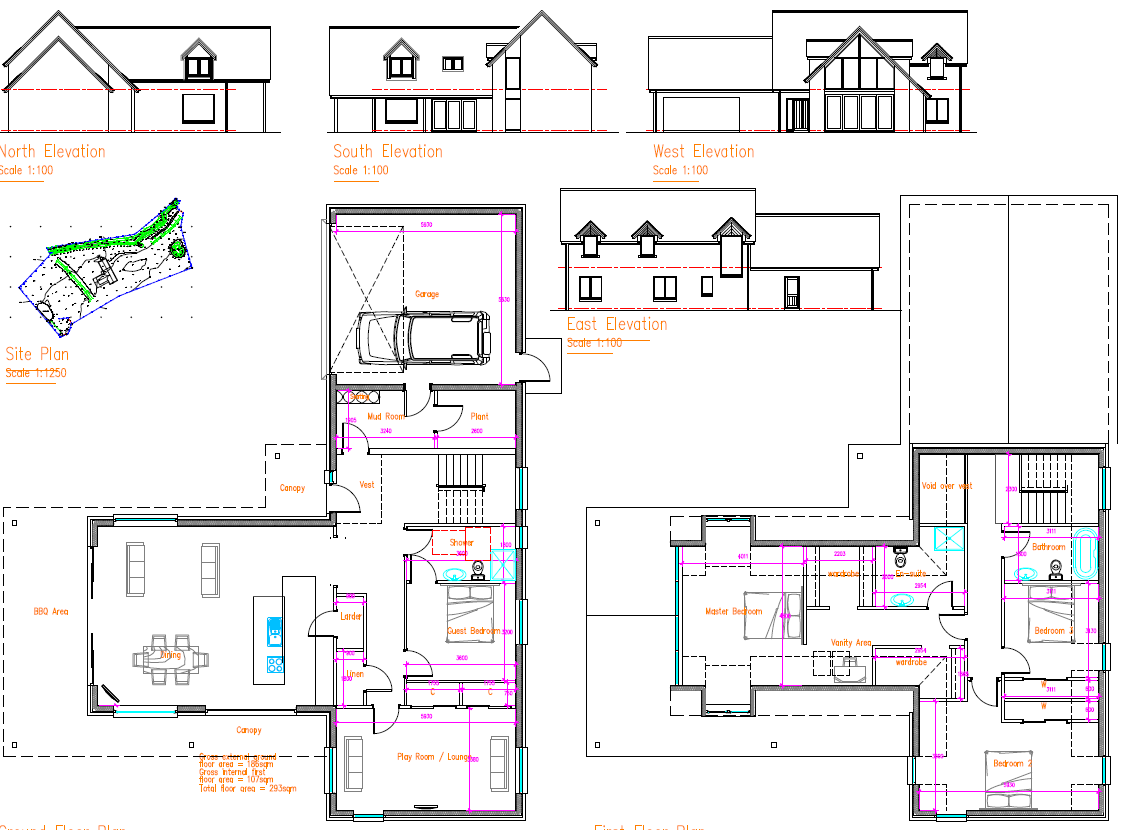
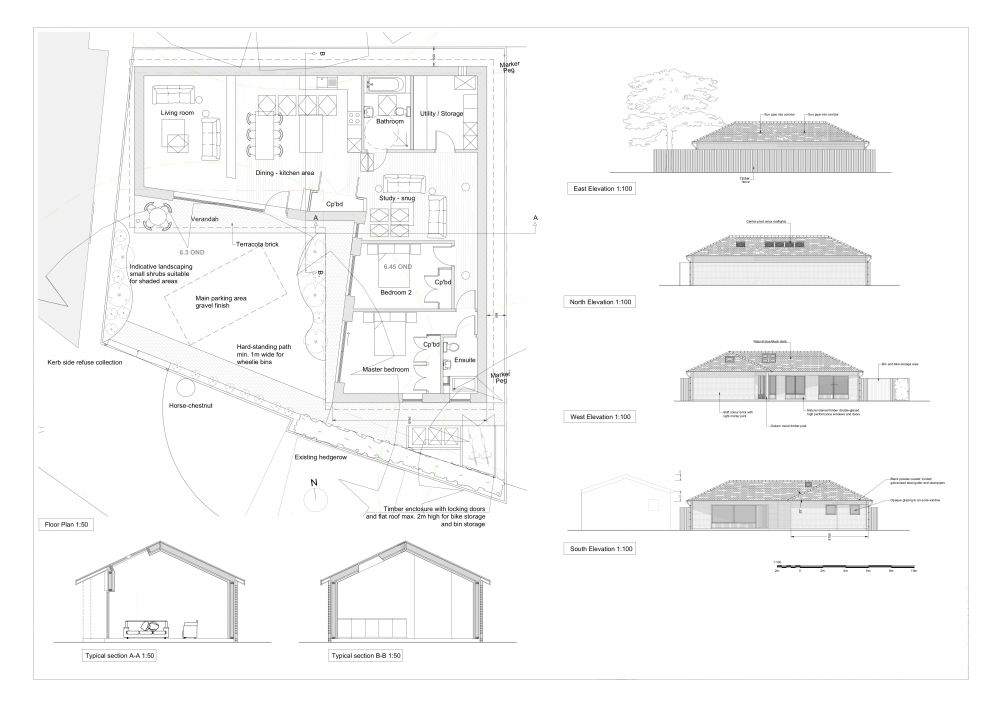
OK, here we go - a set of floor plans for your friendly and gentle comments ? ? Background - we have a narrow plot in a residential area within M25, with an existing bungalow (to be demolished). Neighbours' properties are very close, so party wall agrt is coming up, and a basement would be too dangerous. Not much room to move around, really, so we are building up. Generally we are quite pleased with the plans, but after looking at these for the past 6 weeks we need an extra pair(s) of eyes to see what we can't see. One of tight areas is access from street to garden (via garage only, so garage doors on both ends). Any feedback would be gratefully received. Furniture placement is very random at the moment.
-
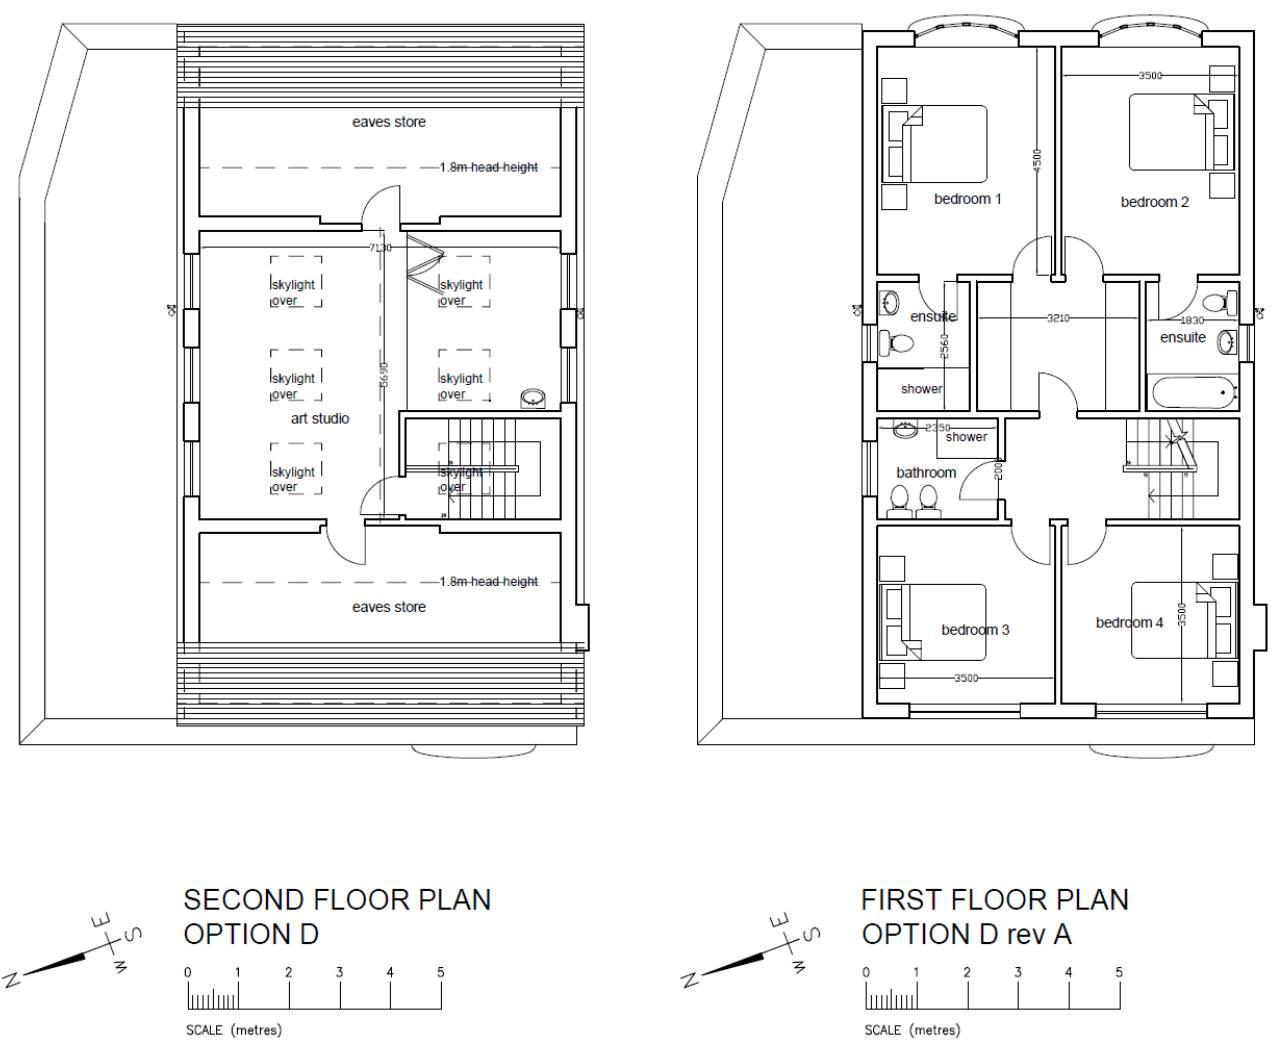
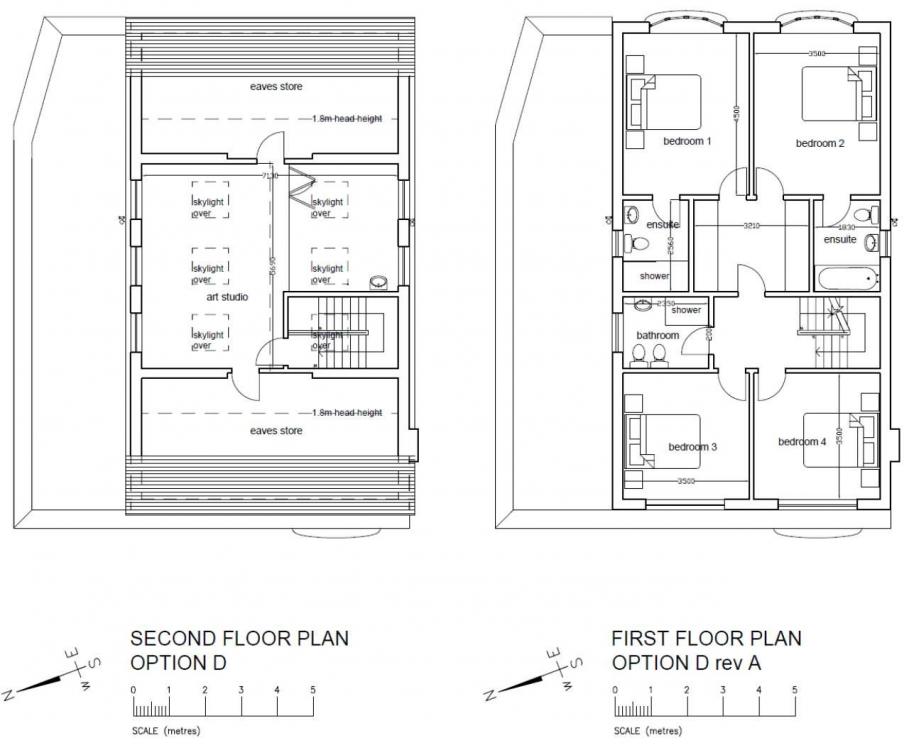
This is what has gone to planning for approval. I would welcome people's opinions, observations and suggestions for floor plan tweaks. The aim was to design a floor plan with an eye on saleability The constraints are that we are forbidden to overlook to east or north. Even roof windows are not allowed on the east but are allowed on the north. We are limited in height. And we cannot remove any trees.
-
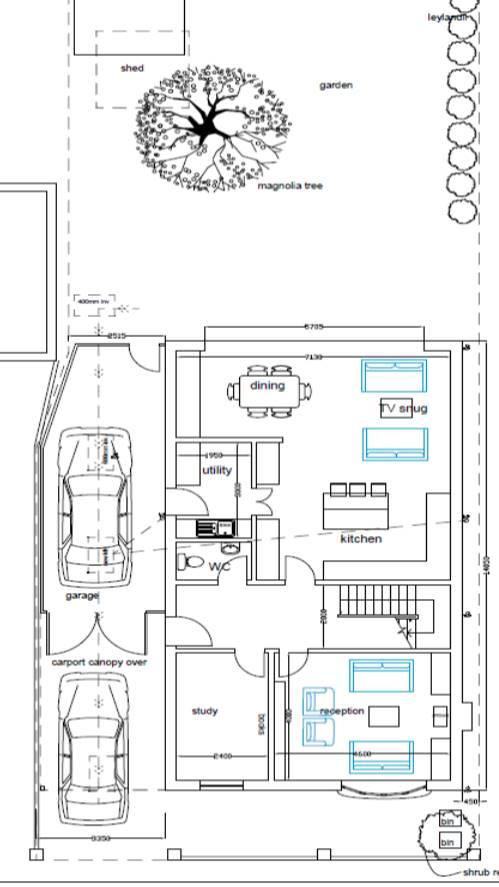
I thought I would post a plan of a terraced house I ran across recently. The small estate of houses was built in 2004. Typical but pleasant modern houses, but this 2.5 storey terrace has a notably efficient layout. In the overall footprint of 5m by 9m (including external walls) includes 1047 sqft, and includes: Large lounge 12' x 16'. Dining room 8' x 10' attached to 10' x 7' kitchen Three double bedrooms (one ensuite) Family bathroom Small utility A reasonable amount of storage Here is the Plan: I like: That circulation space is minimised to around 10%. That each bedroom has space for bed + chair + desk, even though bed 3 at 9' x 11' is tight. That there is space for a workdesk on the middle landing should it be needed. That the layout is reasonably flexible. Should it be desired, bedroom 2 could be made into 2 singles of 8'5" x 8' each, which is still larger than most 3rd bedrooms even in semi-detached houses, or could have its own ensuite included. Looking at the plan a decade later, I think there are only three things I would change: Remove the wall between the kitchen and the dining room to create an open space, and insert a small breakfast bar. Add a roof window or two to the rear aspect of the Master Bedroom. Make changes necessary to comply with more recent regs - especially around disabled access. What do you think?