
Stones
-
Posts
3761 -
Joined
-
Last visited
-
Days Won
23
Everything posted by Stones
-
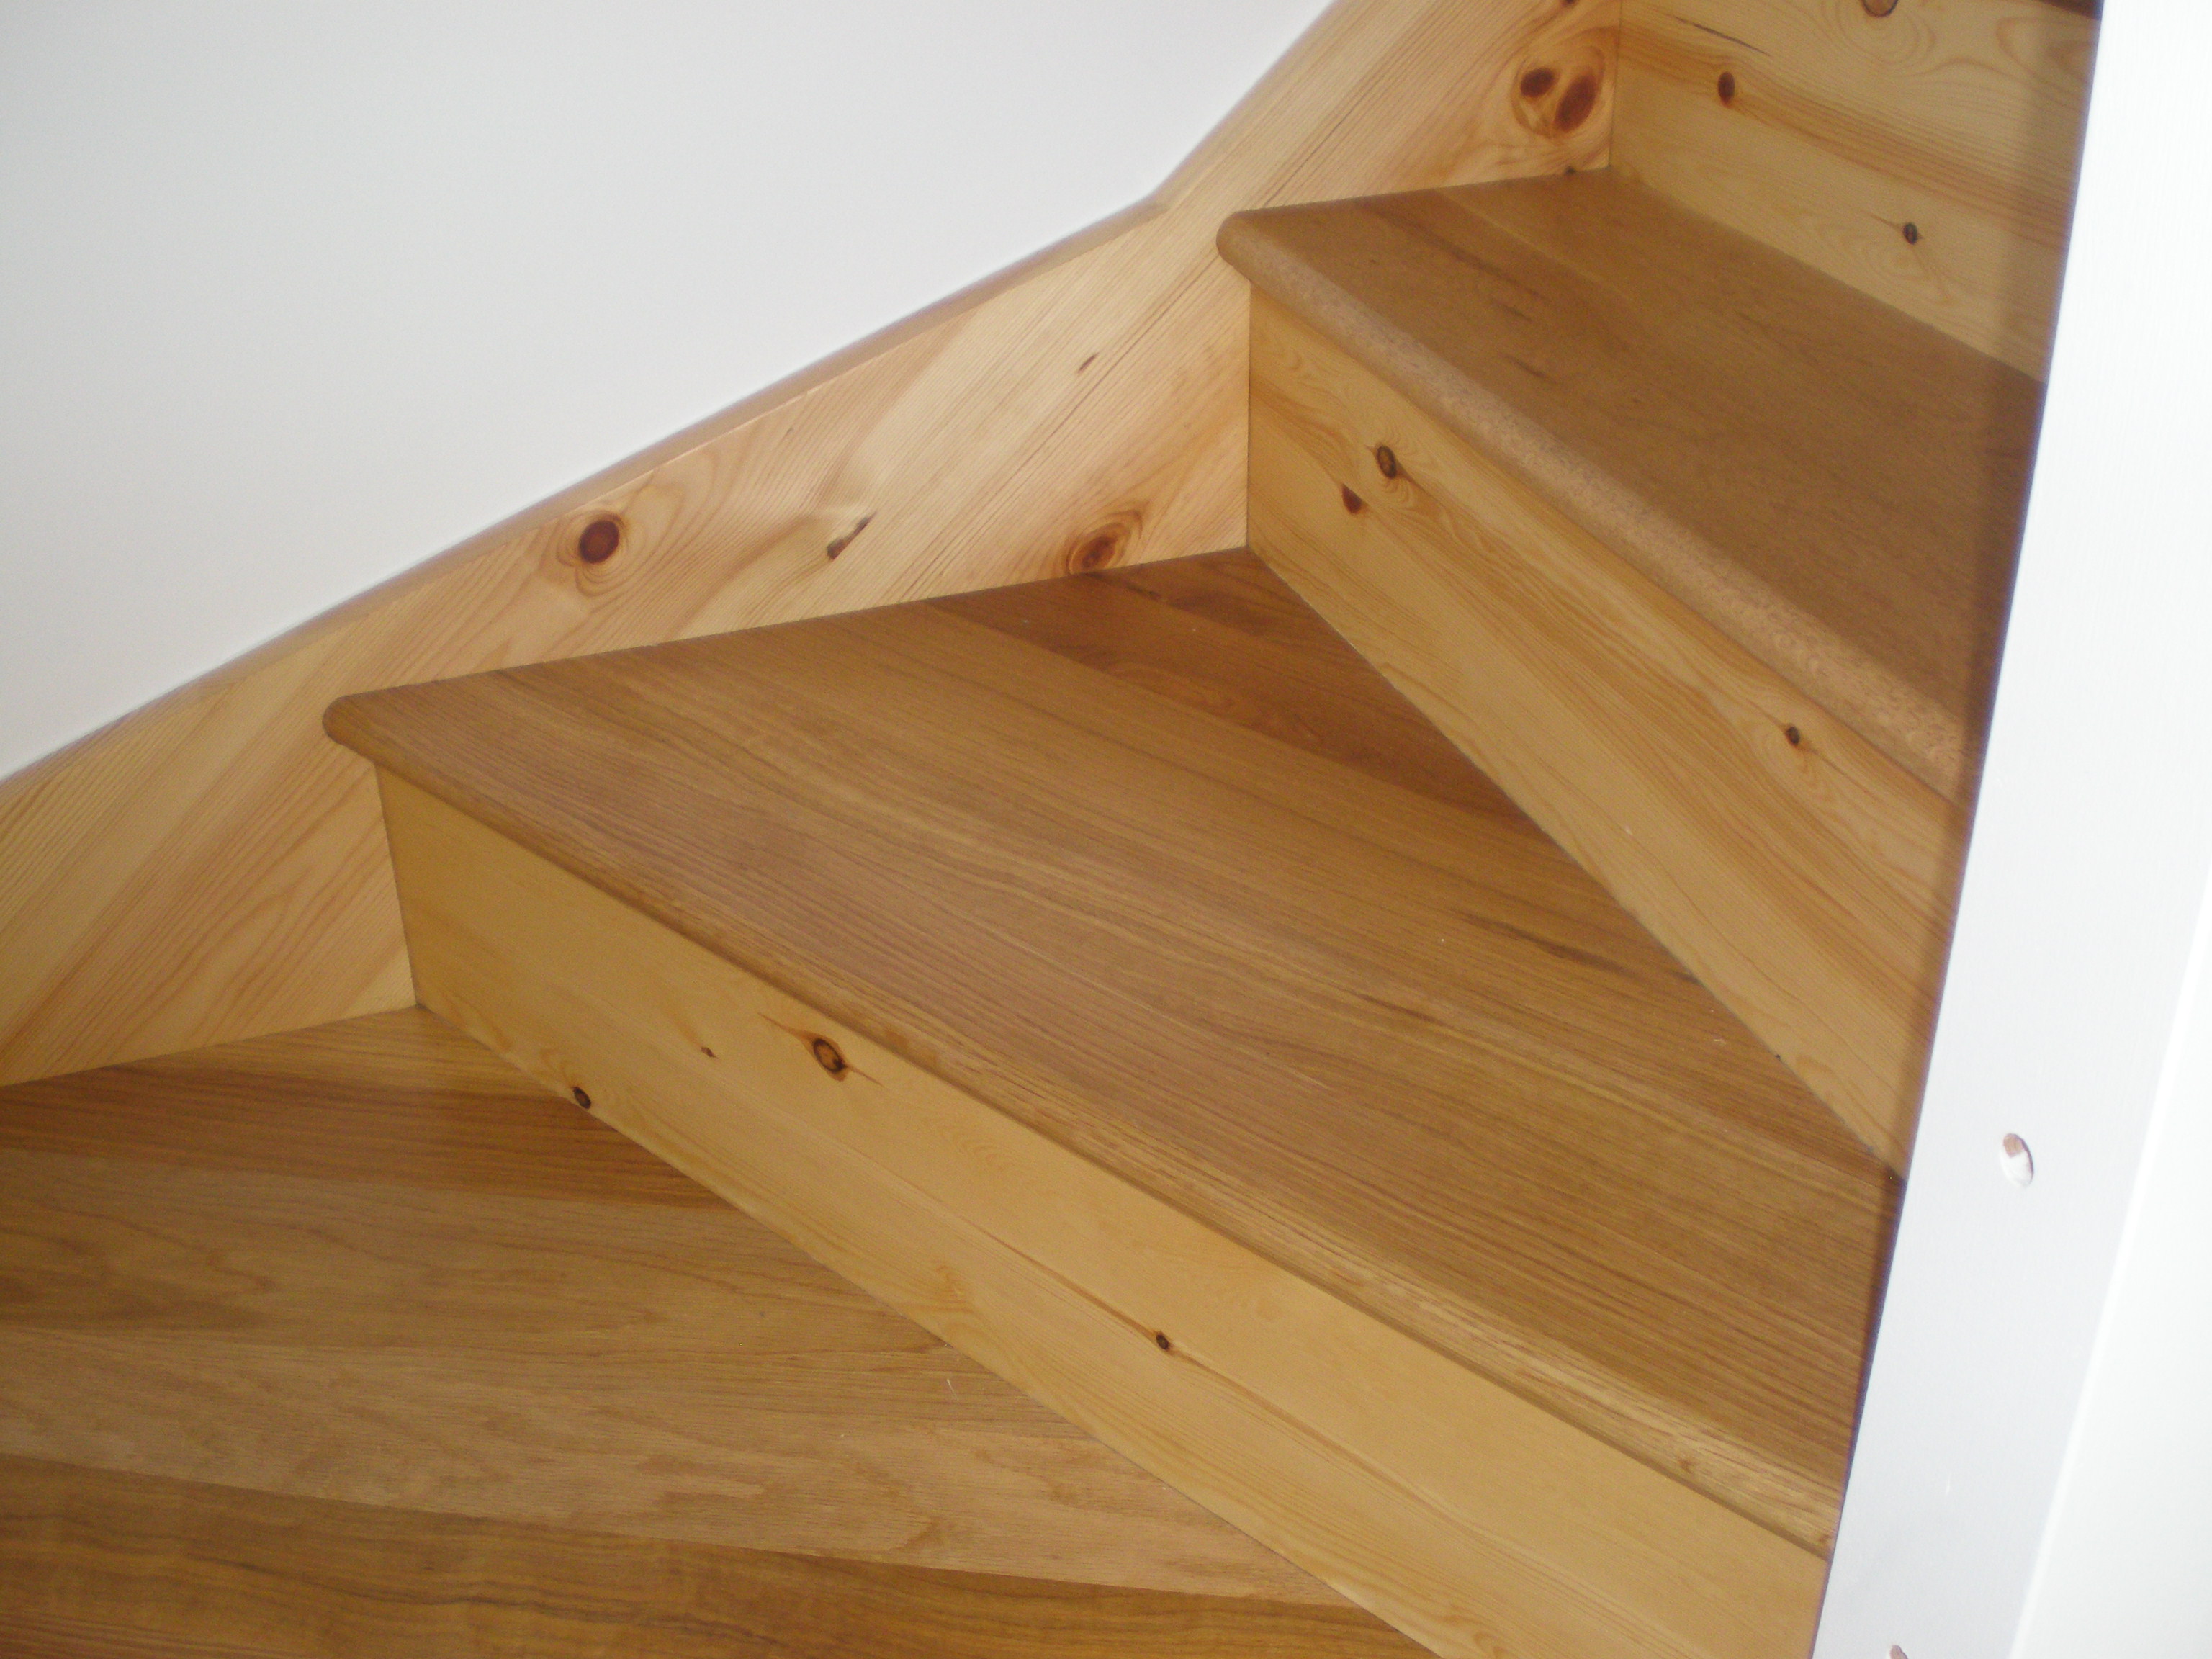
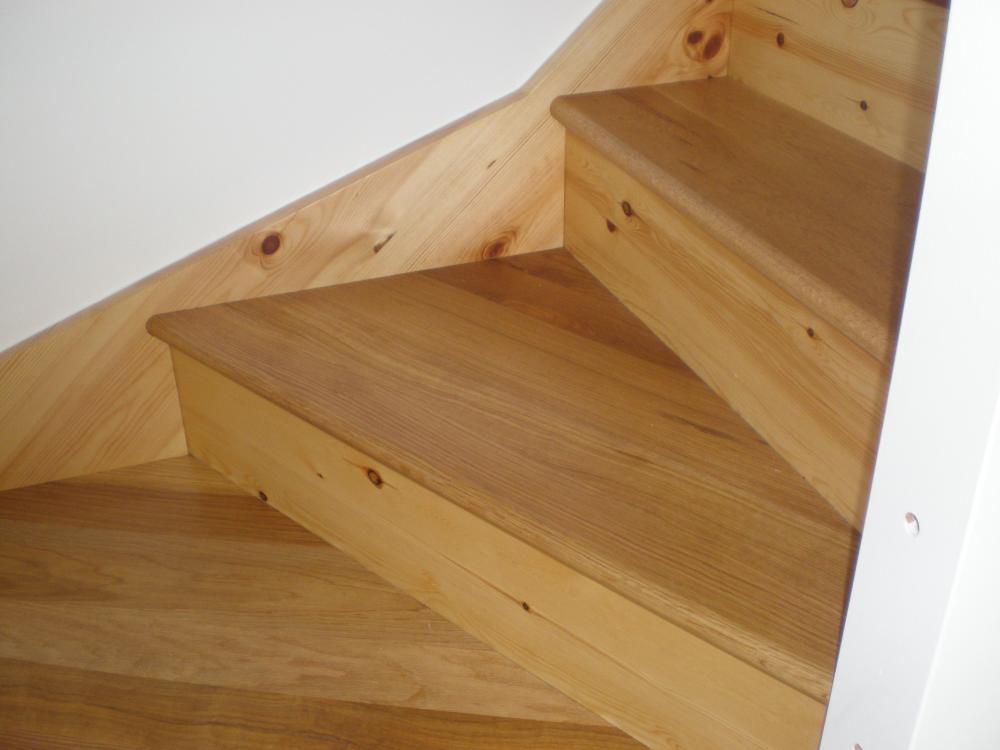
I was pleasantly surprised as well. The original intention had been to have a white painted staircase with the oak treads (SWMBO had found some decals of mice that she had planned to stick to the risers). As soon as the stair was fitted, I could see it would be a crime to cover it up, so we decided to try it, working on the basis if we didn't like the result we could always paint it. Difficult to do it the other way round. I used the same Osmo oil on the softwood as on the oak and I think this is what has made it look so good. Having experimented with polyurethane varnish, I don't think it would have worked nearly as well. Yes all our joinery is pinned. Unfortunately, filling all the pin holes (I'll be mixing linseed putty to colour match) is a job I still have to do...
-
I considered going for a twin DHW storage solution based on the length of pipe runs - bathrooms at one end of the house, kitchen and utility at the other. In the end it simply made more sense (and was cheaper) for me to centrally locate our 300L cylinder to the centre of the house and have longer primary pipe runs to the ASHP.
-

Hi all - new member with a build starting soon.
Stones replied to Carrerahill's topic in Introduce Yourself
Yes, a warm welcome. -
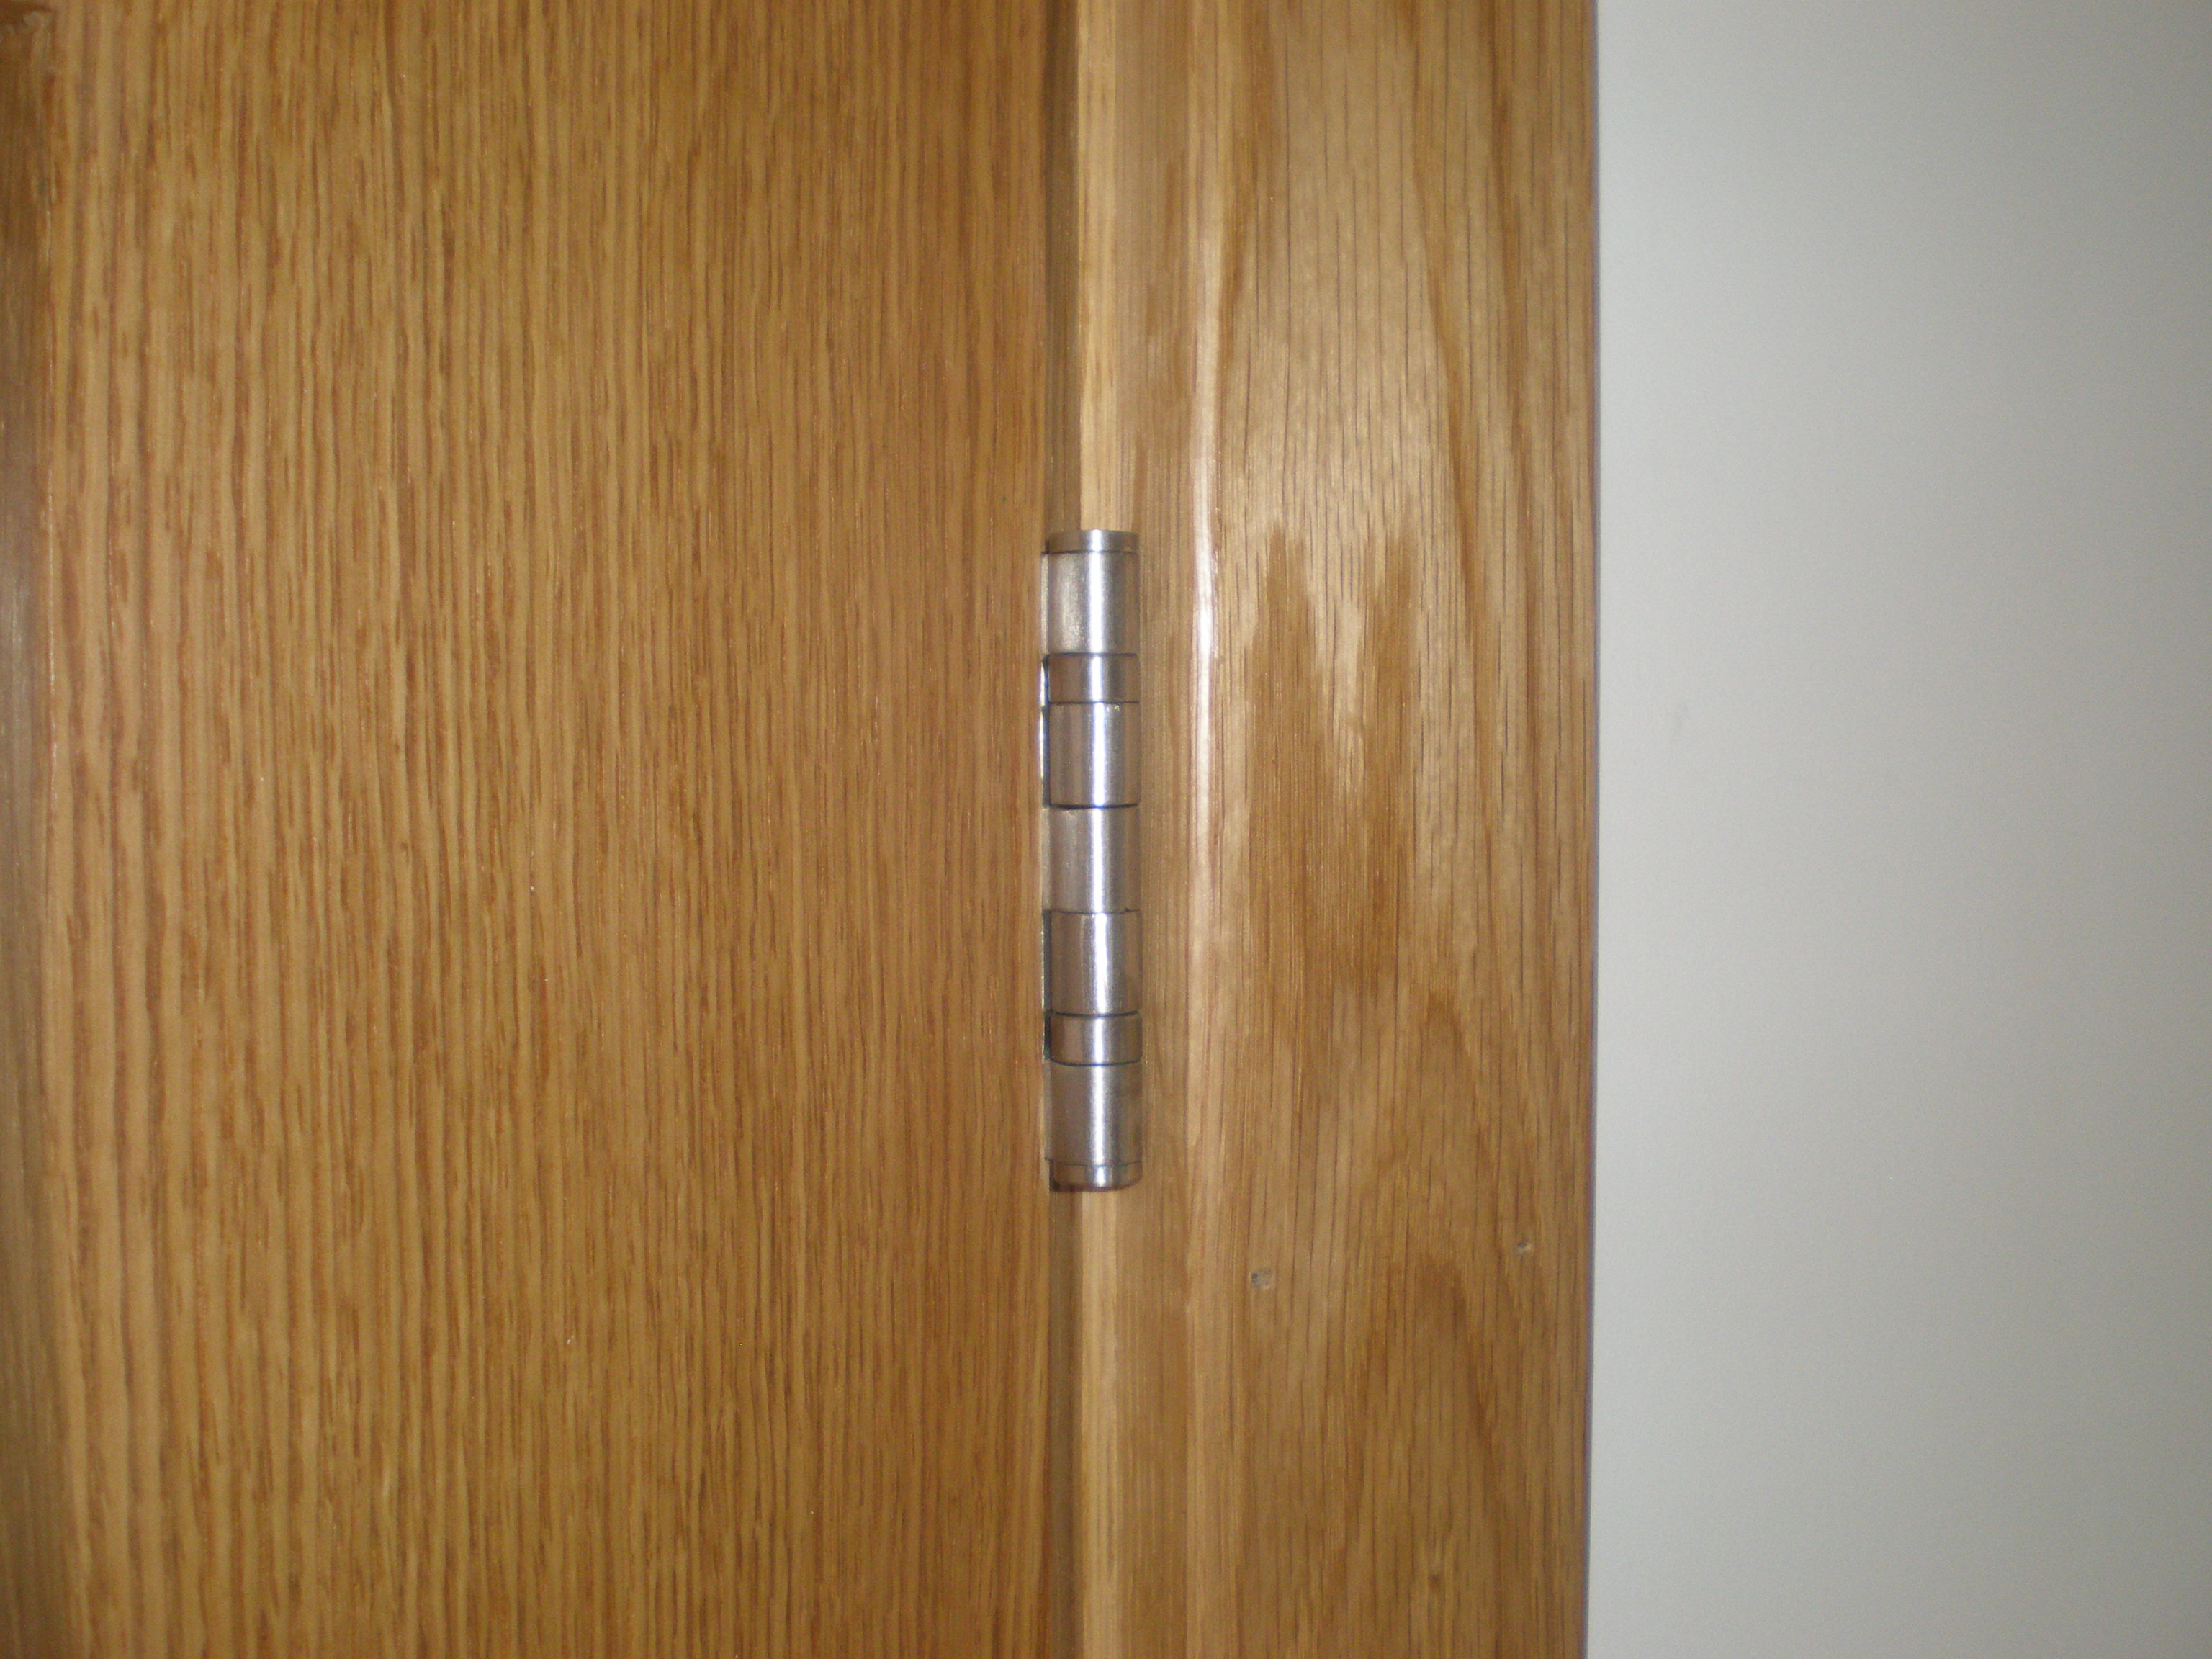
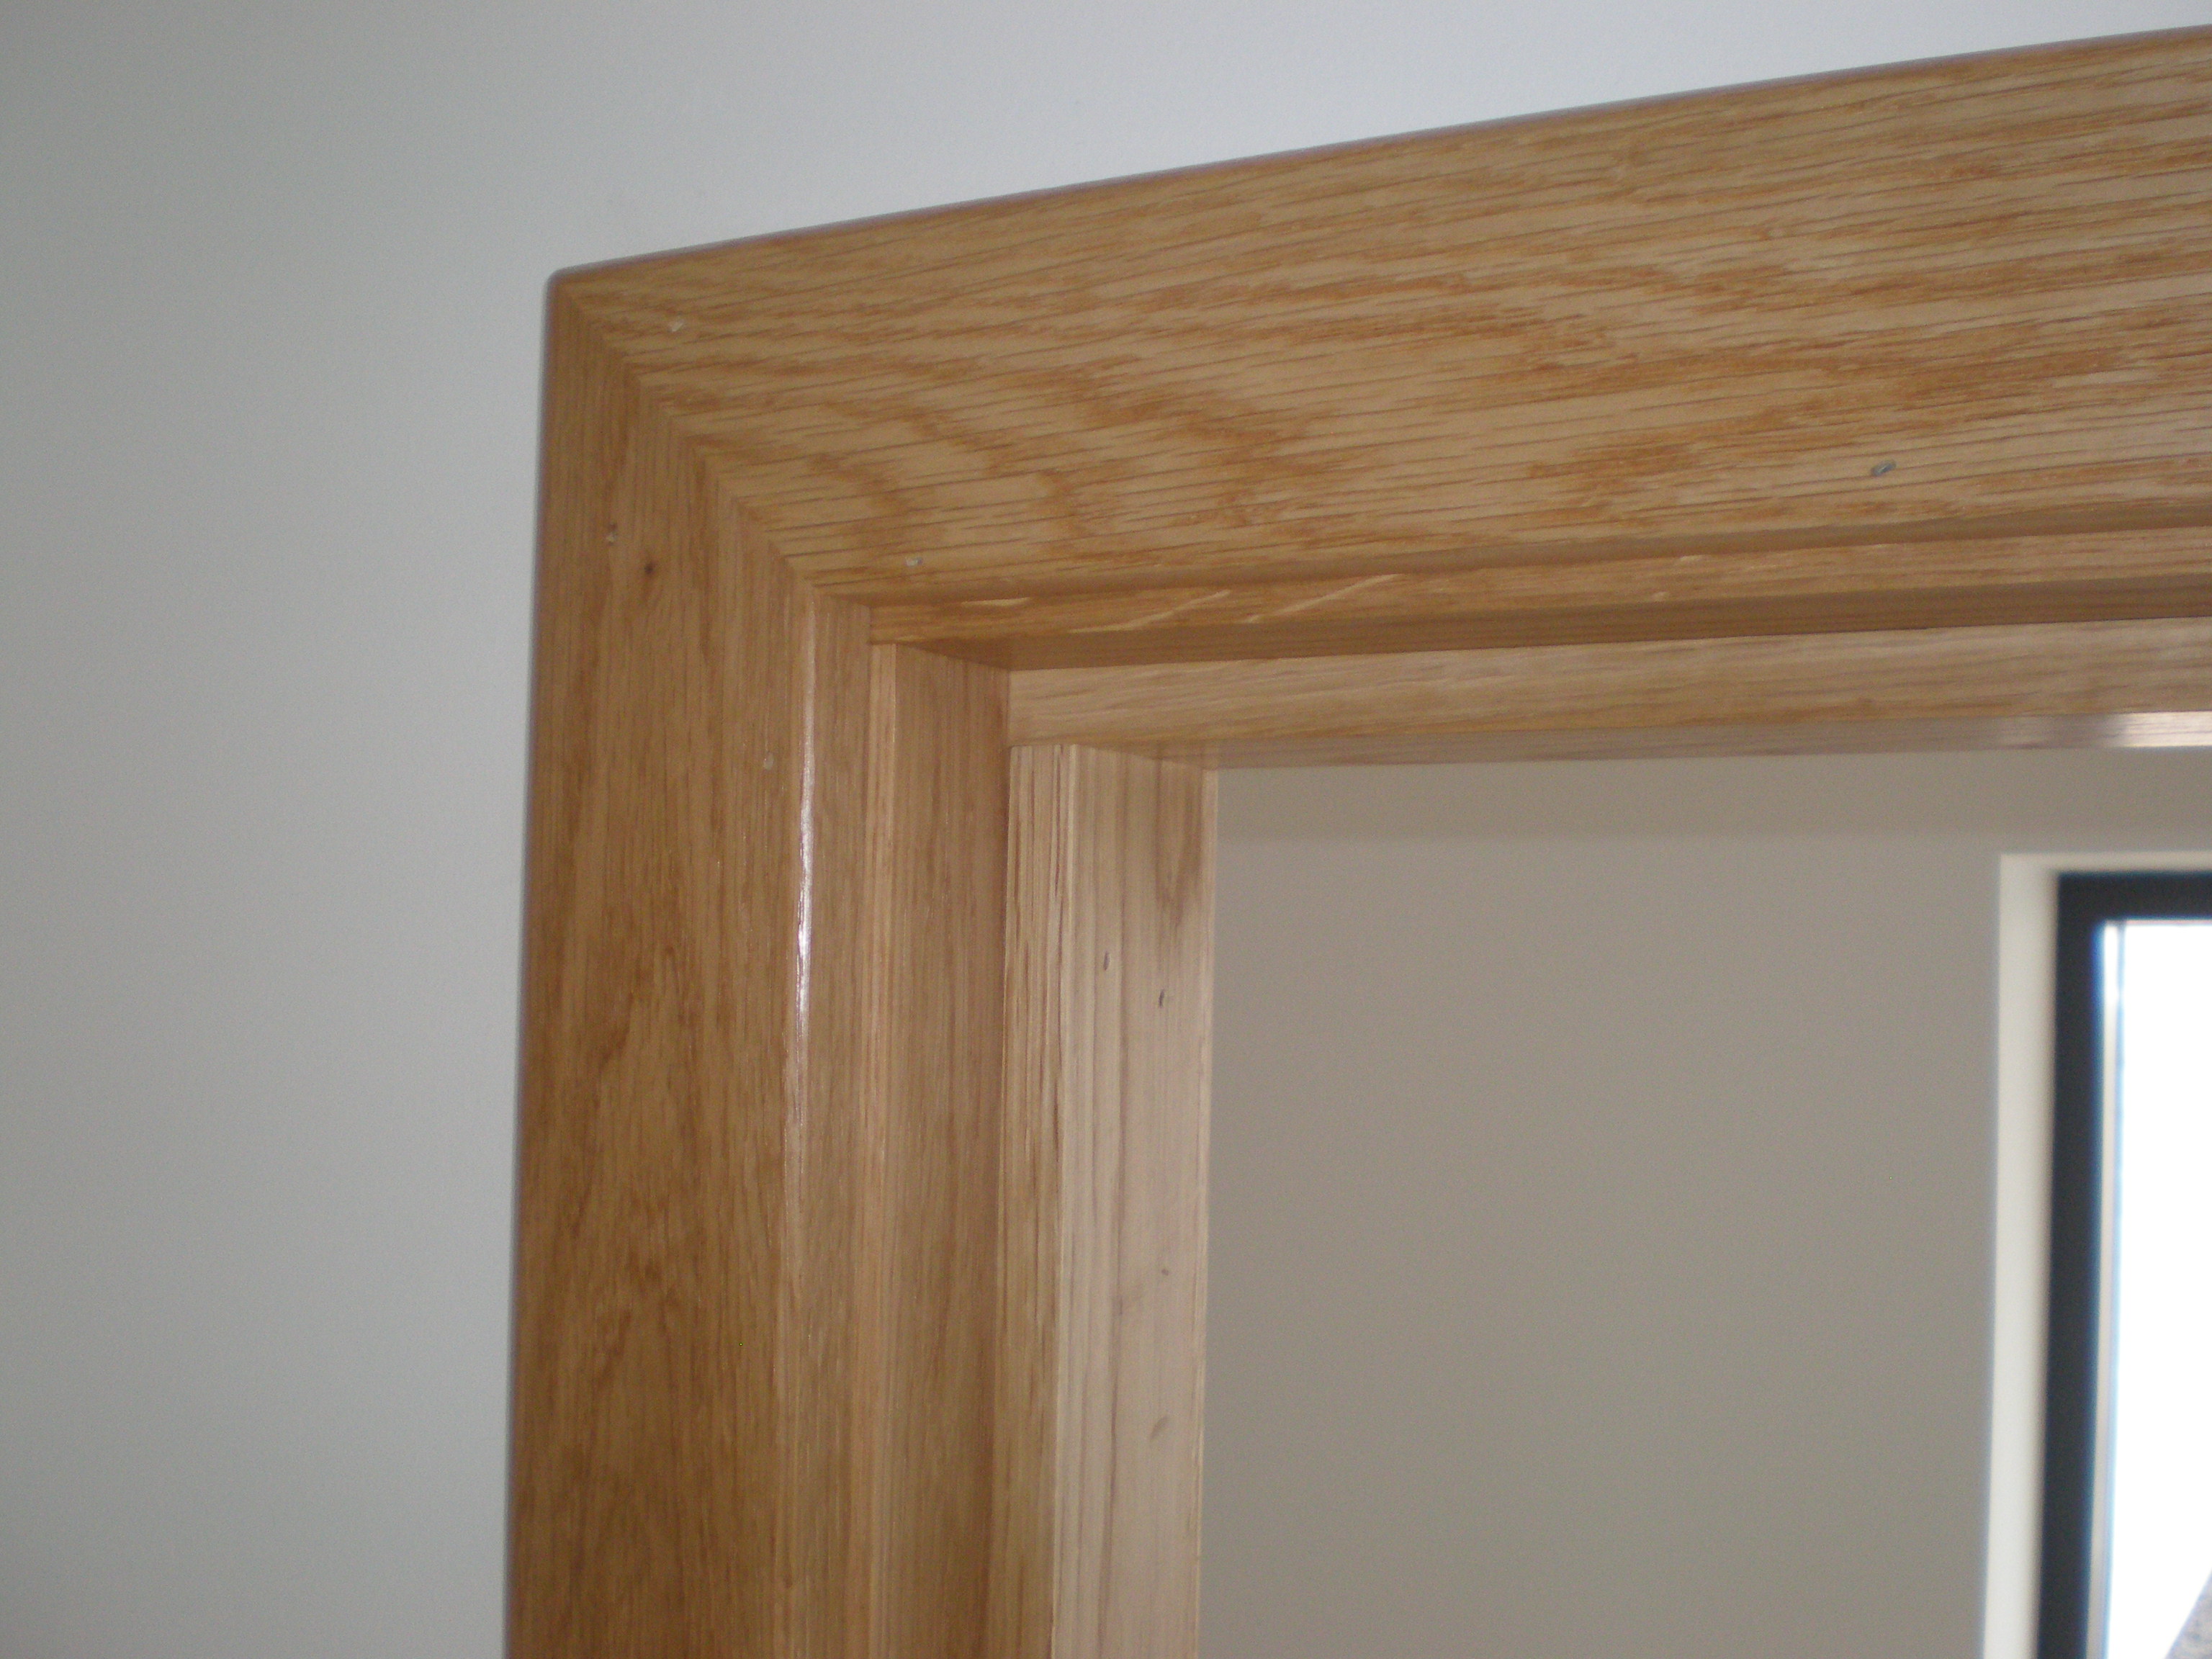
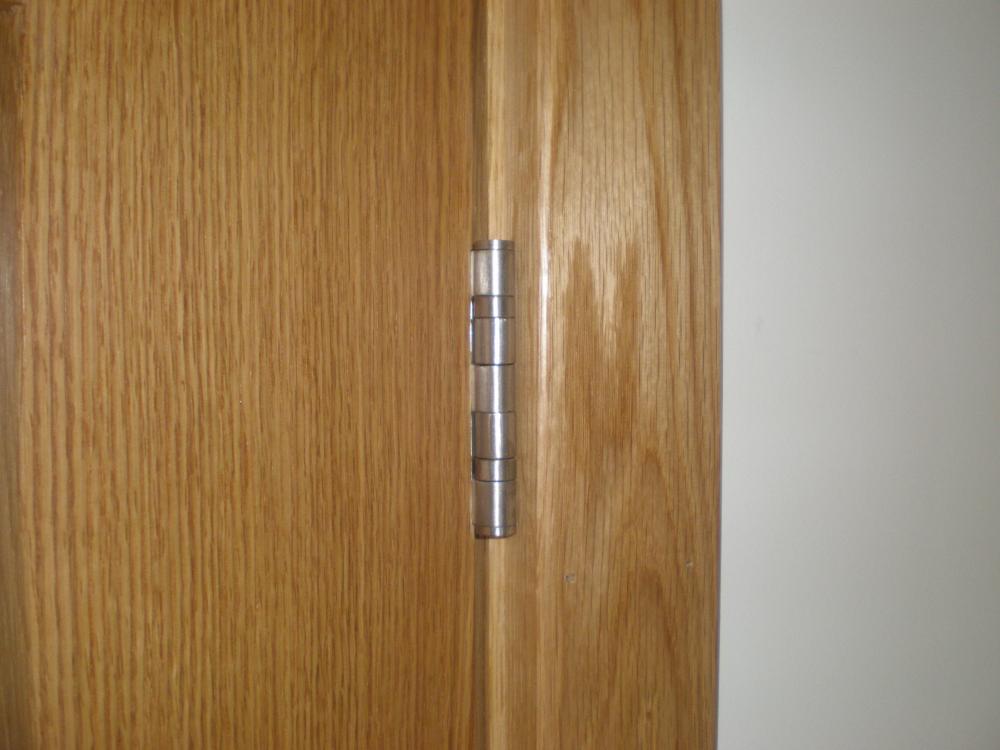
Our finishings are all oak - linings, stops, facings and doors, and the finished product looks really, really good. Well worth it if your budget can stretch that far. The linings were packed off the openings to ensure they were plumb, doors hung, stops fixed on then finally facings fitted. Rebates for hinges as shown in pictures. In terms of finish, if oak isn't an option for the linings and stop, white or off white woodwork can work well. I would avoid staining softwood to look like oak, as its impossible to get the softwood looking like oak, or at least that's what we have found having tried in our last two houses. One option, which may seem a bit odd ball, is go for softwood linings, and facings and simply oil them to bring out the natural beauty of the wood. We did this with our staircase (softwood stringers and risers, oak treads)

-
A first time builder making a timber frame home
Stones replied to climbinggeorge's topic in Introduce Yourself
Hi and welcome. Please tell us more about the community self build project. Re your questions, ask away, but for a detailed response I would suggest starting individual topics on the various questions you have. If you haven't done so already, the blogs (including mine ) are well worth a read and show what's possible. -
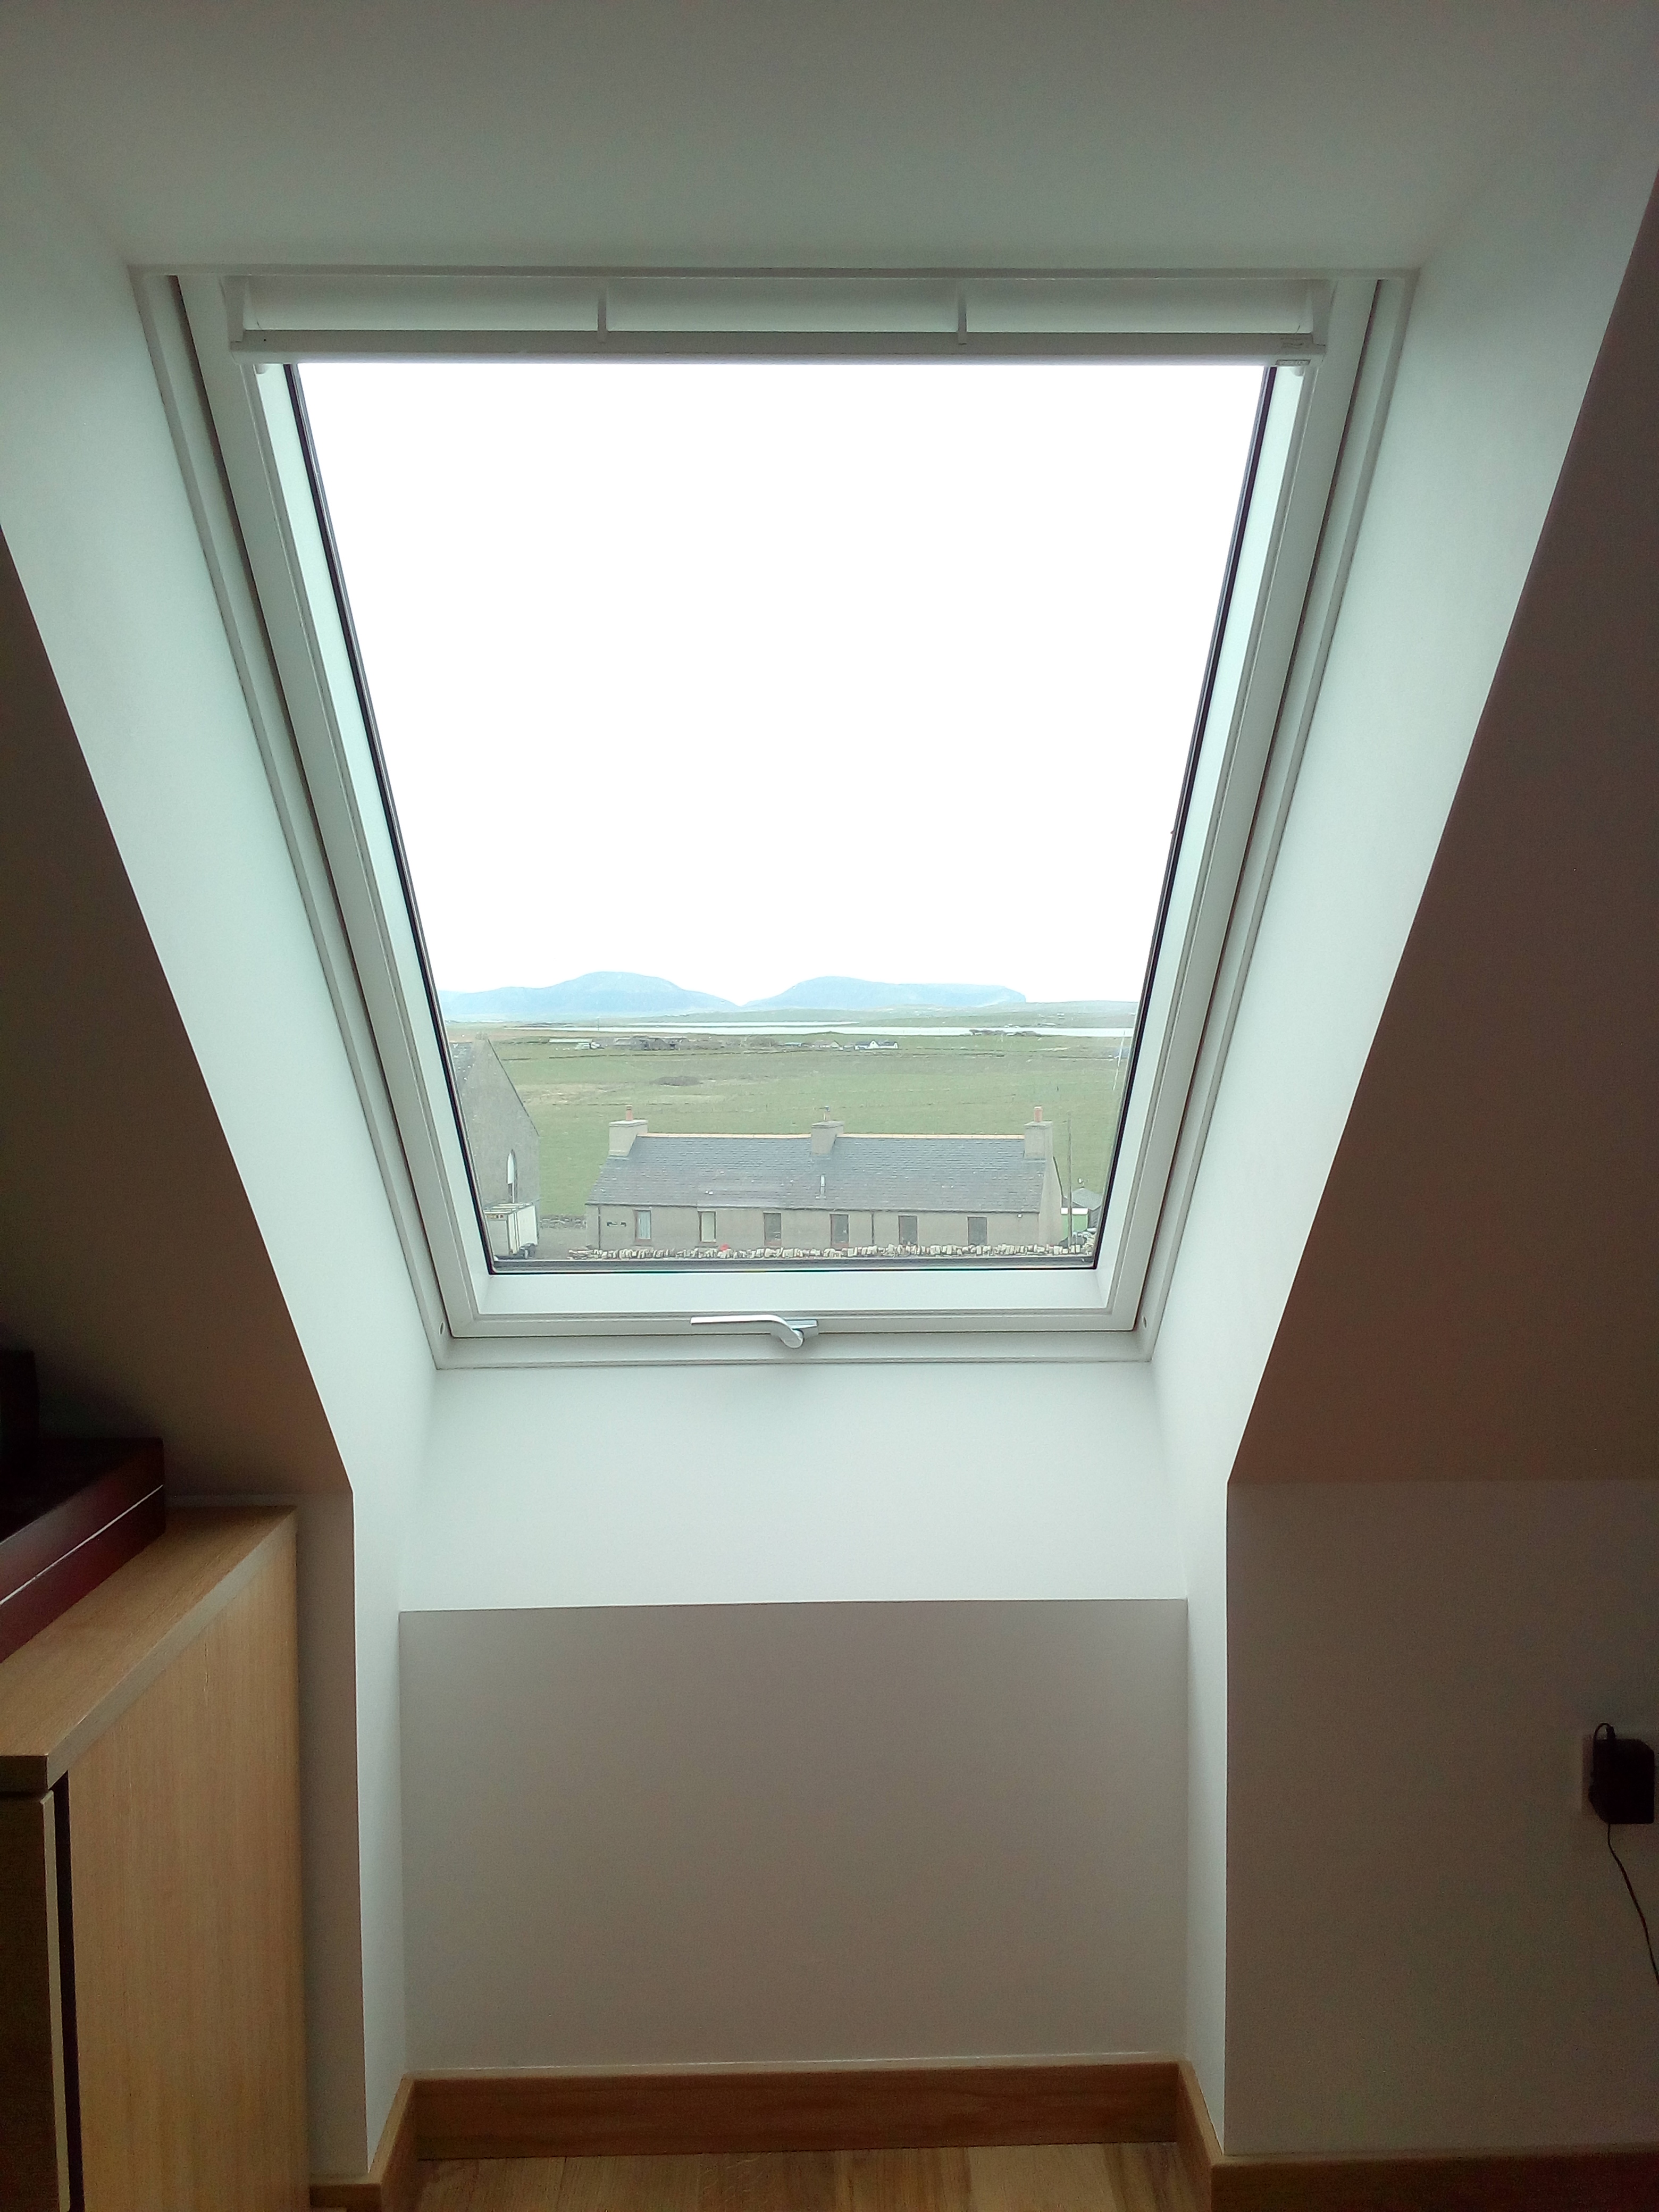
I would, but the prospect of explaining the reason why to SWMBO... As suggested, smoothing off the 'step' seems to be the first thing to try. I'll pick up some sealant tomorrow and report back in due course. The window itself seems to amplify the noise doesn't it? I doubt we would even be aware of it if we had concrete cills,
-
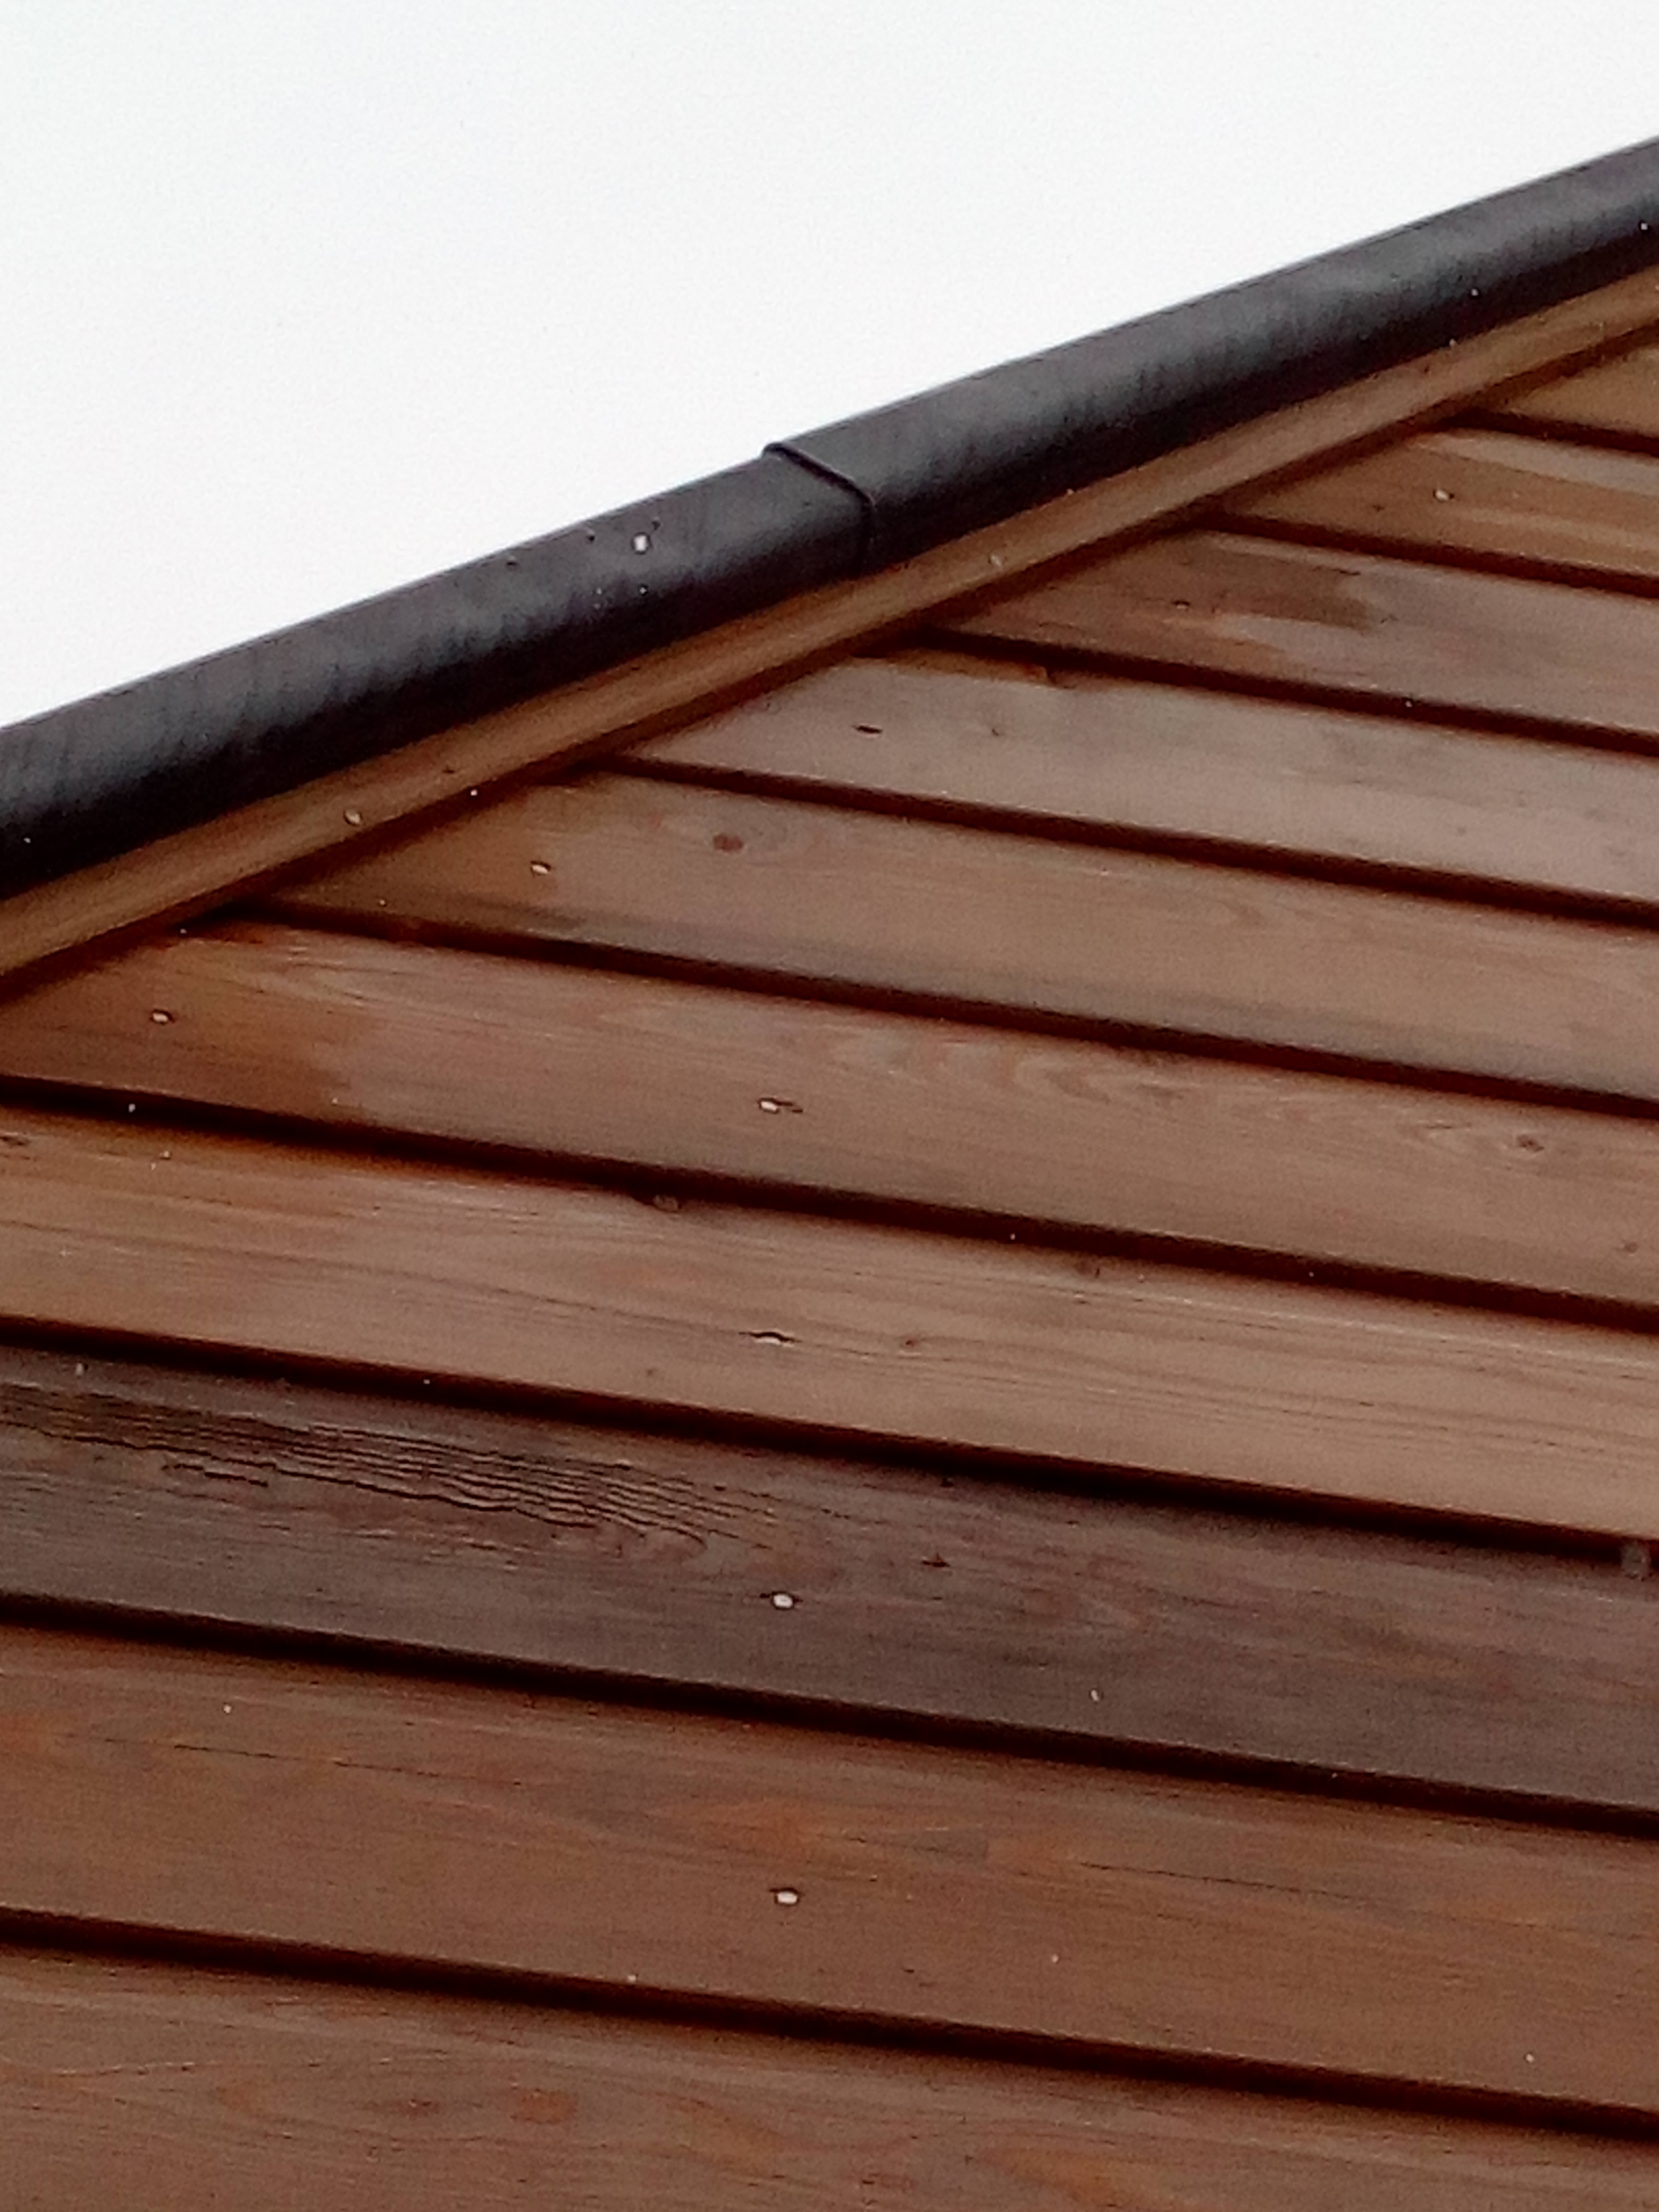
A very minor issue - We have lead covered 'skews' as our gable verges, made up from a series of overlapping lead sheets (to allow expansion and contraction). Unfortunately, one of the overlaps is positioned directly above one of our bedroom windows, and in certain weather conditions, water runs to the underside of the overlap and drips down onto the aluminium window cill. Typically this happens at night, and without any bulk to the cill, the noise of the drip hitting the cill is transmitted very loudly. Its very annoying as its otherwise very very quiet inside, the prevailing weather, be it wind or rain almost impossible to detect unless you look out the window. As a short term measure I can put something on the cill to absorb the drip but ideally a more permanent and aesthetically pleasing solution is required. I had wondered about a bead of silicone on the underside of the skew to let any water track onto the cladding and run off that way. Any other suggestions?
-
BT/Openreach New Connection
Stones replied to worldwidewebs's topic in General Self Build & DIY Discussion
@PeterStarck Do you mind telling us the costs involved - connection, equipment and monthly ongoing? -
Getting the phone connected at my new house...
Stones replied to ProDave's topic in General Self Build & DIY Discussion
Has your complaints manager mentioned compensation as yet? -
There's a small hydrogen project up here using the excess electricity generated at the EMEC test site: http://www.surfnturf.org.uk/ Huge potential but needs a lot of capital to scale up.
-
I just roughly measured with the nearest thing to hand, which was a ruler, so there is a fair + / - to my 800mm. Ours is a standard window.
-
What are you trying to achieve? We fitted ours so we could comfortably look out and take in the view when seated. In our case the bottom of the window is 800mm off the floor.

-
This is exactly the approach we used, supply head and meter in garage, CU in garage for treatment plant and garage electrics, SWA into house where main CU located in service cupboard. There were a number of reasons for doing it this way, first it was the easiest and quickest way of getting a supply on site, second the meter is out the way but convenient enough for reading, and third to facilitate connecting Solar PV in the future, I have somewhere suitable to locate the inverter and make the grid connection.
-
In Scotland, if you were to clamp a vehicle, you would probably end up being charged with extortion. There are stated cases for those interested. The only people who do clamp are the DVLA, clamping vehicles that have not paid their VEL.
-
Well done Neil. Enjoy the champagne.
-
Having gone through the process of considering then discounting travertine as our floor covering of choice, we eventually settled on a porcelin tile to cover those areas (kitchen, utility and vestibule) that were not having oak flooring laid. Unfortunately for us, the person who we believed was going to be doing our tiling (and does virtually all of the builders tiling), at the last moment refused to undertake the work in our house. Quite why I've not been able to establish, nor has my builder. To say I was put out is an understatement. My builder was none too happy either. Fortunately, he was able to pull a rabbit out of the hat a couple of weeks later, in the form of Tony from Australia, a tiler on an extended visit to Orkney. As neither of us had seen his work, we agreed that he would tile an initial small area and decide whether he would do the whole job on that. We needn't have worried, a really nice and hard working guy, he set about measuring and marking out, discussing patterns and the best way to achieve the look we wanted. As the tiles started to go down, we could see the care he was taking, and we are more than happy with the result. Due to insufficient clearance under both the front and back door we ended up creating mat wells for the door to open over, edging the wells with aluminium trim. Moving into the bathrooms, where we had decided to use the same porcelin tiles, we tiled all the walls to half height, and finished with a simple straight edge aluminium trim. In the picture you can see the bulkheads we created to conceal the cistern and give a finished height of 1000mm, and the frame / surround for our bath. Access to the cistern / basin trap is by a removable tile (held in place with silicone). If for any reason we do need to get to the cistern and the tile breaks, I have 6 boxes left, so a healthy supply of spares. In the utility room, the units and oak worktop were fitted. A 50mm offcut strip from the utility worktop was used to create a handrail on the staircase, as required by building control. One of the key uses of our utility is as our clothes drying area. Readers may recall from earlier entries that we have a section of vaulted ceiling in the utility which now accommodates two clothes pulleys. Each pulley can take a full load of washing which means all washing can be hung up above normal ceiling height,out of the way. I fitted the utility MVHR extract in this space to ensure moist air is drawn away, and can happily report this particular feature to be very effective, drying all washing overnight. Through in the kitchen, plinths were fitted, doors put back, appliances installed and the worktop (quartz) lifted into place. On the island, we decided to go with a quartz splashback, and to finish with oak on top. We're very pleased with the finished look. On the other side of the kitchen, we are still undecided how to finish the splashback, so in the interim have a length of quartz. We may opt for tiles, glass or leave it as it is. We also have to decide how to finish the underside of the overhead units. This was something I flagged at the design stage but I was overruled in the quest for a 'clean look'. We have the option of fitting a piece of pelmet or a piece of shelving matching to the doors / carcuses. I suspect the later would give a better overall finish. Next entry: 2nd / final fix electrics
-
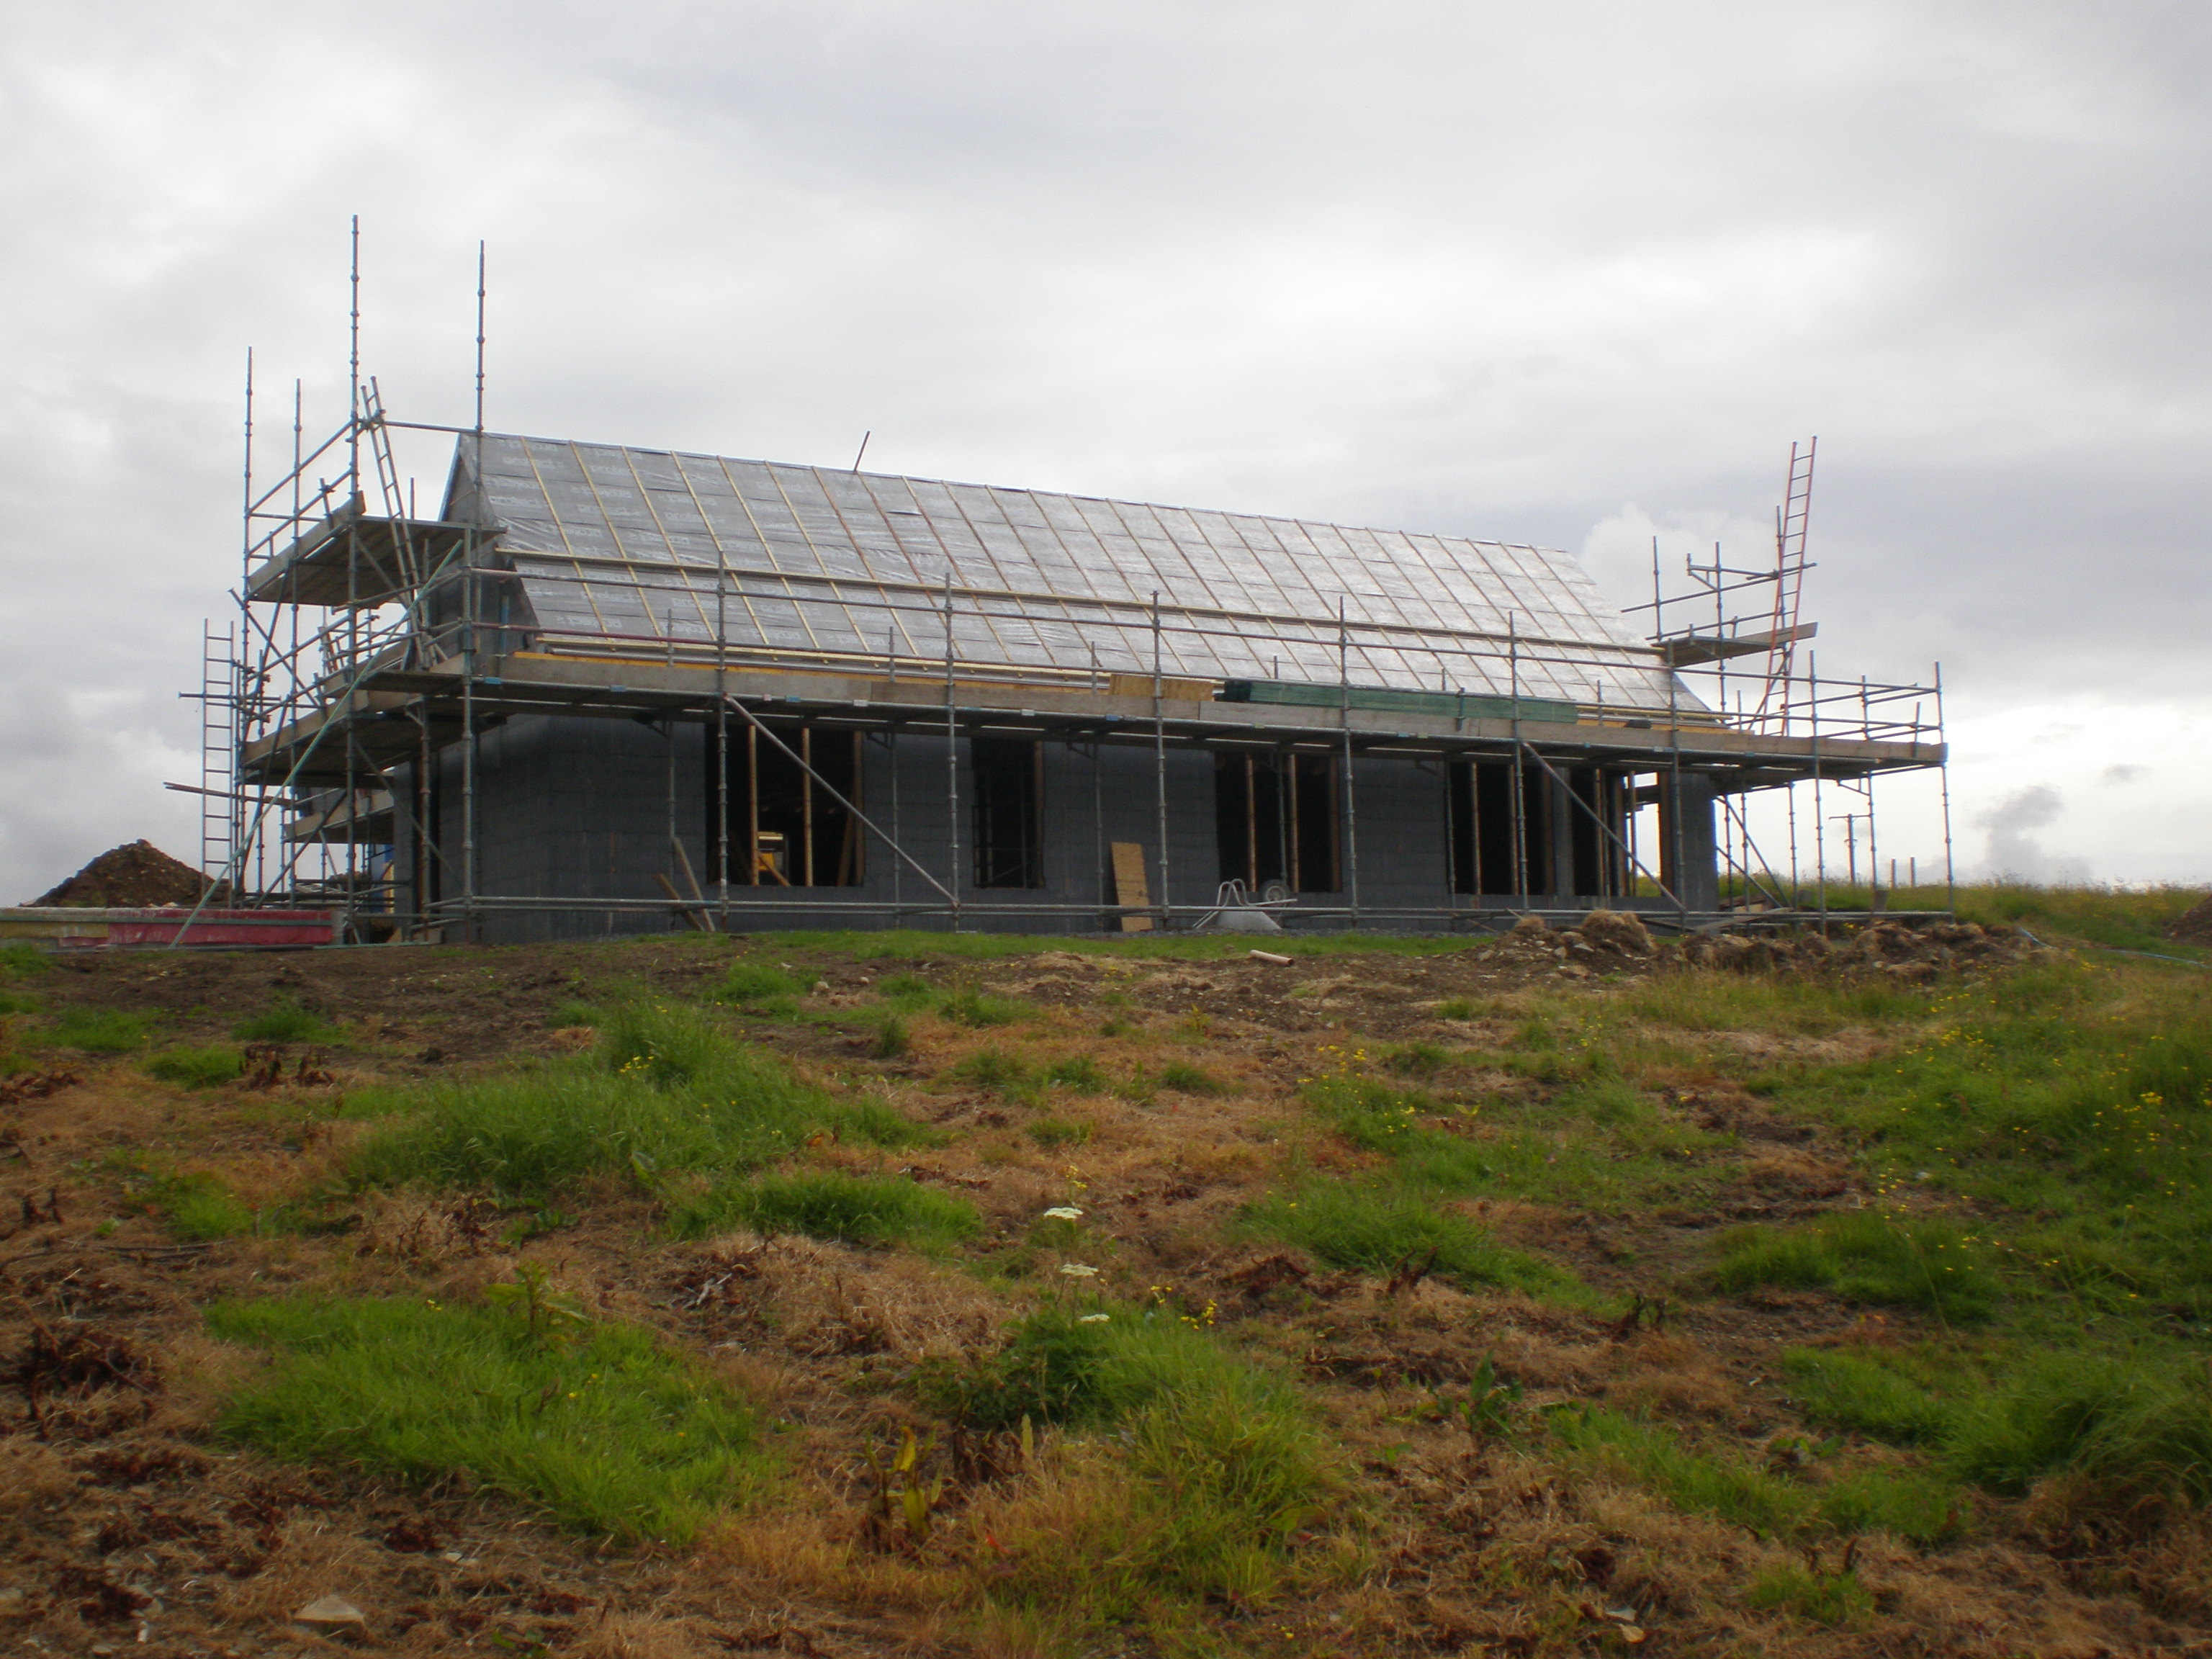
Can a self builder design a house without professional input? One could argue I designed my house by coming up with the floor plan, but the technical design to turn that sketch into working drawings was done by others. To get a building warrant, input from a structural engineer is almost always going to be required (unless the self builder happens to have these skills him or herself).
-
...and you didn't see that coming?
-
Act IV - Progressing the Design
Stones commented on AliMcLeod's blog entry in A house! A house! My kingdom for a house!
Really interesting to hear about the process you went through. Good that you both agreed that it wasn't quite right and to go back to the drawing board. It would have so easy for each of you to put a brave face on things and say you were happy with the design to only later admit you were only saying so for the benefit of the other. -
Fingers crossed it makes him realise that there could be consequences if he goes ahead. I quite like the 'insurance company' approach as previously suggested. Ultimately, you still have the nuclear option...
-
Agree 100% that you have to contact SEPA. IIRC, culverting a watercourse for land gain requires a licence. Can't imagine they would be that happy about increasing or creating a localised flood risk, nor the pollution that the work would create downstream. https://www.google.co.uk/url?sa=t&source=web&rct=j&url=https://www.sepa.org.uk/media/150919/wat_ps_06_02.pdf&ved=0ahUKEwi_7eOimfrSAhWpI8AKHVIEDicQFggwMAI&usg=AFQjCNEmVS1yN9UrLXrH0v5dFJDOl1HPOQ
-
@Crofter - a few observations and thoughts. The most important thing you have to think about is will the proposed changes make this a better working a holiday let for clients and for you maintenance and cleaning wise. Vestibule - whilst I appreciate you like the feel of the big space as is, getting rid of the vestibule would i think be a mistake. Blowing a gale, your visitors coming in from the cold and wet have a weather front following them directly into the main room. Where do visitors hang their wet coats and place their muddy boots. At least with a vestibule you provide that space and give some protection to the main room. Easier to clean and repaint a small vestibule vs a whole room. W/M cupboard. Make this 650 deep only to accommodate the W/M, use storage space beside machine for vacuum, brush, mop etc and provide coat hanging space / shelves above. Use leftover depth to create built in storage in bathroom for towels etc. Other options for the leftover space - use as part of a vestibule or shift the main dividing partition back, making the main room even more generous. Bathroom - consider what is going to be easiest to keep clean in terms of the shower enclosure. Whilst a generous size is important that could be achieved with a 1200 x 900 tray, then use the remaining width of the room for built in bathroom storage or built in storage in the bedroom or combination thereof.
-
It is fan rather than terminal related noise, as the volume and pitch corresponds to the unit and speed it is set at. What little air rushing noise there is at the terminal (which you only notice at very high fan speed where terminals have been quite restricted) can be dealt with by opening the terminal a little. Certainly something to be said for balancing at the manifold as this would let you have the terminal open rather than restricted, thus reducing any sound of air rushing. How effective would you judge the foamed manifold to be I'm terms of noise reduction ( difficult I know but say compared to standing next to the MVHR unit itself) ?
-
I've lived with MVHR in several houses, but this is the first where I've really noticed the noise at night. None of my previous houses had silencers, but all used a main duct run with branches off to individual rooms, with adjustment at each terminal. The two new variables are the MVHR unit (a Vent Axia) and radial ducting. A combined silencer / manifold makes a lot of sense - surprising that nobody seems to make them.
-
I've been mulling over what the best shape and size of silencer would be. I think foam is the way to go as the silencing material if for no other reason than there is more surface area available (assuming egg box etc) compared to the mineral wool type I linked to previously. The question really is do I build a box and line it with foam as per @JSHarris or get lengths of 200mm plastic duct (or bigger) line with foam and use reducers to take the diameter back down to 150mm to fit to the existing. I have enough spare MDF to build a box for the supply side 600 x 600 x 300 and for the extract 600 x 300 x 300. I also have half a tin of MDF sealer and some silicone to help make the box airtight. If I were to down the plastic duct route, in effect making my own version of the one I linked to in the OP, I could fit two silencers, in series on both the supply and extract (one horizontal, 90 bend then one vertical into top of plenum). Whilst there would be slightly more foam surface area if I went down the homemade box route, clearly there would be more length and a bend if I went down the duct route. Any views / thoughts about which would be the most effective?