Onoff
-
Posts
21128 -
Joined
-
Last visited
-
Days Won
206
Everything posted by Onoff
-
Dodgy cable from the start or have you damaged it? I assume everything is NOT in conduit?
-
We had this discussion a while back. I think it was ME who posted a link to a high end one with cabling hidden in the mounting brackets. For the life of me I can't find the thread. @Nickfromwales WILL remember! Then there's add on "housings" to neaten up and hide the cabling in regular ones. http://www.geyser.co.uk/cable-housing-unit-single-heat-element-shiny-chrome-p-845.html
-
More for flickering than dimming issues but worth noting: If there's two way or intermediate switching involved you can try swapping the strappers and common around in the 3-core + earth, this to vary the (stray) capacitance in the cable. Just make sure you do the same both ends! Snubbers sometimes help too. https://www.maplin.co.uk/p/rc-contact-suppressor-rg22y
-

Anyone recognise this toilet cistern fill valve?
Onoff replied to ProDave's topic in Bathrooms, Ensuites & Wetrooms
Don't tell my missus! She'll be wanting our wall hung wc fitted! Along with the basin, shower, tiling, maybe a door frame and door.....lights, heat.....etc -
In the cheap seats here I used Slik stuff. Not all that imo. https://www.macbuildingproducts.com/product_info.php?products_id=11702&gclid=EAIaIQobChMIjv670OWr1wIVqArTCh23fQenEAQYASABEgKcGPD_BwE Similar to what your wanting to do I guess: Handy for storing small children though: We have this racked out now and floor to ceiling with baskets of tat! Some pics somewhere of the finished doors (routed and white glossed MDF) and the door gear itself that I'll try and find. Also used their kit for a pocket door in the bedroom. Tbh it's noisy imo but slides OK.

-
If you wanted "metal" then you could probably get these people in the first link I posted to cut you some out to whatever shape you wanted, even down to fixing holes:
-
Dunno, maybe get a straight connector and piece of 32mm just in case? Don't forget the inserts btw! Seems silly to buy a length of pipe of you have none. Maybe someone on here could post a foot of it?
-
Please! Soft Southern Shandy Suppers! Drinking a lager the other day and I felt the urge for a lemonade top...
-
I was getting a load of fast grown, radiata pine a few years ago, came from NZ in containers supporting machinery. 4"x1", 4"x2" and some 3"x3". Made a few bits and ripped some down to give 2"x1" for the front fence. Very soft though.
-
Presumably before you cover it with earth you would put a couple of layers of landscape fabric over the top?
-
@Vijay, did you somehow miss this thread?
-
Does he mean up/down lug for level?
-
A bit like that scene in The Day After Tomorrow where the helicopter bloke freezes up on the spot!
-
YES! The SSR-40-AA variant, picture 15 at @dogman's link looks to be ok. It's 80-250VAC input. Love the rip off of the RS logo!
-
Or undo, sling and replace with something like this:

-
I have a double garage, shed and stable block that are each a mixture of each other. Slowly getting there. For instance I now have two tubs of assorted washers (garage/shed) that could become one! The disorganization is just an extension of my mind! My shed bench is one of the oak teacher's desks that came out of my infants school where I went 45 years ago!
-
Infamy! EDIT: On my attempt the black goes into the grey and is push fit. Then it's grey to grey solvent weld. to get the "kick". Solvent weld fittings are just that bit more compact. The grey to brown joint, (where I didn't want a collar) caused me a few sleepless nights with questions over whether brown soil will in fact solvent weld to grey. The brown is more "plasticky" if that's a word, Thought they're all pvc thay have slightly different BS numbers. With hindsight I'd have done the long length in grey or black. Also, ref different makes of fitting, some joints can feel a bit loose. I got a tube of pvc gap filling cement. It's a bit thicker than the stuff comes in a tin with a brush. Shop around as it's pricey if you do need some: http://www.plasticdrainage.co.uk/clear-solvent-cement-gap-filler-7965.html?gclid=EAIaIQobChMI-ZOMuOii1wIVg7vtCh35VwHJEAQYAyABEgIimvD_BwE#fo_c=1765&fo_k=7ae12d9e5b724501290300d41070b52c&fo_s=gplauk
-
You'd have trouble pushing these Geberit brackets off once clipped in! A bit of silicone spray on the pipe before it goes in etc.
-
UFH in slab or screed, eps or pir insulation?
Onoff replied to Tin Soldier's topic in Underfloor Heating
- Compacted Type 2 (home made, hardcore graded through a 40mm sieve). - Sharp sand blind - 25mm EPS - DPM - 150mm PIR (100 then 50) - Polypipe tray with 16mm UFH Pex-Al-Pex - A142 mesh - 100mm concrete ...s'what I've done. If I could have been ar$ed digging deeper I'd have thickened up on the PIR. -
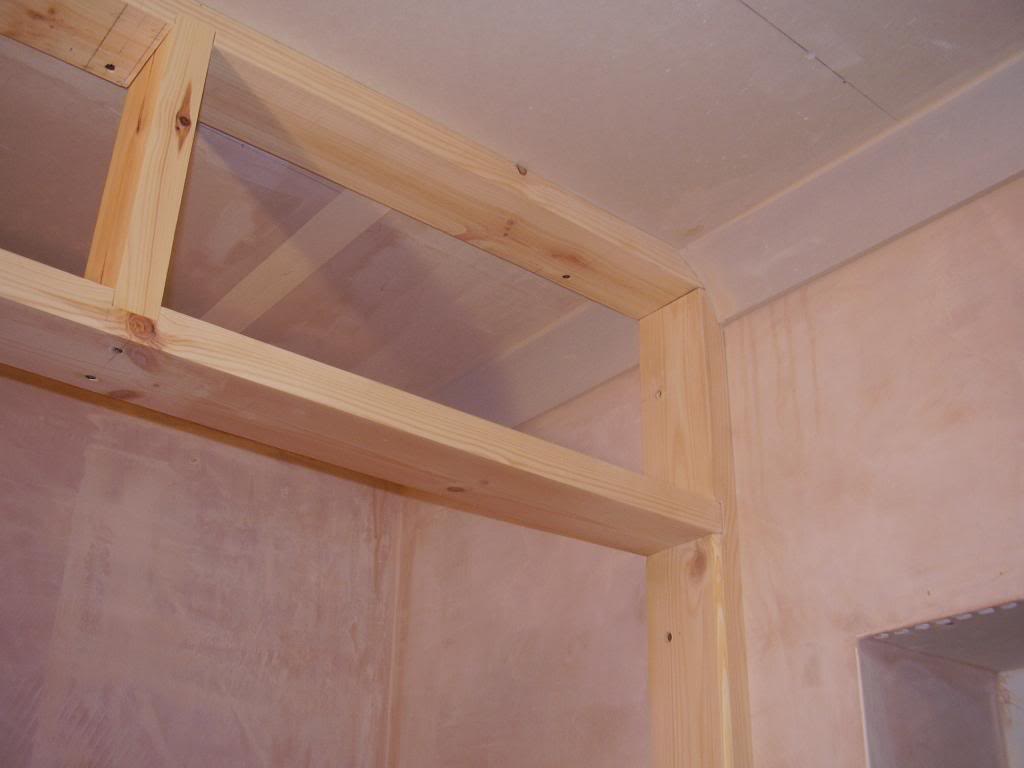
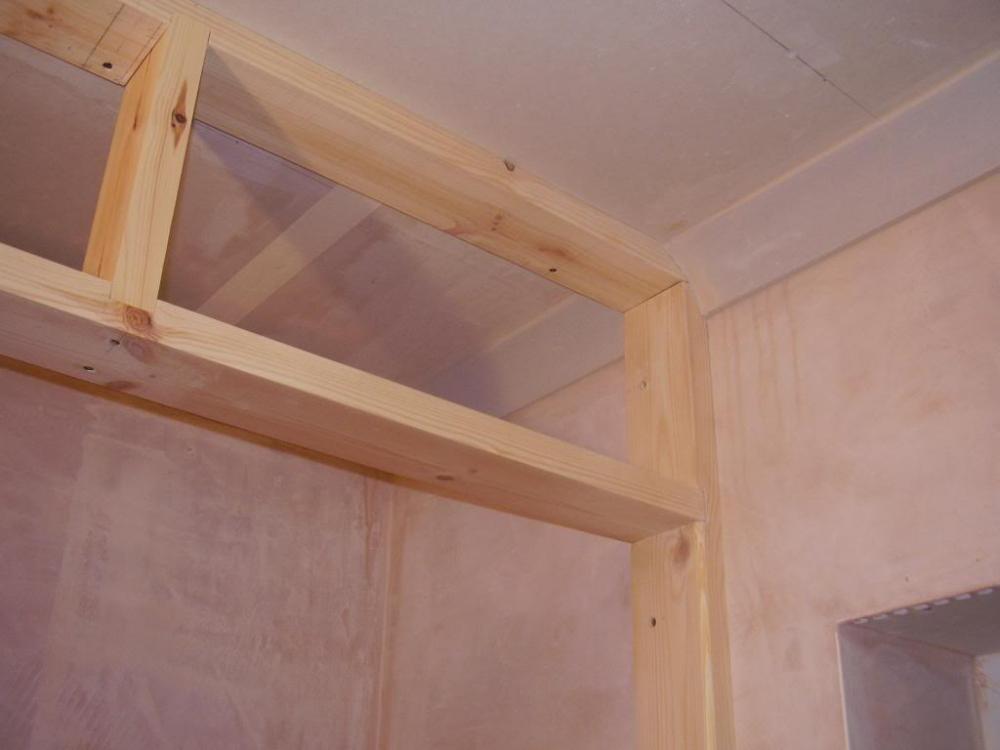
A couple more shots of mine albeit a single pan. More to get an idea of the convoluted route I went to bring the soil run within the stud wall depth. My stud wall is odd in that to square the room off the studs vary in depth from 95mm where the soil exits the wall to 150mm down by the Geberit frame. I was sort of lucky as the frame sits over where was an old door way, now blocked up but with the face of the blocks recessed by about 2" from the original wall: You can see here it was all looking good until I had to account for the collar thickness on the fittings. If you use push fit then the distance from centreline will be in excess of 55mm. To gain mm I went solvent weld. (Measure, dry fit & mark, double check before you glue - not for the faint-hearted but I'd do it again). Even with solvent weld the horizontal brown was just that bit too far out past the stud line and immovable where it exited through the wall. Hence the 9mm packing pieces added above: So now my moisture resistant plasterboard & Aquapanel for the wet room corner will "sail" over the soil pipe and be unsupported there - must remember NOT to screw there!
-
My first bench I made maybe 30 years ago has a frame made from 70x70 par. All the joints are half or through housings. It's topped with salvaged 6"x3"s and has a replaceable hardboard top. The big mistake was continuing the 70x70 frame up at the back with again 70x70 horizontal members. I backed this with ply and screwed loads of component draws to it. Every time I was beating Hell out of something on the bench the draws would rattle & vibrate open.
-
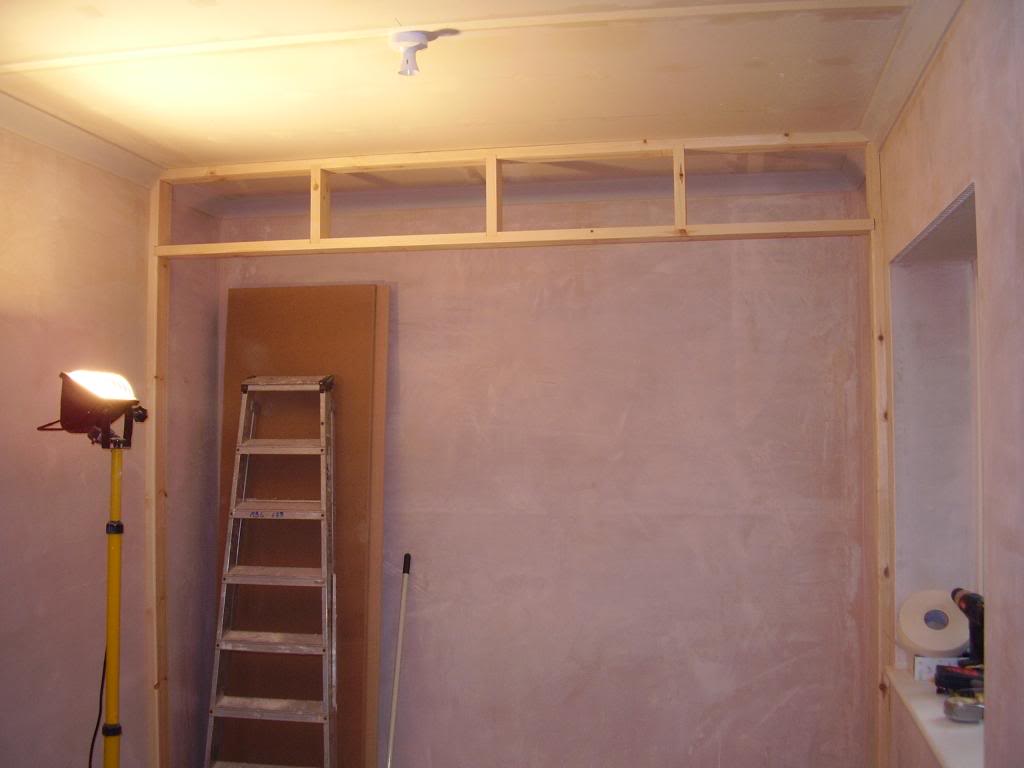
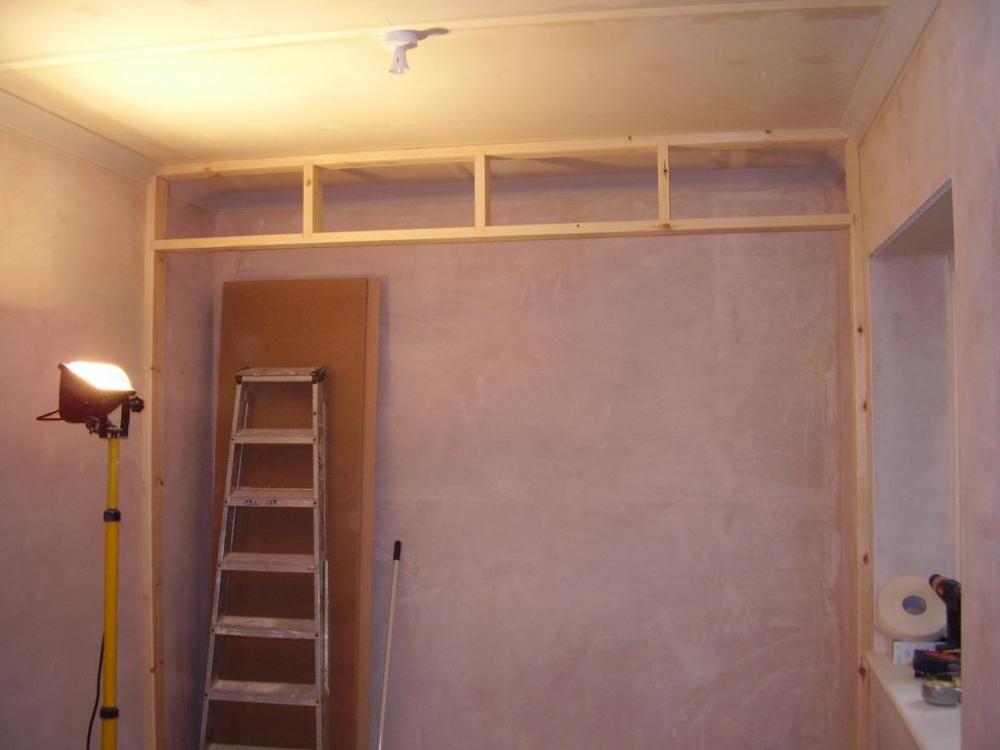
The pipe was put in and expanding foam squirted around and flushed off. I had to add 9mm ply to the face of the studs to allow for the dia of the 110mm pipe collar. I really don't know where to begin...you needed to have been here from the start of the journey... It's a long story...ask anyone here! Depending how bored you are: https://flic.kr/s/aHsk23FYzd
-
DON'T bolt to the wall! Have it freestanding. Not a good idea if you're bashing the granny out of something it'll vibrate the walls and shelves.
-
This is mine:
-
If you do make your own battens then tie them together on trestles to make like a big blockboard when you treat them. Saves on wastage.