Onoff
-
Posts
21061 -
Joined
-
Last visited
-
Days Won
206
Everything posted by Onoff
-

Bath Surround / Boxing In, and concealed pipework
Onoff replied to Onoff's topic in Bathrooms, Ensuites & Wetrooms
Ta. A few pics over on my Tanking thread. Slowed a bit waiting for the wall drain inbuilt membrane to dry. Bought a second kit off Amazon. Should have got the Mapei one you linked tbh to save waiting for the sake of a fiver. Can't see Aquaseal/Mapei not being compatible. https://www.amazon.co.uk/dp/B006FTESLW/ref=pe_3187911_185740111_TE_item -
The tale of the sale of our old house
Onoff replied to Jeremy Harris's topic in General Self Build & DIY Discussion
Congratulations! -
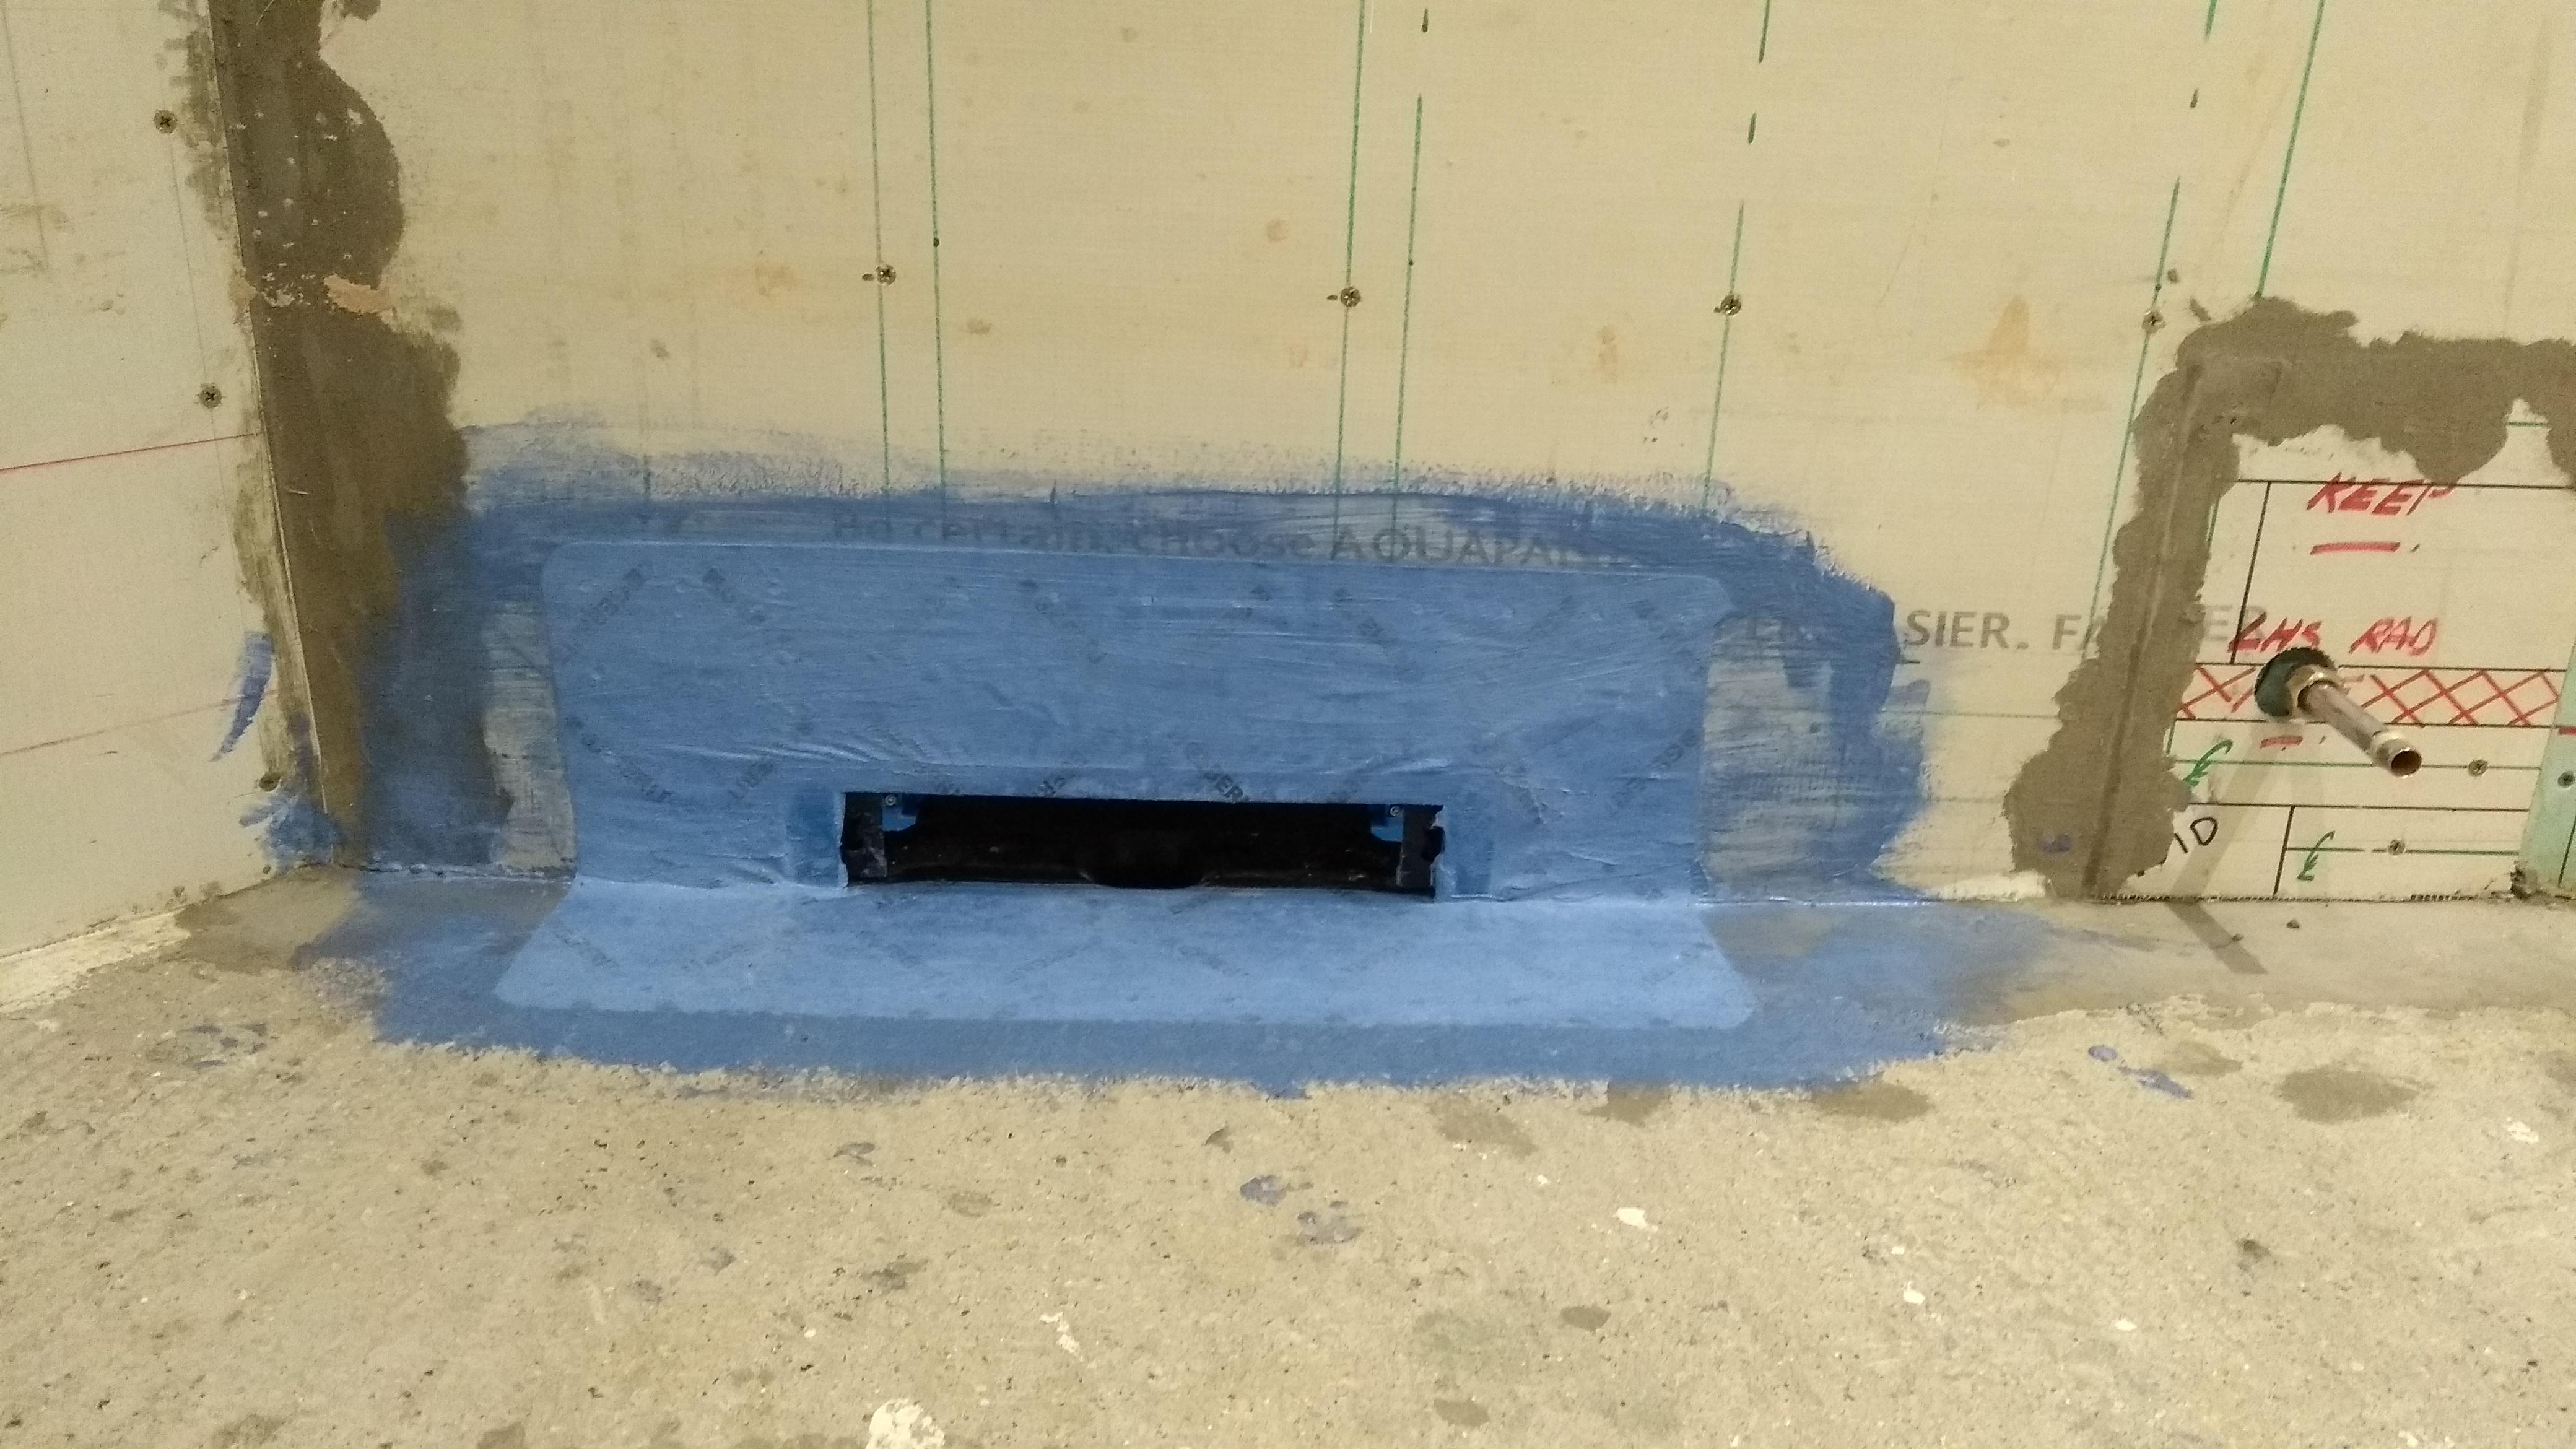
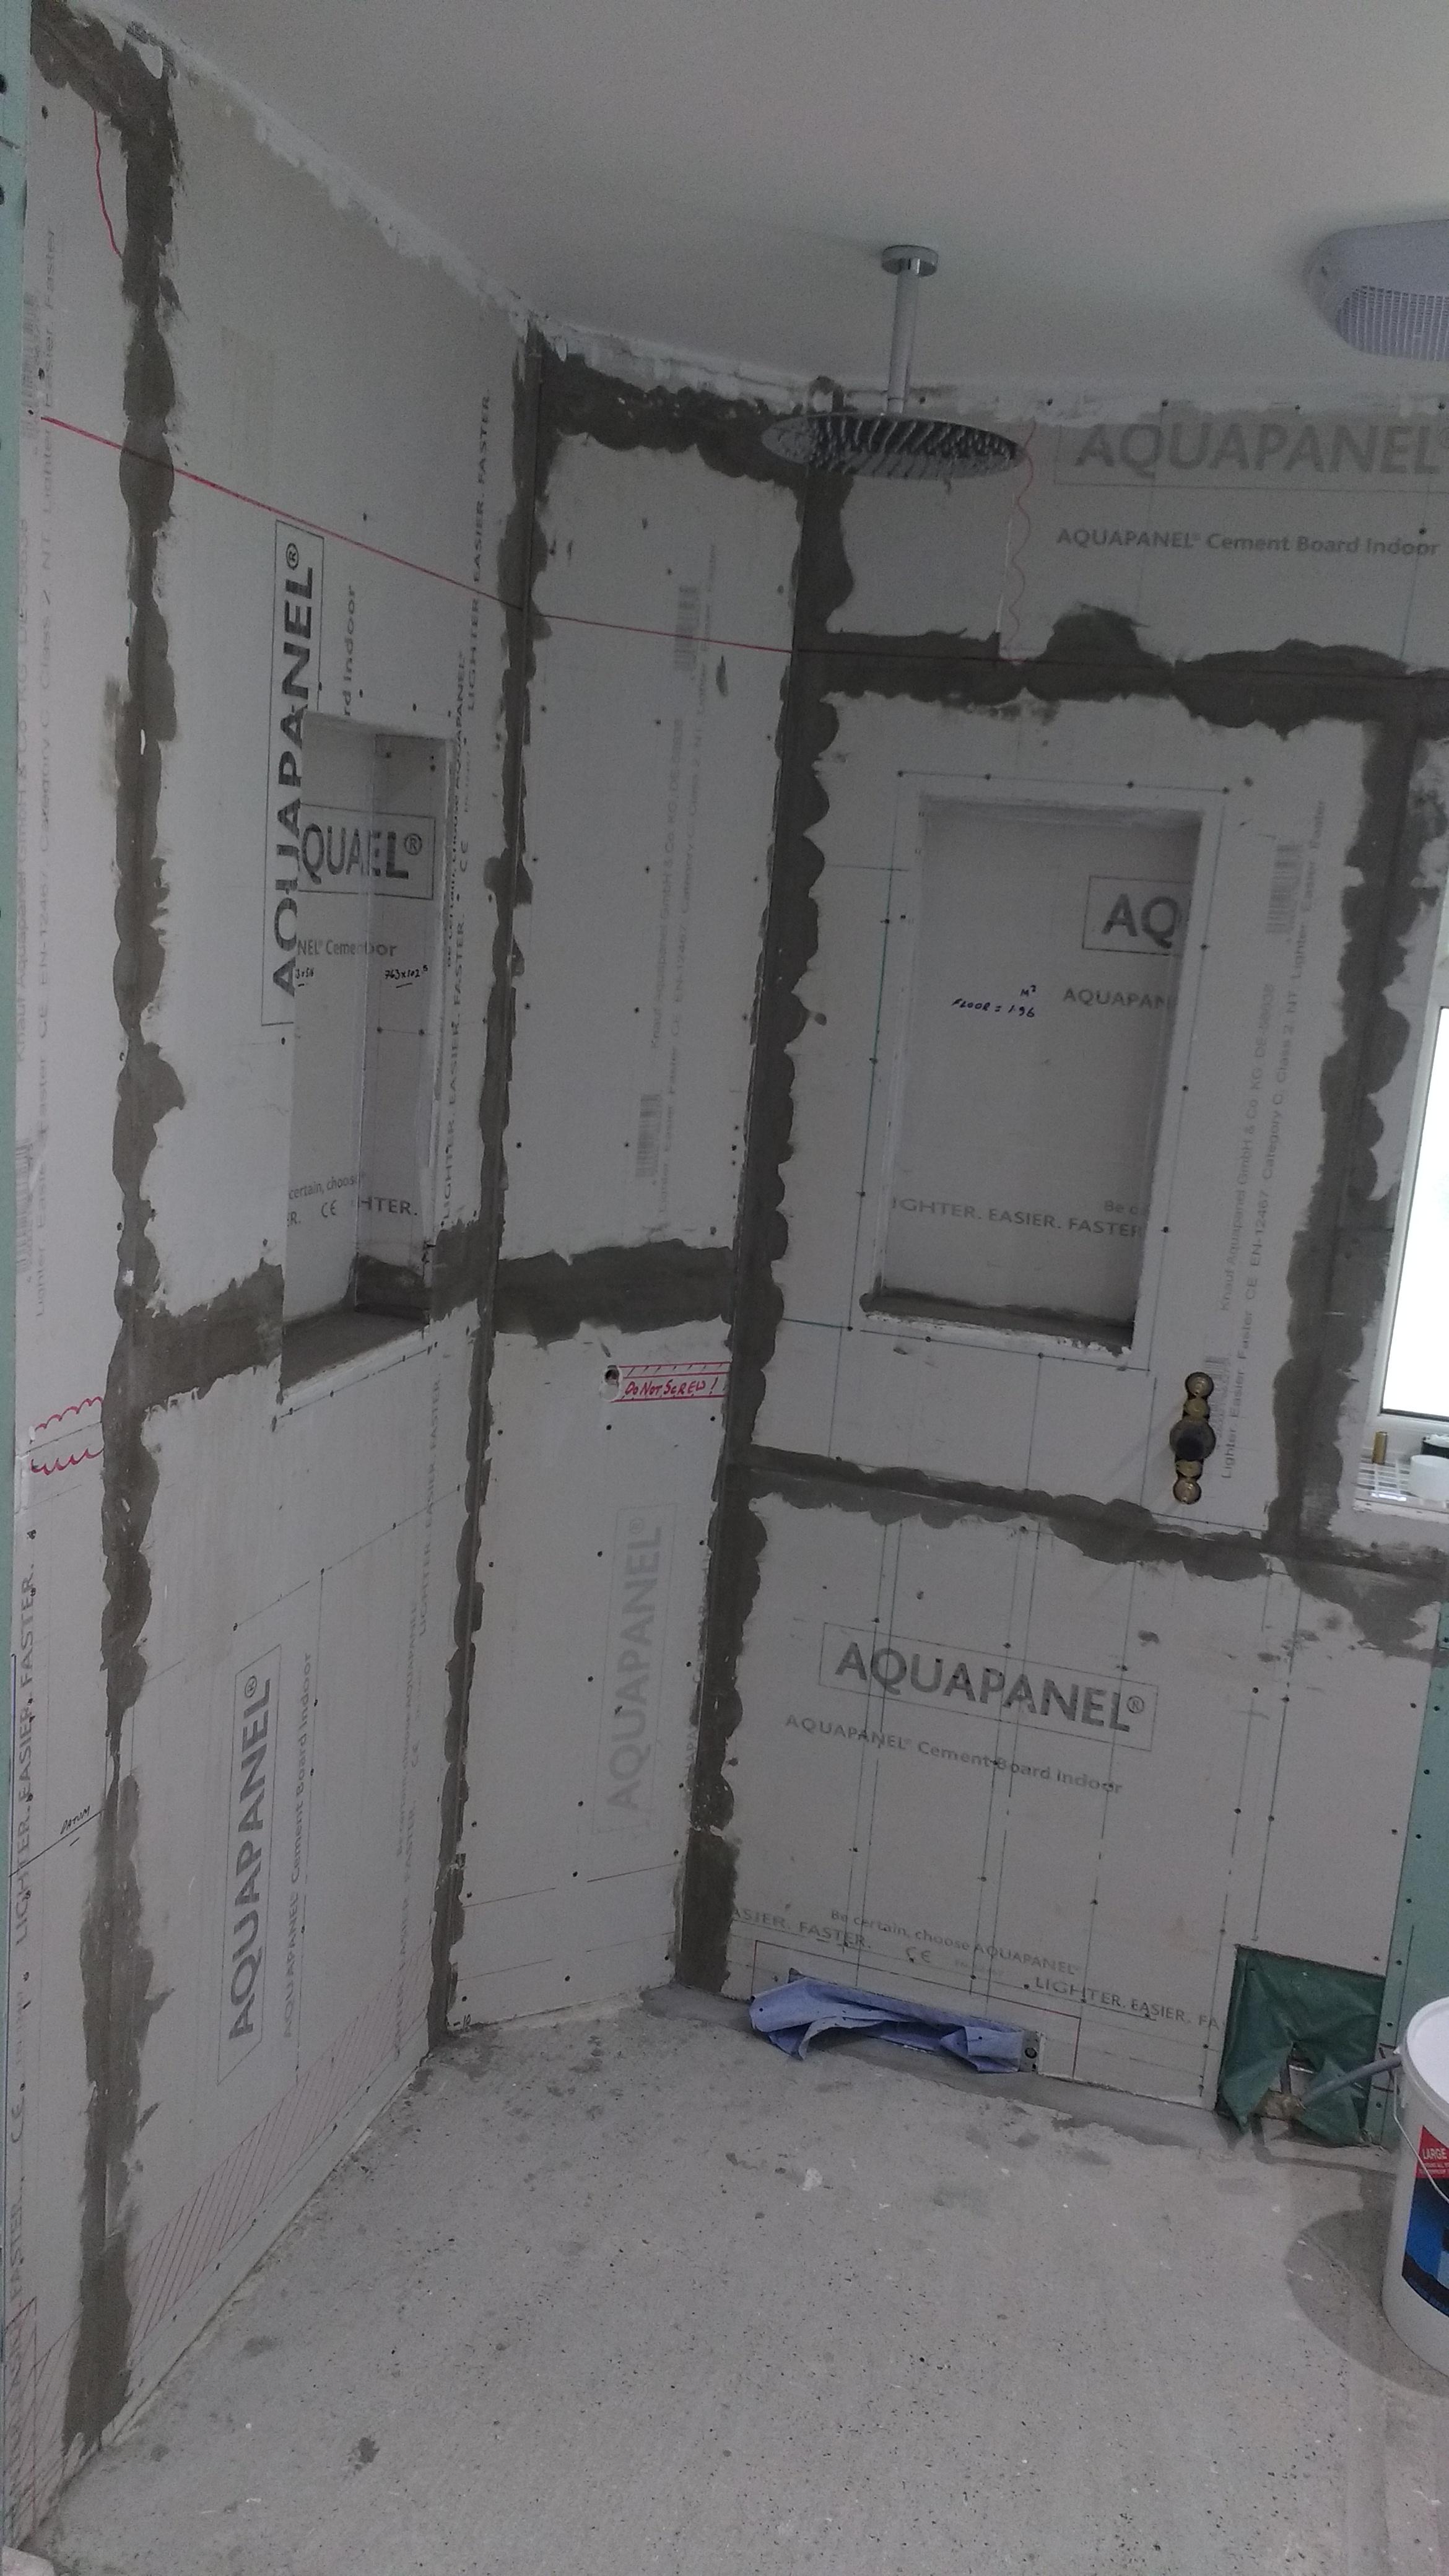
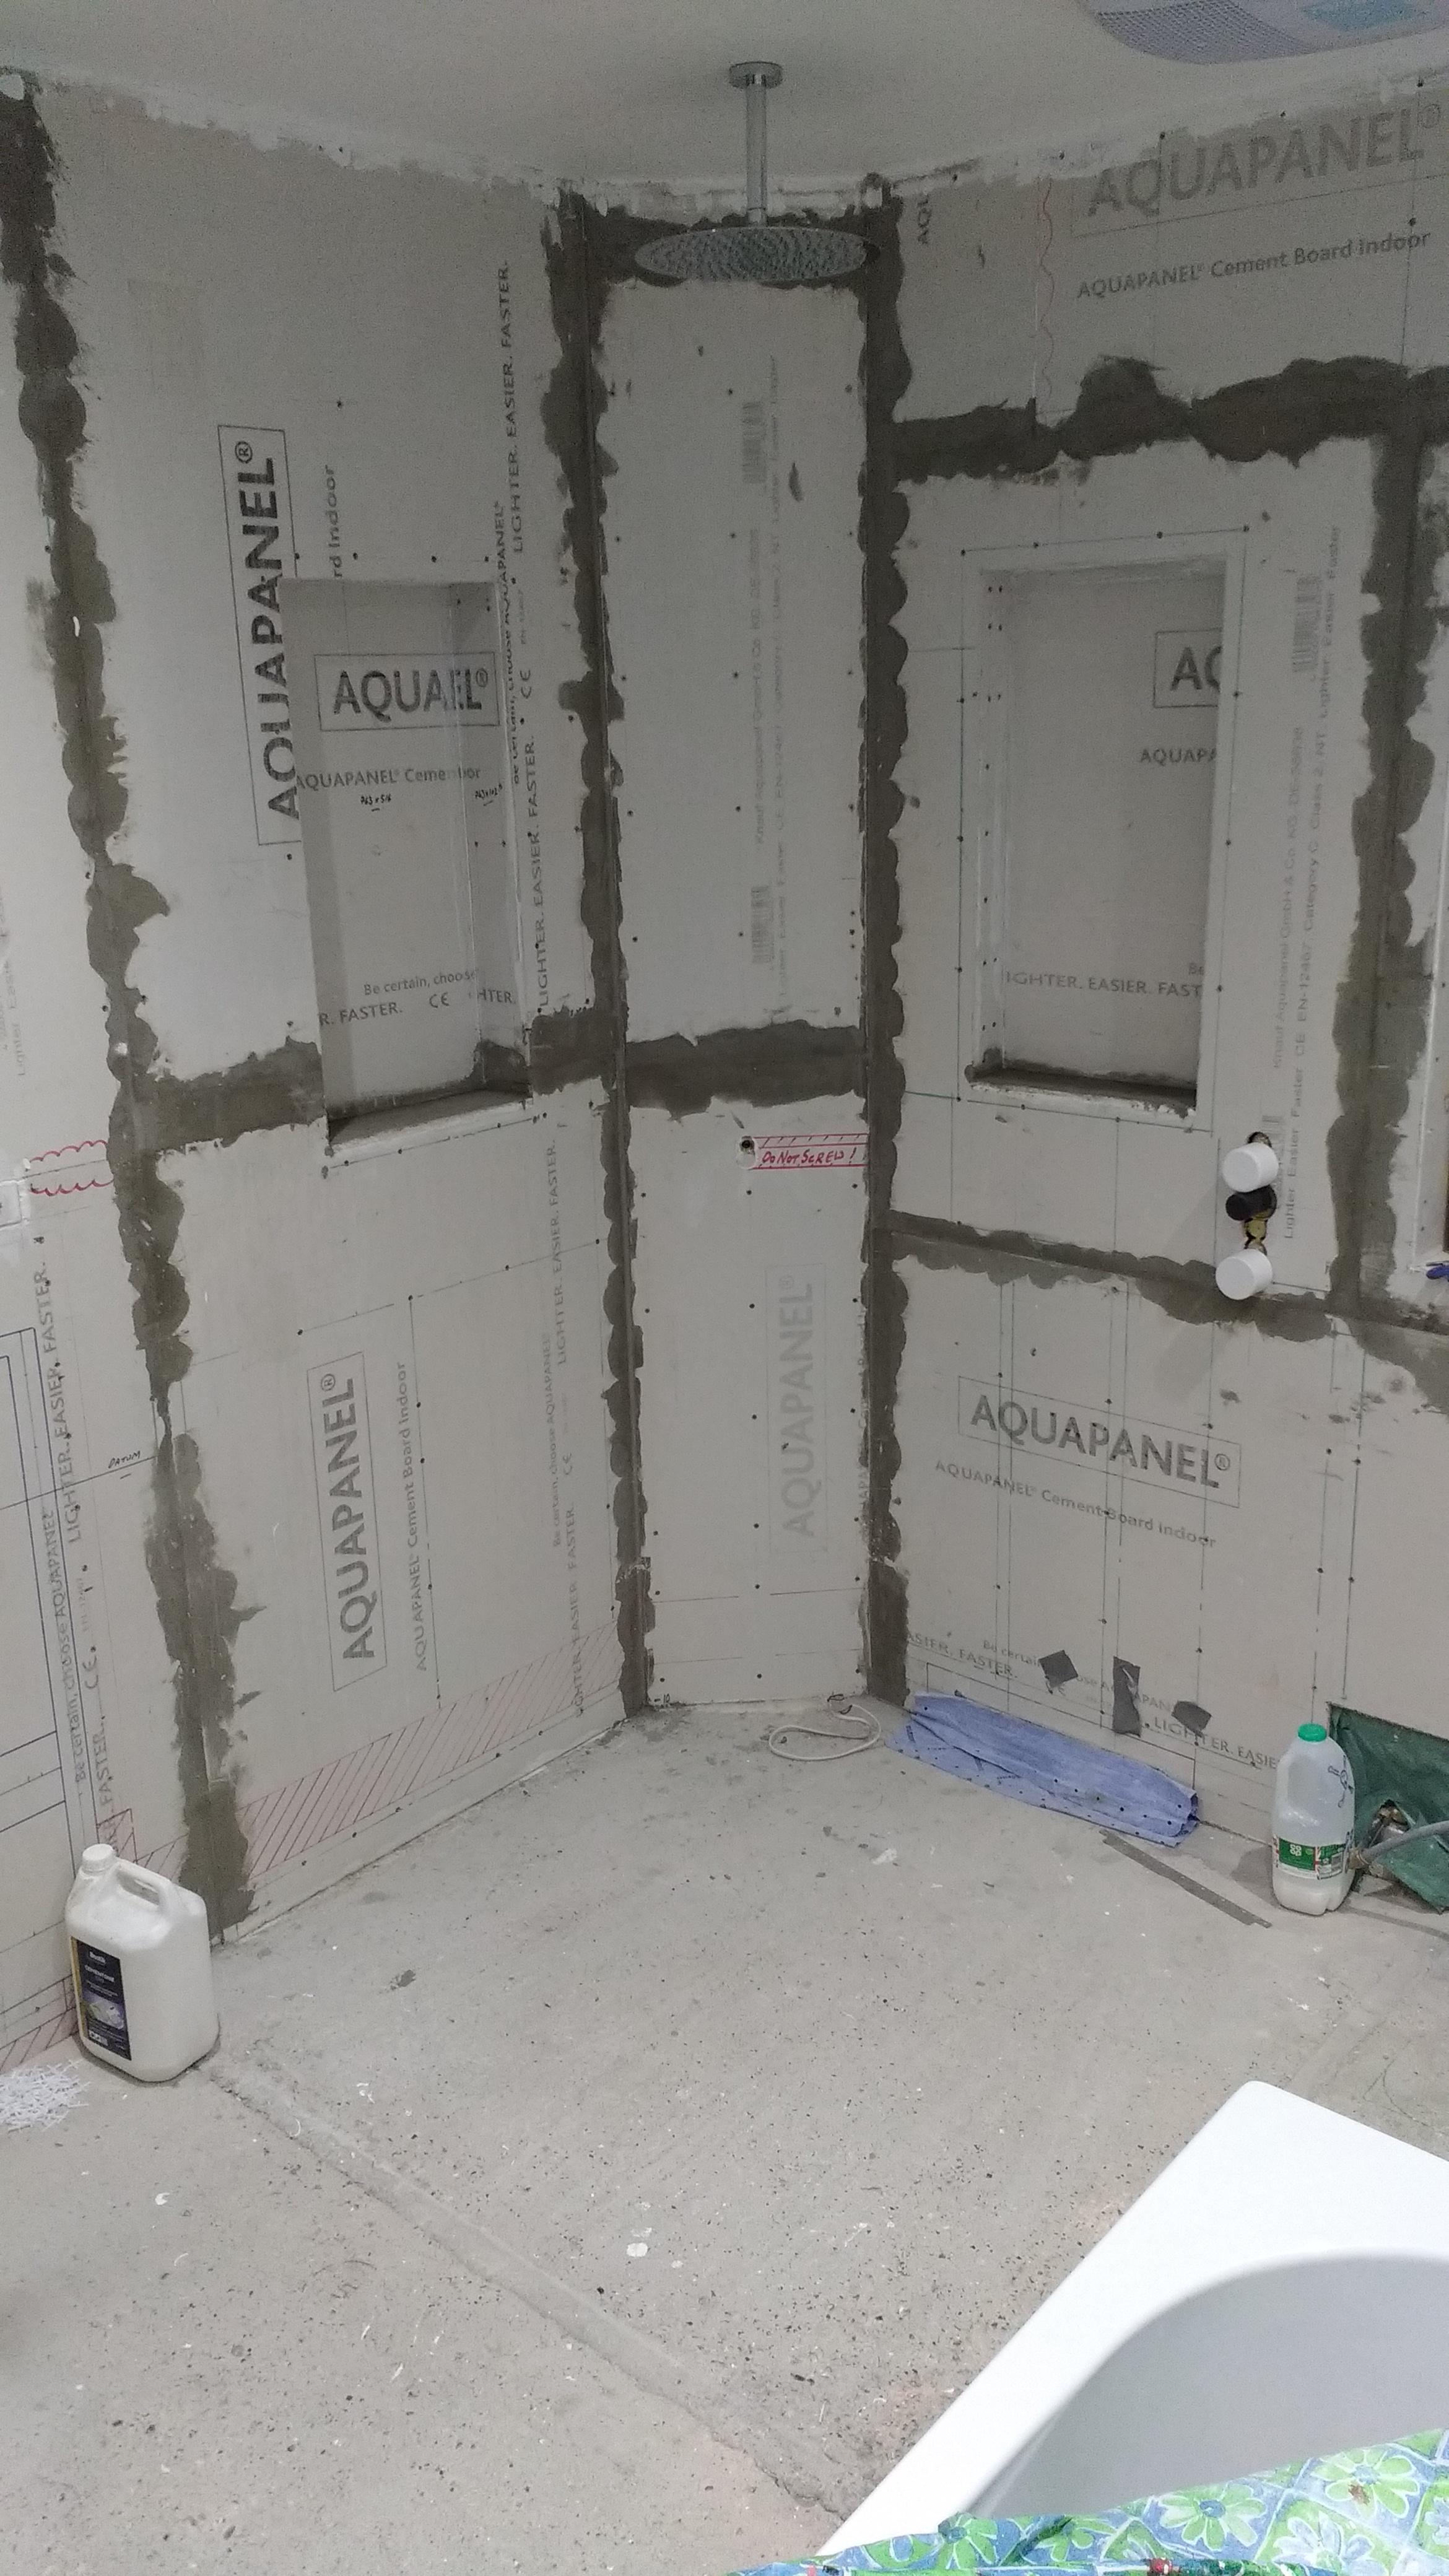
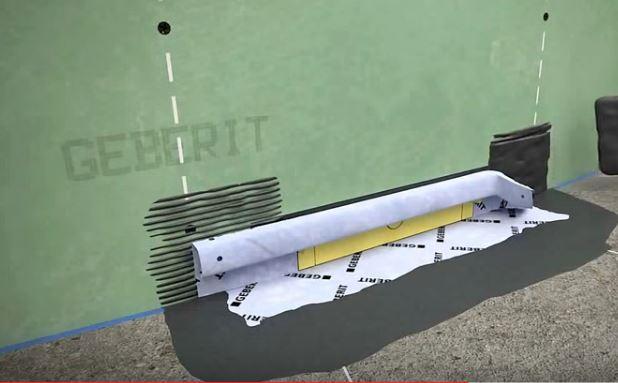
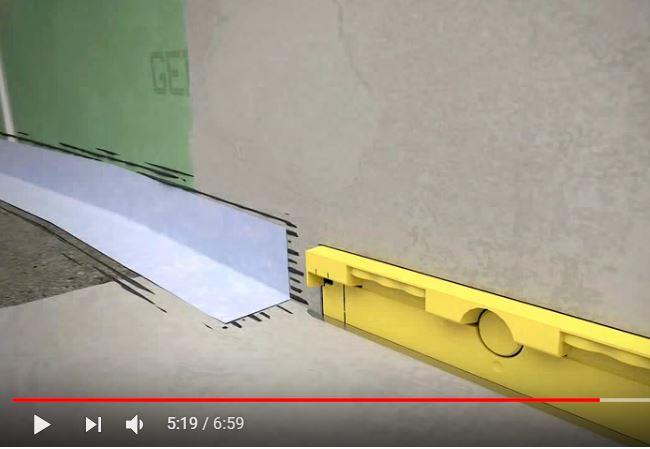
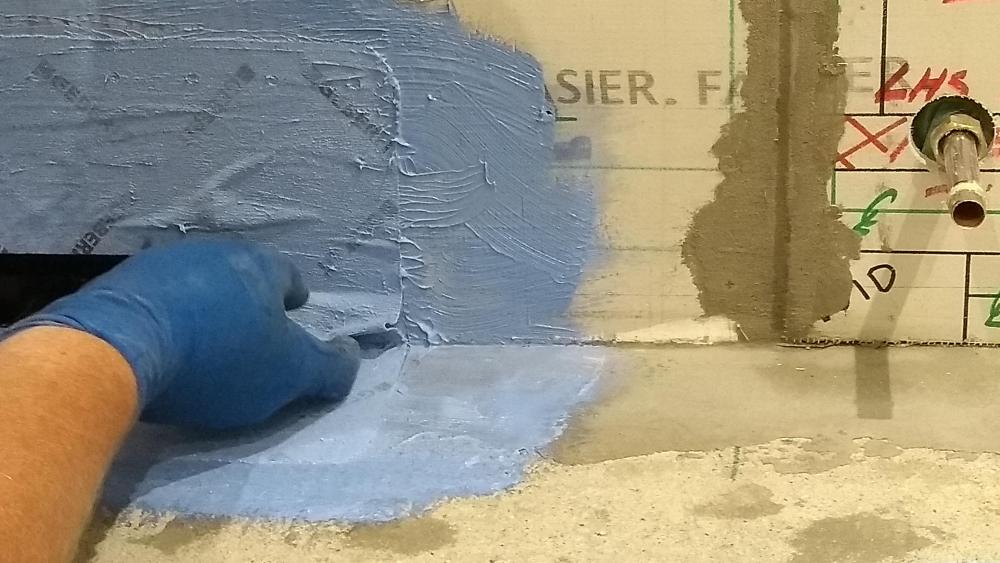
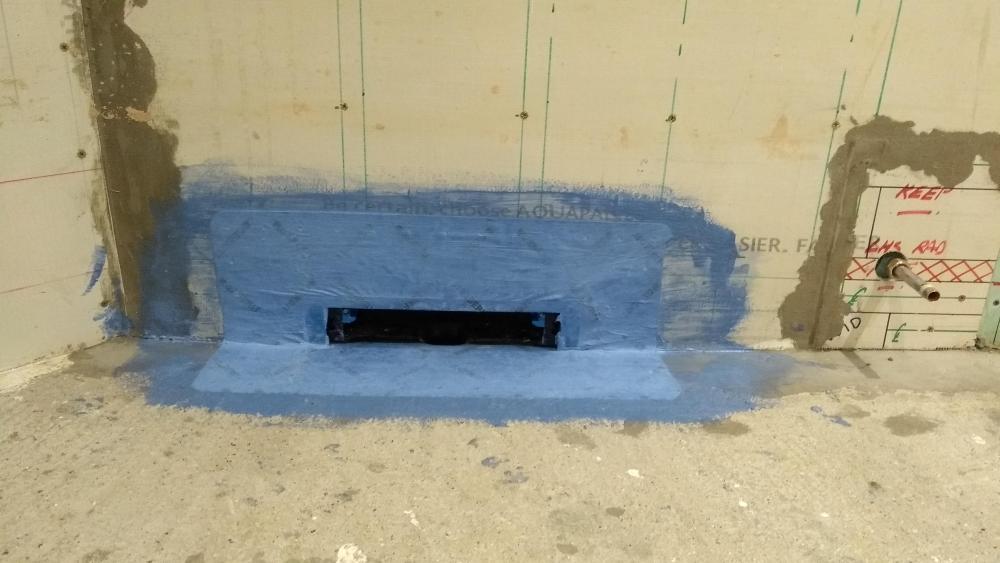
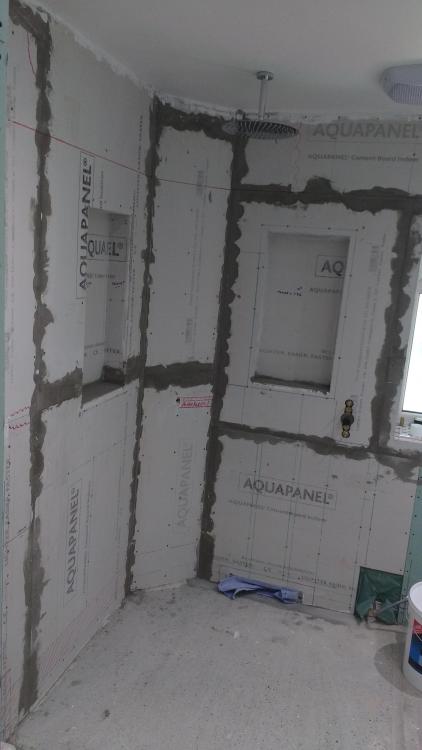
Turns out 1L of Aquaseal Primer goes quite a way! In face quite a bit more than the 7.5m2 they say. Only needed one coat as the mrpb and Aquapanel aren't by nature overly porous. Even the DIY cast shower area concrete didn't take it in too much as it was laden with SBR when I mixed it. So all primed inc the area under and behind the wc. Then onto tanking EXCEPT I needed to incorporate the Geberit wall drain's own tanking "flaps" into it all. For this I've used the liquid tanking membrane as @Nickfromwales said. The video reckons the flaps fold out all nice and neat like in this still shot. They also appear to bed it down on tile adhesive but the thought was this will be too thick. So with the kit's 3" brush I liberally applied liquid membrane behind where the flaps go and left to go tacky. Maybe should have left longer as a couple of bubbles that won't stick down for love nor money! Tbh not that bad really. Mine were a bit rouched at the sides. I think maybe the drain is set a little lower than it should have been. Only thing was to CUT the inbuilt membrane on the vertical face and overlap as best as. The video shows the wall drain flaps (under the pink area) being overlapped by the tanking strip that goes at the wall/floor interface. BUT I need to wait for the liquid membrane that beds the drain flaps to go off. Then I'll run the tap over that like in the still above. Looks like this now: So I'm waiting! Will probably do the strips in the morning and put on the first main coat of tanking membrane (brushed horizontally) on the walls, pockets and floor. Might then go get my Larsen primer and adhesive and do the second tanking coat (brushed vertically( when I come back. Downside of this membrane is I now have a hairless and sore left forearm where I let it dry! A big plus though is the brushes etc wash out under the tap. For now it's back to the Party Seven can and the telly!

-
Help with kitchen renovation/ 1st house.
Onoff replied to zoothorn's topic in Bathrooms, Ensuites & Wetrooms
Not a bad moniker if thinking of a name change on here "Codeine Dreamz! -
Help with kitchen renovation/ 1st house.
Onoff replied to zoothorn's topic in Bathrooms, Ensuites & Wetrooms
-
That looks like a giant leap forward! Seemed to know what they were doing.
-
Bath Surround / Boxing In, and concealed pipework
Onoff replied to Onoff's topic in Bathrooms, Ensuites & Wetrooms
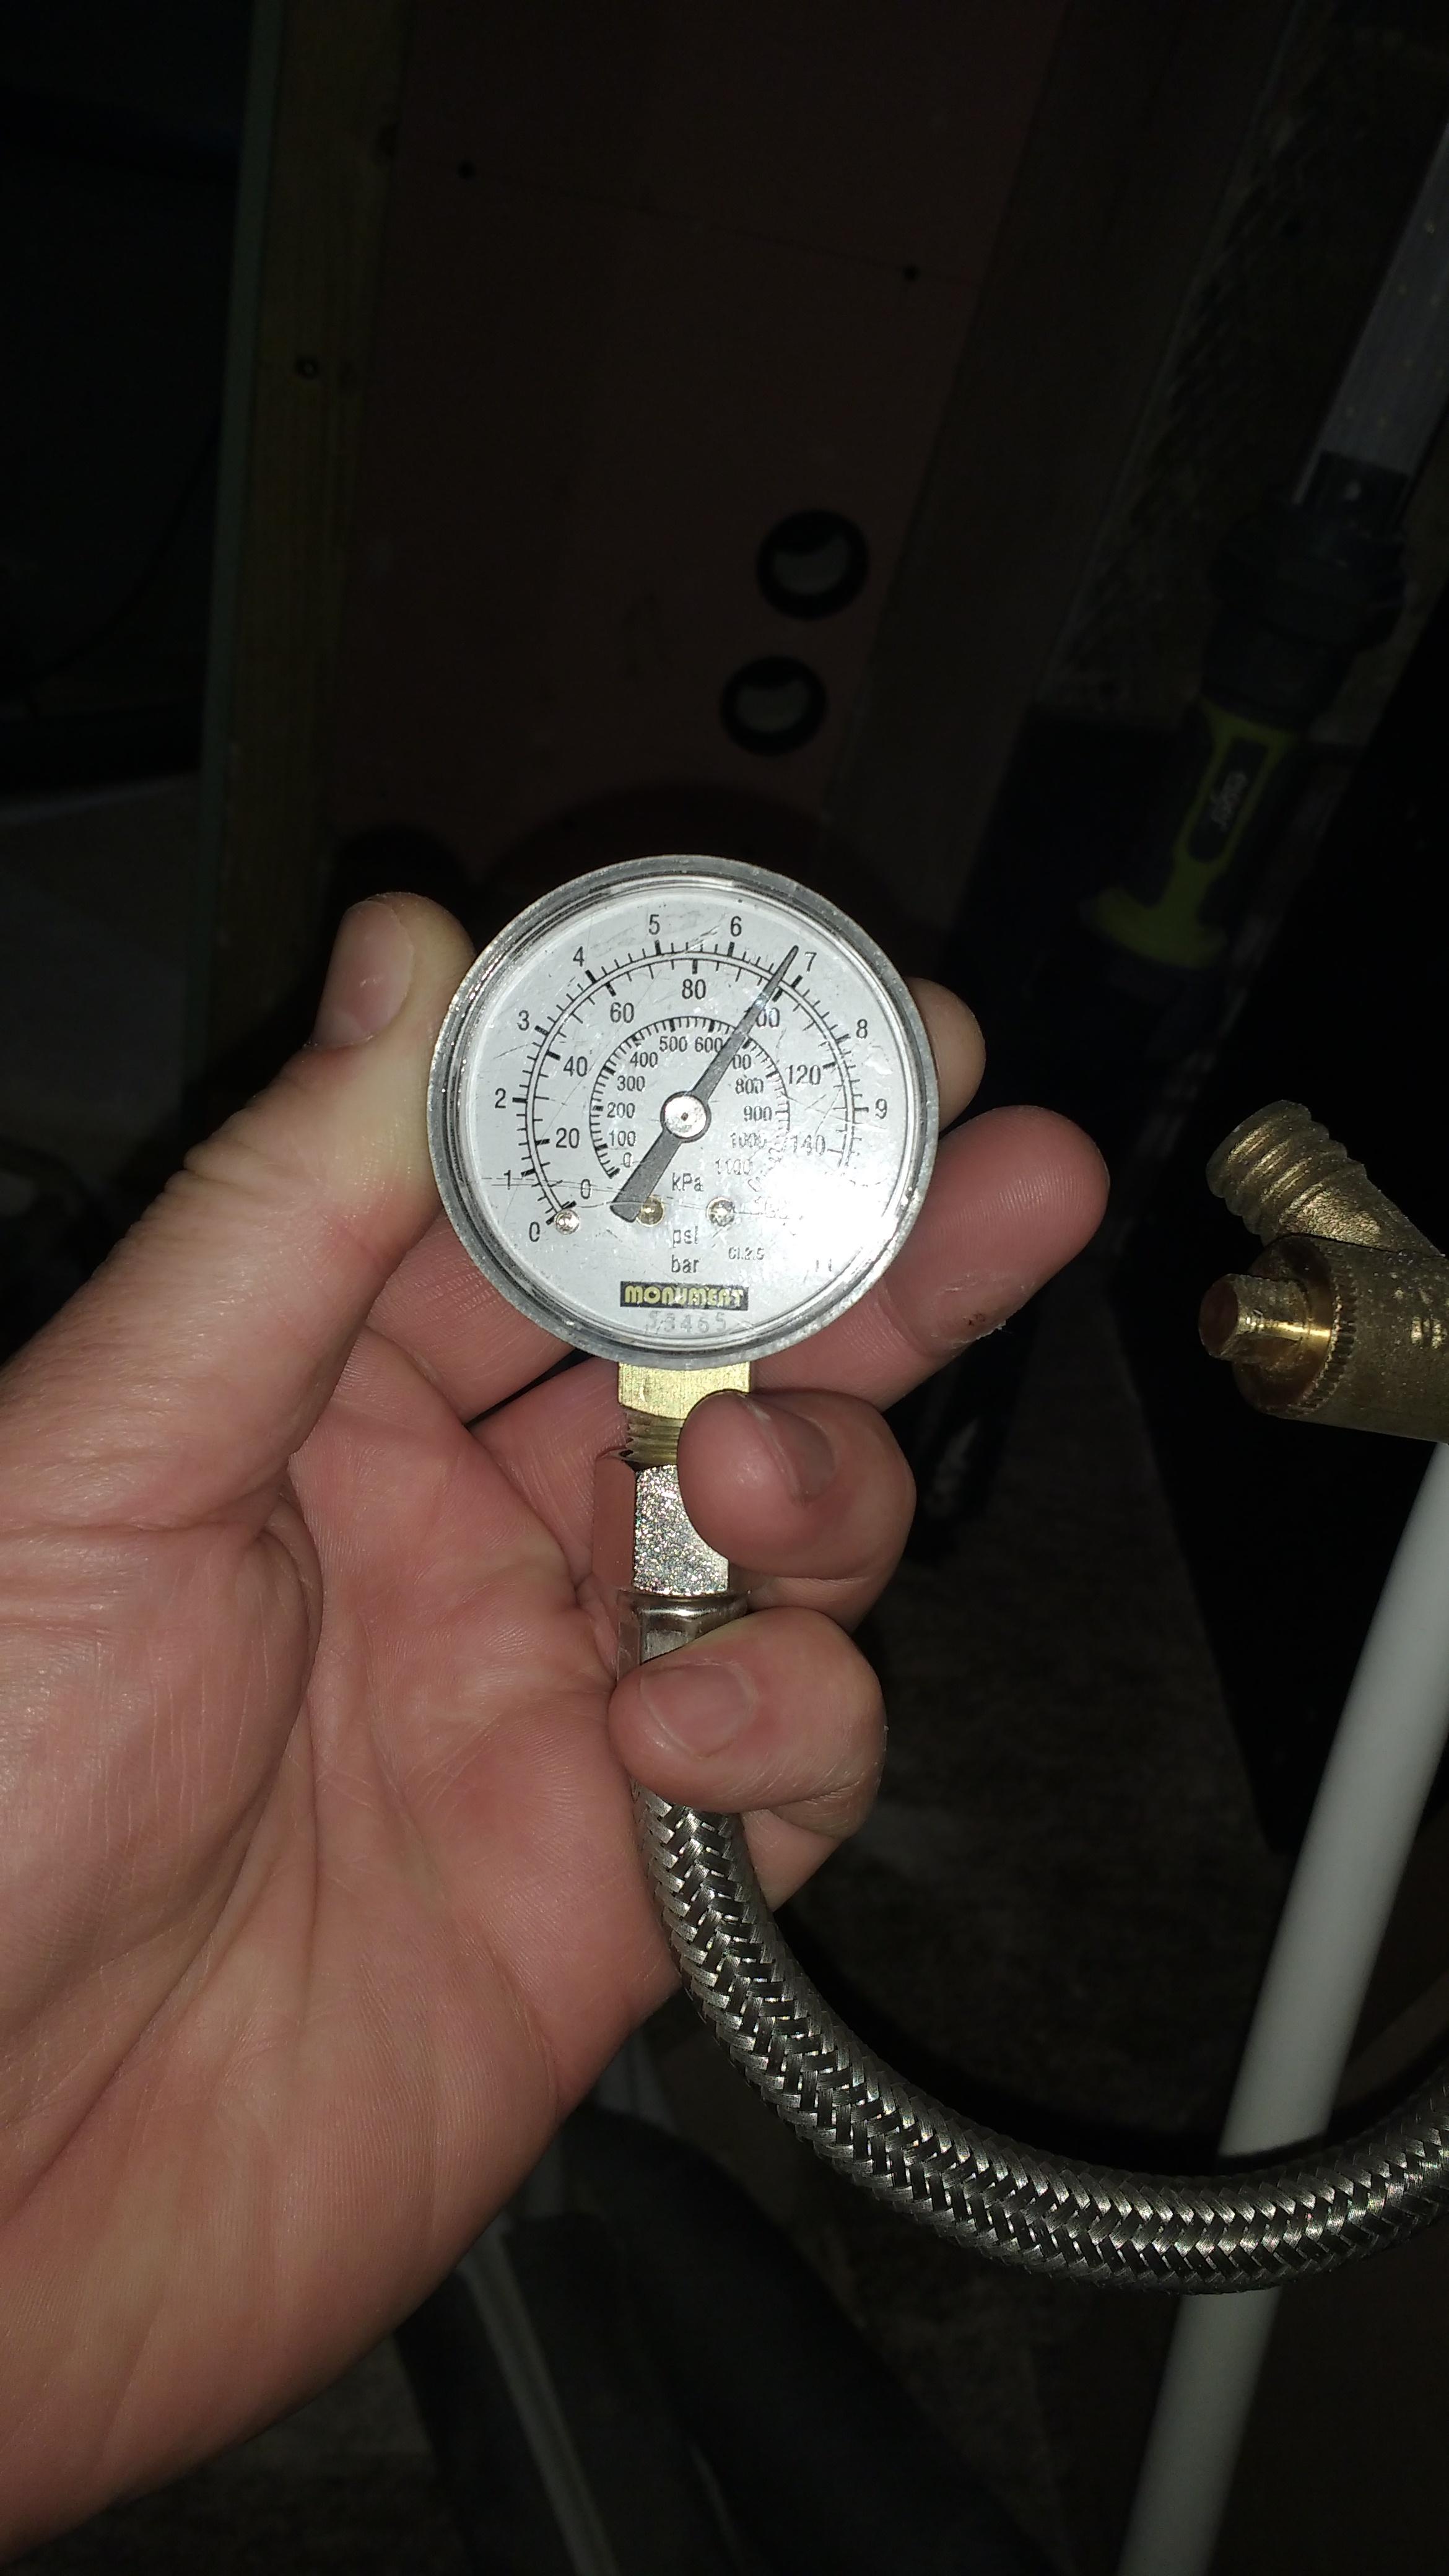
Wtf? I can't see a leak anywhere! Dropped a little more maybe?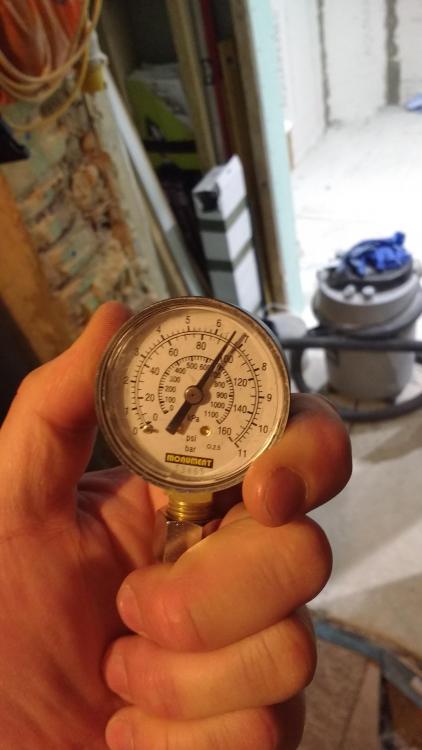
-
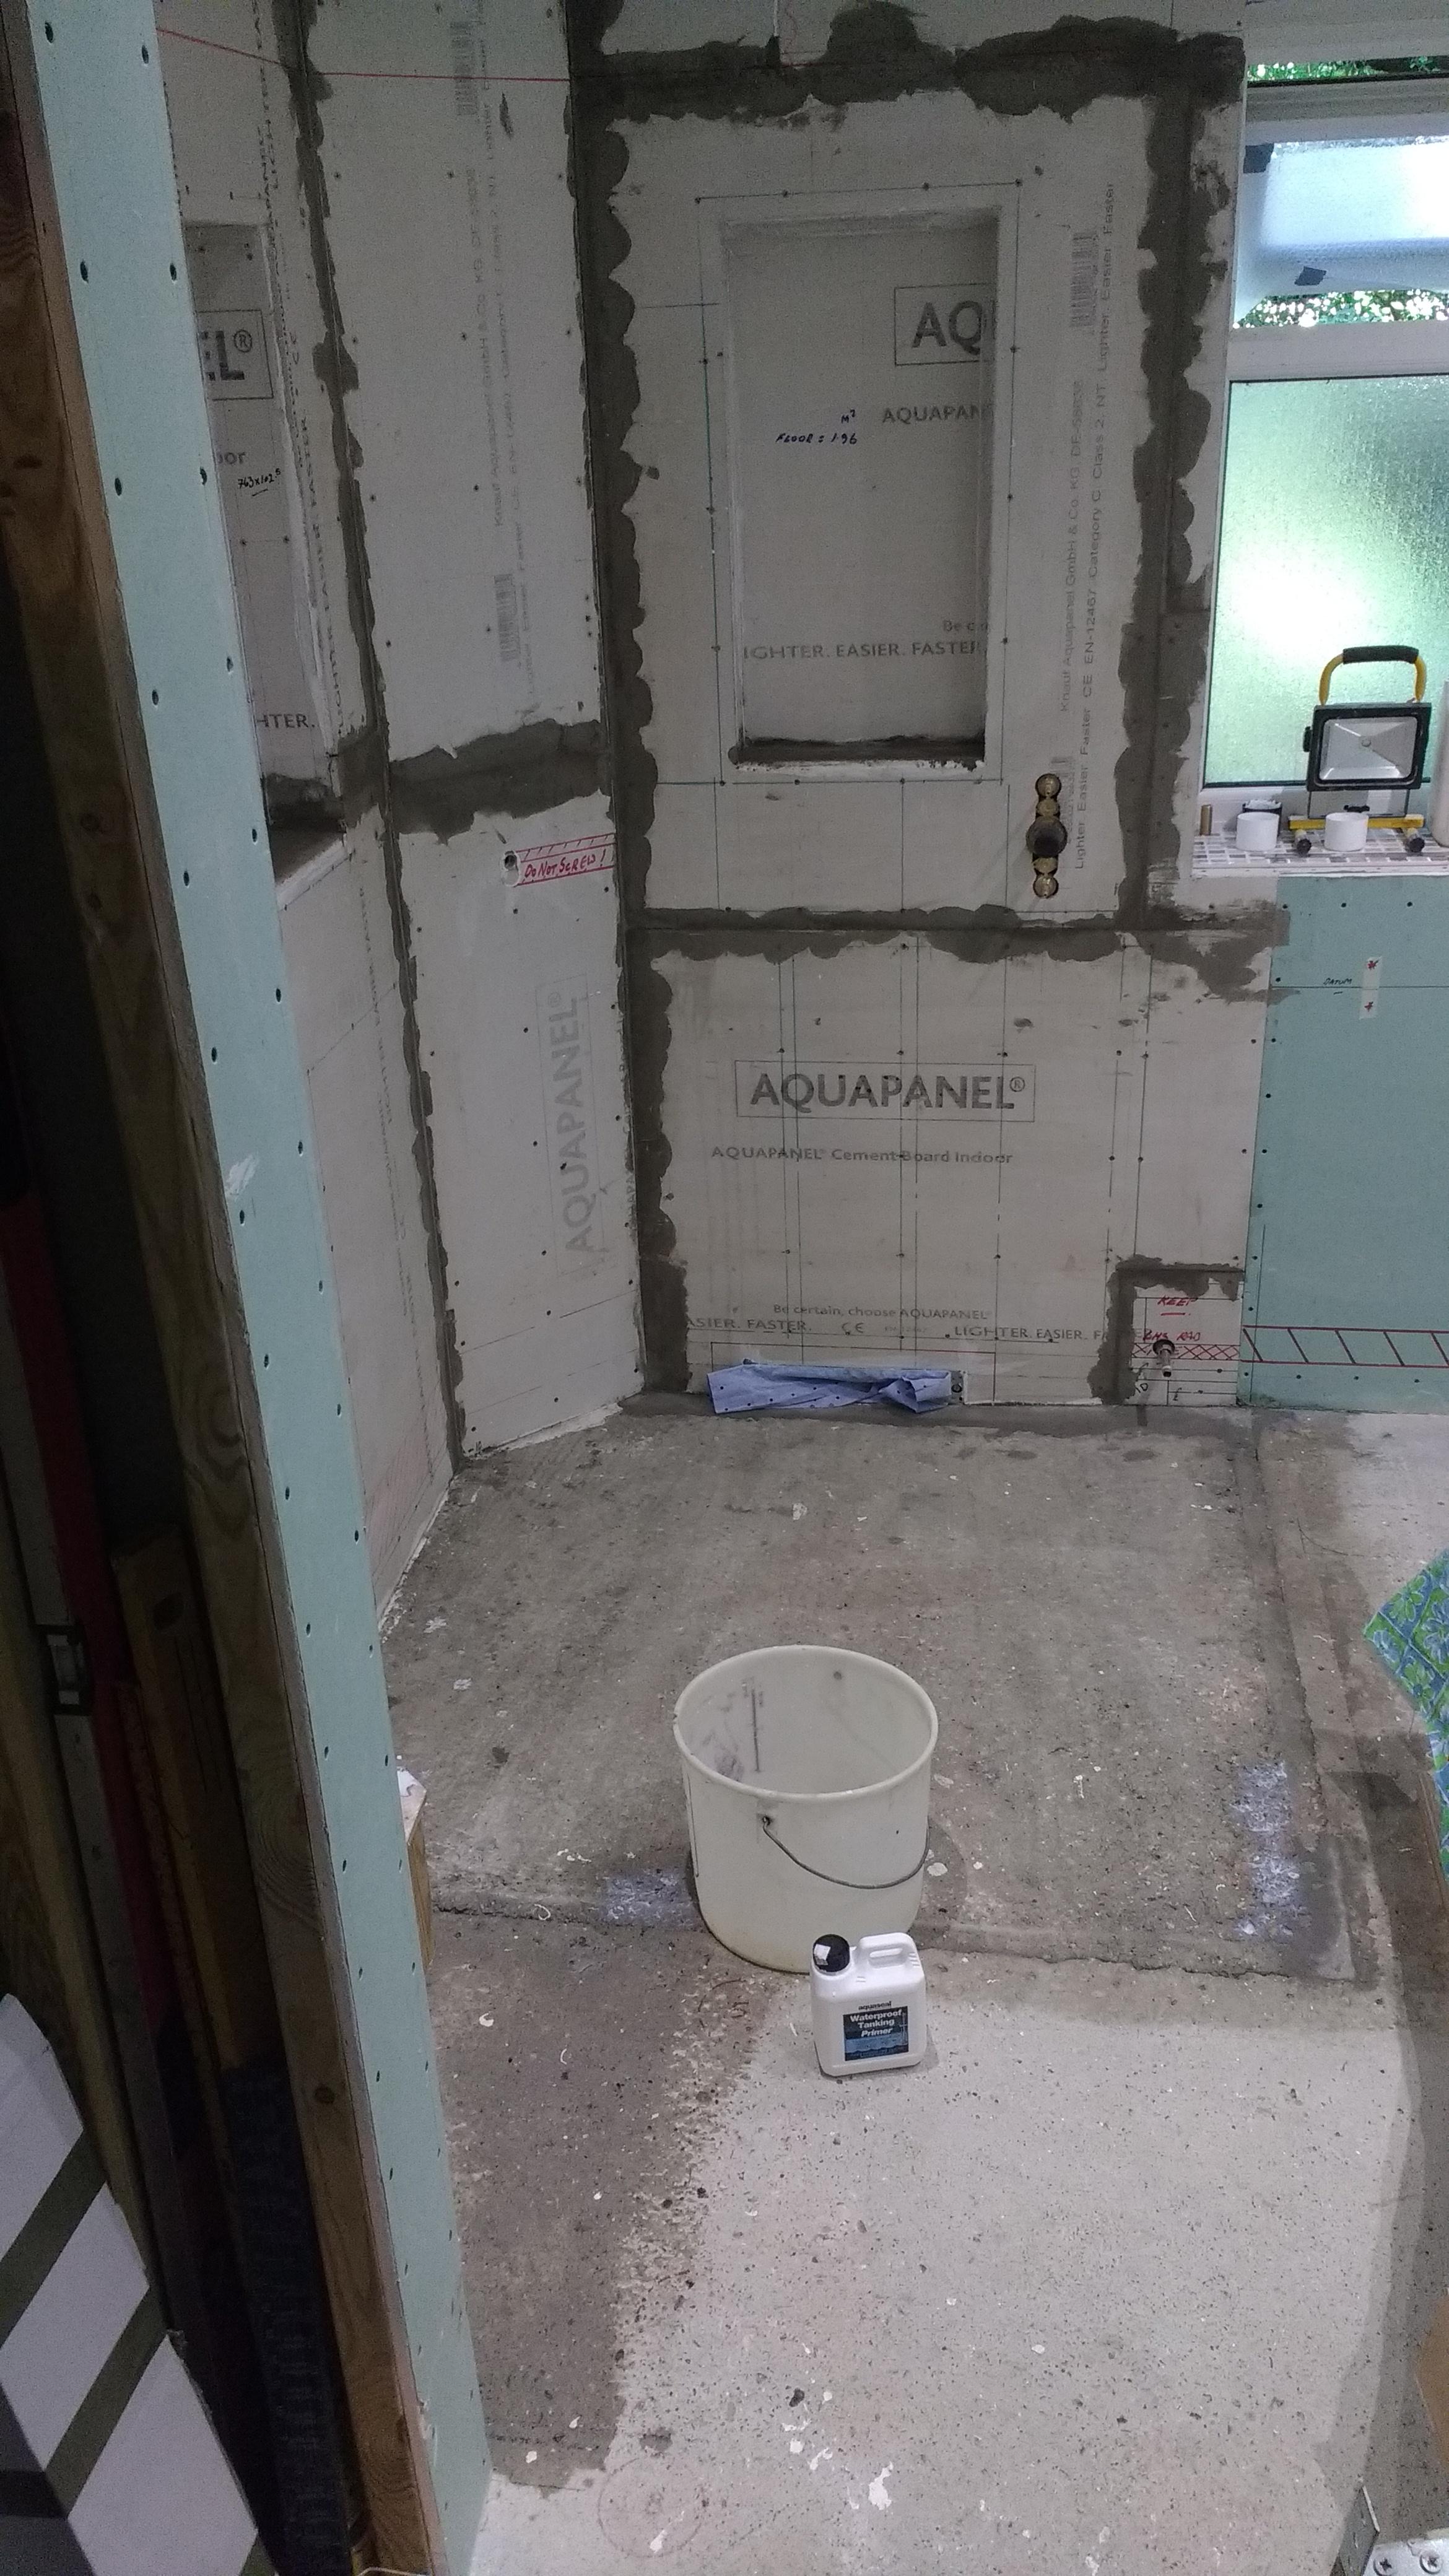
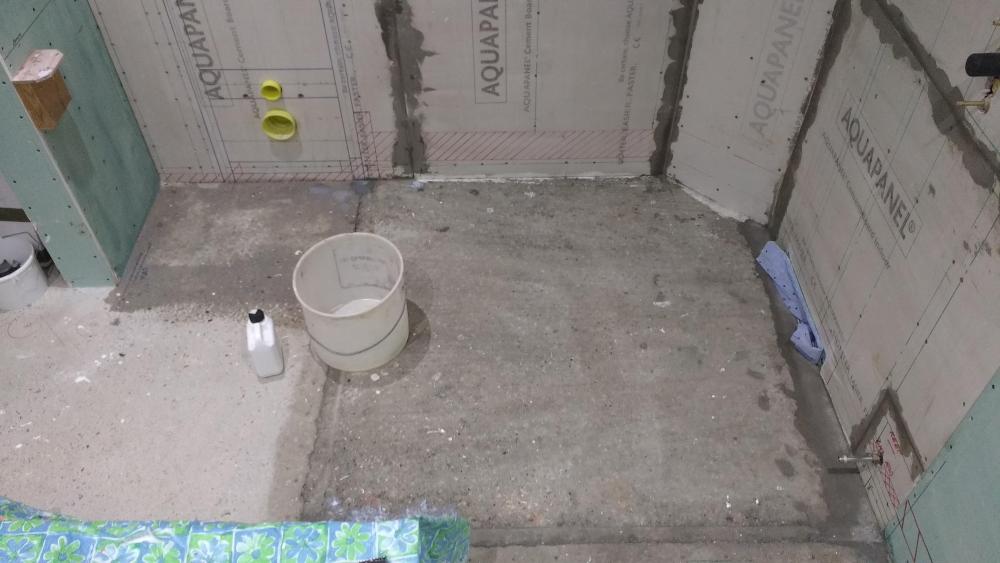
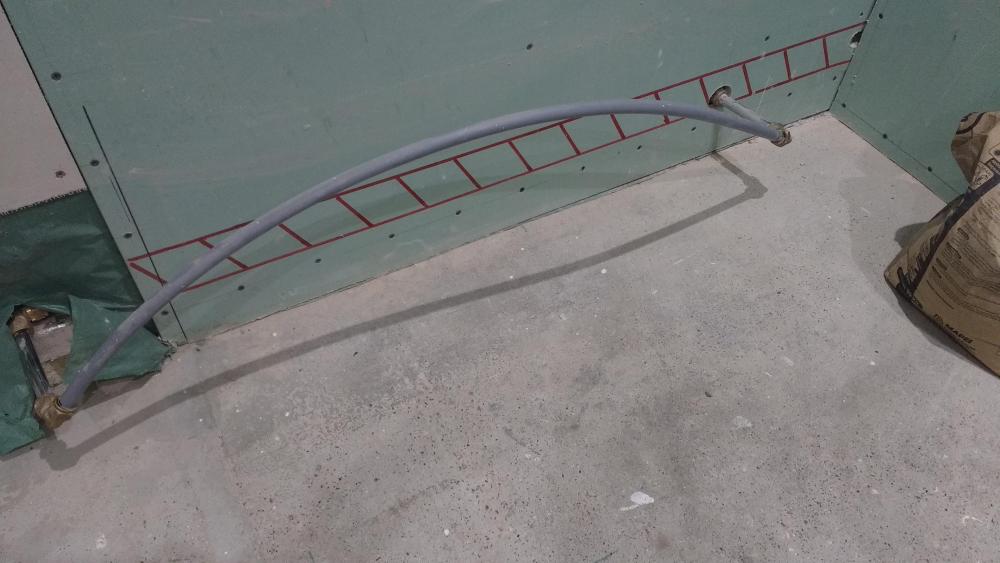
I've calculated that if I stop the tanking 2.1m up the wall (below the red line) I should have enough in the 7.5m sq kit to do all the walls pockets and floor area. Just got to make sure this towel radiator loop is holding pressure and I can get that bit of board on round the pipe and tank! Going to start from the red line and prime working down then onto the floor. Tbh if I run out I'm going to finish off with SBR before applying the membrane. I've also ordered another 7.5m2 tanking kit for around the bath etc.
-
1500 included angle I make it:

-
Help with kitchen renovation/ 1st house.
Onoff replied to zoothorn's topic in Bathrooms, Ensuites & Wetrooms
Then he needs to decide on what is happening sill wise & project some levels across! -
Help with kitchen renovation/ 1st house.
Onoff replied to zoothorn's topic in Bathrooms, Ensuites & Wetrooms
Assuming he brings the concrete infill level with the top batten then he needs to know where 27mm of insulated pb + wood sill or tile will come in relation to the window. That's a fixed window anyway isn't it? -
Help with kitchen renovation/ 1st house.
Onoff replied to zoothorn's topic in Bathrooms, Ensuites & Wetrooms
I'm thinking you'll need 35mm extension boxes for those sockets. Thinking 25mm batten + 3mm pack + 9.5mm pb = 37.5mm so the box will be a couple of mm under. Are you using 9.5 or 12.5mm pb? You might be best getting from a local electrical wholesaler rather than suffering the postage cost if ordering on line.CEF, Edwardes, Newey & Eyre are names to look for. Some bigger builder's merchants might do them too. Typical online supplier: 1-gang: https://www.ukelectricalsupplies.com/norslo-extension-box-steel-1-gang-35mm.htm 2-gang: https://www.ukelectricalsupplies.com/norslo-extension-box-steel-2-gang-35mm.htm? -
Help with kitchen renovation/ 1st house.
Onoff replied to zoothorn's topic in Bathrooms, Ensuites & Wetrooms
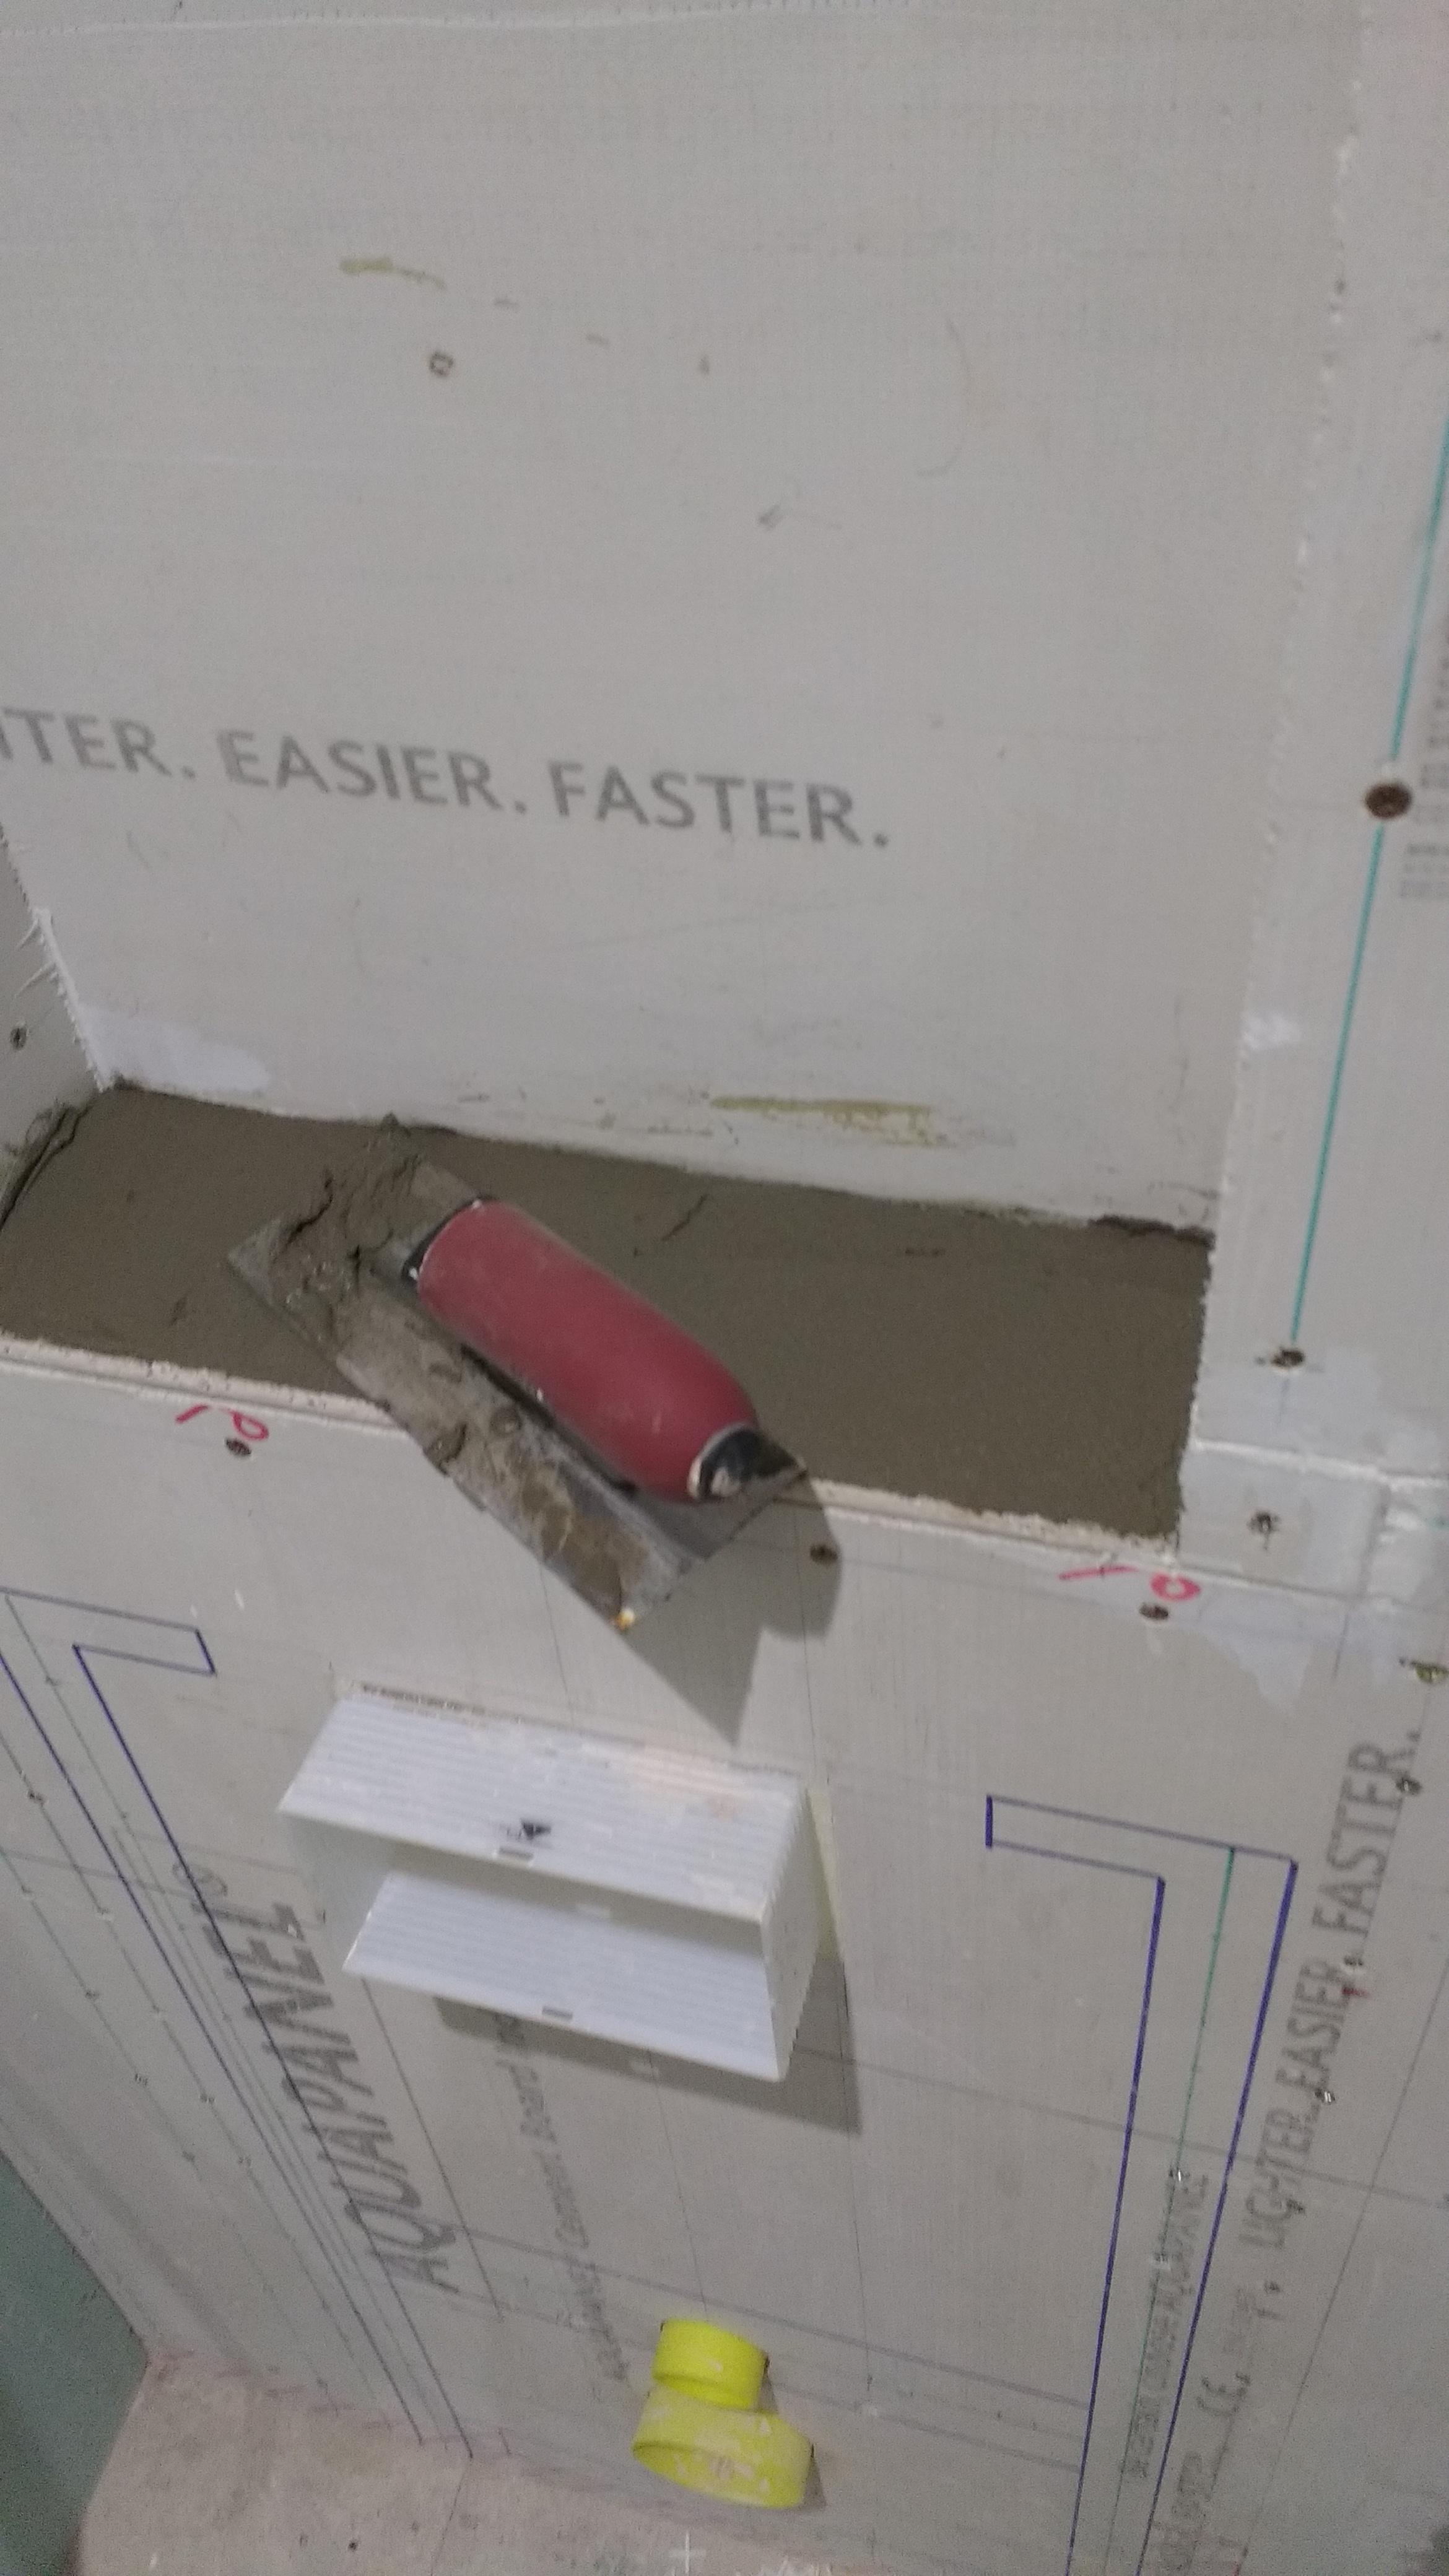
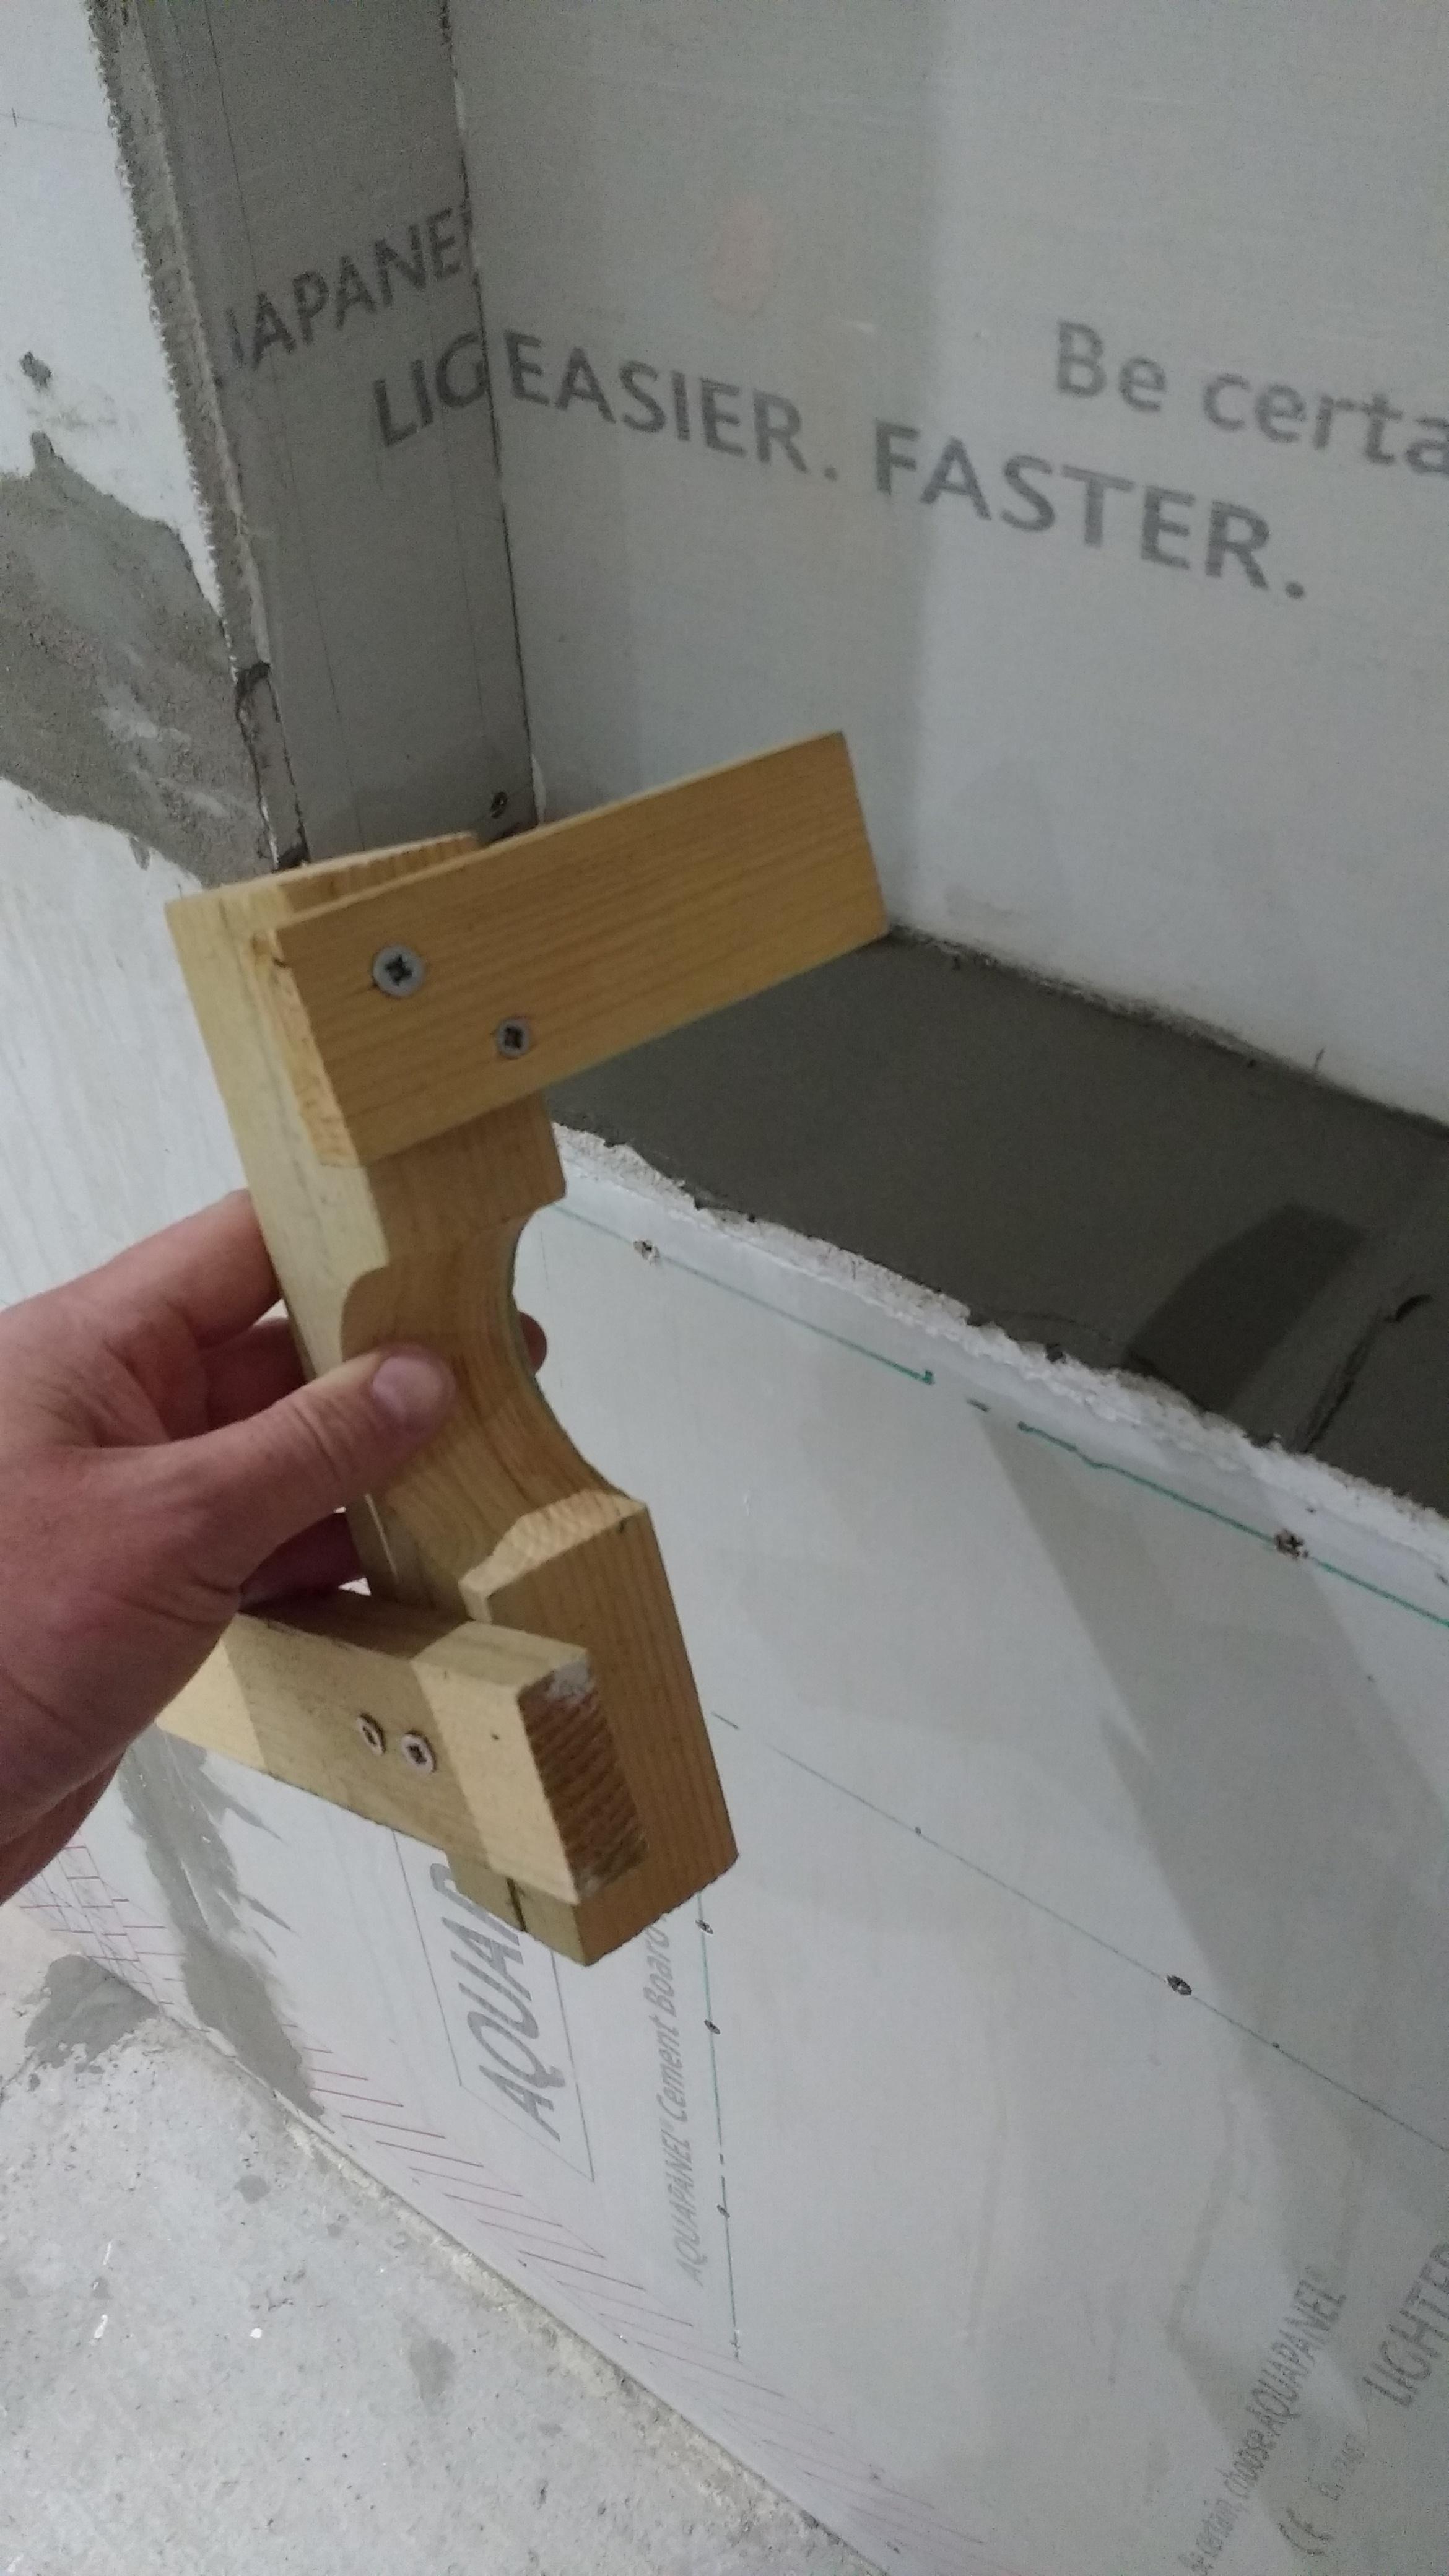
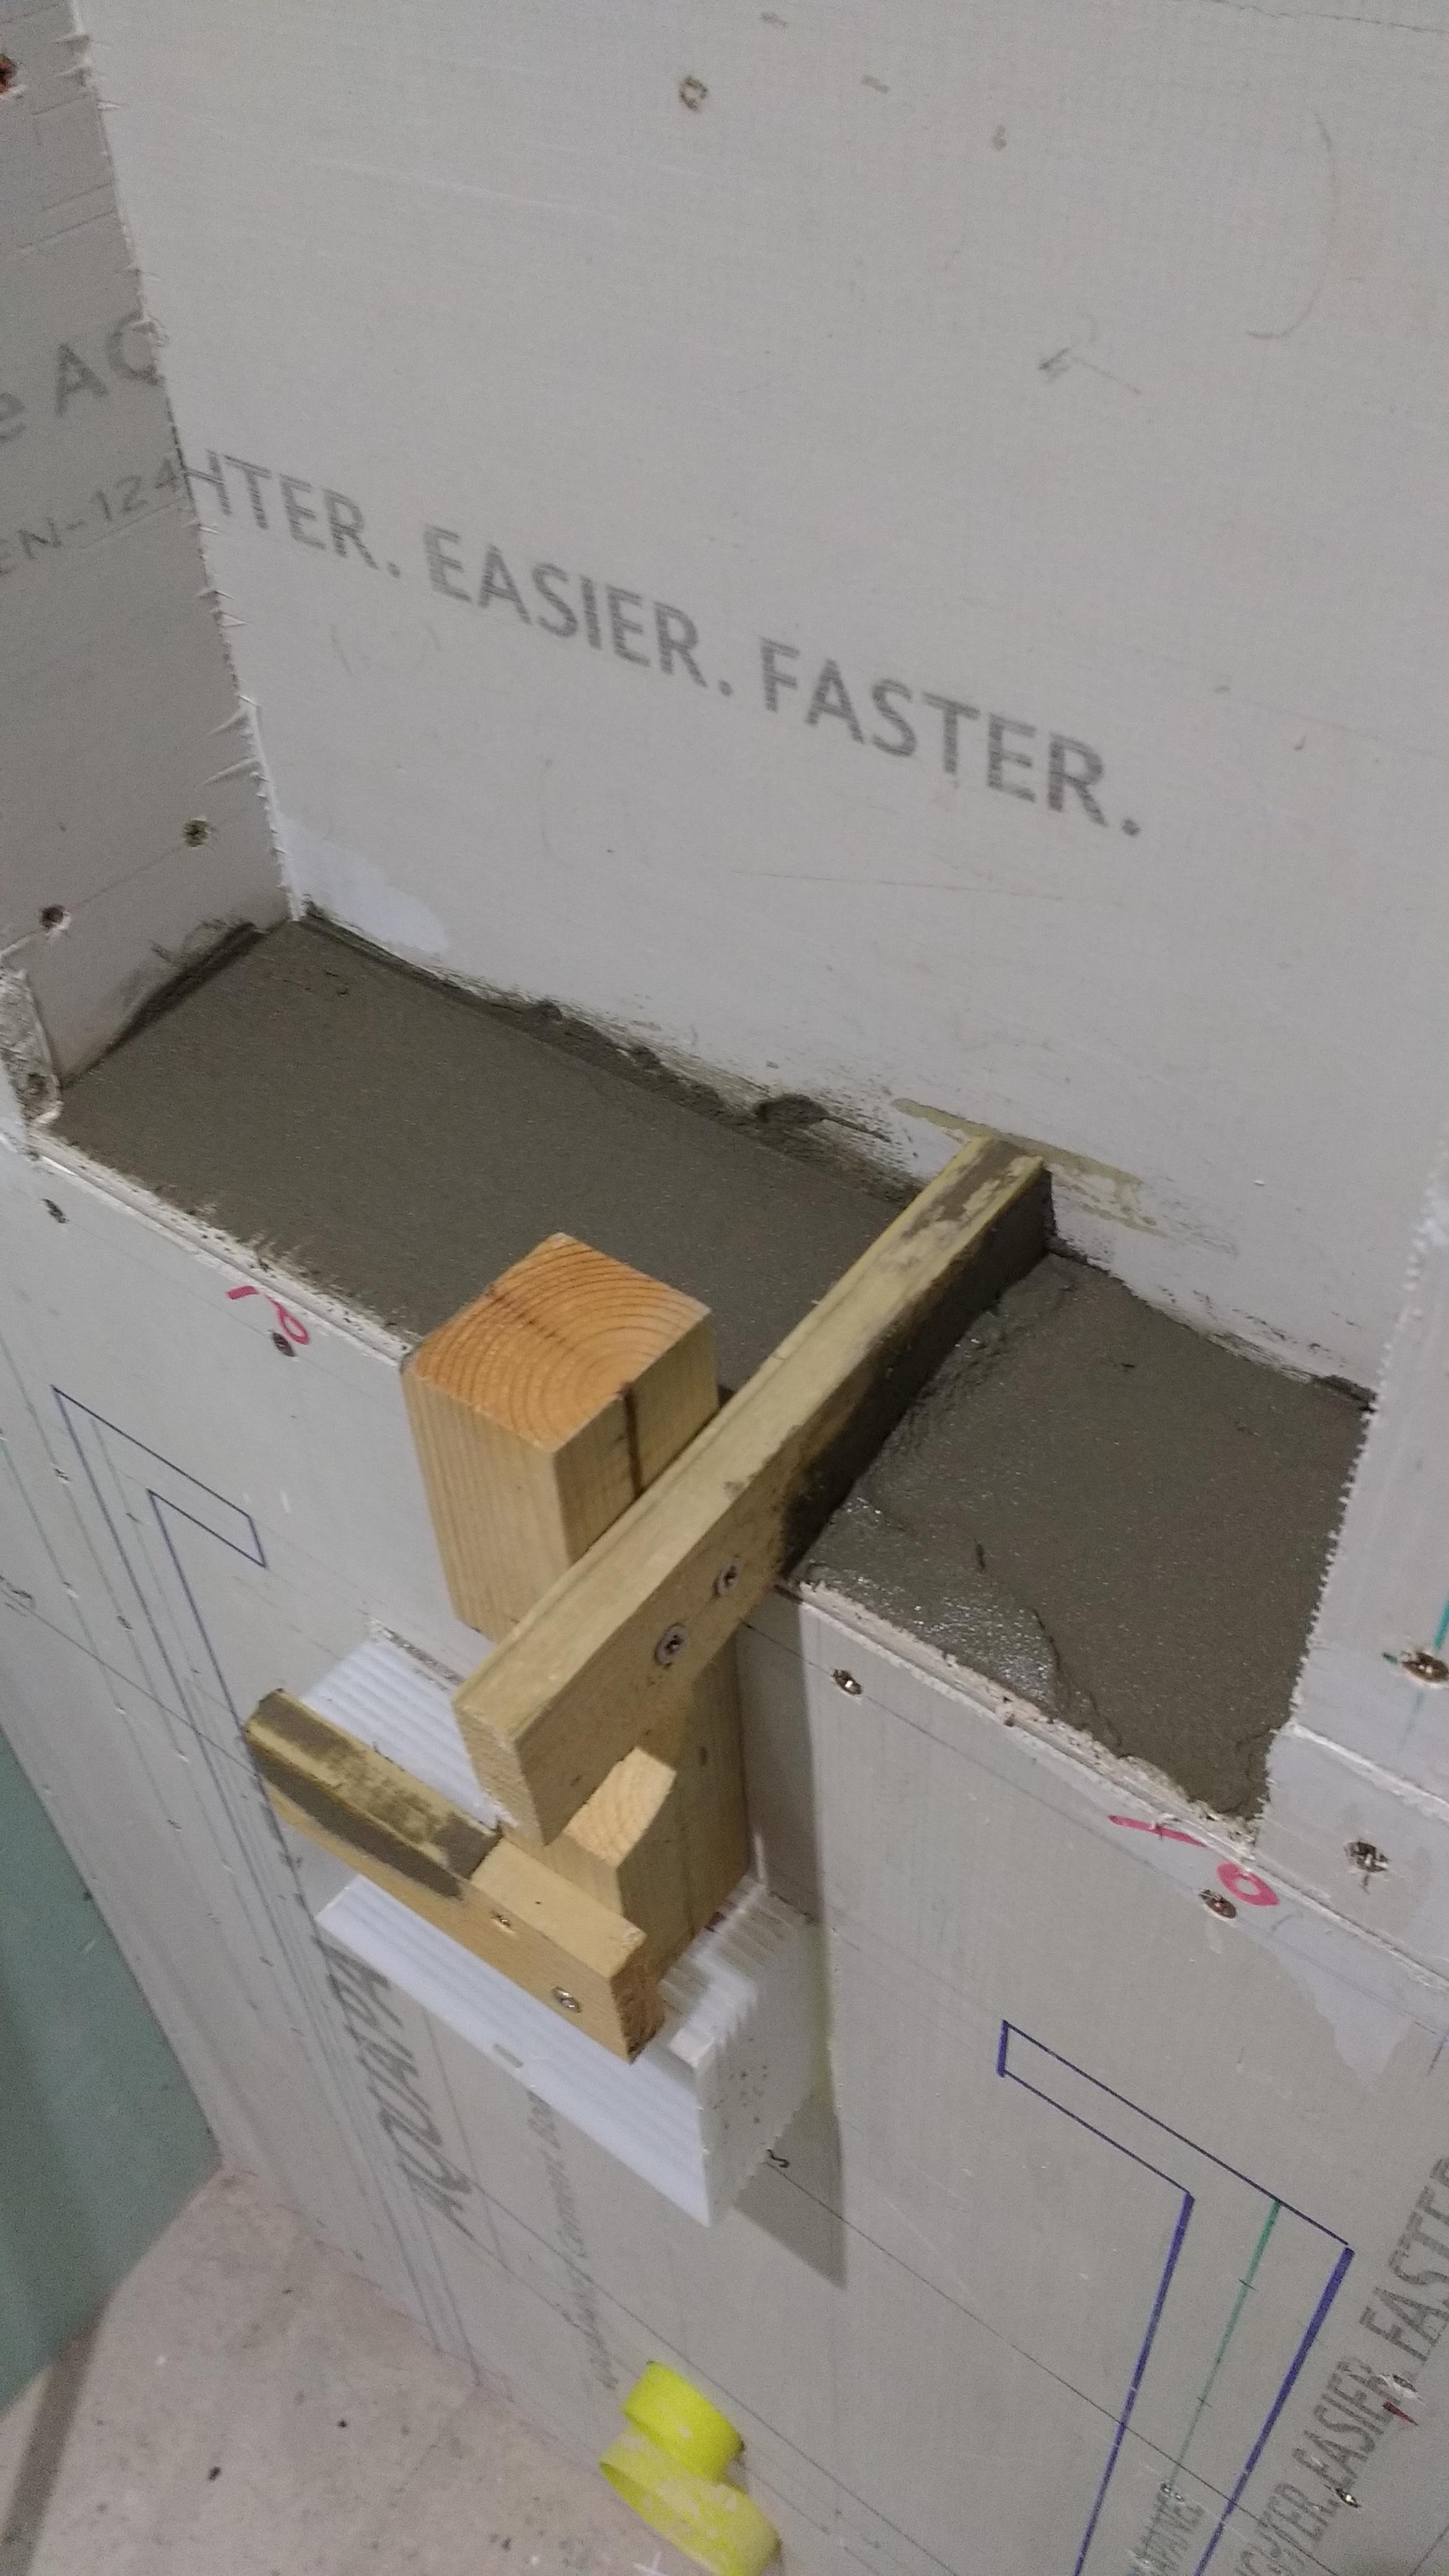
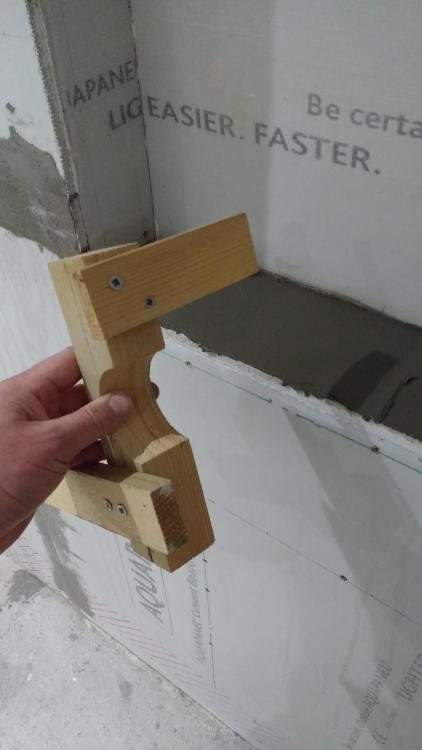
Just seen your latest pic with the extra batten. Cut two short bits of batten and make a tamping tool like mine. Use the height of the double batten as the "wall". -
Help with kitchen renovation/ 1st house.
Onoff replied to zoothorn's topic in Bathrooms, Ensuites & Wetrooms
You COULD use a short level atop a piece of timber as a tamping board. Tbh I've even used my short box level to tamp without the wood and cleaned it off well. Or..... Make up a right angled tamping tool like I did (without the slope like mine of course). Repeated here as you probably won't have read my other thread! :) Put the muck on: Knock up something like this: Drag/tamp. I know you haven't got any pb on yet but you could screw on a board temporarily across the battens to act as "wall": Crack a tinny!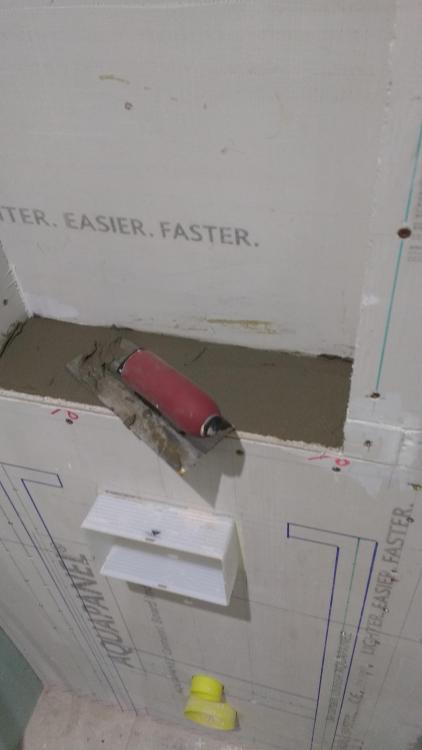

-
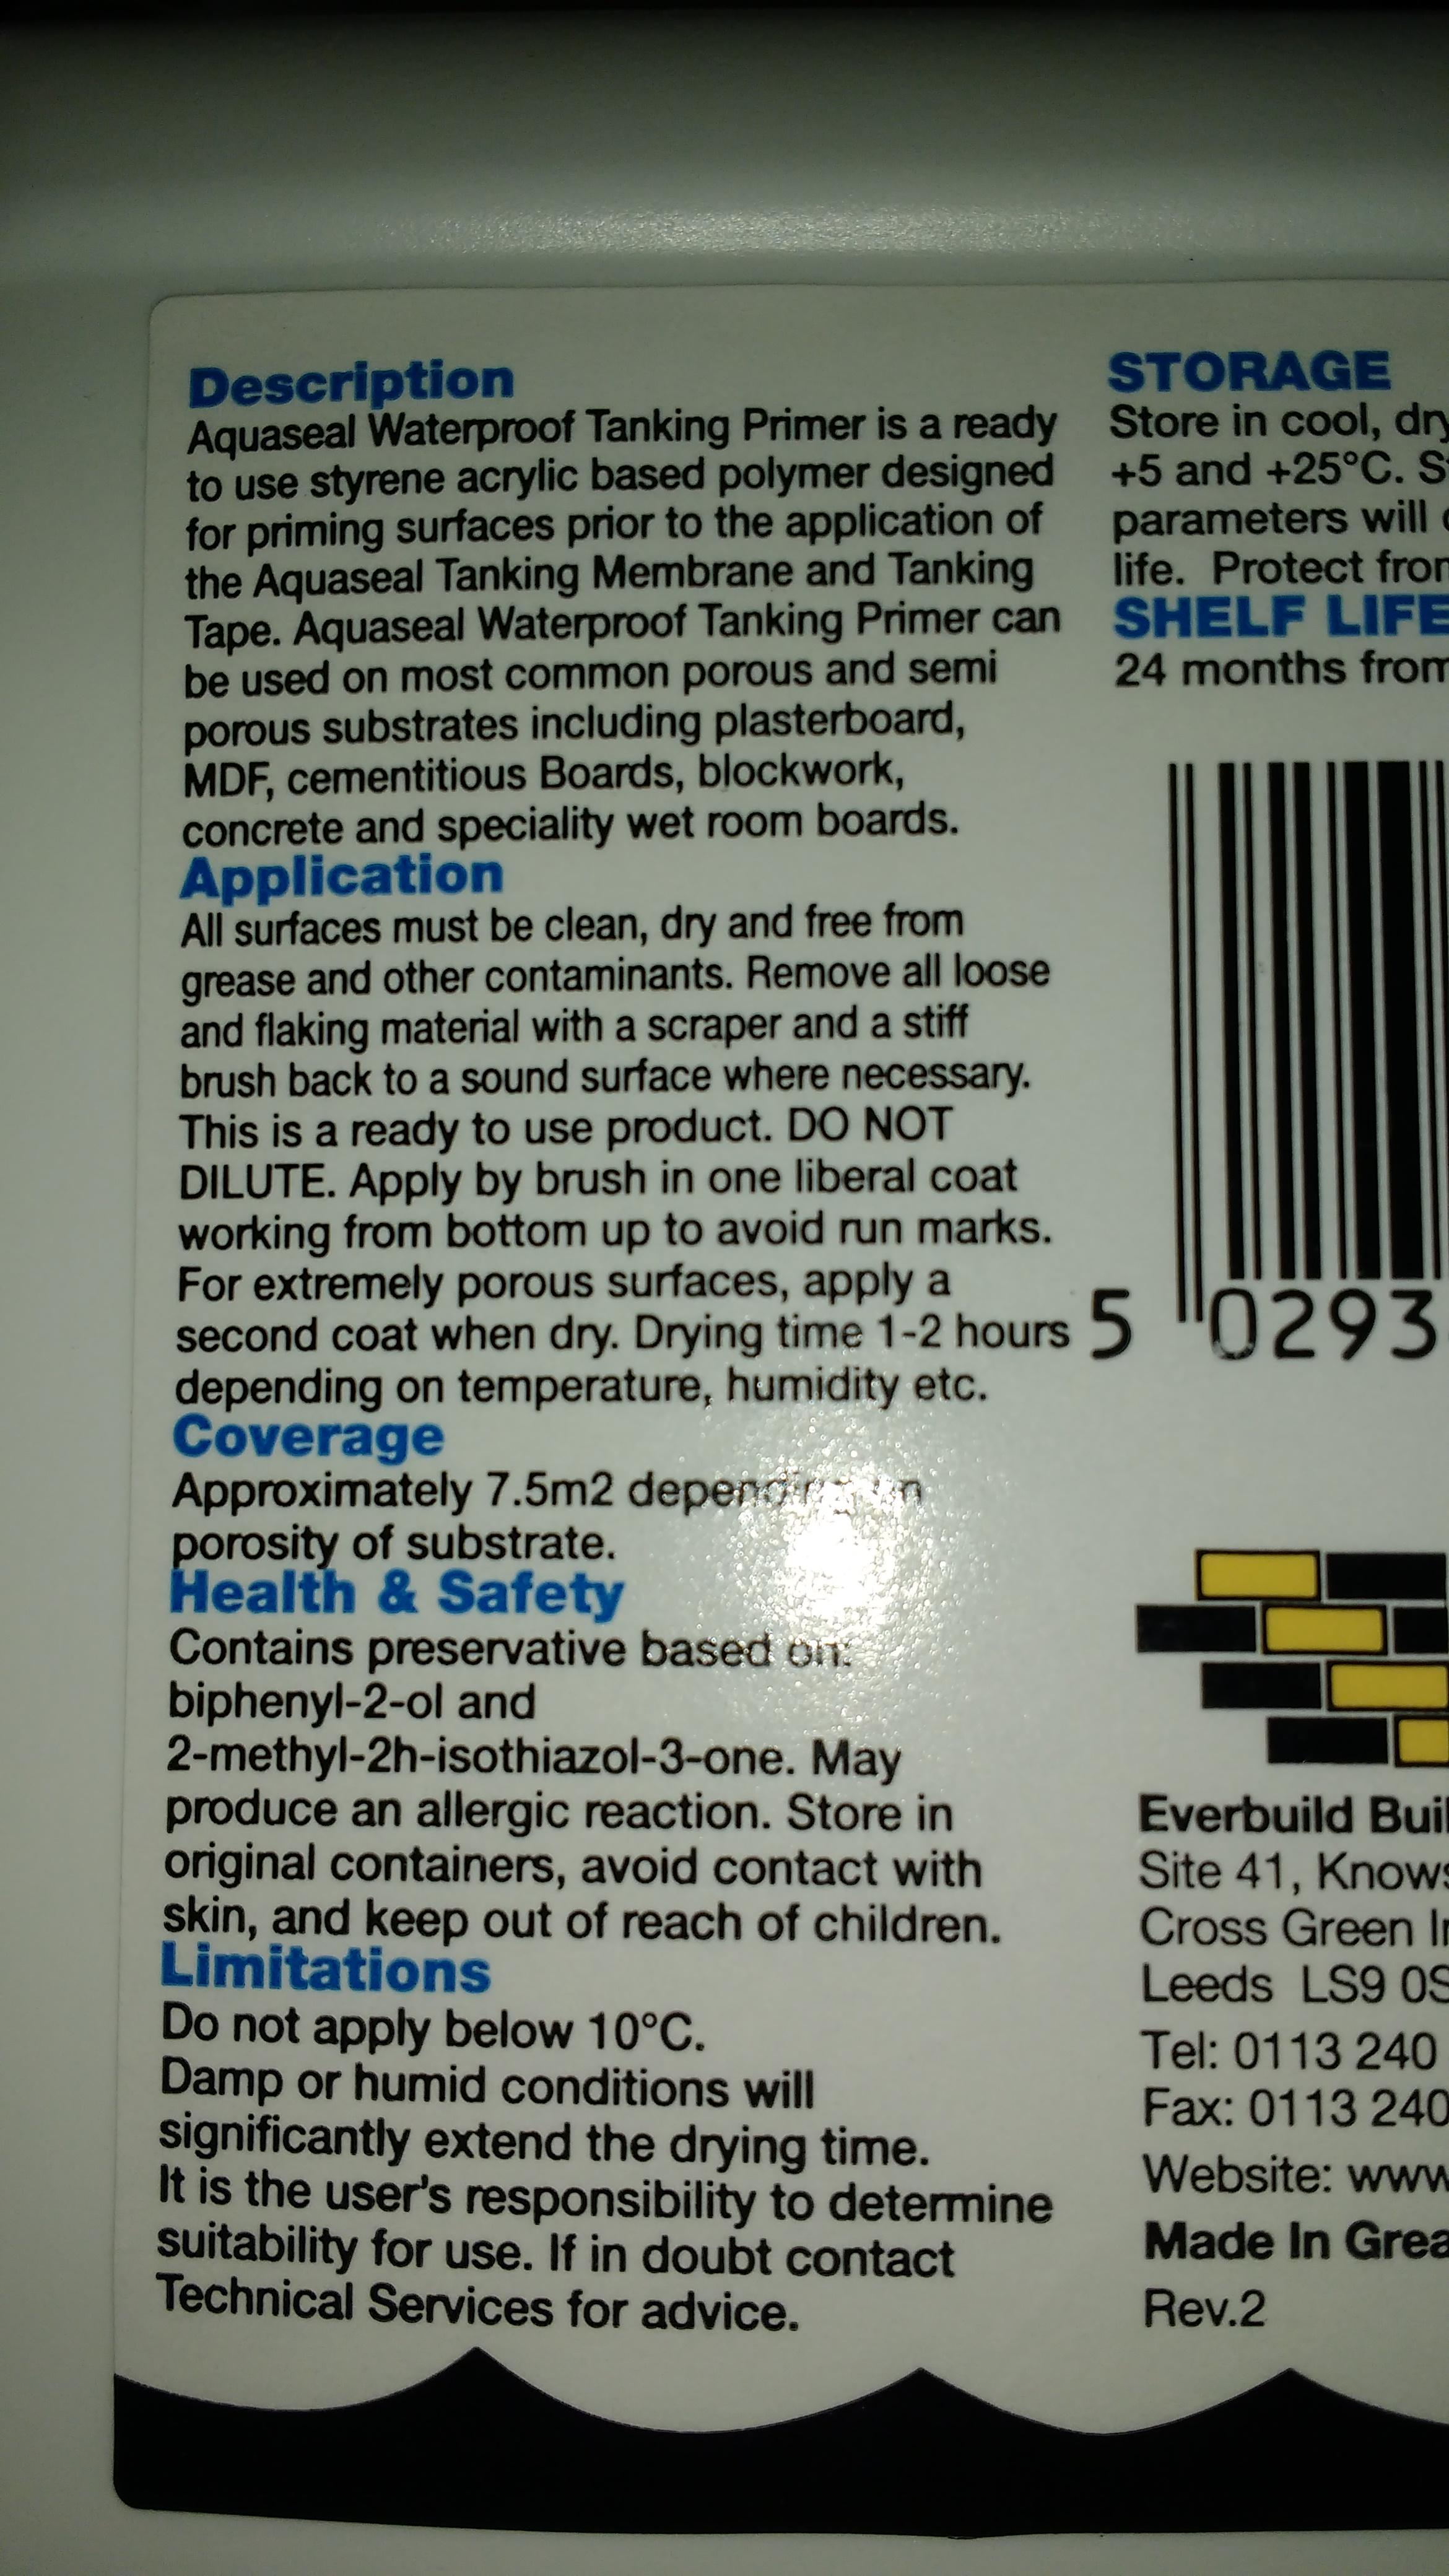
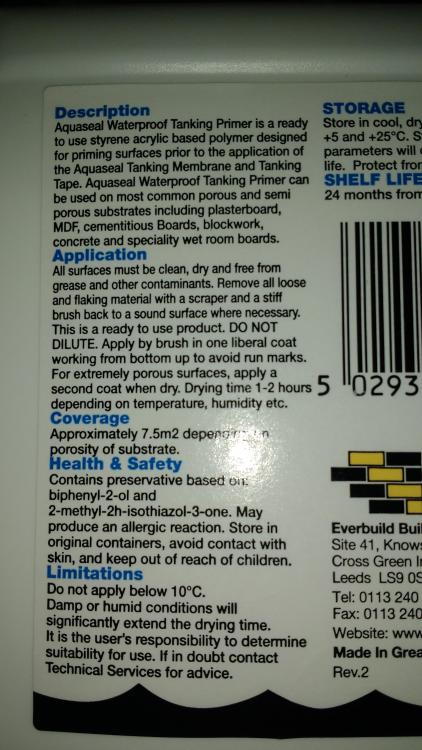
What did you prime with, the stuff that came with the kit or SBR? & how the Hell is 1L of primer in the kit supposed to cover 7.5m2 it's just not possible?
-
I used the corrugated bitumen sheets from Wickes years ago and they were utter crap. Never, ever again. BiL used them on his woodwork shop too, same result. Not much of a slope tbh on either roof. They just sunk between the roof beams leaving like soggy washing up bowl sized depressions that then split. Can't remember the centres on my roof but I put extra angle irons in to have the distance the sheets were spanning. Think it ended up 18" maybe 2'. I always wondered if a ply deck first would have helped.
-
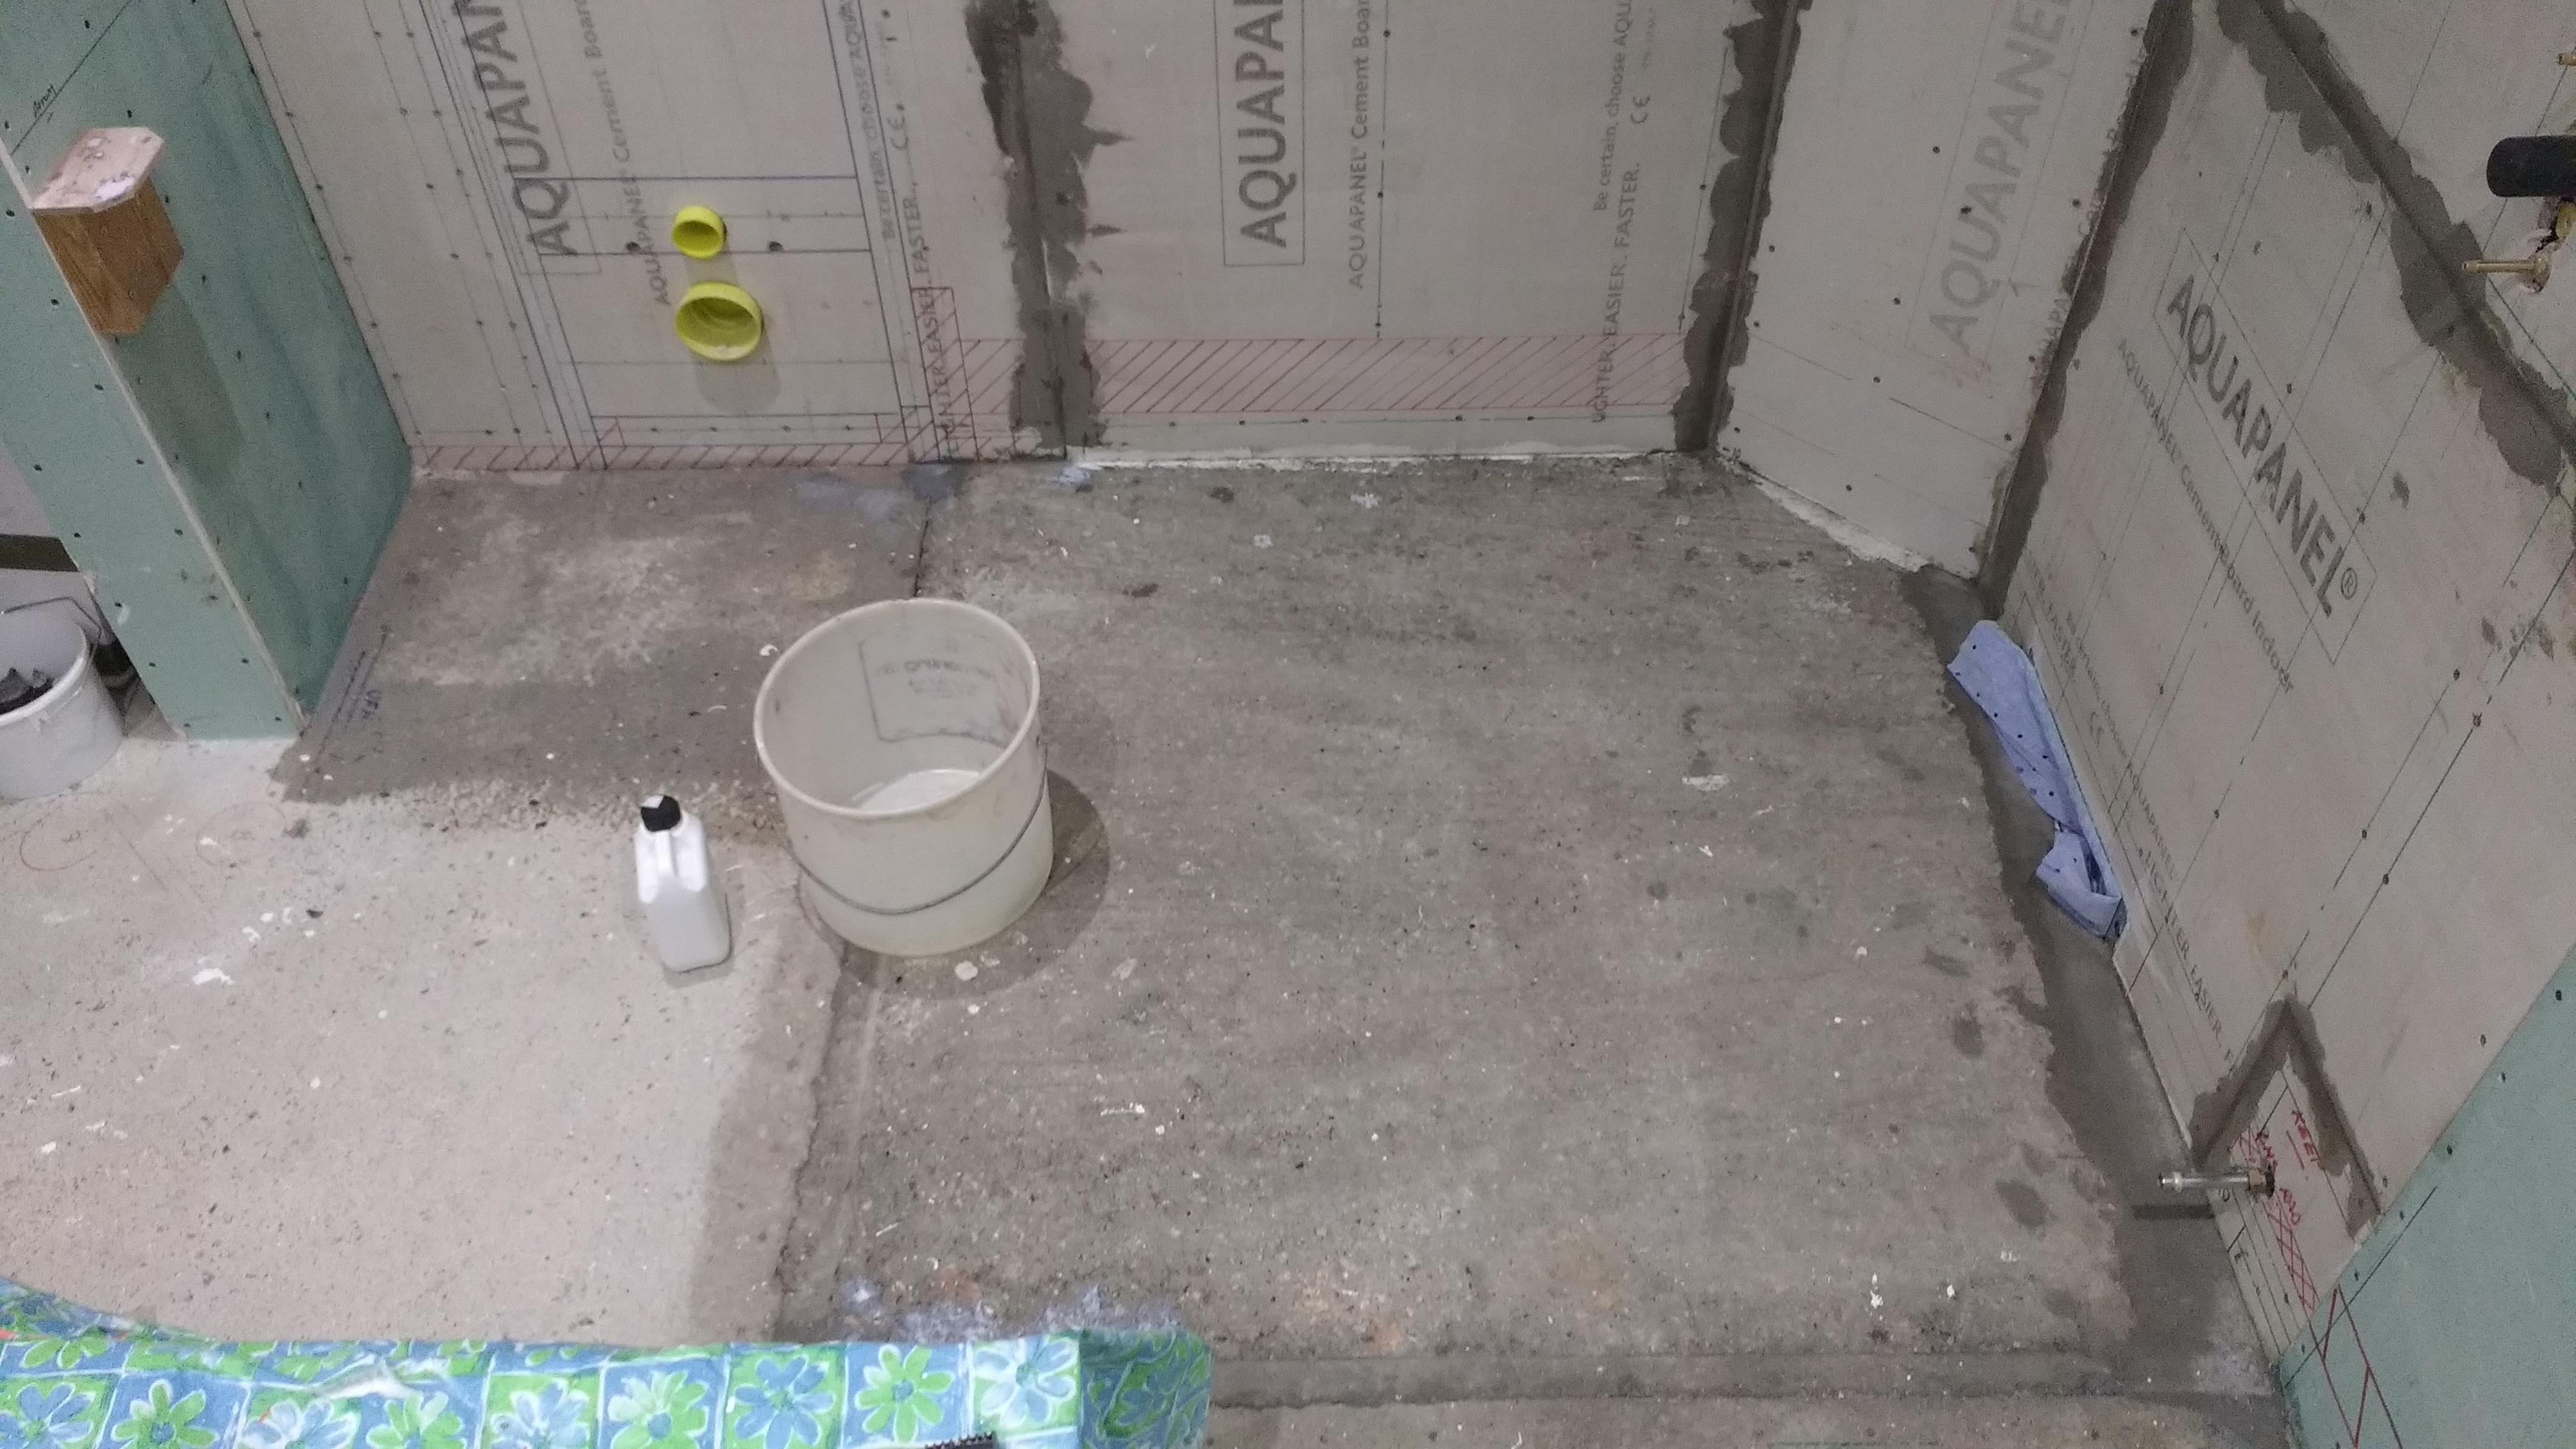
I was originally intending to, at a minimum, tank the wet room corner floor, nom 1.3 x 1.3 AND all the walls including the pockets above this area - roughly straight up in line with the SBR container on the left and milk container on the right: As said before if I do that, the 7.5m sq. kit isn't really enough to do this which works out as below. I wonder if I could maybe do the higher section of the wall in SBR? Wet room corner floor is 1.3x1.3 so 1.7m2 The mitred wall bit is 1m2 Each wing with the pocket in is 2.47x1.3 so 3.2m2 x 2 = 6.4m2 Over 9m2 just there!

-
Bath Surround / Boxing In, and concealed pipework
Onoff replied to Onoff's topic in Bathrooms, Ensuites & Wetrooms
How did you apply the primer and did it go far enough? -
Bath Surround / Boxing In, and concealed pipework
Onoff replied to Onoff's topic in Bathrooms, Ensuites & Wetrooms
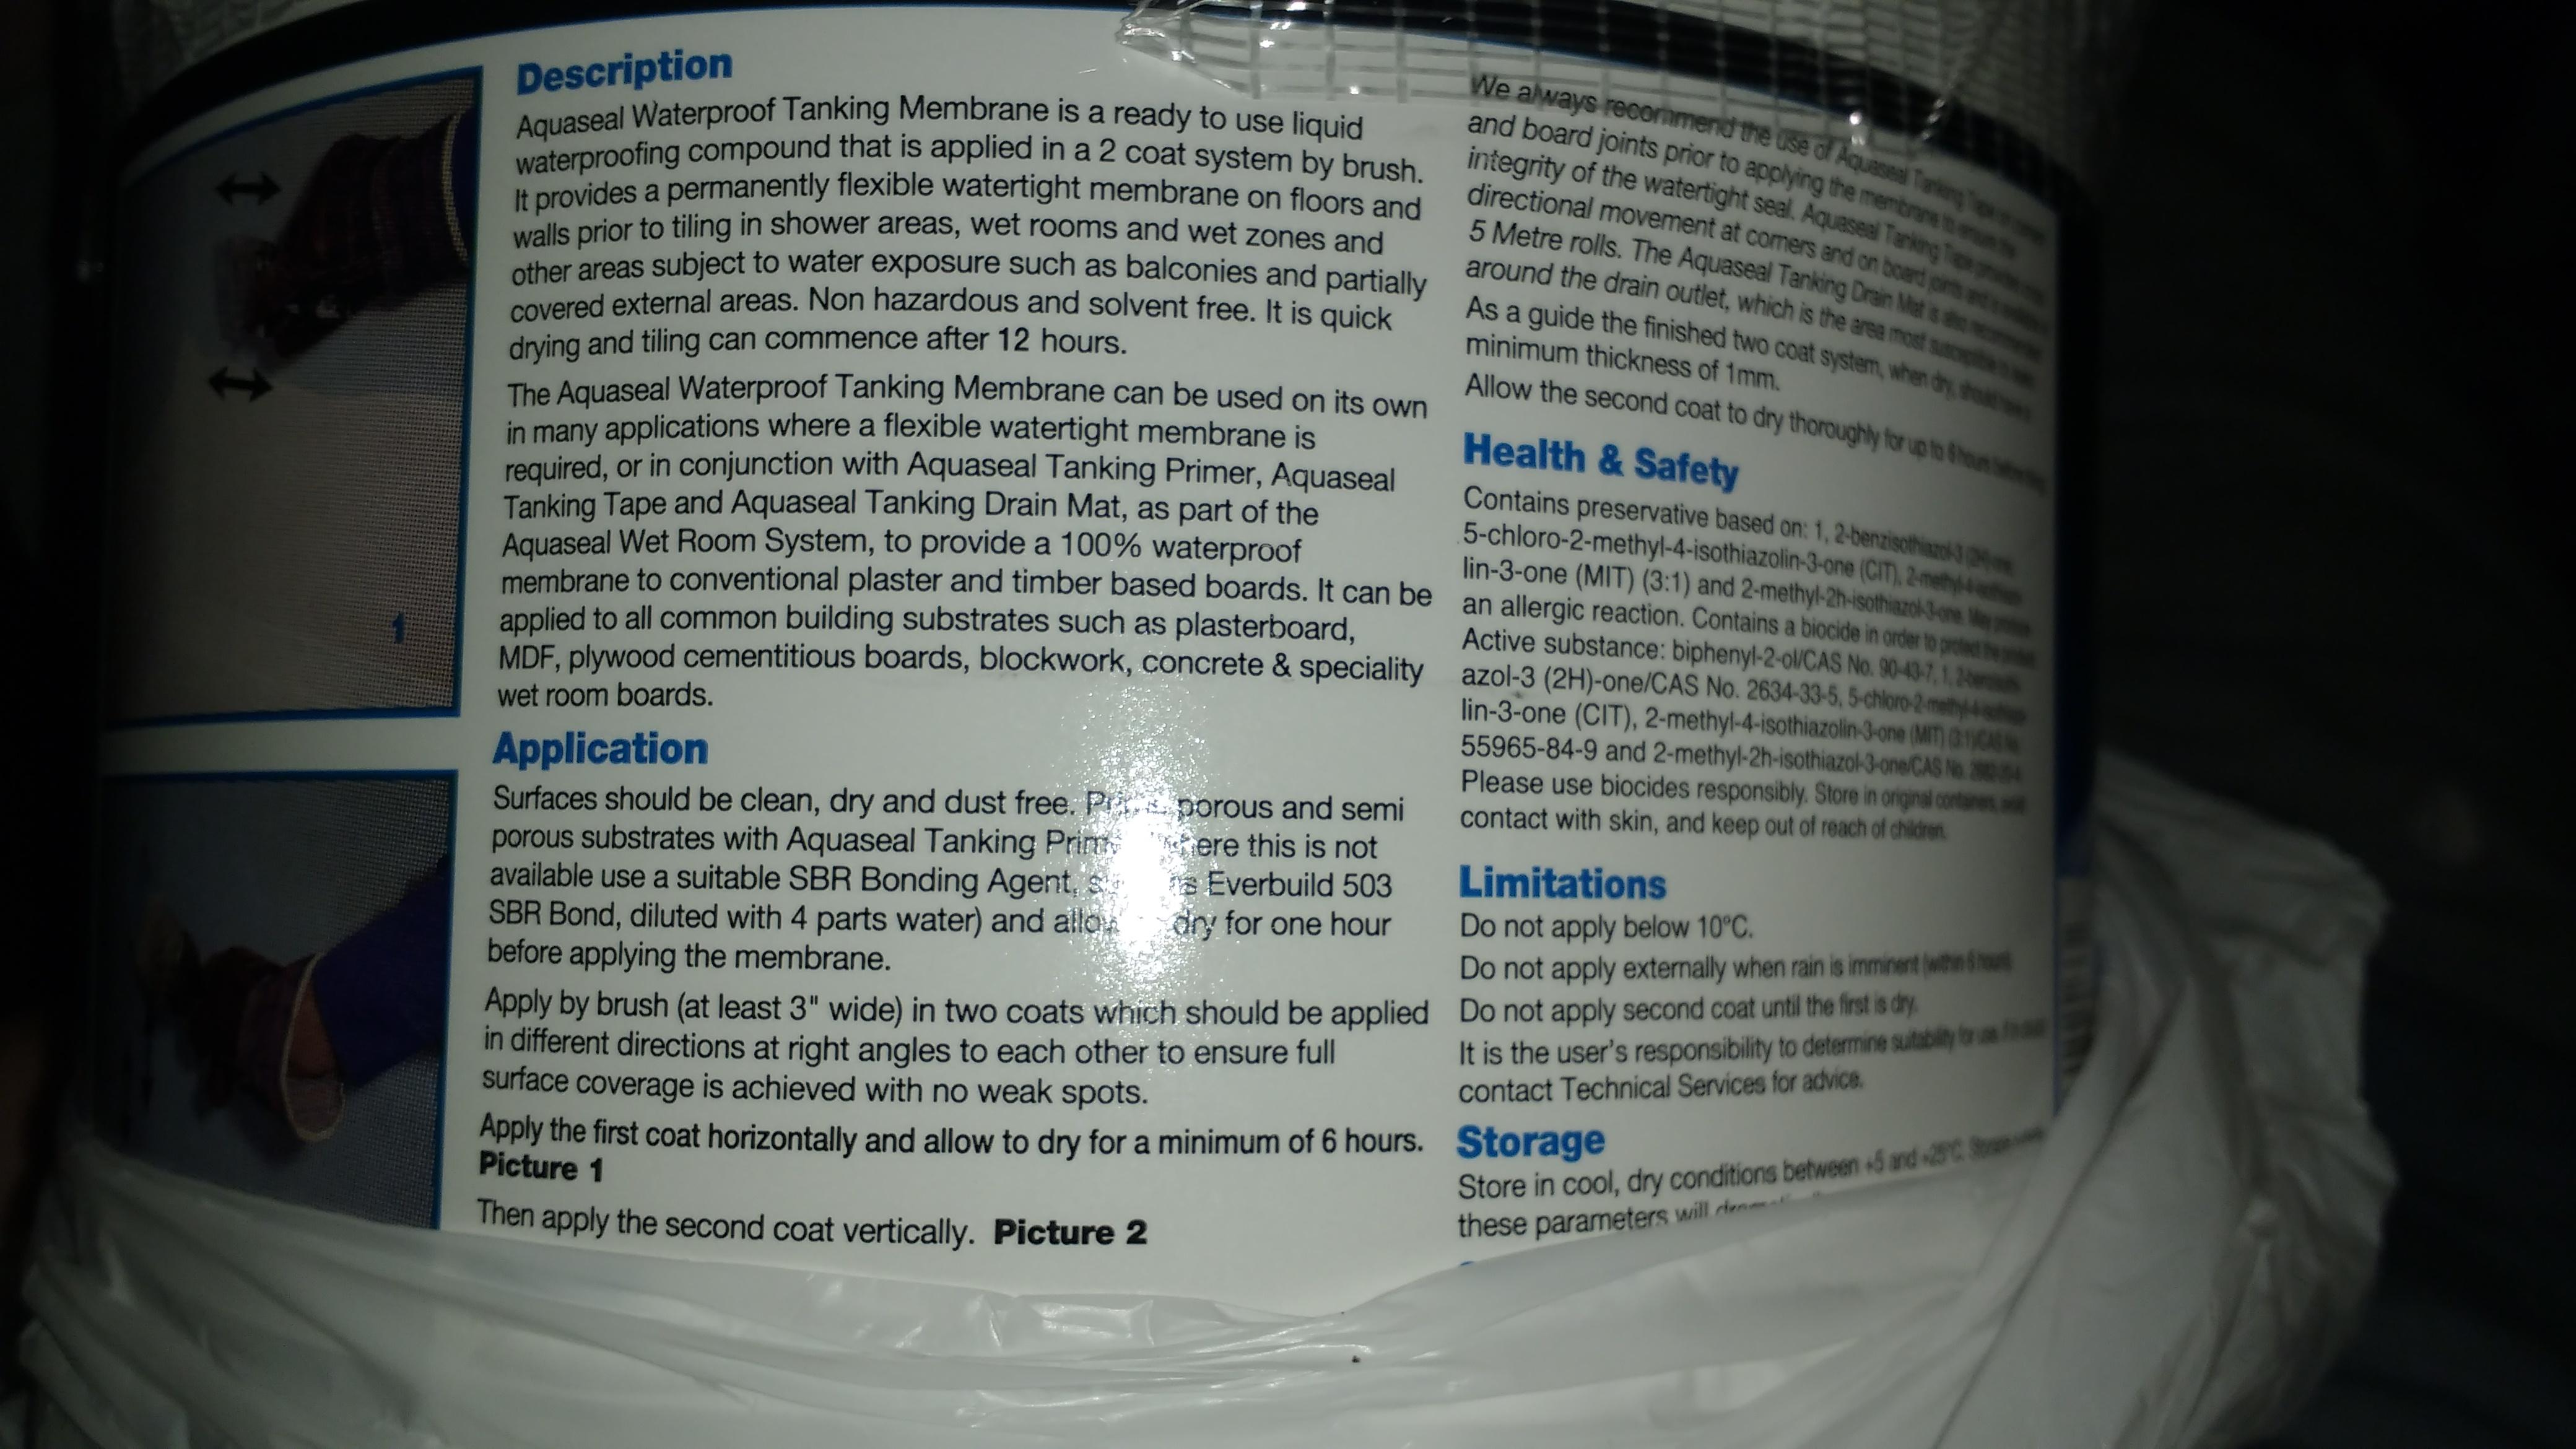
Interesting that the label on the membrane container says that Everbuild 503 SBR Bond can be used as a primer if the actual Aqua Seal primer isn't available: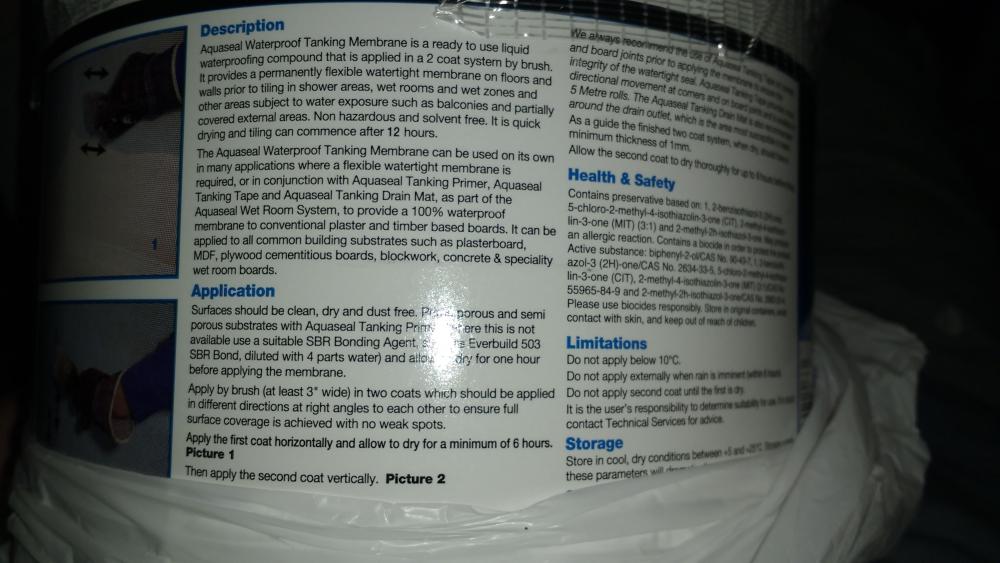
-
Says on the primer label that it can be used on "cementitious boards...and speciality wet room boards". Does that not suggest ALL the Aqua Panel needs doing not just the joints?
-
Bath Surround / Boxing In, and concealed pipework
Onoff replied to Onoff's topic in Bathrooms, Ensuites & Wetrooms
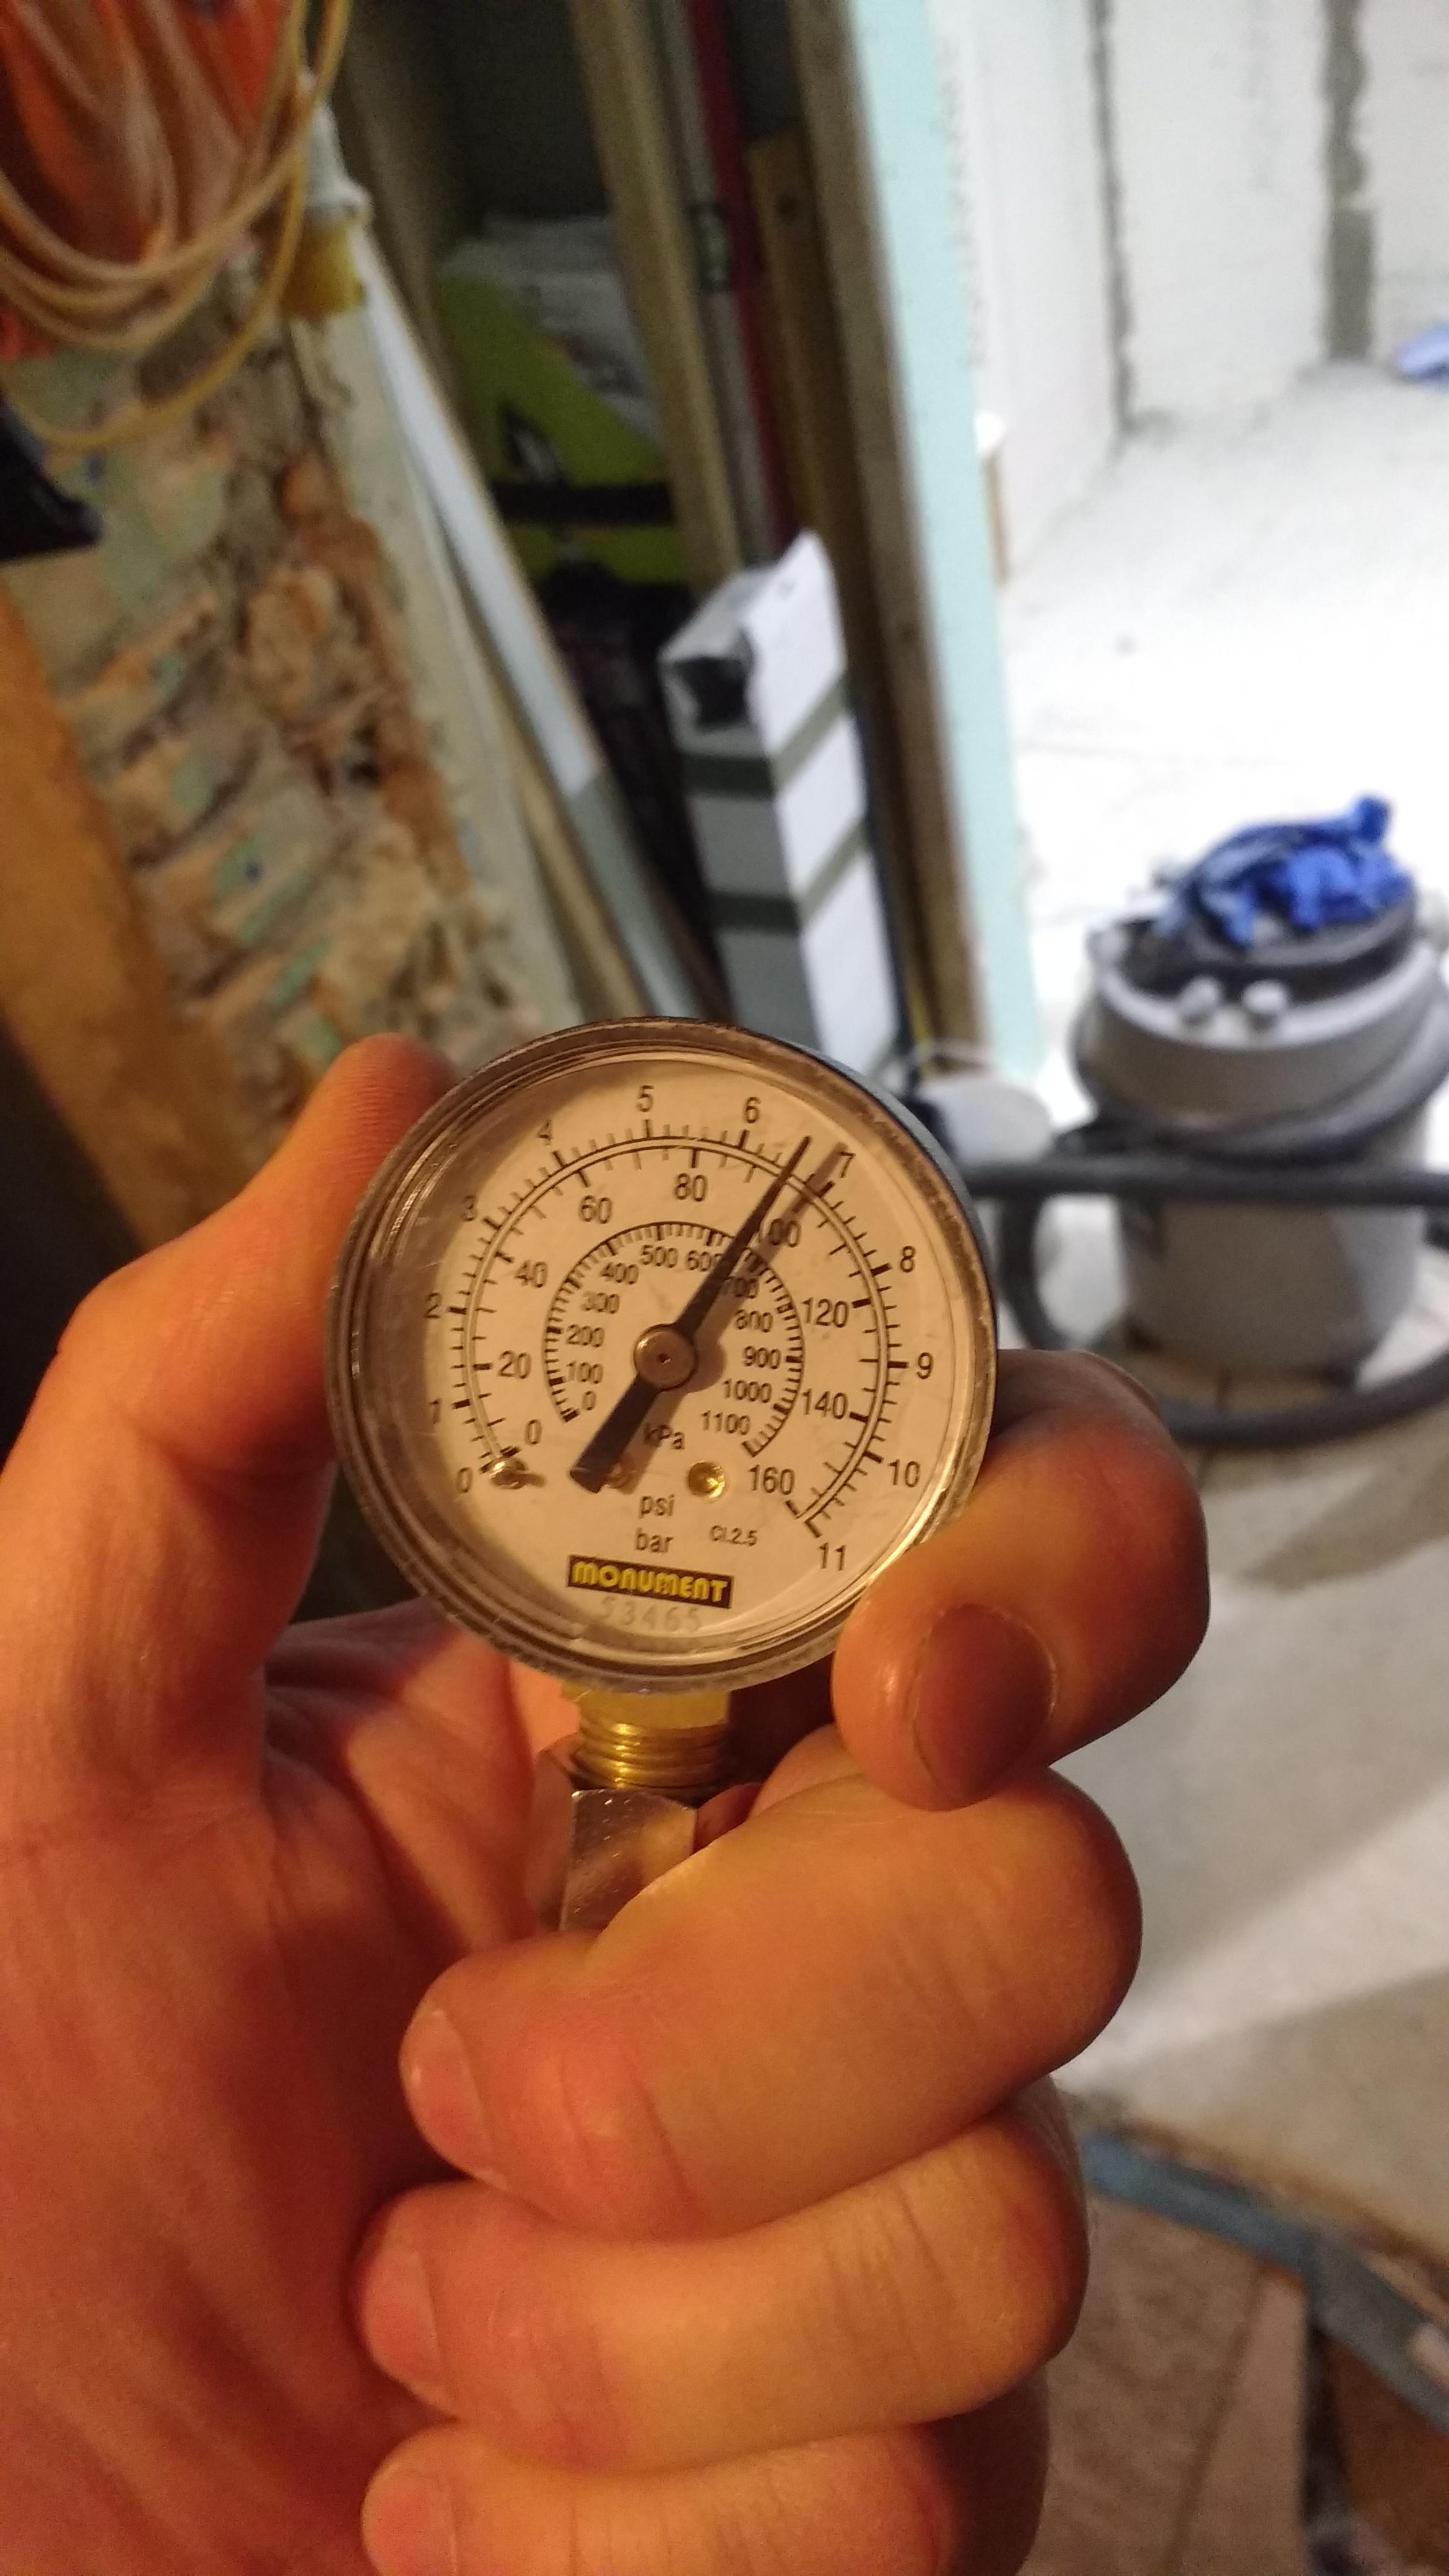
Pressure testing the towel radiator loop over the last 24hrs and it's dropped by a bar. Can't see any leaks though, at least at the testing end or 6 elbows! There's one hidden elbow on the RHS in the wall that's straight onto Pex-Al-Pex. Nothing on the floor though. Ambient has dropped massively though. Could that be it? I bled it pretty well I thought too. Via the drain valve one end of the loop until it ran bubble free.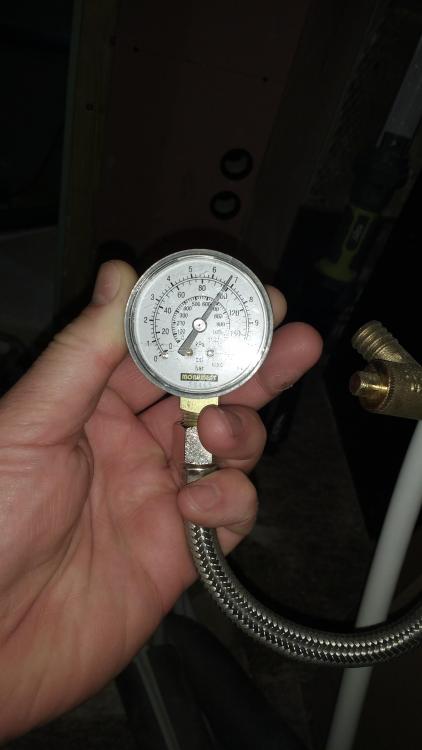
-
My one loop for the bathroom UFH held 3bar for months...in fact years!
-
Help with kitchen renovation/ 1st house.
Onoff replied to zoothorn's topic in Bathrooms, Ensuites & Wetrooms
It'll be fine. Mortar is soft sand and cement. Concrete is sharp sand + aggregate + cement. When you buy "ballast" to make concrete (by adding cement) then that's just sharp sand and aggregate mixed together. The aggregate is often up to 20mm diameter. Concrete is stronger. As I said the bag linked has aggregate to 10mm max diameter. Add water just not too much. -
Jesus no! Like drinking Fairy!
-
As Boy George said I'd rather have a nice cup of tea!