Onoff
-
Posts
21172 -
Joined
-
Last visited
-
Days Won
206
Everything posted by Onoff
-
It's a no brainer surely? Gate Gates, you could by two for the price of one from Easy Gates. Saying that the Lift Master stuff from Easy Gates has been super reliable. My BiL got their kit first (sliding), then me (sliding), then a neighbour (swing), then my mate (sliding). Ongoing support, extra fobs etc never an issue.
-
It looks like YOUR shed!
-
You're not in Kansas anymore!
-
The Rawlplug load / depth table for their R-KEM II is a pretty good go to for resin anchors. Attached PDF. Note they say it's not for use in cracked concrete. I happen to prefer Fischer products, specifically FIS V 360. They do give data for cracked concrete. With any resin product I find it best to use the specific resin gun. You can mind get various resins in a single, silcone tube size for use with a normal mastic gun. I find that hard work. I did a little write up with pictures somewhere on here, will see if I can find it. 22828.RAWLPLUG.EN.R-KEM II POLYESTER STYRENE FREE RESIN CONCRETE.pdf LT_01_FIS-V-T2_F_SEN_AIP_V1.pdf
-
A case of horse bolted but hey ho. One option is to dig out the slab and recast proper pads. I imagine you're keen to avoid that. Without seeing a photo and considering it's existing, then maybe a 4 hole base plate type but use stainless steel studs resin anchored into the concrete. Concrete needs to be a certain thickness ideally. Using resin anchors as opposed to expanding types anchors has a number of advantages. - You can drill closer to the edge and have the bolts set closer together. - Resin is better in cracked concrete. - The anchor method itself doesn't put lateral (expanding) forces into the slab, with an expanding anchor too close an edge distance risks breakout. - The resin / stud combo fills the hole completely like a waterproof plug. Expanding anchors, even in stainless steel, can allow water to get in and freeze/thaw. Sometimes enough to crack the concrete. The key with resin anchors is to have a clean hole to start with. Drilled to size and properly brushed and puffed out.
-
Looks like I did it. Pi$$ coloured grout would finish it off nice.
-
Loads about like this, all variations on a theme: https://www.ebay.co.uk/itm/324527521877?gad_source=1&mkevt=1&mkcid=1&mkrid=710-53481-19255-0&campid=5338723872&toolid=20006&customid=e2YxEO0dAAAAI_-RymarhmEgWqwFAAAAAA Think @ProDaveused similar on his?
-
Hearing it makes me want to commit offences that would put me in prison...
-
Do you work in HR per chance?
-
Insufficient imho. Our neighbour did similar for his fence posts. Cast concrete footings, let them set, then drilled and used expanding anchors for 4-hole metal post shows. Wind took the lot out. The kids tree house base here, 6+ 4x4 posts. I had galvanised brackets made up. 10mm side plates are bent at 90deg where they go into the concrete about a foot down. Then with my 100x100x6 steel gate posts, I cross drilled and put 20mm dia stainless bar to anchor into the concrete.
-
"Pressure stops" as in rubber safety edges. The legislation applies to swing gates too. I think one of the unfortunate accidents was where a child leant through a closed swing gate to reach the button the other side. The attached sets it all out. documents8a.pdf
-
I use this lot: https://www.easygates.co.uk/
-

More foundation fun - straw bale garden room on clay
Onoff replied to Nick Thomas's topic in Foundations
How about a layer of big bubble, bubble wrap under the joists, for the Rockwool to sit on? Air gaps between the bubbles and you could puncture it all over in between the bubbles for "drainage". -
LEDs Are Pants? https://www.kingfisher.com/en/own-exclusive-brand.html
-
So much in common! 👍
-
I reckon the pot hole repairs round here last longer than the LED stuff (all makes) I've fitted. Green washing the lot of it.
-
And I thought my Mondeo was a pain needing a T30 torx and a Phillips to change a bulb.
-
Don't forget matchsticks & PVA for filling wrongly drilled screw holes.
-
Edit: My lad 3D printed the last lot of hinge shims I needed.

-
Scaled up maybe? Give them a soak in Limelite.
-
Dunno, someone else said don't take the rubbers out! So I took the windows out, clipped the rubbers back in, put the units in and banged the trims on with a rubber mallet. All good.
-
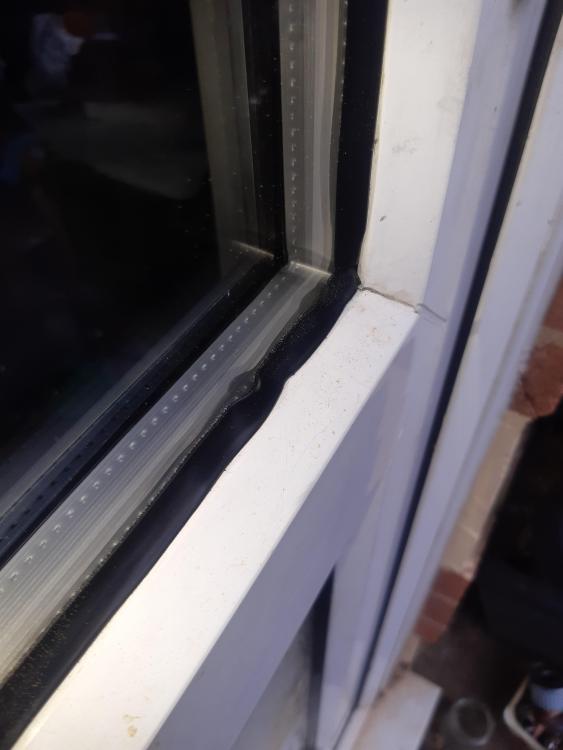
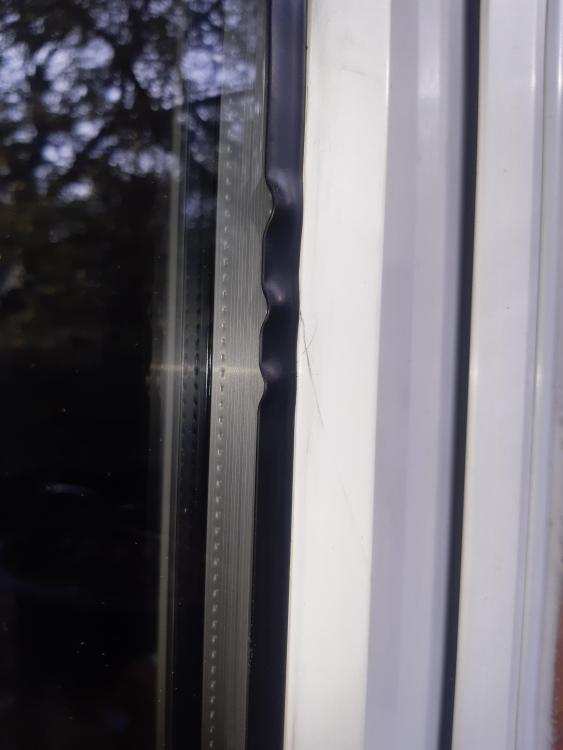
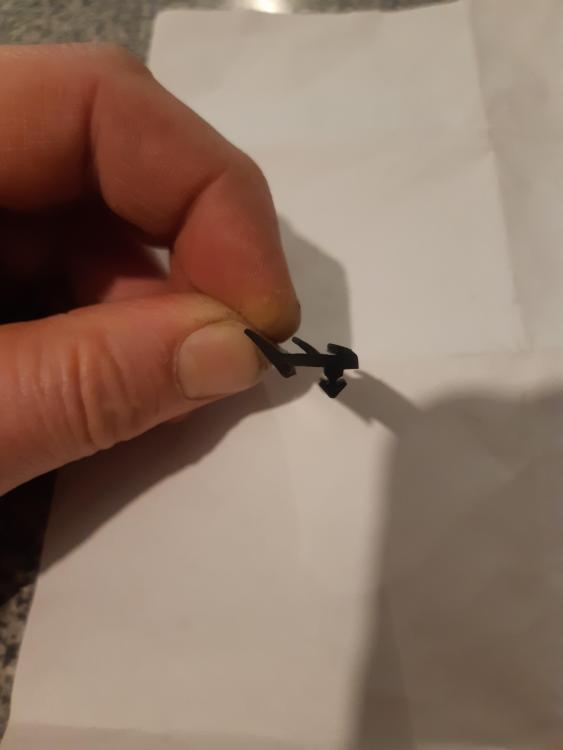
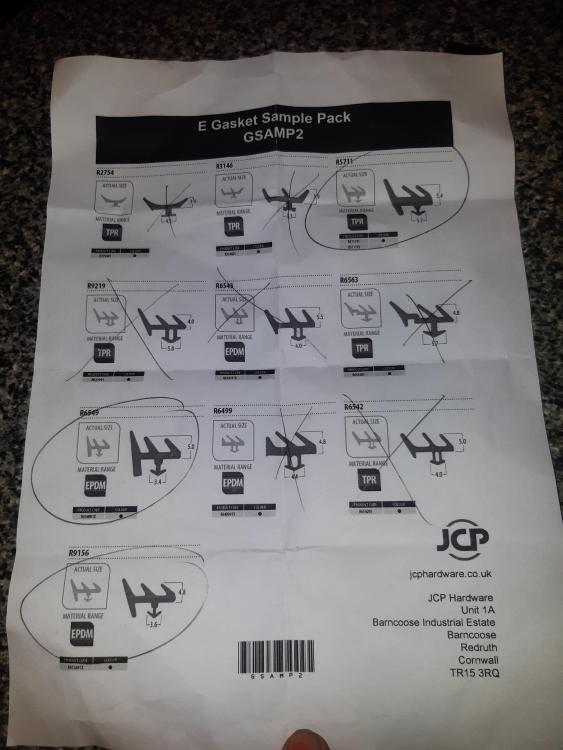
This ref the "rubbers" that seal 2G units on an internally glazed door. I've changed the 28mm units from patterned to clear glass made up by a local place. To measure up I hooked out the rubbers, removed the internal plastic beads with a paint scraper and measured the glass. I then refitted the glass, refitted the beads inside and lastly, refitted the rubbers which tbh was a pita. The new units made, I again hook out the rubbers, then take out the internal beads. New unit fitted and trims in, rubbers last. What a pig, ten times worse than when I first did it! I've made a hash of if and in places the rubbers are irretrievably distorted. When I removed / refitted the second time the ambient temperature was warmer. I even used some silicone spray to help ease things in and worked my way along pushing the rubbers in with a screwdriver. New rubbers are the only option. What did I do wrong? I'm also having trouble matching the profile despite having ordered a sample pack off eBay:
-
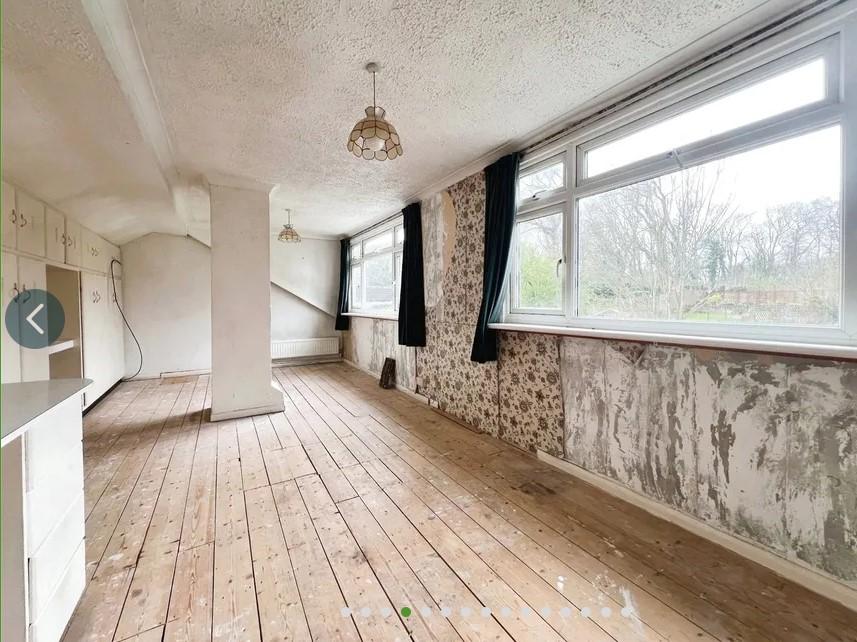
Semi-detached bungalow built in 1960. Has a rear dormer extension. There's an unused chimney stack comes up about 2/3 of the way along the dormer. This for the old fireplace and at one time solid fuel boiler. Now a modern gas boiler with the flue to the rear of the property through a downstairs wall. I think the stack goes up through the flat dormer roof. (Photo angle makes it look like the ceiling is sloped, it's not). The question is is this likely to be structural as in could it come out and the roof be patched? Cheers