


Onoff
-
Posts
21125 -
Joined
-
Last visited
-
Days Won
206
Everything posted by Onoff
-

@onoff’s been on the silicone again
Onoff replied to Pocster's topic in General Self Build & DIY Discussion
Tbh he very likely passed it on as his own observation. Whatever if it gets it sorted. The powers that be would be more likely to listen to him than me. Saying that, an email from Joe Public on this sort of this thing nowadays tends to sort it as it leaves an undeniable paper trail. -
@onoff’s been on the silicone again
Onoff replied to Pocster's topic in General Self Build & DIY Discussion
I knew one of the consultants working at the then new London Bridge Station. As a passenger I noted some stupid, projecting screws on the escalators. Took a photo and told him. Next thing they all got changed. -
@onoff’s been on the silicone again
Onoff replied to Pocster's topic in General Self Build & DIY Discussion
Cruising then. Talk about busman's holiday! -
@onoff’s been on the silicone again
Onoff replied to Pocster's topic in General Self Build & DIY Discussion
No comeback? Presumably in custody charged with going equipped...with a DeWalt cordless and holesaw! -
@onoff’s been on the silicone again
Onoff replied to Pocster's topic in General Self Build & DIY Discussion
Are you looking for fastlove? -
Never had an issue until now in about 15 years. Now there's 5 people using the bathroom. Got any links to this and where the vents should go?
-
Went over today and had a look. Definite mould spots Need to sort asap really. Bathroom is nom 9m3. Height from floor to ceiling is 2170mm. Inside bath to ceiling is 2100mm so Zone 2 all the way to the ceiling above the bath and 600mm past the bath. Interesting outside, an old air brick blocked up with a very weak mix. There's no matching vent inside though, cavity vent?
-
Block Paving - Batch issues different shade
Onoff replied to canalsiderenovation's topic in Driveways
Spray the whole lot with concrete dye. Or knock one of these over:
-
A Vent Axia MVHR unit here? Would draw the warm, wet air across to it and out the wall?
-
Looking to fit an "extractor fan" to a small bathroom extension. Rental and really nice tenant. 3 kids, lots of bathroom use so some black spotting on the ceiling above the bath. Bathroom window directly above the garden box: Access into the roof space above the bathroom is likely doable, through the airing cupboard where the gas boiler is (lucky I'm slim): Looking from the hatch to the end wall above the garden box:. There's a smattering of old fluffly insulation between the ceiling joists. As the outside is all brick thinking this must be a cavity wall on the end. Looks like a line of Celcon blocks just above the joists. Not sure how those ceiling joists are "fixed", looks like L brackets rather than proper hangers. I was thinking I might as well put a crawling board up there and maybe re-insulate whilst in there. Going over there at the weekend so will look then. Going to get some better internal pictures. Thinking mabe a SELV extract directly above the bath but have to check heights to the ceiling ref Zones. Pretty sure it's all Zone 1 above the bath height wise. Saying that, an inline fan in the loft space would I think negate any requirement for SELV/PELV? I can fit an isolator above the bathroom door entrance on that grey bit of wall to the left, behind the chandelier. The door in the picture is the airing cupboard door open against the bathroom door: Rough sketch of the bathroom. There's a shower rail and folding screen the towel rail end. Mulling a single room MVHR unit above the sink exiting out into the "alley", first picture above: Only photos I have:
-
I like the traditional, smelly one that gives you a headache in confined spaces.
-
I think it's the duct he wants in a short length.
-
Always good to chuck spare conduits to such a shed/workshop. Good for hardwired internet, cctv etc. Duct to my gate motor for instance, SWA then two 20mm conduits:
-
Glue some 3" drainpipe together with solvent weld. Makes a lovely duct. Covered in pea shingle it won't go anywhere. PM me your address and I'll send you a few metres of cable tape to put just under the surface. You can even spiral wrap round the "duct" so there's no doubt should somebody dig it up. The "duct" between my gate pillars is drain pipe. Mind its all then covered in concrete. I've SWA in there then other cables in their own 20mm ducts within the 3" pipe.
-
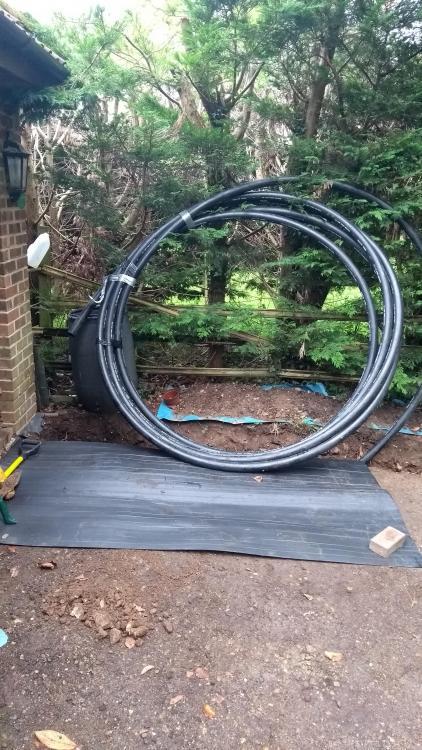
Proper DNO stuff I used. Cost me a tenner off eBay/Gumtree. Brought it back round the M25 from Esher ratchet strapped to the roof of my then Golf GTi. It's smoothbore and a heavy bitch of a thing to wrestle with. No harm, if trenching anyway to run other ducts in, say a blue one for water in the workshop.
-
Proper cable duct in pea shingle, cable tape, draw wire left in etc. Do not use blue water pipe or yellow gas pipe to run your cable through like two guys I know have!
-
Found at random: https://www.idealhome.co.uk/diy/building-a-pergola-things-to-consider
-
Cut through housings in your roof joists at the appropriate angle to fit over the front and rear goalposts. Just Google "pergola designs" and then Images for ideas.
-
So you got two of each?
-
Get a local fabricator to make exactly what you want?
-
That stone wall would probably give a lovely key if you were to render it. Much easier to stick flashband to a flat surface...
-
Ideally you would screw a guide batten to the wall, cut to the angle of the slope. Batten has to be positioned "high enough" so you can use the grinder, 9" probably best. Lead will poke into the slot, come down the wall a bit then dress over the profile.
-
Angle grind a slot in the wall - on a downward facing angle. Fit lead. Bead of lead sealant.
-
Socket Heights (English Regs)
Onoff replied to MortarThePoint's topic in Regulations, Training & Qualifications
I've gone through the whole "elderly parent" thing, watching them struggle with sockets just above the skirting, or having to let go of their walker and reach up to "high" switches. Most sockets or switches I fit or move now are put in / back 450 - 1200mm. Seems very practical to me. -
Be conscious if drilling into a slab if you break out the other side. You can end up pumping copious amounts of resin into any void. Learnt the hard way when a mate and I were fixing to a cavity wall using the old resin capsules. We keep pushing them in and they were falling down the cavity! With pumped resin like we're on about here you can get special mesh sleeves: https://www.kernow-how.com/ProductGrp/resin-plastic-mesh-sleeves Tbh, for what you're doing I'd just scrunch up newspaper and push it tight down the hole. Try and avoid breaking through in the first place by using a depth stop on the drill. When fixing say a 4 hole base plate then use the base plate to mark through with the drill. Then drill and CLEAN the holes out. Clean holes are paramount to the resin taking. Have your 4 studs sat ready next to the holes. Pump in the resin to each hole quickly. Push a stud in each, with a wee twist. Drop the base plate over the studs which won't yet be set. WALK AWAY and let them set before putting nuts and washers on. Don't worry too much about excess resin squidging out of the hole but do worry about excess resin getting on the stud threads where you're going to put a nut. I clean the holes then drop a stud in loose. I'll then tape the thread with some leccy tape where it projects above the hole. Peel off later when set.


