
Super_Paulie
-
Posts
831 -
Joined
-
Last visited
-
Days Won
3
Everything posted by Super_Paulie
-
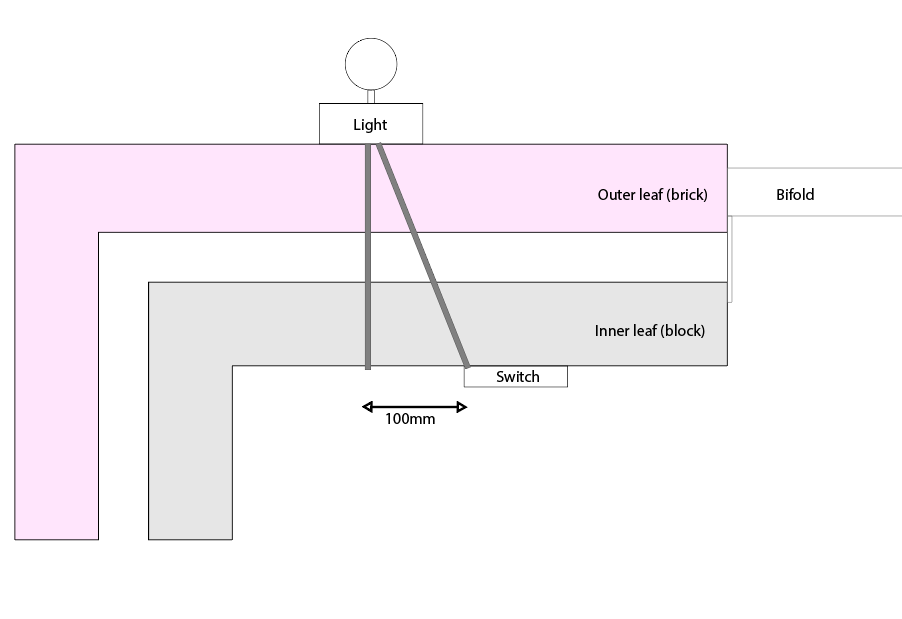
i dont have any photos at the moment as im at work but here is a sketch. Top down, if that make sense, the cable will be the usual in a 20mm pipe sloping away from the wall. Its not a huge distance to drill at the angle and it would be tricky to relocate the light switch at this time as the feed and 2-ways from it are all in place. Not impossible, just tricky. SO i was hoping that drilling at the angle might work, but im aware i might be on dodgy ground which im trying to avoid.
-
Yeah I mean I could add a blanked off socket but I'd rather not as it would be below unit level for aesthetics so a bit of a folly. I can drill at an angle to get it in zone, just wasn't sure if that's a no-no.
-
I can't seem to find any examples of this which probably answers my question. I need to install my patio lights but I want to bring the feed/switch from inside to out. I can't get that in zone unless I drill at an angle from the outside, I've got to move roughly 100mm sideways from the outside skin through the cavity to emerge inside in zone. Is this an acceptable thing to do? Id rather not bring the feed externally in conduit if I can help it.
-

Conducting heat selectively within a house
Super_Paulie replied to Garald's topic in Heat Insulation
this is the reason i made my downstairs 2 zone in the end, the north facing room is always significantly colder than my south facing with essentially a full glass wall. So i what i end up with is a room that is 23 on one side and a room that is 18 on the other. Its easily sorted by just leaving the adjoining door open between the rooms and it evens out pretty quickly, but quite often when that door is closed the loop for the north facing room will fire up and circulate and everythings rosy. Works for me but obviously everyones situation will be different. Ive got rads upstairs and down on TRVs as well but i am yet to use them, seems like wall furniture if nothing else. -
I've used 8:1 dry mix between my joists and after 2 weeks the humidity tells me it's dry. If you floated at the end it'll go solid but if you just screed it and leave it then it'll be crumbly. Either way was good for me as I'm just using it for mass, but by floating it meant it didn't just disintegrate while I was walking around it over the following few weeks. I learned this half way through my application of it. Basically mine is like a cheesecake with a crust on top.
-
How Do I Fix 3 x 2 timbers to dot and dab plasterboard
Super_Paulie replied to Heatseeker's topic in Heat Insulation
in my own situation I have a crappy old lath and plaster ceiling above with no joists to go into as they run in the same direction as my stud. What i did was concrete screw timber directly to the brick wall behind and then frame out from there. Double the timber but it makes it sturdy enough with a 100mm void for services and sound deadening. Not sure if the original poster is in the same situation. -
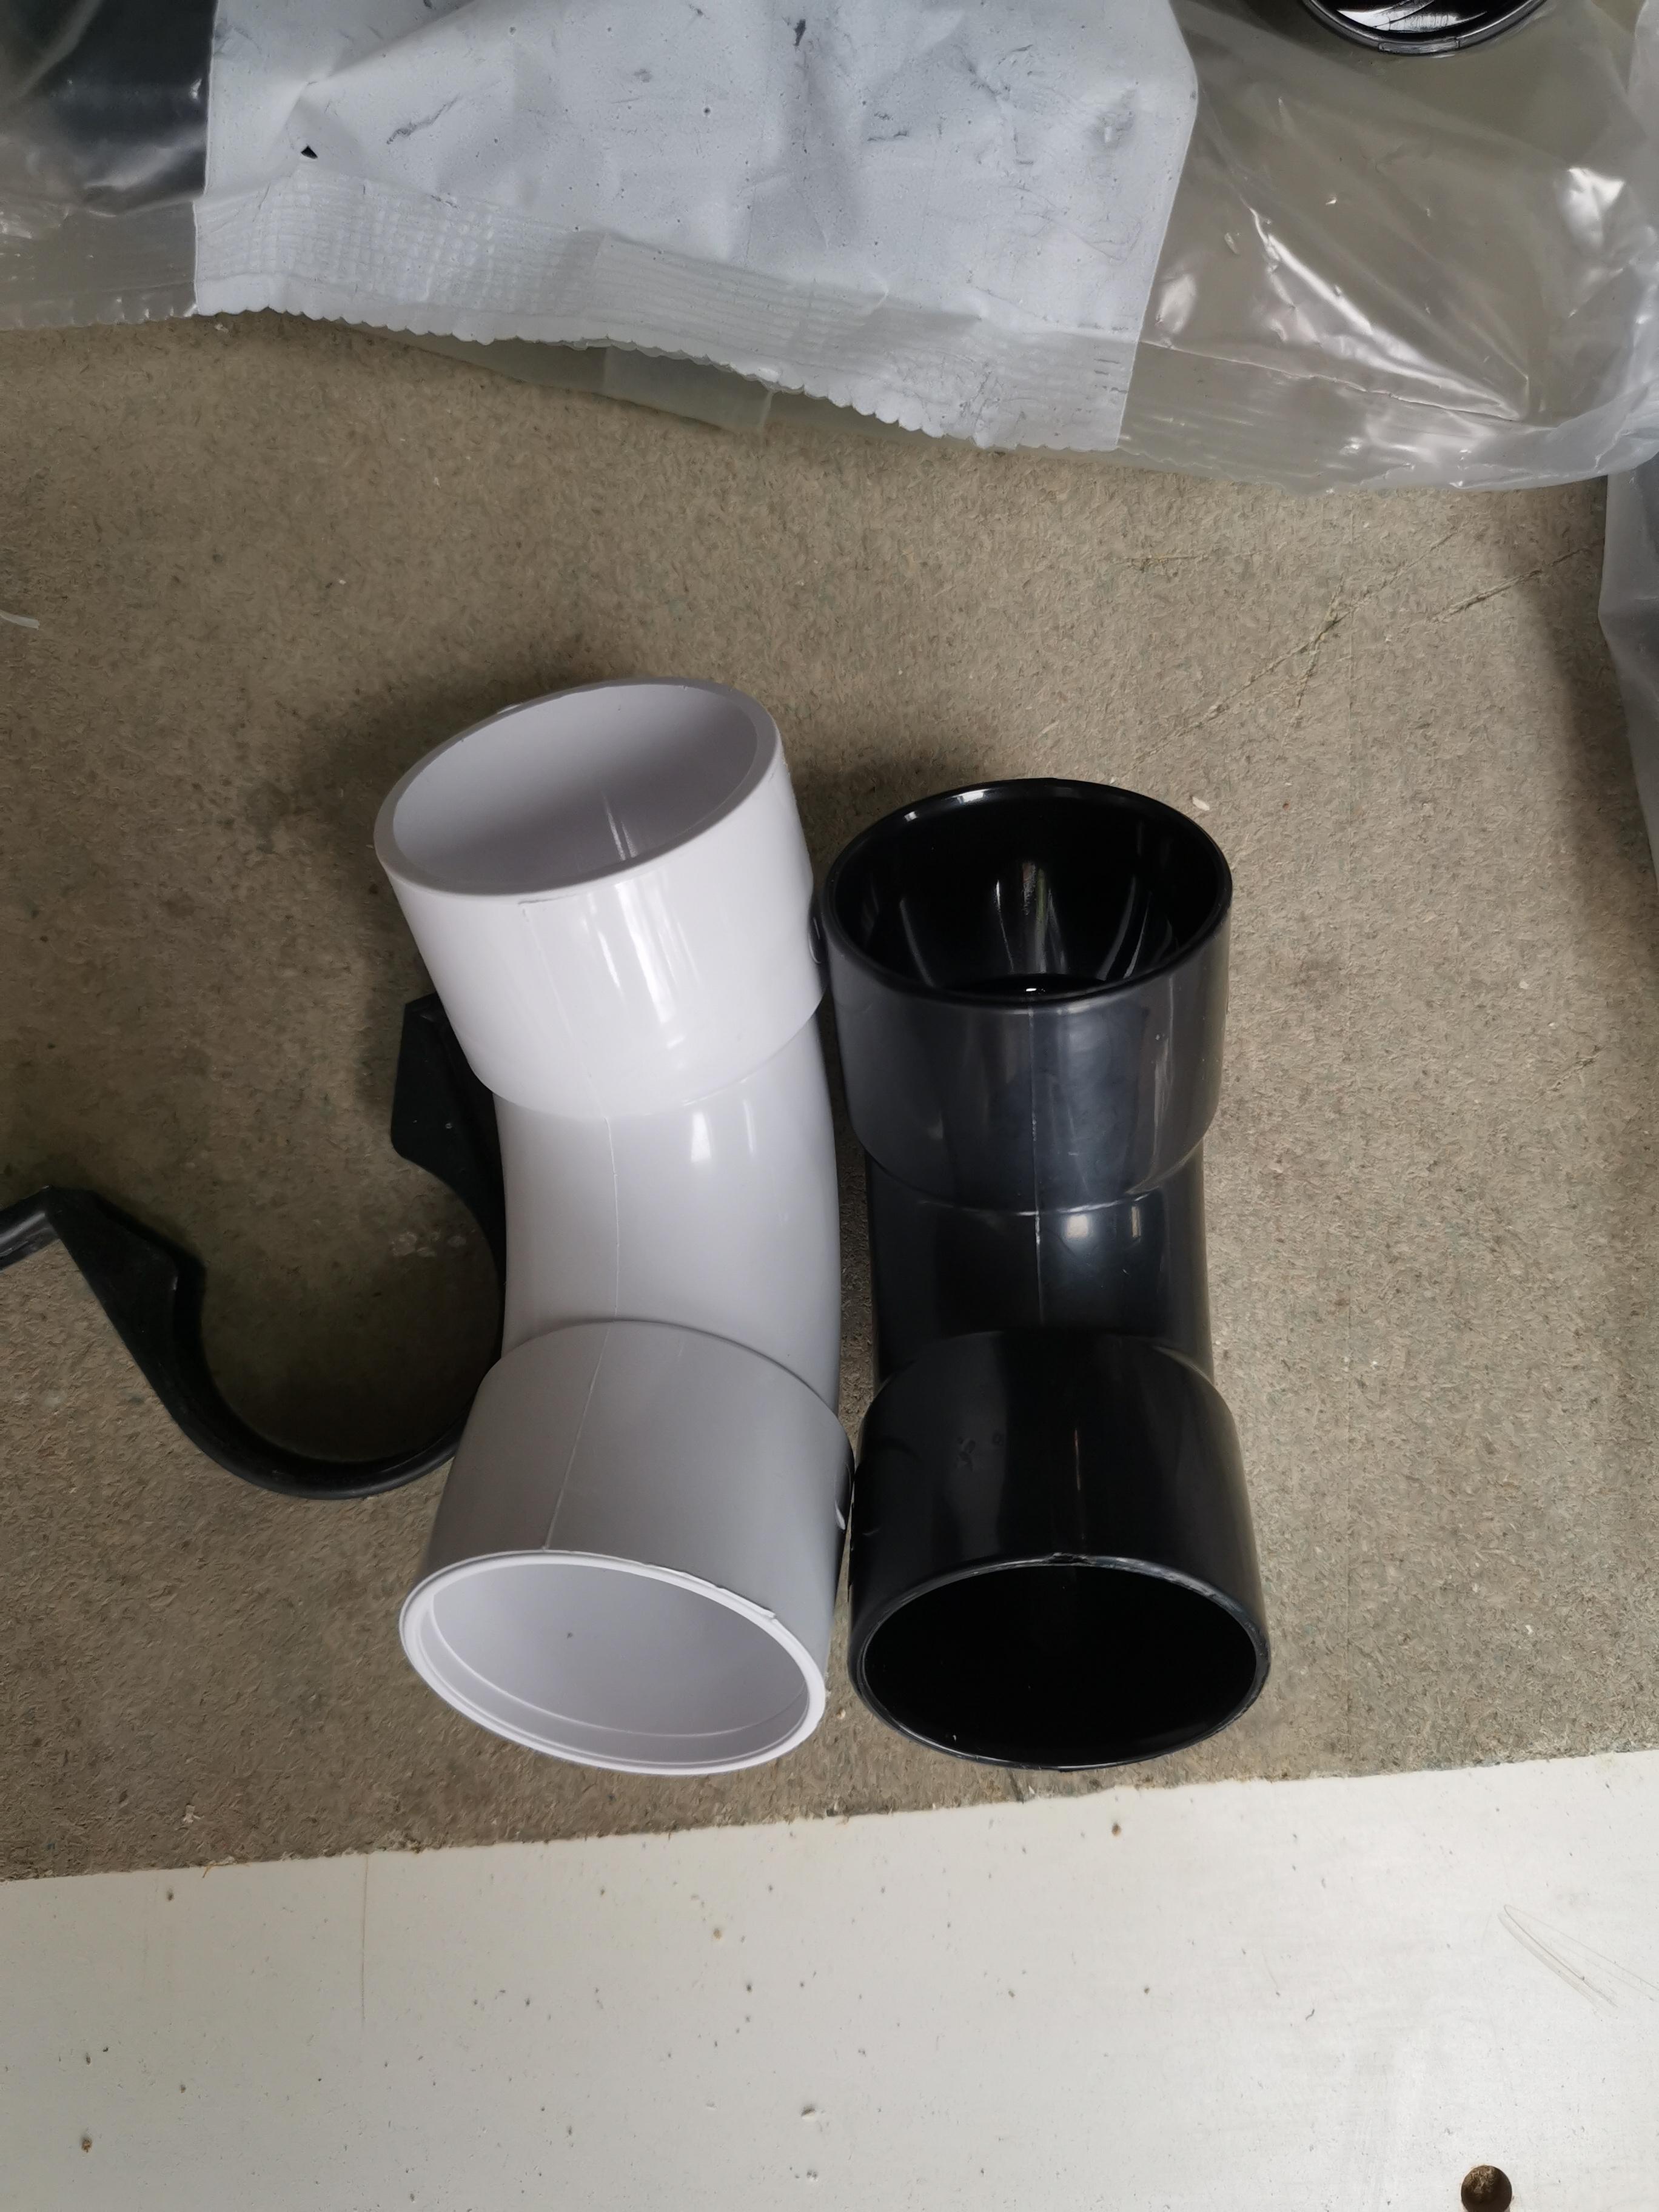
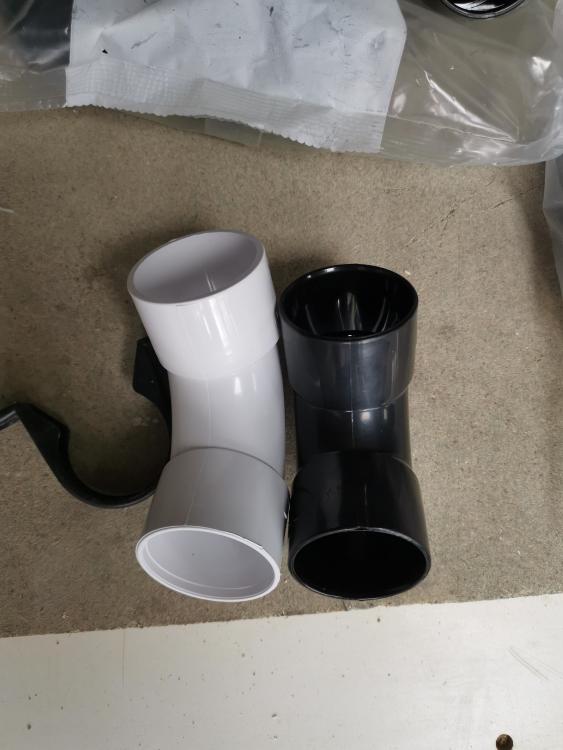
Further to this, why the hell are the white swept bends bigger than the black? I've already cut the pipe now white I waited for them to come into store, proper seen me off 😤
-
How Do I Fix 3 x 2 timbers to dot and dab plasterboard
Super_Paulie replied to Heatseeker's topic in Heat Insulation
i used these shims, pretty good as they could hang onto the screw while you drive it home. https://www.screwfix.com/p/broadfix-assorted-plastic-shims-medium-200-pcs/80408 -
How Do I Fix 3 x 2 timbers to dot and dab plasterboard
Super_Paulie replied to Heatseeker's topic in Heat Insulation
did the same myself last week. 6mm pilot hole straight through the timber into the brick and then impact drive concrete screws all the way in, rock solid. -
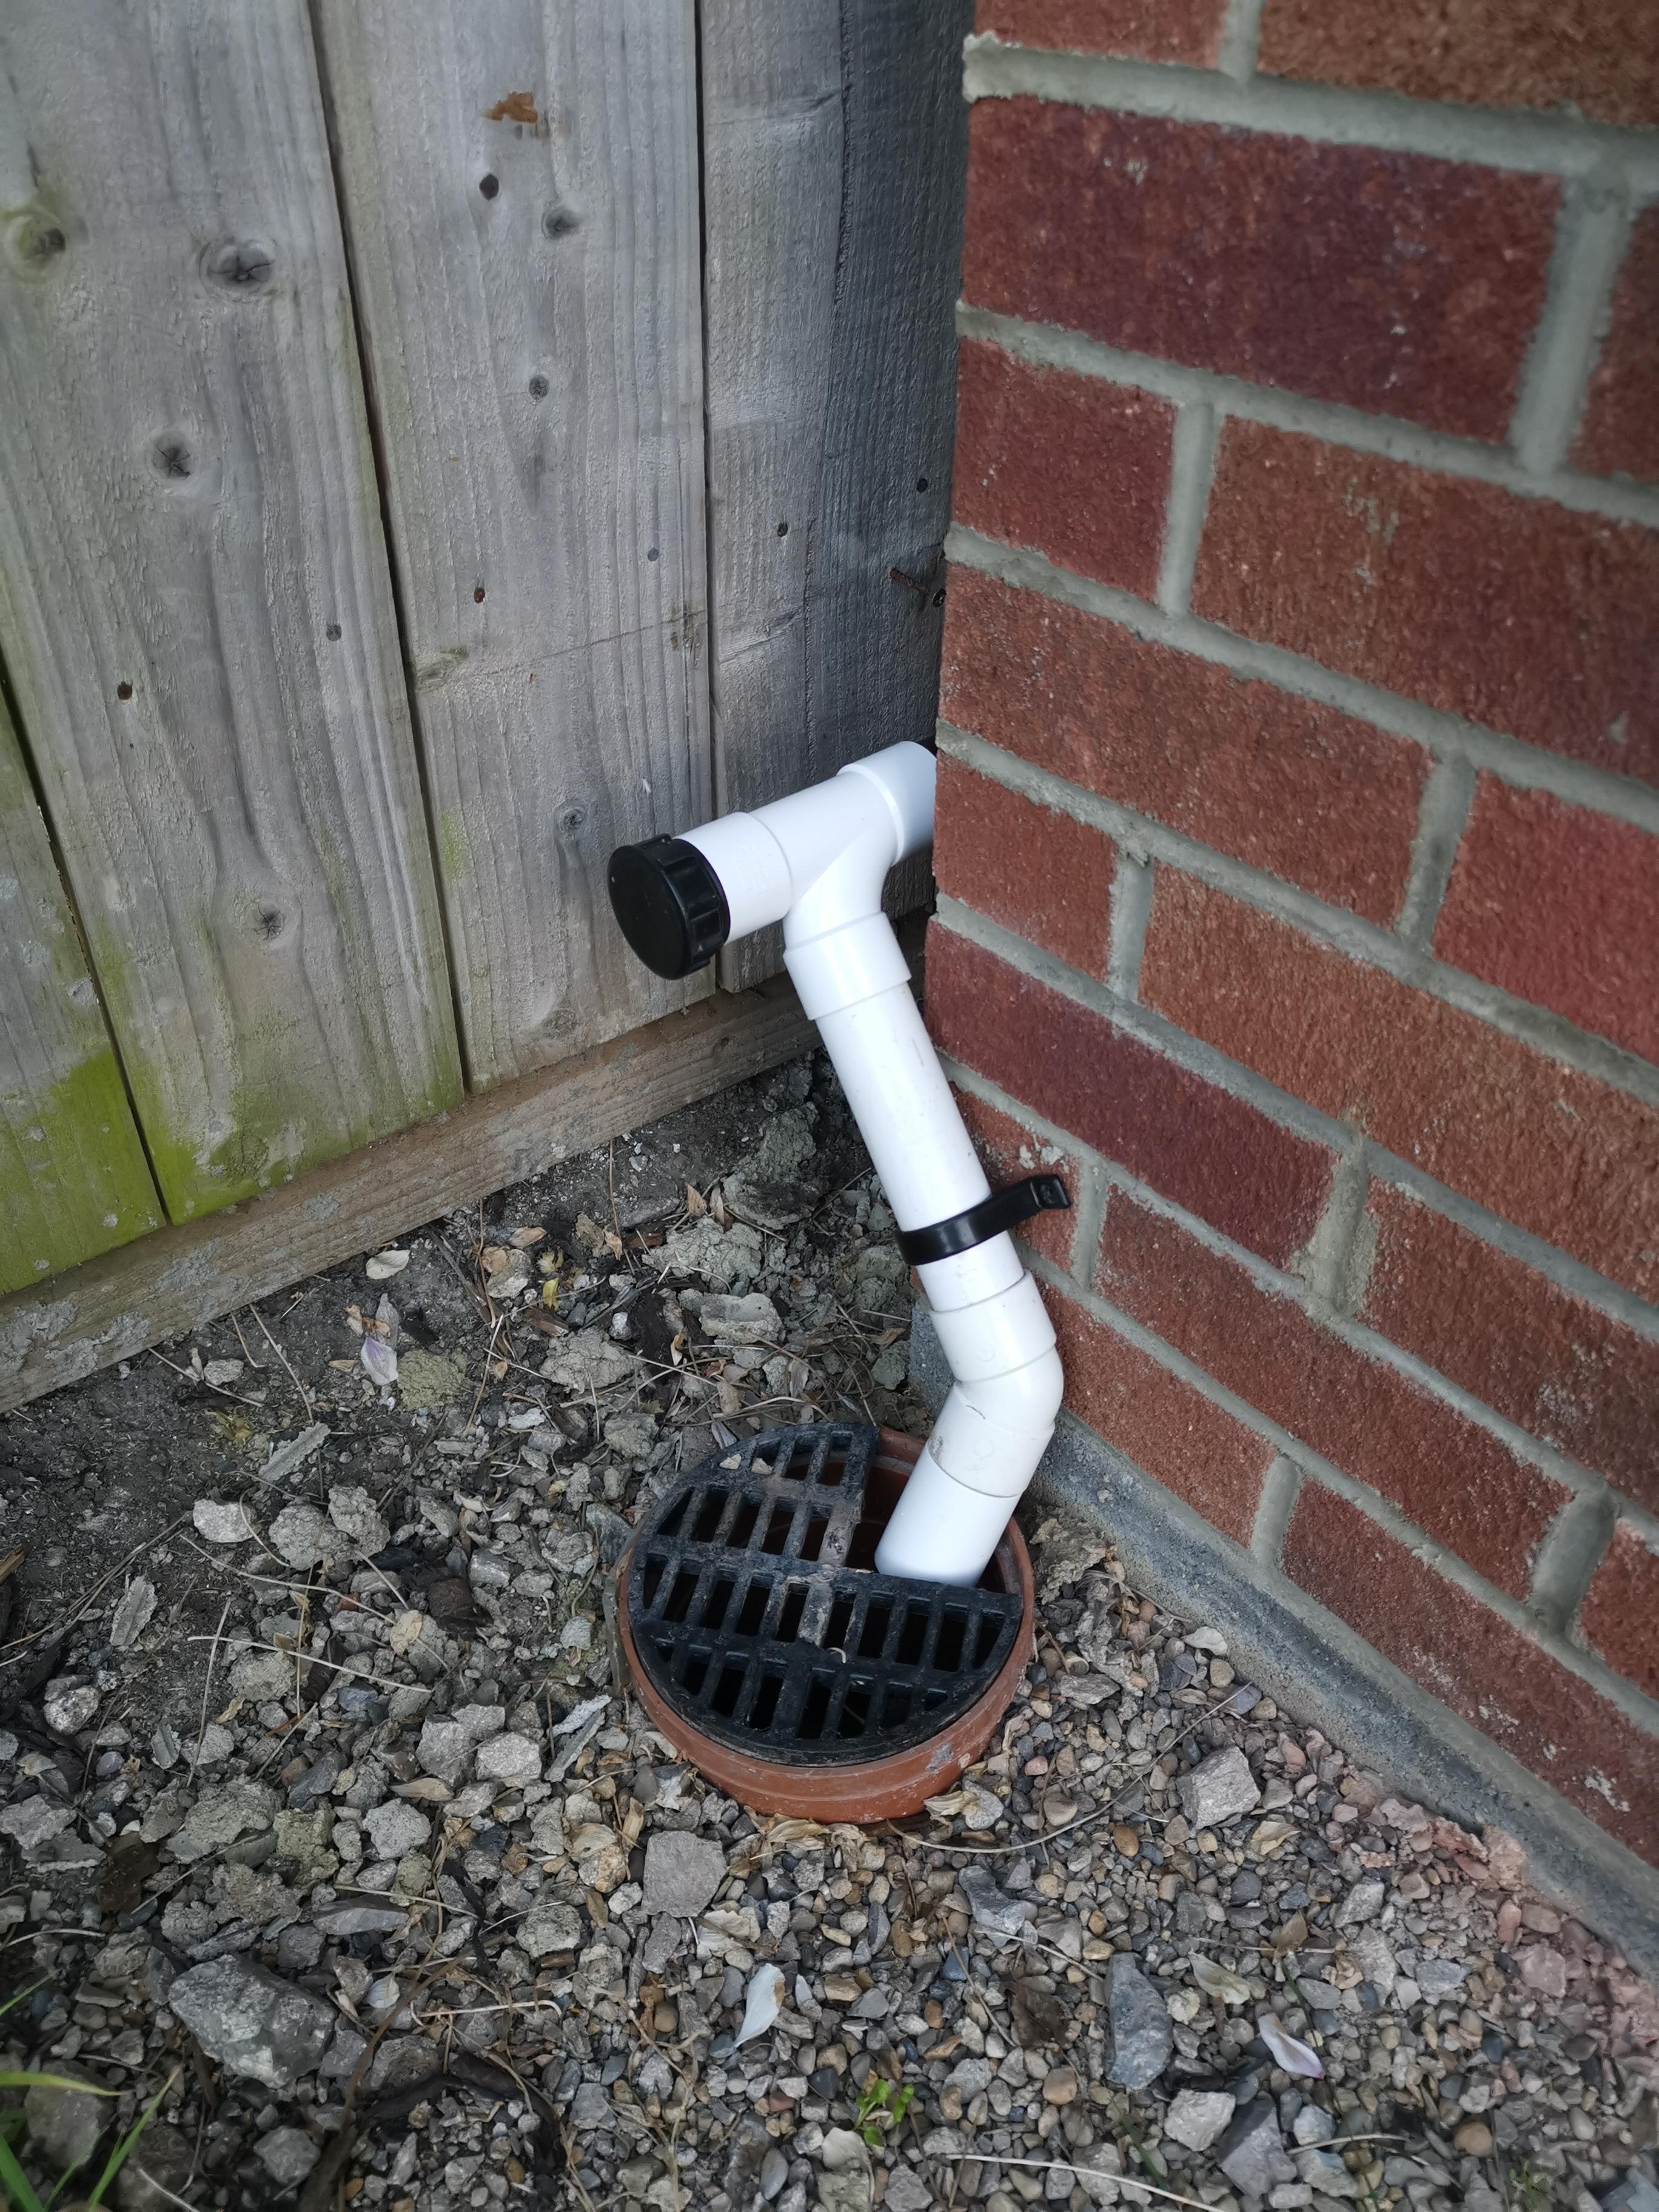
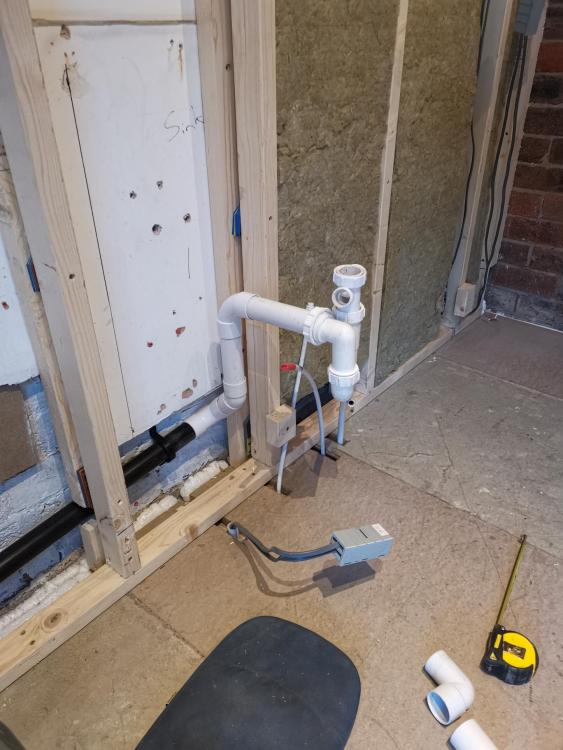
So just remove the rodding point outside altogether? I'd be happy if that'll work as it's much less of an eyesore.
-
i have access but im not sure how to make an access point at it and not look a mess.
-
i guess it wouldnt in the scheme of things, i guess it could collect so much crap that in time it blocks. Dunno, probably over thinking it.
-
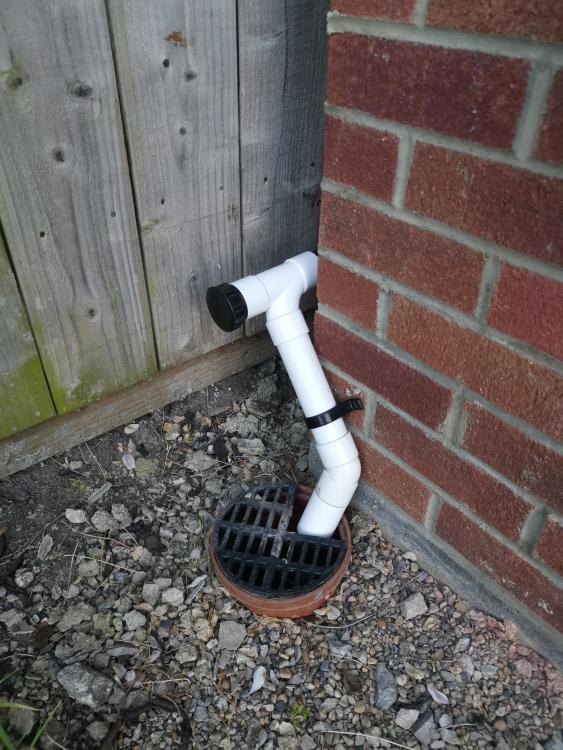
The thought has just dawned on me that I could just use a swept bend and just not weld it on one end, thus making it removable. Or is this frowned upon by the majority?
-
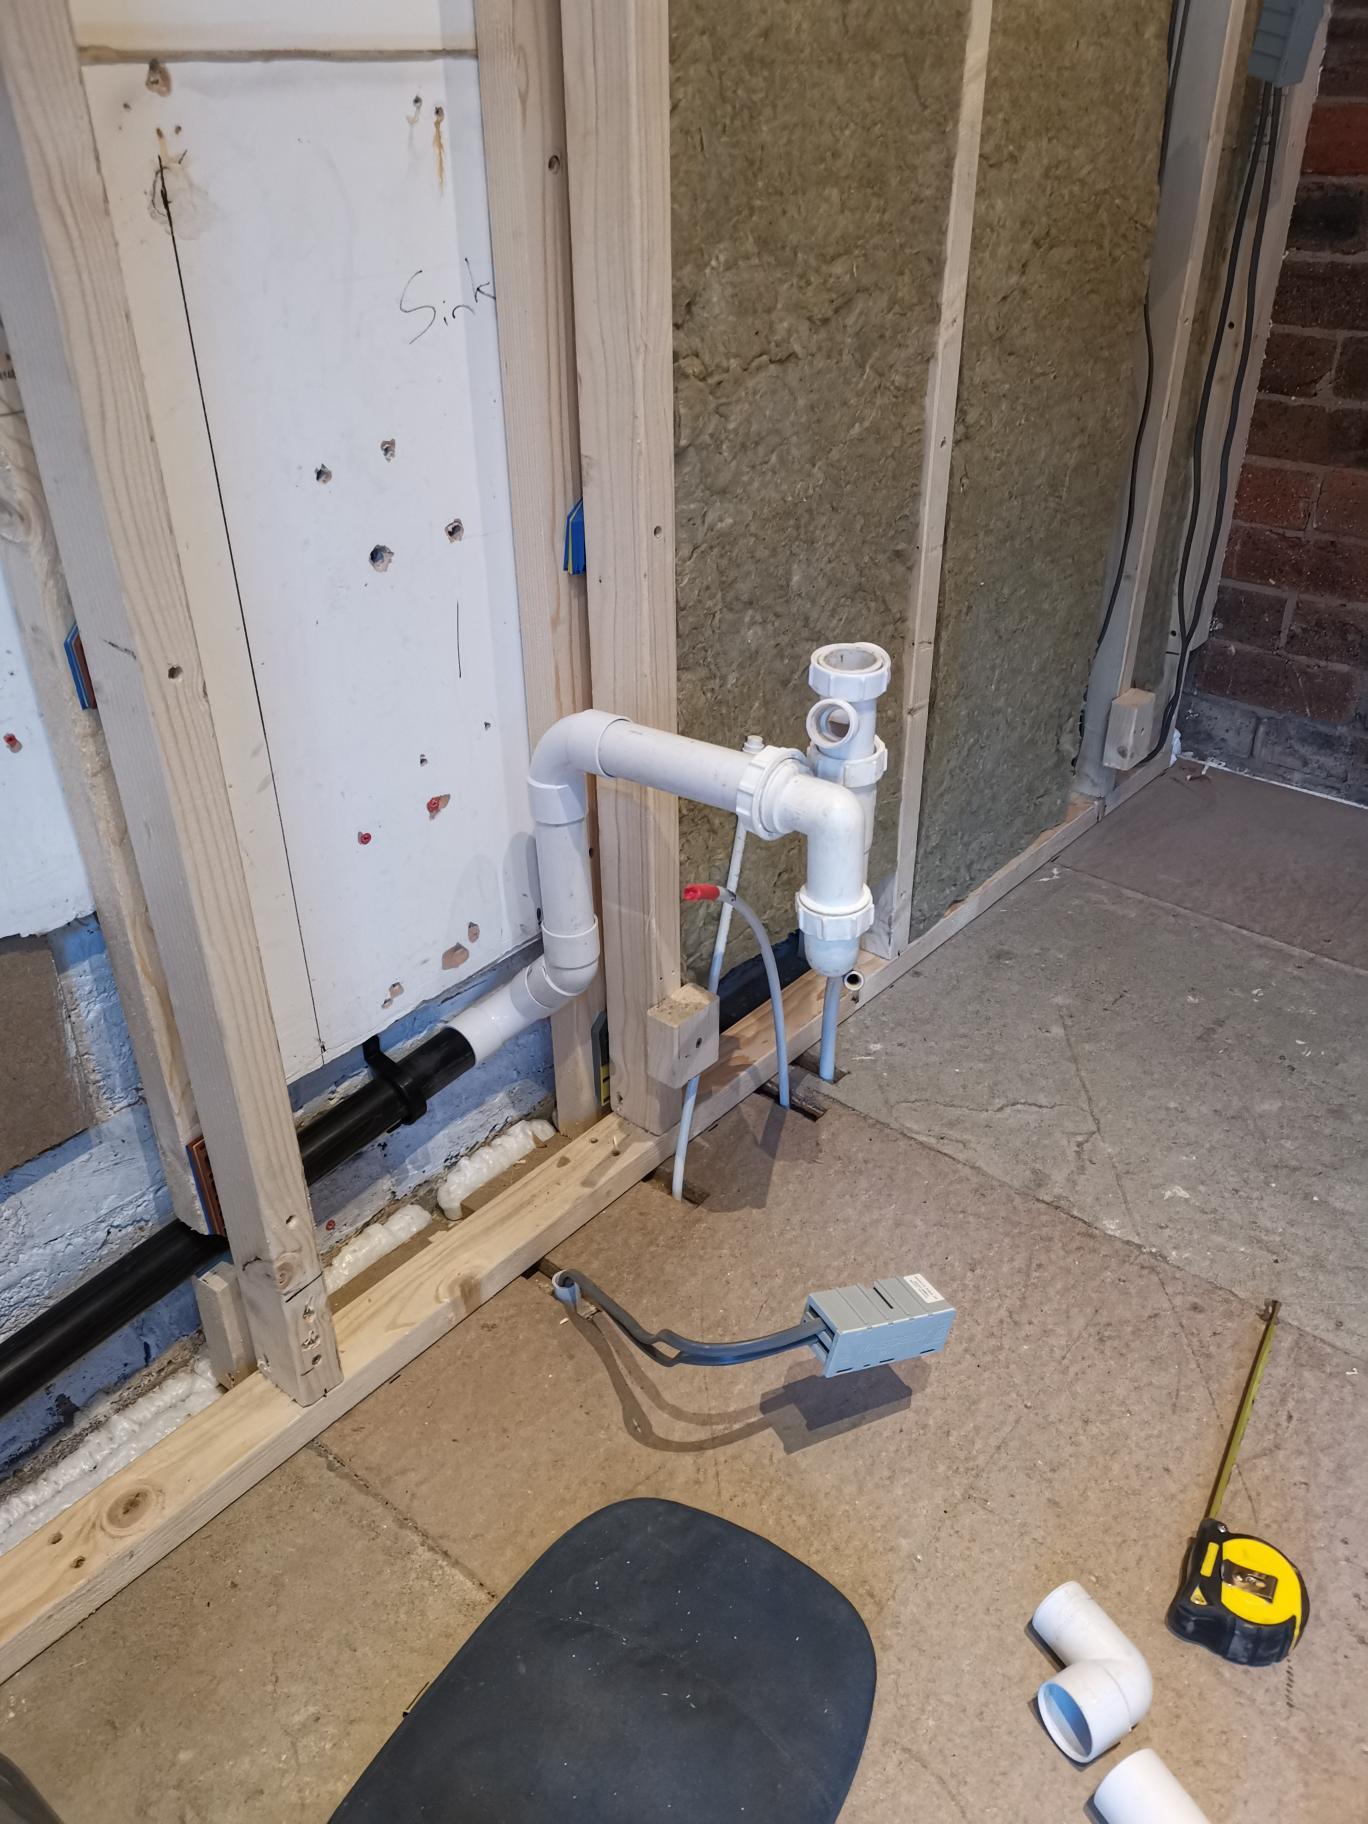
Hi guys. Planning my kitchen waste with various bits I have hanging around. Is this my best option for a rodding access? That run along the side of the extension is 2m which is supported, but I'm thinking this rodding access will just collect kitchen waste and do the exact opposite of what I want, but I can't think of another way to do it? Obviously I'll get new fittings all the same colour.
-
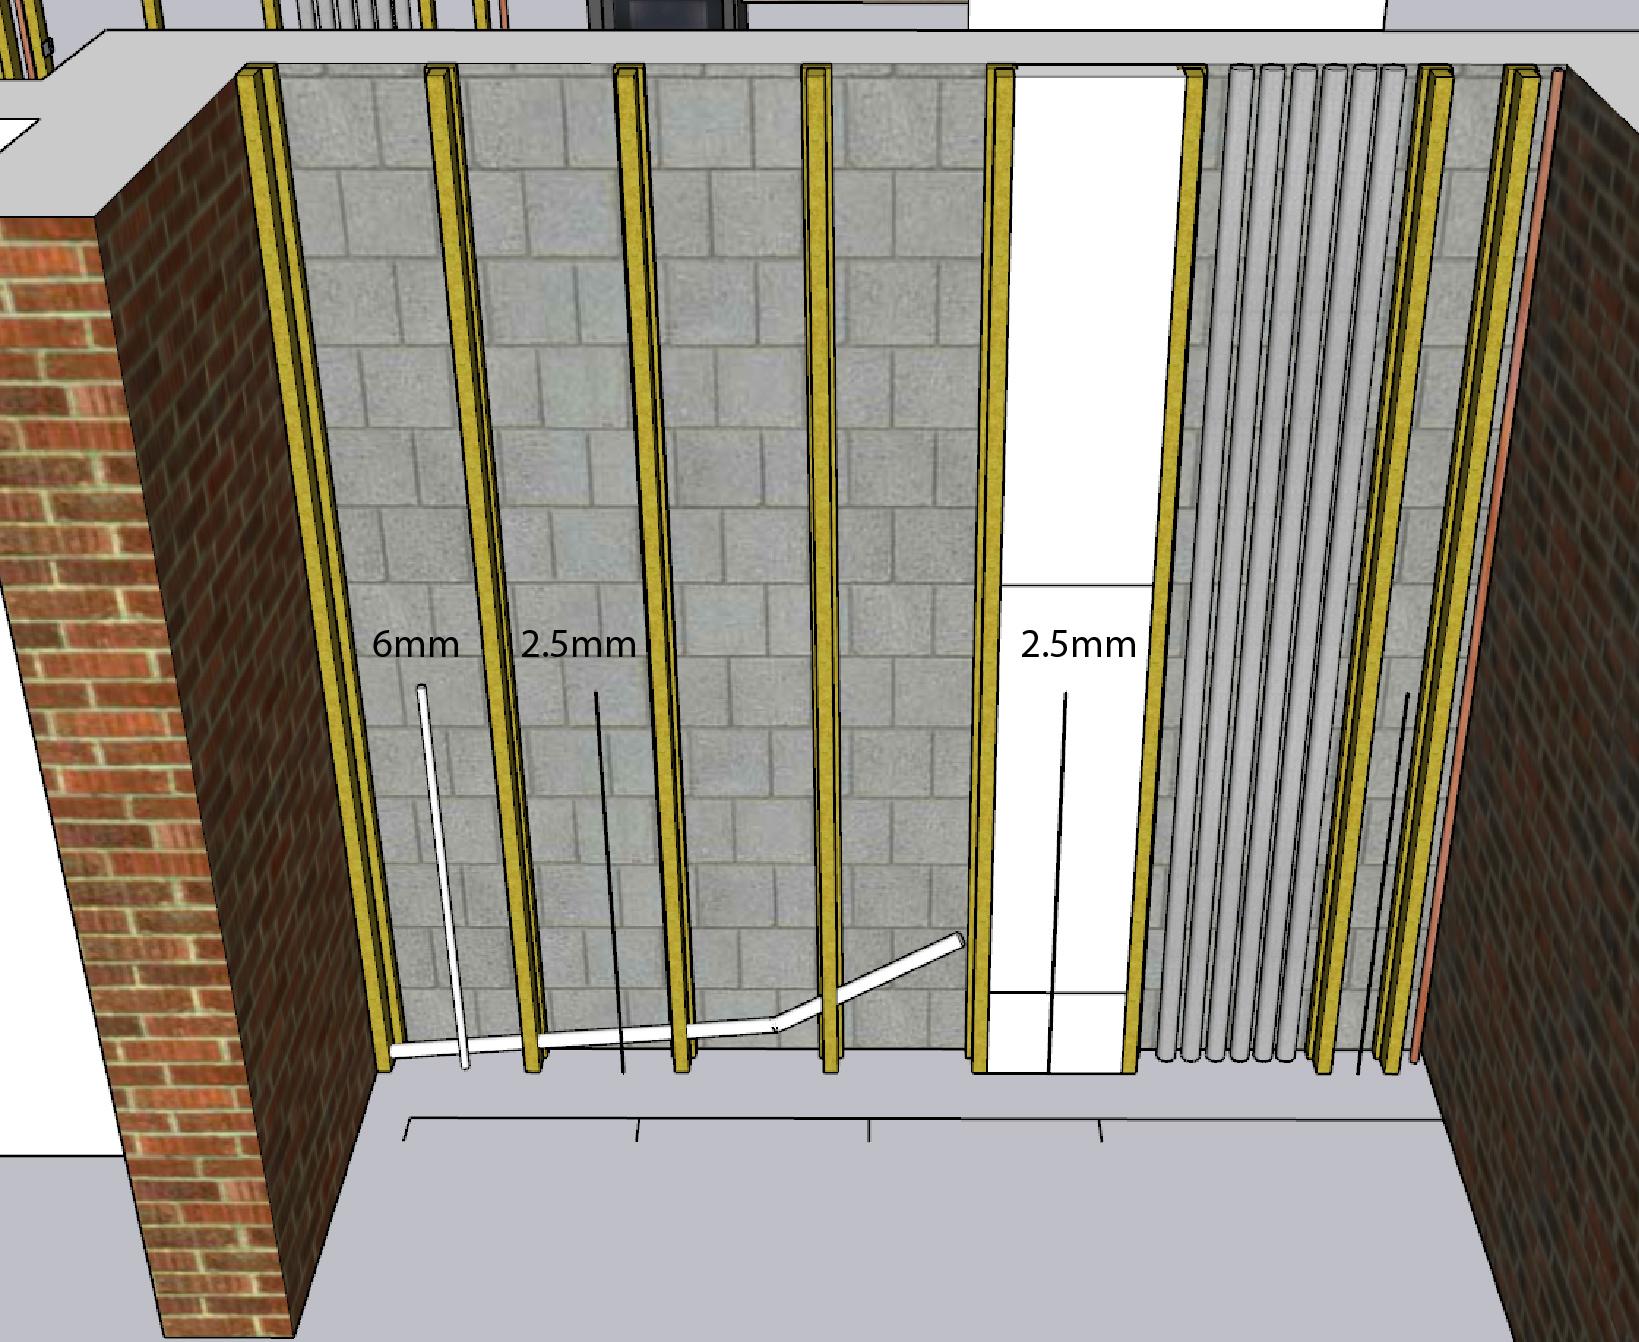
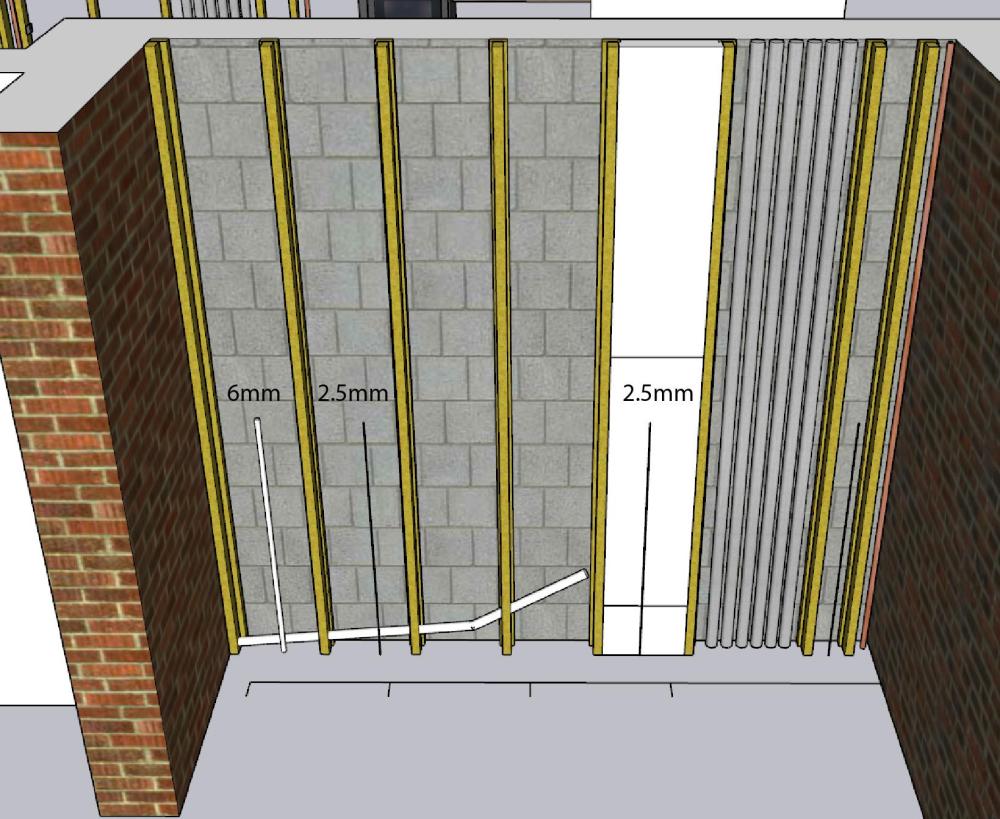
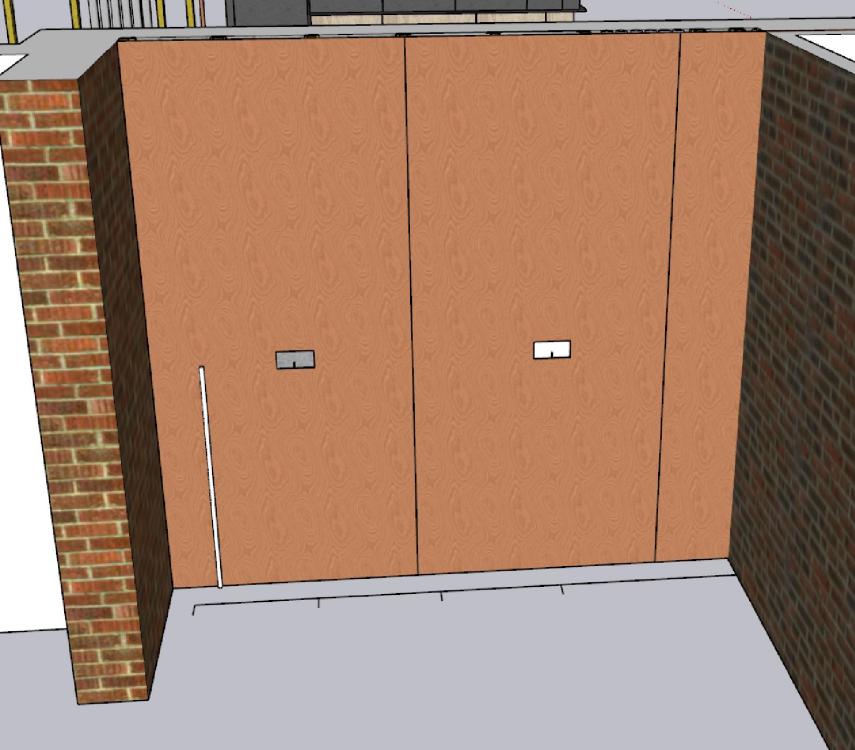
hi guys. About to start a stud wall in the kitchen which i intend to pack with 100mm slabs, ply over and bobs your uncle. However, am i better off running the 6mm for the oven (far left) surface mounted up behind the oven to the connection plate, so i dont have to de-rate it if it was to come up on the inside of the wall and therefore in contact with the rockwool? The oven will be full height so surface mounted behind wont be an issue. Cheers
-
Interconnected smokes, junction box?
Super_Paulie replied to Super_Paulie's topic in Electrics - Other
"just had a notification to say the house is massively on fire, better finish this pint and head off" -
Interconnected smokes, junction box?
Super_Paulie replied to Super_Paulie's topic in Electrics - Other
I guess i could just add and leave cables and then connect to them with Wago when the time comes, it's just adding joints whereas I thought the central location might have been the better option for future expansion and less joints in the system. -
Plasterboard - supporting at perimeter?
Super_Paulie replied to low_and_there's topic in Plastering & Rendering
my builder added in supports all along the perimeter attached/overlapping the wall plate. Looks like he used any old crap he found in the garden to be fair, but couldnt hurt i suppose. -
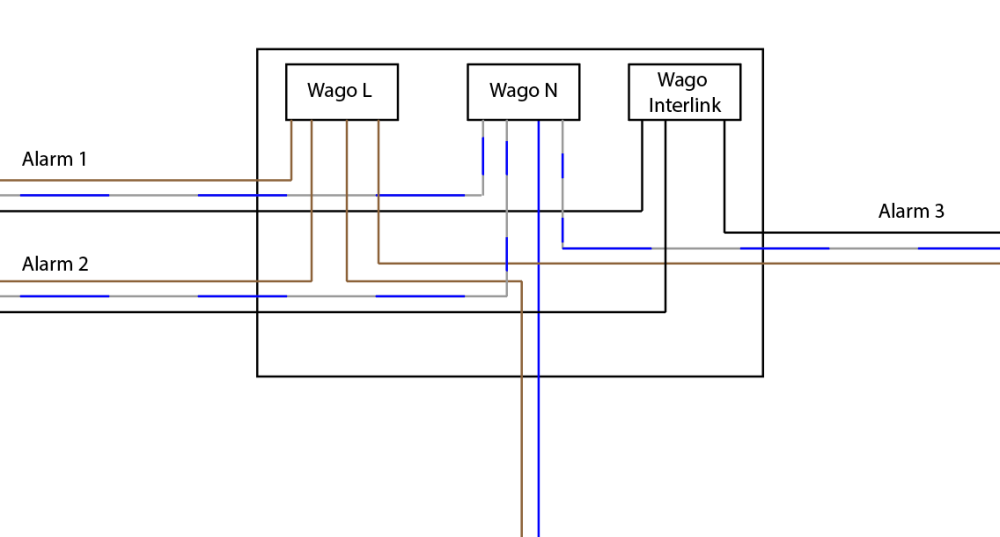
afternoon. Is there any particular reason why i couldnt use a central junction location to distribute my phase, neutral and interlink to my smoke alarms? My reasoning being that i would rather not have to remove final flooring in the future to get to the back of the alarms to chain it to a new one, i could have a Wago enclosure or similar in an easy to access location say under a hatch in the landing. So i can get all my new alarms in now in the new side of the house and in the future i could add in new to the existing part without having to pull all the new floors up. BC are happy with my proposed locations to LD3 but i would in the future add more to upgrade to LD2.
-
Airtightness approach for suspended floor PIR insulation?
Super_Paulie replied to Sparrowhawk's topic in Heat Insulation
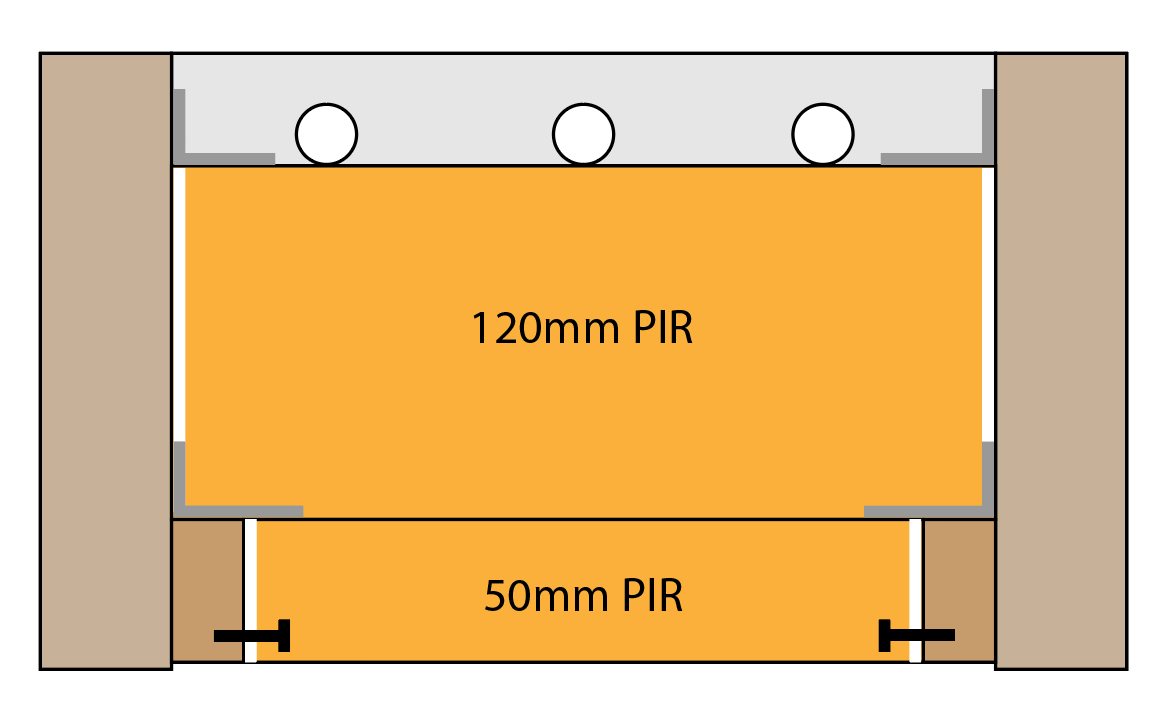
rightly or wrongly i did this. Air tight Illbruck foam all round and aluminum tape over the edges. In places in the existing house where i was also limited to 100mm i did the same but with 2 lots of 50mm. If i could go back and pull it all out and replace with deeper joists/PIR then i would, but hindsight is a wonderful thing.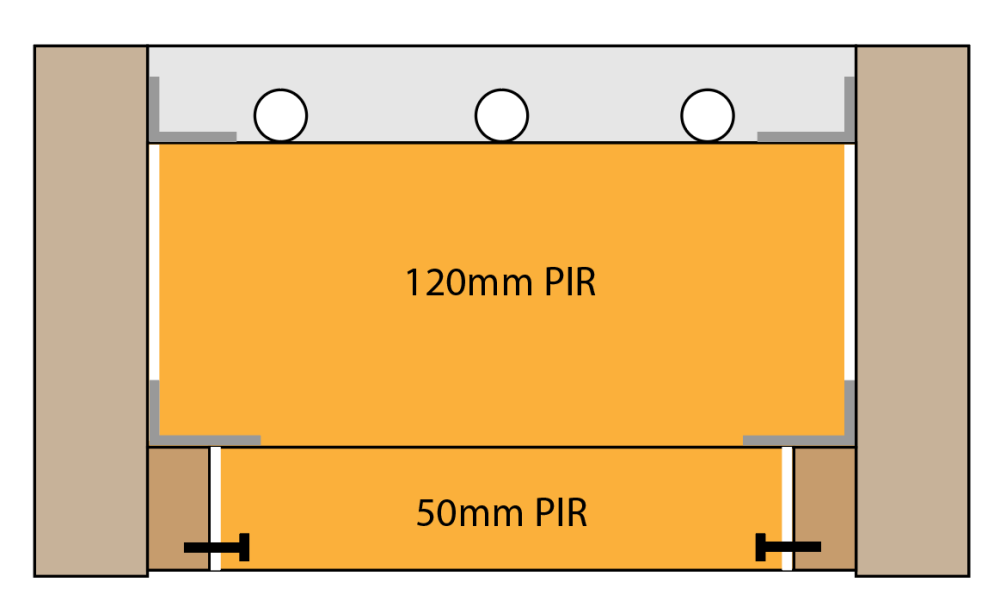
-
Snake the return up and down under the floor from the rad and use a trv to control the floor temp? Cost you nowt.
-
Probably, i still have access to the plumbing upstairs. I have the UFH re-joining the main return as the very last tee and the bypass rad the tee before. So I guess the order, from boiler down is UFH, bypass rad, rads. Therein lies the problem I guess, so I could re-jig the above order to get the bypass in as the last in the system if that sorts it.
-
Gentlemen, thank you, I'm now on board. For what it's worth, the UFH you guys helped me build works an absolute treat. Few little snags to iron out (reverse circulation from the bypass rad) but other than that I am well pleased with how it's turned out and it seemingly costs sod all to run compared to my previous rad only system.
-
Evening. Looking for an easy to understand explanation here. I've got a 2 port buffer in the loft (along with my combi) on the return to reduce short cycling on my downstairs UFH. It works. When trying to explain it to a friend, I said it was there to add volume to the system so that it always has enough water engaged to not have a too hot return and shut the boiler down. That's correct right? My mate then asked why did I bother lagging the tank if my intention was to get the return temperature down. I had no answer for him, which leads me here to enquire as I've seemingly built something which works but I don't fully understand. Can anyone sum this up for me?
-
got quite a few Sonoff relays, all work fine but i guess a risk of burning your house down id imagine.