

Jeremy Harris
-
Posts
26430 -
Joined
-
Last visited
-
Days Won
360
Everything posted by Jeremy Harris
-

Our Jeremy's in a podcast !
Jeremy Harris replied to TheMitchells's topic in General Self Build & DIY Discussion
Thanks for all the messages of support, they are appreciated. Sorry for the delay in replying, but I've just spent a couple of hours writing a PM to Jamie, copied to the staff and another here, explaining, wholly from my perspective and what I've heard subsequently, what went down back in May. Sadly he's blocked PMs from me so won't get to read it....................... -
Our Jeremy's in a podcast !
Jeremy Harris replied to TheMitchells's topic in General Self Build & DIY Discussion
Jamie, Because this isn't really the best place to give you the answers you seek, and put right the assertions as to my involvement you've made, I'm going to send you, and my other critic, what I know, by PM. I will also copy in all the other founders of these forum. None of us know the whole story, I have to say. BTW, your comment does explain why you were so offensive on that (since deleted) post, but I'm at a loss as to why others feel the same. -
Our Jeremy's in a podcast !
Jeremy Harris replied to TheMitchells's topic in General Self Build & DIY Discussion
It's posts like this that are posted without knowing the truth, and misrepresenting me in the process, that are part of the reason I no longer post here. For the record, I had NO part in the closure of Ebuild, in fact I was the one who got a judge off the golf course on a Saturday morning to advise the owner of his legal position regarding the individual who DID cause the closure of Ebuild! The founders of this group know the full story, and much of the background is simply that the chap running Ebuild didn't have the time to do the technical stuff needed to keep it going, nothing more exciting I'm afraid, and the chap that threatened legal action (NOT over something I'd posted!) was the last straw. Anyway, dragging up history, especially history that's not directly linked to me, many months later, wouldn't have been appropriate. in those podcasts. And, just to set the self-promotion rubbish straight, Corrine Mitchell asked the chap who runs that podcast thing ti contact me months ago, not me. He contacted me and I didn't respond for months, not really the sign of someone after a bit of "self promotion" is it. Finally, I started moving my blog before this group was started. All the founder members here know that, as some of them helped me get the content from Ebuild in a format I could use. I pay for that blog, and gain not a single penny in revenue from it. It's comments like these (and I did read those that have been deleted about me, too) that are part of the reason I don't post here. -
Am I being too sensitive or should I be concerned.
Jeremy Harris replied to MikeSharp01's topic in Surveyors & Architects
The wisest words I've heard in a long time. Outside our self-build, I've managed some fairly large projects. Biggest was the replacement for the old Lynx helo, budget initially around £1.4bn, last before retirement, a much smaller project, relocation of all UK defence research to two major centres, including a building project that cost around £95M. The biggest lesson I learned, fairly early on, was "listen and take heed of everyone, no matter where they rank in the programme hierarchy, as more often than not, it's those lower down the "food chain" that make the most incisive observations and contribute some of the greatest benefits". As for architects, yes, they are OK at art and design. Yes, they add value by giving your house the touches that only an artistic eye can bring to a task, but every single one I've met, with a single exception, wouldn't have a clue about designing a low energy house, and, from tales I've heard from many, many, other self builders, most really couldn't give a monkey's about detail design - they chuck that over the wall for an engineer to try and solve. The reason we didn't use an architect? After weeks spent going around talking to local architectural practices, giving them a topo plan, some sketch ideas and an 8 point ordered, bullet brief, they ALL, produced such crap initial sketches, that didn't even meet out most important criterion, that I gave up on them as a waste of space. I would have used an architectural technician, though. We spoke at length to a really good one, who wasn't so far up his own backside as to be happy to listen to others with technical input, and take heed of what they were saying. I'd have gladly used him, but during the year's delay overcoming our plot purchase problems he decided to retire, which left a bit of a gap. The result was I decided to do the task myself, simply because I didn't trust any of the architects I'd met to design a dolls house to the required spec. -
There's slightly less solar gain through most triple glazing, because there are three panes of glass that will absorb more radiant heat than two panes of glass in double glazing. Also, there are usually two low e coated surfaces inside triple glazing, arranged to reflect radiated heat back into the house, so there is a lot less radiated heat loss. The fact that triple glazing makes a significant reduction to heat loss, together with the fact that it's usually fitted to houses that are better insulated and sealed than most, means that overall the slightly reduced solar gain isn't that significant when compared with the much lower overall heat loss of the house, so there is almost always a net solar gain, I think. One thing we noted was that the inside pane of our triple glazing (before the heat reflective external film was applied) would get pretty warm - often up to 35 to 40 deg C on a sunny day. With the heat reflective film the inner pane is barely warmer than the room temperature. My view is that this solar heating of the inner pane of glass contributes quite a lot to the heat conducted and convected into the air in the house, as the warm window panes are acting as big convection heaters, in effect. Since having the film fitted a couple of weeks ago our cooling systems haven't come on, whereas before they would come on most days by mid afternoon. To me that's a pretty good indicator that it's working very well.
-
I always use PU adhesive for wood and used it (with LOADS of screws) to fit the marine ply down to our bathroom floors, ready for tiling. There are several different brands, all equally as good, but Geocell Joiners Mate is locally available (Screwfix) in big containers. Gorilla do the same stuff (in fact the original "Gorilla Glue" was a PU, but they now sell a range under that name). Balcotan is another good brand, and was the first one I used when boat building. All these PU adhesives are moisture-curing, totally water resistant and foam slightly as they cure, so they are gap-filling to a degree. They are handy to have around, as they glue a lot of things other than wood fairly well. Screwfix sell a very fast cure Evostik branded PU in a 300ml cartridge, that cures in around 5 mins. That's ideal whenever you want a fast-curing bond, and I found the stuff handy for all sorts of little jobs, like gluing little noggins of timber in place to hold pipe clips spaced off things. Wear gloves, as the stuff makes your skin go black and does not wash off. The skin will remain black for days until it wears off and new skin grows. It can be washed off skin reasonably safely with IPA, as long as you get to it before it cures.
-
FWIW, one of my car charging points is a 16A one, around 4m from the outdoor consumer unit and RCBO, and that's on 2.5mm² SWA, in fact I could have got away with running it on 1.5mm² SWA quite safely at the maximum continuous power of around 3.7 kW, with a voltage drop of just under 2V. 2.5mm² is a massive overkill for my car charger, but I happened to have a spare left over length, so used it. It does mean I could upgrade that charge point to around 8.3 KW in future if I needed to (around 36A with a 2.74 V drop at 230 V). Most cables are capable of carrying a lot more current than people might think, especially in short lengths. As Dave says, it's almost always voltage drop that determines the cable size used, not the cable maximum current rating. If you want to know the cable size and voltage drop for any given cable type, length and load, there is a useful calculator on the TLC website (in fact there's lots of useful information about wiring regs on there too). This is a link to their technical section:https://www.tlc-direct.co.uk/Technical/index.html And the cable voltage drop and size calculator is here: https://www.tlc-direct.co.uk/Technical/Charts/VoltageDrop.html From that you can see that your 2m length of 2.5mm² T&E, clipped to a wall, with a room temp of 25 deg C, will work at it's max current rating of 27.8 A (6.39 kW at 230 V) with a 1V voltage drop. For a max current of 16A, then you would be safe with 1mm² T&E over 2m, believe it or not (not that I'd recommend it!). With 2.5mm² T&E you could run a length of up to 40m and still just be just on the 5% voltage drop limit.
-
My experience was pretty grim with Buildstore. I initially insured with them for 18 months, thinking that would be long enough. We then had the borehole problem and overran, so I got a 6 month extension from them (far more expensive than 6 months worth of the original policy). I still hadn't finished at the end of the extension, and rather stupidly (although to be fair I was having some health problems at the time) I let the policy lapse for three weeks (so we had no insurance at all - worrying, and I'm glad nothing happened). I then asked for another extension and was quoted a really silly price by Buildstore, like double the original premium, so I started shopping around online. The first quote was refused as soon as I answered the question "have you ever had insurance on this project before?" and I answered "yes". This happened three or four times with online insurers, so I rang one up. He quite openly told me that they all had a policy of never insuring anyone that had been insured by another company, so ensuring that you went back and paid the extra-high premium for renewal. This annoyed me, as I'm not even sure it's legal, it seemed very much as if a cartel was operating, to keep premiums high. I found a broker that specialised if self build and renovation insurance and they put together a tailor-made policy to suit our needs. It was a lot cheaper, because it recognised that the house was secure, weatherproof and had safe access, with no remaining "building site" risks externally. It can also be converted to buildings cover when we complete, at no additional cost, for the remaining period of cover. As above, read the small print VERY carefully. My experience has been that there are some potential problems with some standard policies. Finally, to end on another insurance-related point that may be of interest, our house contents insurance renewal arrived earlier this week. The premium was much the same as it has been for the past goodness knows how many years (I'm lazy and haven't bothered to shop around). It includes a maximum no claims discount (we've never ever claimed on a contents policy if over 30 years). The odd thing was that the renewal notice had loads of errors, and they ask you to check this as it forms the basis for your cover. The errors were serious and included "unknown" by things like construction, roof covering, security systems, age, number of occupants, whether they were smokers, etc, and some really odd things, like it said we had lodgers (no idea where that came from, we've never ever had a lodger). So, I rang them (the usual nightmare of being on the phone for half an hour before you eventually find a way to speak to a human being). I explained that we'd been insured by them for around 15 years (they didn't know this!) and that the renewal notice had more errors on it than facts. They tried to say that these weren't important, so I read the heading of the notice, that starts by saying that if any of the information below is in error your insurance may not be valid, they may not pay any claim and they may choose to just cancel the policy without notice. At that point the chap asked if I'd like to give him the missing or erroneous information, all the time assuring me that it wasn't really important. At this stage I said that yes I would, but given the fact that I'd (by then) spent 40 mins on the phone trying to sort this out, I was sorely tempted to just not renew with them and find an insurer who was half way competent. This induced a sudden attitude change, with an apology, a sort of vague muttering about their computer system having some problems (how many times have we all heard that one!) and that he'd try and see what he could do to put things right as quickly as possible. I gave him the details, and said I wanted a new renewal notice in writing, so that I could check the details were correct before renewing (it runs out at the end of this month). Imagine my "surprise" when the new premium turned out to be 40% cheaper than the renewal one we'd originally been quoted................. And some wonder just why I'm just a bit cynical about insurance and finance organisations.
-
We wanted fairly chunky looking, 285mm wide, window boards and I ended up buying some 30mm thick solid timber worktops and ripping them in half. It worked well, as we wanted a finish to match the natural lacquer finish of the inside of the windows. The boards I used were radiata pine, 600mm wide x 2400 long x 30mm thick. They were "engineered" boards, made from jointed strips, but as the radiata pine is very straight grained and completely knot-free the joins don't show at all. I finished them with several spray coats of 2 pack satin lacquer, rubbed down with a Scotchbrite pad between coats and we're pleased with the result, they are a very close match to the finish of the windows.
-
Oh it was definitely rock solid and not going anywhere! It is a bastard of a job to change the pan, though. That vinyl is glued down with something like Evostik, and whoever did it did a cracking job. I've spent two whole hours with a pot of MEK trying to prise the stuff off by running the solvent underneath it to soften the glue. I tried heat from a heat gun, but that didn't have any effect at all. A scraper and patience with dribbling solvent to dissolve the glue seems the only way to get the stuff off. I ended up having to go out for fresh air after an hour of this, as the fumes were that bad. Next job is to get out the big 9" Makita angle grinder and see if I can grind some slots in that lump and try and chisel it off. I was hoping to get the floor cleaned up and tiled by tonight, so I could make a start on fitting the new loo and basin tomorrow, but I can't see me doing any tiling today - it'll probably take another hour just to get rid of that lump of concrete off the floor...................
-
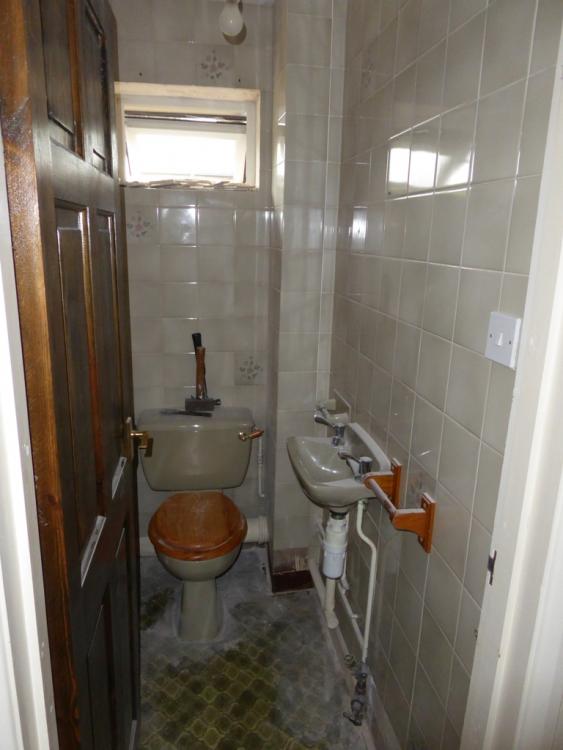
As some know, I've been pre-occupied this week tarting up the only room in our current house (which is shortly going on the market), that I've not decorated or renovated, the downstairs loo. It's always been grim, but it works and we've just got used to it, so have never done anything about it. It's green. In fact everything in it is green, except the ceiling. Green tiles from floor to ceiling on all the walls, green WC and cistern, green wash basin, green vinyl flooring, even a bonded to the wall green ceramic toilet roll holder. It even had a green loo seat until we changed it. We had a minor disaster a couple of weeks ago, when a load of tiles fell off one wall, it turned out they had been stuck on to an emulsion painted wall................... This meant I had to do something with it, as there was a right old mess left and there seemed no point in trying to patch it up. The decision was made to buy a cheap white fitted WC unit, back to wall pan and a very narrow white basin unit, with a slim white ceramic basin on top (it had to be slim, as this loo is so small it wouldn't come close to passing current building regs). This is what it looked like when I'd picked up all the loose tiles and made a start on the wall behind the door: Lovely, isn't it? That's the main stopcock on the floor at the right, with a stub of black alkathene pipe coming up through the slab and a lovely neat coil of earth bonding wire clamped to it. I think the green colour of the WC, basin and tiles is probably "sage green" or something similar. I've always thought it was hideous, but clearly someone went to a lot of trouble to get the same shades of green everywhere. It's undoubtedly original, from 1982/3 when the house was built, although why on earth they painted the walls and then stuck tiles on them is beyond me. AFAICS, there is only just a thin mist coat of emulsion on the walls, too, and the paint on the skirtings was applied after the tiles were put on, as the top of the skirting is bare wood when the tiles are removed. We've lived in this house for a few years now, even though it was only ever supposed to be temporary, until we found the house we really wanted, as we had to move in a hurry. When the government compulsorily move you around the country (as they do when you get to a certain level) they give you a "generous" five days to find a new house -any longer and they don't pay your removal expenses and legal fees. I've learned over the time we've lived here that the joker that built it had some unusual building practices. For example, when we came to replace the doors and windows, we found that the thin plywood external soffits extended over the top of all the windows and were plastered inside as the top of the window reveals. Another surprise came when I re-did the bathroom shortly after we moved in (that was also floor to ceiling green, like the loo). The loo wasn't screwed to the floor. The screw holes were filled with something like mortar, which I thought at first was just covering the screw heads. It wasn't and so after an hour or so of trying to work out how it was fixed down to the concrete floor, I just smashed it up with a lump hammer. What I found was that the loo had been fixed to the floor with a large lump of concrete. Knowing this, when I came to remove the other loo I had a feeling that it might well be fixed the same way (it was the same colour, so I think was fitted when the house was built, like the one in the bathroom). Knowing this, I decided to just run a masonry drill down the fixing screw holes, and lo and behold there were no screws, So I drilled both out as deeply as I could, to reduce any key to what I was sure would lie underneath, another girt great lump of concrete. I didn't want to smash the loo, as it makes a hell of a mess to clear up, so decided to gently tap around the base with a bolster and lump hammer. To my surprise, after a few minutes the whole thing lifted clear, leaving this delightful lump of concrete stuck to the concrete floor: The next job is to chisel this off the floor, then remove the stuck-down vinyl flooring and crack on with getting the floor tiled, so that I can fit the new loo and washbasin units, with a new stop cock inside the wash basin cabinet and new wall covering. Because this is a budget job, the walls have had the tiles removed, been belt sanded to get them roughly smooth and are being covered with PVC wall panels, in a sort of cream colour. Much cheaper than tiling, and much quicker, and I reckon it will tidy it up enough to sell. I do just love the "lump of concrete to fix the loo" idea. I think I've replaced around 8 or 9 WC pans over the years, and have never yet seen one fixed down like this, yet for this builder/plumber (a local firm, still in business) it seems to have been his normal method.

-
Data Cat5 and other wiring
Jeremy Harris replied to Auchlossen's topic in Networks, AV, Security & Automation
Worth noting that it is damned hard to pull cables through posijoists once the plaster board is up and the floor down (ask me how I know this..................). I think that running fat flexible cable duct around through them might be an idea, with a loop of pull-cord, so you can pull cables thorough and still leave the pull cord in place for use in future. There are a couple of places I wish I'd done this, and can say from experience that when I decided to split the kitchen/dining room ceiling light panel array into two, after it was installed and the ceiling plastered and painted, it was a complete PITA trying to run new cables to the kitchen end, as they snag on the metal webs in the posijoists. For anyone doing this, where the only access is a series of down lighter sized holes, I suggest putting the cables in a bit of 20mm plastic conduit and then bending that gently and feeding it up through a down lighter hole and through the posijoists and insulation. It will catch on the top member of the first posijoist it encounters, but if you can get your hand up the same hole you can pull the conduit down in a gentle bend and get it through. Once it's through the first one it's plain sailing through the rest. The conduit needs to have a cap taped on the far end, with smoothed corners (I machined up a bit of 20mm acetal to a bullet-shape that plugged in the end of the bit of conduit). Once I had this trick sorted it was relatively easy to get the cables where I needed them, but it would have saved hours of faffing around if I'd had the foresight to fit large (say 50mm) flexible conduit around a few places before hand. Given that rolls of black 50mm flexible conduit aren't that expensive, it's an investment I wish I'd made. The only thing to watch is cable ratings, not likely to be an issue at for lighting or control circuits, but you may need to uprate heavier cables if they are run in conduits. -
Data Cat5 and other wiring
Jeremy Harris replied to Auchlossen's topic in Networks, AV, Security & Automation
Sure, the kitchen ceiling speakers and Bluetooth amp I bought were cheap, from ebay, with a small amplifier/receiver that's powered from a plug in power supply. They are still available from the same seller: http://www.ebay.co.uk/itm/152027262383?_trksid=p2057872.m2749.l2649&ssPageName=STRK%3AMEBIDX%3AIT I was surprised that the sound quality is as good as it is, given the low price. They seem to connect to my tablet, my wife's iPad and my laptop with no problem at all. Unlike some Bluetooth amplifiers, this one does not have the very annoying voice "feature" that tells you when it's connected or not, it just gently beeps, which is fine. I have another Bluetooth amp that is so annoying I never use it. Every time it connects the thing says "Blutooth is connected", very loudly, with no way of turning this extremely irritating feature off (the brand name is Nobsound, so if you don't want a "talking amplifier" then choose another brand!) -
Wall vents for mvhr
Jeremy Harris replied to ProDave's topic in Mechanical Ventilation with Heat Recovery (MVHR)
The instructions for our MVHR stipulated that the ducts through the walls should have a fall on them, sloping down towards the outside. I assume that this was to ensure any water ingress or condensation drained outwards. The plastic grills I have fitted at the moment also have two small water drain holes at the bottom, presumable to let any water that gets in, flow out again. There was also mention of the need for the ducts connecting to outside to not have any dips in them; they had to slope outwards towards the external terminals and inwards and down to the MVHR condensate drain tray. I'm guessing that this is to avoid getting a pool of condensation anywhere in those ducts. -
Data Cat5 and other wiring
Jeremy Harris replied to Auchlossen's topic in Networks, AV, Security & Automation
The builder is right, I've found that the wifi signal isn't as good around the house with our timber frame as I expected. Interesting that he thinks it's the insulation, as I stuffed loads of rockwool in all the internal walls, to cut down sound transmission, and didn't give a thought to it affecting the wifi signal. I added a really big co-linear antenna to the wireless router that did make a useful difference, but I'm glad I also ran loads of Cat6 cable everywhere (I only used Cat6 because I got loads free, Cat 5 would have been plenty good enough). I have ethernet sockets in every room, two or three in some rooms, all lead back to a modular wall plate in my study, where there are a lot of short patch leads that connect to a multiport switch (can't recall whether it's a 12 or 16 port one, but I've used most of the ports). I also ran Cat 6 across some rooms, for example in my study I have four runs going from the modular plate on one wall to the wall opposite, so that I can easily hook up the printer one side of the room and the desktop the other side if I want to. The other place I ran cable was wherever I thought we might want a TV, as most have connectivity now, for iPlayer and the like. One place I wish I had run Cat6 to is the ceiling void in the kitchen, as I've retrofitted ceiling speakers with a Bluetooth amp in the ceiling, but it would have been neater to have put a remote multimedia amp up there, with a network connection (the ceiling speakers are great, not expensive ones but nevertheless surprisingly good). On the topic of speakers, it's also worth running speaker cables behind the walls wherever you think you might need them. I initially connected these up to wall plates with speaker terminals on, but recently changed this and have fitted in-wall speakers, that fit inside the 45mm service void (total depth around 57mm). These also sound very good indeed, with some added rockwool stuffed in the void around them. It's nice not to have speakers cluttering the place up, and the ones I fitted barely protrude from the wall surface. I ran lots of satellite cable around, with dual runs to any room or wall that I thought might ever have a TV. I ran these all back up to the point high on one gable, in our service room that's on the first floor. We get lousy radio reception, so as well as a dish with a 4 way LNB, I also fitted a band II antenna plus a DAB antenna on that end gable, with a duct to bring all the cables in. At the moment I'm multiplexing one of the satellite feeds, plus the band II and DAB feeds and demultiplexing in the living room wall plate and in the eaves void for the drop down to my wife's study. Sadly I still can't get DAB, but FM radio is just about OK. We can't get a TV signal since the digital switch over, so all the TVs are using Freesat. I'd definitely run multicore cable from wherever you think you might have controls to wherever you think you might fit thermostats or programmers. I ran a length of 4 core cable from the wall in the hall (where the thermostats are) to the wall near the UFH controls and wish I'd run 8 core, as I could then have avoided using wireless thermostats (although the wireless stats do work well). The 4 core cable is just for the MVHR controller, but knowing what I know now another 4 core run would have allowed me to fit the ASHP controller next to it and use it as a combined thermostat and programmer. I embedded some temperature sensors in the floor slab, one outside in a shielded enclosure on the North wall and some on things like the ASHP flow pipe, the buffer tank (around mid-point), the hot water preheat flow temp going into the plate heat exchanger. These are all DS18B20 sensors, encapsulated with epoxy into short lengths of 6mm OD brass tube with screened 3 core cable from each, leading back to the wall by the UFH manifold, where I have a data logger mounted. This measures all the sensors every six minutes, displays the data and stores it on an SD card so I can see what the house is doing when conditions change. More fun and educational than practical, really. If you're MVHR needs, or you want to fit, a manual boost switch, then you can run two core cable for this. Ours is controllable from the controller in the hall, and has a one-push "party" button to increase the ventilation rate for a pre-set period of time (programmable). I added a programmable humidistat with a humidity sensor in the extract duct, and this is programmed to switch the MVHR to boost if the humidity exceeds a preset level. It also displays the humidity. I find this needs re-setting in the autumn, when the humidity level rises, and again in the spring, when it drops, as otherwise it tends to either not operate when it should or operates when it shouldn't. It's easy to programme and was relatively cheap. It was also easy to wire to the boost connection on the MVHR. -
Definitely looks like a very old crack. When welding, don't empty the fuel tank, fill it right to the brim. Diesel liquid doesn't burn, only diesel vapour is flammable, and then only when there is lots of oxygen around, so if the tank id full of diesel it's effectively inert and safe; any fire can only start outside the tank if the vapour concentration is high enough (which needs the diesel to be hot) and if there is enough air around.. I've welded near petrol tanks on old cars (Mini van and traveller rear subframe repairs!) many times, and the key was to fill the tank up to the brim, poke the TIG nozzle down the filler and just squirt in argon (with the power off, it displaces any air left in there) put a cold, wet towel over the filler cap (to cool any vapour that may escape down below flash point) and then weld in short sections, with wet rags to cool off hot bits and stop the heat spreading. In your case I'd just fill the tank with diesel, put the cap on, put a wet towel over it and have a hose nearby so to can cool things down after a few minutes welding. As above, it would be best plated on the top and bottom if you can (not the sides, there's very little stress in the web - the main loads are taken top and bottom). It'll need a lot of grinding out, and I'd make a nice big vee down the break with the grinder and run several beads in there to fill it, concentrating on getting the best weld top and bottom, where the stress is, so probably best to start in the centre and work towards the top and bottom, so any inclusions are more likely to be in the near-zero stress region in the middle.
-
I can believe it, rather too easily. I've been friends with a teacher at a comprehensive for around 15 years, and her tales of some of the frankly juvenile behaviour by some teachers towards other teachers surprised me.
-
Wall vents for mvhr
Jeremy Harris replied to ProDave's topic in Mechanical Ventilation with Heat Recovery (MVHR)
No, it's not a requirement, but it is a big (can be VERY big) energy saving measure. With a well-built and well-sealed house, with a reasonably good insulation standard, then it's pretty common to find that ventilation heat loss dominates, especially for larger builds, where insulation has less impact on energy use. For our build the MVHR saves around 50 to 60% of the total heat loss, so our annual heating energy bills would be roughly two to three times greater without it. Any saving from MVHR will vary a lot with the overall insulation level, the level of airtightness and the size of the house (for small houses insulation tends to dominate heat loss, for large houses ventilation tends to dominate). Unless the house is significantly better than the airtightness level in building regs, MVHR (even in a single room) probably doesn't give any worthwhile saving, though, so the decision is quite tightly linked to your airtightness target. For example, building regs allows a pretty draughty 10m3/m2 floor area/hour, with a pressure difference during the air test of 50 Pa. Our house is just under the passive house limit, at 1.22 m3/m2/hour, so makes MVHR worthwhile. If the air leakage was more than about 5m3/m2/hour then the saving from fitting MVHR probably wouldn't be worth it, in terms of energy cost saving. It'd probably still be worth it in terms of much improved air quality, though, and some fit MVHR just to gain that benefit alone. -
Me neither. Teaching apprentices in tech college was bad enough at times! Seriously though, I have a friend who teaches in the local comprehensive. I really do not know how she copes with some of the stuff she has to deal with every day. Neither do I understand why she sticks at the job, when most evenings she comes home deeply stressed by something that's happened that day. No matter what teachers do they are going to get it in the ear from someone. If they comply with school policy then the chances are parents will have a go, if they try and appease parents then the chances are their management or even OFSTED will have a go. They seem to tread a tightrope, every day, with the worst aspect being that they have been over-regulated to the point where they can't use their common sense, for fear of breaking some rule or another.
-
It was fairly common in years gone by to just dig a hole and build a brick-lined chamber, with a few bricks missing around the top to allow the liquid effluent to seep into the ground. They are far from being hygienic, as there was no treatment at all with a system like this, and nothing to stop pathogens from breeding and infecting the soil around the tank, or even penetrating aquifers and watercourses. I helped dig one out many years ago, and all the soil around the thing was deep black and exceedingly smelly. We dug out all the soil for around three or feet away from where the old brick lined tank had been, and spread it over a field, where it will have gradually been made safe by normal soil bacteria. Not a pleasant job, it has to be said! We replaced it with a Klargester "onion" septic tank, with perforated pipe land drains in pea shingle filled trenches running away across the adjacent field. That's still apparently working, but it's 20 odd years old, so my guess is that it's really just draining raw and untreated effluent into the field by now. A proper septic tank will be sealed and will have a drain (or drains) coming from near the top running out to relatively shallow land drains. Nowadays these land drains will be perforated pipe, but older ones either use unjointed clay pipe sections, with gaps between the joints, or field-type land drains with just a trench filled with stone or hardcore. All these forms of land drain stop working after a few years, in terms of treating the effluent, but there won't be an outward sign of this, the effluent will still drain away it will just remain septic in the deep soil, where there's not enough oxygen to allow aerobic bacteria to treat it and make it safe.
-
Me too - having looked at some of the mechanical ones my first thought was that they would be a maintenance nightmare, which is why we ended up with a unit very like your's Dave. I doubt that Onoff has a cess pit, I too suspect that it's an old septic tank with land drains going somewhere. I've seen some old ones without land drains, where a few bricks have just been left out to allow the thing to drain, not nice putting raw sewage into your garden.
-
If you're off mains foul drainage, then there are three options, and the law was being changed to pretty much force everyone towards the most favourable one, in environmental terms, but I think that the EA (SEPA in Scotland, DOE in NI) just have too much work on to even look at enforcing the EU legislation on this. The least favoured option is a cess pit or tank. This has no means of treatment, will be highly septic (it's anaerobic) and needs frequent emptying, as it is just a sealed tank with no drains from it. You can now only fit one to a new build if it is for short term use or under special circumstances - BC try hard to dissuade their use. The next option is a septic tank. This is also septic (anaerobic, as its name suggests), but it makes the effluent it discharges safe by tertiary treatment by aerobic soil bacteria around the land drainage pipes that take the liquid effluent away. Septic tanks have a limited useful life, as after a few years biological films build up around the land drains and so stop oxygen reaching the soil around them. They then become septic and present a hazard because there is reduced aerobic tertiary treatment. After around 10 to 15 years the general consensus is that septic tank land drains won't be working as tertiary treatment and pathogens will be being discharged to the leach field, which is why the preferred option, treatment plants, have been invented. The preferred option is a package treatment plant, approved to the EU standard. This is not a septic tank, it operates under aerobic conditions, and so is very effective at removing pathogens and massively reducing the BOD (biological oxygen demand) of the discharged effluent. Treatment plants look a bit like septic tanks, except that they have a means to oxygenate the whole content (usually including the solids) by means of a mechanical system, an air pump, or some form of air permeable media and a ventilation system. The effluent from such a treatment plant is safe to discharge to a large soakaway, constantly running water course, a soakaway mound, or conventional land drains. No tertiary treatment is required by the drainage system, as the effluent is not septic and does not have a high BOD.
-
MBC Foundation EPS protection
Jeremy Harris replied to Leaway's topic in General Self Build & DIY Discussion
I just used galvanised mesh, buried just below the lower edge with crushed stone infill to the base of the cladding around the house. Shop around, and the price for expanded mesh varies a lot. I managed to get some surplus stuff at a good price. Leave the heavy duty DPM/radon barrier stuff folded over the EPS and place the mesh tight up against it. -
Bear in mind that, in all probability, the difference in applied policy between your own planning application and that of the sites around you is unlikely to be deliberate. My experience has been that in local government cock-up from incompetence or indifference is far, far more likely than conspiracy. If I was a betting person, then my money would be on your planning officer having recently become acquainted, or re-acquainted, with the law protecting wildlife at around the time your application crossed his/her desk, whilst whoever dealt with the other applications may not have had a recent experience with this bit of law, so just forgot about it. It's very likely that this was a desk-officer foul up, that wasn't picked up by the planning officer that signed off any of the decisions, in my view
-
This was only resolved because I prevented any access to the area by that notice. Various phone calls and emails to the council were just fobbed off until the contractors turned up on site late in the morning, saw the signs and rang me as my phone number was on the notice. As it happens I hadn't gone over to the new house that morning, mainly because I wanted to sort out the problem here, so when they rang I just walked out and chatted to them. They were nice enough, showed me the instructions they'd been given and they showed that the highways bloke had misled me, by saying it was nothing to do with them. They rang him to say they were blocked from accessing their equipment, or the job. He then rang me to ask if I'd let them on to our land. I said no, not until I have an undertaking from your department that you will reinstate the land to it's original condition. He then had something drafted by their legal people, emailed it to me, I agreed to it and let the blokes sort out the mess. The contractors were actually very good, they did a good job of putting things right, made sure I was happy with what they'd done and said they'd come back the following day and turf the area and that they wouldn't sign off with the council until I was happy. The apology from the council can only be described as grudging. They did apologise, but suggested I should have fenced the area to avoid confusion. When I replied that they had put a condition on our planning approval that prevented that area from being fenced, they didn't bother to reply.


