

Jeremy Harris
-
Posts
26430 -
Joined
-
Last visited
-
Days Won
360
Everything posted by Jeremy Harris
-
Yes, but be aware of the impact on the electrical supply if doing this with electrically driven compressors. Most compressors have a pretty high starting current, which is OK when you're only looking at one starting and drawing a high current for a short time, but may be an issue with a couple of compressors trying to start at the same time, which will probably happen with compressors in parallel, as they will all tend to want to start and stop at the same pressure. A 13 A outlet is OK for 3hp, but not really for 4hp, as 4hp = 3.056 kW = 13.28 A at 230 VAC, with a starting current that may well be over 20 A.
-
I can add that our aluminium clad timber windows, fitted with 3G glazing (4 - 20 - 4 - 20 - 4, so 52mm thick glazing units) are extremely good at keeping out sound. If anything they are too good, as the house is a bit eerily silent inside at times.
-

Cheap but good looking vanity worktop
Jeremy Harris replied to Jude1234's topic in Bathrooms, Ensuites & Wetrooms
Is it worth looking around for Corian offcuts? Corian can be cut with a router or circular saw without any real problems, and is one step up from laminate, I think. Not sure I'd use it in a kitchen, as experience with it in an office kitchen environment was that it stains badly, but it should be fine in a cloakroom (does anyone still wear cloaks, I wonder, let alone leave them in a cloakroom?). -
Car charge points all run from the mains supply, none run direct from PV panel DC, so that makes the wiring simpler. Both our charge points run from the external consumer unit. If you want to use a Zappi variable rate charge point, then worth looking at how far away from the meter box it's going to be, as I believe that the sensor cable for the variable charge rate sensing can only run for a limited distance, as can the wireless link, if you use that option. Also worth running the cables for this in a duct, as I think it's likely that things will change as charge points evolve.
-
Found a video showing exactly how to apply EPDM to an upstand like yours, might be worth watching, even if it's just so you know how the job should be done:
-
There is: https://www.rubber4roofs.co.uk/how-to-join-two-pieces-of-epdm
-
I've just dug out all the notes I made from conversations with Sunamp technical support. I can confirm that when the over-temperature switch operates the pump stays on and only the heating element stops working, so it sounds very much as if this switch needs resetting.
-
Pretty much all plastics have a much higher coefficient of linear thermal expansion than metals, typically around 6 to 9 times higher, so any plastic fascia, gutter or whatever will expand a lot more as it warms up than a metal one. There's no significant difference between any of the different uPVC formulations. The way to stop creaks and noises from this expansion and contraction is to fit the uPVC to allow for thermal movement, so that it then doesn't make a noise as it changes temperature. Problems arise when people butt the uPVC planks tight against each other when fitting them in cool weather, without allowing the required expansion gap at joints (covered by the joining plates, which must not be bonded to both uPVC planks).
-
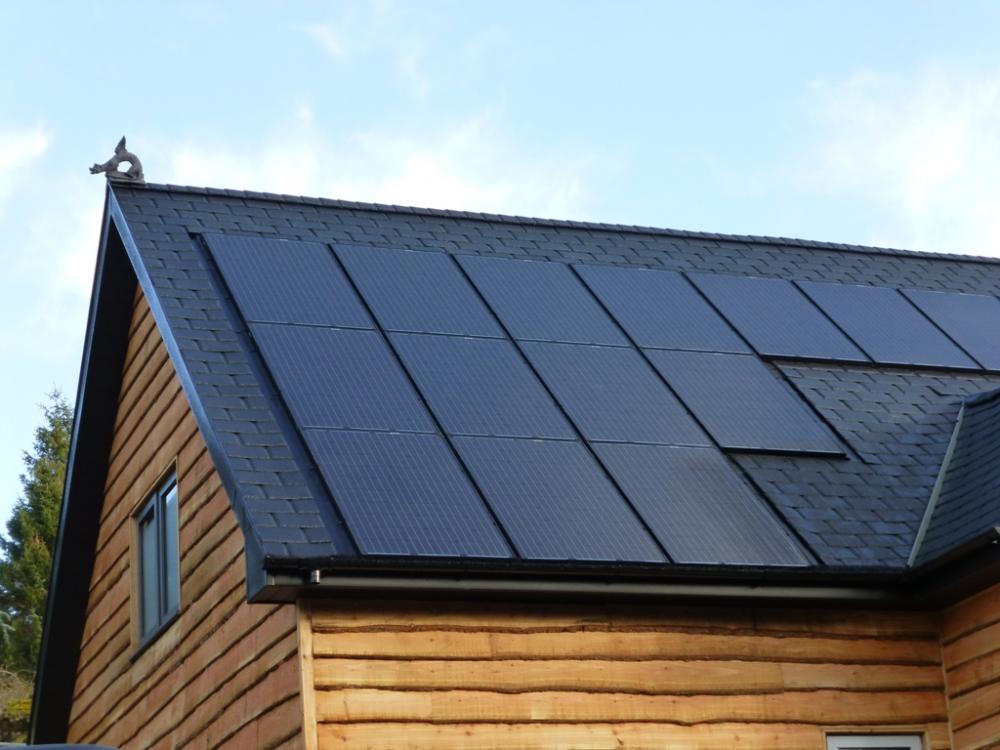
We opted for black uPVC, which went a bit against my view that we shouldn't use plastics, but the desire for minimal maintenance won out. I think the combination of dark slate, black aluminium dry verge and the black uPVC looks OK. We used the thick structural uPVC facias and barge boards, with tongue and grooved uPVC soffits.
-
I think you may be able to get away with only breaking out the concrete around the upstands, if the job is tackled with a great deal of care. It seems highly likely that the joints around the upstands are the cause, from looking at all the photos you've posted. One way to do this may be to use a diamond cutter, carefully set to a depth that cuts just deeper than the rebar, to cut through the concrete that's under the pavers around every upstand, maybe a foot or so away from them. The concrete won't have adhered to the EPDM, so, with luck, you may be able to carefully crack it away and lift sections off around each upstand without damaging the EPDM. A proper repair of the EPDM can then be made, running the EPDM right up and over the point where the window frame seats. The "moat" formed by cutting away the concrete would be an effective way of testing for water ingress after the repair, too. If the roof still leaks after doing this, then I think it may all have to come up, but I reckon it's worth a try at a minimally invasive fix first.
-
Sounds to me like there's no power getting to the heating element. That's in a tube at the front of the unit at the top, and I have a feeling that the overheat switch may only be in the power feed to the heating element. It's not air in the pipework, as when that happens the the lack of flow detected by the flow sensor switches the pump and heating element off. I think it's worth isolating the power, removing the lid and the neoprene insulation and checking the overheat switch. It's screwed to the side of the heating element tube, with two high temperature wires running to it. Between the terminals there is a reset button. Try pushing that in and see if it clicks to reset the switch. After doing this, try the unit again to see if it fires up. If it does, then there are a couple of possibilities as to the cause. The first is that the overheat switch may have a fault. There is a known issue with very early Sunamp PVs (earlier than mine) where a small number were fitted with a faulty switch, but I'm pretty sure all these were replaced. The second possible cause is heat soak after the unit has been turned off. This is an unusual occurrence, because it only happens if all the power goes off when the unit is hot and still heating the cells up. Normally there is a pump over-run timer that keeps the pump running for a short time after the heating element has switched off, to remove the residual heat from the element. If the power goes off to the whole unit (both power supplies) then the heating element tube can overheat from heat soak and cause the over-temperature switch to operate. I had this happen a couple of times, and tracked it down to times when the power had been turned off when the unit was still heating. If resetting this switch doesn't work, then more involved diagnostics are needed. There is a diagnostics mode that you can access on the main circuit board, that will run through a sequence of checks and give an indication on the LEDs as to the possible problem, but it does involve working on the unit with power on and a cover off, so best to try the overheat switch reset first.
-
Which Sunamp is it? Is it a Sunamp PV, as they are radically different to the Sunamp UniQ range? If it's the Sunamp PV, then the first thing I'd check is that both the line wires in the four core cable have power, as both need to be powered for it to run. Next check to hear if the pump starts to run when power is turned on to both line wires - the pump will run for a short time then stop if there's an airlock or air in the water. If nothing happens, and the lower two LEDs are on, then the chances are that the overheat switch has operated and will need to be reset as described above. If you have a Sunamp UniQ then they are completely different and the LED diagnostics are only visible with the control box cover off, and there is no pump or other noises from the Sunamp unit, other than a sound a bit like a crisp packet being scrunched up when it first heats from cold, accompanied by the click of the power relay in the control unit switching on and off every 30 seconds or so during initial warm up.
-
Which Sunamp model is it? Is it a UniQ eHW? If so, then check that the permanently on power is really on, and listen to hear if the power relay in the control box clunks on. Also check that the heater power supply is on. Also, look at the LEDS on the control board inside the box, as they will give a reasonably good diagnostic readout. If you have a Sunamp PV, then there's a four core power cable and both the line wires need to be powered for the unit to work. Clues as to problems with a Sunamp PV are to listen for the pump to see if it is running when power is on. Also, there are four LEDs visible on the side of the box that are a pretty good indicator of status. One problem that can make a Sunamp PV stop charging is an airlock in the pumped circuit. It's very sensitive to air in the water, which upsets the ultrasonic flow sensor. Another known Sunamp PV problem is the over-temperature switch operating. This is on the heater tube and can be reset by isolating the power, opening the top cover, lifting off the neoprene foam insulation and checking to see if the over-temperature switch needs resetting by pushing the button in the centre of it. If it's tripped then it will click and push in a bit.
-
Looking at the BBA certificate, Durisol is only classed as moisture resistant when an approved external waterproofing coating is applied. EPS based ICF systems won't have this limitation, as EPS is approved for use when buried underground (our foundation rests on 300mm of EPS). I'd be wary of trying to use any product outside its BBA certificate limitations, because of possible problems down the line, getting building control to sign off on something that's outwith the BBA (or equivalent) approval parameters and because of possible insurance implications. As an example, our house frame was built under the Irish approval system, which is recognised as being equivalent to BBA, but I still had to provide building control with evidence to show this.
-
It's wood fibre based, so my guess is that it won't tolerate being in contact with damp all the time in the subterranean areas, such as the retaining walls.
-
Any form of internal ceiling waterproofing is going to require two things: 1. A uniform fall to all walls in order to allow water to drain behind the wall membranes. 2. A level of insulation that meets building regs underneath it, as the water ingress will render any external insulation ineffective. All told I reckon this is a non-starter, and you're better off looking at another fix. Looking at what you've got, then it seems highly likely that the cause of the EPDM failure is as @Onoff says, the added strips around the upstands. This is fixable, by removing the pavers around those upstands, perhaps carefully removing some of the underlying concrete (if you have to - better if you can get access to the roofer-laid part without doing this) and then making a professional and robust repair to the EPDM where it extends upwards. At the same time, I'd also think about whether you can create some form of drain to remove standing water from around the upstands. One thought I had was whether you could slice the underside of the pavers around the upstand at an angle, then create a well-bonded mortar bed at an angle sloping away from the upstand all around, rather like haunching, so that although the top of the pavers adjacent to the upstands looked level and flush, the solid base under them sloped outwards.
-
It's too late now, but if they had gifted you the land before getting PP then the value would almost certainly have been below the SDLT threshold and may well have been below the CGT threshold as well, as getting PP usually uplifts the value of land by somewhere between 50 and 100 times. Probably something that's worth noting for others in a similar situation, though, so worth mentioning.
-
And therein lies the concern. This is a semi-basement construction, where some of the subterranean walls need to be watertight retaining walls, I believe. As such I share the concern about ensuring that the poured (presumably waterproof) concrete is without even the slightest flaw that might let water through. EPS is fine when subjected to continuous damp, but are some of the other ICF materials?
-
Sealing above the source of water that's making its way in isn't going to help, and may even make things worse. The golden rules with something like this are to prevent water getting to a low point where it might be able to penetrate, to provide the best possible drainage route for any water that does get to a critical area so it drains away from anywhere it might be able to penetrate and, finally, to ensure that the sealing system around any area where water could penetrate is sufficiently robust as to keep any small amount of water that might get that far out. Sealing on it's own isn't the fix, I think, you need to try and find a way to stop water pooling around the upstands somehow. Even if you do manage to seal things up for now, as mentioned earlier, a few freeze/thaw cycles on the trapped water will almost certainly cause further damage.
-
The simple answer is no, and I think you really need to get water to drain away as quickly as possible from underneath the pavers.
-
Not sure, I was just thinking that stopping water from sitting around the window upstands would help.
-
I'd not go near MVHR ducting with internal ridges; sounds like a nightmare waiting to happen when it ends up trapping dust etc, apart from the reduced performance it would have. I've never seen 75mm OD air ducting with ridges internally, so it might be useful to name the brands you've seen that I like this.
-
I think that all the 75mm OD, 63mm ID ducting has a smooth bore. I used the HB+ stuff and that's got a smooth, white, internal bore, but I'm pretty sure this stuff is all made to the same spec, and just sold with different labels on.
-
Would it be possible to provide some sort of linear drain across the pavers, by cutting slots out to an edge? Not sure if it would help much, but I think that, for any sealing fix to work it's going to help a lot if there isn't water sat in a puddle around the window upstands.
-
Looks like the pavers are always going to sit in a puddle of water, as there doesn't seem to be any way for water to drain away underneath them. Not sure how you can fix that easily at this stage. The water level looks like it can get up to the top of the pavers, so that's going to make the sealing around the windows challenging. Not sure how you can solve this, TBH. My best guess is that water is either getting in through the corners around the windows, where the original EPDM corner joints didn't look that neat and tidy, or it's just getting in through the window frame to EPDM seal and running under and into the blockwork. Any sealant you try and seal this with now is probably going to fail at some point, as this window and frame is going to be subjected to movement from thermal expansion and contraction plus the load from cars and people walking over it. Hopefully someone can come up with an idea that might fix this.


