Nickfromwales
-
Posts
30983 -
Joined
-
Last visited
-
Days Won
328
Everything posted by Nickfromwales
-
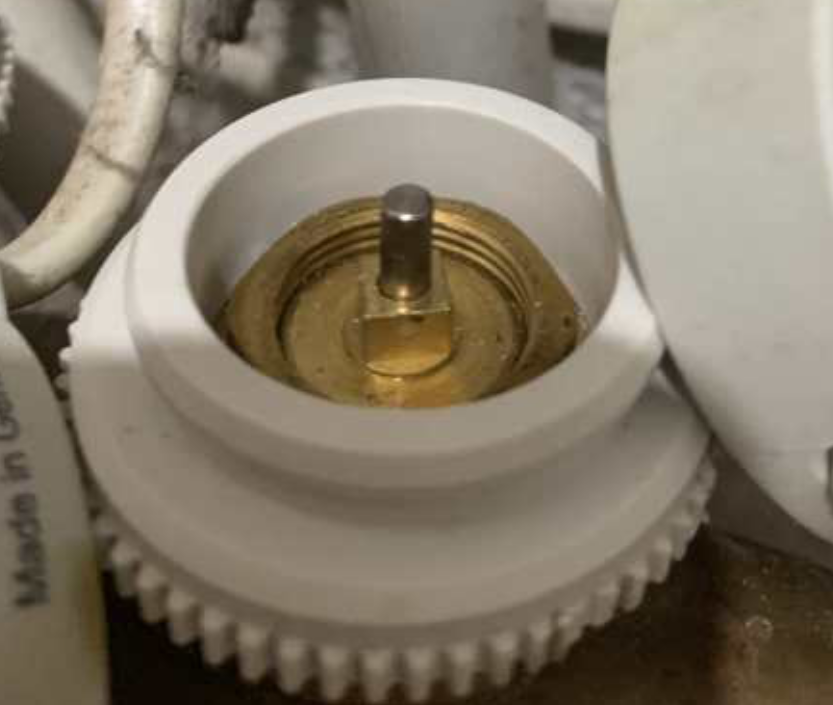
These are the ‘stems’ around the pins, and the square head of the stem allows you to rotate the body of the valve; further down = less flow > no flow if fully seated. How old is this setup?
-

Heatmiser, Hive and Willis....Help!
Nickfromwales replied to Antonb182's topic in Underfloor Heating
Second (primary) pump. Willis heaters do hot water by convection, when in a hot water cylinder, but for a heating arrangement where there are variables I employ the primary pump. This is to ensure flow across the heater is sufficient to avoid early kettling or any kettling at all. -
Heatmiser, Hive and Willis....Help!
Nickfromwales replied to Antonb182's topic in Underfloor Heating
@TerryE has this and iirc is using SSR’s to power the Willis. Ive installed Willis heaters on a number of jobs, and I chose to create a recirculating loop which I then glean flow and return from (via some close - coupled T pieces) so this acts like a figure of 8. That way the main pump can circulate freely, regardless of demand, which makes the system less erratic and the UFH manifold pump is hydraulically decoupled and can just do its own thing. -
Cold (but new) extension - what should I do
Nickfromwales replied to jc212's topic in Heat Insulation
UK “general builders” are mostly older single tradespeople who have learned to pull a few bodies in to piecemeal a complete project together and stumble over the finish line; as quickly and cheaply as possible to max profit from price. Yes…..plenty of good ones, but the minority for sure. Check their previous clients / workmanship and get references people!!! Prob there is someone with no knowledge or experience doesn’t know when they’re just looking at a shiny 💩 so may still speak highly of these individuals. A lot is misadventure, or just a lack of simple understanding of how ventilation heat loss can suck a building of all the heated air by allowing free flowing cold air infiltration to enter freely in this exact way. 🤷♂️🤞. -
Sudden pressure loss in ASHP system
Nickfromwales replied to kandgmitchell's topic in Air Source Heat Pumps (ASHP)
Any particular time of year for each ‘event’? -
Is this a common Vaillant problem?
Nickfromwales replied to Post and beam's topic in Air Source Heat Pumps (ASHP)
Yes. The ‘proper’ way is to use a cold mains feed onto the flow rail and a hose to a drain on the return, and then to blow the loops through (one at a time, not altogether) until no air remains. UFH flow rates are tiny, so it can therefore take days / weeks / longer for them to purge themselves completely; the air goes into the manifold and simply gets sent back around as not all of it can be created by the one bottle vent. These vent very slowly, so don’t catch everything before it gets pumped back into the loops, and around it goes……and repeat. -
Is this a common Vaillant problem?
Nickfromwales replied to Post and beam's topic in Air Source Heat Pumps (ASHP)
Did the installers purge all the UFH loops, or did they do the usual ‘lazy bollocks’ method of telling you to run it and the system will (eventually) “purge itself”? -
Because of the word ‘commercial’. You are a domestic client, so are wires apart here afaic. Keep them on a tight leash is my 2 cents. 😌😉
-
The basic architect questions thread
Nickfromwales replied to SilverShadow's topic in Surveyors & Architects
Fwiw, and FYI I have zero knowledge of any of the above, it’s a melting pot. Some are good at A,B,C…..others H,I,J…..and then there’s X,Y,Z. Very few seem to have a complete, overarching knowledge / skill set, and still way too many putting their own personal preference ahead of their clients. Look at their portfolios and decide for yourself if you think you’ll have some synergy, as there’s the pot of gold imho. -
Expansion vessel having no pre-charge is the usual suspect here. It seems the heating of the cylinder is creating expansion, and there’s nowhere for it to be absorbed. Time to isolate the expansion vessel and check the charge pressure so we can help you through the process of elimination. Regarding the ‘bomb’ issue, relax. There’s been a failure of some sort, and the safety features have done their job; the red T&PRV had opened to relieve the buildup of pressure in the cylinder, functioning entirely as intended to keep you safe
-
The architect built his own house this way!! I went for a 3-way meeting and just couldn’t believe the tripe falling out of his mouth. Turns out he’s mostly versed in commercial projects, ffs, so afaic it’s time for him to go bye bye.
-
Yup. Just throw them some generic stuff and see what they quibble over, basically. One architect had the client spend £1k on an MVHR design, which I got them to refund as it was a bag-o-💩. Totally unnecessary at this early stage to give any more detail than the very basics.
-
On a current client project we’ve moved steels about and altered doorways, all so simple (and virtually free) to do, when it’s just a click of a mouse and the house only exists on a screen. So many poor architects out there even today, still not paying homage to plant space / transits / integration of the M&E into the fabric of the build, and worse; it’s gone past crazy and now it’s just embarrassing. And they charge handsomely for delivering this crap level of detail. One client had been told by his architect to make the house airtight, but he “doesn’t like” MVHR so had recommended trickle vents and mechanical fans ffs. What a tool !
-
If the heat loss / system sizing calcs are in it, then ASHP spec in their quote should hold sufficient info for them to be silenced. Tell BCO they’ll give you the G3 certification etc too. Re MVHR etc, just tell them it’s too early to decide on a system or supplier, but that whatever arrangement you end up going for will be certified and accompanied by any other (relevant) compliances and a full ventilation certificate. Again, tell them you’re currently undecided but that they can assume trickle vents and basic mechanical fans for the get go. The gaps in your understanding of how these systems can benefit you is your concern not theirs, also you really should make yourself forearmed with things like the correlation between airtightness and a great end result with MVHR, vs you not beating natural infiltration rates and are then just pumping cold air into the house all winter. M&E is a whole, so best to join the dots before doing much more, just for yourself. Don’t just pay this lip service, it’s about making a high performance / low cost (& maintenance) and comfortable future-proofed home for yourselves too!
-
I can’t believe anyone wouldn’t! Early design / planning before the foundation goes in is essential, as otherwise it’s just best guesswork; the birthplace of compromise or unnecessary costs to rectify later when you then see how it fecks up 1st fix etc. Fail to prepare, prepare to fail.
-
Borderline professional misconduct, so I’d feck them off and get someone less invested in bankrupting you and causing huge delays. Architwat is getting added to the Acronyms list later lol.
-
Ground floor shower tray support over insulation
Nickfromwales replied to Dunc's topic in Bathrooms, Ensuites & Wetrooms
All sounding good atm, just not the take out / put back in of the insulation part. This should be continuous where it appears out from under the screed into the shuttered area. When installing the layer of insulation where the trays going, use a load of exp foam and put some weight (sand / blocks) on top to keep it all bonded whilst it cures (30 mins or so). I use the solvent weld boss on orange (underground) pipe quite often, just clean it and rough it up with some sandpaper. I’ll try to remember to add some pics tomorrow. -
Repairing MLCP pipe without pressure too
Nickfromwales replied to andyscotland's topic in General Plumbing
Bingo. -
Your architect needs to enter into confidentiality regarding your project!!!! Bloody ecologist would have been asking loaded questions about your project to try and identify it. Have a word!
-
Ground floor shower tray support over insulation
Nickfromwales replied to Dunc's topic in Bathrooms, Ensuites & Wetrooms
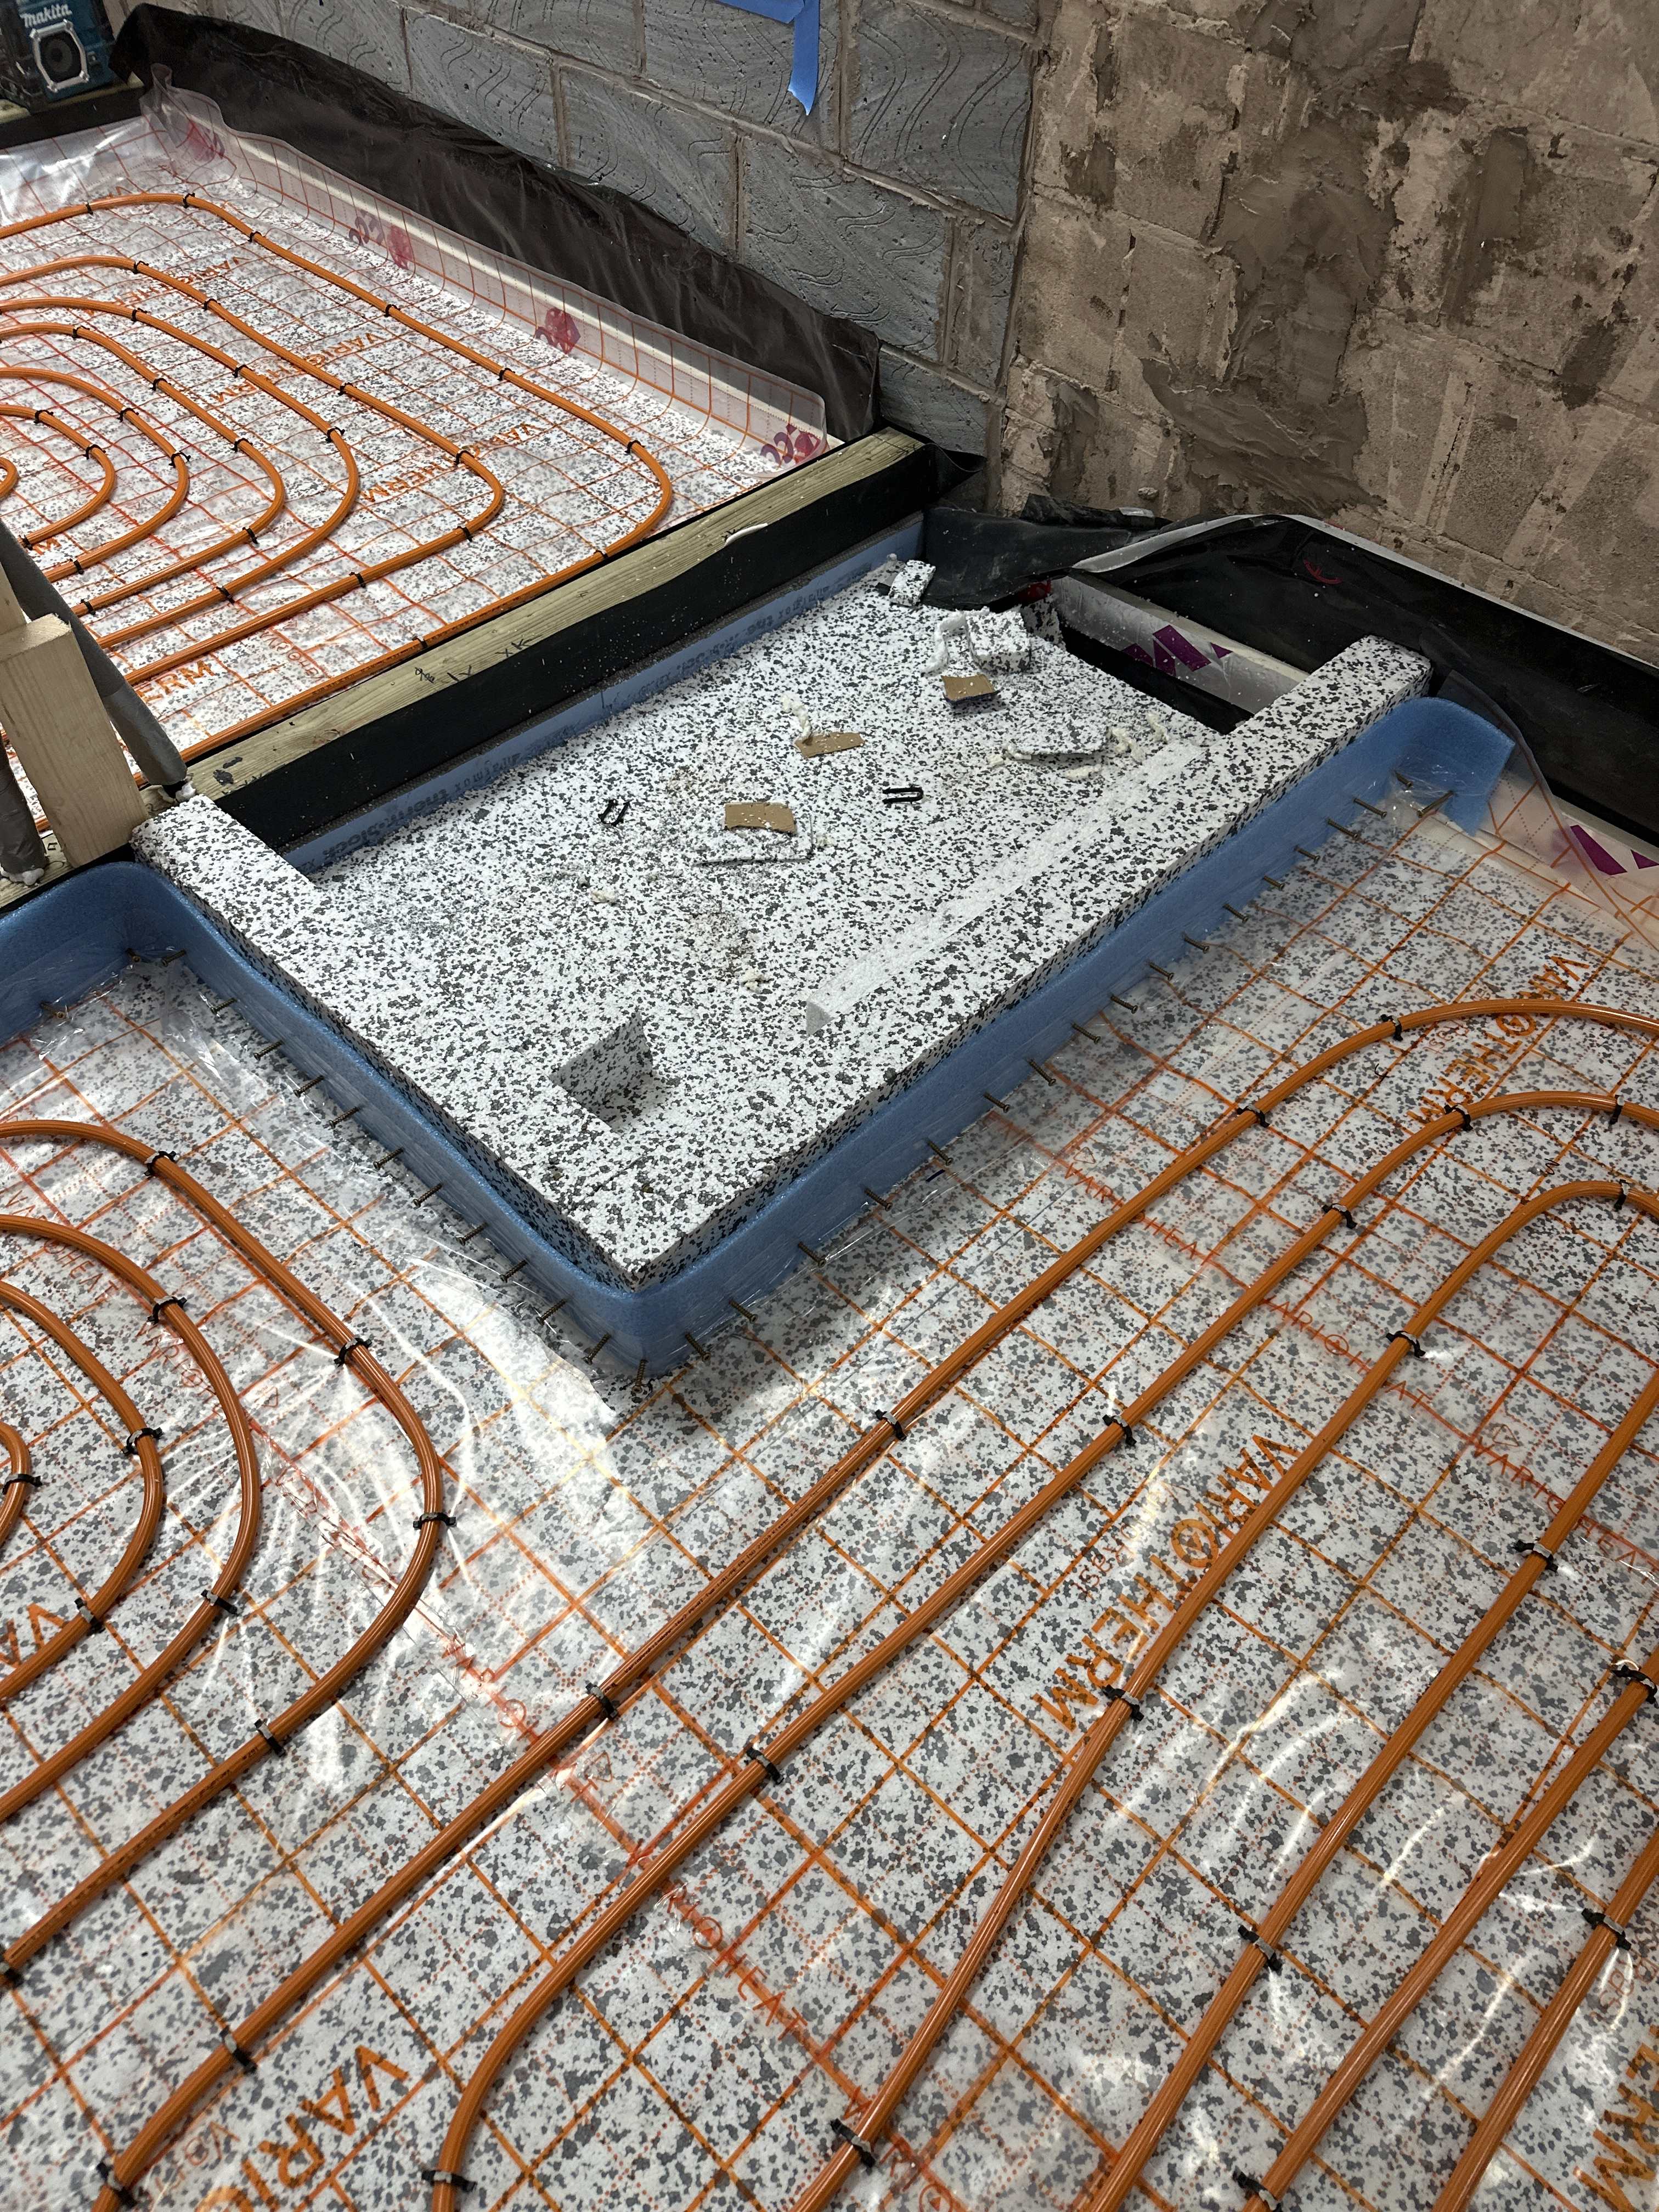
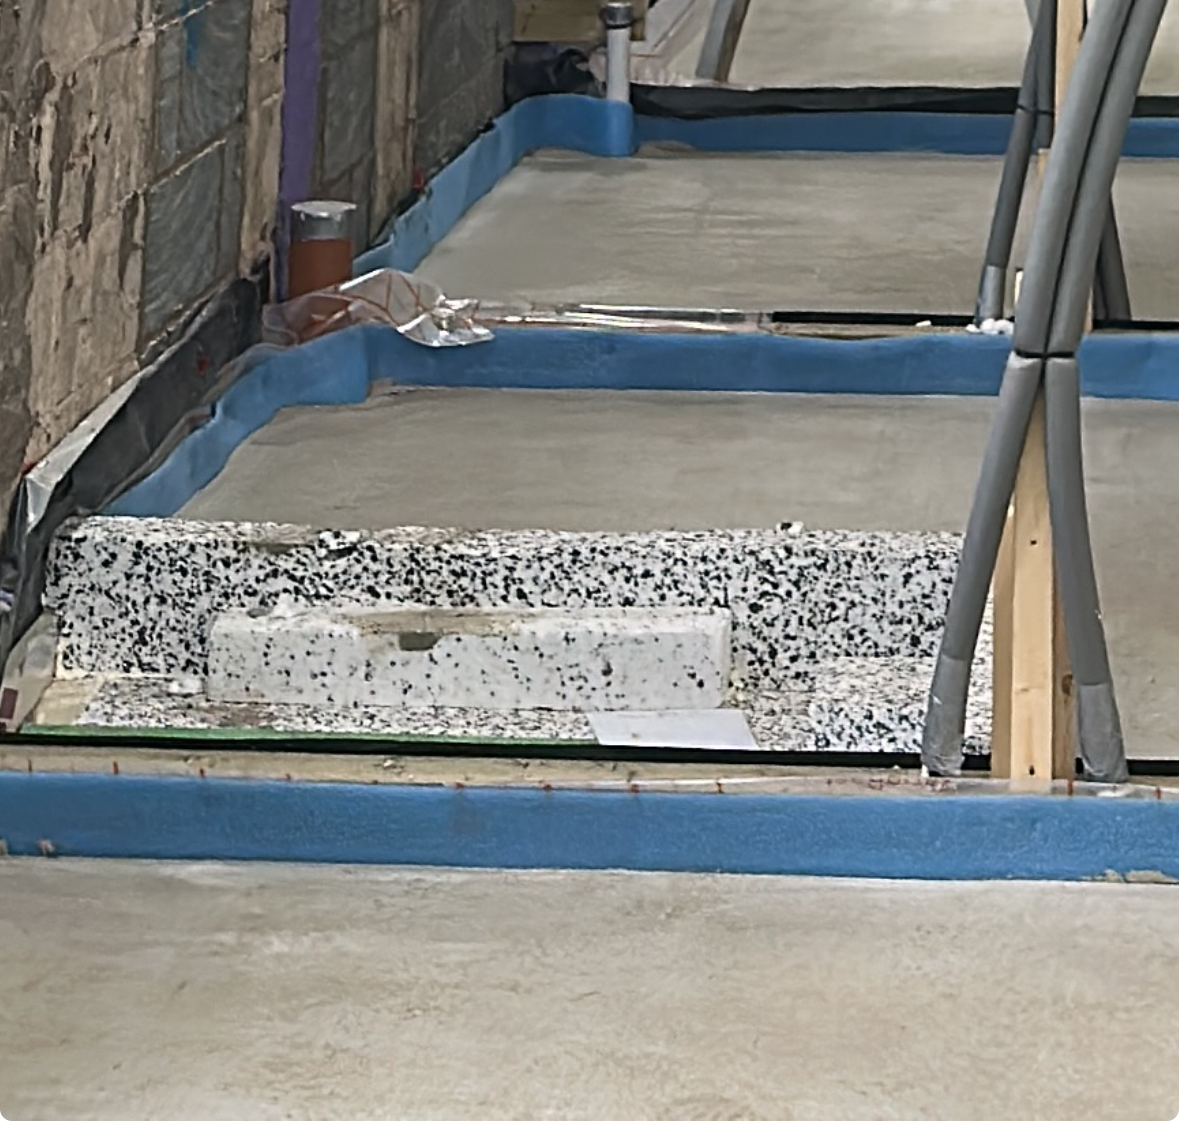
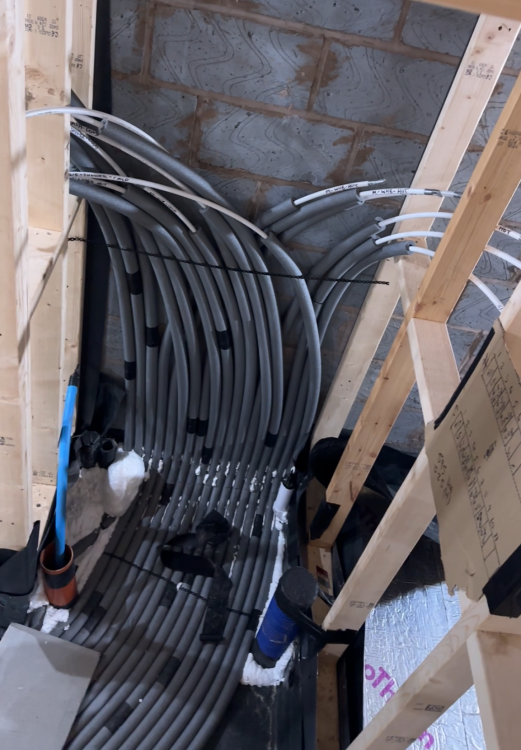
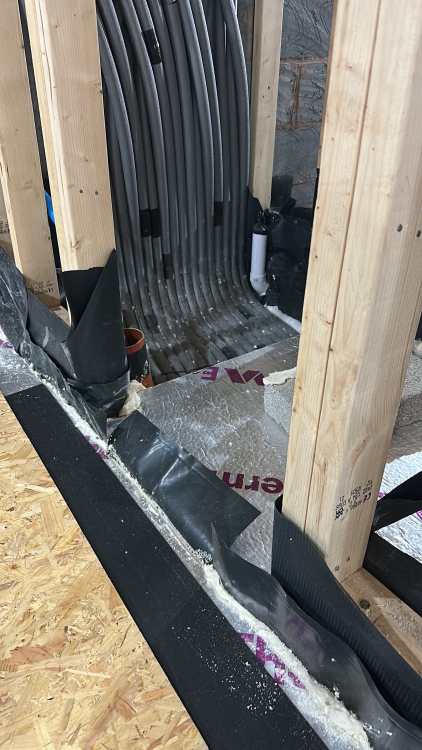
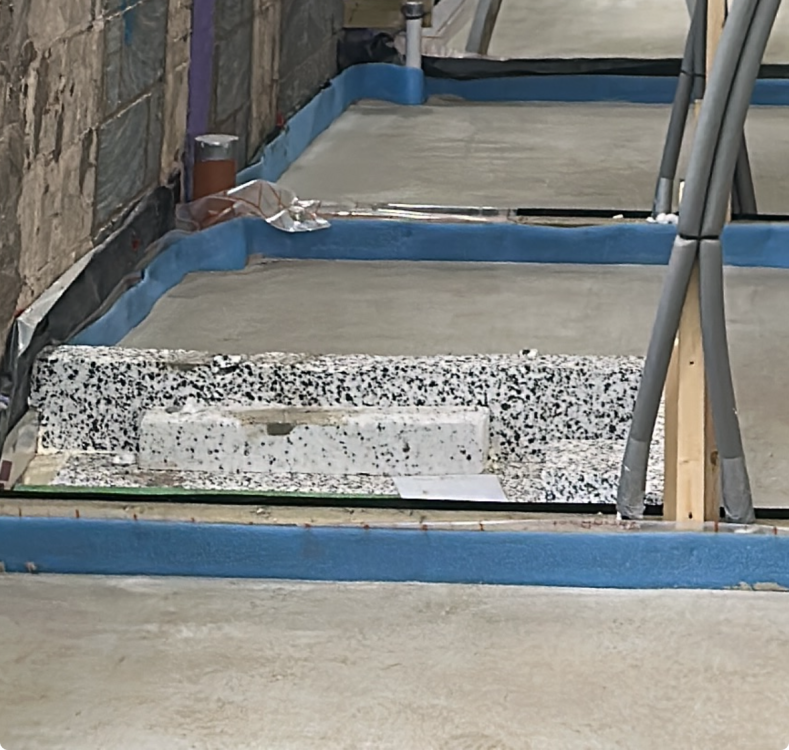
Nothing to worry about here, other than you do NOT use mortar. Flexible tile adhesive or builders screed (Mapei self lever with fibres), or for a full depth install a mixture of both. On my current clients project we’re doing both trays exactly as you propose. One over 250mm of EPS and the other over 175mm of foil faced PIR ( depths differ here with old + new substructure levels, as it’s a conversion at kind of EnerPHit level). Got an airtightness score of high 0.1’s, so happy to declare a definite flat score of 0.20 ACH for bragging rights. 😎👌. Firstly, 220mm of PIR is very good, no need whatsoever to get that to 300mm ; PH is achieved with 300mm of EPS don’t forget!! Diminishing returns say not to bother much past 200mm, which you’ve gone over. Anyhoo… Trays don’t ‘rock’ unless you’ve got that section of insulation cut away and are infilling that also, but if there’s full sheet material locked in 4 sides around then it’s going nowhere. My ‘trick’ is to use 150mm concrete screws to set into the main screed as catchers / rebar pins, so the infill of SLC / tile adhesive can bind to those. Zoom in and you’ll see these pushed half way into the EPS blocks I made as shuttering. You need to have these low enough not to interfere with the tray when set into the void. The blue expansion skirting wasn’t necessary around this, but the 3rd party UFH company did it anyways…. Down at the end is a buried 50mm waste pipe for me to jump on later, which all went in as 1st fix with hot / cold / waste plumbing all got installed / hidden below the insulation. I’ve set the waste pipe low enough to allow for the tray to be slightly recessed eg lower than the surrounding screed to reduce the step / lip left after tiling, however the clients have chosen very low profile pre-finished trays so probably only dropping those by 5mm or so to leave 10mm of shower tray showing above the tiled floor. All hot and cold feeds went in on a radial setup. Another 100mm of PIR got put down there after I sorted out DPM etc around the pita pipes / other obstacles in the plant cupboard. If you’ve still got an opportunity to get the 1st fix in the ground floor like this then it’s something to consider, as it makes 1st fix much easier imho, but more relevant here as it is a bungalow with vaulted ceilings / no attic void for services. Shuttering worked perfectly for the screed pour (liquid cement) Shuttering now removed and all walls gone up. Getting boarded atm ready for my very good plasterer mate to come and do his thing. I can post some pics of the trays going in but prob a week or more away from that yet. @Dunc when are you doing all this?
-
Architects are usually great at opening cans of worms, but afaic this is largely so you can’t come back and moan to them (or sue them) for anything they didn’t highlight. Were an odd thing, human beings, as we want one thing, but then get it, and then complain if we fall on our own swords This is why professionals highlight these things imo, however they should be communicating such information exclusively to yourself and then you can decide to action any of their recommendations, or ignore them, to suit convenience / cost / time. Defo not one I’d be waving any flags about for, so plod on sympathetically (and just tip your hat to the architect and silence them on the subject). It’s quite common for this type of over-zealous behaviour to end up costing my clients 5 figures, which is why I mostly promote the use of architectural technicians nowadays who are more grounded / pragmatic, so proceed with caution!
-
Today's heat pump install questions!`
Nickfromwales replied to MikeSharp01's topic in Underfloor Heating
You just need to unscrew the bush too, which either leaves you with a 1/2 or 3/4” bsp thread. You then just buy the reducing bush for £2 and screw the vent into that. PTFE is your friend here.

-
Near the beds, as a fail safe. If the existing one is a few years old, replace it. ’vans rely heavily on the airflow through floor / lower wall vents, which most block up in winter, to allow gas appliances like cookers and fires to breathe / vent. Modern boilers are “room sealed” and have a coaxial flue to outdoors; smaller inner pipe ejects the fumes and outer pulls air in for combustion. Balanced flues need air from the room. Stayed in a large static once, and it was like a colander lol. Wife was paranoid so refused to let me leave the gas fire on overnight in the living room (at night this was the adult / spare bedroom) and it was like a fridge once that got turned off.
-
Repairing MLCP pipe without pressure too
Nickfromwales replied to andyscotland's topic in General Plumbing
Needs to be equal pressure opposing on all sides so the fitting and insert don’t deform. -
Rainwater Drainage Basics
Nickfromwales replied to MortarThePoint's topic in Rainwater, Guttering & SuDS
Weak concrete pads at the start and end of the run, and then multiples more every 1200mm or less will make life easier here. Be mindful that you cannot compact / whack anything retrospectively, so do as much of that as you need to, prior to installing the pipe.