AdamSee
-
Posts
158 -
Joined
-
Last visited
Everything posted by AdamSee
-
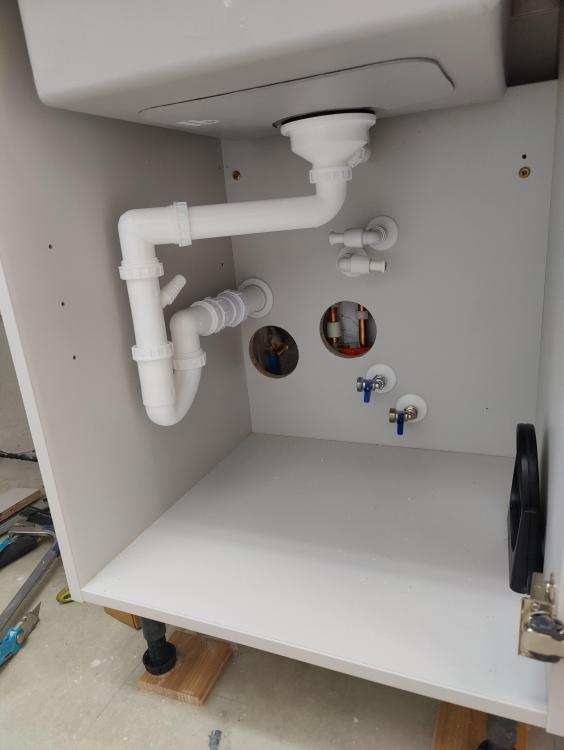
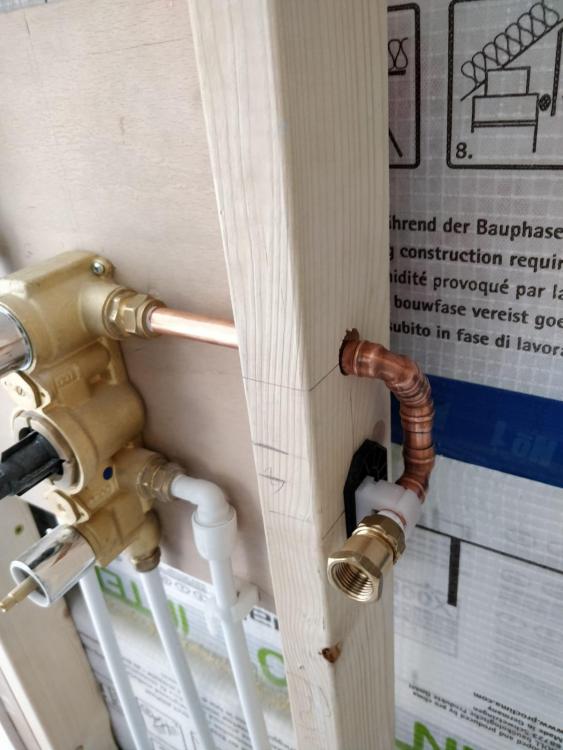
Glad I did it the way I did as it's a really tight fit to get the waste pipe around the corner before it hit the next pipe along. The hot and cold ended up the wrong way around, but by fitting them above and below makes switch sides less messy. Still have the cut away more for the shut of access. But otherwise pretty happy with how it ended up. I'll put a picture up when the entire room is finished.
-
Probably could have gone that way too. But I got the idea in my head to put both isolators next to each other.....then couldn't see any other way to do it.
-
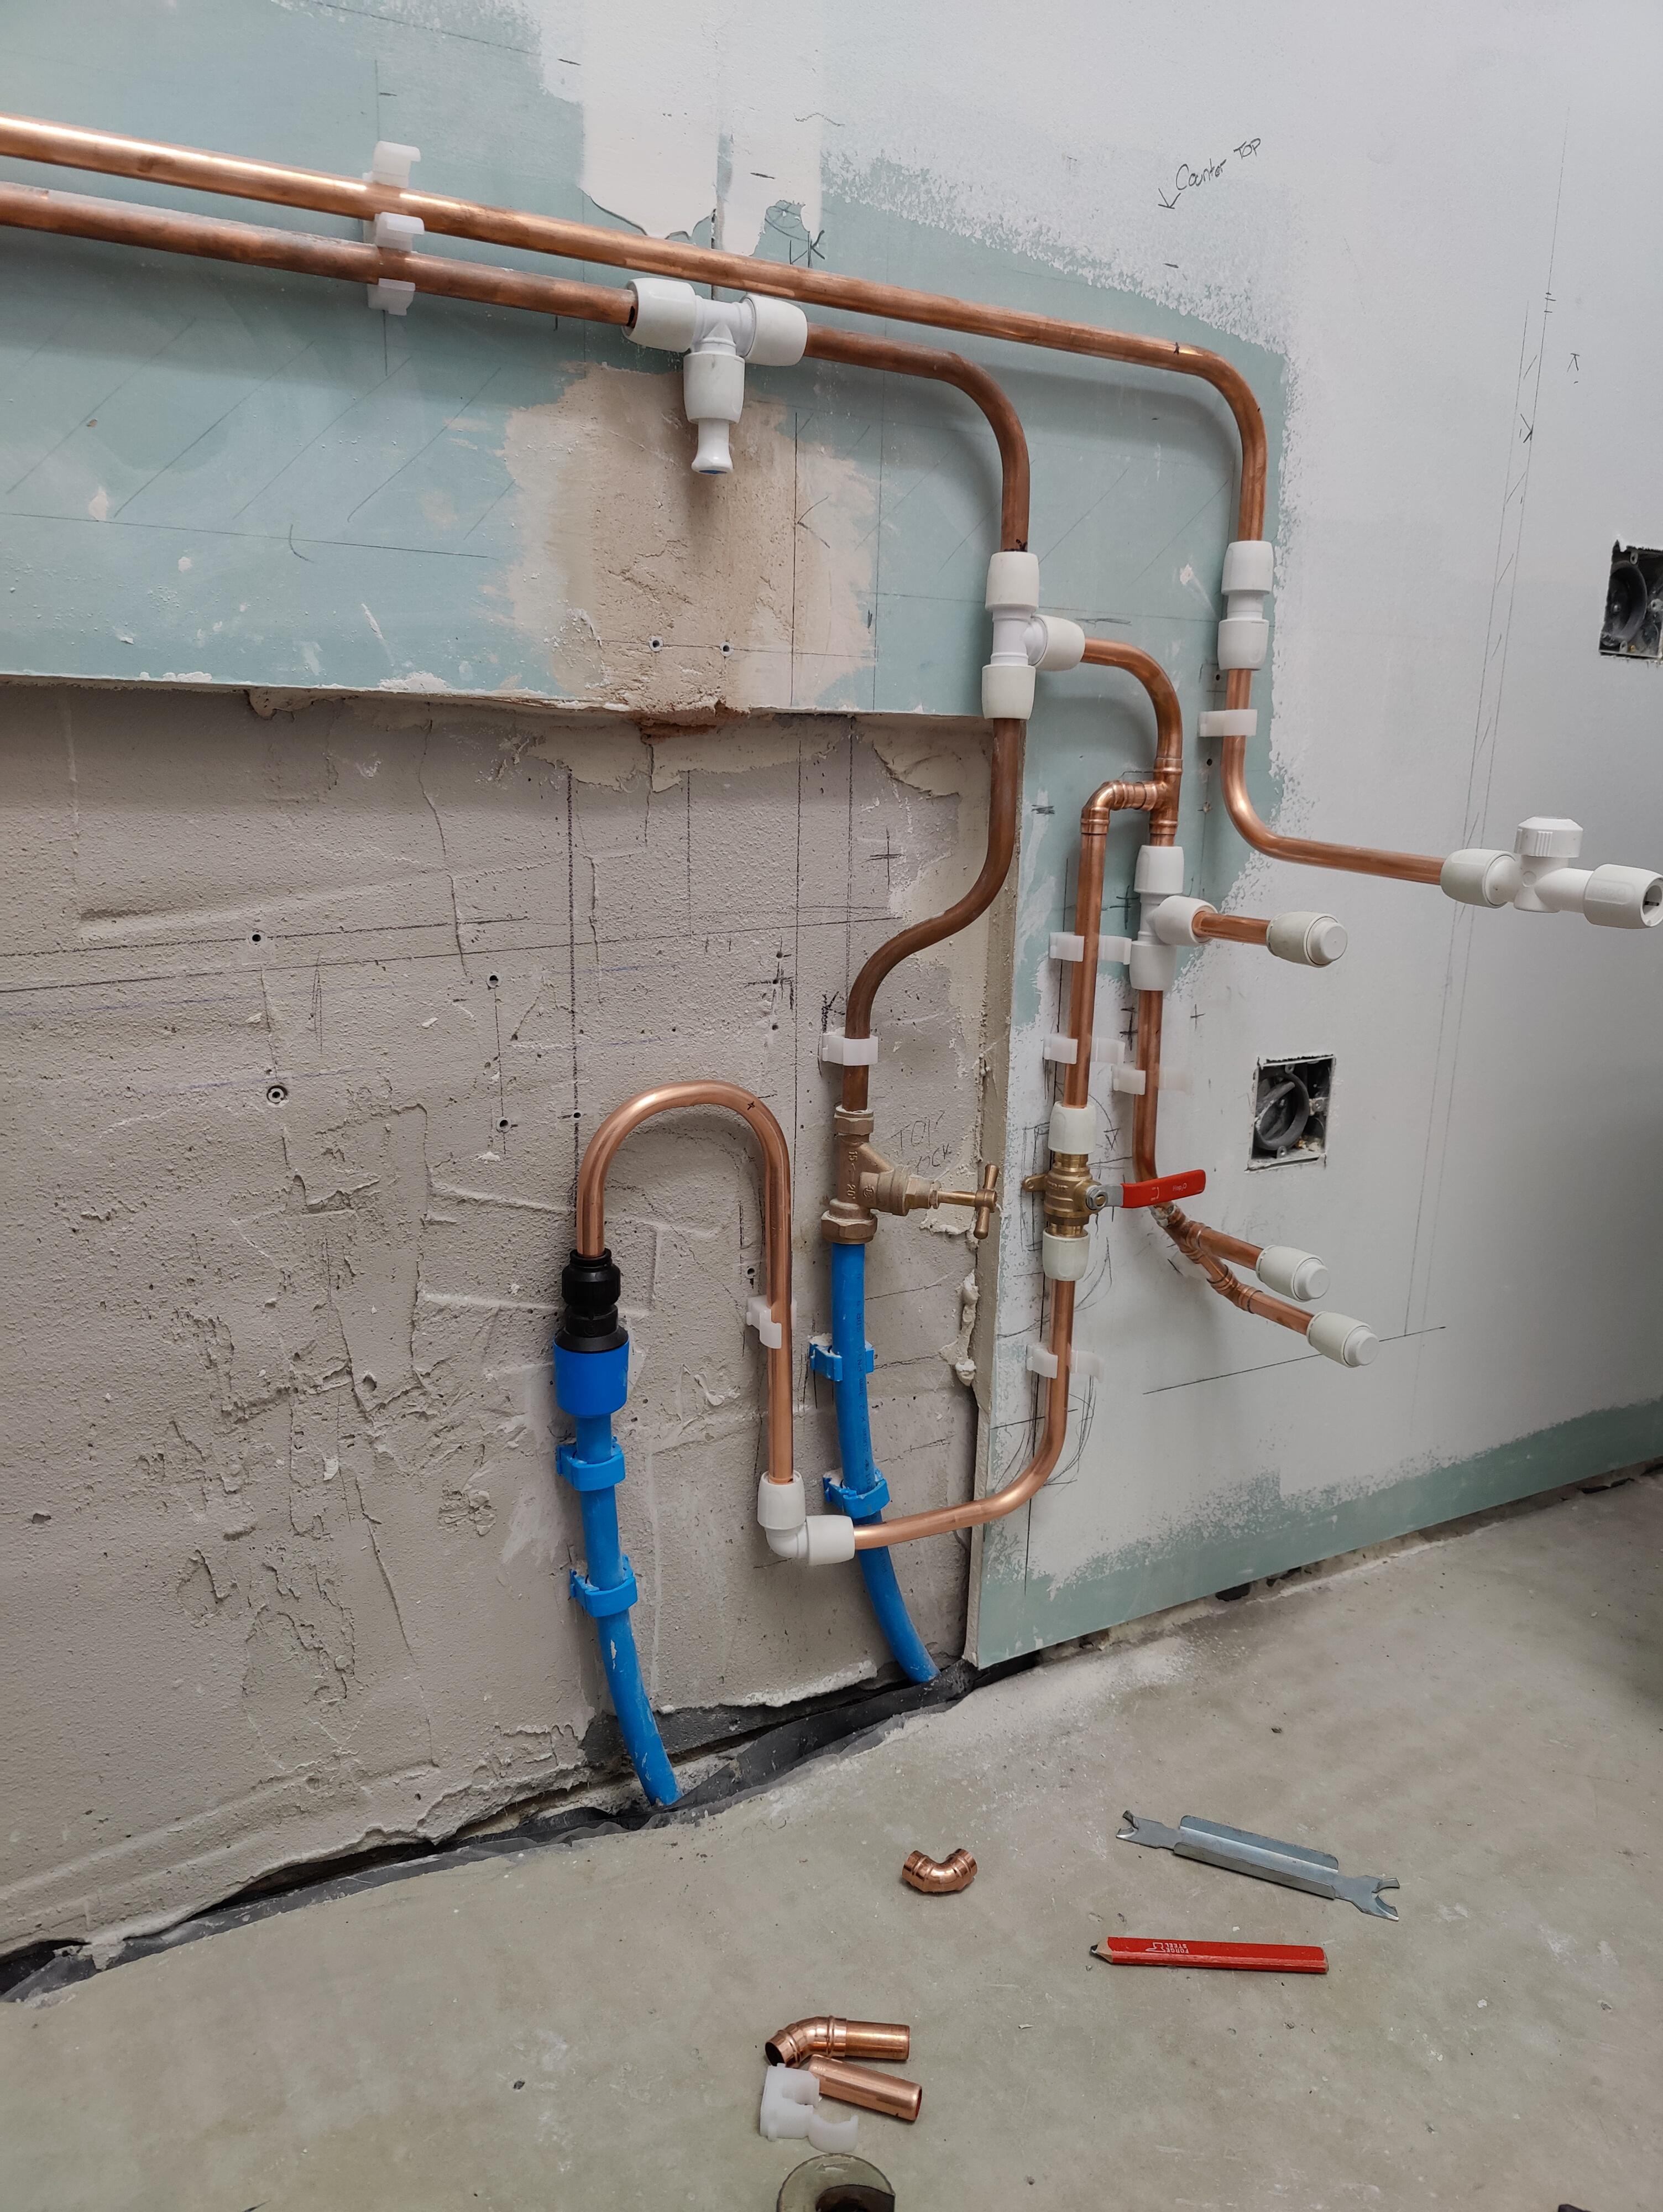
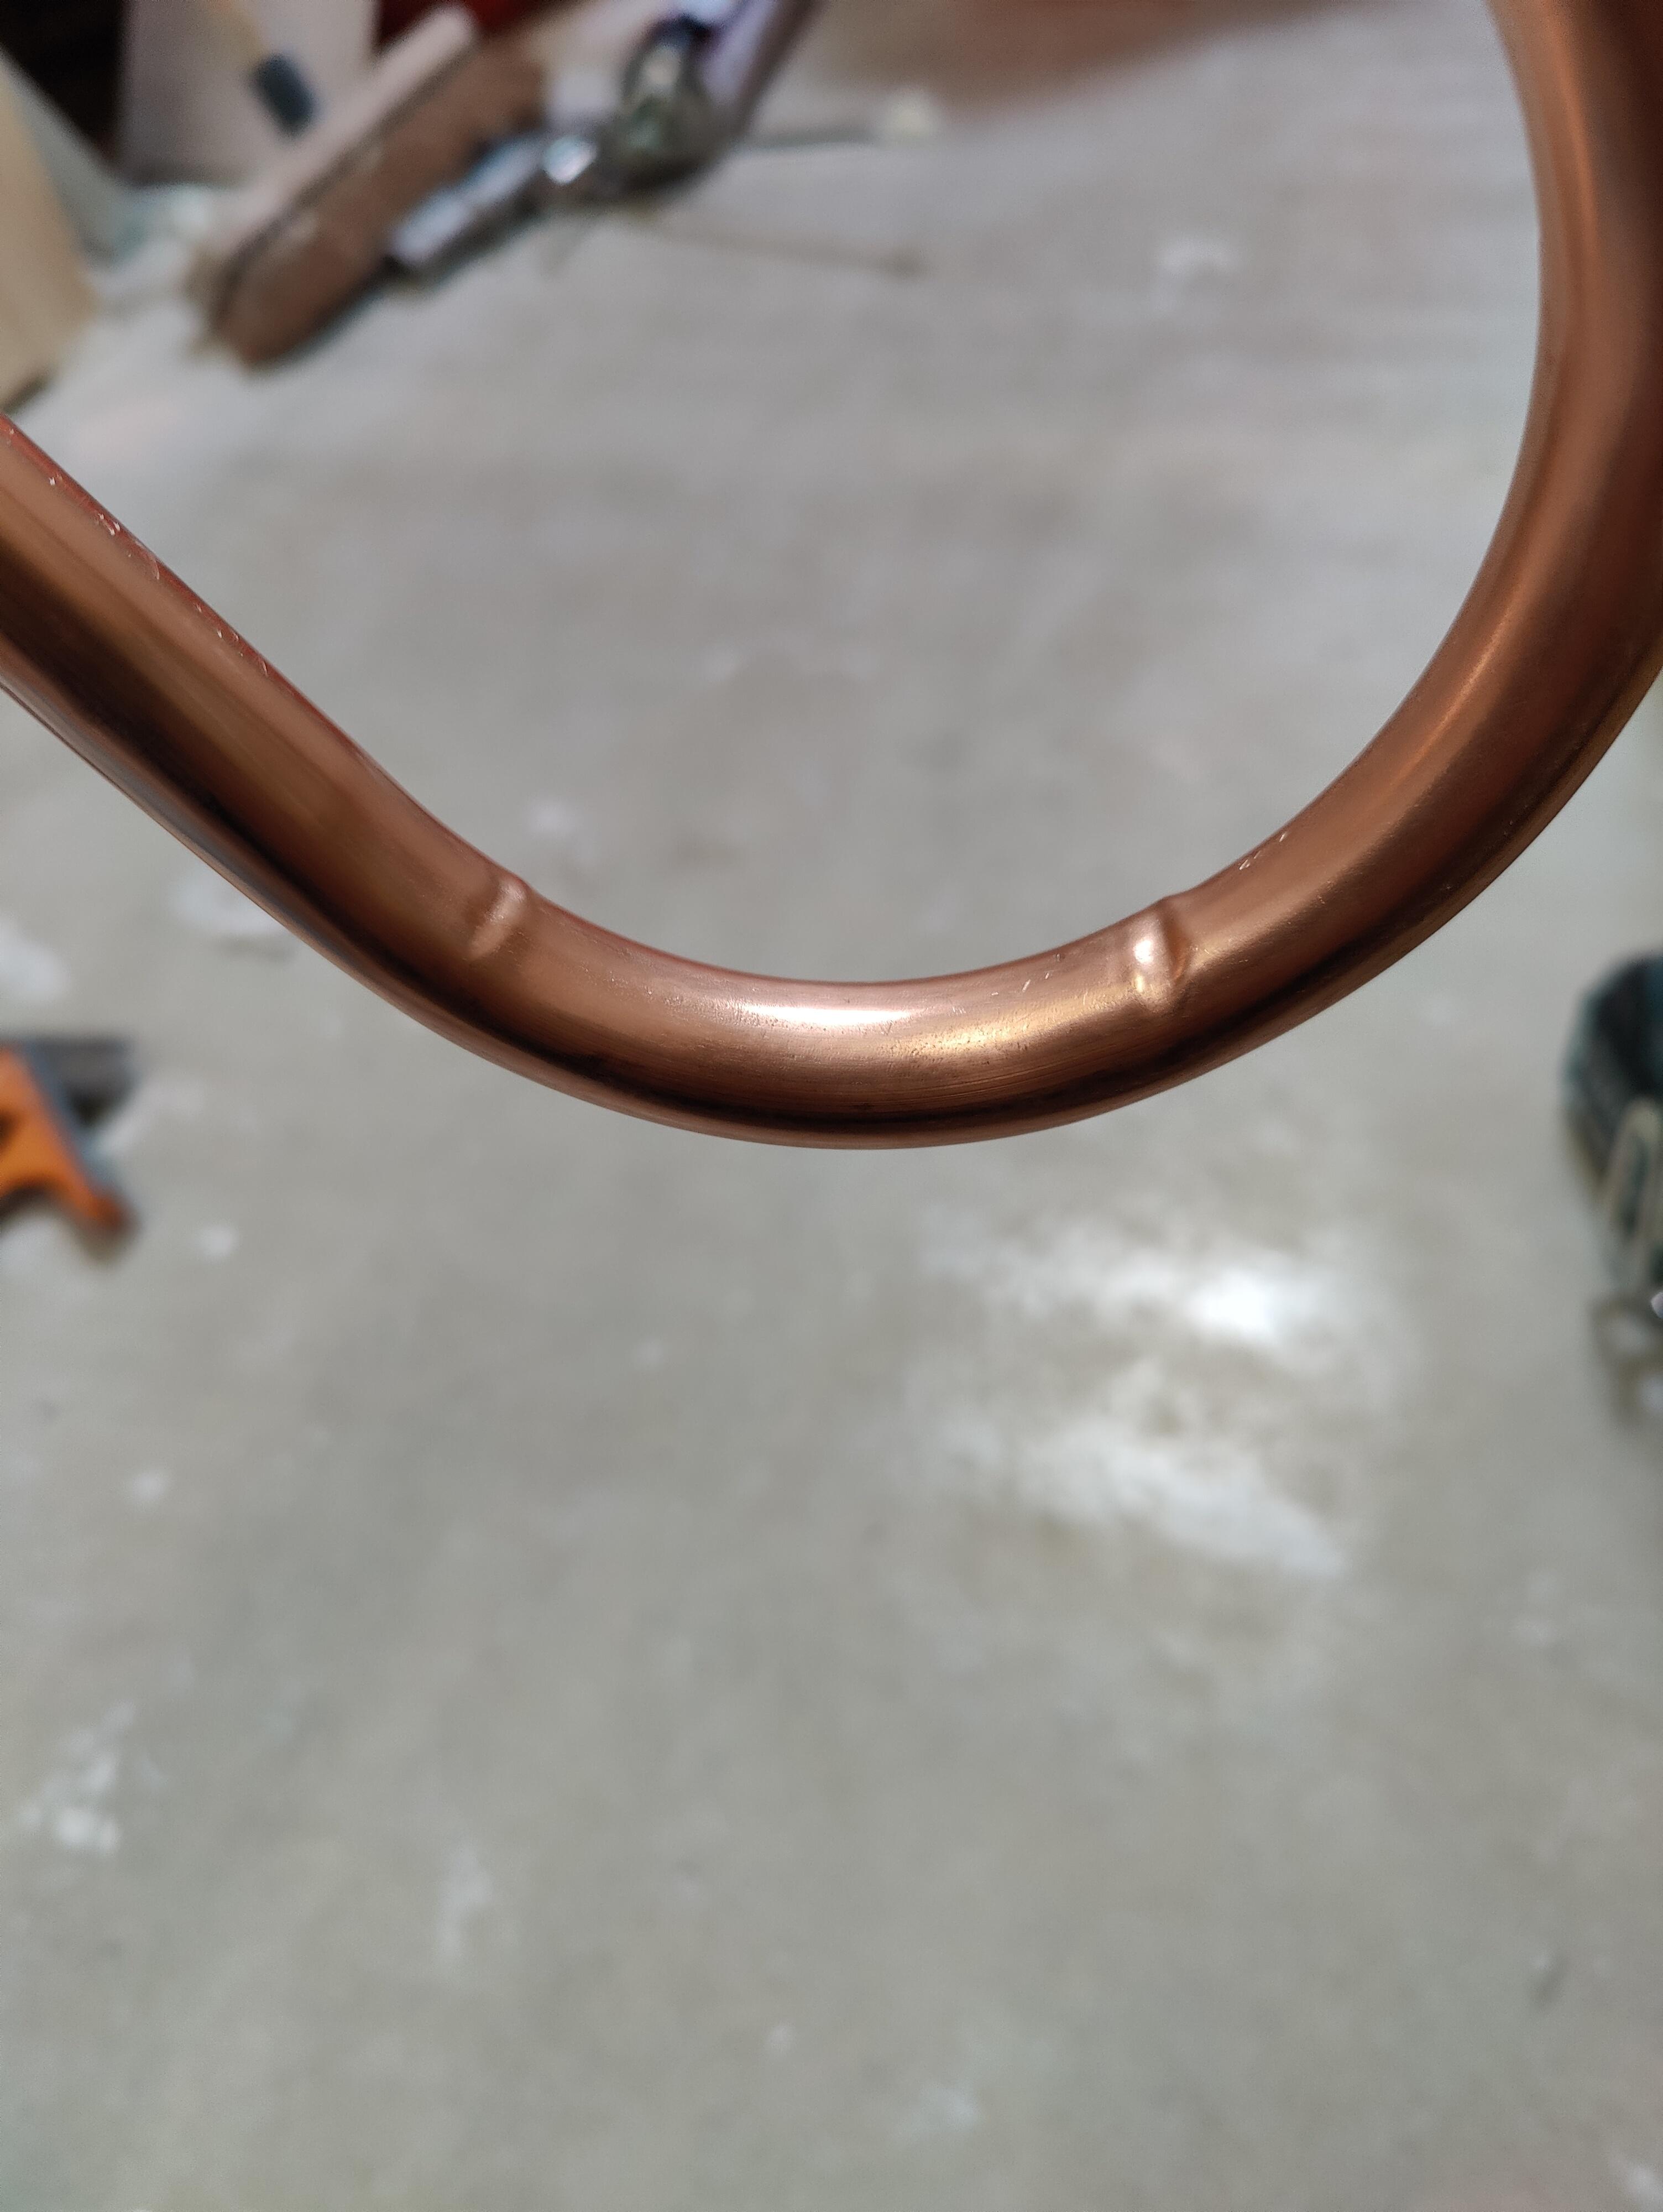
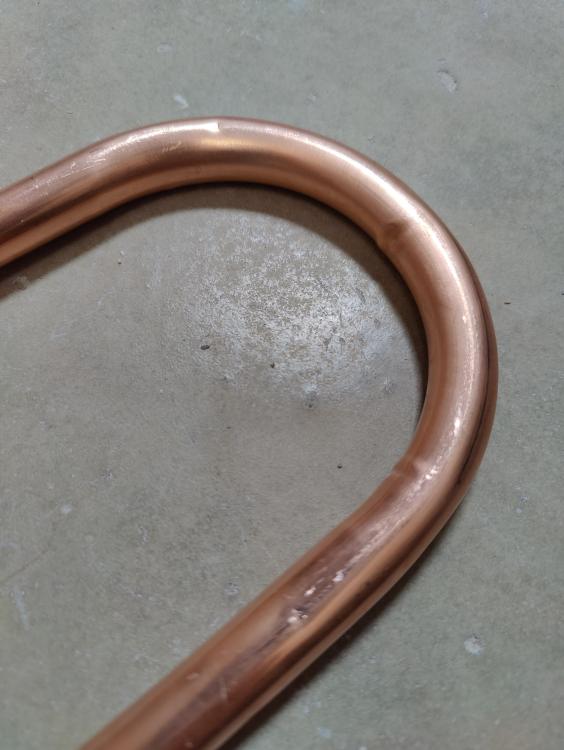
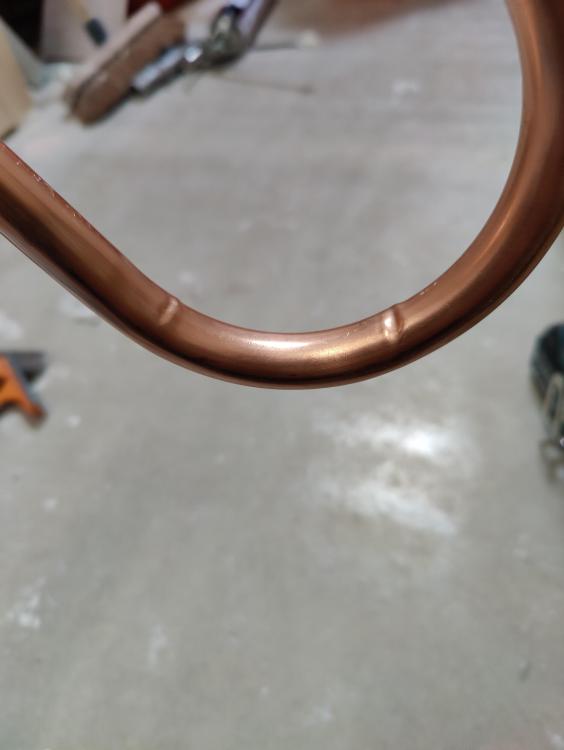
Apparently I had limited parts and wanted it done this evening so I used the left over pipe to redo it. A small crease formed in the middle, but nothing major. But it did end with a small flat/straight section at the top of the bend. The whole job was alot of faff just to make sure that that I didn't have to pass a 40mm infront of the pipes and possibly not leave enough room for the washing machine to sit infront. It's all done now. Theres a mix of hep2o, soldered joints and pipe bends. Was a good first experience of pipe bending.

-
Pushfit might have to be the way to go. For some reason, even though no one will ever see it, I still want it to look half decent. Still got a length of pipe left. May give it another hit and see how it goes.
-
After some opinions on my copper bends. I'm trying to bend some copper pipe in to 180° to avoid soldering 2no. 90° together. Unfortunately I get a crease in it from where I have to rejig it in the pipe bender. Would you use it or find another way? Once it's fitted it's trapped behind a unit so it's not going to be accessible for a repair and it feeds water just to an outdoor tap.
-
Wall starter kit not used! What can I do?
AdamSee replied to johnannik's topic in Bricklaying, Blockwork & Mortar
I would say that it's critical. I guess you could retro fit helical bars used in crack stitching on either side of the wall. Same as Mr Punter has said; use screw in wall starters. Possibly just take off the top few bricks if there not fully set yet and fit them. -
I built a deck for my parents summer house using recycled plastic wood bought from this place. https://www.earth-anchors.com/product-category/lumber/ The deck is in a really wet part of the garden and was worried that using timber for the structure and supports would mean that in a few years I would be doing it again. The top was still finished off using bod standard wood decking from wicks so that it could be painted to match. Peace of mind is worth its weight in.......recycled plastic, because its really bloody heavy if I remember correctly.
-
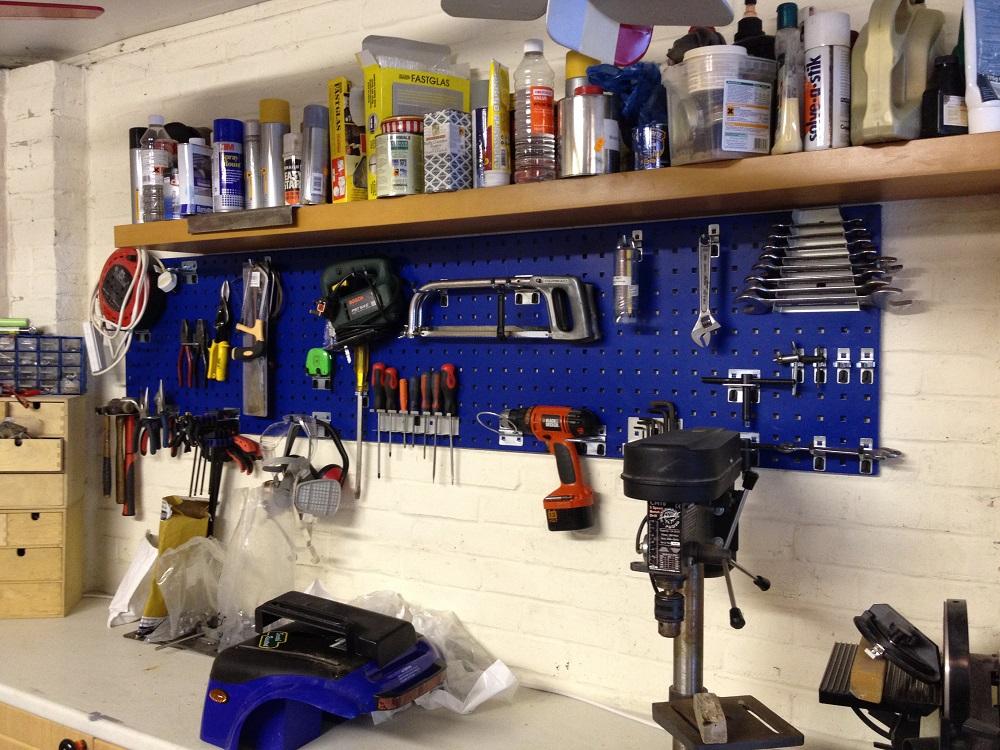
I'm not sure if there are suitable alternative of hooks to use with the Bott system other than their own brand. You can buy a mix pack of hangers and you can arrange them as necessary to hold things. I would expect to spend the same on hooks as I would the wall panel. For holding items such as cordless drills its best to combine 2 different hanging parts to make a "holster" suitable for it. Items such as hammers, screwdrivers, spanners, etc, all have their own dedicated hook. Here's the ones I hung in my dads garage for him. Panel 1 of 2 (circa 2011) Again, there's plenty of inspiration on google.
-
The Bott Perfo panels are good. The last commercial workshop I was in had made walls using the panels to split up the different areas of the shop floor. Was great for quickly reorganising the place. If you have the time and tools. I would go down the French cleat system. Google has many images of how it works. You an make a dedicated holder for everything and rapidly rearrange it.
-
Yes, I was proposing setting it a few cm lower so that if necessary you could pack above it with a bit of timber.
-
Fit it lower than nessecary? You can always build the hight up or pack it up. Can't removed material from it or lower it easily.
-
I have an extension with a liquid screed pour which has cracked in the same way. I've just given up worrying about it now. I want to it be right and perfect, but in the end I just want it done and without burning a bigger hole in my pocket than I already have. Do everything possible to minimise the chances of it cracking the tiles by using a decoupling mat, flexible adhesive and grout and then live knowing that you did everything possible without spending another fortune. I've used tile masters ultra flex s2 adhesive and anti fracture matting on a bathroom timber floor with UFH and I'm amazed that the builders didn't crack it when the fitted in a RSJ below it. So personally I have a lot of confidence in these products now.
-
Bean to Cup Espresso machine recomendations please
AdamSee replied to dnb's topic in Kitchen & Household Appliances
Not sure why I made the switch to a bean to cup machine. My parents had a Nespresso machine before, and it made good coffee but not great In comparison to a freshly ground cup. My biggest gripe with the capsules is the waste. I hate the idea of something that can't be recycled or composted without work. Atleast the "biscuits" of used/compressed coffee grounds compost well. (Keep the dog away from the compost though) I never considered the cost saving as a factor of purchasing the machine. -
Bean to Cup Espresso machine recomendations please
AdamSee replied to dnb's topic in Kitchen & Household Appliances
+1 to the Delonghi Magnifica Bought one for my mum 10 years ago which lasted 9 years and bought one for myself 3 years ago which has been at my work ever since making about 20-25 cups a day. Still works fine, just sounds pretty rough. Did however break the steam knob off. -
I've Just had this issue with my build. Turns out the weight of the screed was enough to push the boards down and now feel pretty solid. But......My builders decided that when taping up the seals on the DPC (laid over the insulation to protect the foil) they would also stick said dpc to the wall. That combined with the expansion strip, (also stuck to the wall) around the perimeter meant that everything was pretty dam secure. The problem is that the weight of the screed has pushed down the boards down and left the screed around the edges in an unsupported hammock made of dpc. Moral of the story....use 25mm free moving perimeter insulation, rather than just a expansion strip.
-
I see something similar every so often. Its not the stainless steel rusting. Its cross contamination from using the same grinding wheel to what was used on a piece of mild steel. Considering the rust is localised to the welded corner, I would assume its this. As for-mentioned a scotchbrite and some stainless cleaner will do the trick. Ironically stainless steel does actually stain, you may be left with a "tea bag" stain.
-
Main bedroom suite layout design ideas
AdamSee replied to Adam2's topic in New House & Self Build Design
Personally, I would try to bring back the service cupboard in the hallway. There's always stuff to store upstairs that I don't like having in the bedroom. Such as the hover, cleaning bits.......a bucket? -
I used the omnie torfloor in my 1930 house renovation. Personally, I think it's great, more than enough to heat the upstairs of the house on it own (no heating downstairs to rise up and help) It's quite a time consuming job to fit and you need to plan your returns to your manifold carefully. I had access from below, which made it easier....but still a pain. Don't use PU glue when sticking it down, it can bubble up through the boards and block the pipe channel. Becuase you have only a thin Alu spreader and a thin piece of ply over the top, you can make out where the pipes are laid. I don't notice, except where it's tiled over.
-
14 Degrees.....really? I have no heating in the downstairs of my house and in winter its 14 degress on average in the evening. Granted it does have a south facing window but there's no insulation what so ever above it either. I haven't seen this episode yet. But seem some pictures and it does look good.
-
You could have a look at supplyonlybedrooms. There marginally cheaper than diyhomefit, but it's the exact same stuff. Same catalogue etc. I found them to be really helpful. Happy to modify cabinets to specific sizes for certain areas. Even changed out the carcass side panels on a set of drawers to full gloss so that we could user it as a stand alone unit with additional end cladding panels. We too had sharps price for units. Found them to be to expensive. I hate the way they quote for thing. With discount on top of discounts. And then offers that are "only" on the table of you sign up now.
-
I would go with a airlock aswell. I have ufh pipes above the mainfold and also had to install air bleeding vents at points higher than the floor. Could you close all of the flow regulators except for the room that's a problem and listen out for air movement comming thought? That would give a reasonable indications as to how much air is in the pipe. After starting my system up after the summer months it took about 2 days to stop gurgling from settled air in the pipework.
-
I've used a table saw with extraction to cut 75mm celotex. Works just fine and does minimise the dust, but you need to made some proper infeed/outfeed tables if your doing it on your own. Its quite satisfying when you have cut a perfect fit to go between your new and perfectly parallel floor joists. I do have a insulation saw from toolstation which is practically dust free. It has a wavy blade rather than teeth and feels like it could slice your finger up pretty well. Downside is that it can only cut a max of 75mm, even then it sticks pretty easily. O and its bugger to keep square without a decent guide. +1 to the bandsaw idea. You would get a greater depth of cut and easier and safer than a circular saw. I believe you can get a small Record one for under £300 and it will do up to 120mm.
-
UFH 8 zone Heatmiser System Under Floorboards
AdamSee replied to AshleyH's topic in Underfloor Heating
This is un-related to your problem. But what brand of control system/application are you using? -
Same problem, tidier solution. Same idea could be achieved using a inline kink in a piece of copper pipe. Would require a pipe bender though. I also fitted a bunch of valves so that I could test the system / make a mess from air & water shooting out unexpectedly.
-
Good looking job with the adhesive. Just out of curiosity, Is that an external wall?