
Plastering and the white room of paint

Entry posted by vivienz
4338 views
It's 3 weeks since my last blog entry and, as usual, things have been moving at a pace. The difference with the most recent round of work, though, it that the building is starting to look like a liveable house rather than a construction site. This is largely due to the glory coats of plaster and paint, but far more than that has been keeping everyone busy.
The boarding started in earnest before Christmas and so the plasterers were in bright and early in the new year. We've got through an astonishing amount of board of various types - I thought I'd calculated reasonably well and had a mahooosive delivery of the stuff a while back, but it all seemed to disappear and the building was hungry for more. I bought all the board from Sydenhams as I found their price to be competitive. I've used standard 12.5mm plasterboard on all external walls, 15mm acoustic on all ceilings and internal walls, moisture board for bath/wet rooms, and pink fire board for the garage walls and ceiling. The garage is attached and so building regs require a fire door (FD30, sourced from Enfield Doors, though I've since found cheaper suppliers when looking at other stuff) and fire board throughout the garage, but only a single layer as there is no habitable space above it.
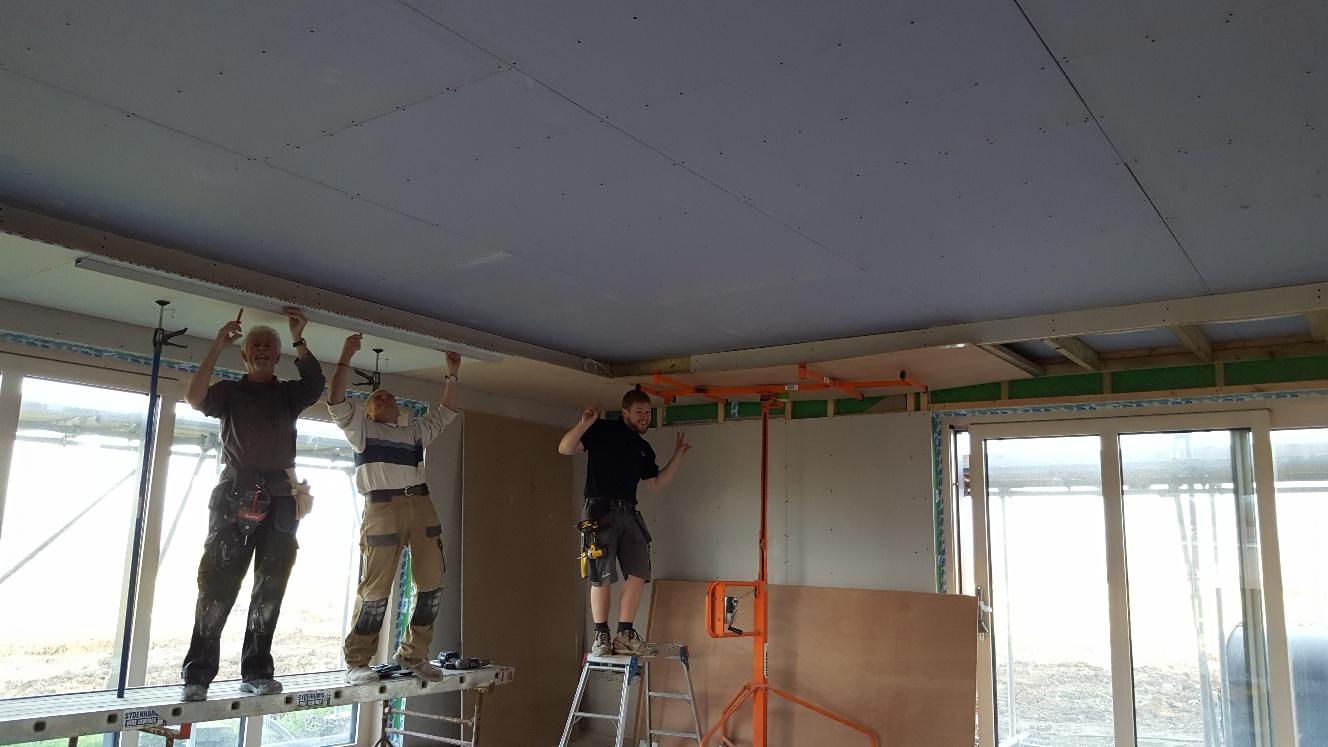
I've had a board lifter on hire as it really helps the team position the boards up onto the ceilings without dropping anything on themselves or damaging either themselves or the boards.
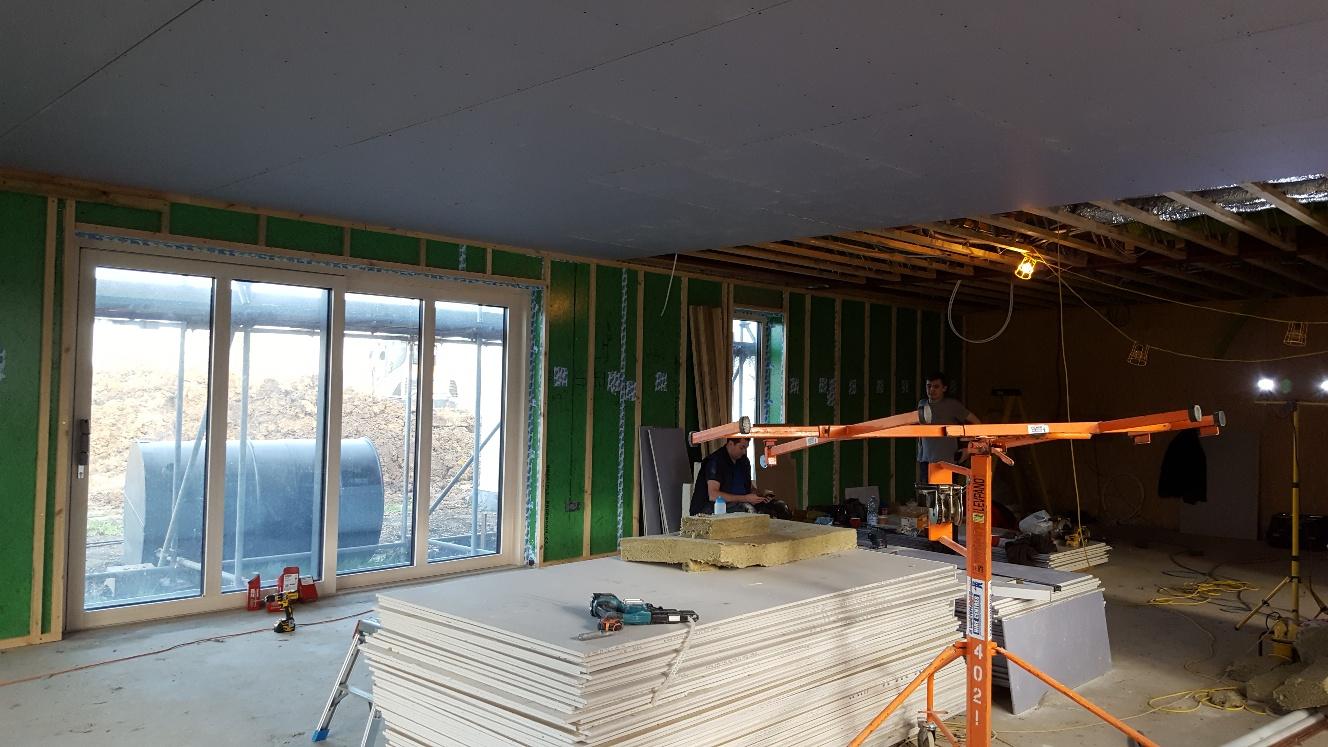
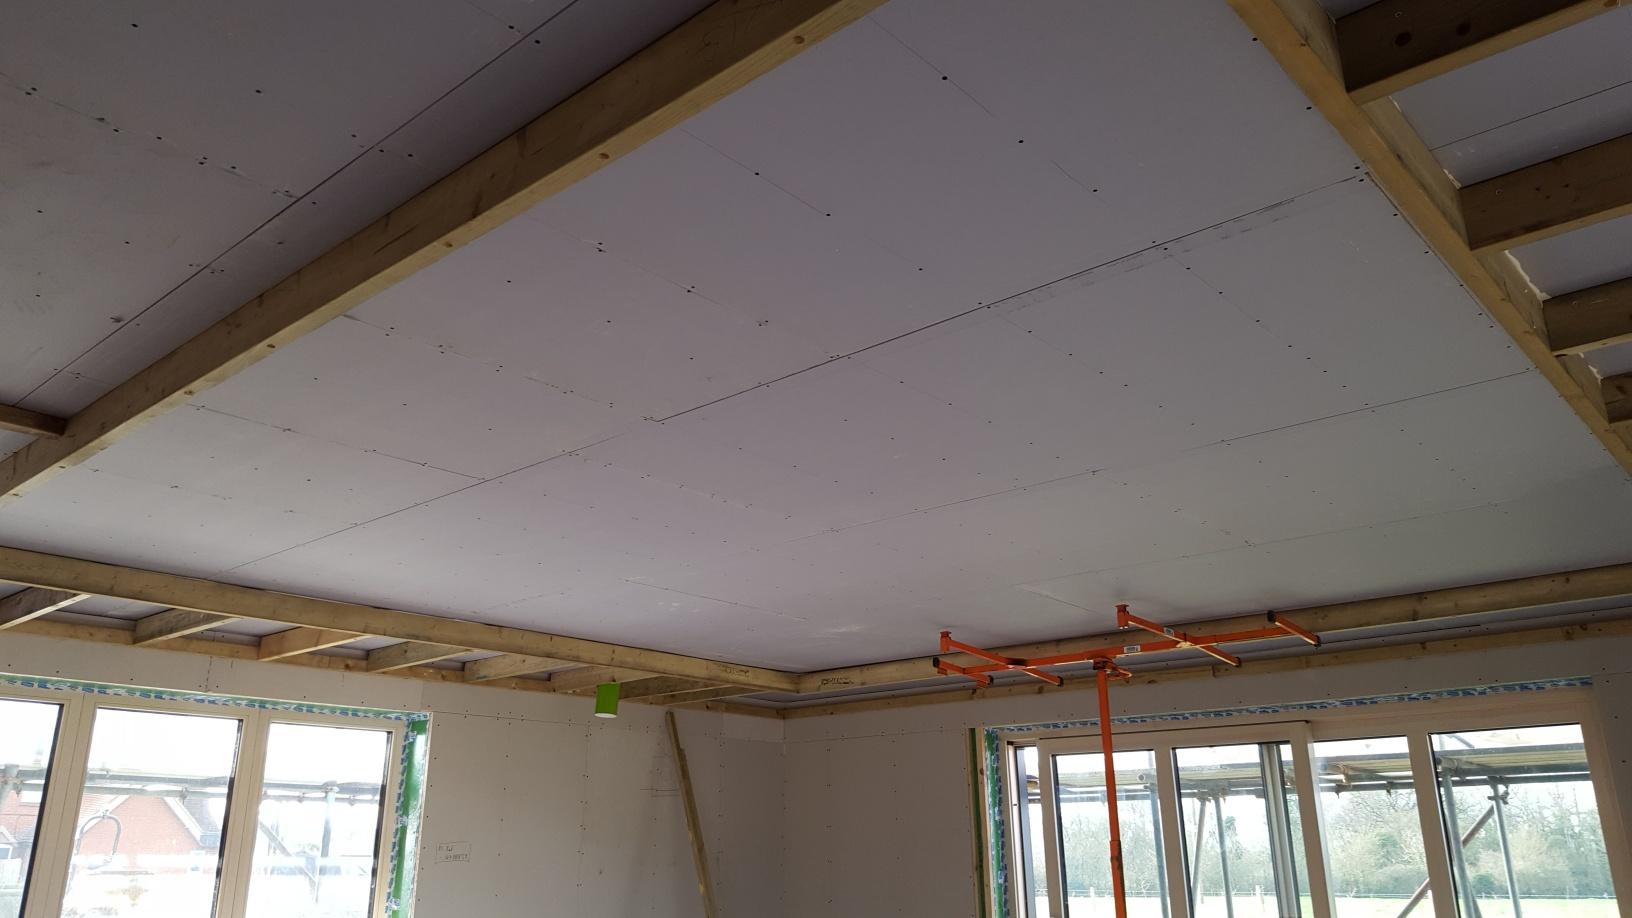
Here is the board going up on the lounge/dining area towards the kitchen area. The orange frame is the plaster board lifter. The black thing outside the window is my sewage treatment plant tank, which will be installed in a couple of weeks(ish).
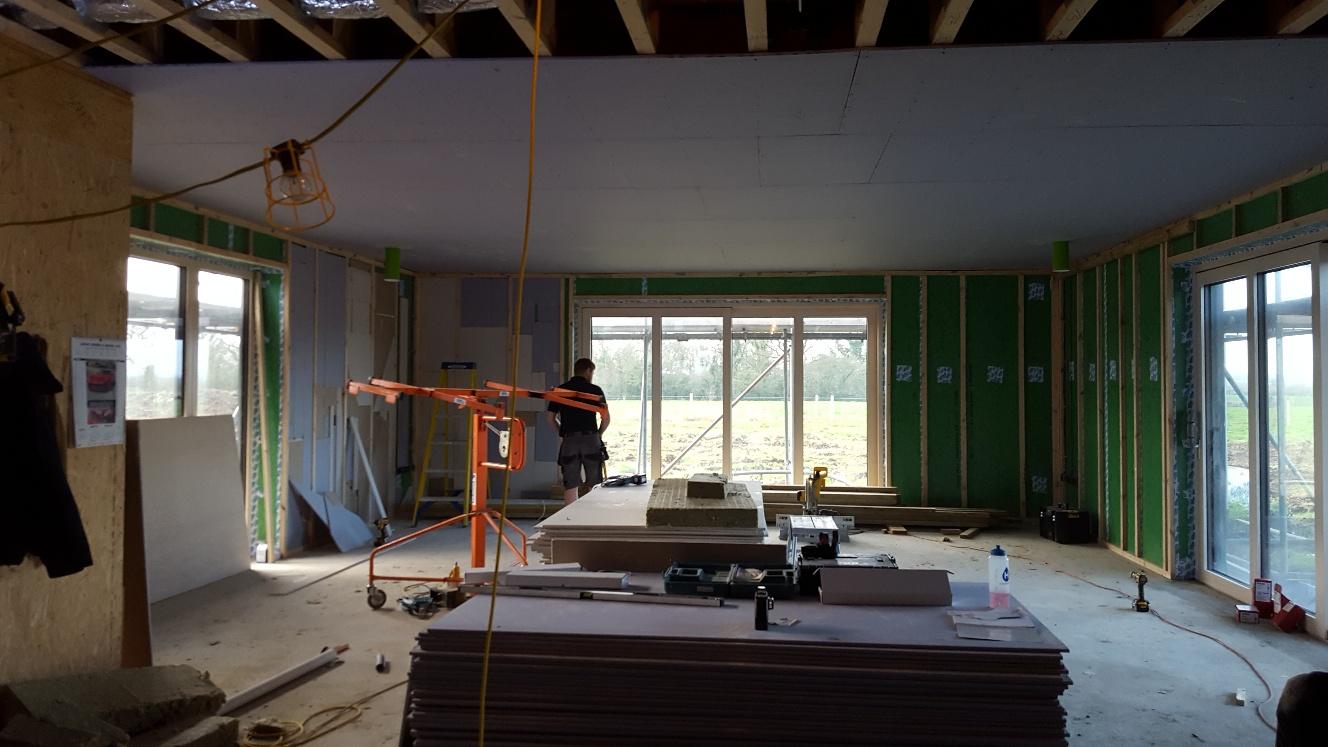
Looking in the opposite direction towards the lounge area:
There have been plenty of plasterboard offcuts and so we have followed @JSHarris's tip of stuffing as much of this into the stud walls before boarding over. Double bubble - increasing the heat retaining ability of the house and no paying expensive disposal fees on waste plasterboard.
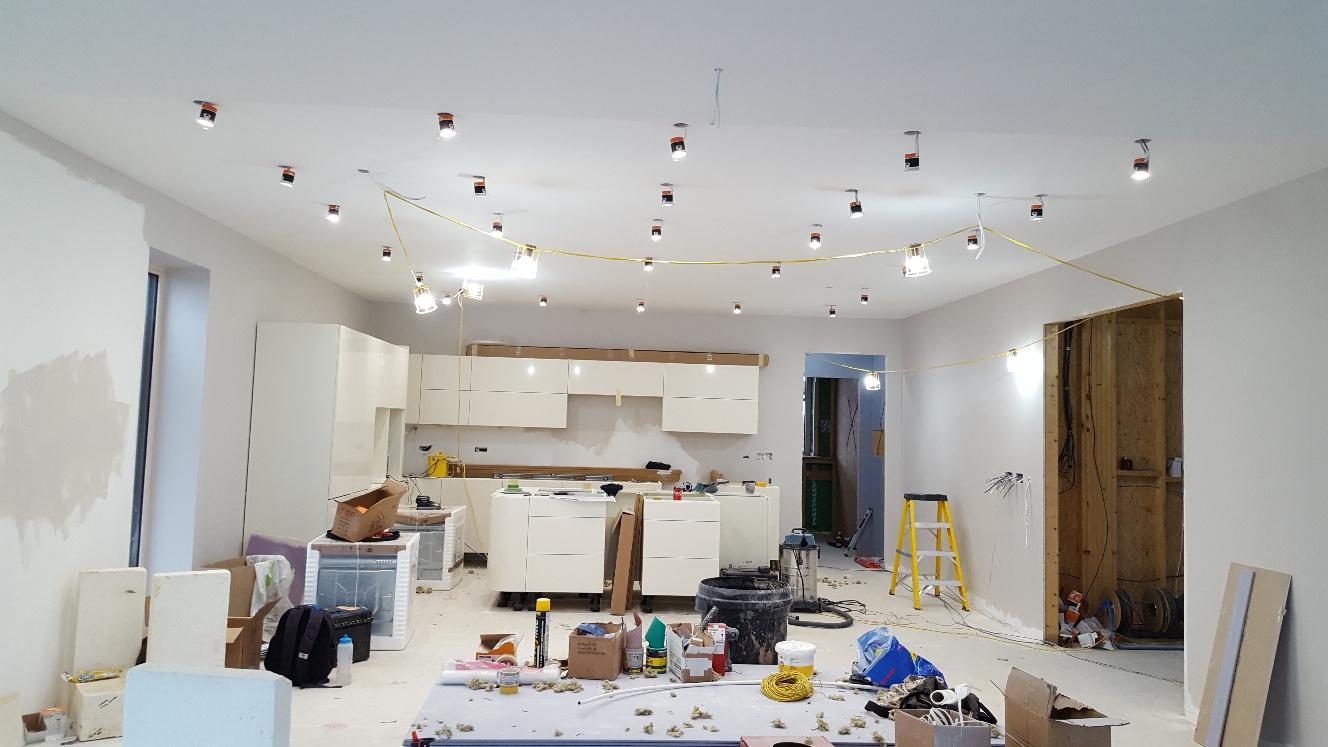
As well as the boarding and plastering, first fix is underway, getting all the wiring, sockets and switch positions in and running vast amounts of cable through the building for all sorts of stuff. It's not just a case of chucking the cable in, he's done a great job of working out the flow of the building and the people in it, and how the building's circuitry should function best to suit them. It's a pity that it isn't more visual, but suffice it to say that at the last count, something like 2.9km of cable has gone into the building. It's in there somewhere!
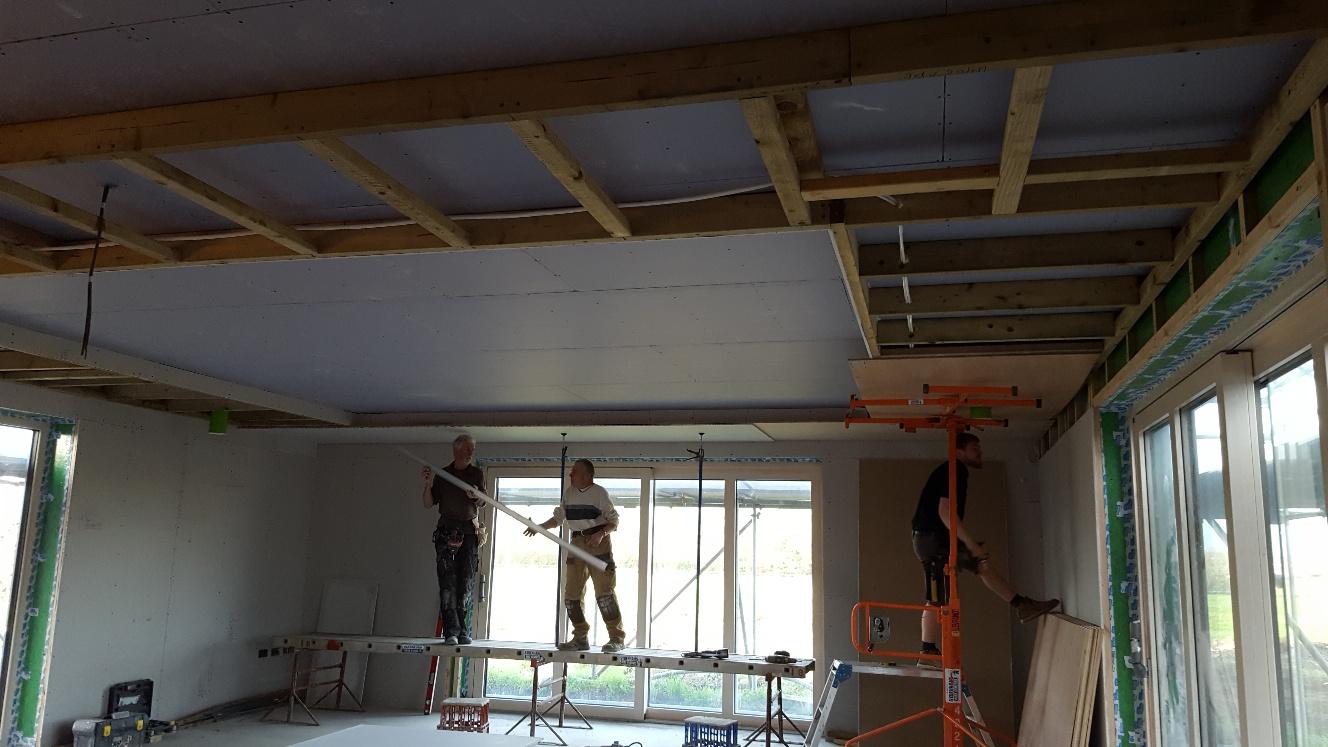
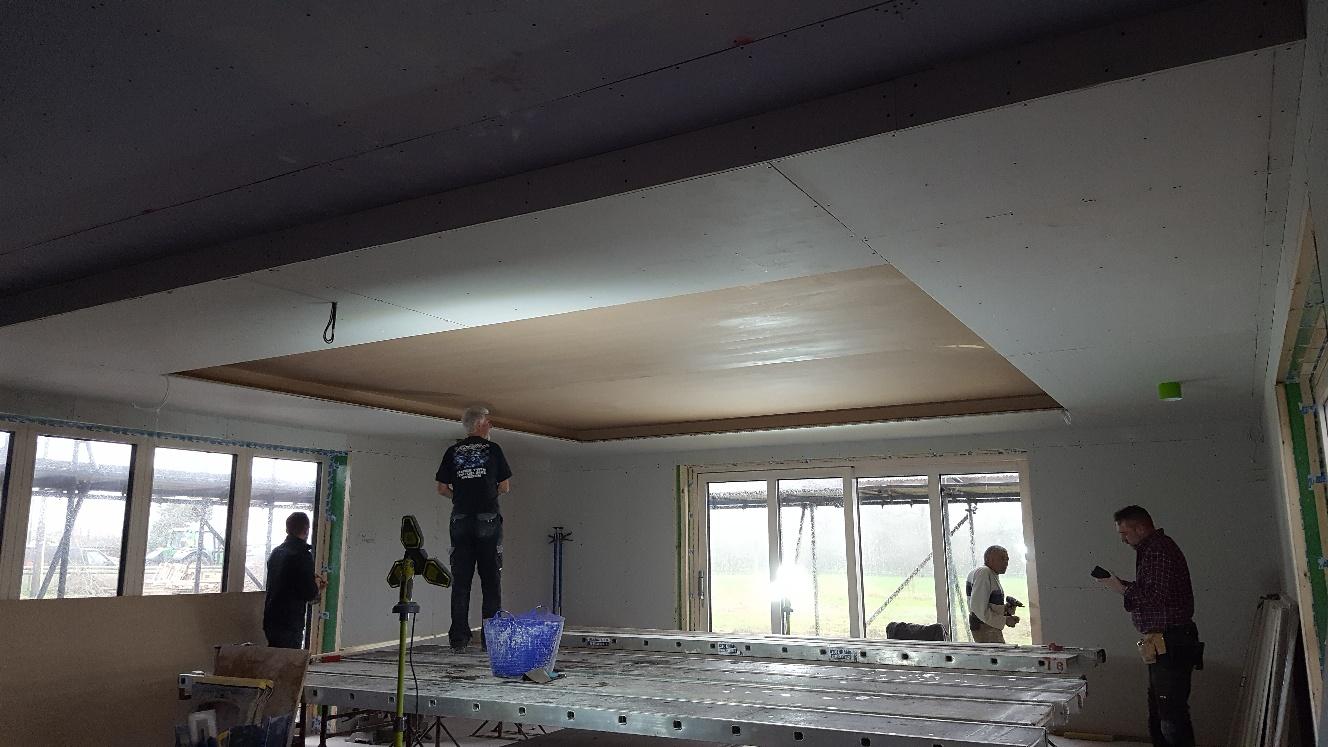
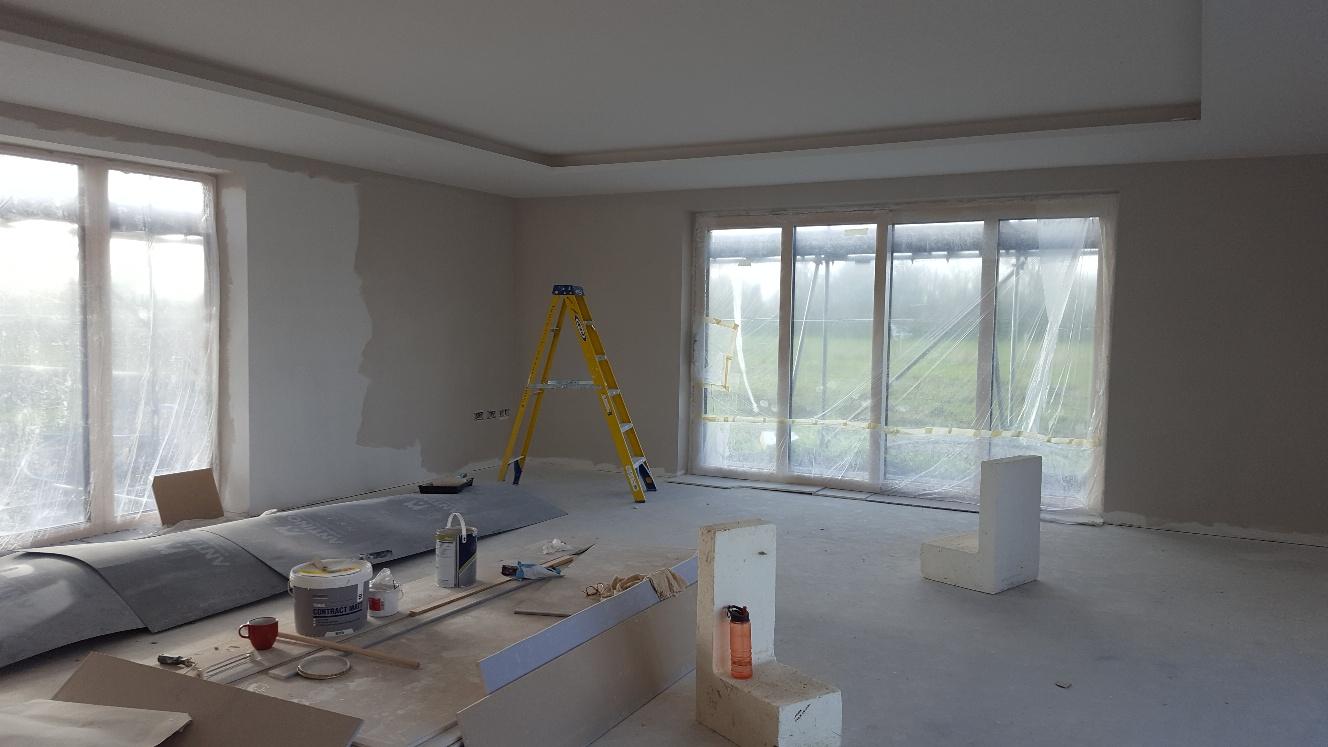
The room that forms the greater part of the ground floor is the kitchen/dining/lounge area and it's a very large space. From the outset, I've wanted to achieve some form of visual separation of the living area but without putting physical barriers in the way. It seems a waste to have gone to such great effort to create a lovely large space like that to then chop it up and close it in. I had inspiration for the solution from a couple of sources, the first of which is a tiny, crappy image on Pinterest when I was browsing cinema rooms. The second came about from chatting to another BH member, @Dreadnaught and a suggestion someone made to him to vary the heights of the ceiling throughout his proposed build. From this, I decided that I wanted a dropped section, like a frame, on the ceiling above the lounge area, with lighting recessed into the inner lip of the dropped section. Everyone pulled together really well to meet the challenge, and worked out what was needed from the carpentry, boarding, plastering and electrics contingents. The full ceiling was boarded out first, then the studwork frame put over it. The electrics were run through, then the frame was boarded and eventually plastered.
Here's the completed framework and the first of the plasterboard going up.
They're a cheerful bunch in their work!
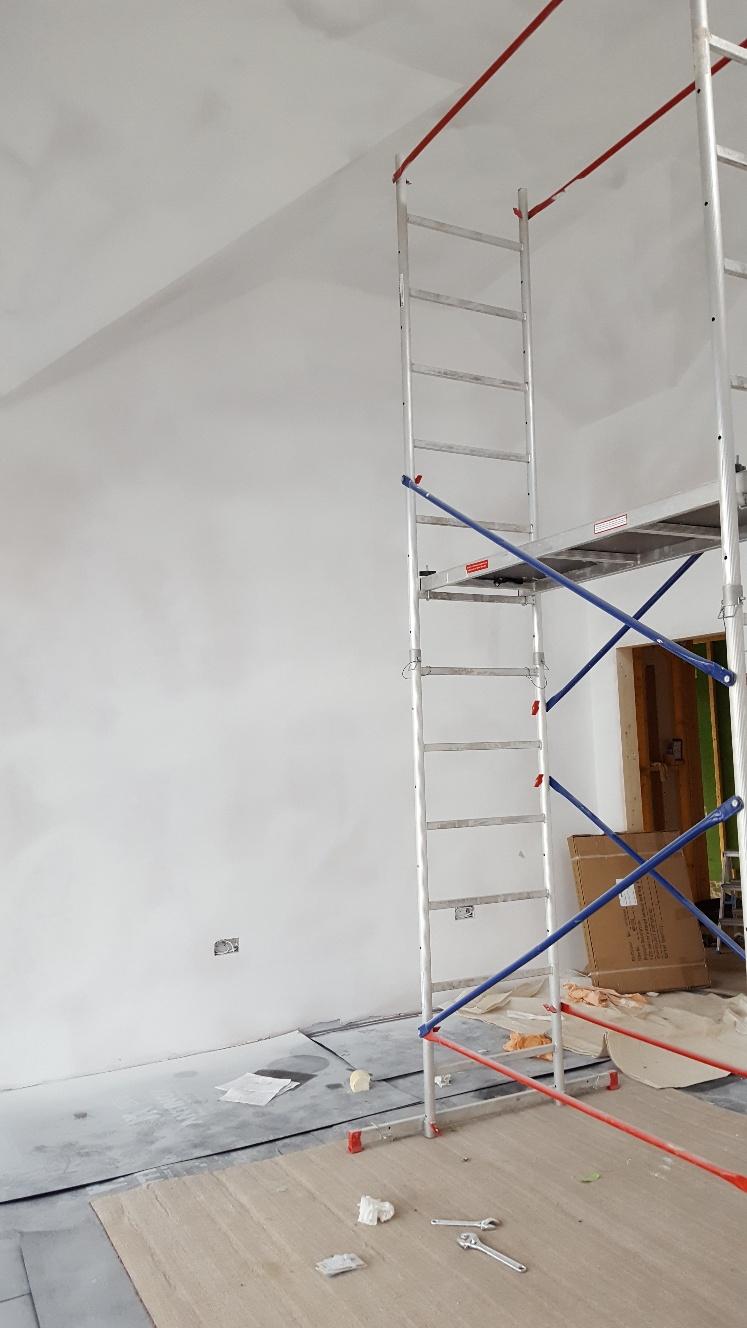
One thing I haven't skimped on is hire equipment to make the job of the plasterers and others easier. I figure it's a false economy to not get equipment like platforms and board lifters in as it will just cost me extra labour as the guys won't be able to work efficiently and possibly, not as well either. We had scaffold towers upstairs in the bedrooms for plastering and downstairs, we had a really big platform. I wouldn't do it any other way as the quality of the boarding and plastering is second to none.
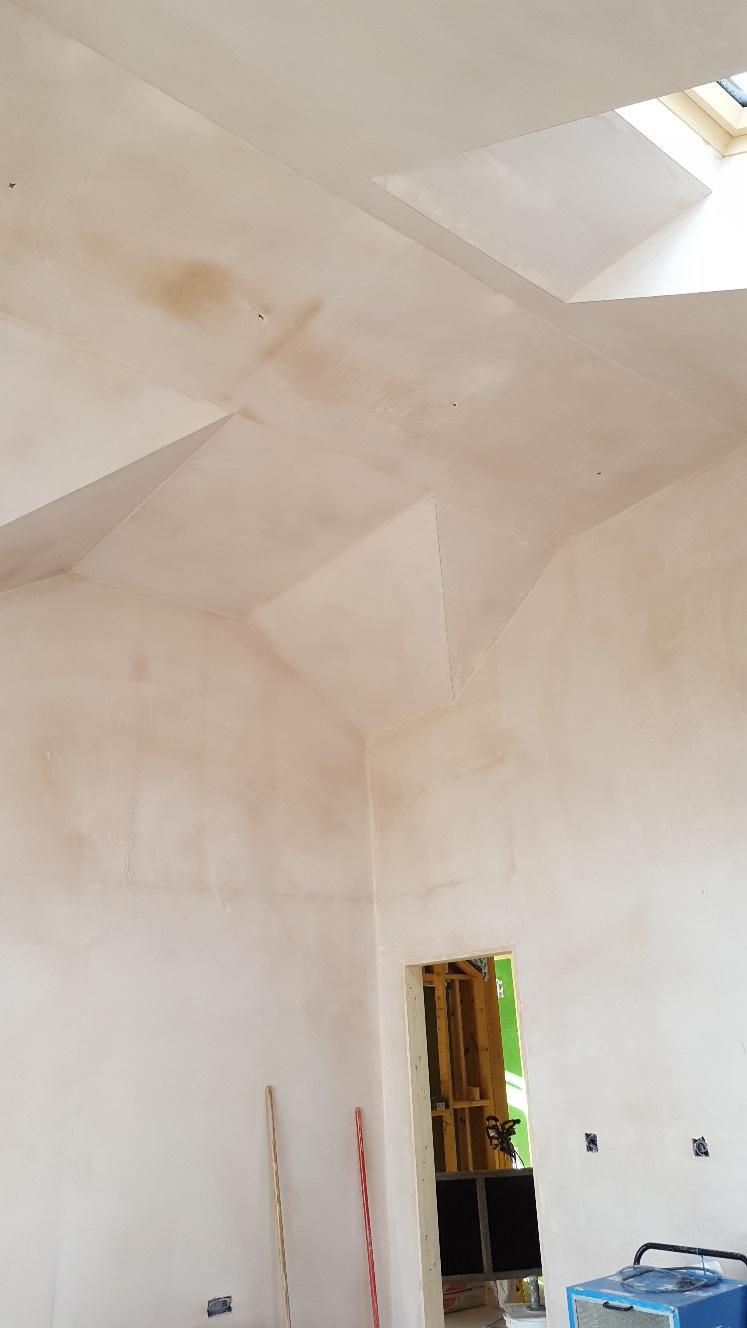
Once the studwork was boarded out, the inner ceiling section was plastered. The inner lip of the frame had an upstand added to it to make it appear more substantial and to hide the rows of LED lights behind them. We're going for a range of lighting intensity here, achieved by increasing amounts of lights, rather than dimmers. There will be 3 rows of LED lights hidden up there and we've used a car headlight analogy for want of better descriptions - the selection is dipped lights, main beam and rally lights. These are the only ceiling lights in this area as we plan to have floor lamps for specific task or reading lighting.
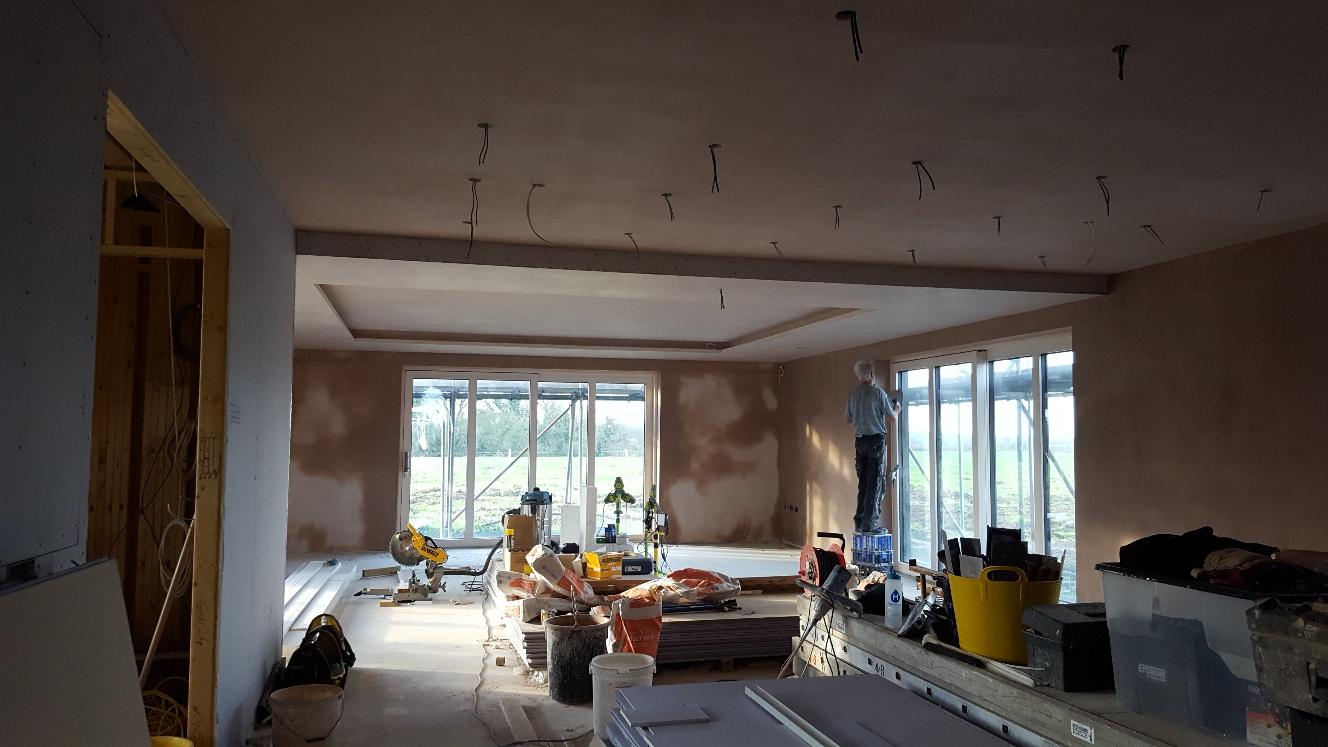
Once the inner ceiling was plastered, the framework itself was done the following day. This photo is some way on from that, as you can see. By this stage, the whole of the downstairs main room has been done and recesses formed for the spotlights at the other end of the room.
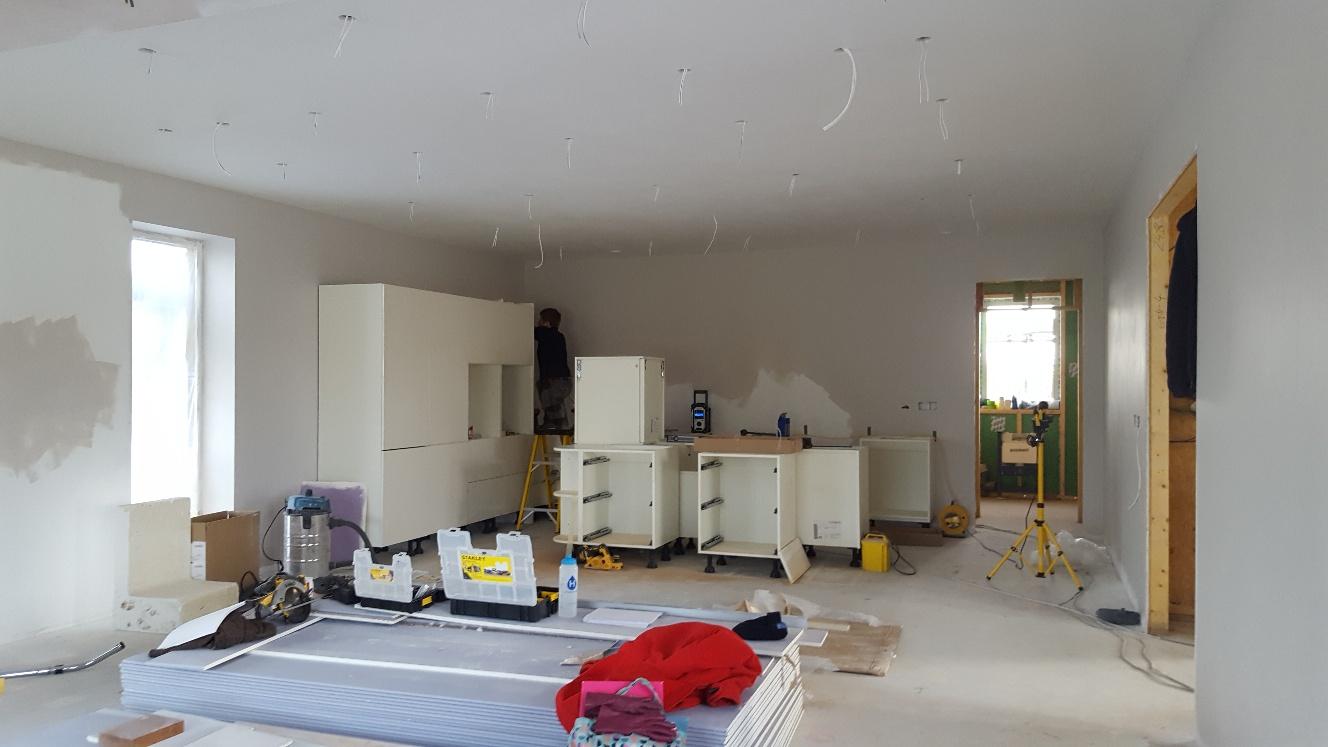
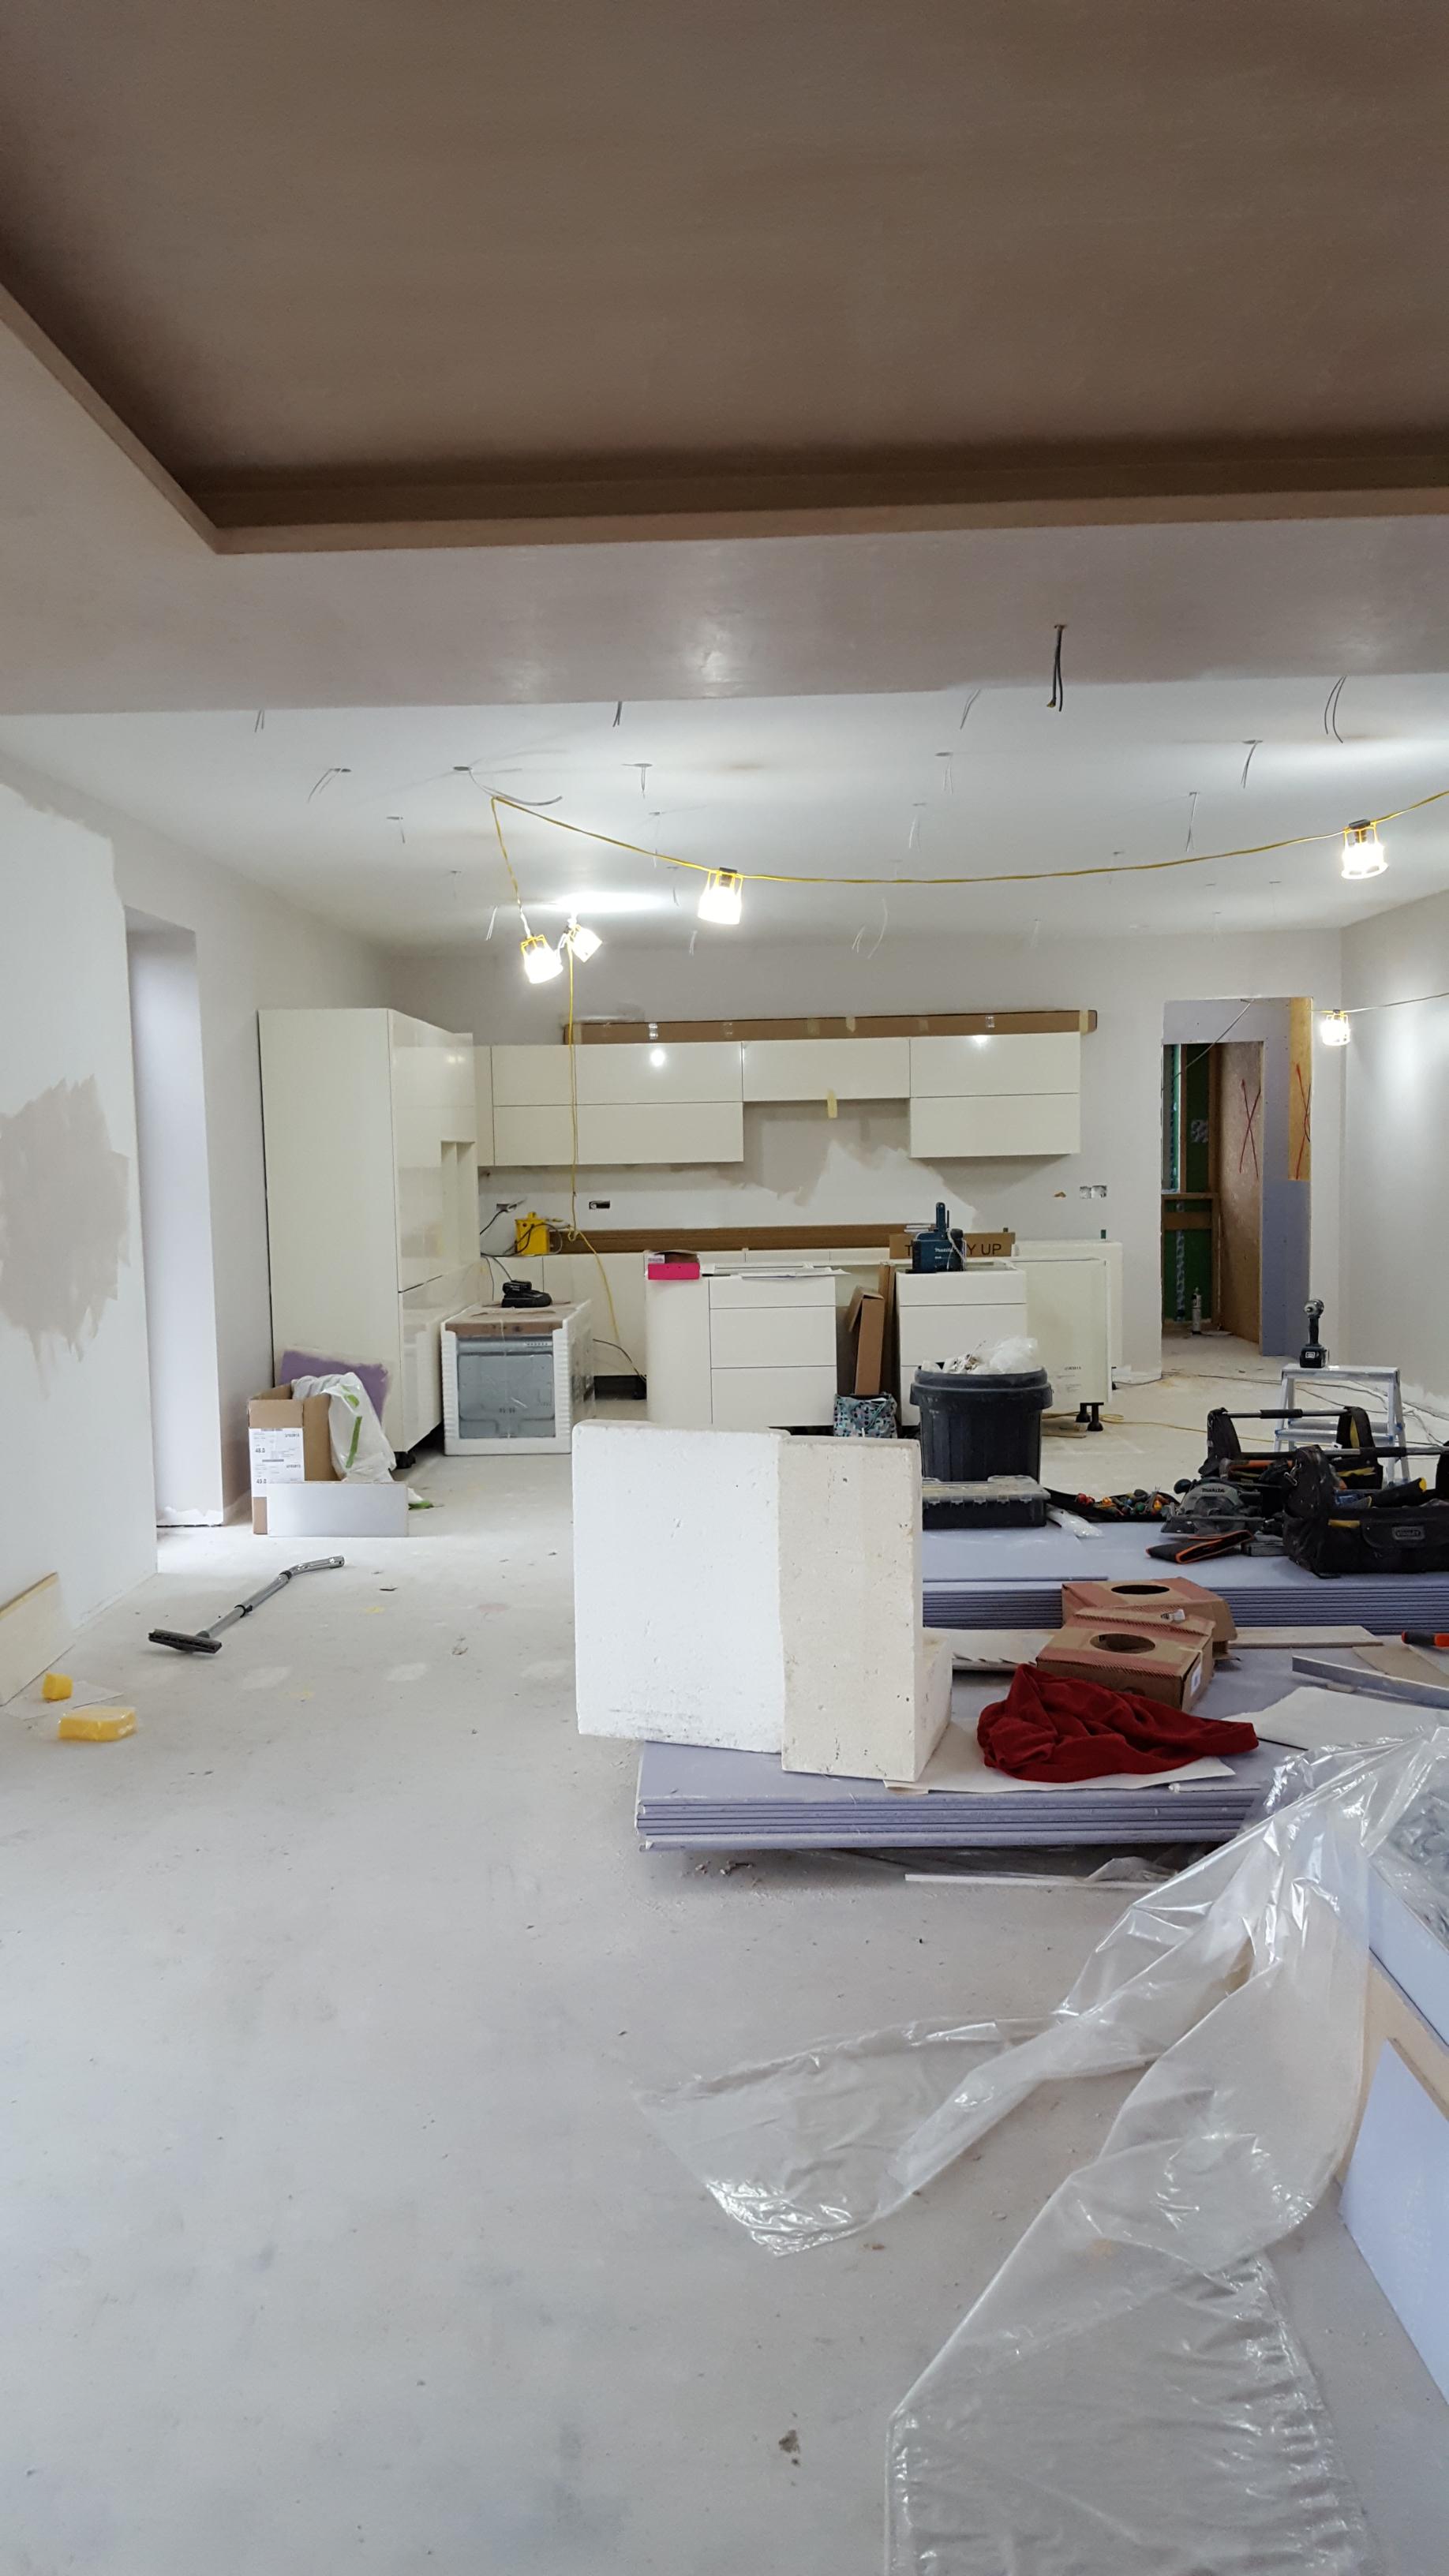
Not too long after this, the kitchen arrived from DIY Kitchens. Lovely quality units and everything is going together well. It did mean, though, that I had to get on with the painting up the kitchen end so that a start could be made on installation.
A paragraph or two on painting is appropriate here. I put a brief post into the main decorating section here on BH regarding spray painting, but it deserves repetition. I've planned from the outset to do the painting myself. I'm competent and it's nice to get some hands on involvement in the build. But, and it really is a big one, there is a vast surface area to cover in this house, and the vaulted ceilings upstairs are really quite intimidating for a vertically challenged person such as myself. Mind you, I think a vault of 4.7m would make most people ponder their method of attack. I decided that by far the most effective approach for me was to spray the mist coats to seal the plaster and continue with white for the ceilings. I wasn't sure at that stage whether I would also apply the colour coats by spraying, so adopted a 'wait and see' approach. First off, masking takes ages, even with a relatively empty house, as that spray will get everywhere and anywhere. Once the masking is done and you've familiarised yourself with the sprayer itself, though, the speed of coverage is astonishing. I was able to comfortably do one large room per day - both mist coats and a couple of extra ones on the ceiling to get it opaque and full white. It was messy. Really messy! Especially as when I first got going I had the spray pressure a little too high, the mad angles of the vaulted ceilings meant that my nozzle was never going to be held at a constant 90 degrees to the surface, and it's just a messy process regardless. In addition, there is a vast amount of moisture in the air, particularly as we had plaster drying at the same time. I hired a commercial dehumidifier for a couple of weeks to help with this and it was very effective.
I bought all my paint from Brewer's Decorator Centre, who are mainly based along the south coast of England. I opened a trade account with them and got 20% off the entirety of my first order, so I put everything I could think of onto that, including my antinox floor protection mats. Very useful they were, too. I used their contract matt white for the mist coat and ceilings. It's white, but not brilliant white and it's lovely. Very chalky, easy to sand and gives a nice highly matt finish. Also cheap as chips.
Here's one of the bedrooms, masked up and sprayed.

Here's another bedroom with that ceiling. My scaffold tower came into its own for reaching up to those heights.
Then, finally, the kitchen area with its mist coat. The sprayer is the little beastie sitting on the plasterboard.

I popped over on a weekend to also put the first colour coat on over at the kitchen area, whilst I could still get in easily before the kitchen started going in. I'm having splashbacks between the wall and base units, hence the odd looking finish level with the paint.
These were all the kitchen units as they arrived, prior to painting.
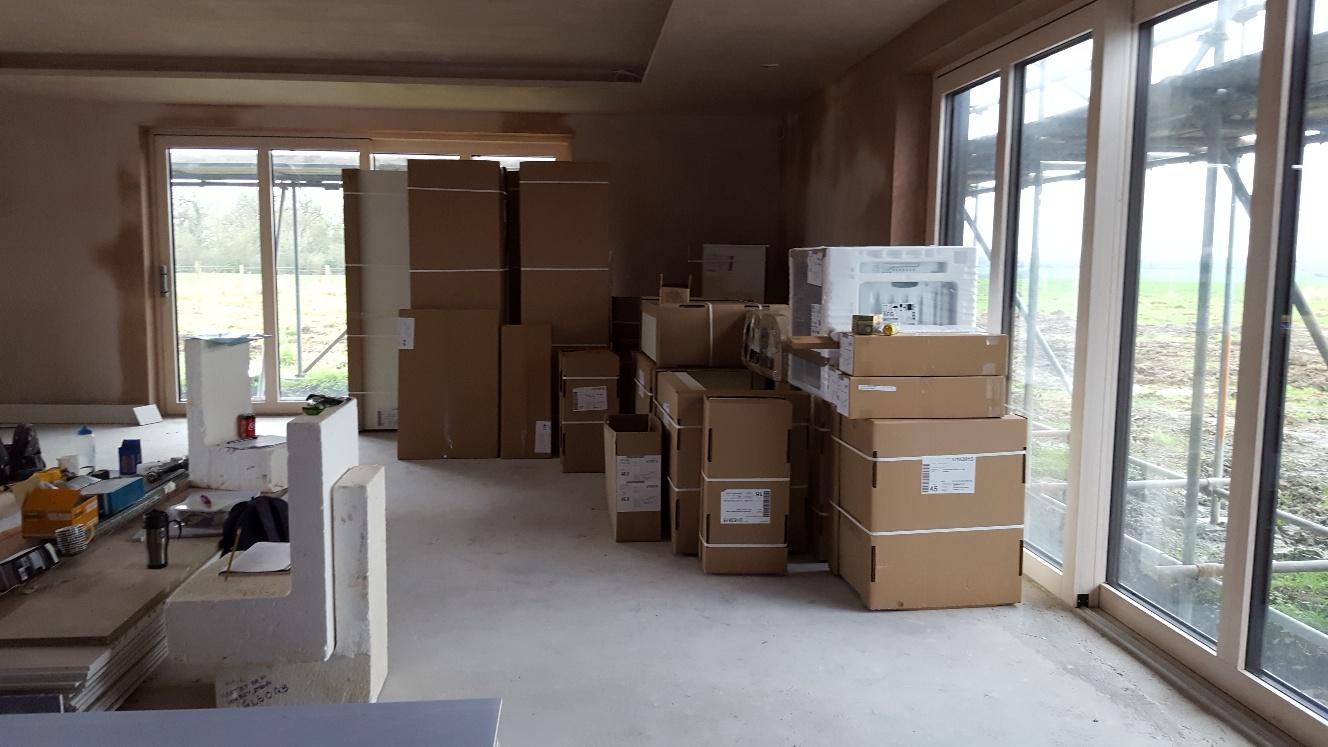
Everything was really well packaged and came with the doors on and drawers in. The delivery crew were pleasant and efficient, so all in all, a good experience.
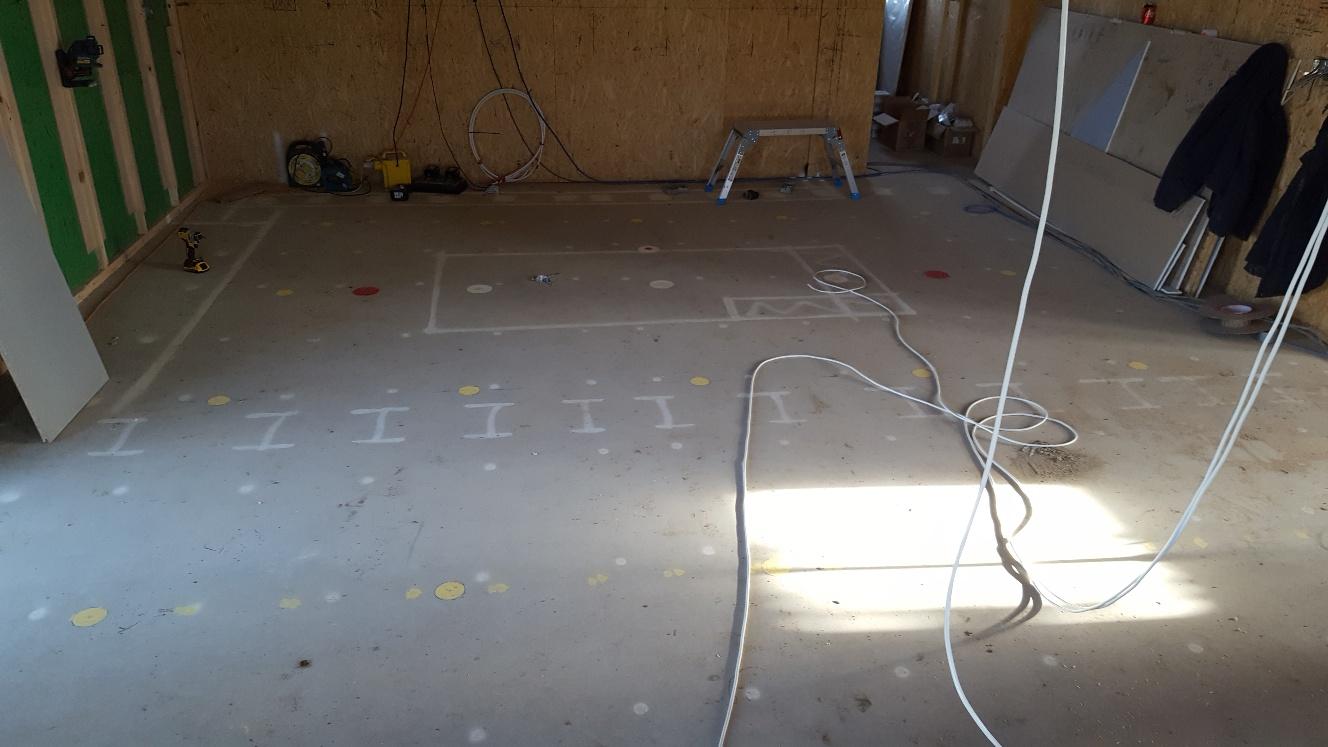
Moving away from painting and plastering, the ceiling plan for the lights was marked up on the floor, along with speakers and smoke detectors before the boards went on so that there was no guesswork involved in what was running where. Here's the marking plan:
This is what the kitchen units look like at the moment. I made a cock up in ordering, purely out of ignorance, and I'm waiting for a few end deco panels to arrive. These didn't even occur to me as they will go between units and appliances to give a better appearance from face on. It made perfect sense when it was pointed out to me, so things have halted temporarily until those and my worktops arrive shortly. In the meantime, it's looking good:
We also now have spotlights in place:
Finally, for the curious, this is what karndean flooring looks like. It has been laid upstairs and the downstairs will be finished in a couple of weeks. Upstairs, it was all laid on ply that was feathered in at the edges and downstairs will have a latex feathering coat to level the floor and provide an even base.

Next up is more of the same. The final session of boarding and plastering, lots more painting, the end of first fix and moving onto second fix. Outside, we need to get cracking on the rainwater goods, perimeter drain and exterior cladding. The cladding is due to arrive next week, so it will be interesting to see that and figure out the system.
I hope to be able to report back on over height doors soon, as well, and my endeavours to find these at a reasonable price, but that's all for now. There's painting to be done.
-
 12
12
21 Comments
Recommended Comments
Create an account or sign in to comment
You need to be a member in order to leave a comment
Create an account
Sign up for a new account in our community. It's easy!
Register a new accountSign in
Already have an account? Sign in here.
Sign In Now