


Kelvin
-
Posts
4085 -
Joined
-
Last visited
-
Days Won
48
Everything posted by Kelvin
-
I thought my groundworks team did a great job and the slab was fairly flat overall with an 8mm variance from the highest point to the lowest point. The screeders told me about a recent job where there was a 60mm variance between the high a low point. Too great to pour the screed in fact.
-
Can you be sure it will be contained? My various membranes have taken a real battering in places that I wouldn’t want to be relying on them to keep water out of the building
-
I see. It could cause all sorts of structural problems. Wouldn’t you be better biting the bullet now and redoing?
-
What’s the error? You can buy Wi-Fi hygrometers for wine cellars etc That might work. https://uk.govee.com/products/wi-fi-temperature-humidity-sensor?currency=GBP&variant=41546205069485&utm_medium=cpc&utm_source=google&utm_campaign=Google Shopping&utm_campaign=pla-lp&utm_source=google&utm_medium=cpc&gclid=EAIaIQobChMIzcvOxI_z_wIVBIVoCR3oRAP3EAQYAyABEgKIvvD_BwE https://www.energycontrol.com/Shop-Categories/Humidity/Remote-Mount-Humidity-Sensors
-
Space needed for truck deliveries and turning?
Kelvin replied to Alan Ambrose's topic in Project & Site Management
You also need to be mindful of how wide the road is and how straight it is. Is there a ditch on the opposite side etc Are the verges to the road soft? Our road is single track, straight and had a running water ditch opposite. The ditch was collapsed by the scot loo driver. Despite a wide belmouth I had to make it wider still. The hardcore surface is no use for pallet trucks even the powered ones. I’ve has to handball loads of stuff off the wagons. -
Do you actually use the deck at that point or is it just a walkway? If not claim the space back for the garden with a path through it maybe. Why has it rotted? I’ve just started planning our deck which will span the south elevation of our house. We’ve decided on Thermopine using hidden fixings and the Justifix mounting system from Sihga.
-
Exactly that. You really three plans I guess with plan C being people and wheelbarrows. But great effort. Well done on a very neat and tidy job.
- 39 replies
-
- 2
-

-

-
- the windy roost
- icf
- (and 2 more)
-
Mitigating Risk With Upfront Payments To Timber Frame Companies?
Kelvin replied to thefoxesmaltings's topic in Timber Frame
But they mostly all operate like this as far as I can tell. Lesson learnt. I’ll never build another house but if I ever did it wouldn’t be a timber kit. -
I was in a house a while back that had wall to wall ply inside. And I mean ply everywhere. It was beautifully done. However it was too much wood. Plus they daren’t put pictures up etc as it’s not so easy to fill holes and paint over. Be nice in a smaller area like your hut. It’s so expensive though. I have a bunch of sheets left over from the roof to use in the garage as mounting points for all my plant equipment.
-
Thanks all
-
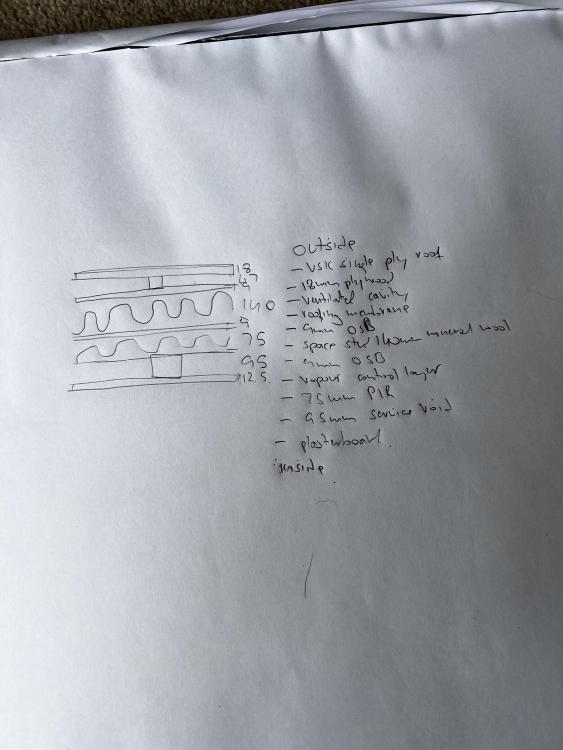
So we’re quite happy with the build up. Specifically the wool, osb, vapour control layer (pro clima), pir?
-
That’s one big house with a complicated heating setup. It must be full of pumps too! As per above. One manifold and 8 loops and no heating at all upstairs.
-
It is. It seems to be the standard build up for HH flat roof. I’ve not done the service void yet so can make it smaller. I am using the mountain of material that HH over ordered. I just fitted the PIR then had a moment of doubt when the last board was in. 😂
-
Space needed for truck deliveries and turning?
Kelvin replied to Alan Ambrose's topic in Project & Site Management
I’ll say that again but in English! I tested how big my offloading space was for turning using my Jimny and trailer and quickly realised it was pretty much impossible to turn around long vehicles without having to make multiple incremental turns. It would have quickly wrecked the surface. It already got churning up just with the tele-hanlder. -
Space needed for truck deliveries and turning?
Kelvin replied to Alan Ambrose's topic in Project & Site Management
The I tested our site was to try and turn my Jimny and trailer around in the off-loading space and quickly realised it wasn’t near impossible. Reversing in and driving out is easier on the ground. -
I thought about replacing the wool with PIR but I really couldn’t stomach taking the roof apart to get to it. I should have done when it was being erected but I had so many other issues to deal with I never got to it
-
Space needed for truck deliveries and turning?
Kelvin replied to Alan Ambrose's topic in Project & Site Management
The other thing to think about is how much hard standing to put down. Any soft ground will get destroyed especially if it’s wet. Same with verges on the road. I put a lot of hardstanding down right around the house so we don’t have a muddy bog that gets trailed everywhere and into the house. The downside is I’ll need to do something with all of this come landscaping time. -
Space needed for truck deliveries and turning?
Kelvin replied to Alan Ambrose's topic in Project & Site Management
Our site had no space to turn so I instructed all the deliveries on large vehicles or heavy vehicles to come from east side of the road and reverse onto the site. I created a large off-loading area. This was big enough for everything bar artics. They had to park on the road and we used the tele-handler to off-load. If you want them to be able to turn on-site you’ll need a huge amount of space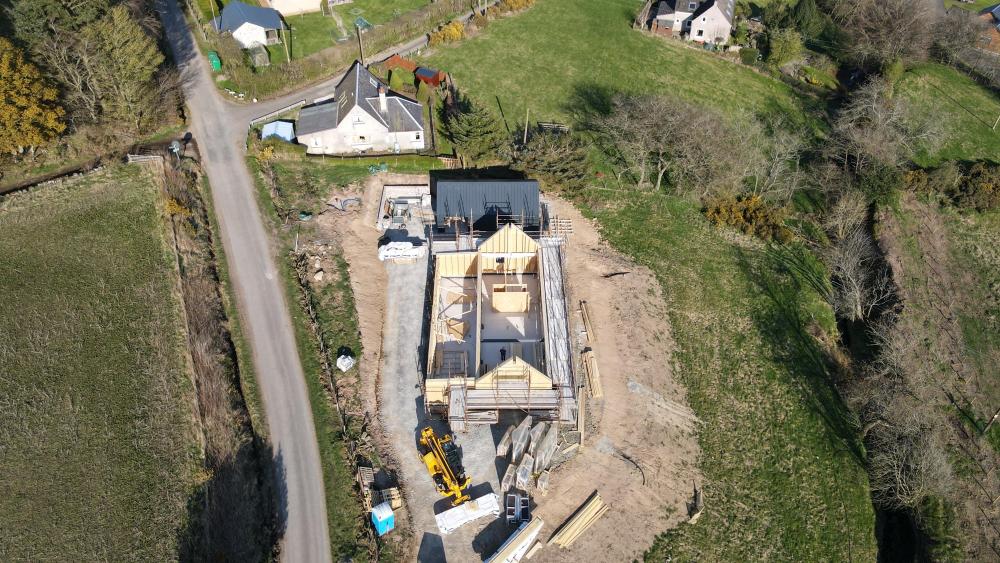
-
Due to yet another error the insulation in the flat roof of our dormer bathroom isn’t as deep as it should have been so have tried to address by utilising what I have on-site. However, I’m now worried I’ve caused myself a condensation problem. Is this ok? outside - Alwitra VSK roof - 18mm plywood - ventilated cavity - vapour control roofing membrane - 9mm OSB - space stud 140 wool insulation - 9mm OSB - vapour control layer - 75mm Celotex PIR (i’ve added this) - service void - 12.5mm plasterboard (should have been 53mm insulated plasterboard) Inside
-
Mitigating Risk With Upfront Payments To Timber Frame Companies?
Kelvin replied to thefoxesmaltings's topic in Timber Frame
Exactly this. After our experience I couldn’t recommend a timber kit, well certainly not Heb Homes. It’s not really benefited us much and it was still fabricated incorrectly causing us a whole number of problems. -
I followed the experience of others on here and didn’t put any heating upstairs. I’ll wire for wall heaters just in case but based on the last few months building the house it’ll be fine. Definitely no need in a truly passive house.
-
I can’t see anything on Nordan’s website on how to detail this.
-
There’s no issue with the windows themselves. It’s how they are fitted and sealed that’s the problem. Nordan are visiting site next week to replace an IGU that the scaffolders smashed. I’ve asked them to look over the installation. Separately I’ve told HH I want them to provide a detail for the window install and for their builder to apply it. I paid them to do it so they can do it.
-
Timber cladding (Scotland) what would you use and where to source
Kelvin replied to Grian's topic in Building Materials
We are going board on board Scot Larch from Russwood treated with Sioo:x to get that driftwood silver look uniformly as quickly as possible. It’s the thing I am most looking forward to doing in the next few weeks. It’s not cheap but it is lovely. -
Is it normal for roof membrane to leak like a sieve?
Kelvin replied to Tom's topic in Roofing, Tiling & Slating
The issue with the membrane is it can get damaged when you have folk crawling all over your roof screwing in battens to help them clamber about the roof. A section around our rooflight was in a right mess so I replaced it. We have two breather membranes on ours, one over the OSB sheathing, then an air gap then one over the plywood deck that supports the metal roof. We’ve been quite lucky as our house has remained more or less completely dry.

