ProDave
-
Posts
30671 -
Joined
-
Last visited
-
Days Won
423
Everything posted by ProDave
-
I would phone them and ask WHY they quoted for something different, and could I please have the quute for the items I wanted.
-

A Timber framed house with external wall insulation
ProDave replied to ProDave's topic in Timber Frame
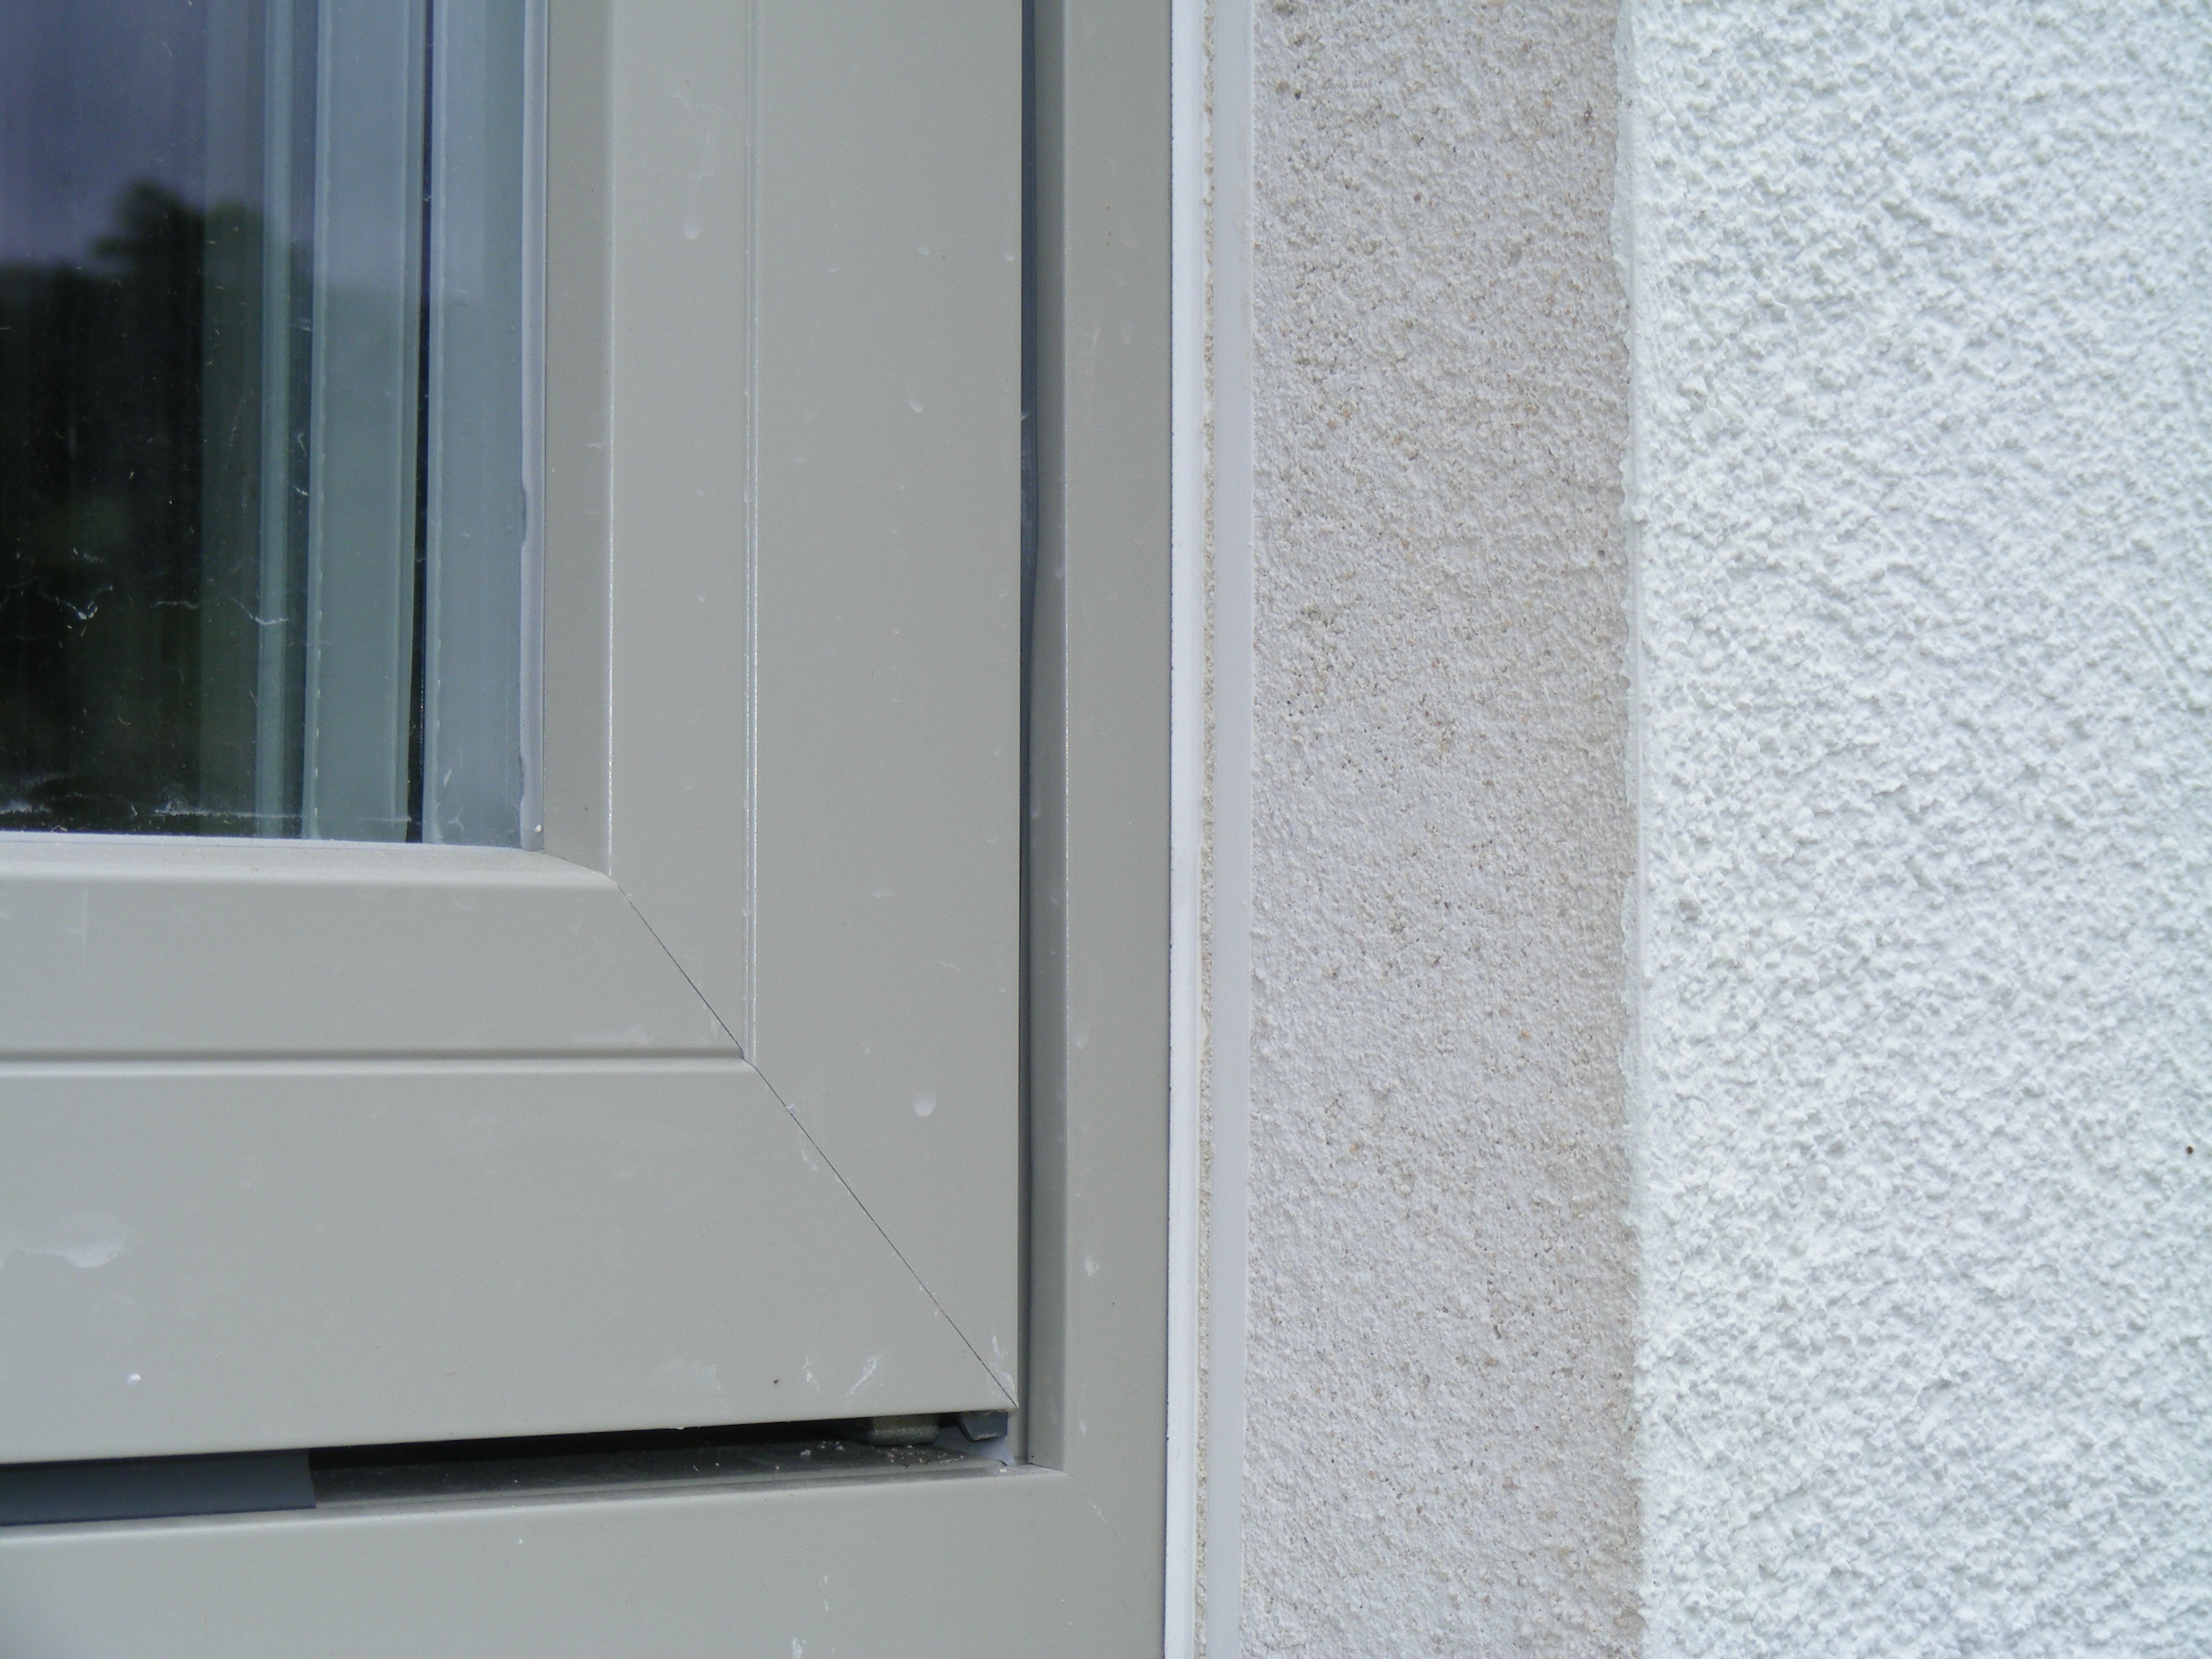
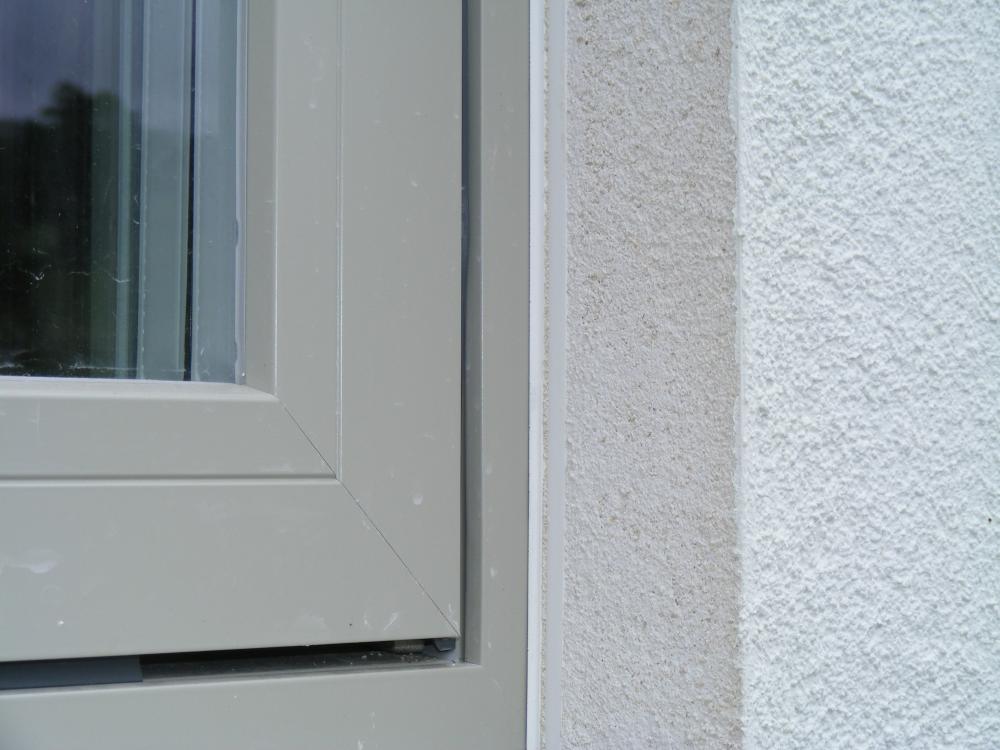
Sory for the delay. Just back from the days work on site with some pictures. This is one of the windows on the back wall, yet to be rendered. You can see there is a deliberate gap between the side of the window frame and the wood fibre cladding so the gap between the timber window frame and aluminium cladding is kept clear. At the bottom I have shown a bit of the render stop bead that is being used. This ensures the render does not go down the gap between the window frame and the wood fibre board, and risk blocking the gap between the window frame and ali cladding.. So if any water did get between the timber window frame and the aluminium cladding, it could escape and run down onto the window cill (which is wider than the window) Though quite why it would come out of the side rather than just run down to the bottom I don't know. The gap between the wooden part of the window frame and the wood fibre board is filled with compriband expanding foam tape. And this is one of the font windows, now rendered, showing the finish achieved using that stop bead. I have mentioned before this may not be the "official" way of doing it, but I had to work with the tradesmen available, and the guy doing the rendering (only one up here who does this system) said the "official" way is an impossible detail. So this is a "possible" detail that still preserves the essence of ensuring the gap between the window frame and ali cladding is not compromised. It does make for a very crisp finished detail.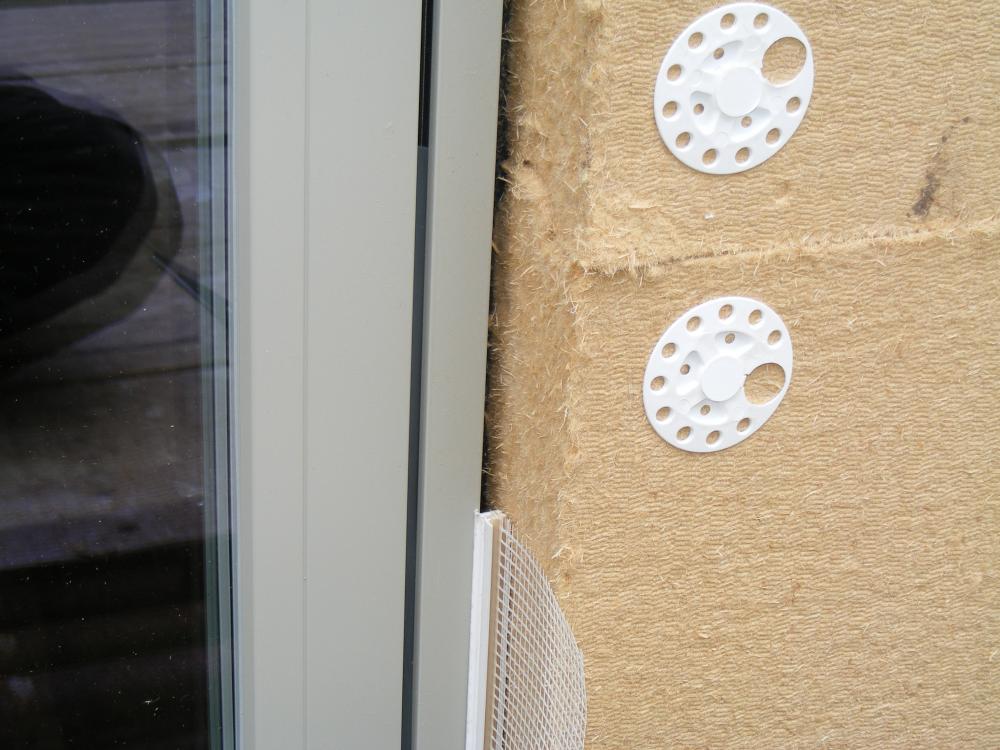
-
I get the feeling if our planning aqplication had been somewhere else, but with all the "features" of this plot, we would have had a lot of ecological conditions. As it happens, there are none whatsoever. For a start we have the burn. I am sure some environmentalists could find lots of ways to make our life awkward. The reality is we are not really touching the burn, apart from installing a discharge pipe, but we are not altering it's course or anything so disturbing nothing. But I'll bet in some places you would have to jump through hoops just to prove you were not disturbing it. Then there are friends the bats. There are loads of them here. Go outside at dusk and you can't fail to see them flying about. Where do they roost? heaven knows, probably up ther road in the derelict wooden building that years ago used to be a pub but it's now abandoned and in a very poor state with holes in the roof. Again in some places we would probably have conditions attached so we don't harm their habitat. And then there are trees. We have lots of them. Two had to be removed to build the house and were agreed by the planners, but the remaining ones don't have TPO's so I can trim them or thin them out as I want to. I am just applying common sense. I am not cutting all the trees down. I am not (as my neigbour keeps talking about) culverting and covering the burn where it passes through the garden, I am not knowingly disturbing wildlife. In some places you are not credited with enough intelligence to apply common sense and have to have everything dictated to you.
-
This was a ticking time bomb I had at a previous house, our old 1930's semi. I know the incoming pipe was steel, and rusting. If you went away on holiday and came back, the first thing I did was turn the kitchen tap on to purge the slug of brown rusty water that had buiolt up while it was standing. To make matters worse there was one stopcock in the road that served the pair of semi detached houses. So apart from not knowing where the pipe ran, and where it branched, any replacement would have to involve the neighbour. Thankfully we sold the house before it started leaking but I guarantee at some time it will become a problem. In your situation, I see little point digging up the floor. What are you going to find? an unrepairable rusty leaking pipe and the act of distrurbing it might make it a whole lot worse. I would seriously think of laying in a new mdpe pipe into the house, and trenching it all the way to the stopcock then getting the water company to swap it over. Does your kitchen for instance have a suspended floor? if so bring it in there rather than into the bathroom.
-
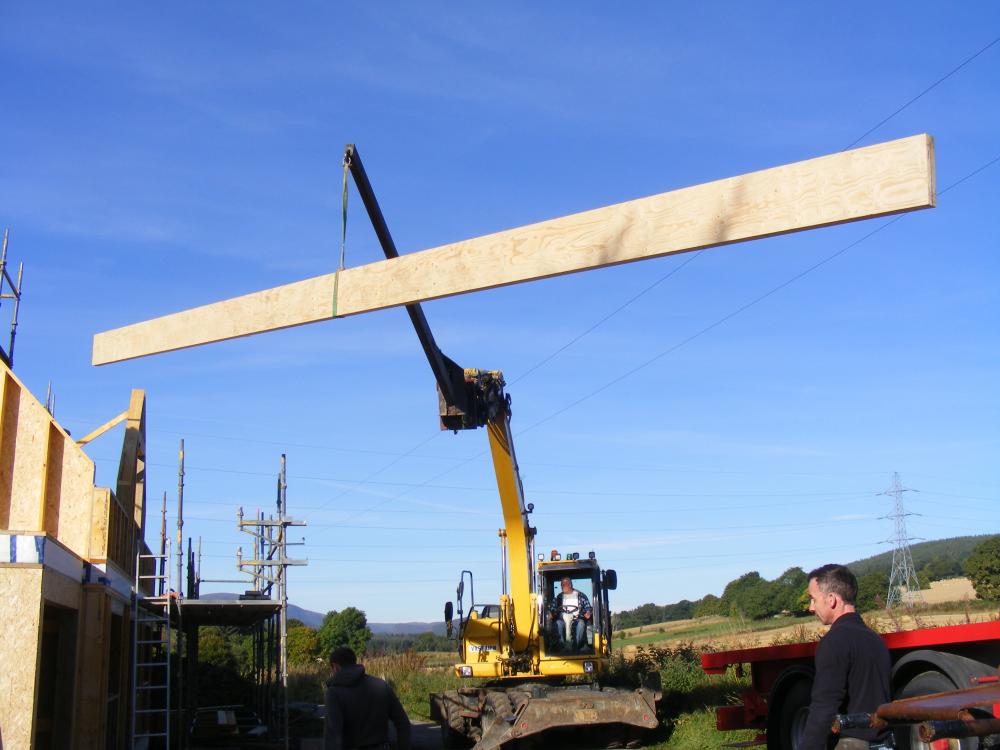
Watch for lifting big loads at full reach, and then turning sideways and whoops the digger falls over. I was impressed with the 13t digger our builders used. A 360 degree digger but on wheels not tracks so it is road legal (but more prone to getting bogged down on site) As well as loading forks, it also had a long "boom extension" that just fitted to the quick hitch. It was just a long bar with a hook on the end. They use if for lifting timber panels and beams into place. In spite of it's length, and only being attached to the quick hitch in place of a bucket, it did seem very smooth, which is both a complimet to the mechanics of the digger, and the skill of the driver. Here it is lifting our big ridge beam.
-
A Timber framed house with external wall insulation
ProDave replied to ProDave's topic in Timber Frame
Standard Marley verge covers. If I had got my way with the planners we would have used a concrete tile which has verge tiles available where the concrete tile wraps over the end. But this tile was all we could get passed the planners and they are flat tiles and the plasic end cloaks are the only option. The tiles are Marley Edgemere Riven, just about close enough in finish to "slate" to be about the only concrete tile the planners would allow. -
A Timber framed house with external wall insulation
ProDave replied to ProDave's topic in Timber Frame
here you go It was quite a tricky detail to work out. The rafters end at the edge of the timber frame. The roof is clad in wood fibre board, as are the walls so the two boards meet and the entire frame is wrapped in wood fibre boarding with no bits of the frame prortruding to form a cold bridge.. The 8 X 2 is then screwed with 200mm long screws through the wood fibre board into the rafters and timber frame. Then the render goes on up to the "soffit" board. As it stands there is a poor detail there, in that wind driven water could get blown in above ther render if a gap opened up between the render and the fascia. That will be solved when the ali cladding goes on as that will project below the bottom of the fascia, then return up forming a drip bead to ensure water drips off in front of the render. You can also see my shortened drainpipe offset detail.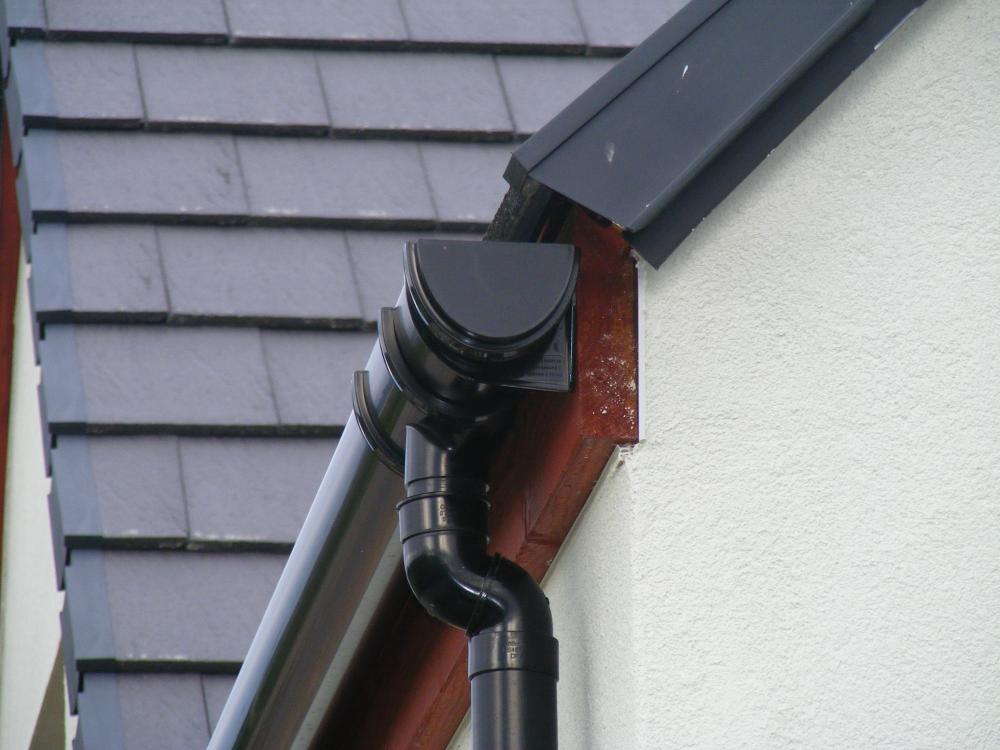
-
A Timber framed house with external wall insulation
ProDave replied to ProDave's topic in Timber Frame
Which bit? I can go and take some more photo's. -
On that note, I would not have wanted to dig the hole for mine with anything smaller than my 3 ton machine. That was at almost full reach down into the hole. My machine would have been too small to have enough height to lift it off a truck, but luckily I ordered it from TP (who actually gave the best price) and their own truck offloaded it with a hiab. On the other hand we still have a lot of trees and I often find I have been working under them and then wished my machine was not as tall......
-
Did he give a reason? I am sure I have seen polished concrete with UFH.
-
..... And change it back to one WITH a hose connector as soon as the idiot has left the site. What does he think the double check valve is for FFS? I had this nonsense with Scottish Water. They would not make my connection initially because I didn't have the double check valve in line with the standpipe or the caravan. So I had to fit two of them and call him back. Lessons learned. ONLY provide your stand pipe, NO OTHER connections. Once your supply is on site SW don't require any other insperctions, building control see to all of that. And this double check valve thing drove me nuts. There is a single check valve in SW's toby on the boundary. There is a single check valve in my own toby used for my water distribution network. There is a single check valve in the TAP. But these three single check valves are not considered adequate, so as well as those 3, I had to install an in line double check valve. Talk about being paranoid. Why don't they just fit a double check valve in the toby that THEY supply, then the whole site sould be covered?
-
If 1.5 metre is your deepest excavation, then just about any machine will do that. For me, the choice was made by what was available nearby at the time. If the machine is to far away, transport costs add up a lot. Perhaps not an issue in densely populated areas where you will have a lot of choice nearby, but up here there wasn't much for sale close by.
-
Now I am a "believer" in dowsing in that I have been able to find a pipe before. But to be able to pinpoint where a leak is by that method? Greatest respect to him if he is right. Do let us know.
-
A Timber framed house with external wall insulation
ProDave replied to ProDave's topic in Timber Frame
Yes it was. It was a design feature that I wanted to keep it simple and in some ways more traditional looking (most of the old croift houses don't have a boxy soffit or fascia) The wooden fascias you see now are going to be over clad in aluminium painted the same colour as the windows. That will ensure no maintenance and provide a drip bead at the front edge. Knowing they were going to be covered, I just used lengths of 8 by 2 constructional timber left over from framing up the roof. Originally I had planned to uses some posh rainwater goods, but chose the cheap plastic in the end. Having done so I like the black on white look. Surprisingly the most "difficult" detail was the offset bends where the downpipe joins the gutter. The downpipe is offset from the wall by a fixed distance by it's brackets. Two standard 45 degree bends gave it way too much offset from the wall. But I couldn't just take it straight down, that would have looked silly. In the end I had to choose the make of 45 degree bends carefully (the ones I ended up with came from TP) and then some careful work with a hacksaw to shorten them to make a much smaller offset. The finished thing looks good, just a shame you can't use off the shelf stuff. -
Most of my run to the kitchen hot tap will be parallel with, not through, the posi joists, so I should be okay.
-
That sounds like a fair price. When I last tried an "architect" I was getting silly prices based on about 7% of their estimate of the build cost. So I didn't even go down that route this time. I used an architectural technician to detail the design.
-
My thinking is I need 10mm copper for the LPG supply to the hob (can't do that in speedfit) so one coil of 10mm copper will probably do my LPG run and my kitchen hot water run.
-
I must admit I was thinking copper for the 10mm run, no restrictions at joints (soldered) High mains pressure so I expect the hot water to be running at 3 bar from the PRV.
-
What thickness of EWI? My house is clad in 100mm thick wood fibre, and the standard Rationel cills work by putting the window frames half in the timber frame of the house, and half sticking out to then be encased in the wood fibre board. P.S I think the fitting of the cills is the one "bad" feature of the Rationel windows. They fit by being "pressed" into a slot in the bottom of the window frame. The builders didn't want to fit the cills to the windows before fitting them as most of them went in from the inside and the cill would be in the way to do that. So it was down to us to fit them from the outside afterwards. One of them in particular took some serious hammering with a hammer and block of wood to get it to go in. Nervous moments hitting the bottom of the window frame (in effect) very hard with a hammer.
-
I would say a SE is needed if there is a retaining element. I am building my house on strip foundations. One of my design briefs to the SE and architectural technician was I wanted "simplified" foundations. A lot of timber frame companies will design a house that uses thin joists on the ground floor and then a lot of intermediate sleeper walls to support them. I took the view that I need thick joists anyway to get enough insulation in (I am using 300mm JJI joist) and the first floor joists (posi joists in my case) are capable of spanning the distances in one go, so there is no reason the ground floor ones can't also span the same distance without intermediate sleeper walls. One thing others will warn you about is what happens if the timber frame arrives and it does not fit? Who is responsible? I solved that problem by contracting one building firm to build the foundations, and construct and errect the timber frame. If it didn't fit, it was entirely their problem to solve. As it happened, the joiners came to measure the foundations before building the frame just to make sure the ground workers had got it right.
-
I will be doing the same, 16mm leftover bits of UFH pipe from the last house, using the 16 to 16mm adapters at each end. The flexible pipe will wind its way through the posi joists, converting back to copper in some accessible point for the final conections. I don't want any hidden joints. I doubt I will actually use a true manifold. The objective will be the absolute shortest possibler route from hot tank to hot taps, and I doubt that will be achieved with a manifold, rather just branches off a backbone pipe with individual isolators. For the long run to the kitchen tap, I am going to install a parallel 10mm pipe. Only when I try it will I find out if the 10mm pipe delivers enough hot water flow to the kitchen tap. If it works, that's a lot of wasted volume saved. If not the 16mm pipe will be there to swap over.
-
I don't understand that "borehole view" on that geology map. Can you explain why there are a lot of "boreholes" all along the A9 road, where there are no houses? And the one real borehole that I know of nearby is not on the map. One of the estates in town appears to have about 100 boreholes, yet is on mains water. It doesn't make sense.
-
A Timber framed house with external wall insulation
ProDave replied to ProDave's topic in Timber Frame
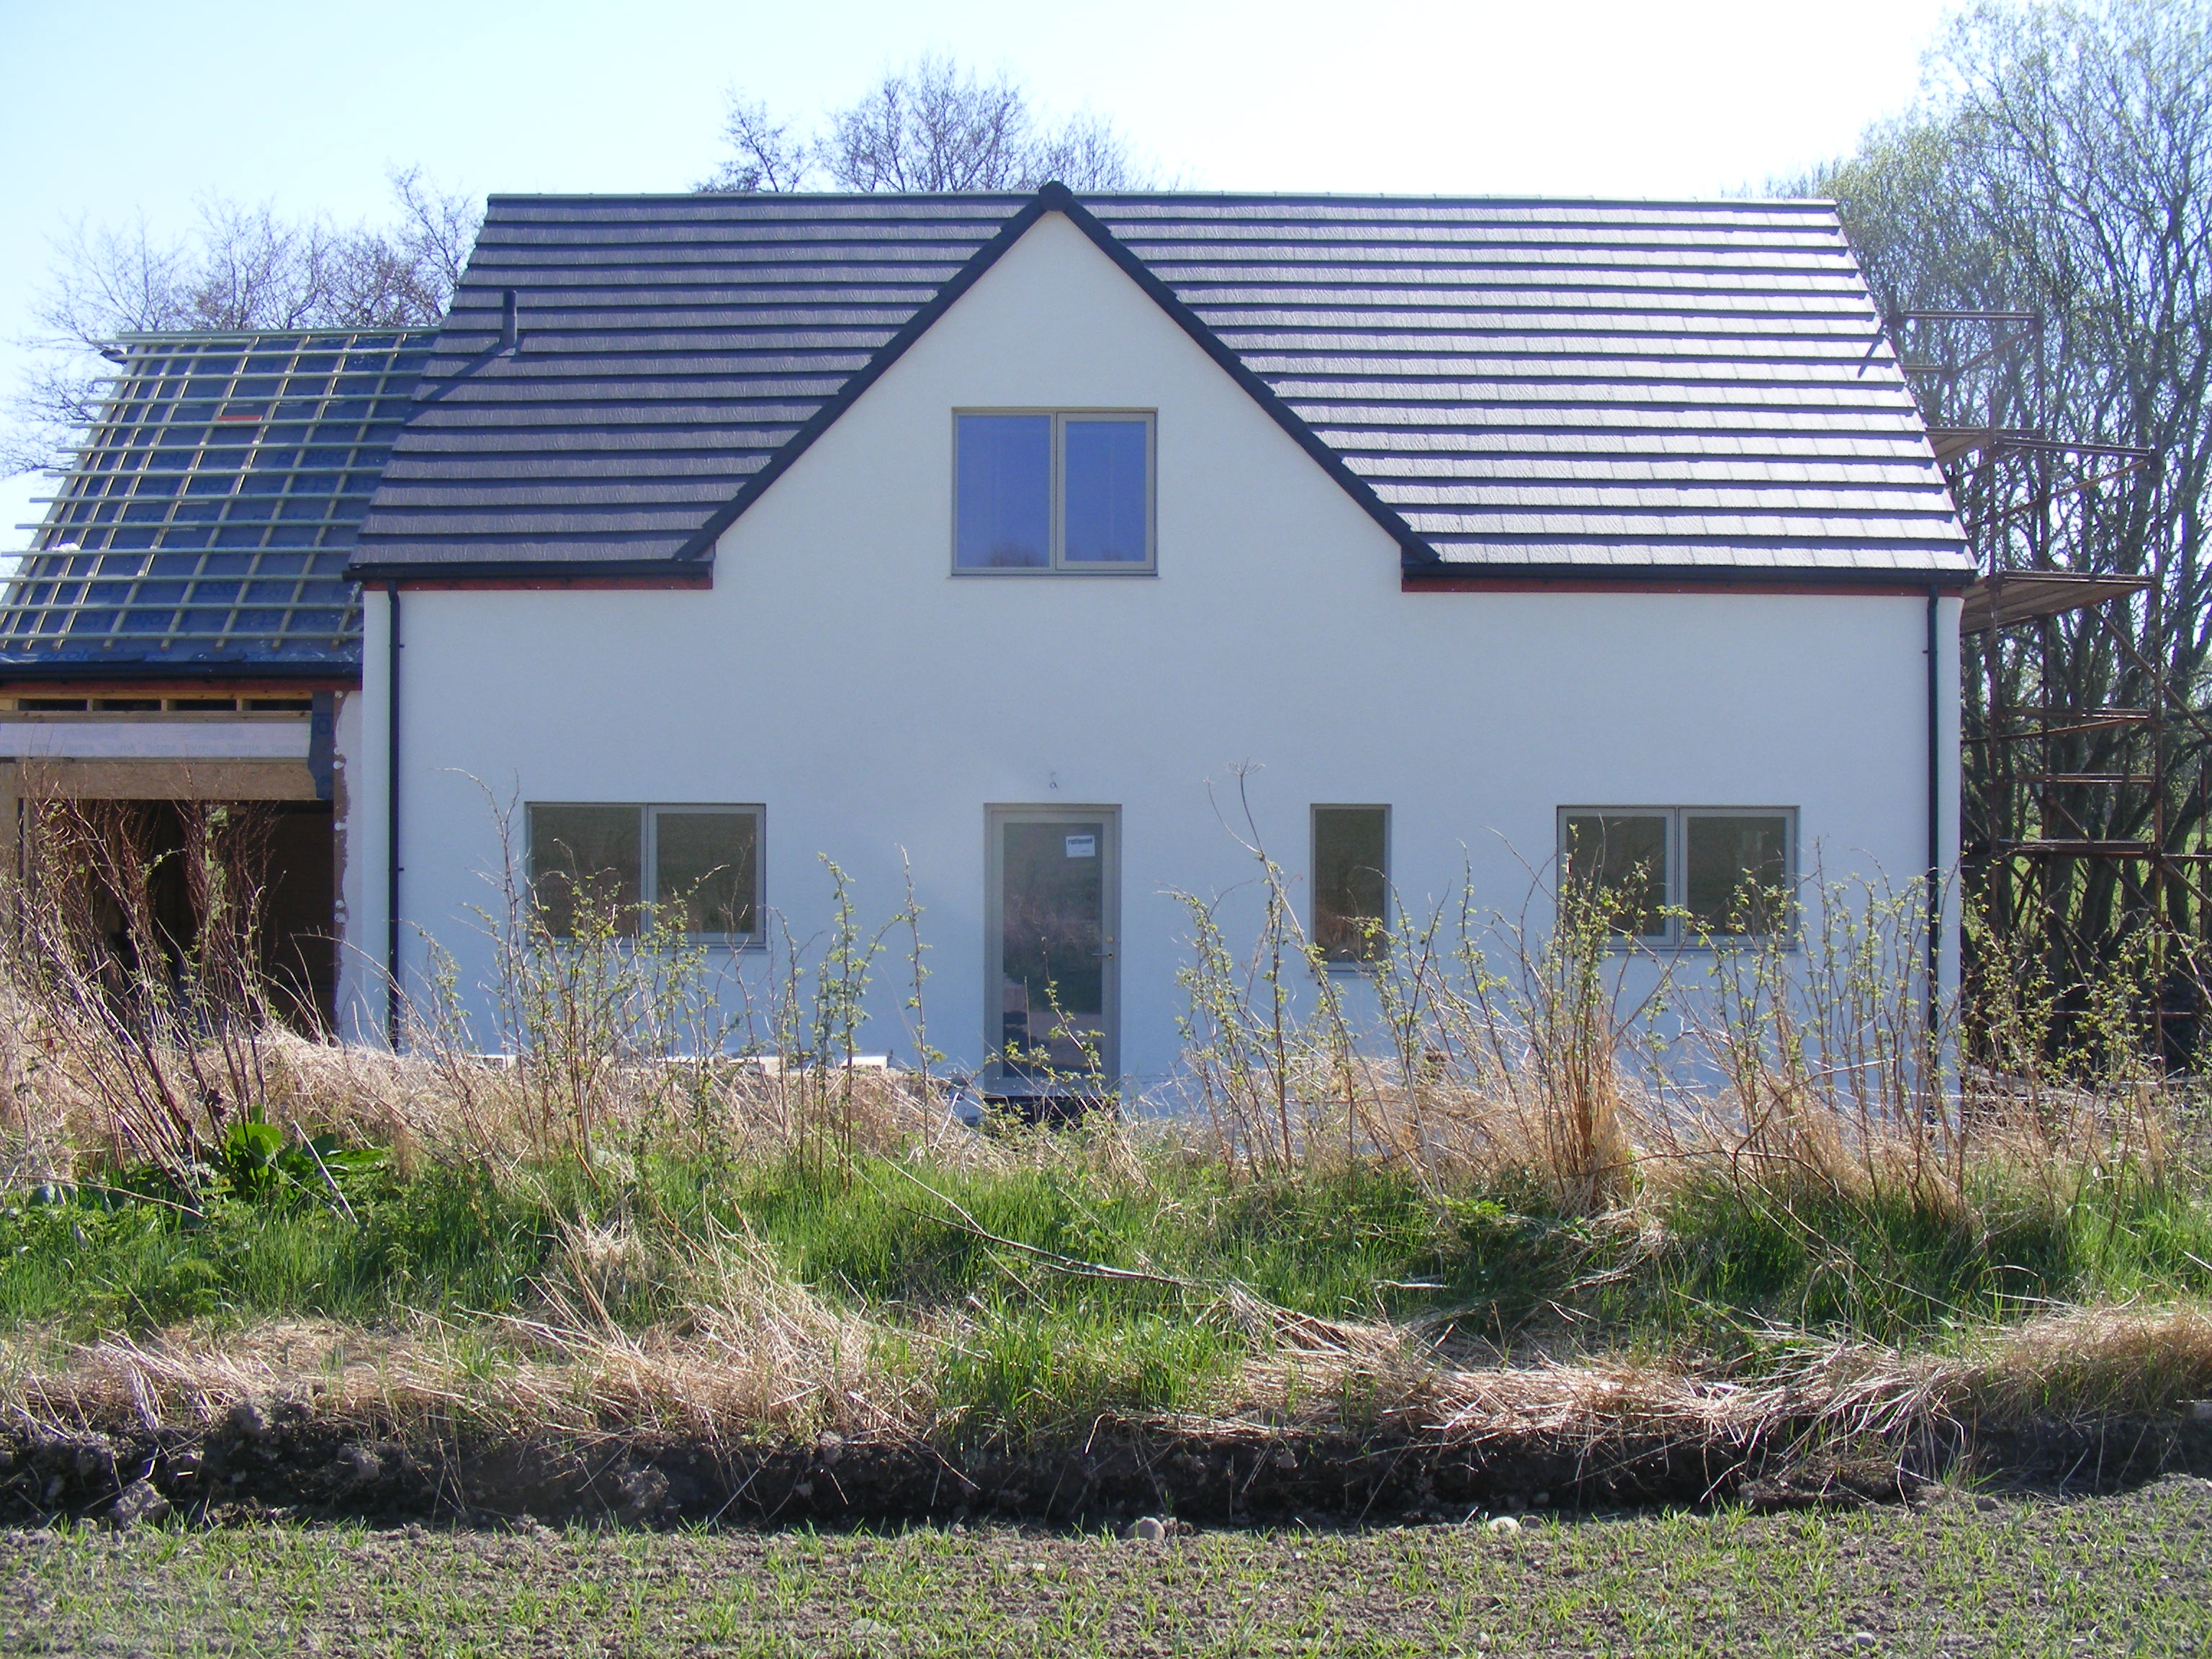
Another wall has been rendered, and it's really starting to look like a house now. More on my blog at www.willowburn.net, look for the blog entry "More cladding and rendering"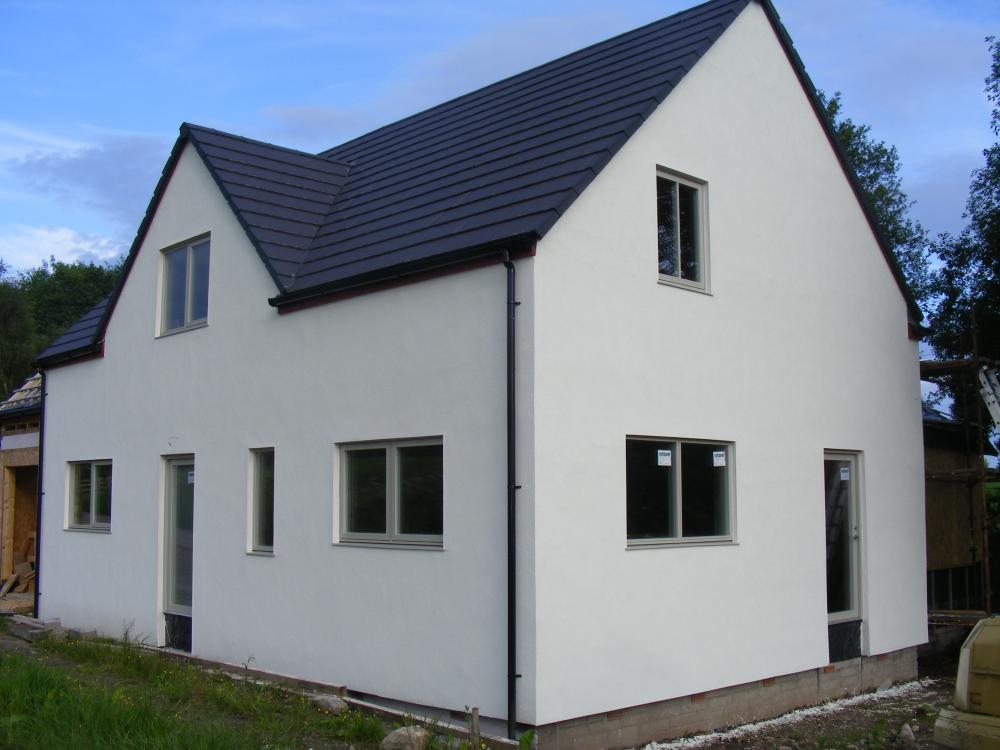
-
I think that's a good machine. I haven't used one myself, but a local ground works contractor has one, and it was used to dig the foundations of my present house. It is currently sat in next door's garden having installed his treatment plant earlier in the week. I would go and have a look, make sure it runs okay, check for leaks, check how much play there is in all the joints etc. The only difference is the one my local contractor has is on rubber tracks. That one is on steel tracks so it's probably older. Steel tracks last longer and seem to be harder to throw a track off, but they are somewhat unkind if you want to travel along a tarmac road in anything other than a straight line. My little 3 tonner has steel tracks so I wouldn't let that put you off.
-
Your second link is the type supplied as standard by Rationel.