Tom
-
Posts
866 -
Joined
-
Last visited
Everything posted by Tom
-
Slab poured today, praise be, and the pressure in the UFH pipes has been going off the scale - as in the needle on the gauge is right round and touching the zero-stop. I have relieved a bit of the pressure and brought it down to 5 bar, but wondering if that's the right thing to do?
-
Is it normal for roof membrane to leak like a sieve?
Tom replied to Tom's topic in Roofing, Tiling & Slating
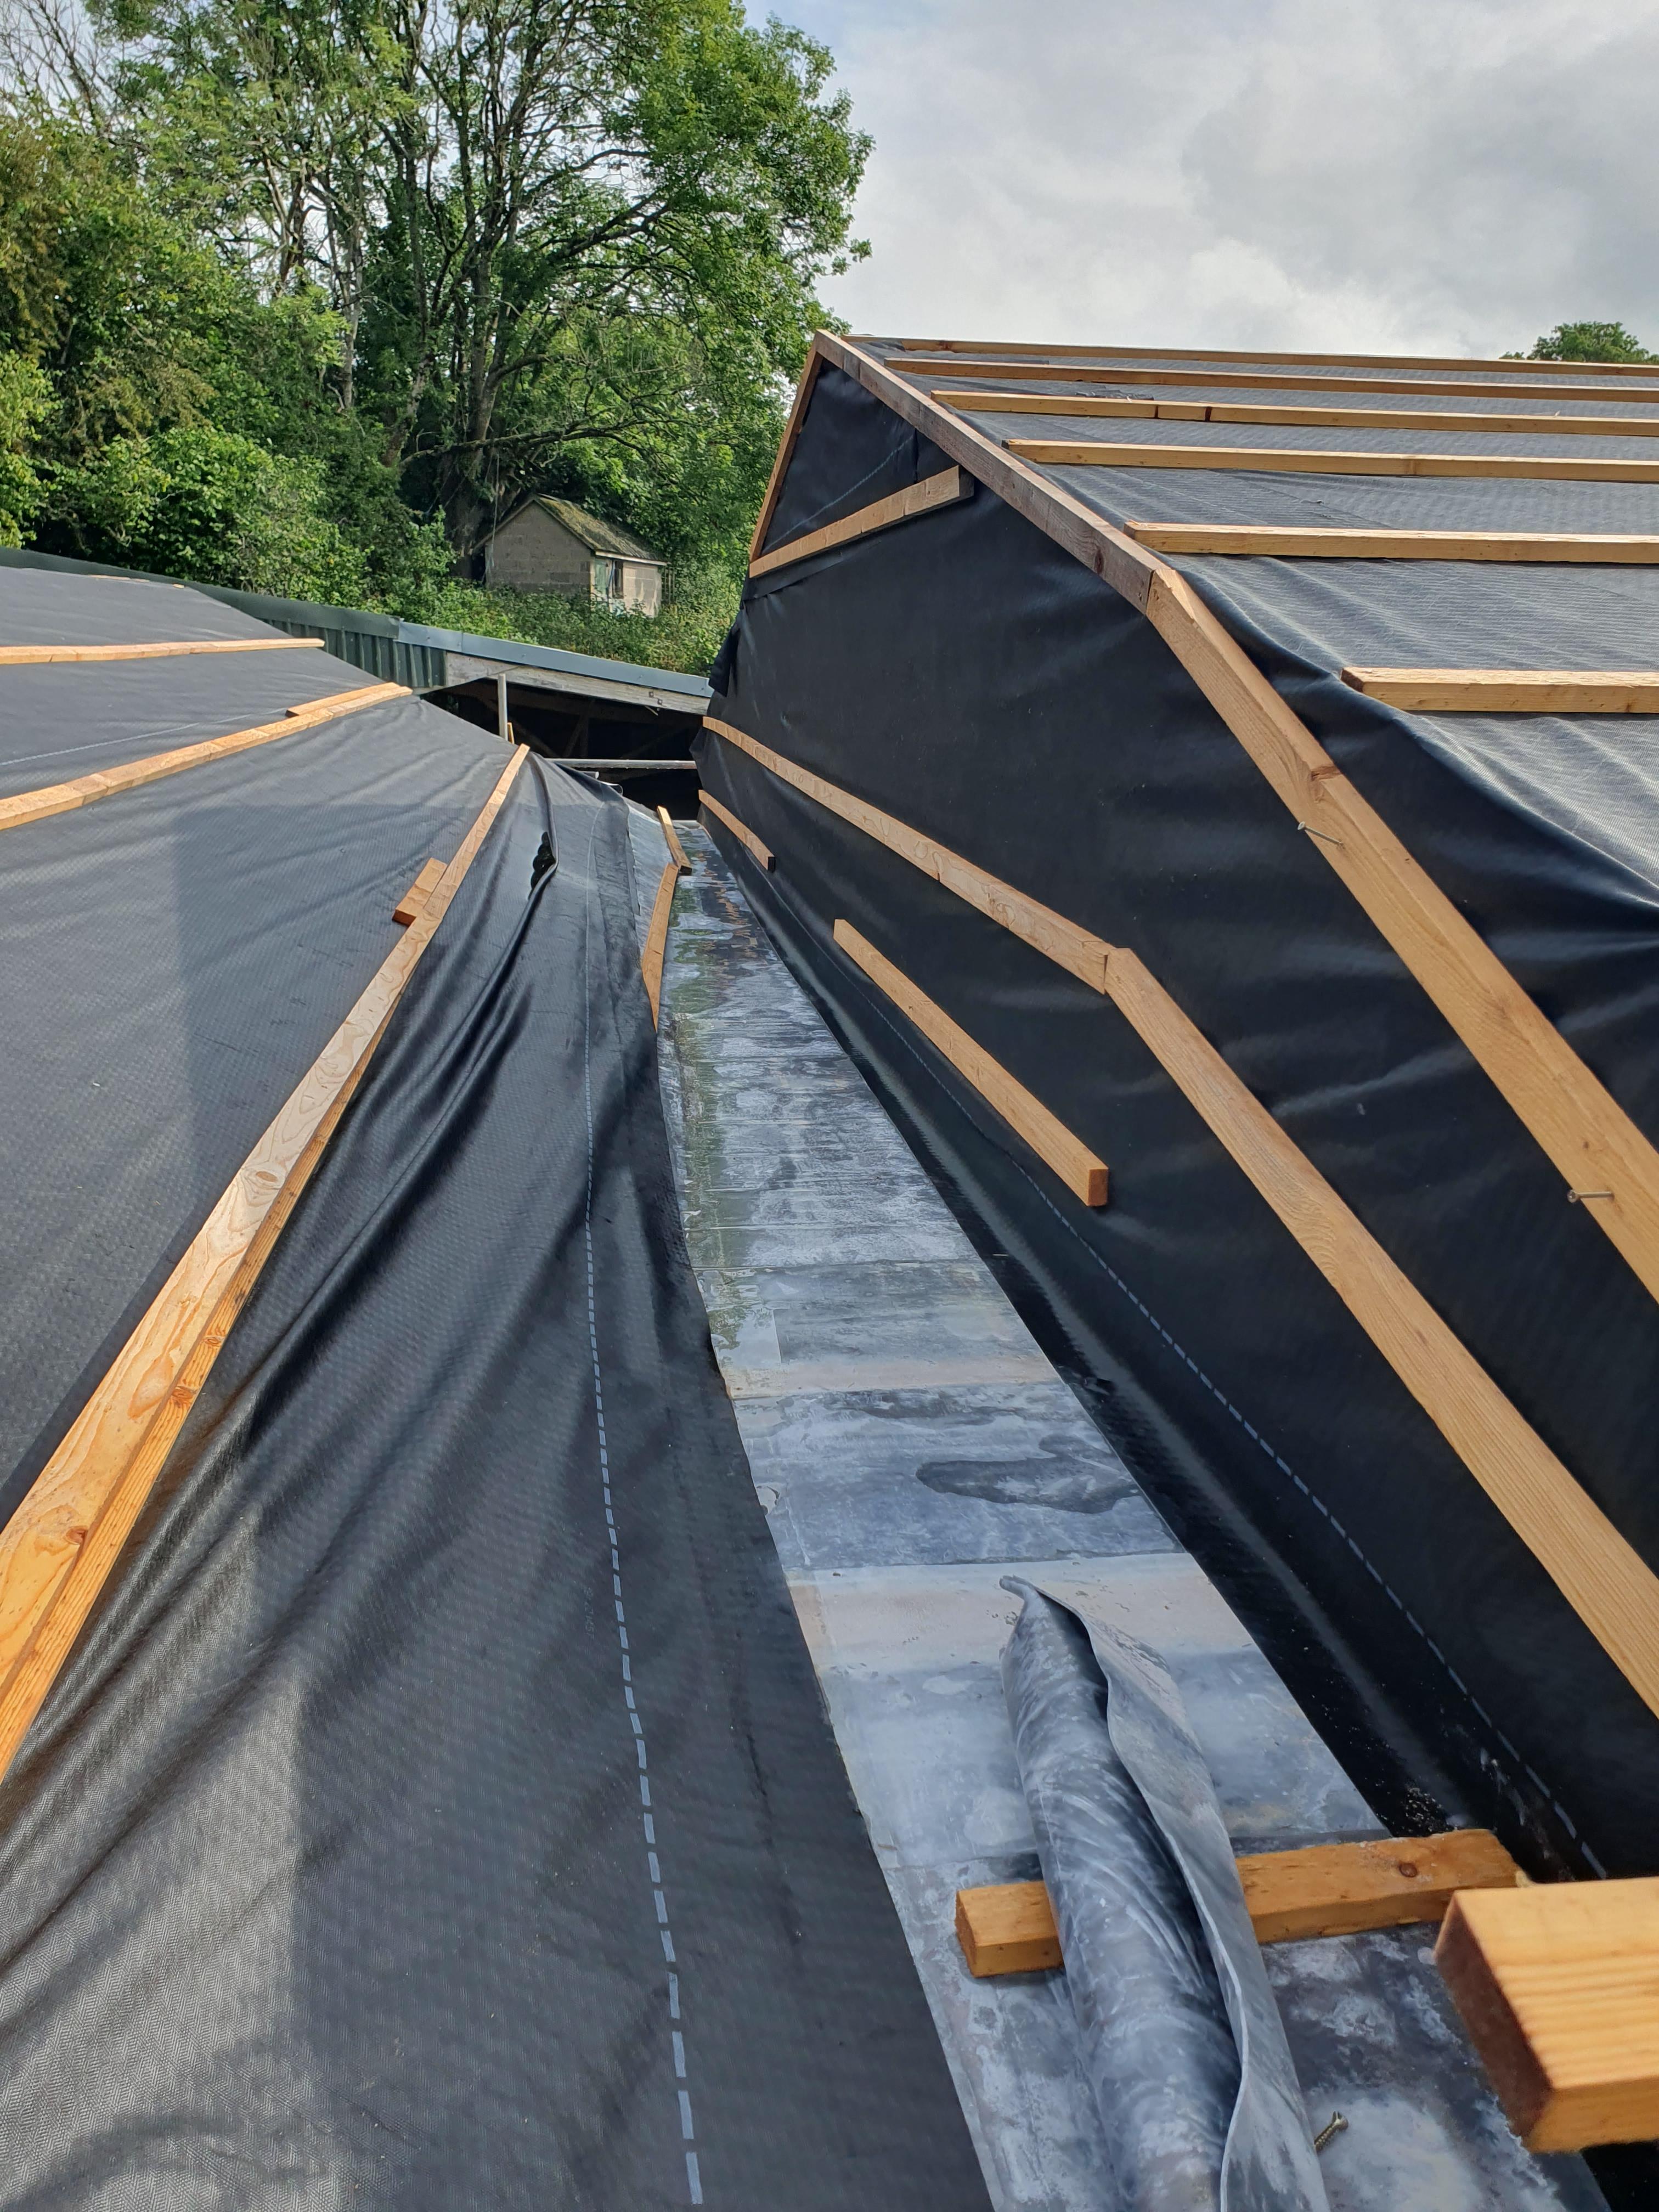
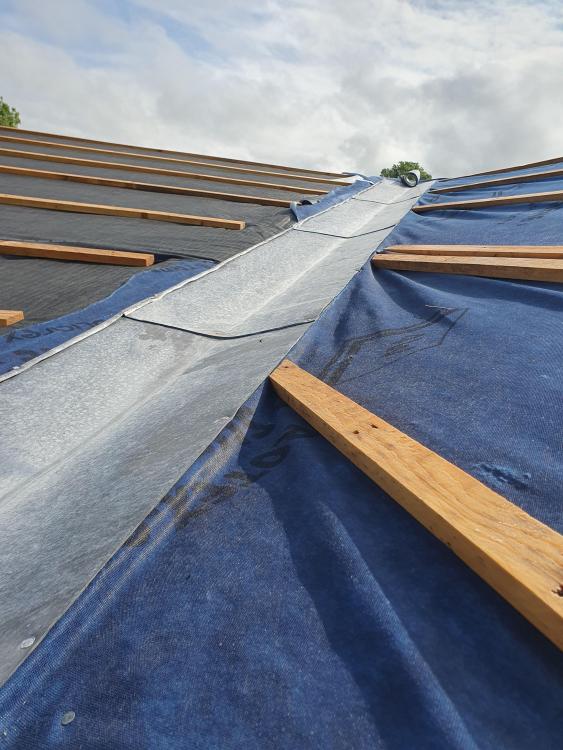
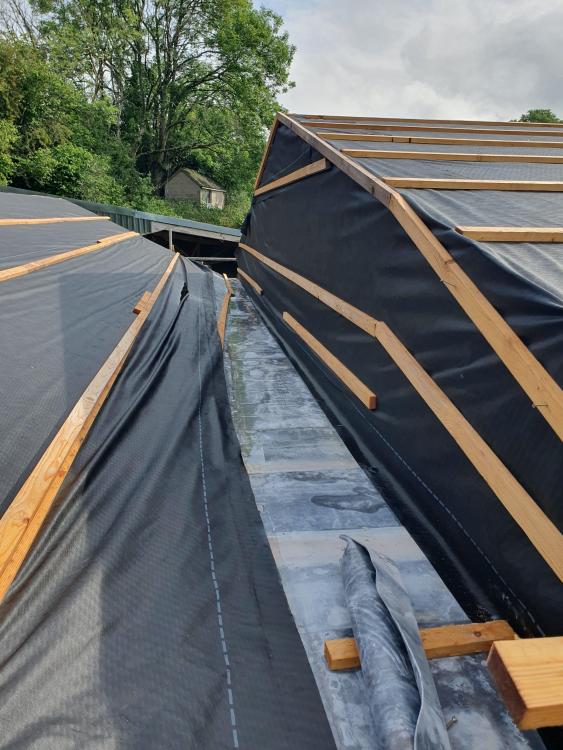
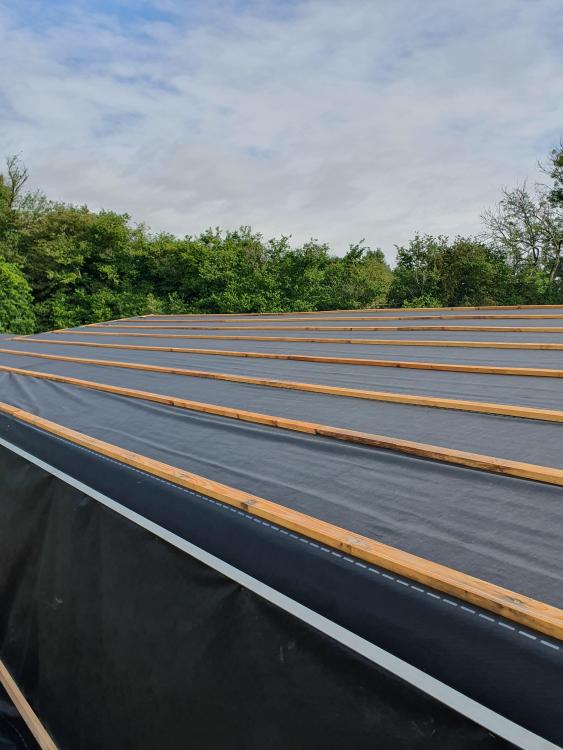
Thanks @saveasteading . I guess however mane holes there are, filled or otherwise, in the composite panels, shouldn't matter - as we have the (supposedly) watertight layer of membrane above and then of course the final roofing sheets. I just had a word with the builder on the phone to make sure he was planning on coming over tomorrow morning, which he is. I fired an opening salvo re the faults with the roof, to be met with "it's breathable membrane, of course it's going to leak". So, if possible, I need a dose of reality before my face to face with him tomorrow. So far I can see the problems with the work as follows: - membrane pulled too tight allowing water to pool at the battens - multiple holes all over the membrane (one you can get your hand through) - membrane not lapped over in to lead valley gutters as the leadwork is too proud - galvanised nails used on the lead, not copper - lead gully not stepped (tbh why should it rely on £4 of mastic "leadmate" to keep it watertight when there is the best part of £1k of lead there?) I've just added it up and we've paid just over 7k for this work so far - and that's just for the labour. What should I realistically be execting from him? Redo? Not sure I want him to considering the standard of his work so far. If he can't/doesn't want to, do I find someone else and give him the bill? If he reiterates the "it's breather membrane, of course it's going to leak" what is the best response? I'm so effing hacked off with this. We had to pause the build for the best part of a year while this bloke gave us the runaround as we thought he would do a good job - local recommendations etc. -
Is it normal for roof membrane to leak like a sieve?
Tom replied to Tom's topic in Roofing, Tiling & Slating
The fixings in question are 230mm long tech screws - going through the 2" counterbatten, through the 150mm composite panel and in to the z purlin. So essentially you need to aim it right when screwing through from the top, or you will miss the z-purlin, and on a few occasions you hit the steel rafter instead and the self-drilling tip just melts - either way you can be left with a hole. I guess these were not considered a problem at the time as the panels are not meant to be forming the watertight layer, this should be the membrane and final covering - the corrugated sheets. Can I ask what you mean by the depth? -
Is it normal for roof membrane to leak like a sieve?
Tom replied to Tom's topic in Roofing, Tiling & Slating
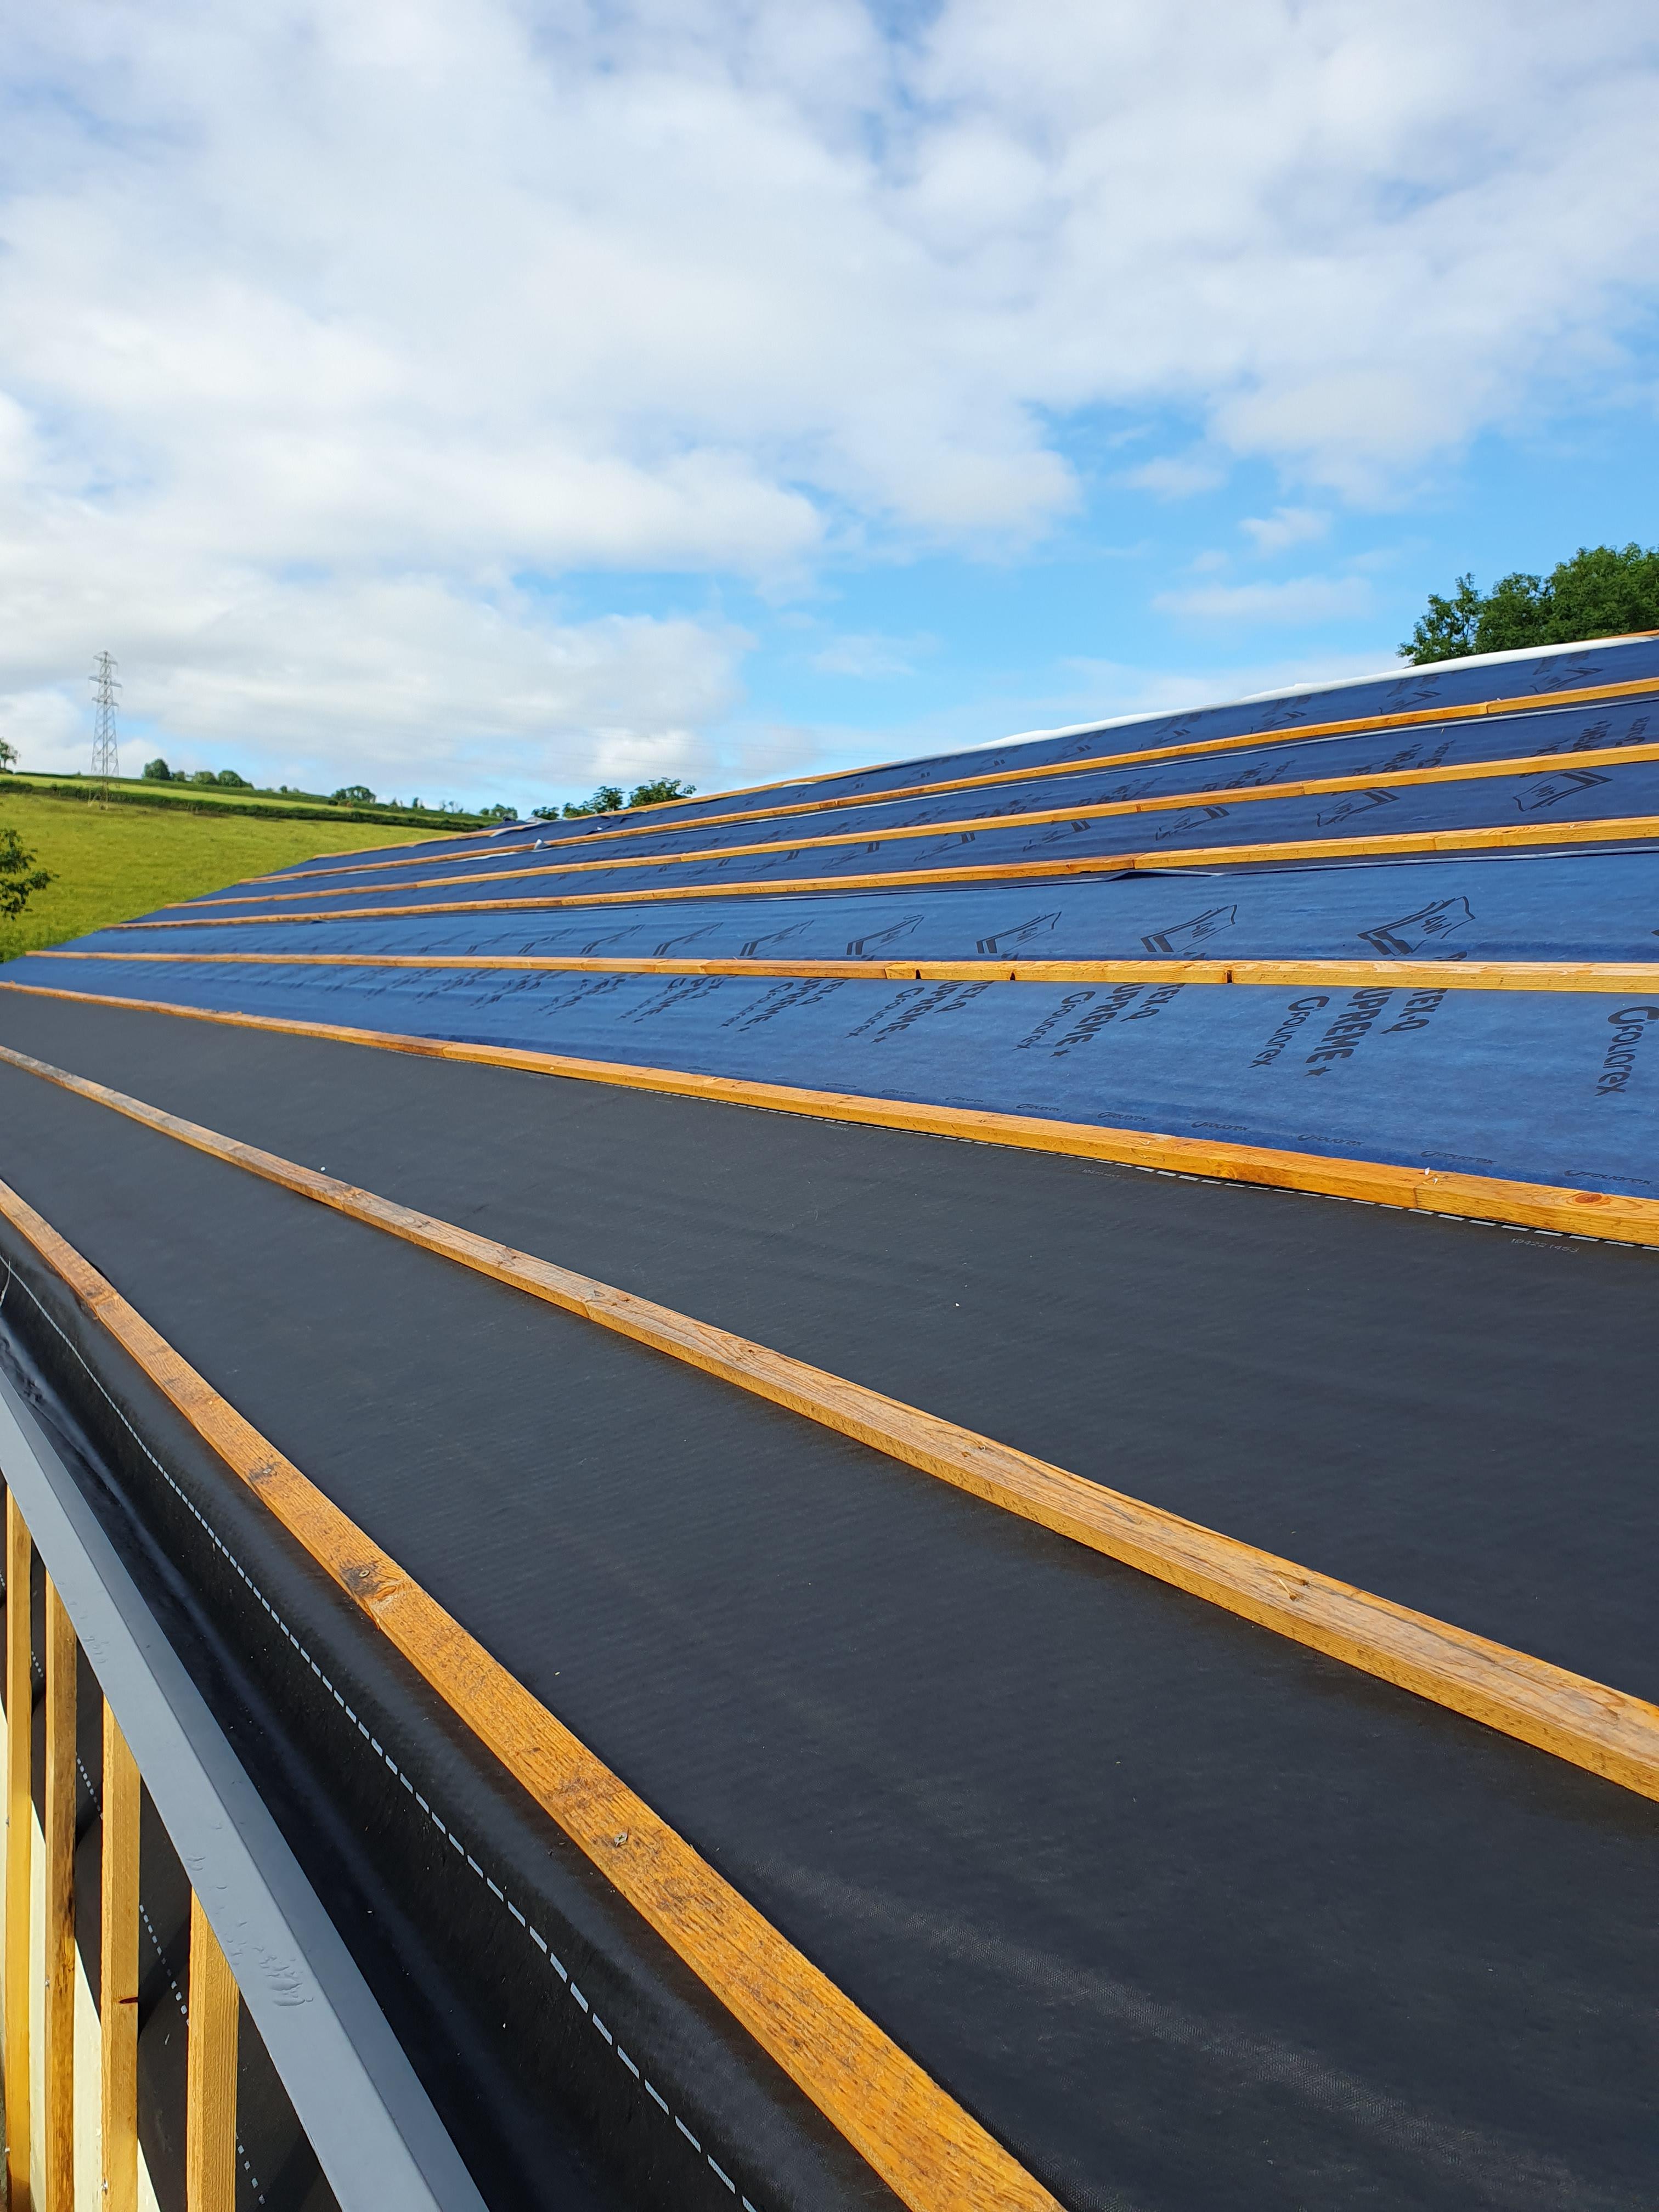
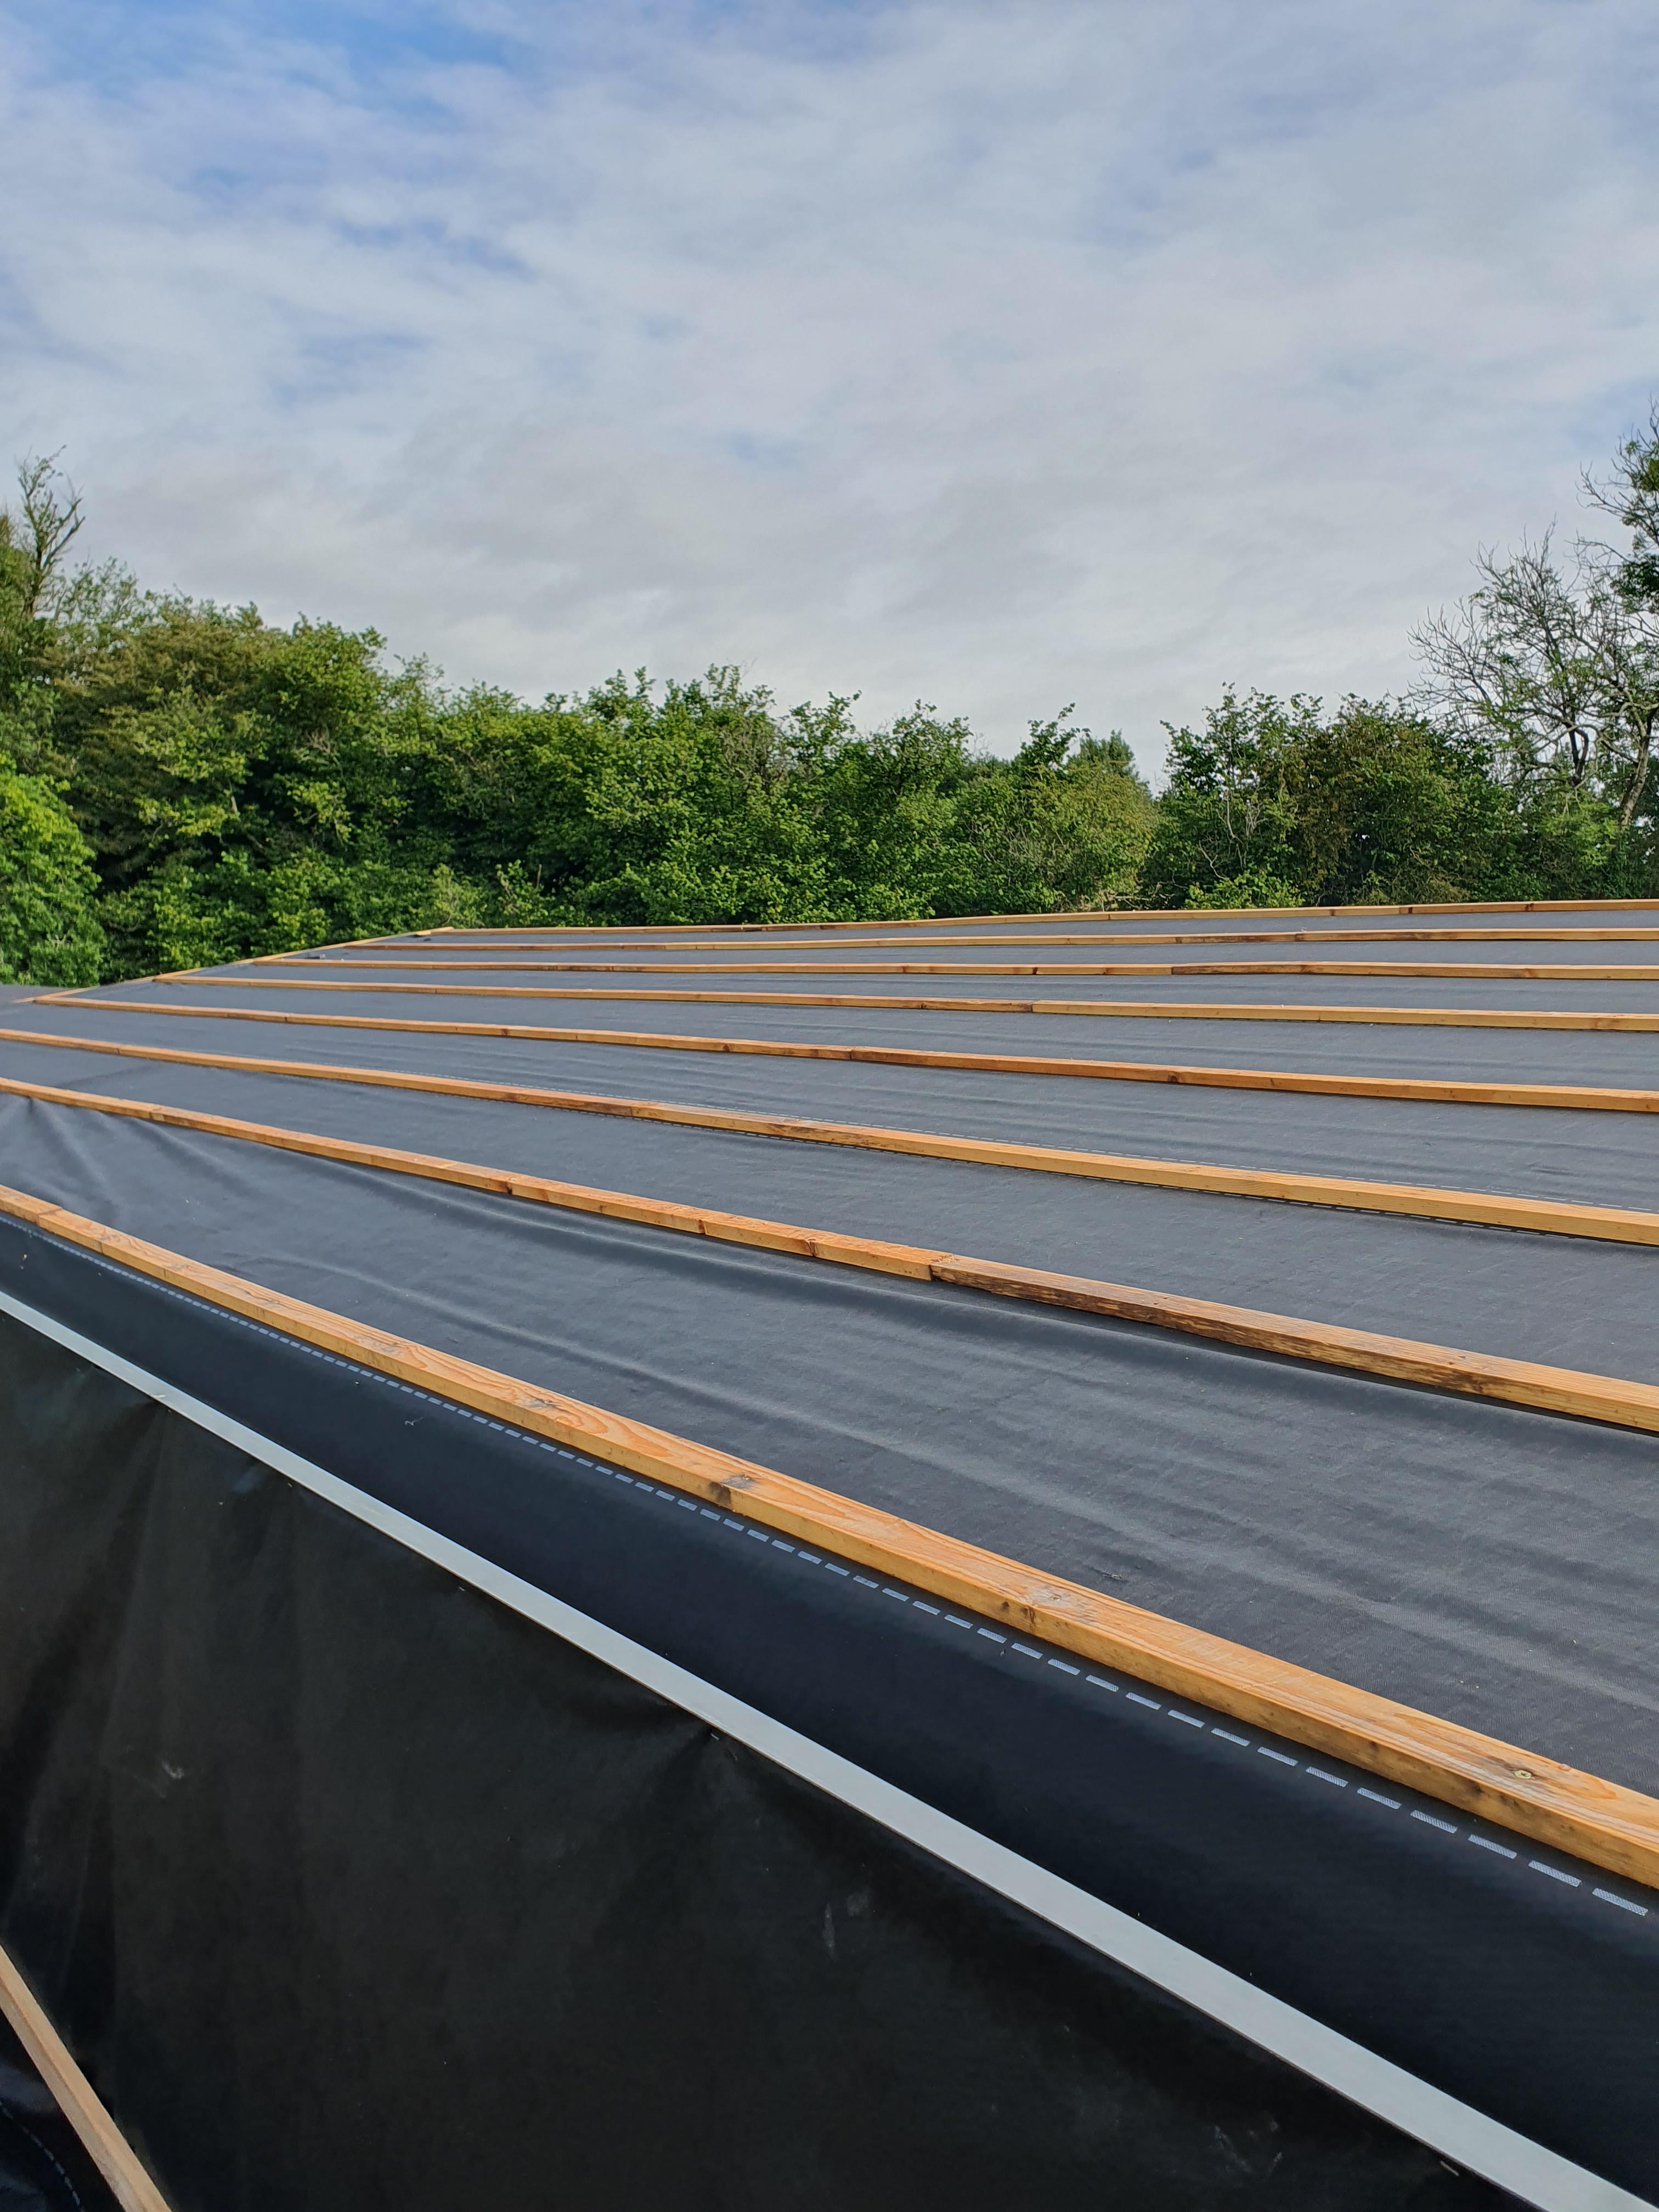
Thanks both. There are counterbattens, as per previous post there are 2x2 battens running vertically down the roof, then membrane, then battens going across. I agree that the membrane does seem to be pulled very tight which holds it against the underside of the battens. @Gus Potter can you explain what you mean by the valley material being "on top"? The lead here sits on 8x1 boards which themselves sit on the 2x2 counterbattens, so the lead is above the level of the membrane. -
Is it normal for roof membrane to leak like a sieve?
Tom replied to Tom's topic in Roofing, Tiling & Slating
Thanks all for your replies everyone, sorry its taken a while to reply. In asnwer to a few questions, it's definitely leaking rather than condensation @Jenki. Quite a few areas where its dripping down the walls from under the membrane, but because the membrane is nailed under battens there is no way I can peek under to see where. The lead in the gully goes up about 200mm both sides I think. There is a fall on it, but not sure how much (2%?) and the run of approx 10m is in about 10+ pieces, apparently with "lead mate" between the sheets where they are lapped. @makie is this done correctly? I already had the guy redo it once as the fall was so shallow there was water pooling up and over the laps. Likewise in what way has the valley not been felted properly? @saveasteading - the panels should't leak, but they are screwed down to z-purlins (and the 2x2 timbers on them the same) and in a few areas where the screw didn't take or whatever there are holes going through with no screw, if that makes sense. So essentially can't rely on the panels as a watertight layer unfortunately. There are quite a few tears in the membrane all over tbh. Quantity is a bucket or so. @ToughButterCup, cold beer time. So, to rectify this, could I just put another layer of felt OVER the battens? The final covering is currugated sheets, so even with membrane over the batten there will be air flow between this and the sheet. Trouble is, if I get it all stripped off, there's no guarantee the second time it gets done will be any better.... -
Is it normal for roof membrane to leak like a sieve?
Tom replied to Tom's topic in Roofing, Tiling & Slating
Not possible unfortunately, our roof is composite panels, 2x2 timbers running down this and felted over that. I can see lots of drips running down the panels under the felt, but no idea where the water is getting in. -
Is it normal for roof membrane to leak like a sieve?
Tom replied to Tom's topic in Roofing, Tiling & Slating
-
Is it normal for roof membrane to leak like a sieve?
Tom replied to Tom's topic in Roofing, Tiling & Slating
-
Is it normal for roof membrane to leak like a sieve?
Tom replied to Tom's topic in Roofing, Tiling & Slating
-
Is it normal for roof membrane to leak like a sieve?
Tom posted a topic in Roofing, Tiling & Slating
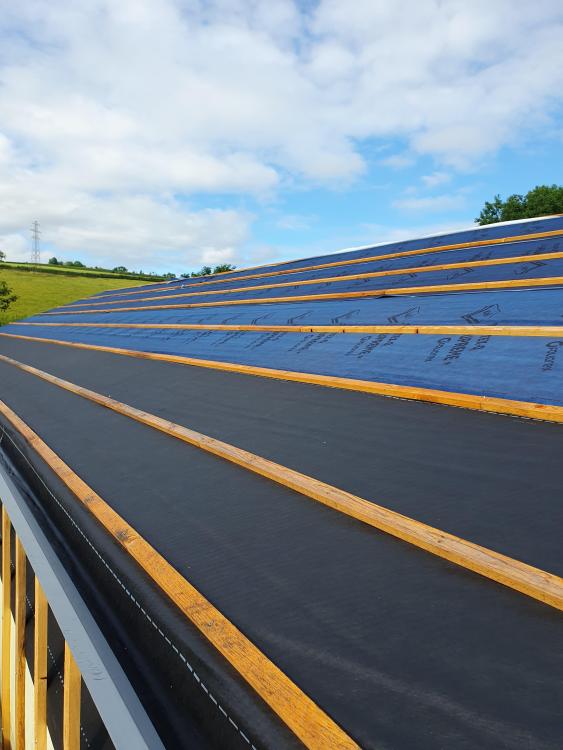
Finally thought I was making progress over the last few weeks, but of course the dry weather was just a smokescreen, and once again the self-building gods piss in my eye. Most of the roof is now felted and battened, but still seems to be letting quite a lot of water through in the recent heavy rain - is this normal?? -
The 20mm of Kooltherm is doing absolutely nothing for you here, other than costing more and being a headache to fit. UFH companies tend to think only one way: slab, insulation, pipes clipped to this, screed. Anything that diverges from this and the computer says no.
-
We're using "corrugated" profile sheet on our roof and most of the cladding, it's a 14-3 profile, whatever that is. Works out at approx £14+vat a sqM
-
Hi all - can anyone recommend a stapler/staples that I can use to fix membrane on to vertical batten? Too many options out there... thanks all
-
Thanks for all your responses, really helpful. How about this for a solution: I'll sleeve the 110mm pipes with 150mm plastic ducting (eg https://www.screwfix.com/p/manrose-150mm-round-ducting-1m/207GY?kpid=207GY&ds_rl=1249404&gclid=CjwKCAjwsvujBhAXEiwA_UXnAFPVjHn0tcX-6D__aSDqrLyQNSrKWppXkC81Ba1cUv1O8ZFA7Gy9BxoC-1UQAvD_BwE&gclsrc=aw.ds). I can stab the ducting in to the insulation layer, then bring it up short of FFL and cap it with a bung of EPS at 20mm below FFL. Within this I'll put a straight coupler on the 110mm with a bung (just in case). He does seem to know what he's doing, his business is just these floors, it's just me that is slow on the uptake. He has suggested a dry powder sprinkle during the powerfloat stage to harden and give the darker finish we are after, I think.
-
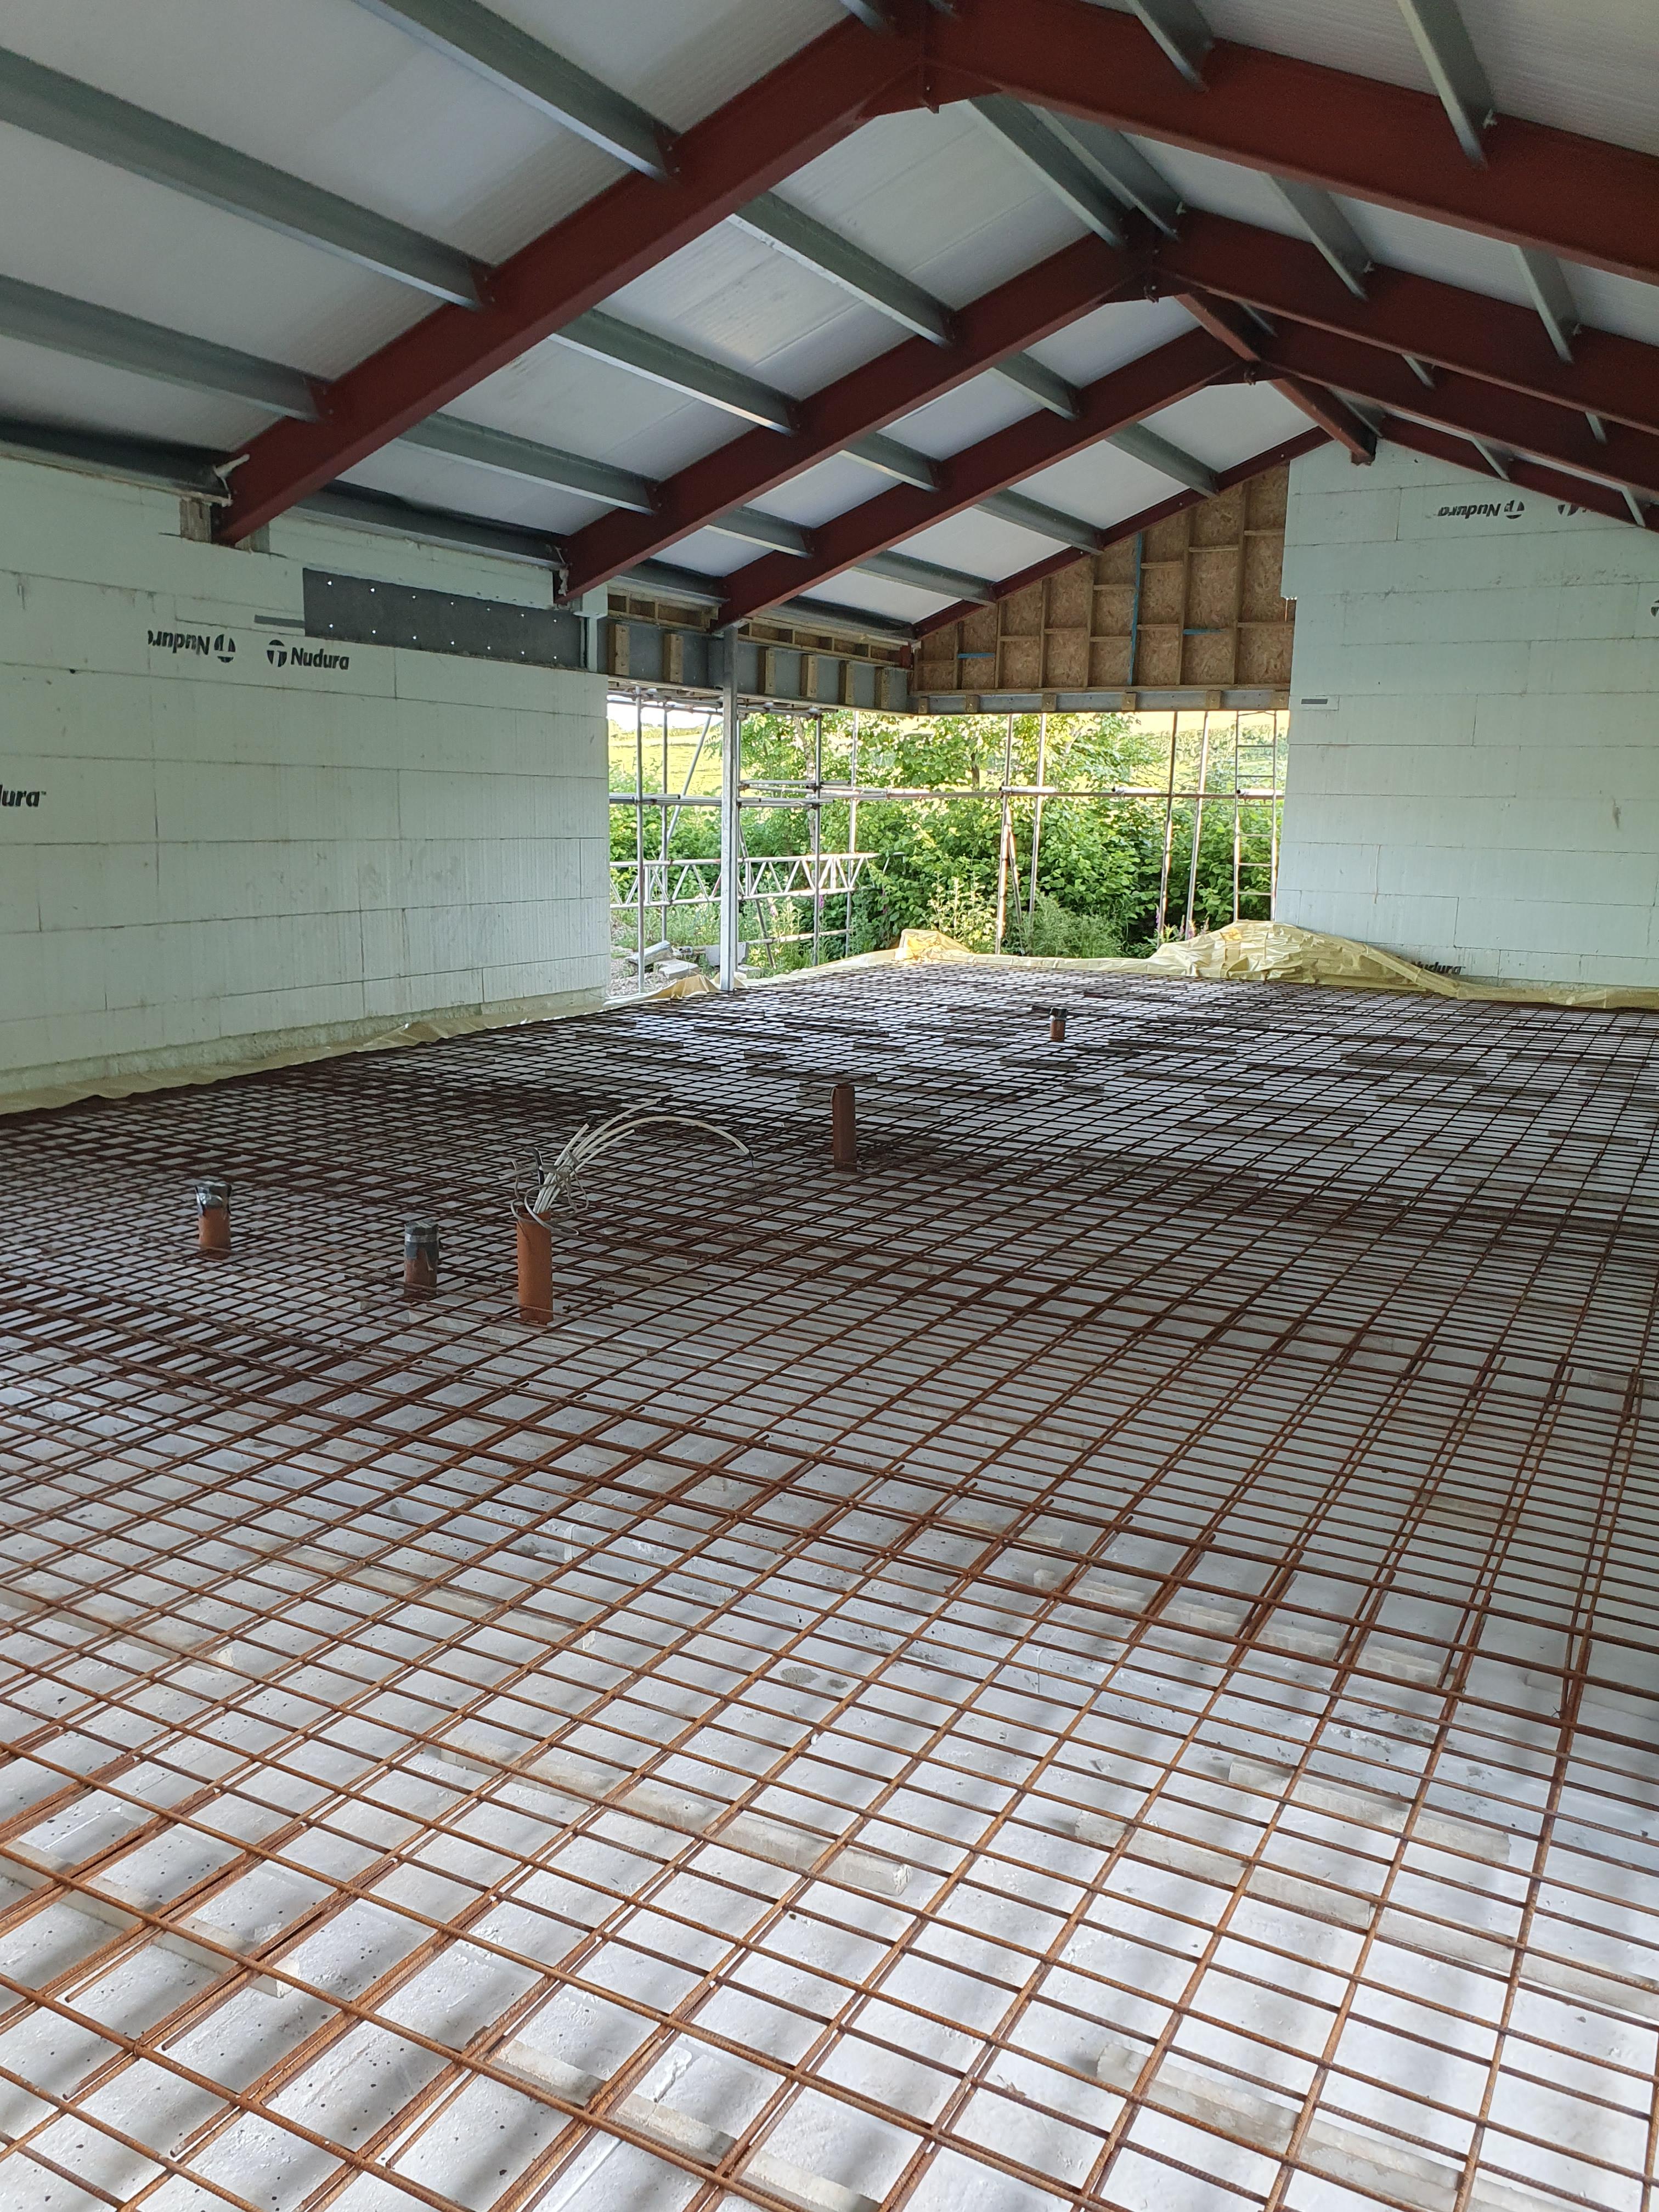
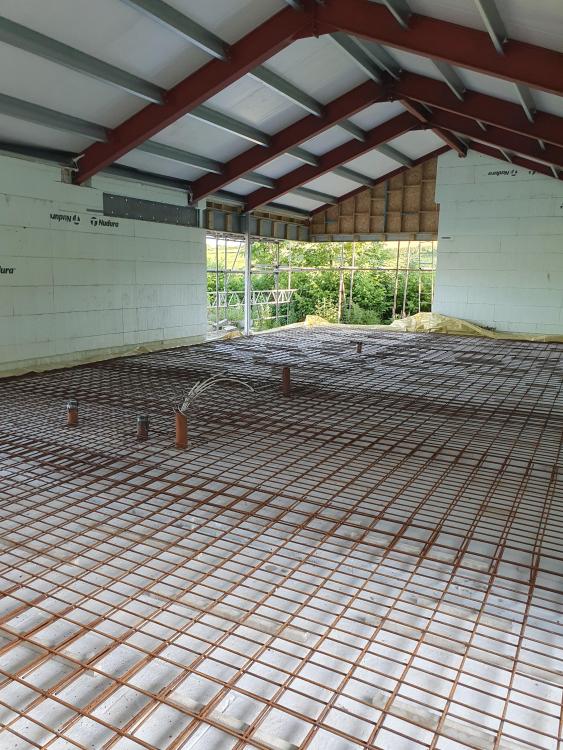
Waaaay too far down the road with the suspended slab to consider alternatives now. Each of the four sections of floor is approx 8x4.5m, supported around the perimeter. First layers of rebar are down, I need to spend the next few weeks zip-tying the ufh pipes down, then wiring the deckchairs in before the final few layers of mesh.
-
You're not the only one! For layers of A393. It's a suspended slab and is going to be built on with blocks. The SE was adamant it was needed...
-
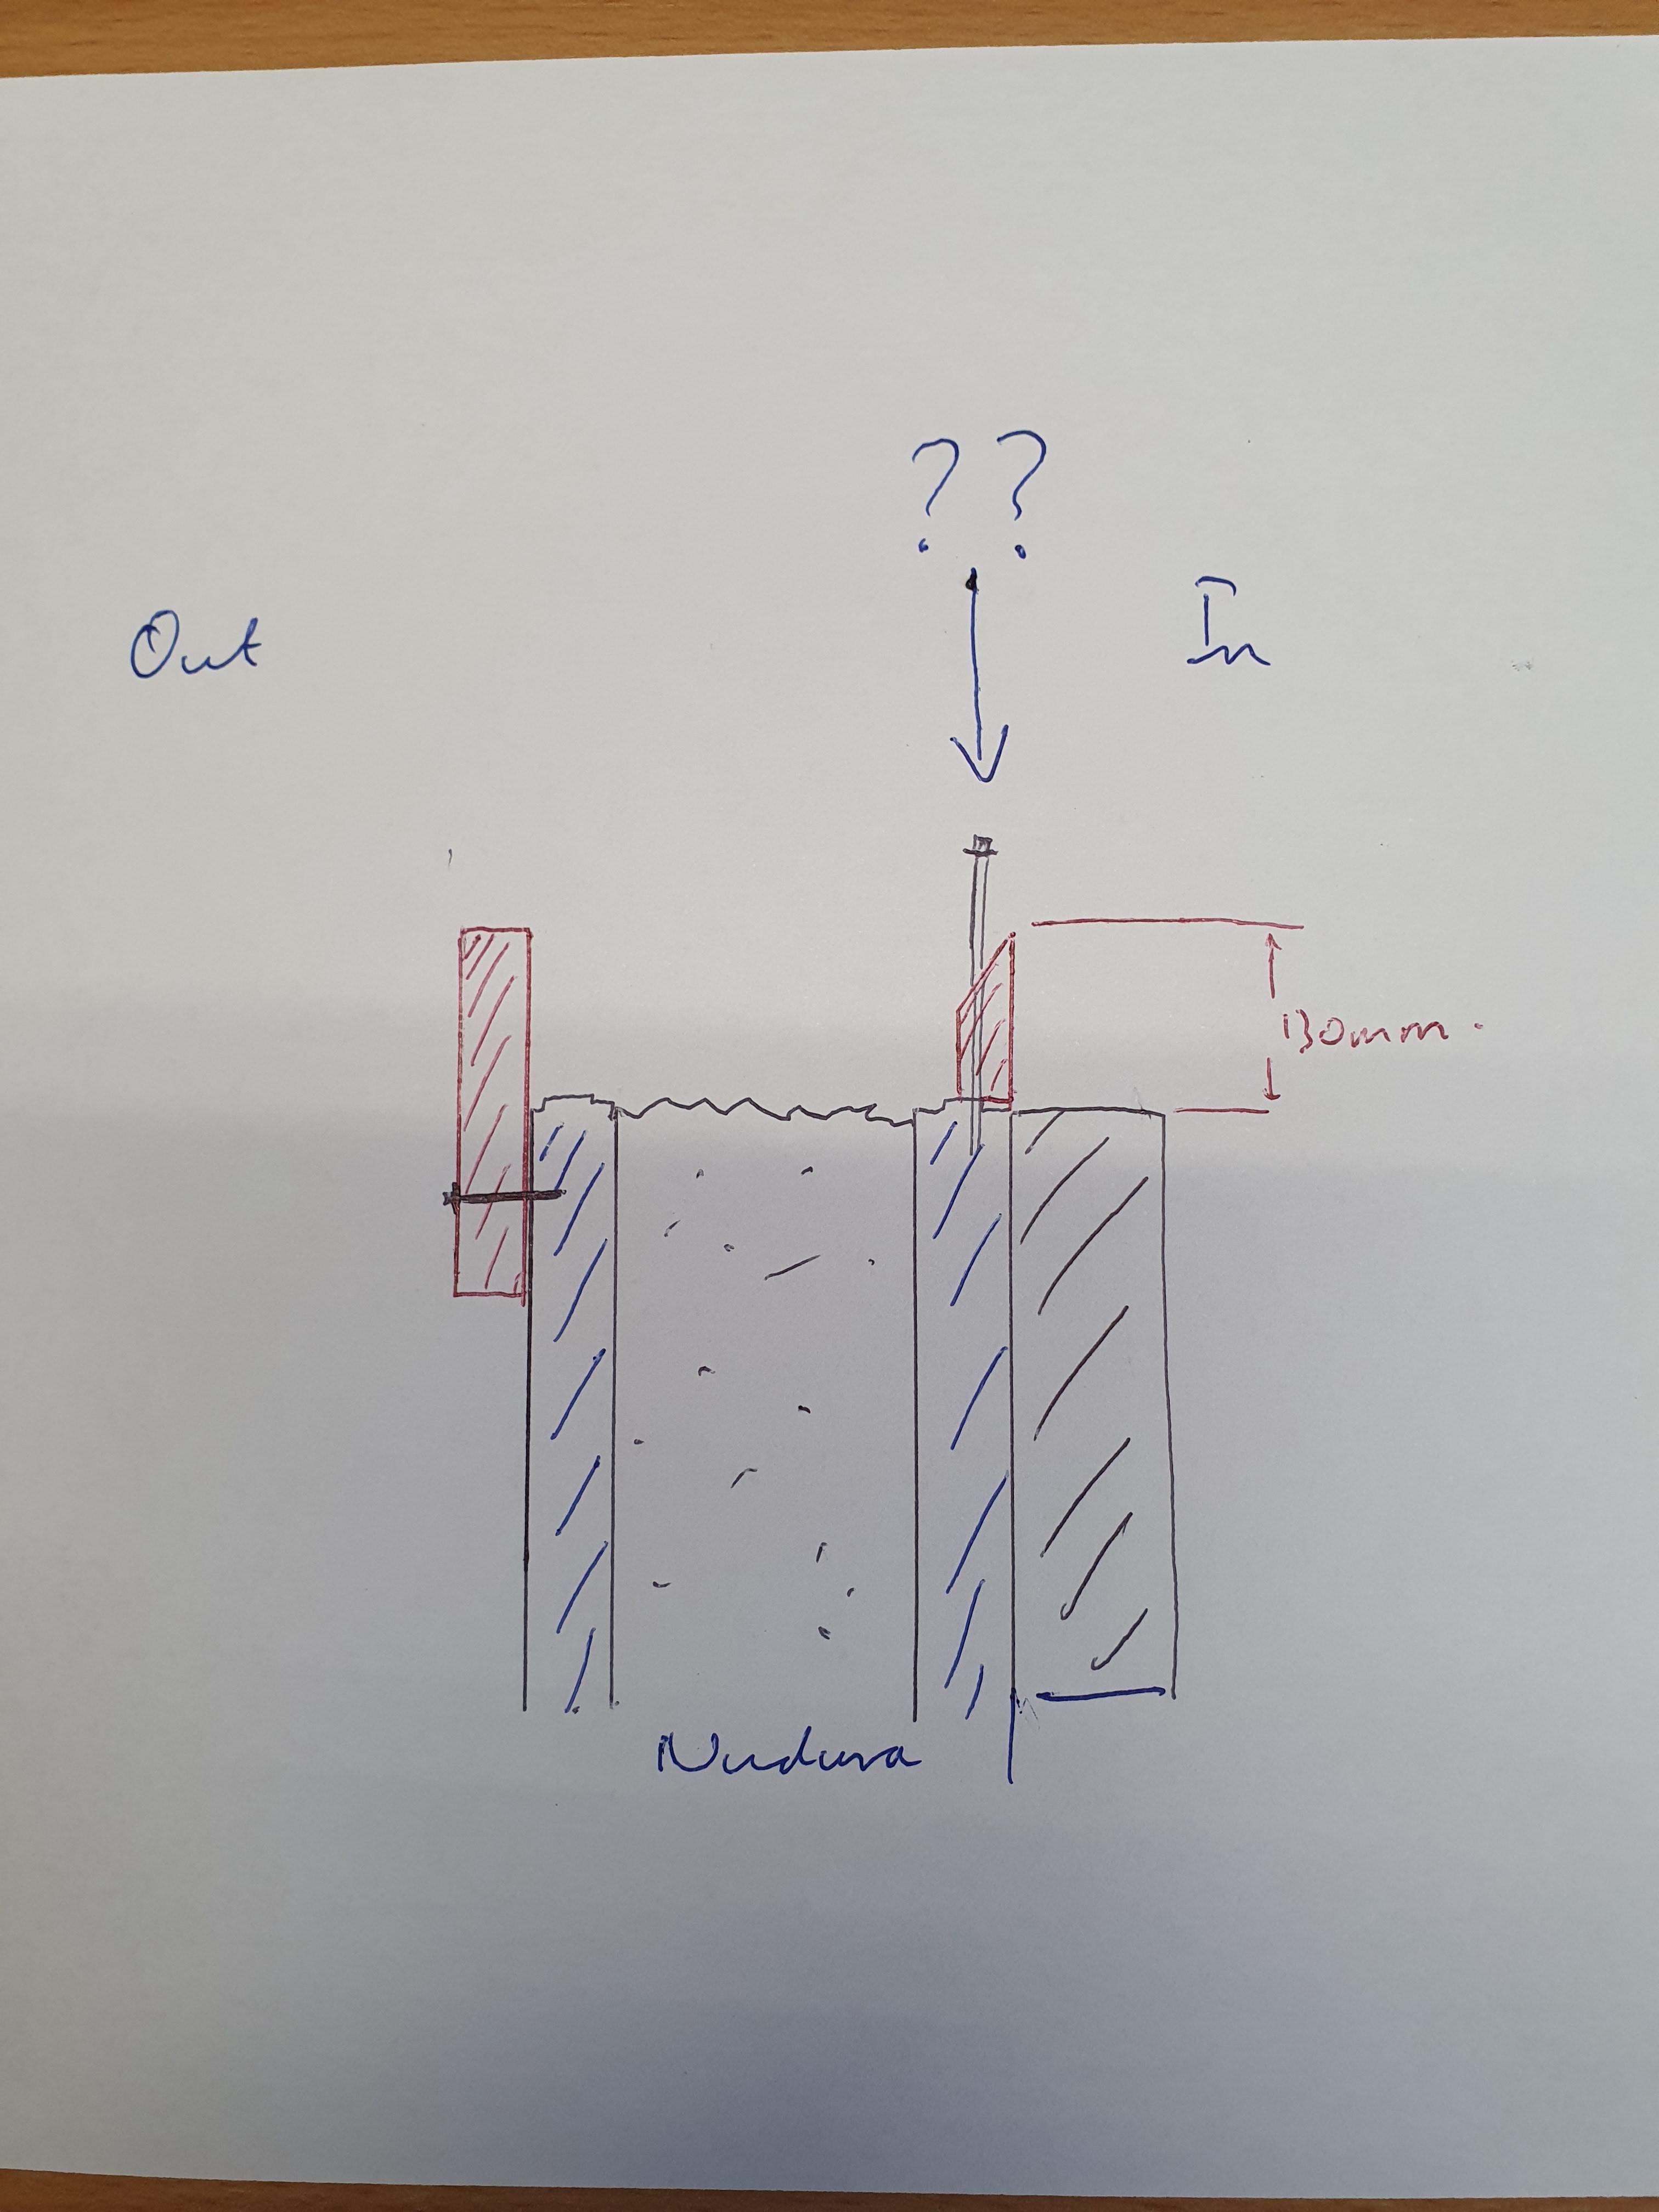
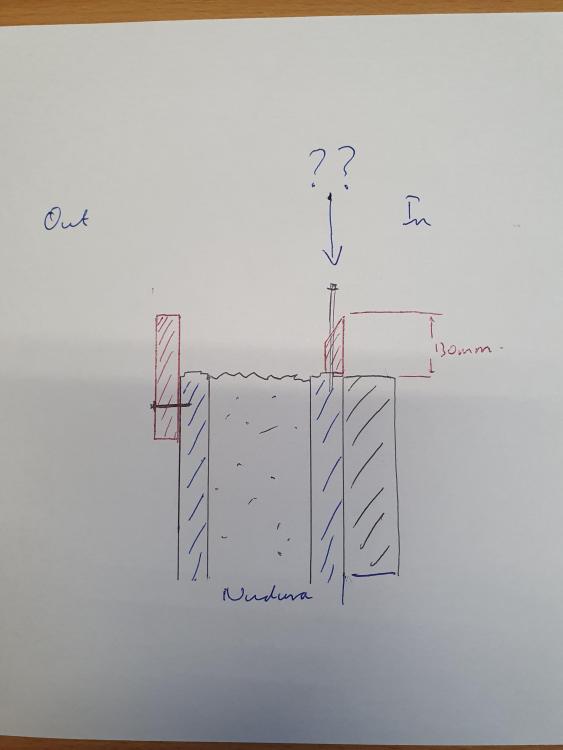
So one of the legacies left to us by our previous builder is the unfinished sill which needs to take our large sliding doors. The concrete needs to be 280mm wide here (so wider than the concrete within the nudura block), and currently the nudura blocks stop approx 130mm short of the required level. I can attach a strip of PIR to the outside face of the block to screed to but I'm struggling to see how I can get the inner strip attached to the nudura blocks. I'm thinking I can use some long fixings to stab through the PIR and in to the Nudura block (see pic), but worried this won't hold back the approx 130mm deep concrete I need to pour. Any ideas?
-
Thanks mate, I can certainly see your logic but not sure we can do exactly that given the make-up of our slab. It's 200mm thick with four layers of rebar mesh passing around the 110mm pipes
-
Ah, good point re the aggregate. And the straight coupler - on before or after?
-
Ah, gotcha, so full thickness of the pour
-
Yessss... though I was thinking to leave enough space around the top of the pipe (by using PIR or whatever) to give enough room when this is hacked away to be able to add the coupler, makes sense to add the coupler first though I guess, then just stick a bit of PIR/wood on to the top of the blanking plug and have this 10mm below the surface of the poured concrete. Does this sound OK?
-
Thats brilliant @JohnMo, thanks for posting and sharing the pictures. Good idea re the PIR, can I ask what depth of this you used and what depth of concrete went over?
-
So I'm currently prepping for the pour of our floor which is 20cm reinforced concrete over insulation. We have several 110mm pipes coming up through - one for an internal stack, another for the loo waste. The chap that will be pouring the floor wants all these terminated below floor level - so that he can powerfloat and then polish over the top. He suggested capping the pipes with a square or round of ply, this would then be evident after the floor had been poured as the concrete would colour differently as it would just be a ~10mm thick cover over the ply, the concrete can then be carefully chipped out and the pipes exposed. This might work well for him (and we're going to do this in another few areas where we have conduit coming up for floor sockets) - but is it OK from a plumbing point of view? I would presumably have a 110mm connector to be able to extend the stack, but not ideal I'm guessing. Any thoughts? Thanks all
-
Yep, I'll go through the usual refund channels - just wanted to know if the thing was salvageable really, but I guess not.
-
I have just received a Marcrist diamond core drill (DDM1) I bought second hand off eBay "fully working, mate". Well, turns out it isn't quite - it rotates but stops or the clutch engages at the slightest resistance. I know, I know, what should I expect buying sh*t off eBay - it was a punt and not a great deal of money - but still annoying. Anyone any experience with these drills? Fixable or skip-able?