
Weebles
-
Posts
399 -
Joined
-
Last visited
-
Days Won
1
Everything posted by Weebles
-
My paint is pretty well mixed but only with a stick of ply (no whisk on a drill yet - might need that for top coat emulsion) As @recoveringacademic points out, it must be clean to work. I am taking it apart and cleaning it religiously with hot water (sometimes washing up liquid too) after each use. Even if I down tools for an hour it doesn’t perform as well for the rest of the day. Luckily I am only doing 2 hour stints in the evenings. For me it’s worth £40 even if it just does the mist coat (2 coats on each wall - 10 rooms plus hallway)
-
So far I am only using Matt emulsion, slightly watered down. And for that I am using the largest nozzle size. So I suspect it may struggle with some paints. Soon I will be testing it on no not watered-down top coat emulsion. We’ll see. There is a really tiny nozzle which may well be able to be used for varnish?
-
After rolling paint in one room I realised my shoulders weren’t going to make it. So I invested in this Aldi paint sprayer. It’s not an industrial one so coverage is only marginally quicker than a roller. But you don’t have to keep dipping into a tray and there are no streaks. And it’s brilliant for applying a mist coat onto fresh plaster where the ceilings and walls have the same paint. Best £40 I spent in a long time. Progress much quicker now and my shoulders are surviving. Takes about 5-10 mins to clean it for the next use. Took a few mins to get used to the ‘controls’. Still available online and free delivery. Still reckon we have 8 weeks of painting ahead of us. 1-2 hours a night after work just isn’t enough. But I love my spray gun?

-
I should add that way back in October the supplier agreed to replace the glass as some sort of goodwill gesture but wouldn’t cover the transport or install as the defect was “within quality guidelines”. Transport from Europe and install requiring a crane and glass lifter still amounts to a couple of thousand, on top of an already eye wateringly expensive glazing order. If it is outside quality guidelines it should be replaced free of charge. If this is “quality” then it’s one disappointing window. ☹️
-
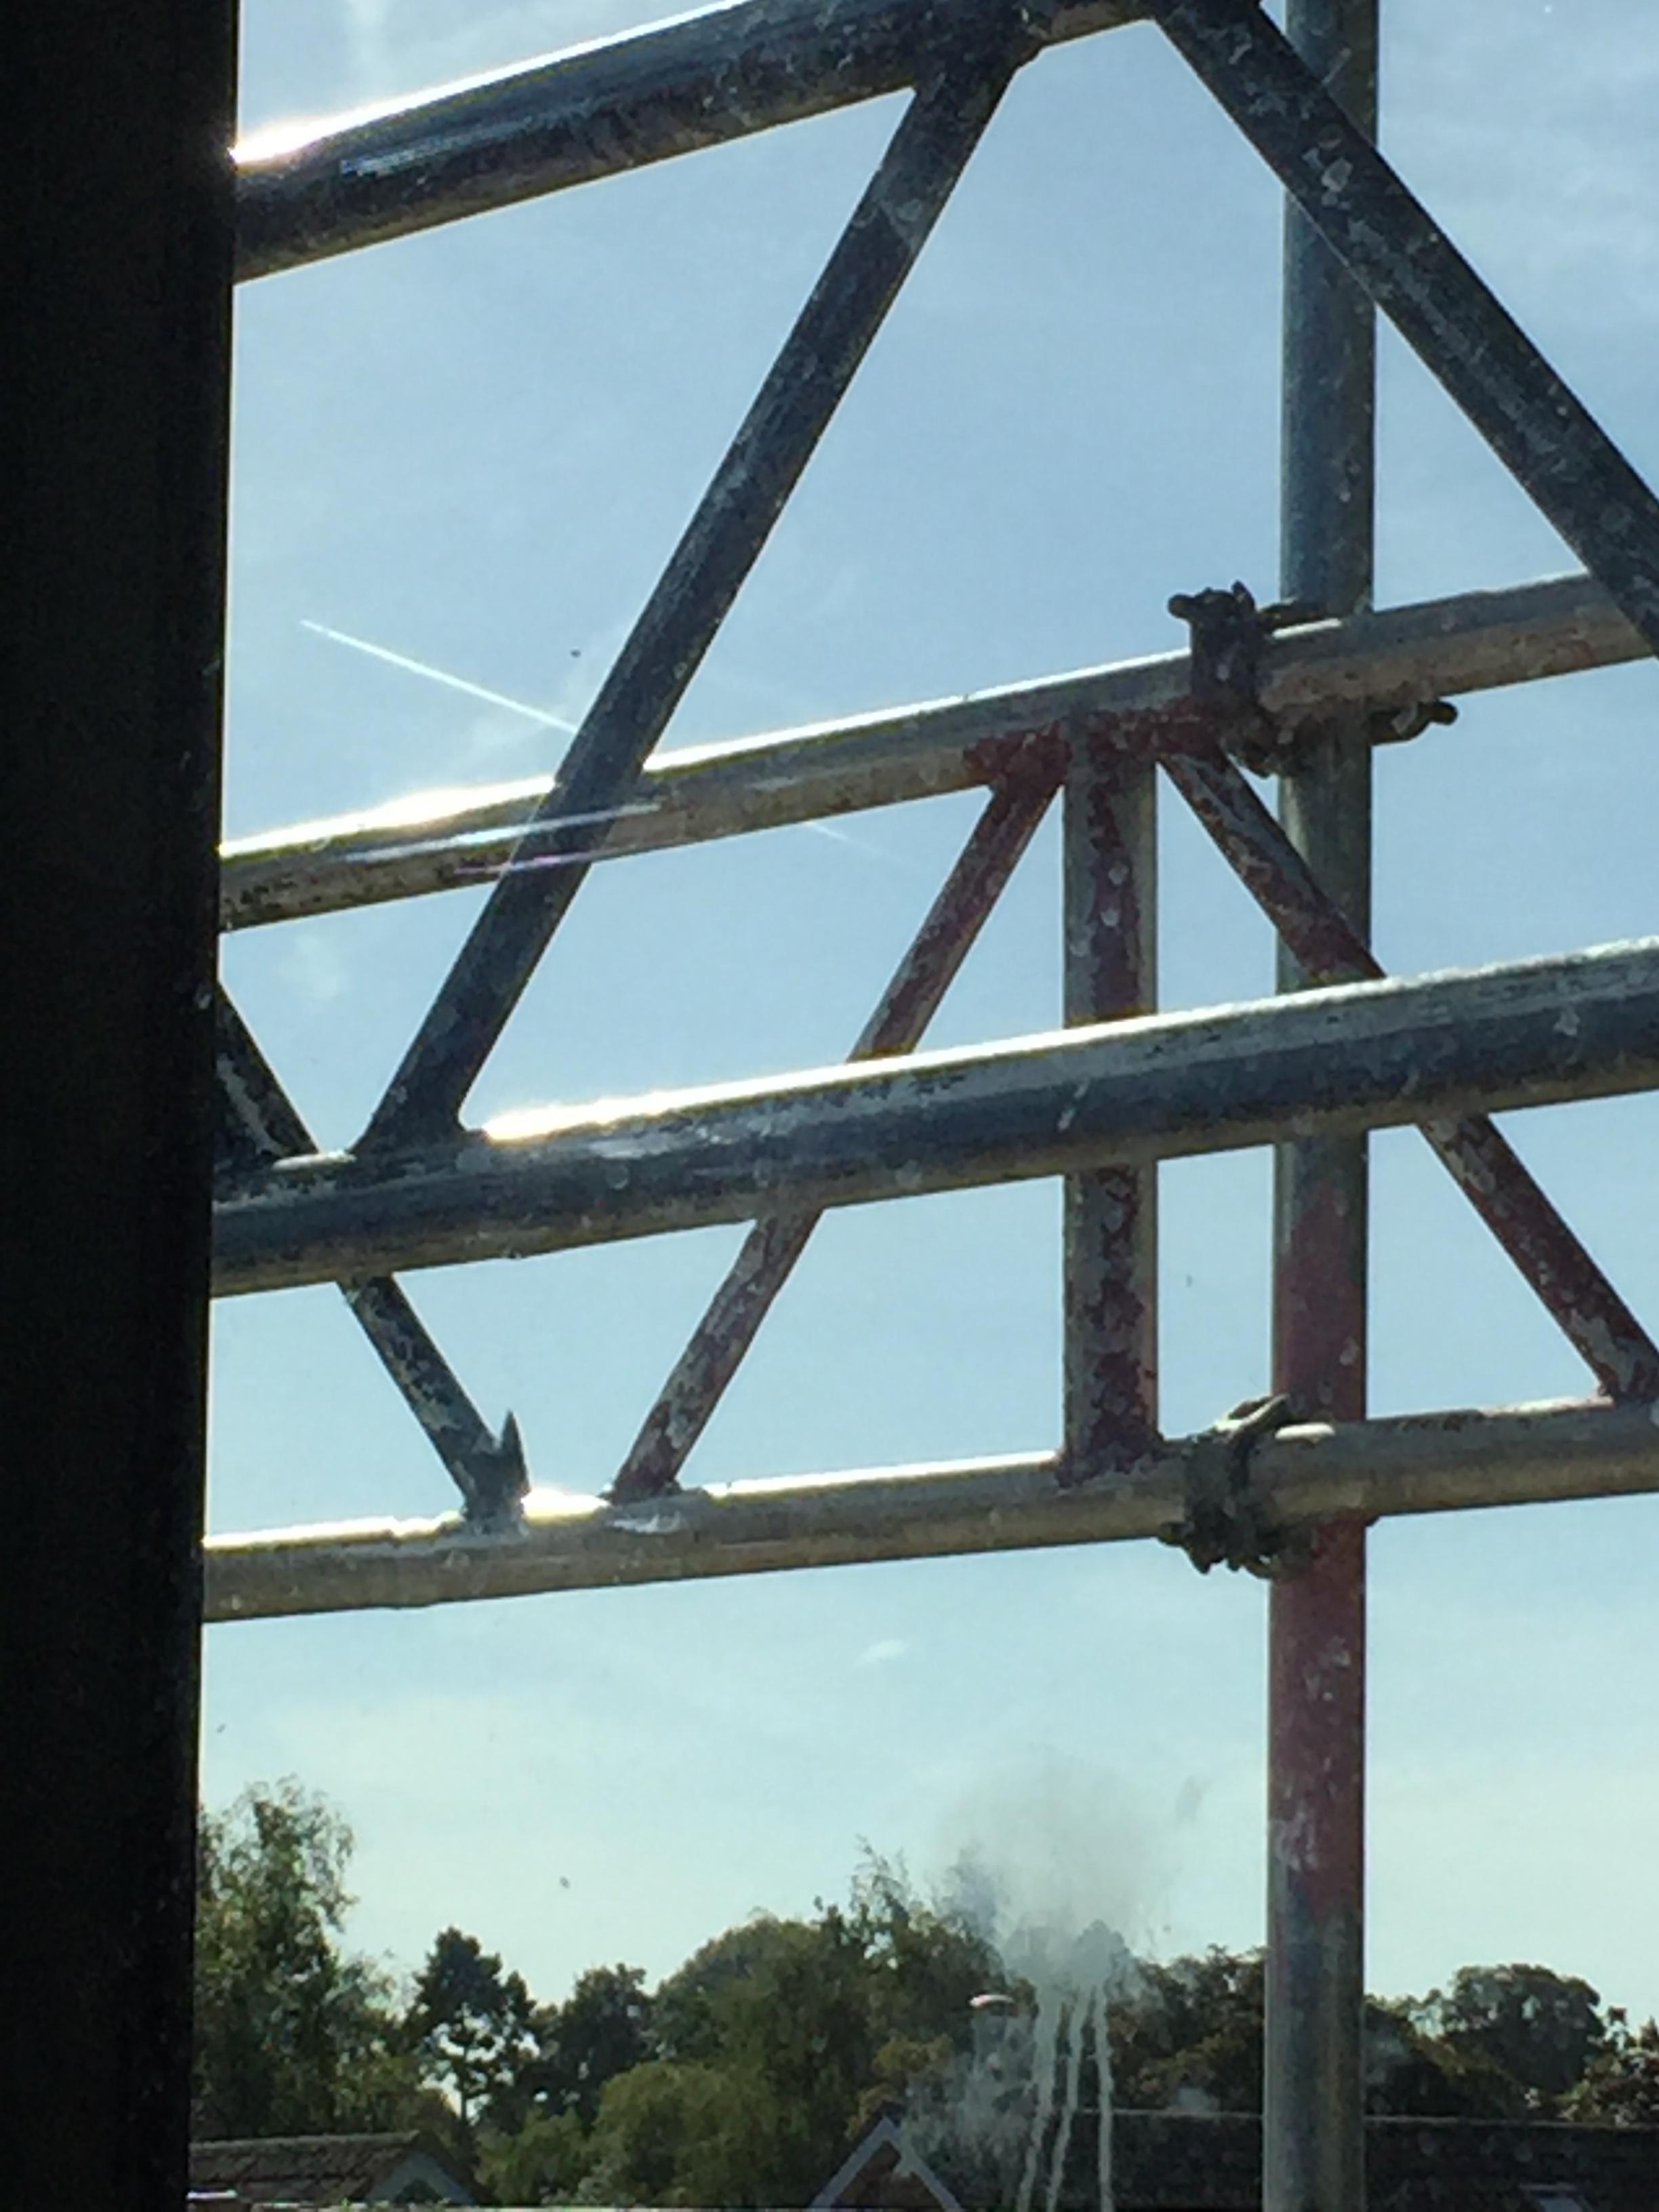
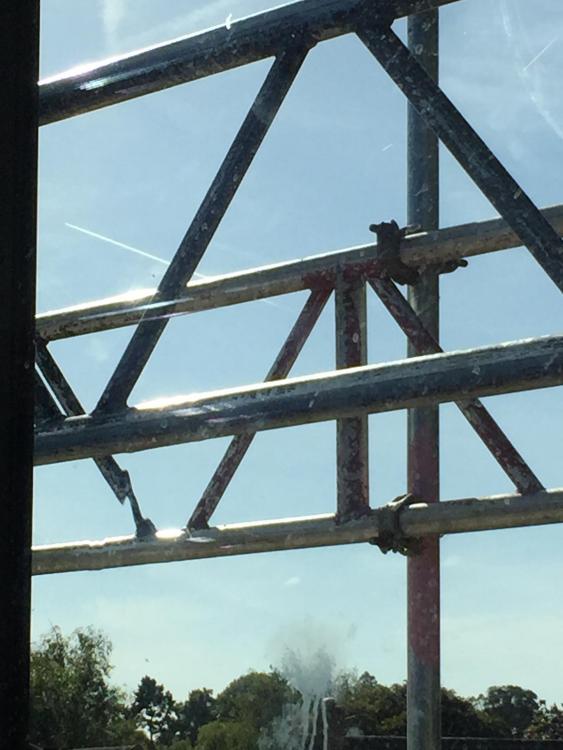
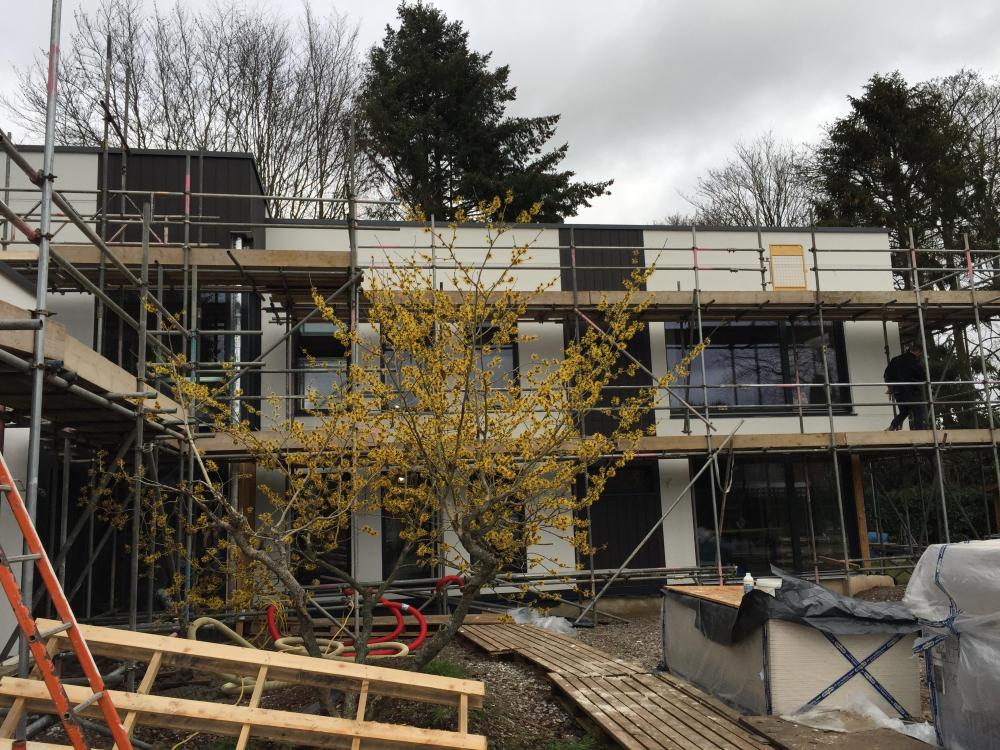
The defect itself is visible from well over 2m if there is something behind the window. Trees for example are distorted. The shadow in the wall, caused by the defect, is visible from the whole room. And nothing we can do to hide that. It will be on the wall opposite our bed so we’ll wake up to it! The quality guidelines are all in German so going to need to work on that. I really can’t believe this is acceptable to the manufacturer. Nobody would buy large windows from them if they thought they might get 2 inch high shadow marks on their walls due to defects. The marks in the glass itself are tear drop shaped on the middle pane. We’ll have to challenge on technical grounds. The manufacturer’s representative hasn’t even been out on site to see the issue. The distributor has and appears to be on our side.
-
Replaced at your cost or theirs?
-
Soon after our windows were fitted last September we noticed two defects in one of the large panes. We were told this was part of the manufacturing process and one of the risks of getting a large pane of glass. The pane in question is about 3 m x 2 m. We have 12 such panes of glass in our house and none of the others have any defects. Other than this window, we are absolutely delighted. At the time we raised it with the UK distributor of the windows. They agreed it was unacceptable. They raised it with the European supplier who noted it was part of the acceptable defects that may appear in a pane of glass this size. Now that the walls of the room are plastered and painted, the sun reflects through the defect and puts a rather hideous shadow onto the wall. Does anyone else have any defects on large panes of glass? Are such defects normal? Windows are aluminium clad, triple glazed. Supplier and distributor shall remain nameless, currently, as I dearly want to get this resolved. The only resolution for me is a replacement pane of glass, fully paid for by the supplier, including transport and fitting. That would be honouring our original contract in my opinion. We have been offered a compensation sum of about a 10th of the cost of the entire window. The windows were very expensive. I don’t want to wake up to that shadow every morning. Photos show the shadow on the wall and also the view out of the window when the scaffolding was in place showing the distortion in the view. Any thoughts welcome please.


-
Internal Finishes when no cill - help please
Weebles replied to Weebles's topic in Windows & Glazing
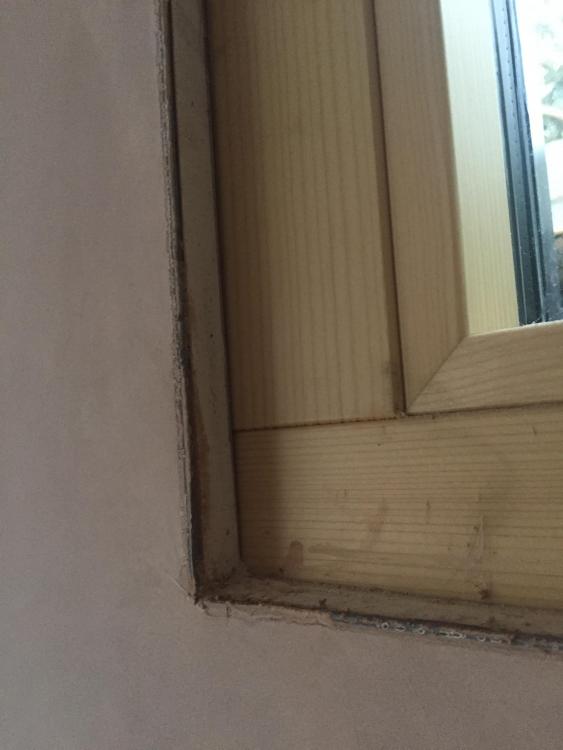
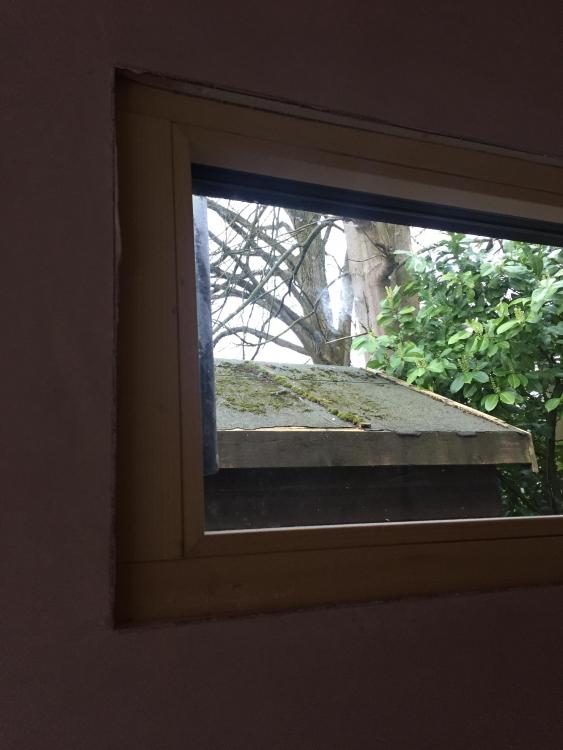
Thanks. Stick on timber beading sounds the quickest and easiest so gets the vote. Only a garage but will actually be a games room..... (keeps the kids out of the house ?) -
Due to an error (mine) when ordering the windowsills and forgetting that our garage walls are thinner than the house walls we have ended up with our garage window almost flush to the internal wall. How can we finish this internal detail so it looks neat? The plaster goes to the corner of the wall but the reveal is simply the plasterboard edge. It’s only the inside of the garage but it would be nice to finish it properly rather than leave the bare plasterboard edge which I guess we cannot paint straight onto? any suggestions?
-
I did a 400 euro order from Megabad back in January. No issues then. Still got a couple more things to get so looks like I might be looking elsewhere then......
-
Cladding straight onto battens (which had a damp proof membrane fixed to them). The cladding overlaps (each piece has an overlap edge detail) so should be weathertight.
-
I am almost looking forward to it now Thanks!
-
So it looks like we just "size" the walls and we are good to go. So I can't put this off for a year then ? - going to have to hang wallpaper for the first time......
-
Plastering (onto plasterboard / timber stud walls, not masonry) is part finished so we can start painting (mist coats etc). My daughter wants some wallpaper in her bedroom and a friend said her builder had advised waiting at least a year before putting wallpaper up onto fresh plaster. Does that have any merit? Or can we mist coat the wall and then wallpaper it? Or something else?
-
Thank you. Our planners are a rare breed. They like “different” and were happy to see a contemporary house in an area dominated by 1970s 4 bed boxes. Thankfully.
-
Well, it’s over. The company that did our render and cladding has finished and the final bill paid so the warranties can be issued. Now I feel I can blog about what has been an up and down experience. We started looking at companies to do the render and cladding before we had finished knocking our previous house down. The sales guy sat in our caravan in May last year. We felt we had got on top of this at an early stage. One issue we were really concerned about was the joins of the render with the cladding. We were told that the battens for the vertical mounted cladding needed to be a min 38mm but that fitting vertical cladding would require horizontal battens. So double battening needed. The sales guy guy got his render depth wrong (told us 25mm when should have been 19mm). That 6mm matters when you are trying to get battens to fit two different depths of final finish. Should have confirmed sales guy conversation in writing. Lesson learned. Confirmed every subsequent conversation. But didn’t notice that the company cocked up their calculations of area to be rendered / clad. So got a surprise demand for extra money at the end. The experience of the actual time on site can be summarised as follows: Delivery of materials was in mid November. Bizarrely, no one rocked up on site for a further week. Then, no one knew what to do with the materials that were there. Alarm bells were ringing loudly at this point. We had had outsourced the whole job to a specialist company so expected them to project manage it. A project manager was absent for most of the first two weeks with the guys on site working without any guidance with a render system they claim never to have seen. For the record, this was SAS ProWall and the company we used was recommended by the SAS people. Some of the workmanship was shockingly poor. This sort of thing - see the photos. Awful mess on the expansion joint mitre (which would remain visible) and huge variations in the render board gaps. It was down to us to raise this as nobody supervised their work. We had to raise issues a few times, including right at the end for remedial work. It seems it was too much to ask for someone to just do a good job. They all tried to take shortcuts or simply hadn’t a clue how to do what was needed. Half way through the job, one guy was let go. Good job as his efforts at fitting Cedral Click boards were pretty poor. The two teams (Estonian and Romanian) who then came in were good. Finally. The Latvian render team delivered a good final finish but it was a big effort from us to get them to focus on quality. Apparently they “render loads of low cost housing and no one really bothers with the finish”. So, the SAS system involves battens, then heavy render board (which they fitted the wrong way round to start with). On top of the board goes a layer of base coat with a mesh embedded in it. then it needs two top coats in the chosen colour (ours is white) and it has to be 5 degrees or warmer day and night for at least two days to do this. It was December. We were getting worried. But we have been very lucky with a mild winter and they got it all coated by the first week in Feb. It’s a slightly textured finish - hopefully visible on the photo. The Cedral click cement board has to be cut with a decent circular saw. It then has to be fitted so the cut edge isn’t visible. The boards are slightly overlapped and fitted together with metal clips. Each batten has to have damp proof membrane on it (they didn’t know this and we had to tell them). The strips for the ends are colour matched aluminium trims. We still need to silicone the window reveals. But it is done. We are pleased with the overall effect. And delighted that we don’t need to go through this any more or ever again. Difficult company to deal with. We got there but the journey was horrendous at times. Many sleepless nights and days of worry. Plus anger and frustration. But now we can look forward to getting the scaffolding down.......
-
Stress disappears with time! I am already starting to forget.....
-
Hi, it is just finished. Am going to blog post on it properly. We are pleased with the eventual outcome but it has been a very expensive and stressful journey. It is difficult for us to recommend the company we used (who were recommended by SAS) because their quality of work has been so variable. Their project management has been almost non existent. So big lessons for us. Still under scaffolding but here is the finished effect. Will detail some of the issues in the blog.....(which hopefully i’ll have time to update whilst off work next week)
-
Hi, there are a few of us in Oxfordshire on this forum. We are in Henley and about half way through our build. We employed a man with a digger for our Groundworks and he did what we asked. Prob cheaper than using a Groundworks company. Steep learning curve for us but good to get going. Soil survey essential but we had less clay than they said so dug too deep, mucked away a load of stuff and then had to bring crushed concrete in and roll / vibrate it. But no piling needed thankfully. Overkill foundations are the result. And 12k of contingency gone. Taking your time is good advice from @Ferdinand ecology building society has been a good option for us. we can recommend a super electrician (Didcot based so practically next door to you)
-
Not a problem. Just in time to pack the last few walls! Saves £100 at least. Thank you. Looks fantastic. ?
-
Sadly your tip about “burying” the plasterboard in the walls was not soon enough. Just paid £100 for a 1 tonne bag to be taken off site. However, the rest of the offcuts will be dumped in the walls. Too tip. Thanks. And your place looks great. on the Karndean, what is the floor build up in mm on the ground floor slab?
-
+1 for The Ecology Building Society. Their rate was slightly higher but the upfront costs for Buildstore were a lot higher. I worked it out over the 2 years (lock in period for Ecology) and it was pretty even so went with Ecology due to feedback from others. Easy to draw down cash whenever we need. Buildstore had fairly rigid stage payments in our quote. Their surveyor wanted a budget and didn’t believe mine (spreadsheet based) and insisted on a professional assessment. I went with Estimators Online for £180 for them to come within £10k of my budget.....got the mortgage approved within 1 day of sending that in though. TBH, I don’t think the surveyor thought we could build a house - he could yet be right ?
-
Best simple ideas and concepts to design in to new build
Weebles replied to albert's topic in New House & Self Build Design
We are incorporating a larder on the north side of our house. It is insulated (less than the external walls of the house though) and connected to the house with a proper external door. I have vented it top and bottom. There are no windows. It never sees the sun as it is under trees too. The concrete slab was separated from the concrete slab of the house. No UFH in it. It is definitely colder than the rest of the house. But as we are only mid way through our build I can't say how it is performing. I will post more on it when we are moved in (hopefully this year at some point). Current plan is to ply the walls before PB and plaster so we have as many shelving options as we want. I am optimistic for it staying cool but need to see how it goes. -
We are also using 15mm PB on all ceilings. Hope it helps. And we will stuff any spare Rockwool into those metal web joists.