
Weebles
-
Posts
399 -
Joined
-
Last visited
-
Days Won
1
Everything posted by Weebles
-
Have you then finished the interior wall up to the tracks? (in our case, at least boarding out) Pics please if you have any.
-
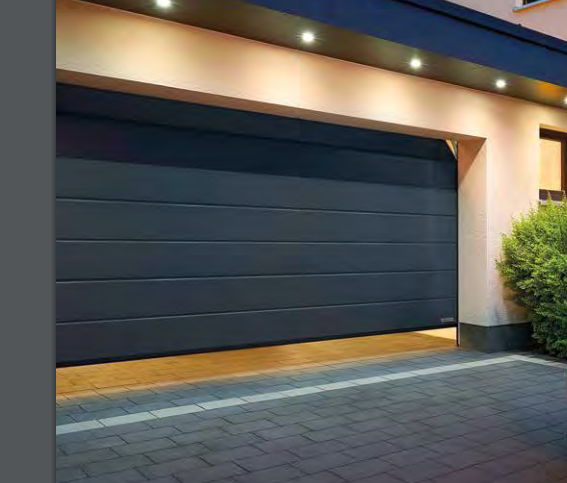
Sectional, on tracks. Should look like the one in their glossy brochure.
-
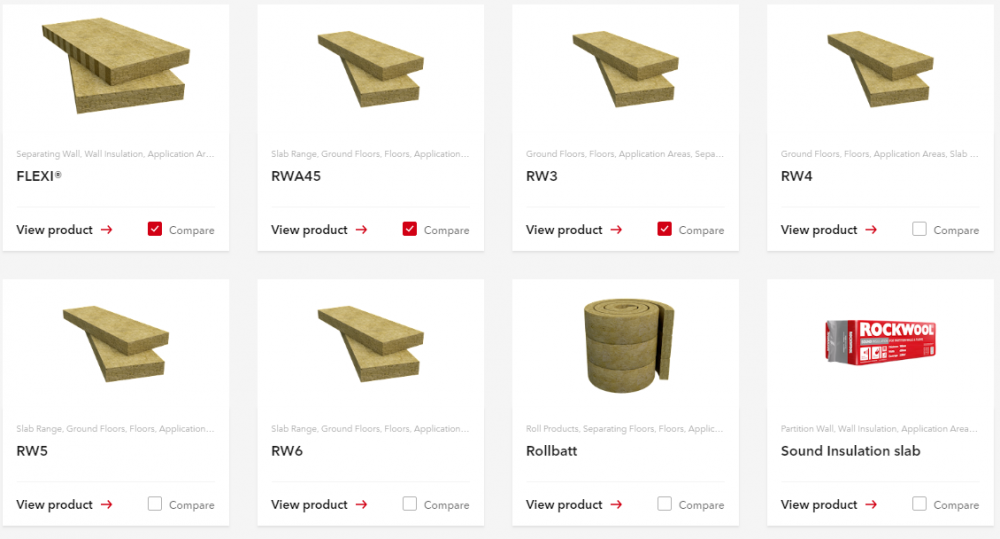
It's a minefield of choice. Advice please. Looking to insulate MBC timber frame internal stud walls before plasterboarding and trying to get ahead of myself with ordering stuff in. Rockwool seems like a popular choice but there are lots of versions. Any preferences out there? (the comparison function on the Rockwool website is playing up) Stud walls have a 90mm void. I read on here in another thread about not compressing acoustic products. Would a 75mm thick product do the job?
-
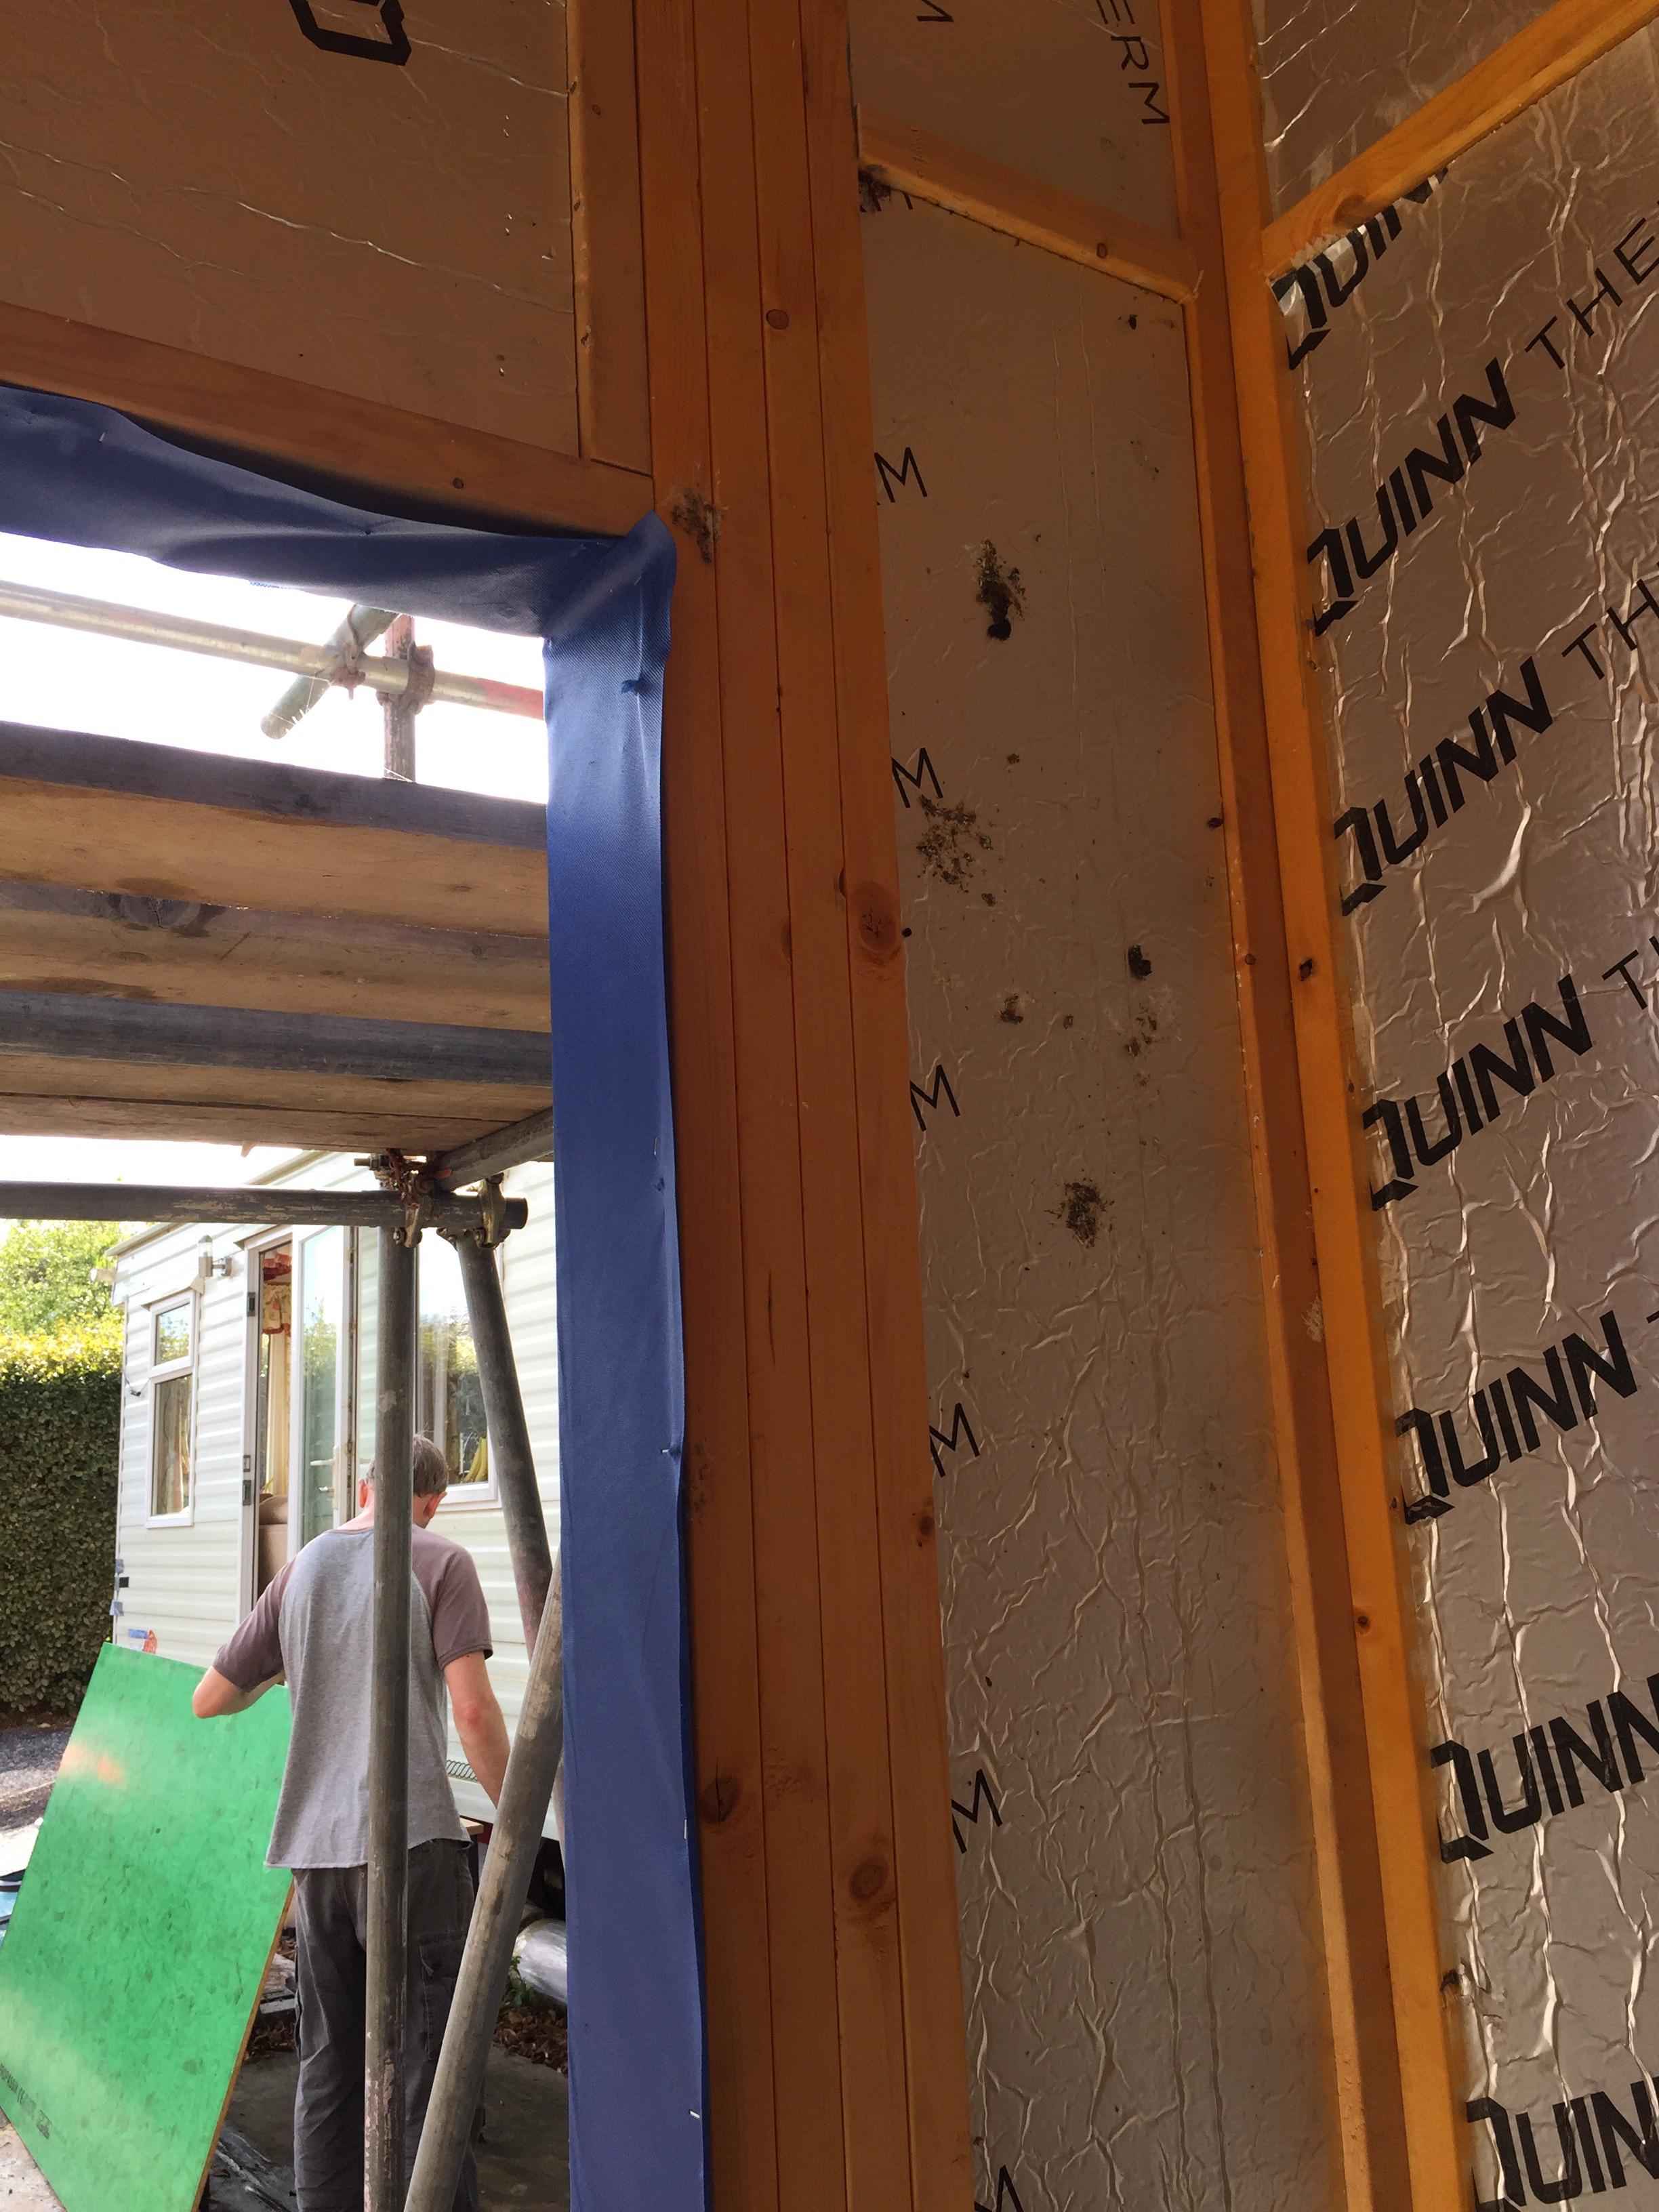
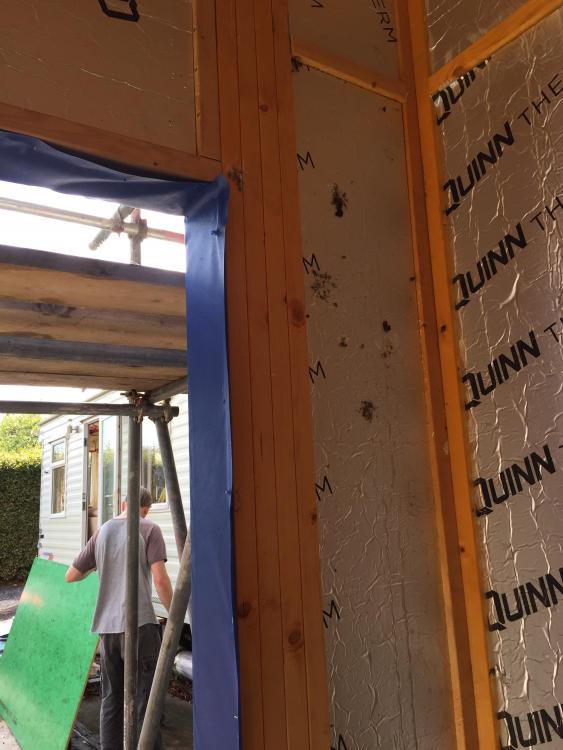
We are going to have a Hormann garage door fitted to the inside. We are just trying to secure our garage space for storage over the winter ( door fitting next year) but our render company is going to render it in a few weeks time. So we are thinking about the internals where the tracks of he door will go. what do the tracks fit to? The finished surface or a ply layer before service battens and final boarding? Or something else? (garage will not be used as a garage for cars so we will board it out properly and may even plaster it). current make up is in the photo
-
MBC arrived on site, laid Type 1 and soil pipes pretty quickly and 50mm sand blinding and then set to constructing the EPS raft that is now our slab. Its been said many times on this site, but I will say it again. These guys work hard. They arrived before 7am each day and left at 6pm or later each night. They hardly stopped. And after a week it was assembled. Ready for concrete.
-
The SE suggested digging 900mm deep because the soil survey said we had clay. And we have trees. I used the NHBC foundation depth calculator and did alot of reading around foundation digs. Overthinking it all, alot. BC said to dig to 700mm and see what was there. Guess what? No clay (well, only a tiny patch amongst loads of gravel). So the SE suggested a new depth of 200mm. But we are already at 700mm I said. No problem he said. Fill it back in, with crushed concrete and then Type 1 on top. So £5K for muck away and another £7K to fill the hole we didn't need to dig. Did I mention our contingency was gone? But we have extra secure foundations. BC happy. And we have moved on. A photo blog seems like the simplest way to show what has happened. So here we are digging it out. We even shovelled a bit by hand late one night. We laid some ducts. Thanks @JSHarris for swift assistance on getting those in properly. For about 10 days we got up at 6am, worked on site for 2 hours, went to work, got home, worked on site til 11pm or later. Couldn't have MBC turn up without it being ready. Then we put the crushed concrete and Type 1 back in the hole and compacted it to level. Just in time. MBC arrived the following morning. Its now 4th July.
-
From this To this The demolition guys worked alarmingly slowly. They didn't bring any machinery in until late on when the slab needed to be dug up. Unbelievably they were loading the skips by hand, brick by brick, concrete lump by lump. Anyway, we ended up a bit behind schedule due to them taking 3 weeks longer than planned. If we were ever going to do this again, which we are not, we would know better. I would drive a digger into my flat pack bungalow myself.
-
So, as I am backdating this blog by 6 months I need to catch up quickly. I covered alot of our demolition in other posts due to the asbestos issues. The bungalow was encased in plastic sheeting and over the course of three weeks amosite asbestos was removed from the soffits, chrysotile asbestos from the roof tile edging and from inside every internal wall. We left this job to the professionals and were pleased to do so. It whacked up the cost of our demolition by about £20K in the end and the contingency was dipped into straight away but best off done properly.
-
Back in March our new home arrived. Manoeuvring it into place took more time than we possibly imagined. And we looked at our snow covered new home from the relative warmth of our 1960s flat pack bungalow and wondered if it was too late to turn back. Thanks to fellow buildhubbers we got it safely hooked up to gas. Thanks to You Tube we got it levelled. Thanks to him indoors it got all plumbed in to mains drainage. We moved in in mid April.
-
Internal wall make up - what’s best?
Weebles replied to Weebles's topic in General Construction Issues
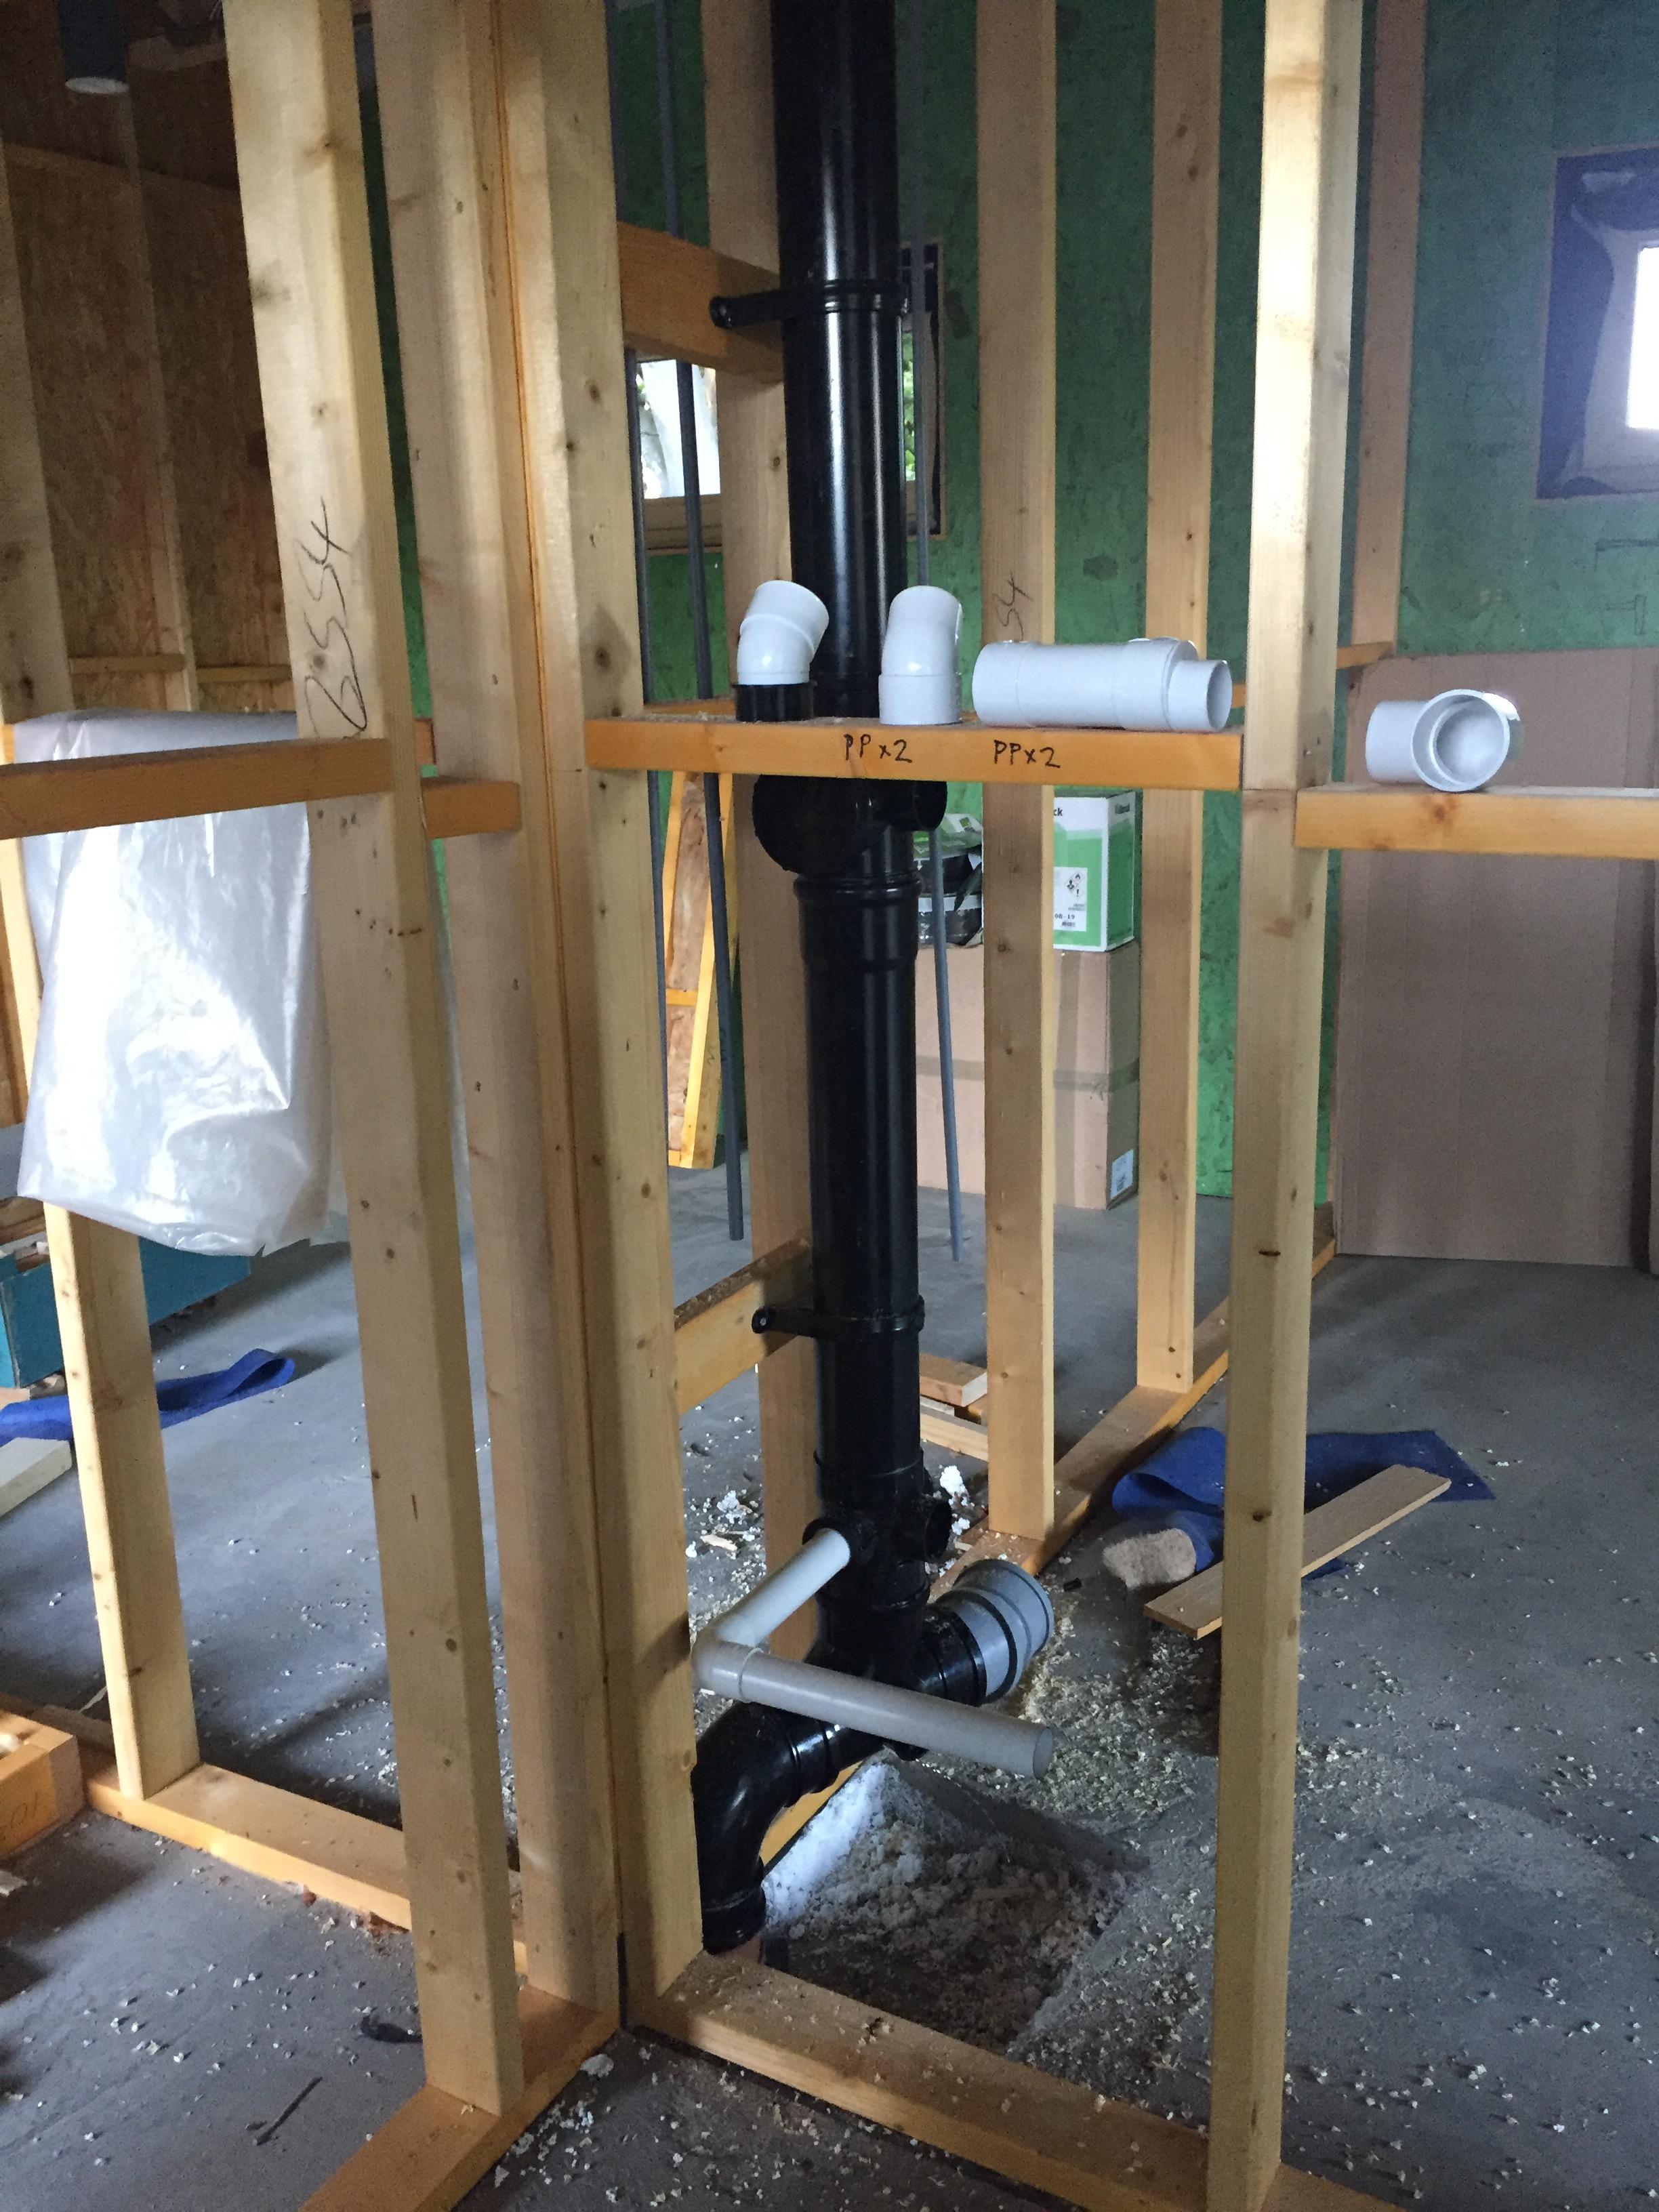
The photo was just to show a sample of what the studs look like. This just happens to be the junction of two rooms which are back to back and 2 cupboards on the near side. So at this particular junction I guess we prioritise the rooms and then we can sort out the cupboards afterwards. Most of the other studs don't have this issue. I probably picked a bad photo. What depth OSB? Plumbers saying OSB not so great to fix to, need to use a decent ply if we want to screw into it securely? Got a load of OSB on site - was going to use that behind areas of boxing out as they won't ever see the light of day again. -
Shower screen sizes - advice please
Weebles replied to Weebles's topic in Bathrooms, Ensuites & Wetrooms
Thanks @AliG. Have gone for the 1000mm screen on the 1500 tray (shower 1). Have taken your advice and upsized to a 1700 shower tray for shower 2. Not done final decision on screen but will prob put in 1000 or 1100. And will tile the end wall. There is a cavity for the valve so that works well. Shower 3 tray and screen is for another day. Thanks for input, really helpful to know that a 500mm gap is fine. -
Hi. Our plumber is first fixing our MBC timber frame build. Some box outs are needed and it got me thinking about walls. I have no idea on materials so help needed please. What should the internal wall make up be? Plasterboard (what depth, any recommendations?) screwed to the stud walls (which currently look like the photo)? Or ply / OSB first? If so what sort and what depth? different ply / plasterboard for bathrooms? and what type of insulation would you put in the wall? what about walls that have stuff that will hang off them (bathroom and kitchen units and TV)? Thanks. Going to have a go at some of this ourselves......

-
Shower screen sizes - advice please
Weebles replied to Weebles's topic in Bathrooms, Ensuites & Wetrooms
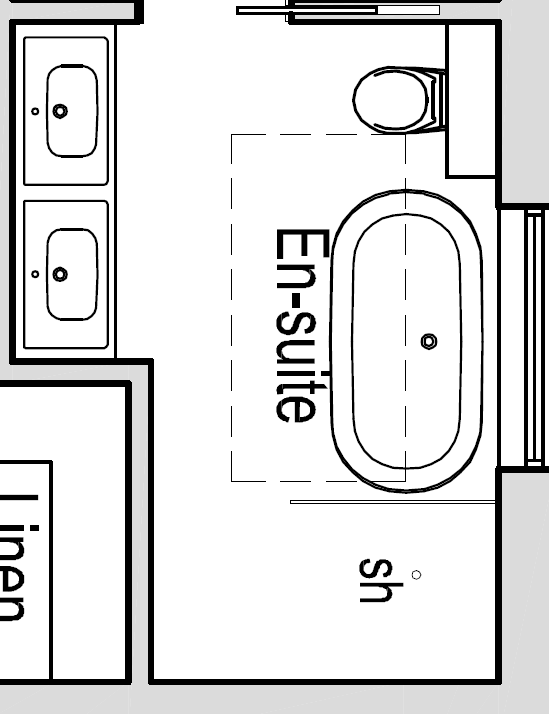
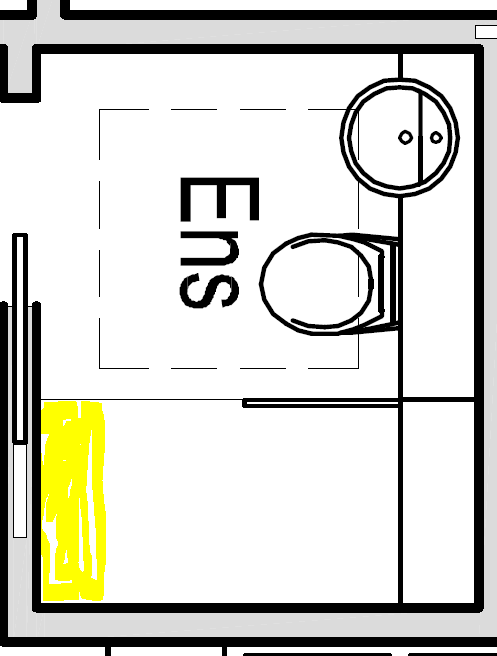
Images would be better I agree. Here we go. Shower 1: 1500 x 800 shower tray. Does anyone think that 600mm is more appropriate than a 500mm gap? (a skinny teenager will be using it primarily but I may want to welcome larger visitors......) Shower 2: looks like a wetroom on the drawing but we are planning on a 1500 x 900 shower tray. The length is just over 1900mm and there aren't any trays that fit that space perfectly. Thought we'd go a bit shorter and maybe use the end space for something (if it isn't getting wet). Shower 3: Have had to reduce shower tray to 1200 x 800 as the shower waste on every other size kept hitting the joists. So now there is a gap of about 300mm (shaded in yellow). Should we screen off that bit - will the water come out the back of the shower?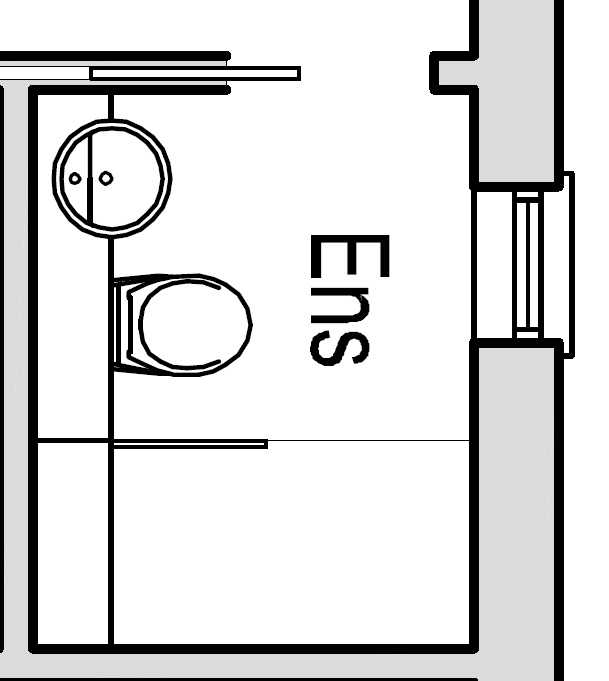
-
Just ordering shower screens and could do with some advice on gap sizes / screen lengths. All for shower trays (with tanking planned down the walls to the tray, but not on the actual bathroom floor where you get out of the shower - unless someone says this is advisable?) Shower 1: 1500 x 800 tray (to be tiled on 3 sides leaving the 1500 length untiled). What length screen should I get? 900mm, leaving a 600mm entrance in. Or 1000mm, leaving a 500mm entrance in. Shower 2: 1500 x 900 tray with a 450 x 900 tiled floor area at the end (to be tiled along the 900 and 1500 sides) What length screen to get? 1400mm or shorter so can get into shower via the tiled floor at the end or side? Or screen off the 900 end? Am worried about the shower spraying out the end of the tray...... Shower 3: 1200 x 800 tray only tiled on 2 sides. Full enclosure not desired by claustrophobic teenager. Screen the 800 end and screen 700mm of the 1200mm side? Or just a side screen? Will the water spill out the back of a 1200mm tray? Thanks
-
Render / cladding quotes a bit of a shock
Weebles replied to Weebles's topic in General Construction Issues
Nothing done yet. Got a company coming out on site this week to look at installing both. What sort of hassle with the mortgage? -
Vent Axia MVHR Install - Top Tips?
Weebles replied to Weebles's topic in Mechanical Ventilation with Heat Recovery (MVHR)
Thanks. We will look at running the ducts out of the top rather than the side to lower the unit. Otherwise it will be a stepladder to do anything and not sure I’d ever find enthusiasm to move it! -
Vent Axia MVHR Install - Top Tips?
Weebles replied to Weebles's topic in Mechanical Ventilation with Heat Recovery (MVHR)
A min of 1.5 metres apart we have been advised by BPC. And they will be on the same face. There are trees very close but there’s nothing we can do about that. I guess the filters might need changing more often? they will be about 2m off the ground. Is that ok? -
Vent Axia MVHR Install - Top Tips?
Weebles replied to Weebles's topic in Mechanical Ventilation with Heat Recovery (MVHR)
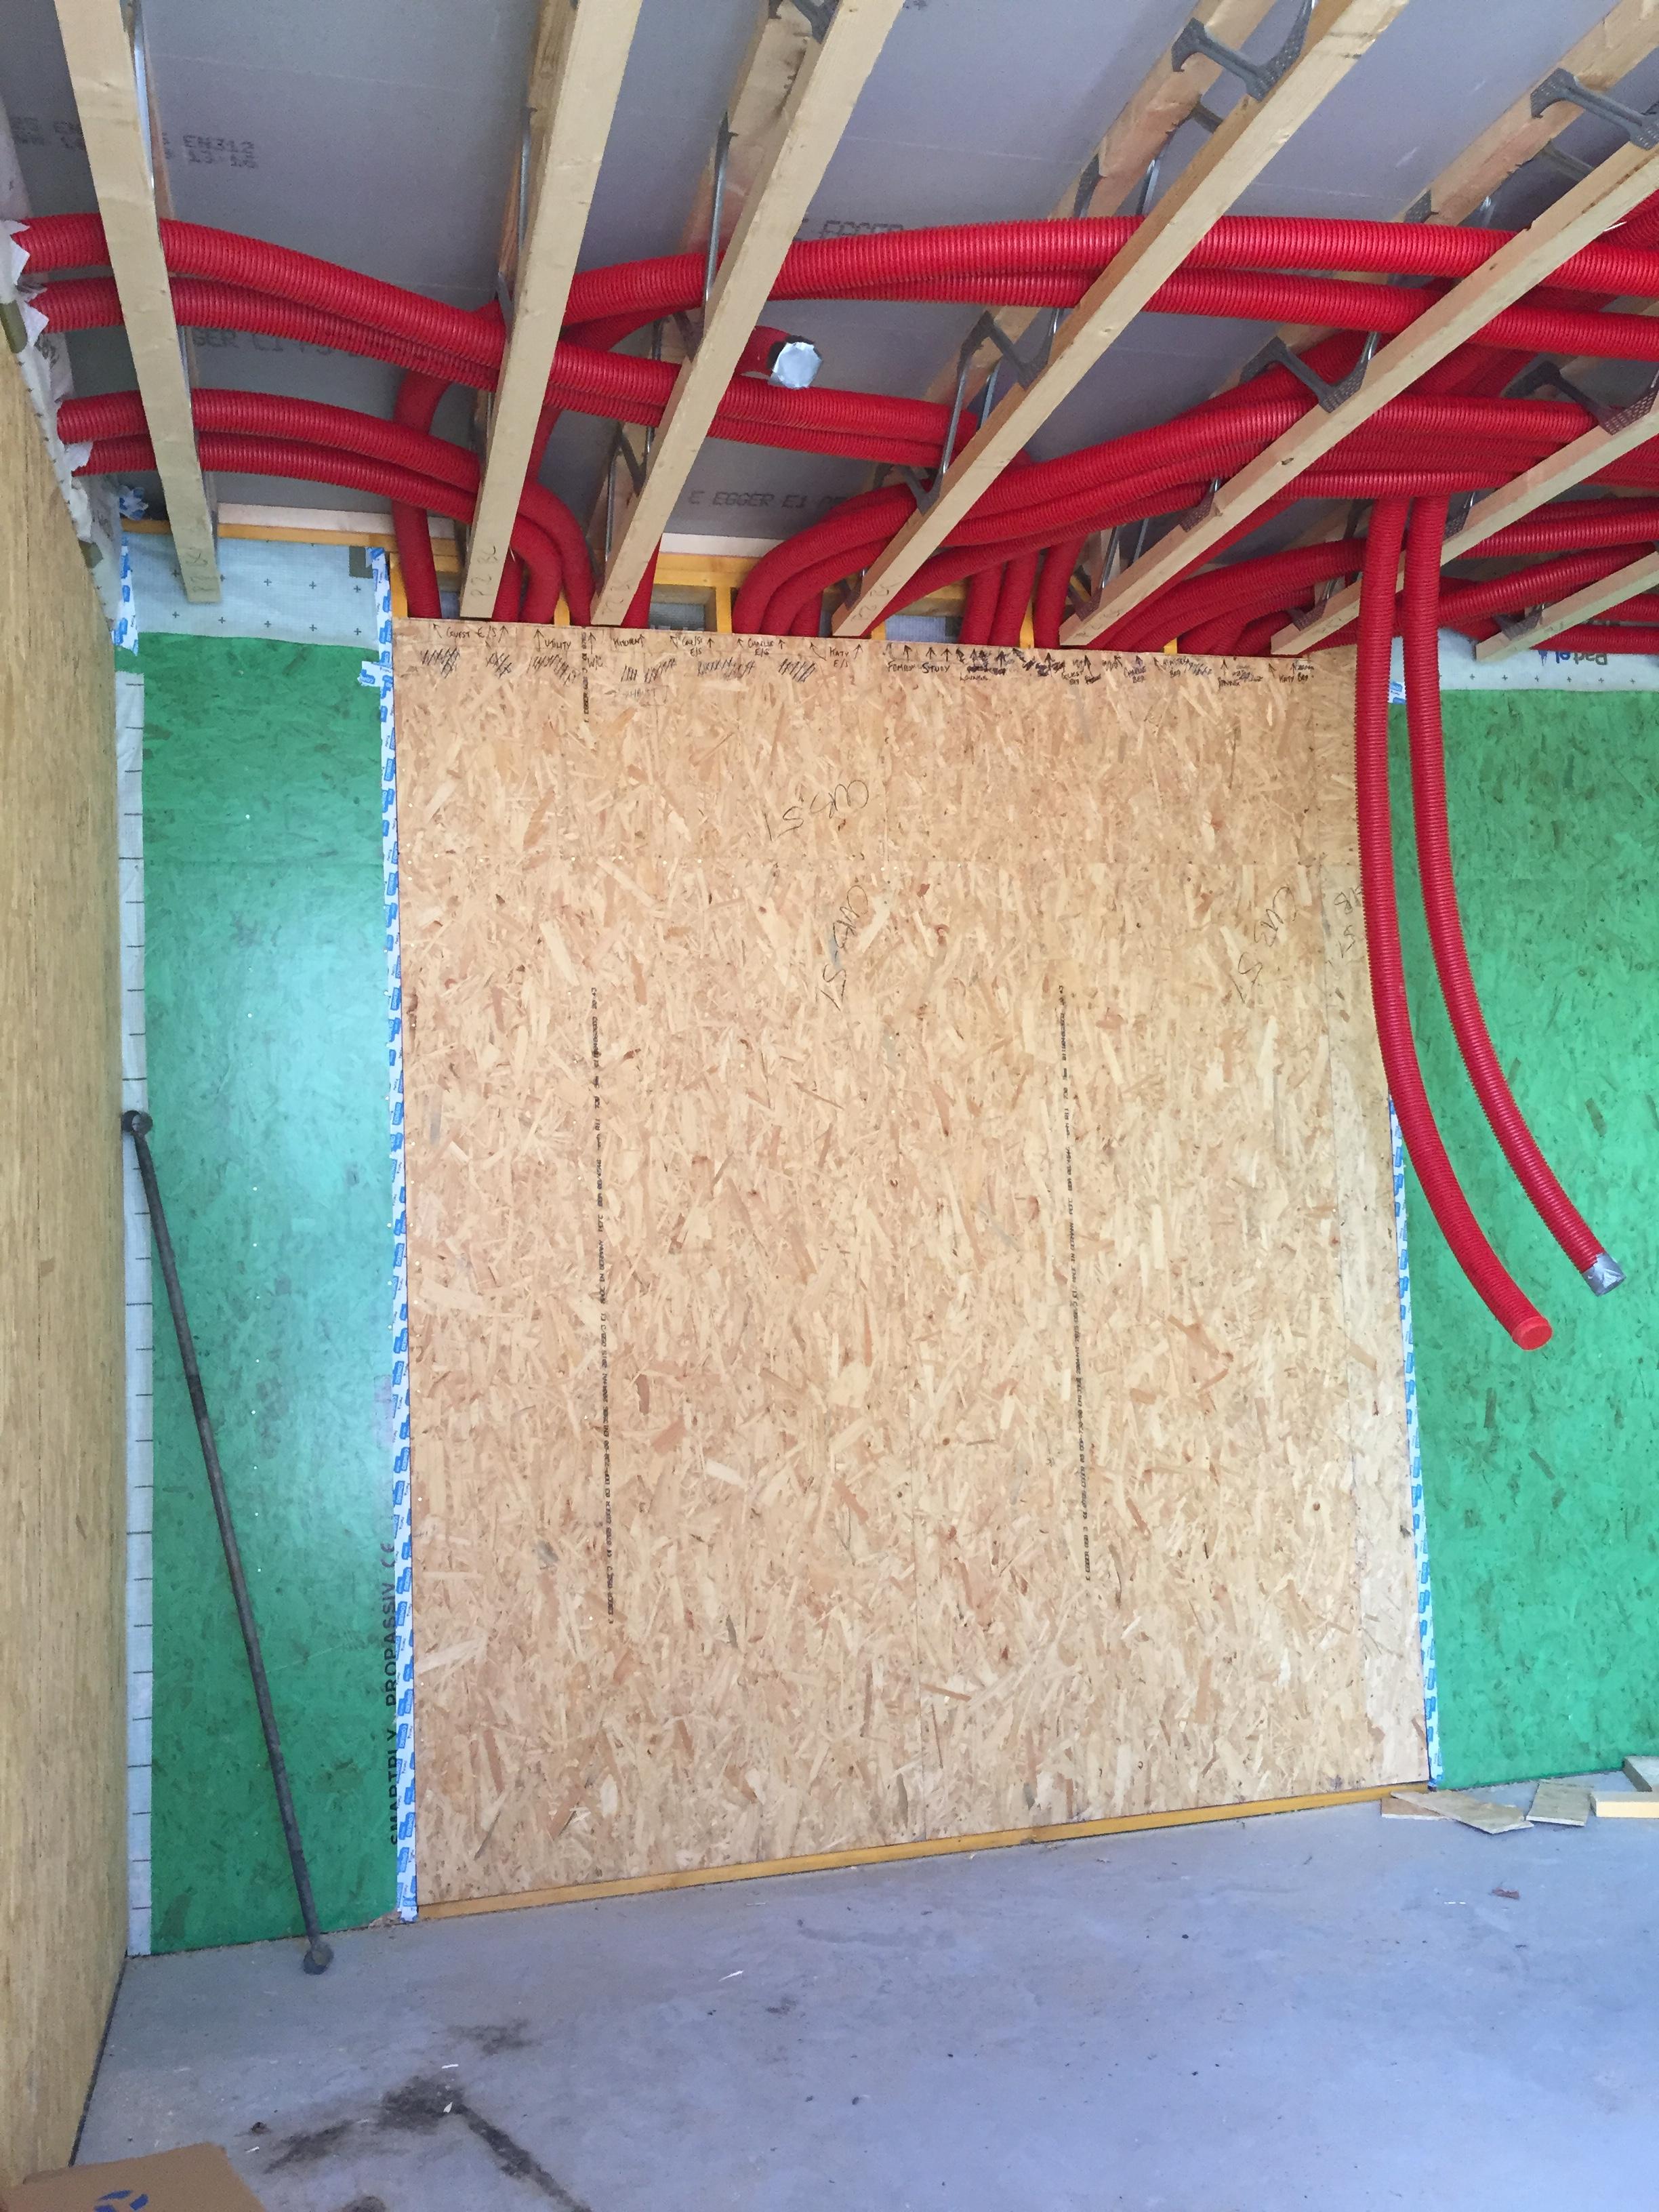
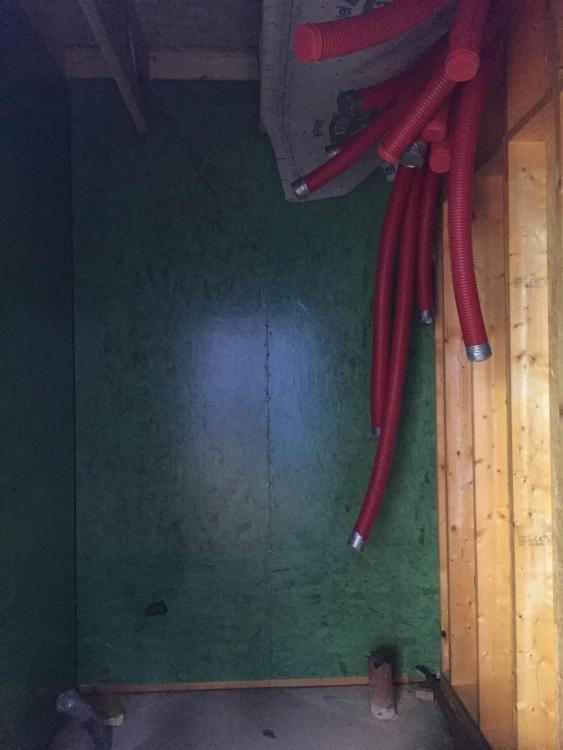
Radical duct mostly in now. Two or three pairs of hands worked well. So now the unit / manifold connections. We have worked out how it all fits together. Bends, couplings, silencer, flexible duct. Our unit needs to be in our plant room which single storey and is inside the thermal envelope. Should we fix the unit to the wall (it would be an outside wall) or mount it on a platform? The plan is to sit it high so the exhaust supply vents are as far off the ground as possible on the rear wall with vents out on the left hand wall as you look at it. Good idea or not an issue? First image shows duct runs going through to the plant room. Second image is the plant room.
-
MVHR vs Kitchen Exhaust
Weebles replied to mike2016's topic in Mechanical Ventilation with Heat Recovery (MVHR)
Just starting the MVHR install so thinking about ducting and punching holes through the thermal envelope. I recall @dogmanthat you have a separate oven and hob. So are you talking about the extractor above the hob? Are you suggesting an external venting extractor unit (rather than recirculating) for heat reasons? And because i know nothing about these things, how does an extract work for a stand alone oven? Do you even need one? -
Our first quote (the finished look is part render, part Cedral vertically mounted) came in at £80K. Your 42K looks like a bargain to me ? Got some guys coming out tomorrow from Cedral, the render company and the installing company to see how they can make it all fit cleanly together and what battens need to be used. Not the guys who quoted £80K! Would be simple if the total depth of finish was the same or similar. But it is not. Will see what the outcome is and post an update.
-
2 months and counting. No "additional hire fee after an initial period" though - its a flat rate and then a bit more each time we ask them to come back and move things around - so not worried how long it takes. Suspect another 4 months minimum though.
-
Well done. Assume you managed to refinance without problem without a completion certificate? Any issues to note as one day we hope to get one of those certificates too?
-
We weren’t charged VAT either. Total cost of removal was almost £20k. All the quotes but one came in at the £20k mark. We took the one at £13k. Would have been ok until they discovered more behind every internal wall. On every vertical timber strut that has contact with the wall. The stuff we knew about from the initial quote was the soffit boards (amosite), roof tile edging (Chrysotile) and the Artex ceilings. I am pleased it has all gone though and have never regretted paying the professionals to do the work. What I wouldn’t do again is get the same company to demolish. We hadn’t thought it could be two separate contractors (assumed that the removal would part demolish anyway - it didn’t) and thought it would be cost effective to lump it in together. It was not.
-
Vent Axia MVHR Install - Top Tips?
Weebles replied to Weebles's topic in Mechanical Ventilation with Heat Recovery (MVHR)
Wall vent. Not sure. Any recommendations? (We probably won’t be boarding out the house) Thanks for tips on rolling out / cutting (not cutting) ducts. Will rope in a friend too who can be a third pair of hands..... Is the order of attack about right or would anyone prioritise anything in particular? The manifolds and unit are going in a plant room which is not heated and is separated by a full height wall but is still within the air tight envelope of the house. We have been supplied with a load of flexi duct (insulated) to connect to the unit. Any photos out there showing those unit to manifold and unit to outside wall connections? -
This weekend is MVHR install weekend (hopefully). We are looking for some pointers from anyone who has installed a Vent Axia Kinetic Sentinel unit. BCP has supplied all the kit. Very thorough. Could do with an idiots guide for the plan of attack though. First attempt at a plan. How does this sound? 1. site manifolds 2. Site plenums 3. Cut duct lengths and join between manifold and plenum (cutting holes in walls and floors as needed) 4. Site unit 5. Figure out how to connect all those silvery pipes from the unit to the manifolds 6. Put in pipes to outside Is this a reasonable approach? We have trawled this site for photos. Any out there that show all the connections to and from the unit itself and the manifolds? It looks like it should be fun (or the makings of a divorce) ?