


Carrerahill
-
Posts
2132 -
Joined
-
Last visited
-
Days Won
10
Everything posted by Carrerahill
-
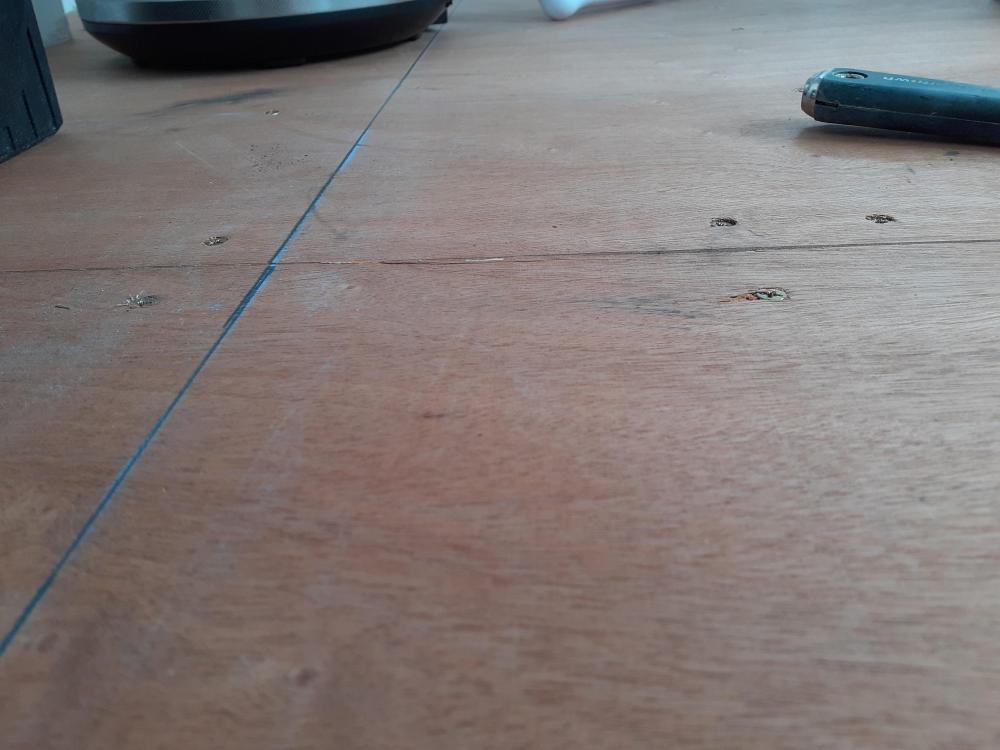
OK - I made a start. 12mm Hardwood core external grade ply was finished last weekend. I screwed it down on a grid, 8x12" in the field and 6" on edges, this resulted in a very smooth level floor (floor deck was level anyway). I then used F-Ball Stopgap to fill the screw heads and also to feather a section of the ply that differed in height by about 0.5mm - as I had the stuff I ended up just feathering the whole joint, took the finest of skim and that's me happy it is damn flat and level and these variations and marks cannot telegraph up through the Amtico. I then snapped lines to work out where cabinets would be and the centre line, I was going to butt a piece up to either side of the centre line but after a little test layout I discovered I would be better centring a piece on the centre line as that would save me awkward slither cuts. I even sanded the F-Ball just to get it super smooth, I then vacuumed it all.
-
https://www.amazon.co.uk/kenable-Cooling-0-12A-Sleeve-Bearing/dp/B00HT52VD8
-
You don't need the 3rd wire, that is just a speed signal. I used to build a lot of PC's and Servers and fans were always coming in 2/3 wire mixes. I never had a 2 wire fan fail to operate on a 3 wire circuit - it just meant you didn't have fan speed in the BIOS and if it had speed control it often ran at full speed regardless, which frankly isn't so bad.
-
I have just looked myself as my switch needs fans too. https://uk.rs-online.com/web/p/axial-fans/6688808?cm_mmc=UK-PLA-DS3A-_-google-_-CSS_UK_EN_HVAC+%26+Fans+%26+Thermal+Management_Whoop-_-Axial+Fans_Whoop-_-PRODUCT_GROUP&matchtype=&pla-436838252065&gclid=Cj0KCQjwx7zzBRCcARIsABPRscO9z_Kt5TGUJ1y0seNnka8F-a5yIXL-PFUhGiuB7ZQCVTpp1iSDYQcaArPtEALw_wcB&gclsrc=aw.ds
-
How to stop water coming through soil bank
Carrerahill replied to rpuddle's topic in Garages & Workshops
Basically, the cheapest option is to drop the ground level to below that of the finished level of the slab all the way around. Basically your slab is a bowl in a bath of water and the lip of the bowl is under the surface of the water - simple as. -
How to stop water coming through soil bank
Carrerahill replied to rpuddle's topic in Garages & Workshops
You really need to lower the level of the ground at the back, simply that is the only real "long term" solution. A french drain will work but that requires dropping the level of the ground and back filling with washed gravel, which will still sit against the garage, so it's a sort of half solution really. If you don't want to drop the level then excavate down the back of the slab, pour a foundation with a seperation gap from the garage slab and build a small retaining wall, back-fill the high side with washed gravel then make up your ground level to the wall, leave a gap down the back of the garage. This will keep the water back and leave a nice ventilation gap so the timber can breath. Ideally this section would have been built in block/poured concrete and waterproofed. -
What your wholesaler has tried to explain to you is true but the GU10 will cause more grief over time and also suffers lumen loss. A domestic downlight will probably average about 300-500Lm - so say a reduction of 30% (L70 I'd suggest if after 50,000hrs) so 150Lm loss, at that you would be hard pushed to actually see a difference albeit yes it would be there. The fact your wholesaler seems to well versed in this suggests that the integrated products they are selling are not very good and thus this issue is rearing it's ugly head too soon. I was on a site that had been handed over to the client 2 weeks ago, reception staff complained their desk was too bright, we had run the calcs and inline with CIBSE guides had designed the reception to 300Lux Avg with uniformity greater than 0.6. So in we went one evening with a light meter (only way to measure light in rooms with natural daylight penetration) and took a reading, on the desk we got readings of 250-350lux - fine, CIBSE LG07 would recommend 300-500lux for office spaces depending on use, so even allowing for the peak area of 350lux it was still well within spec, what I suggested the problem really was was the high gloss white reception desk reflecting light into her eyes! We rolled out a piece of cardboard immediately the issue was gone! However, on the lead up to this I advised the electrician to go into the fitting, and turn down the drive current from 1050mA to 750mA - now I didn't have the current/lumen curve so I don't know what lumen reduction that would have resulted in but at a 300mA drop we couldn't "see" any light drop - we eventually dropped it to 500mA and we began to notice it if we looked, others still could not see a drop - the humen eye is actually not that good at these relatively small light changes. The issue I have with GU10 is the little "driver" it is often no more than a cap and a resistor and some other bits, prone to being inefficient, getting hot and potentially being a big of a weakspot as the "driver" circuit usually fails before the LED. Aurora, JCC, Enlite etc. are "popular" among contractors as they are cheap and cheerful, you will generally not find Aurora speced on a job unless it was D&B or contractor lead - do not get me wrong I think they do fine, but as I see it they are really only suitable for the domestic market and often the optics and distribution is a bit rough. So most LED products that we would spec would be L90 - 100,000 - very basically it means that the LED will output 90% of it's initial lumens for 100,000hrs. L90 industry standard was always 50,000 - so if someone quotes L90 with no figure after it then it is only 50,000. You will also get L80, L70... Now even at 50,000hrs that is 11.41 years at 12 hours a day! So if the wholesaler is telling you about 30% lumen loss, then just how soon are they expecting this drop that you would start to individually replace lights? If I got say 15 years out a set I would probably be happy to replace it with the 2035 version which is 0.5W for 500Lm! Something to bear in mind is that all light sources degrade with time, florescents were terrible for it, people just saw they lit up and assumed they were fine but in fact they were well beyond their service life and could be as low as 50% of original lamp lumens. The high quality range of LED downlights use an LED engine/module which can be changed out, the Aurora units are largely all glued up and sealed - once dead, you bin them. A nice option for dometic installs is to buy a nice GU10 downlight and then buy the likes of a Tridonic LED engine and driver. You end up with a cost effective product with the light output and quality of for example a Flos or Erco down light which can cost £200 each! Like this: Note it has a decent heat-sink on it and optic etc. all built in. You can get a nice downlight for about £12.00-£15.00 and the Tridonic module and driver is about £15.00-£20.00 depending on lumen output - also, try and stick to around 3000K unless you want a white commercial feel.

-
Corona Virus precautions on site
Carrerahill replied to Ferdinand's topic in Project & Site Management
Mad eh! I know where you are, I have family just on the outskirts of Stranraer. -
Corona Virus precautions on site
Carrerahill replied to Ferdinand's topic in Project & Site Management
Exactly! The issue however I think is the lack of official public announcements, even a simple ad campaign blasted out giving out fact, talk about the 10,000's of people who have recovered. If I was older or had existing morbidity yes I think I would be taking a lot more care and limiting my exposure but people have gone mad, I am sure they are expecting scenes from 28 Days Later. The media is to blame for a lot of this and ejits on social media with followers because they sang a song in 2004 and are now looked up to by the deluded.- 16 replies
-
- 1
-

-
- corona virus
- health and safety
- (and 1 more)
-
Corona Virus precautions on site
Carrerahill replied to Ferdinand's topic in Project & Site Management
Hopefully this will drive down the demand for pointless meetings, people love meetings and most of them are totally pointless, not all, but most. I used to fly down to Heathrow nearly every other week for a meeting, I came away from the meeting 1/2 a stone heavier and with some liver damage as all that ever seemed to happen was a couple of days of people talking to convey would could have gone in an email then eating and drinking a lot! So perhaps meeting lovers will soon realise that having people trotting up and down the country just to be seen to be doing something is a waste of time, resources etc. I worked for a firm about 10 years ago where the MD wanted to Scottish office to have a monthly meeting, so we duly had this meeting, we all sat in the conference room and ate sandwiches and discussed pretty much the same stuff every time, it was fine and they only lasted 2-3 hours. Then the MD decided we were to have our meeting in Manchester... so every month we all met at motorway services and travel lodge carparks in the middle of the night across Scotland to car-pool groups of us to drive down... Must have cost the business at least £1000 in fuel and parking then on top of that the loss of productivity. -
Welcome! Start a build post and get your photo diary started!
-
Any tips or tricks? Did you roll it?
-
I will do. I'll probably make a start on Sunday.
-
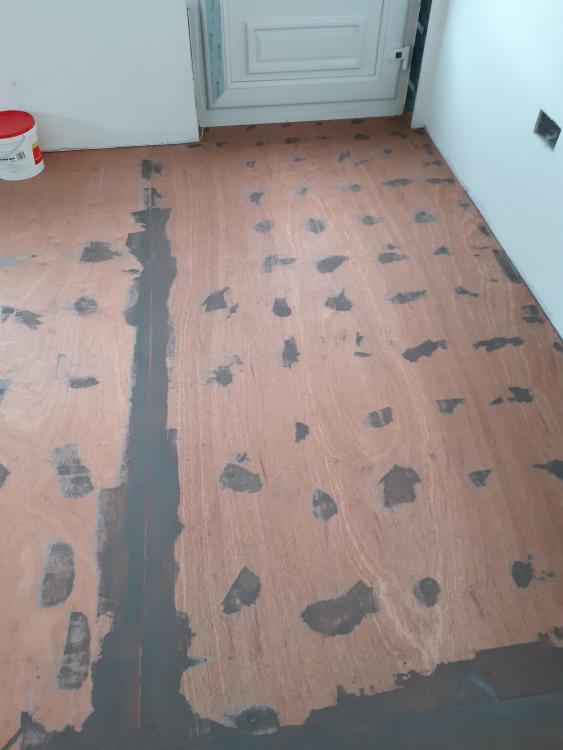
I have solved this. So this is where I am: 12mm exterior grade hardwood core ply laid, it is flat, seriously flat, really happy with it, and I was tempted just to varnish it and be done as it looks nice too! The only bit that needs a little tweak is where I got a little carried away with my router blade depth when removing a 150mm x 900mm x err 5mm section to run the sheet right up to the back door and over the 2x6 floor plate which the door partially sits on I intentionally set it 5mm higher than the sub-floor level so when I ply lined the floor, assuming 5mm ply, it would come in at the same level, but I had no reason to think, back then, that I was going to need to find 14mm so my fridge cabinet sat at the same height as the wall cabinets, easiest solution was to raise the whole floor level 14mm - so taking into account my flooring and the ply I needed min 11.5mm - so 12m ply it was! Anyway, I must have leaned a little heavily on the router or something and ended up maybe taking 7mm - result is that the bit that slides over the 2x6 was flappy! So I just poured in PVA, trowelled it out, put the ply down and screwed it down, it is going nowhere, but it has created a 2mm dip to the door, not to worry I have 4Kg of F Ball Feather Edge compound on its way, might even arrive today - I will also do the screw heads with this. I have Ardex flooring adhesive coming too and an A2 trowel. The actual Amtico will be here tomorrow too, we went for their mid-rage the "Form" and the friendly chap also found me some discontinued 2.5mm stuff in the back of the warehouse I could have for £10 p/m to go under cabinets. So the plan is to mark out the kitchen cabinet layout on the floor plus say 30mm saftey margin, ping a central line across the floor and start with an Amtico "plank" either side and work my way out, once over the cabinet line I can stop and finish it in the cheap stuff. The stuff I went for is 235mm x 1505mm so it should look smart with the large format planks, we have 225mm Oak in the living room and hall and it looks brilliant, I have never had so many comments about a feature of a house in all my life! I have spent hours and hours and hours researching and coming up with a strategy, sitting on flooring forums and talking to suppliers and even fitters - in the end I have come to the conclusion that it is just sticking some bits of plastic to a floor and as the prep is excellent, although really the prep wasn't hard because I built my floors blinking level, it will be fine! If I can build an extension I can lay some Amtico. I think Amtico installers just like to make out that their skill is far more advanced than it maybe is, I also was given horror stories when I decided to lay my Oak, apparently it was all going to warp and buckle and the whole lot would need ripped up. I think much of the horror story stuff is from poor prep, not dealing with the sub-floor properly, particularly where concrete and screeds are involved and using incorrect adhesives. I think the skill in Amtico is laying out borders or putting motifs into the floor but at that, it is just a keen eye and careful cutting.
-
I'd have that though (not for welding though), OK so not 600mm off the deck but it's been isolated significantly from the ground and lifted up a bit and that is real timber!
-
I considered a timber garage but decided against it for all sorts of reasons, when I was still on the timber build track I researched and confirmed, from fairly early on, that it would be built on a dwarf-wall of either concrete or block up to the height of about 600mm minimum. I had many many reasons, when I design and build something I want it to last, I want to know it will survive for many years. I even considered that in the future some muppet might bank up earth against a wall not realising the implications of building ground levels up around buildings, or the fact we get so much rain, or the fact that timber structures arguably need more care through their life to maintain structural integrity. I just didn't think timber was going to be ideal, I also do some welding in my garage and decided a timber garage and me welding and angle grinding away was going to be a bit dangerous. I then decided that given I was going to build up 600mm anyway I might as well go the other 1800mm! The block garage was also going to be far cheaper and less time consuming. Can you lay brick? If you have never laid brick then it can go two ways, majority of people who try DIY brick/block work make a complete mess of it and there isn't a straight bit in sight or you will have an aptitude for it and make a great job. I ask a friendly bricky for a job price. I gave my bricky the size of the garage, showed him where the main door and side door would go, how many lintels and he worked out how many blocks it would be and how much he would charge me. What are the dimensions, makeup and concrete mix of your slab? Was it designed to have a brick/block structure on it?
-
I agree, a nice solder job looks so smart. On my first ever pipe soldering mission I think I used steel wool, no flux and ended up with pools of solder on the floor - I have come a long way since then. I taught how to solder pipe by an old gent (who has since becaome a good friend) who explained all the do's and don't and the first thing he banned me from using ever was steelwool! Yeah wet pipes are a pest, in those circumstances if I must "close" a system with solder joints I solder in a T with a solder on drain valve into one of the ends of the T with the plug removed, this allows the water to steam out.
-
Depends what you want. There are bricks and there are bricks. I just used the local merchant - they had or found everything I needed. It got to the point I didn't do too much shopping around as they know me now and I automatically get discount and free delivery etc.
-
I'd get on well with you Jeremy!
-
What he said! Clean clean clean. Also, I like the La-Co flux, it is non acidic so you don't have the old worries of acidic flux being left in joints and eating them over time. It is also handy for longer them work that may not be live for months. https://www.screwfix.com/p/la-co-flux-paste-with-brush-in-cap-125g/61072?kpid=61072&ds_kid=92700048793290397&ds_rl=1249404&gclid=CjwKCAiA7t3yBRADEiwA4GFlI_RF0ft0G1SubltEtdC4mClKiPPV5r8XBbpoTsDn-OX4IFqW8Fea9hoCKzMQAvD_BwE&gclsrc=aw.ds I have dipped stranded wire that had gone near black into this stuff and heated it with a soldering iron and it looked like brand new copper a second or two later! However, steel wool is not actually an accepted method of cleaning under BS EN1254. Plumbers do use it but it was always frowned upon, the issue is if you leave a little steel wire behind it can be included in the solder either fully or partially encapsulated, if the latter then the steel will rust essentially creating a pinhole through the solder, chances are it will be find, but a single strand going through the solder can become a leak fairly quickly (less than a year). The recommended method of cleaning is a wirebrush wheel, or a scotch pad - sand papers and anything using grit is also frowned upon for the same reasons. I always use scotchpads, I have used 1200 wet and dry but I then rinsed the pipe with a little water to remove any abrasive paste (which can act as a separating agent as it will just cook on with the heat). I will accept, it is all possibly a bit pedantic, but I do see the benefits to not using steel wool so have always just stayed clear of it for this work.
-
Do it in copper, bend the pipe where possible, solder everything up (add valves after so heat cannot damage them). The number of cupboards I see where a kitchen installer or "plumber" has thrown in a total mess of plastic pipe and stupid big connections and it takes up most of the space and you are scared to shove anything into the cupboard for fear of knocking the unsupported pipework. For under a sink you can use about 1 length of copper and a tenners worth of solder joints. If you cannot solder then I highly recommend getting a plumber (preferably a gas engineer as they can all still solder). I am not fussed about solder joints looking beautiful, a few solder snotters doesn't offend me but a quick wipe round with a rag cleans them up and makes them look decent. The result is solid pipework, slimline joints, and it just looks the part.
-
That is it.
-
Screwfix do a Rothenberger one for about £12. Does pretty much all the normal sizes.
-
Calculating radiator output at different Temps
Carrerahill replied to Miek's topic in Central Heating (Radiators)
I don't know the formula, but I do know that some radiator manufacturers have a table which list their radiators with all the different outputs at 5°C increments from about 35-85°. I found most of the rads were listed at maximum potential output and not realistic outputs with normal water temps. So if it was me, I would be looking for some manufacturers datasheets listing models and there outputs by water temp. -
Yes this stuff is 3mm I think, I was just more concerned about under the WM and DW (pulling it forward and damaging the first row). I have however just done a wastage calc and with the stuff left over I can floor right into the WM/DW bays (albeit integrated DW it may still need to come out in the future!). Thanks for your thoughts.


