
Pocster
-
Posts
14369 -
Joined
-
Last visited
-
Days Won
29
Everything posted by Pocster
-

I just know SWMBO would love this: question is ....
Pocster replied to ToughButterCup's topic in General Construction Issues
Use it all the time but not as a rule -
I just know SWMBO would love this: question is ....
Pocster replied to ToughButterCup's topic in General Construction Issues
I’ve only got 1 thing a foot long and yes it’s VERY sensitive! -
I just know SWMBO would love this: question is ....
Pocster replied to ToughButterCup's topic in General Construction Issues
Yeah upset fish are a nightmare ! ? -
I just know SWMBO would love this: question is ....
Pocster replied to ToughButterCup's topic in General Construction Issues
I love it !! -
I is 'ard. But a man needs his rest now and again mucker!
-
Really?. Not sure I trust CT1 that much....
-
Ok . Will add more ! It’s hard work drilling the lintels to get the timber fixed .
-
Ok . Best solution ! We’ve wrecked this planet so let’s find another and wreck that !
-
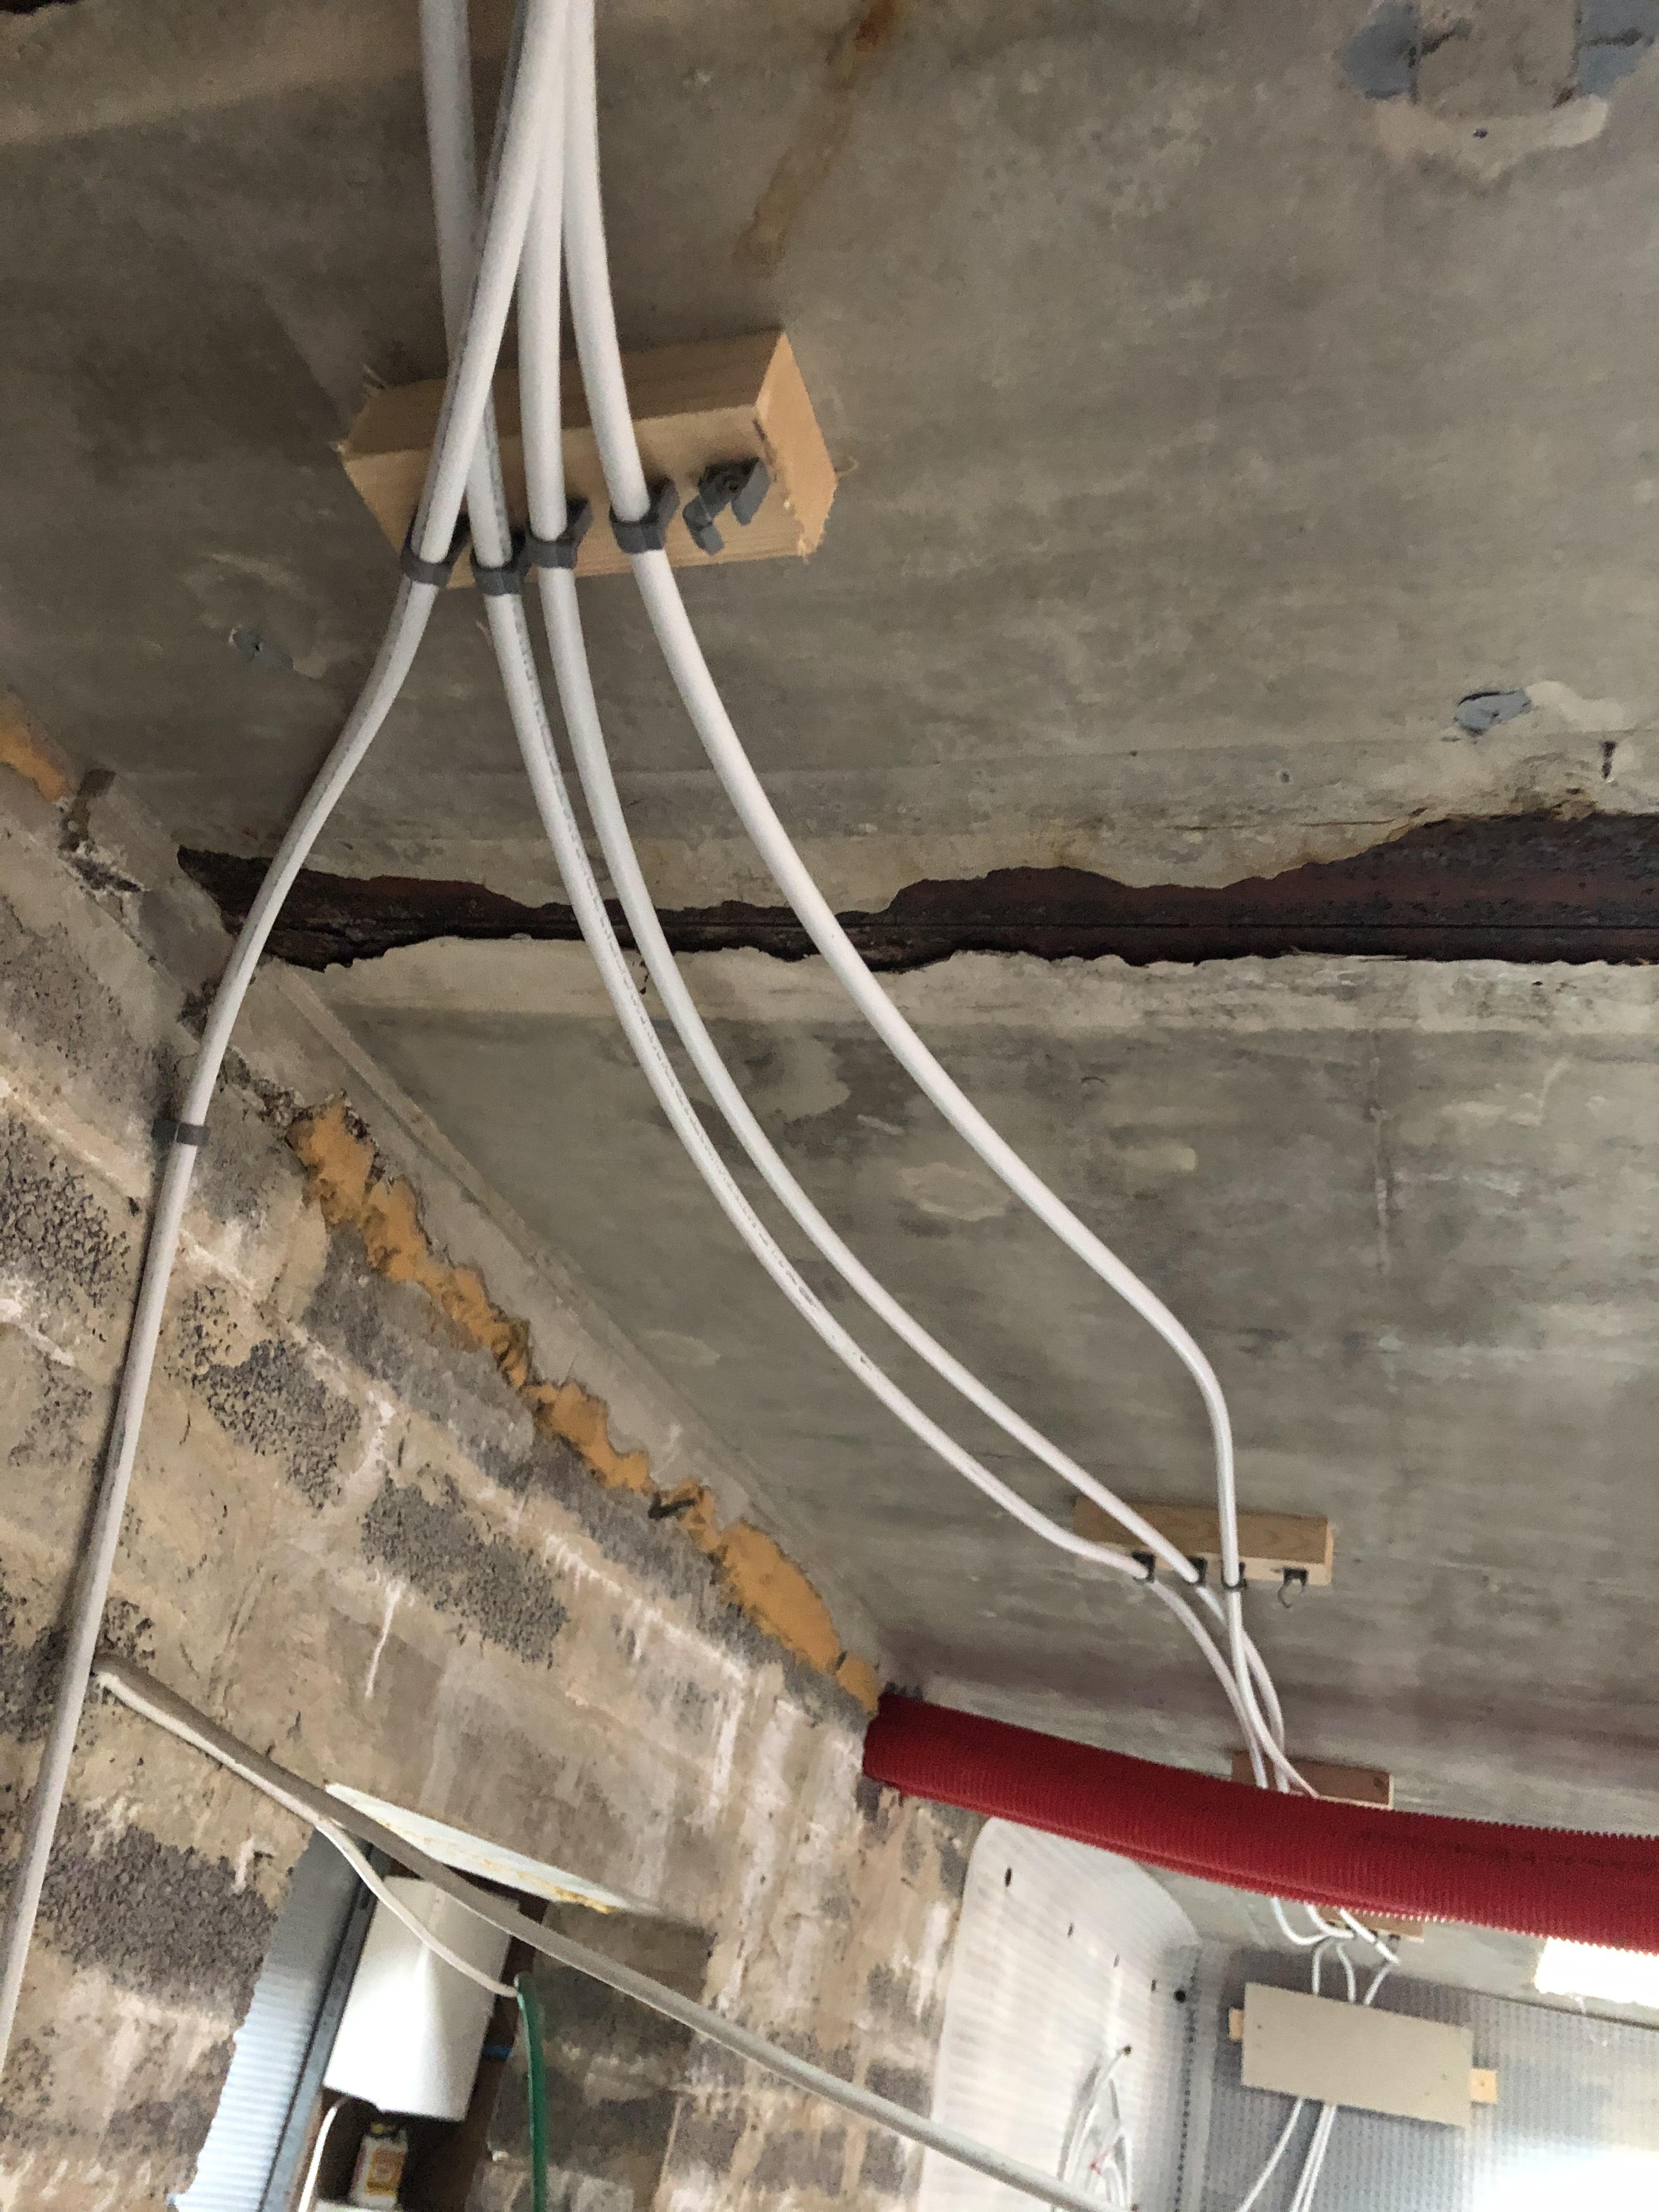
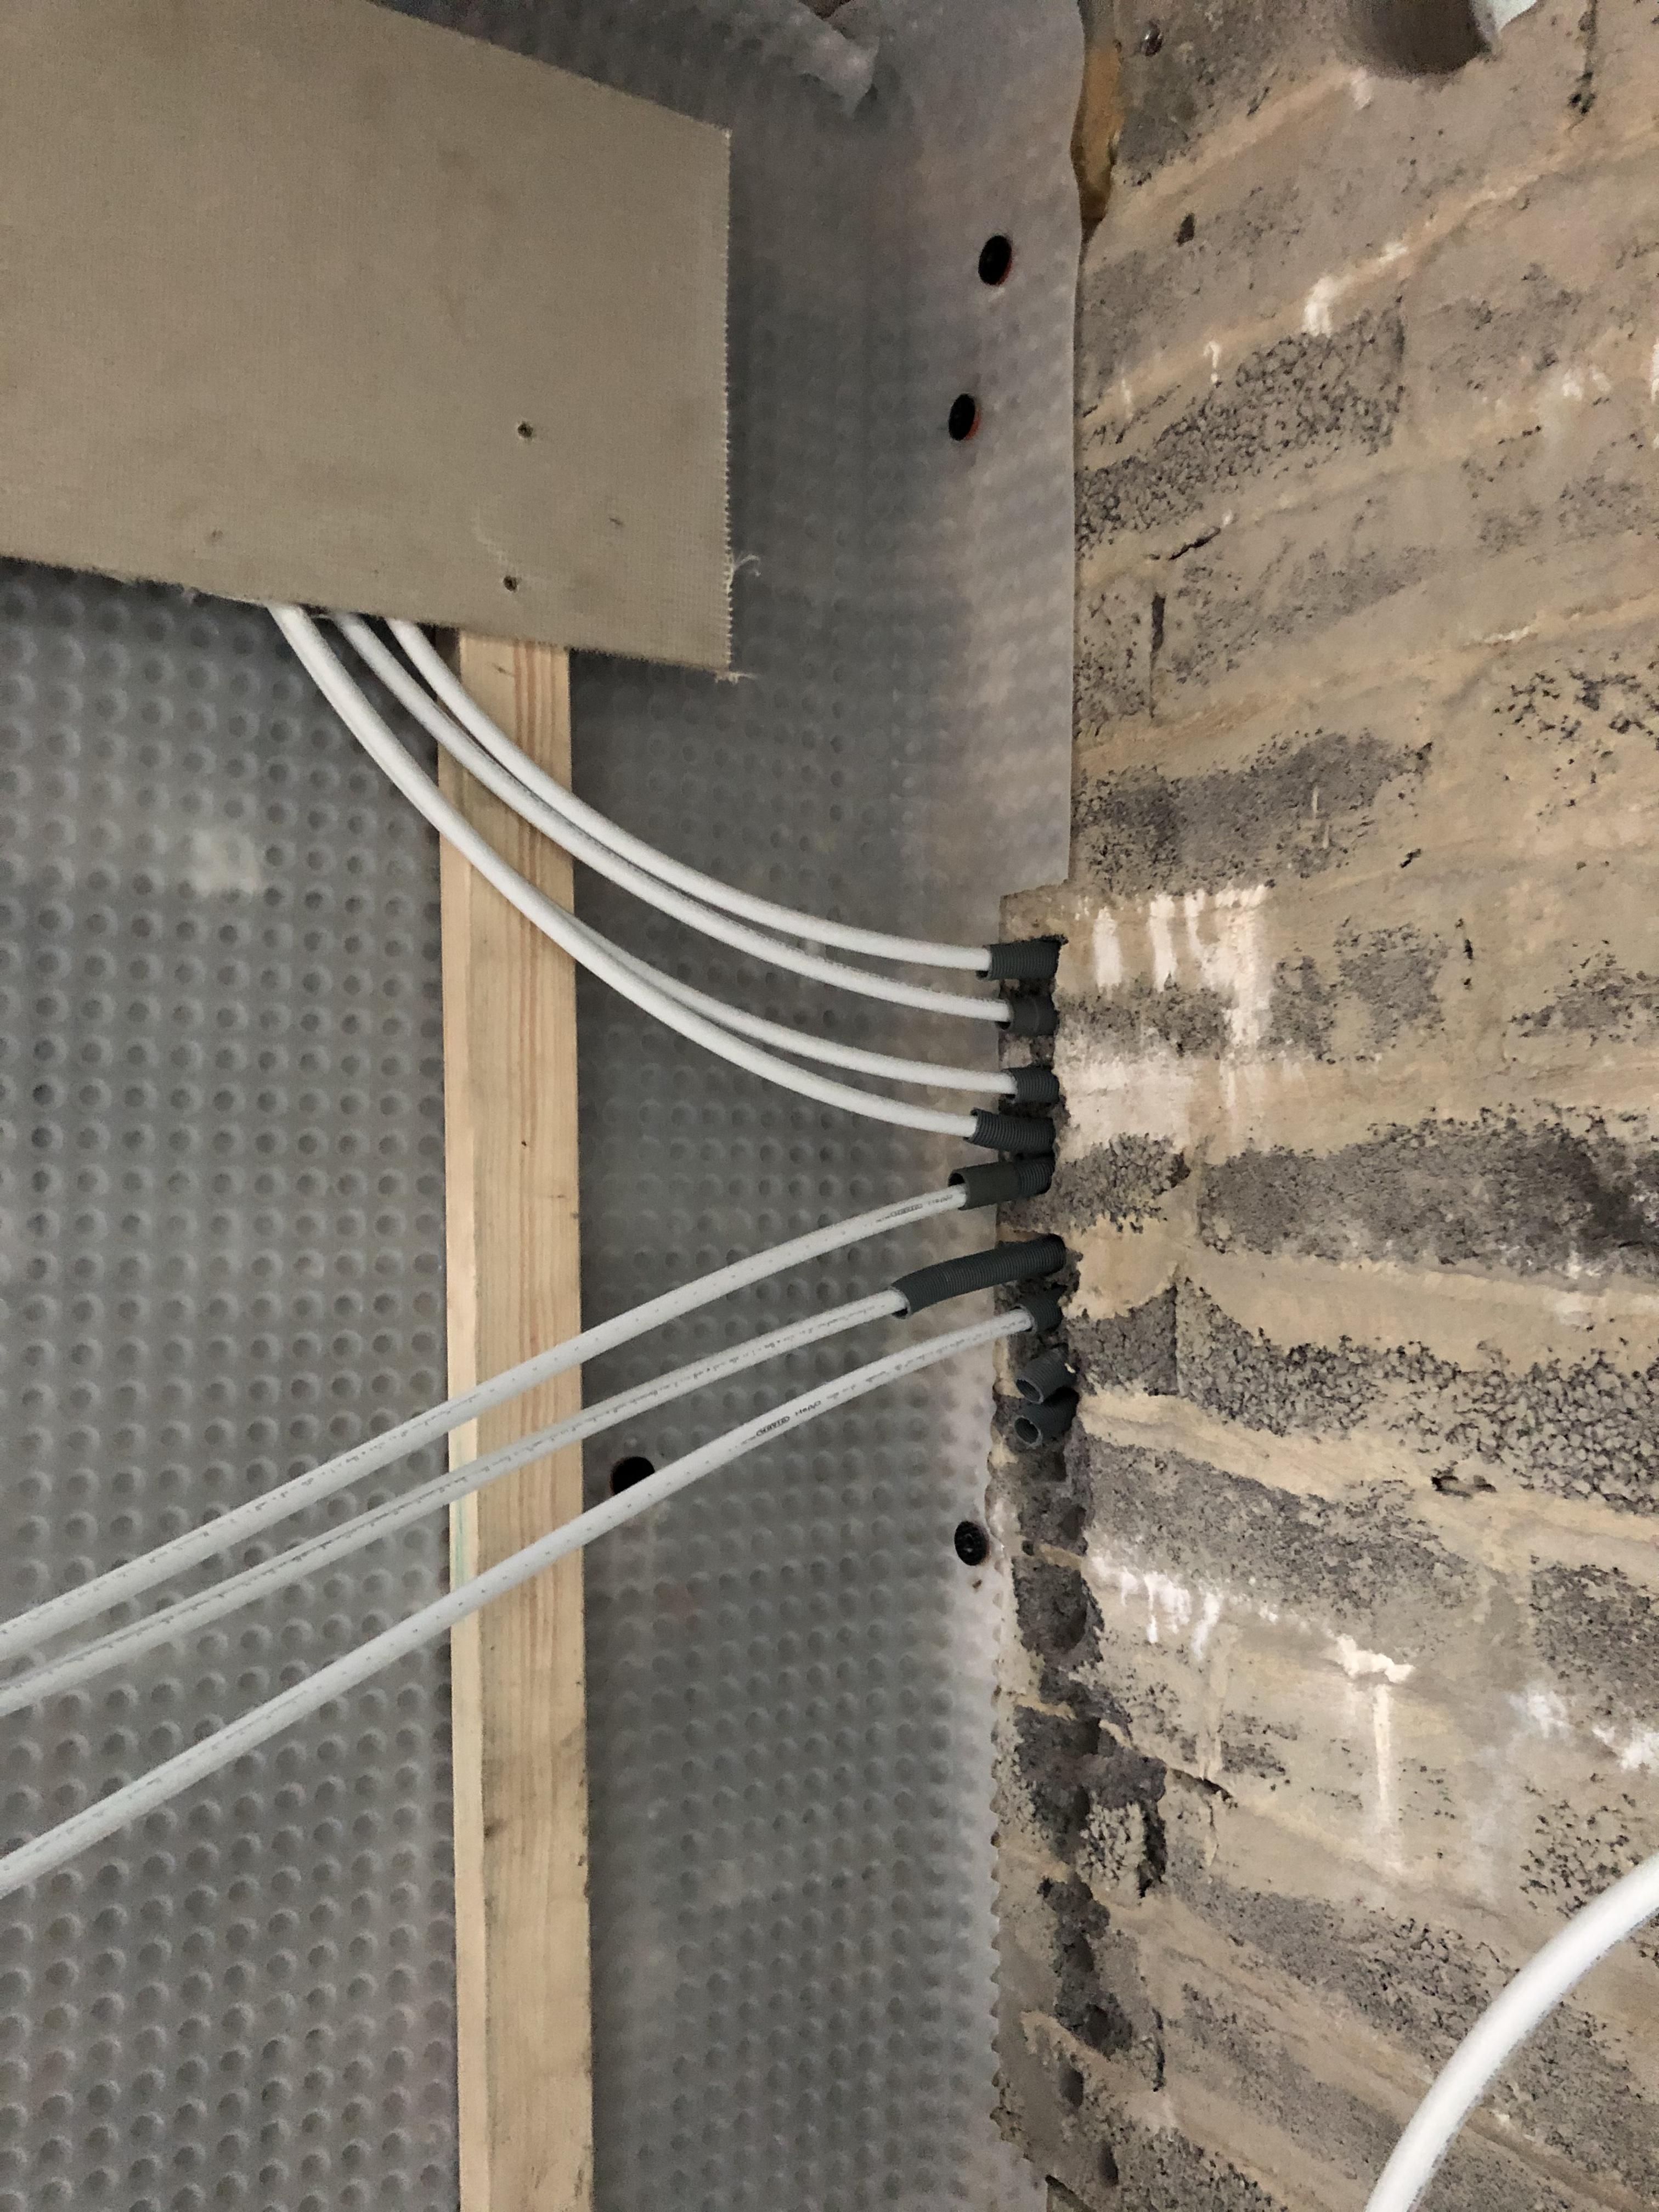
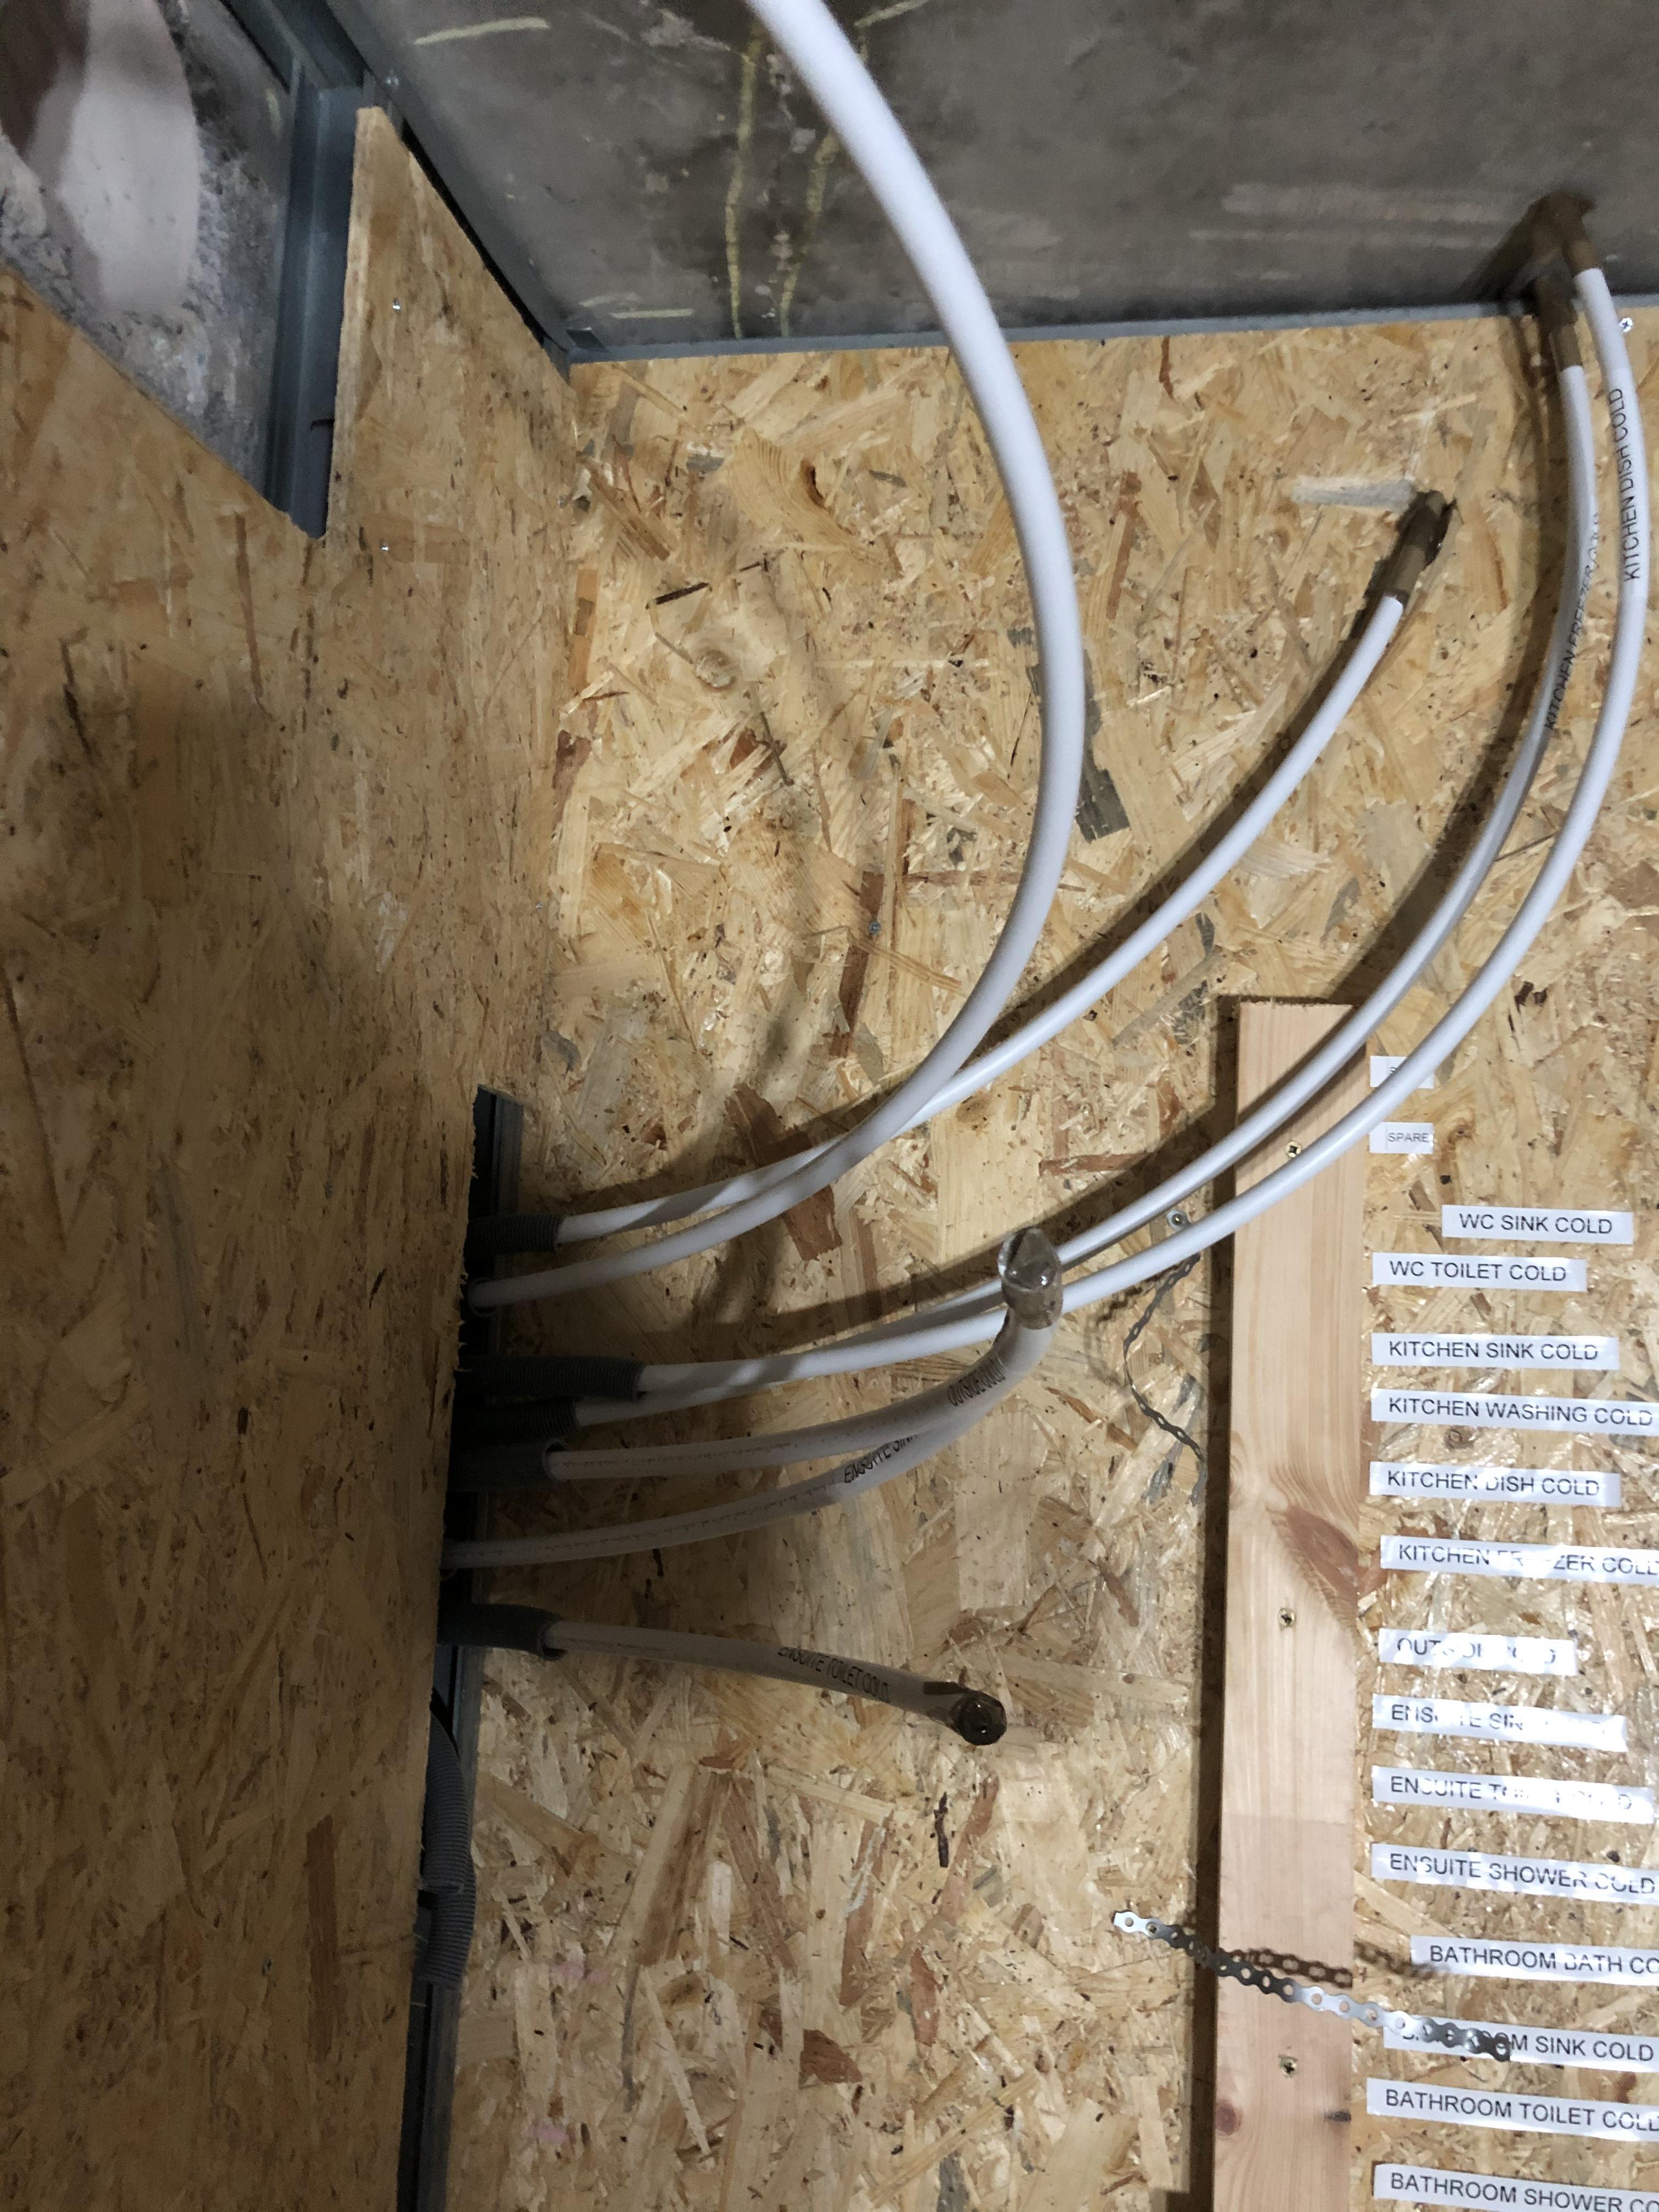
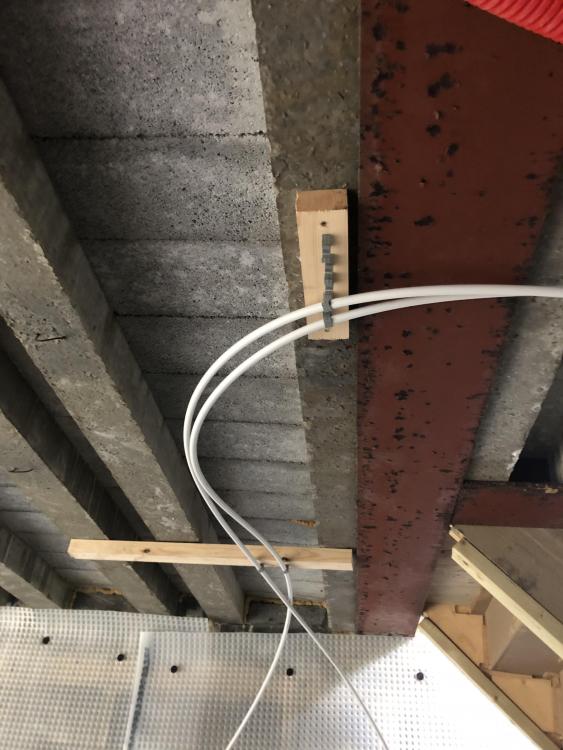
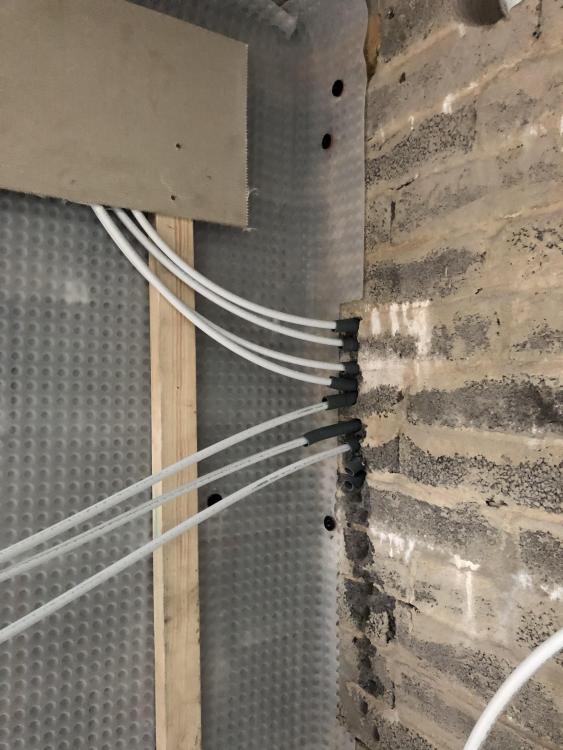
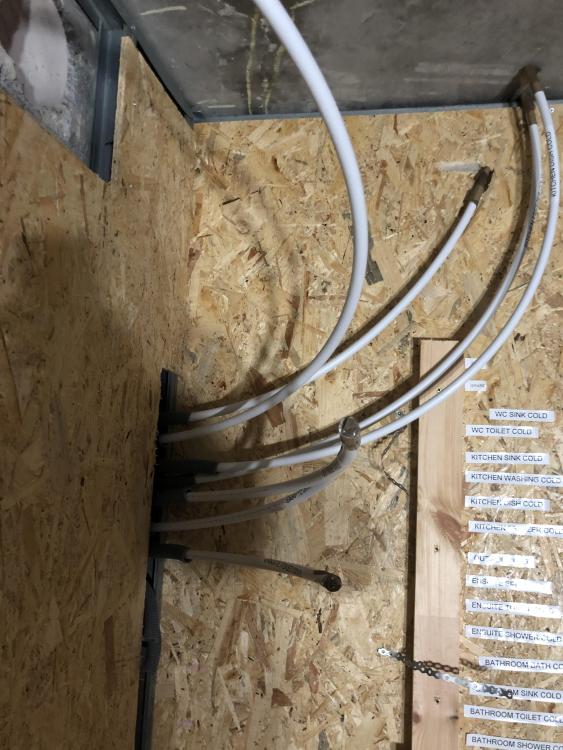
So I started putting the Hep2o in . Do they need more supports ? . They aren’t going to fall out the clips . But once pressurised will they jump / move as taps go on and off ?? I want some slack as they approach the manifold so I can demount it with relative ease if need be .

-
Agree with you 100% . Of course no one wants anything built near them . I think the solution is to simply build a brand new city somewhere , commutable to London . Instead of trying to cram more into areas with ever decreasing space . Ok some green belt or brown belt will take a hit - but some land has got to be used somewhere.
-
Just a modern version of slums . But still what can you do with an increasing population??
-
This is what I thought . But I think councils can choose to ignore like Bristol do and don’t !! . Planning for a 1 bed flat 50 - this ‘student pod’ less than that . Planning is anything but consistent...
-
Why on the news today a student ‘pod’ is 25m sq and they complain . Yet if I build a 1 bed flat min regs are 50m sq . Why is ‘student accommodation’ exempt from property size rules ?. It’s a self contained unit I.e bathroom , kitchen , bedroom . But if I submit anything less than 50 sq m - end of the world . Why is that ? ( grump )
-
MVHR newbie.. help needed
Pocster replied to Savage87's topic in Mechanical Ventilation with Heat Recovery (MVHR)
Yet to turn on my Vent Axia SX advanced. All installed apart from electrics and the condensation drain. Mine is in a bedroom!! - as it was the only place available. Be very interesting to judge it's noise in normal mode and boost.. -
I'm sure there was a thread on this before. But anyway! Any recommendations Qubino over Fibaro ? Also when these 'switch' are they noisy? ; I'm assuming it's not a mechanical switch... I'm going to have a good few of these in a DIN cabinet so if it's clicking all the time might driver me mad. (der - before anyone else suggests that edit) Taking this one for example: https://www.amazon.co.uk/Qubino-ZMNHSD1-Din-Dimmer-Grey/dp/B01DL8OWS8/ref=asc_df_B01DL8OWS8/?tag=googshopuk-21&linkCode=df0&hvadid=231965104222&hvpos=1o1&hvnetw=g&hvrand=6144952454685597230&hvpone=&hvptwo=&hvqmt=&hvdev=c&hvdvcmdl=&hvlocint=&hvlocphy=9045635&hvtargid=pla-422963820217&psc=1 Looking through the blurb I see the attached Does that mean it can switch multiple lights upto 200W (if 240V lights)?. If so how are the lights wired ? i.e. as there's just the return to the Qubino unit. Think I've found a sparky - but he's new to all this HA stuff......

-
Yeah and the ‘cliffhanger’ ending is always crap . Yours not Stenders !
-
Goodie ! It‘s like Eastenders . You don’t really follow it but it feels wrong when it’s not on .
-
Not used steel clad but fully empathise with poor quality tradesmen ...
-
On the p*iss !! My grannies knickers are straighter than that !
-
Trust me as soon as you go Hep2o the better . Mdpe can be ok but if you have a long pipe run you can ‘feel’ the fittings under strain - this is where you get the leaks . Hep2o pipe is more flexible and the fittings just feel tighter , more reliable- not had a Hep2o fitting cause me an issue yet .
-
It’s not what you make - it’s what you don’t lose in this case to the tax man !
-
Shhhh be quiet !
-
This is what I did . Split the plot . Sell main residence CGT free . Then build on plot . Also option of making that your residence when complete and sell CGT free again ?
-
Or ....... Split one plot off . Sell the rest CGT free . Then build a new residence ...
-
Ah yes ! If you sell the whole thing including your residence then CGT free !!!