Onoff
-
Posts
21061 -
Joined
-
Last visited
-
Days Won
206
Everything posted by Onoff
-

Help with kitchen renovation/ 1st house.
Onoff replied to zoothorn's topic in Bathrooms, Ensuites & Wetrooms
Soudal Low Expansion foam...all about it: http://www.soudal.com/soudalweb/productDetail.aspx?w=9&p=282&ID=1912 -
Help with kitchen renovation/ 1st house.
Onoff replied to zoothorn's topic in Bathrooms, Ensuites & Wetrooms
He's going to moan now about who's suggestion to follow... -
Help with kitchen renovation/ 1st house.
Onoff replied to zoothorn's topic in Bathrooms, Ensuites & Wetrooms
You're going to have to experiment! The deeper you fill with foam i.e. the more volume in the hole, the longer it takes to set. Temperature etc plays a part too. Squirt a couple of lines on a bit of scrap. First it's as sticky as. Then it forms a skin but is still squishy if you push it with your finger. When set its quite hard. You can give a flick with your finger and it'll sound like a sharp knock. Try cutting your test bit with a saw/kitchen knife. If the blade comes out sticky it's not set! Just do some say 5mm beads on the mortar of the sill spaced a couple of inches apart. Lay the sill atop and weight with a couple of bricks. It's LOW expansion, the weight of the sill and bricks should be heavier that the foam can push up. Pb usually gets delivered flat, maybe on a pallet. If moving yourself then transport it "landscape" with the carrier you bought. Lift the sheet upright from the long side. Have the carrier ready and lift one end up and drop the board in the carrier about mid point along the boards long edge. -
A lot of people have copied that idea...
-
In the cold light of day... Before I laid the last bit last night I dry laid the cut tiles again. Needed to trim 4 or 5 of the cut tiles where I'd lost it a bit as I came across the floor, accumulative error I think they call it! One cut tile had a shell on the factory edge so I replaced that. I meant to swap out one full tile as it had an odd, 1/2" dead straight, white line in it, under the glaze. I forgot and it got stacked in a pile and then laid...right by the door! Noted a couple of not so clever bits where 4 tiles meet. So grouting tonight I guess. Ref grout.....I levelled the tiles off when doing them and the excess adhesive oozed out. As mentioned earlier I then used a 1" paintbrush to clean out the joints / lift the excess out and then ran a sponge down the lines. How deep should the grout lines be before grouting? In some areas they're probably the depth of the tile but in others there's maybe only 3mm from top of tile down to the adhesive bed. Cheers
-
Insect mesh help please - stainless steel or plastic or ?
Onoff replied to Weebles's topic in Roofing, Tiling & Slating
St/st penny washers and st/st screws if you go the st/st mesh route imo. -
Is this any good for grouting? Been in the shed since time immemorial. (Can't remember if I bought it 30 years ago when I tiled the lean to I built on the first house).
-
Out the door / in the cupboard. Tried to ensure the tiles at the threshold are nice and level as I've this irrational worry about the gap under the door against the light! I'll have to sort some temporary (hardwood?) "ramp" until I dig up the floor in the stairs room adjacent to minimise the trip hazard. Maybe just a bit of architrave? Am I happy with it...dunno. Lets see when the grout goes in. Tbh I think grey or silver grout would help take the eye off any faux pas, that's how I'll try and sell it to SWMBO.
-
The Build - plaster boarding and insulation
Onoff commented on Redoctober's blog entry in Our Journey North of the Border
This does it for me tbh. Just love the solidity of the outer skin and traditional look but with the passive esque make up behind. -
As SWMBO reckons I'm getting quicker at this... I thought tonight I'd do a half rather than quarter bag mix...less prep/cleaning. All was going swimmingly well as I slopped down the first trowel load and went to spread it. Then the "Oh Sh!t!" moment as I realised I hadn't primed this last m2! Scooped it back up and back in the pot. Primed the floor and got a desk fan on it hoping to dry it a bit quicker!
-
Help with kitchen renovation/ 1st house.
Onoff replied to zoothorn's topic in Bathrooms, Ensuites & Wetrooms
If you go 150mm centres then about 68 per full board sitting over 4 vertical studs at 400mm centres. At 200mm centres then 52 screws. Squirt some low expansion foam in the gap behind the batten and cut flush with the batten when dry. You can patch plaster the missing area later on. Shouldn't affect what you're doing now. -
My wet room corner is 1400x1400. If too much water escapes outside this area I'll be back here looking for door / screen ideas!
-
This will be the second one of your sermons I print off and laminate for future reference. Mainly so I can keep reading until I fully absorb it all!
-
Another m2 'ish done as per the Welsh Wizard's expicit instruction! I actually got brave tonight and LIFTED 3 tiles I felt were low. More muck and re-levelled. It's not the best but it's the best bit yet! Had to trim 3 tiles that were tight when I dry fitted them tbh. Out the door tomorrow hopefully!
-
Help with kitchen renovation/ 1st house.
Onoff replied to zoothorn's topic in Bathrooms, Ensuites & Wetrooms
I do NOW! Before I thought you'd made a typo! I'd be fitting them portrait. If you can find what Jewson code, on your invoice maybe, it is then you might find the manufacturer's part number. If it's: 01129/0 then its "4TE" as in 4 tapered edges. -
Just got another 4 bags of adhesive (£11/20kg), can of primer and... Naughty, naughty, very naughty!
-
Help with kitchen renovation/ 1st house.
Onoff replied to zoothorn's topic in Bathrooms, Ensuites & Wetrooms
Yep & yep -
Primer.... If I've already primed an area but then not tiled it, should I prime it again circa 24hrs later when I come to to tile that bit?
-
@CC45 try Palace Chemicals Ltd in Liverpool for this, the stuff I have. EDIT: Think I'd just get that £12 one you linked, flexible, good for UFH, long pot time. Ardex is a good brand I think. Just looked at the £18 one and it's non slip. Presumably less worries about it sliding down the wall.
-
Bit of Unistrut, some studding....I have an idea! (I'm not kidding either!)
-
330x330mm tiles. 3mm spacers, 6mm trowel, this one: https://www.screwfix.com/p/rubi-open-handle-6mm-notched-steel-trowel/6228F? I also have the 10mm version of the trowel.
-
Guess so...where are you?
-
Help with kitchen renovation/ 1st house.
Onoff replied to zoothorn's topic in Bathrooms, Ensuites & Wetrooms
Hasn't yet killed my 25 year old Wickes (aka Earlex 1000) vac... -
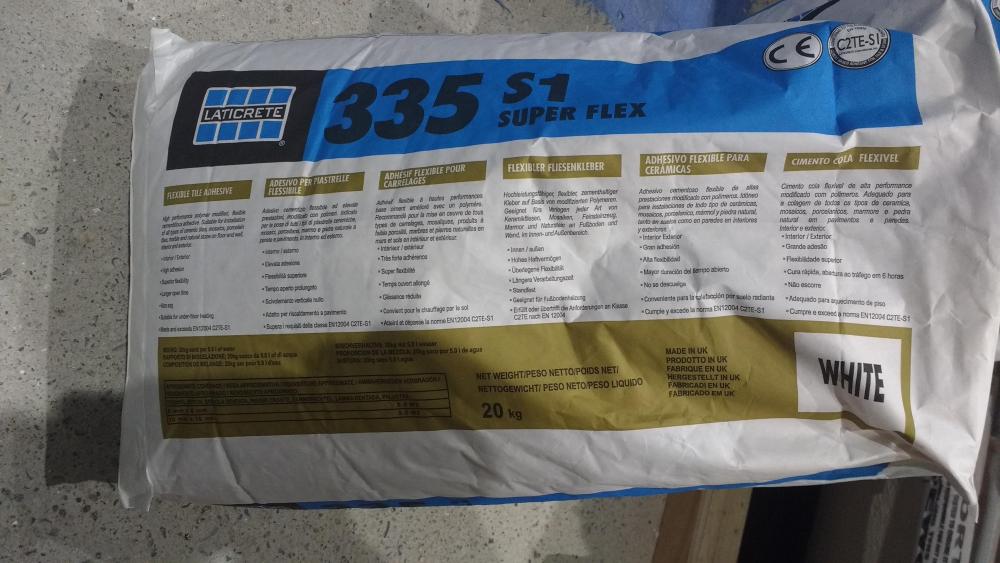
Laticrete 335 I paid £11 / 20kg