Onoff
-
Posts
21127 -
Joined
-
Last visited
-
Days Won
206
Everything posted by Onoff
-
I prefer the coloured H-T ones tbh. You can tell at a glance the number by the colour. I'll look at the RS number on my boxes in a while. For years I just used the 3M tape dispenser type. Think it's empty now or at least severely depleted of rolls. Edit: Knowing the number by colour at a glance assumes you have the resistor colour code engrained into your brain since aged about 10!
-
Sharpie on the sheathing, cable markers on the individual cores where they terminate at the breakers, neutral and earth blocks works for me.
-
Female! Name's not Martin Goodman is it?
-
Classy lass! First beer and smile on my face in a (really sh!t) couple of weeks! I'm clearly designed to drink alcohol.
-
Christ, she best have shares in a brewery if that ends up happening!
-
Bet you can almost taste the Diamond White!
-

Discount Offers of the Week
Onoff replied to Ferdinand's topic in General Self Build & DIY Discussion
Lidl doing Scottish beer range soon: https://www.lidl.co.uk/en/Offers.htm?id=819&week=1 -
Trust @pocster to get excited about a hole!
-
In the Tamarind now!
-
OK I'll openly admit this is the second attempt at this tile! First one was about 2.5mm too low. 35mm cheapo cutter cuts clean as a whistle. The chrome fitting ends up anyway 10mm off centre laterally just due to the way I've laid the tiles. Oddly that doesn't overly bother me.
-
Wickes? Where I got mine but I didn't need much: https://www.wickes.co.uk/Wickes-Pipe-Insulation-Byelaw-22-x-1000mm-Pack-3/p/210012
-
Why not, if she kills the power?
-
Bought this cheapo diamond grit set for £7.50 inc p&p. Some weird sizes like 28 and 30mm. Don't think I've Starretts to match...27 and 32 the nearest maybe. They're similar but lighter construction to the couple (40 & 65mm) I first use to drill the three holes in the tile that goes over the shower valve. You get: 6mm, 8mm, 10mm, 12mm, 14mm,16mm, 18mm, 20mm, 22mm, 25mm, 28mm, 30mm, 35mm, 40mm, 45mm, 50mm Going to try one now to drill the hose outlet.....hole. @Nickfromwales said back on p46 of the mega thread: I've never had one with a backnut. Tbh, it's rare to get rear access so you'd never get to fit one anyway. The one you've got fits as follows. : 1) you measure the diameter of the fitting, the chrome bit after the brass thread. 2) you get that size tile hole saw and make a hole 2-3mm bigger. 3) you fit an outside tap backplate into the wall at about 1/4" shy of finished tile face. 4) you tile and grout after blanking the outlet and pressure testing. 5) turn the fitting into the outlet until its tight. At this stage it'll likely have bottomed out without the chrome going past the tile face. 6) measure what you need for the chrome bit to finish 3-4mm into the tile. 7) cut that much off the brass thread. ? you put 22-26 turns of ptfe onto the last 25mm of thread ( so 50 turns or so in total to get the thread covered ) 9) turn the outlet into the backplate until it's pointing down and just shy of proud of the tile face ( slightly recessed ) 10) do not go so far that you have to back turn anti clockwise 11) clear ct1 the tile hole tobthe brass thread by pumping it full. 12 ) push the cover ring down the outlet until it rests on the tile. It's NOT there as a waterproof seal, and the rubber o-ring is only a friction ring to keep it parked. The ct1 forms the watertight element. Clear as mud ? So the chrome bit that has to go into the tile is a fraction over 30mm dia: Looks then like its the 35mm dia holesaw from the new set!
-
+1. Follow that white cable that goes off to the left and behind the vertical copper pipe.
-
Only said it to see you run! Does access appear reasonable for someone with a screwdriver? If you can safely do it then a clear shot with your the top off would be good. I can see the cables going off to the two valves...I think!
-
Welcome. What's a Heluz block then?
-
Is it a funny camera angle, or has that wiring centre under the mystery switch had the expansion vessel placed so close you can't get the lid off? Was going to say to whip the lid off WITH THE MAINS OFF and post a pic.
-
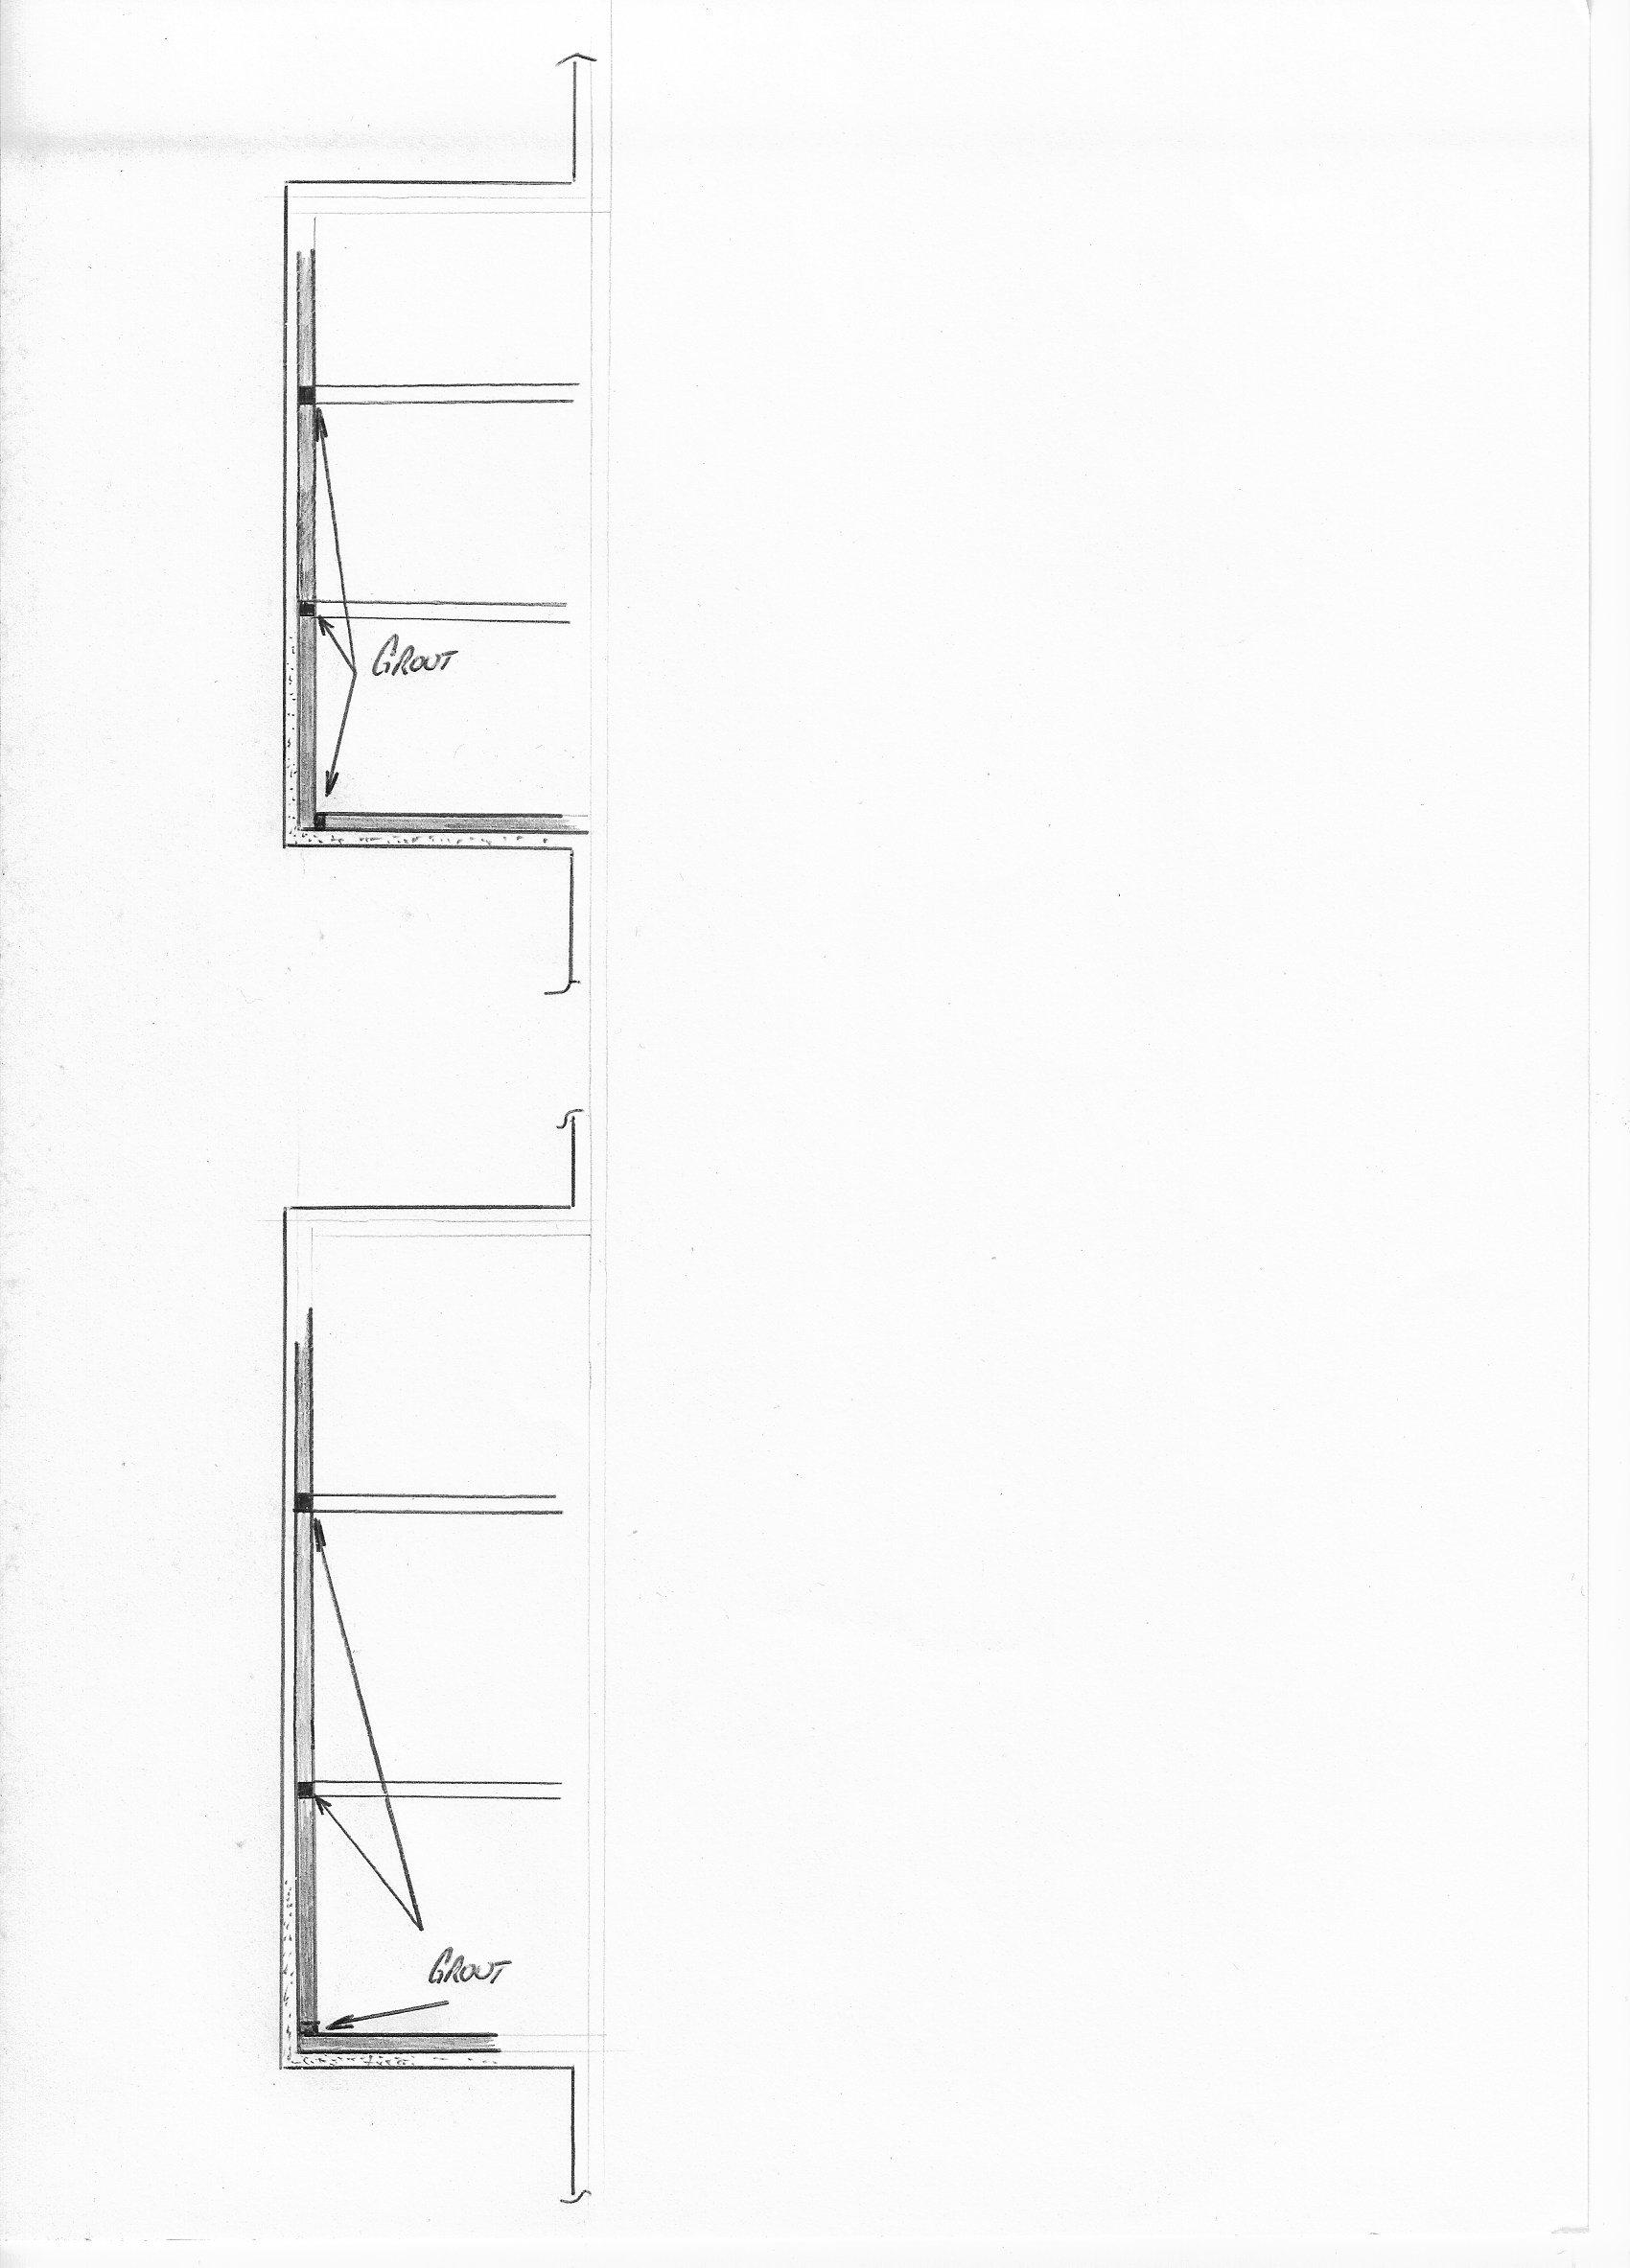
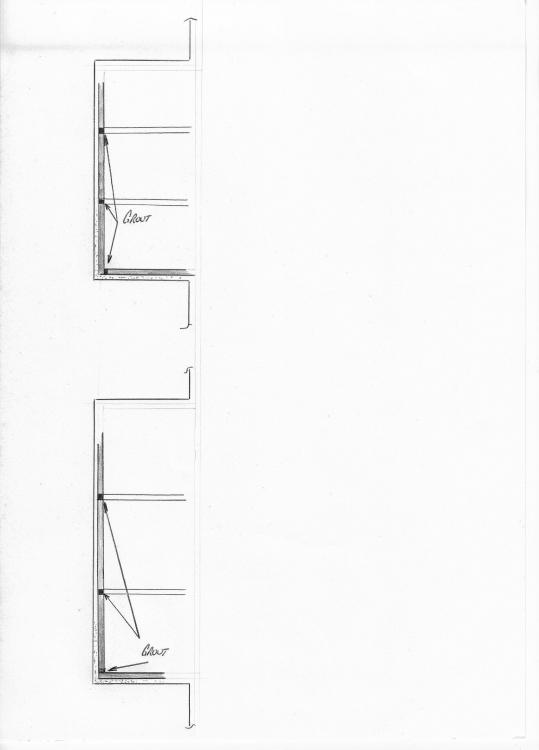
@Nickfromwales I'm 3 tiles high in these pockets. The mosaics at the back then the plain grey, top, bottom & sides. Means I'll have 3mm grout lines which your pockets don't have. I'd envisaged doing it as per the second sketch (water ingress less likely horizontally than if sitting atop the grout line) When you said the rears go on first I thought maybe like the first sketch. Now I'm guessing to do away with that grout line altogether and use CT1? I'll need to be sticking my tiles in with tile adhesive. That's going to squidge out. Trying to figure how to do the CT1 joint without that and the tile adhesive "meeting".
-
I have heard they still wear Lionels in Swansea...
-
What's your name, Mrs Onoff?
-
Just head on down to Argos with a fiver: http://www.argos.co.uk/product/7459788?
-
Somewhere to Live During the Build
Onoff commented on Triassic's blog entry in Mr and Mrs Triassics New Home
I remember I think some older shots in Summer maybe taken from the right. Worth posting again probably. -
I think I need to come and labour for you for a bit to pick up tips!
-
Cheers. Live and learn but I'm going to have to take a skim off each side of the 3 big mosaic tiles going in the back of the pockets I think. The first pocket, well I knew I was tight width wise there. On the remaining two I gave a few extra mm. Didn't though take into account the tanking and little snots that accumulate in the corners.
-
Am I coming across a bit negative? I could do with a "win" at the moment. Swapped alcohol for Ibuprofen of late. Thing I felt better on the sauce. Going cold turkey and cutting out caffeine at the same time probably not the best idea!