


Onoff
-
Posts
21059 -
Joined
-
Last visited
-
Days Won
206
Everything posted by Onoff
-
That's it, draw a bead on @Onoff! Leave me alone. I'm not well and feeling sorry for myself. Don't even have the strength for a witty retort! Christ knows where this came from, been going downhill all week. At first I thought it was the silicone fumes but I could have just as easily caught something on the Tube.
-
Scraping the old silicone out.
-
Can't go wrong with a seefood diet...
-
Could the previous ploughing have cut the pipe and then blocked it with a sod of earth? Hope not.
-

Bear With Small Brain challenged by studding head....
Onoff replied to ToughButterCup's topic in General Joinery
Ivor Wood that one: https://www.theguardian.com/childrens-books-site/gallery/2016/jan/13/paddington-through-the-ages-michael-bond -
It's the same one as mine.
-
If a job's worth doing it's worth doing 5 or six times...
-
Only thing keeping me going is the couple of perfect runs. Having a night or two, (three?) off as feeling oddly "rough" or otherwise out of sorts. Silicone poisoning??? Beer? 4 nights sober!
-
An Ra of 68, that's alright.
-
Bear With Small Brain challenged by studding head....
Onoff replied to ToughButterCup's topic in General Joinery
"Bear with" plus your wonderful sketch reminded me of...
-
I've ripped this all out. Really deep, it was still tacky underneath: Not a nice look where the floor and wall meets. Not sure whether to re do in wide grout? The 12mm bead around the perimeter. I've done all except the bath sides: The best bit, behind where the sink is going done in Mapei cement grey. Again proof with practice it can be done perfectly! Close up, right hand mitre joint. The vertical done in Forever White...itself not great: The left hand mitre joint. Vertical joint is just grouted: Can't of been paying attention here: And I shouldn't have gone back over this bit: Thinking to rip all the grey out and use a smaller bead. It'll mean ditching the CT1 underneath and relying on the Mapei grey on it's own. Also do it in better light and shorter sections at a time.
-
I read somewhere that the residue from soda blasting is sold to the railway companies in the US and spread to keep track side weeds down. Over here in the UK nobody wants to buy the "waste" it seems. I tried back in the Summer the washing soda residue from my electrolysis rust removal tank on our patio, not sure if it did anything tbh.
-
Wet & Forget, Patio Magic etc?
-
You could join and find someone local on the MIG welding forum: https://www.mig-welding.co.uk This is the site of one of the mods there: http://www.paul-holland.com/work.html
-
Having worked with a fabricator who's TIG work is sh!t hot for over 30 years I think I might! Mate's rates etc... Chequer plate might actually aid in masking any distortion. I'd fold on the 4 sides and only weld there. I'd bed it down on 5 Star grout maybe.
-
Needs TIG'ing for sure. Not sure how whatever mortar will adhere to the st/st. How about have the st/st exposed and making from chequerplate? Would need to be 316 and the welds acid cleaned. Pathology table anyone?
-
Quick bit of help please: which way round?
Onoff replied to ToughButterCup's topic in General Construction Issues
Got a link? What are they called? ...other than "the blades from my old Mum's mincing machine"? -
Lidl had some silicone removal tools in the other day.....wish I'd bought them! A couple of points: To be fair it's a silk purse / sows ear scenario, some of the issues. The Fugi kit will not fix sh!t tiling! Last night I had the beginnings of a headache and shouldn't really have started it. Using that Forever White with its strong vinegar smell and the headache just got worse. I messed up in the pockets at the lower corners. Should definitely have done the verticals first then worked from the corner out (like the instructions say) to do the horizontals. Not sure though at what point to do this, when the vertical is just skinned, fully set etc? Where the floor tiles meet the bath sides it's less than 90deg. None of the tools in the kit fit as they're all for a 90deg angle. Around the perimeter elsewhere, where wall meets floor I've ended up with a 12mm fillet of Mapei cement grey. Started with 10mm but the CT1 I used first was showing through in a few places. Then messed up a section where I tried to go over it again! I blame 3 nights off the beer... I'll take a fresh look tonight and maybe think about ripping it all out and starting again. Thinking to take the clear CT1 out even at the wall /floor junction to end up with a thinner grey bead only. Saying that the bit I enthused about first, around the bath, in Forever White is near PERFECT and can stay.
-
Well... Seems like I hate applying silicone more so than tiling and am about as crap at it too! No pics, can't be ar$ed.
-
No. Sheds don't do it. http://www.ct1ltd.com/contact-us/?target=distributors#ct1-norge-as
-
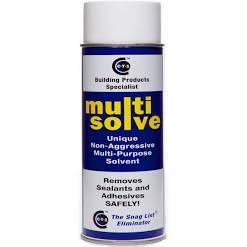
@Nickfromwales, would Multi Solve applied and left to do it's thing eat Lizzies silicone residue she's trying to get off?
-
The wife and I used a Geocel silicon eater years ago to remove the stuff around a bath. Small room, poor ventilation. Evil stuff. I got it in cut and it bled for days. The wife came on early I kid you not! Tried and failed to get the COSHH sheets for it.
-
There's something magical about the material these tools are made from, some ultra low friction silicone themselves I guess. Wet silicon just wipes off then leaving not a trace. Whatever it is it's both tough and flexible so much so that the edge forms against the tile and wipes off the excess with amazing ease. Very impressive in one of the videos where they wipe a rough tile clean of silicone with one of the tools.
-
I just read the instructions you posted...properly! Makes sense. "When working on corners, first start with the vertical wall grout lines and let them bond. Then proceed to the floor grout starting out of the corners in both directions".


