Onoff
-
Posts
21125 -
Joined
-
Last visited
-
Days Won
206
Everything posted by Onoff
-
 I have my Skip Diving badge!
 -
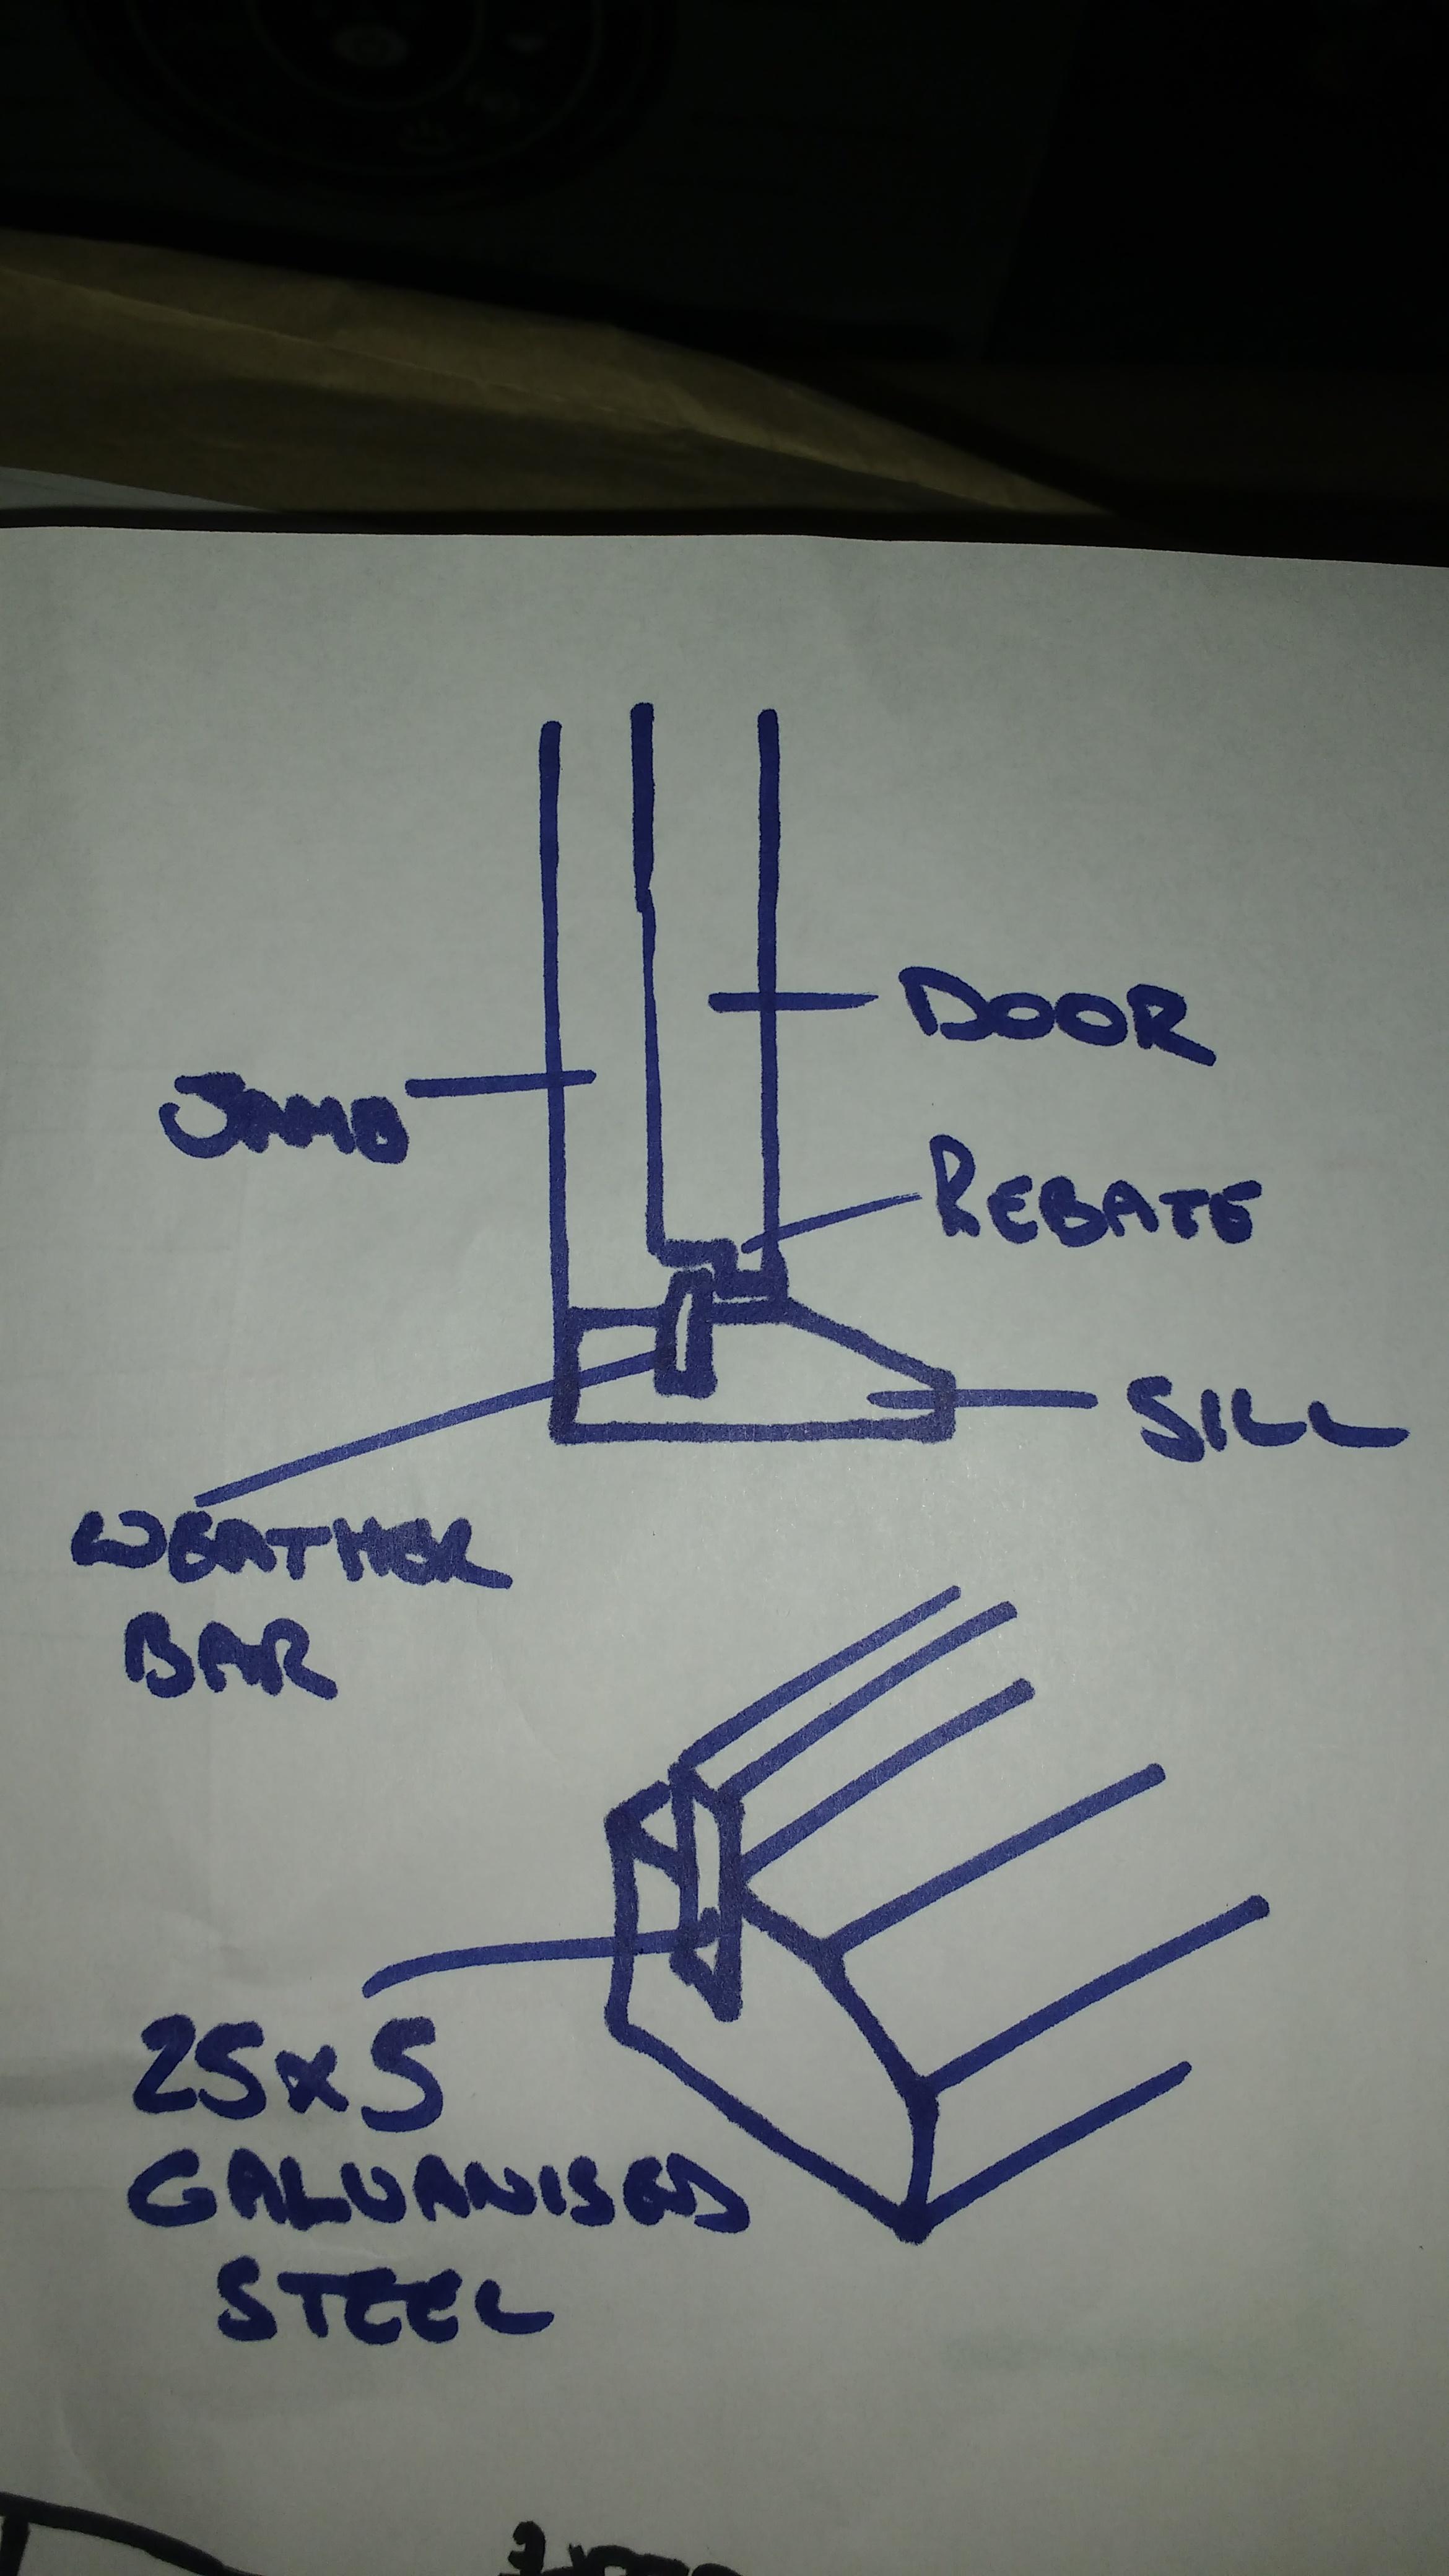
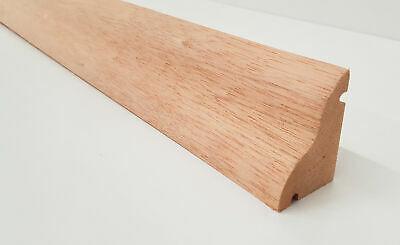
You really want a hardwood sill there as it'll take lots of weather and abuse. You could graft a hardwood bit on the front I suppose.....
-
You can get them combined as a threshold bit then a weatherstrip: https://www.wickes.co.uk/Wickes-Threshold-and-Rain-Deflector-White-838-mm/p/203002 Or put a traditional wooden bit on the door to oversail a modern, sealing threshold. Search the Stormguard stuff:
.jpg.ab9c69756bf5ef0d66303d52093b1513.jpg)
-
Yes. Because too you have a grooved front you might want to silicone a weatherstrip on above something like this below: https://www.google.com/search?q=inward+opening+door+threshold&client=ms-android-motorola&prmd=sinxv&sxsrf=AOaemvJTOQkB52qwZ86TFu9Nd1m7j6ziKw:1632083566354&source=lnms&tbm=isch&sa=X&ved=2ahUKEwiz2dyJ8YvzAhUdDmMBHWIGDykQ_AUoAnoECAIQAg&biw=360&bih=512&dpr=2
-

-
Kitchen extract - Ever used/fitted/made a downdraught one?
Onoff replied to markocosic's topic in Ventilation
A few on here have Bora downdraft extractors I think. Search "Bora". -
Well you have been busy...
-
If you get a plain, IP6x rated box and drill the gland holes yourself, you can arrange the 2 banjos so they "meet" and you can use x1 6mm brass bolt. Take an earth fly lead off that with a ring crimp. Just use Wagos inside to connect everything together. Sort of like this, bits grabbed at random in the shed:
-
I think we've established it's jam and cream...or is it cream & jam? They can get funny about that I believe.
-
?
-
For a shower tray? Good luck with that.
-
I thought it said challenged dad... 8-10 years seems a fair estimate for this job.
-
Stick a couple of bits of 1" thick scrap wood between where the gates meet whilst setting up the second one. Tape it on temporarily etc. Leave in there whist the second post is setting.
-
Ed's brick making:
-
Shows what I know, I thought it was smoked salmon, not jam!
-
If I recall correctly, then @Construction Channel found by chance that brick clay had been extracted historically from a field on his family's land. He promptly went and dug some up and cast an E&F plaque to go on the gable. From memory his attempts cracked and crazed.
-
Cream cheese rather than scrambled eggs there methinks?
-
Lime...ask 10 people get 10 different answers I've found!
-
Looks great ? If the post depth on the 4' gate is ever an issue down the line you could add a diagonal brace from near the top of the post and concrete the other end into the ground or a tie in the form of a steel cable etc. I'm sure it'll be fine. As to different height posts if it bugs you then knock up some subtle / fancy timber post caps to hide the mismatch and make a feature. Worst case you have to redo the post on the short side. Try and make sure the leafs can't swing out into the road and be hit. That's grief you don't want!
-
No, I've a metal staircase kit so thought I might make a temporary one from the. 4x4s whilst I dick about selecting fixings... ?
-
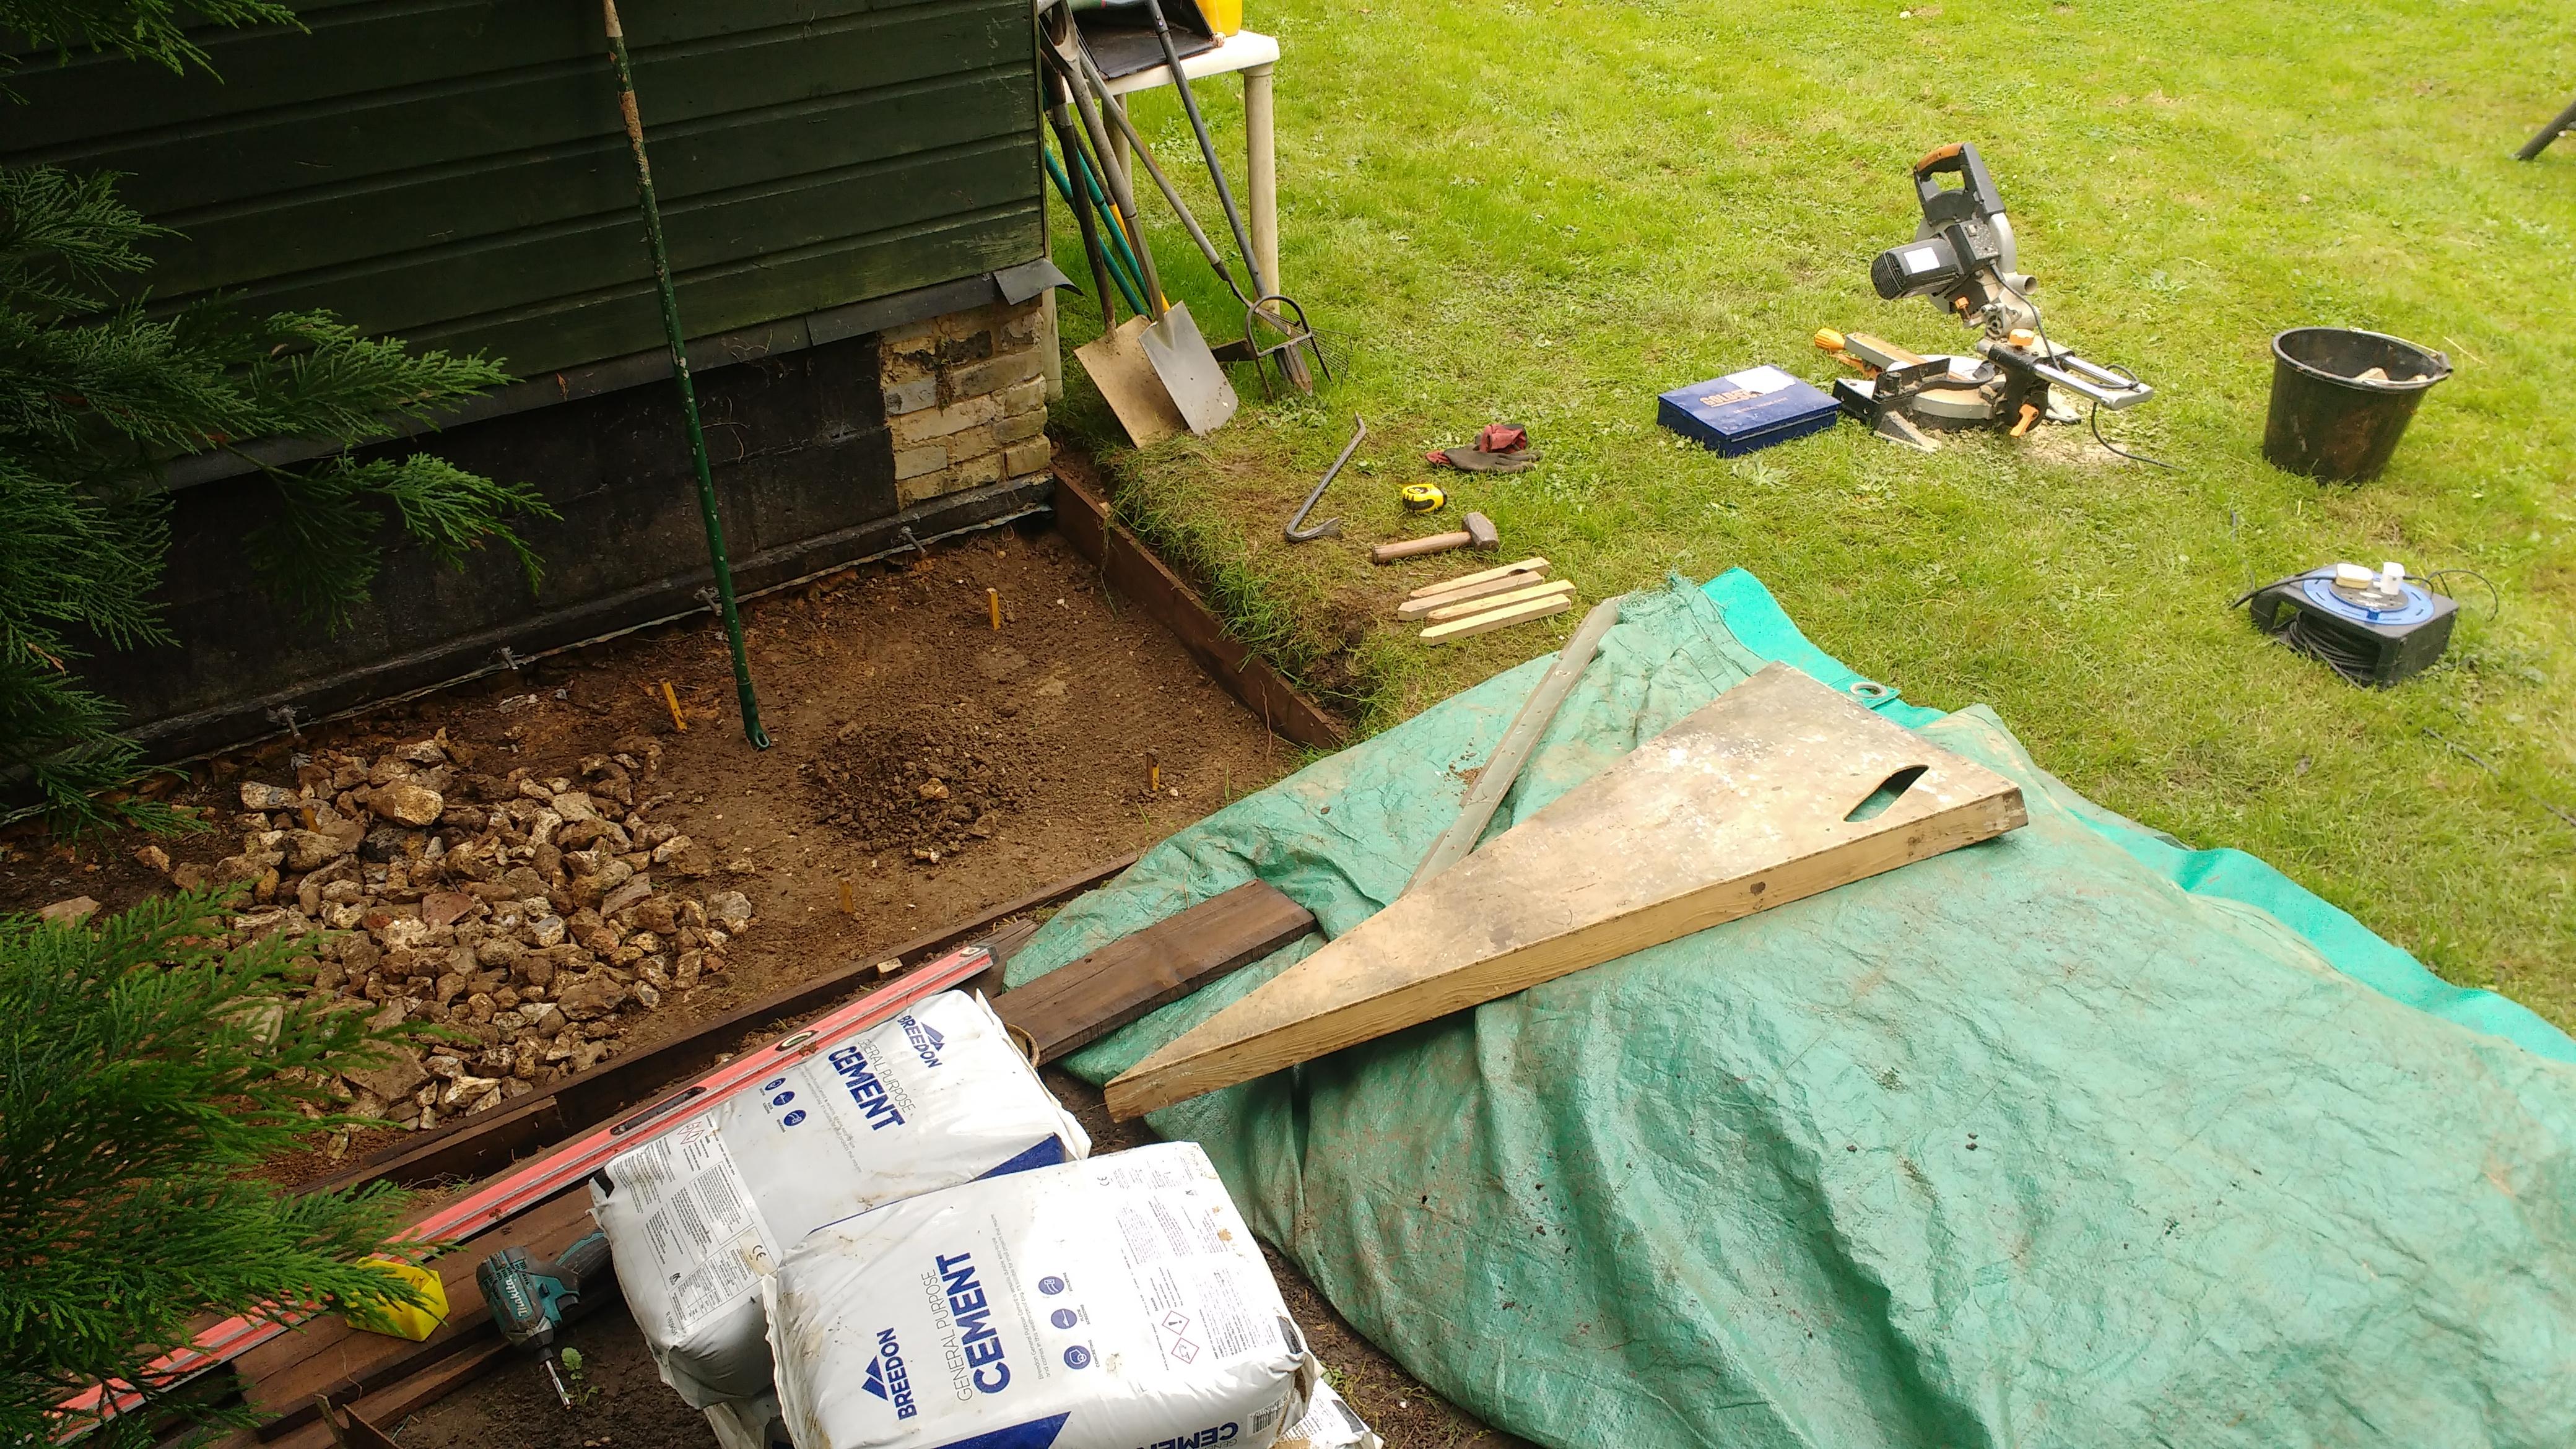
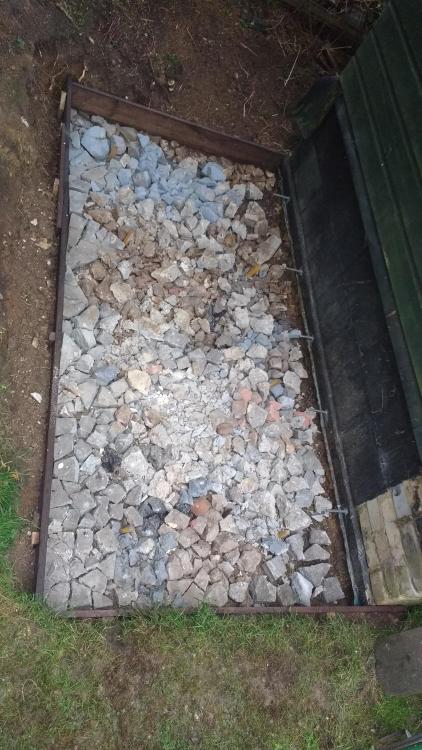
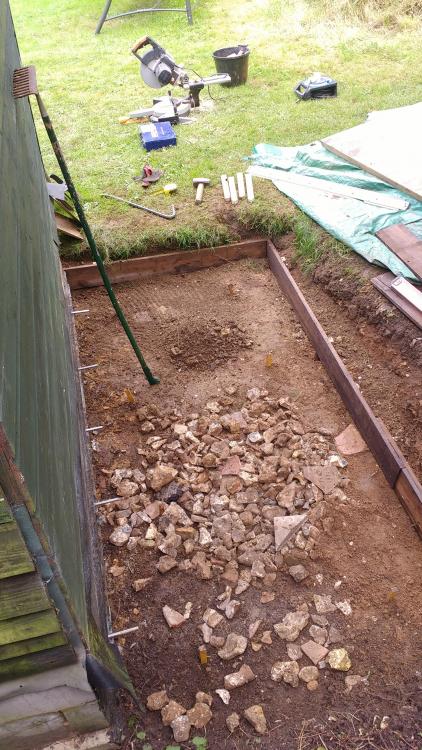
I've just scored 8+, 4x4, reclaimed pine posts, each about 8 - 10': long. That's hopefully the frame and roof sorted.
-
So the app says based on start of symptoms I can stop self isolating tomorrow, the 18th. Great, back to work, pub etc. However if I'm still testing positive with a bit of a cough then surely I'm still infectious? I might not cough, sneeze all day but it only takes one surely? Even when my cough has all but gone... This arbitrary 10 days self isolation seems more like a way of getting the country back to work with an underlying risk of still infected people spreading it.
-
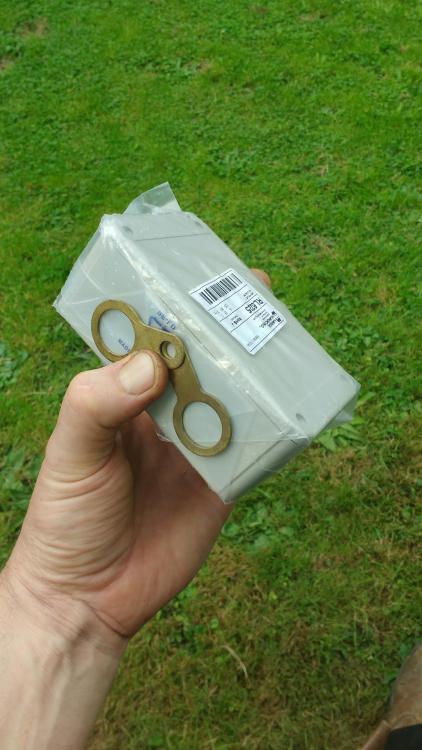
Something like this: You can use softwood, treat it really well then bend/notch a sheet of aluminium to go over it as a protective cover. Done it a few times. I'll see if I kept the last one.
-
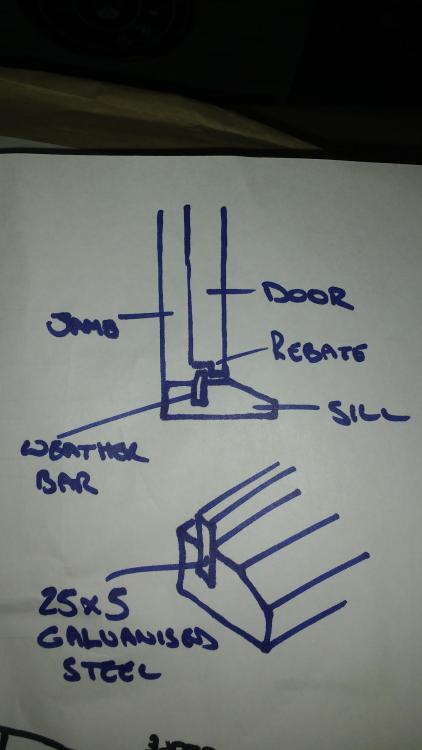
Ideally you want a lump of hardwood door sill with a galvanised weather bar set in a slot. Your door closes against this. Not the best pic of mine. I made everything from scrap. The bottom of the door has a rebate cut in it. Are they your doors in the picture?
-
Leave it there. It could come in bloody handy if someone needs to self isolate. Ask me how I know! ?