Bitpipe
-
Posts
4118 -
Joined
-
Last visited
-
Days Won
53
Everything posted by Bitpipe
-

vat on fitted blinds
Bitpipe replied to DH202020's topic in Self Build VAT, Community Infrastructure Levy (CIL), S106 & Tax
-
vat on fitted blinds
Bitpipe replied to DH202020's topic in Self Build VAT, Community Infrastructure Levy (CIL), S106 & Tax
I'll take some tomorrow and post them -
The joiner has one of those and lent it to me when I drilled the holes for the shower screen U channel. They make good progress but as they're flat, they do wander initially, even using a guide template. So I started using a combination of the cheaper arrow bits to get each hole started with good accuracy and then used the flat bit to continue - apparently the wax filled ones don't need cooling, but I did so anyway. Took a good 15 mins per hole.
-
vat on fitted blinds
Bitpipe replied to DH202020's topic in Self Build VAT, Community Infrastructure Levy (CIL), S106 & Tax
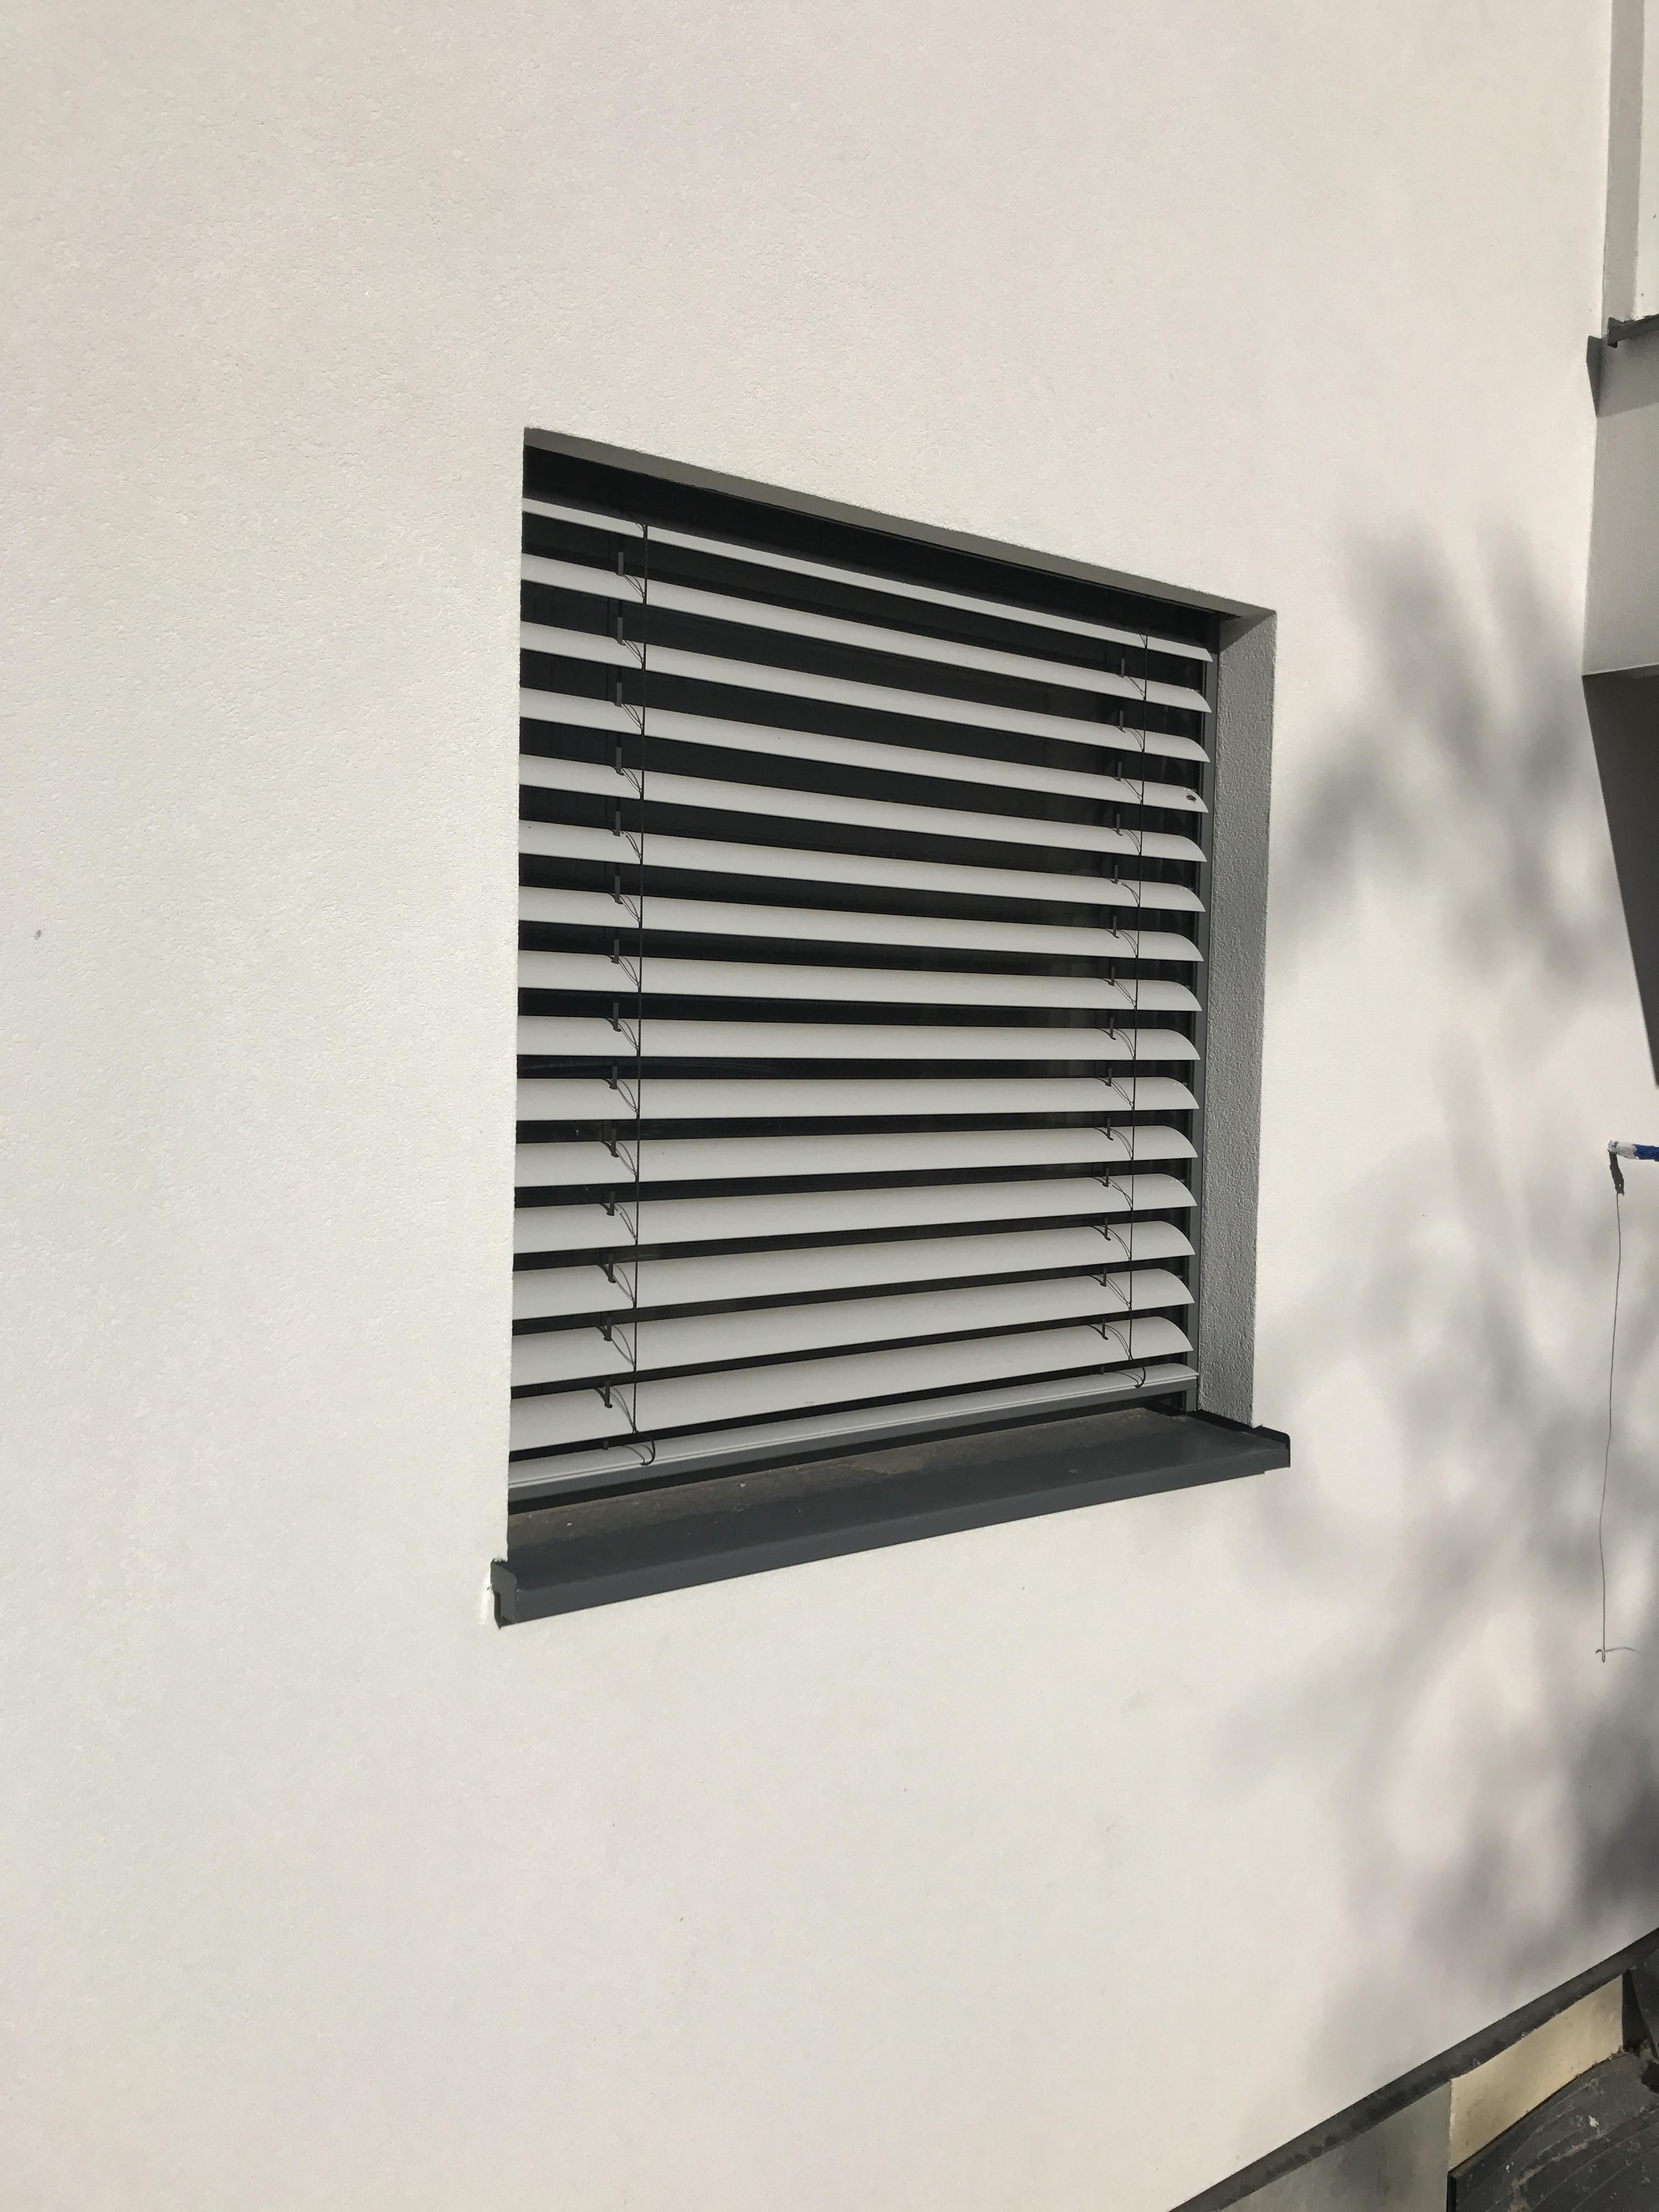
Internal or external? We have external blinds fitted to our windows and they were VAT exempt (supply and fit). It's worth asking your vendor to zero rate them and then you don't have worry. If you buy them then you'd have to take your chances in the VAT refund. -
Both our plumber and electrician independently included an allowance to supply of these items with the electrician to fit - something to watch, it's a common overlap. I sourced UFH stats and wiring centre myself from Boulder and got them both to remove that item from their quotes - electrician obviously fitted them. Also sourced the electric UFH kit from ebay and stats from the UFH super store. Our electrician quoted using the allowance per socket, downlighter etc method which aggregates the first and second fix labour and materials. Makes it easy to understand and budget accordingly. We only had one trade on a day rate - the joiner, probably the only area of the build where we really underestimated (and under budgeted) the labour and materials required. We first had him quote with others to box in services (post first fix) and put in door linings and pocket door systems. He then returned to ply the ground floor in prep for resin and then do the skirting and architrave (totally forgot to budget for that!) build some cupboards and then finally hang the doors plus box in around Ikea wardrobes we'd assembled. Some days he'd rip through the work, on others you would not see a lot of progress but he was always busy. There is a temptation to criticise on those days but then you'd see that he'd spent a few hours making a custom jig to speed up the subsequent door hanging or prototyped how the splay head doors would meet the lining and avoid a potential problem so you have to take it in the round. We should probably have been more organised and had a more detailed scope of work for him to quote against, that said he helped me out many times with jobs such as fitting the shower screens, helping the plumbers remove a sink and cabinet welded to the wall with SikaFlex etc and it would have been unfair to expect those extras from a fixed price job.
-
Great progress - our electrician left cables for spots in the ceiling behind the board so the plasterer could do a better job (always gets a bit scrappy around protruding cables) and then cut out the holes after. Would recommend trimming your MVHR plenums before plastering (we didn't) to get a smoother finish. +1 on the amazing stairs.
-
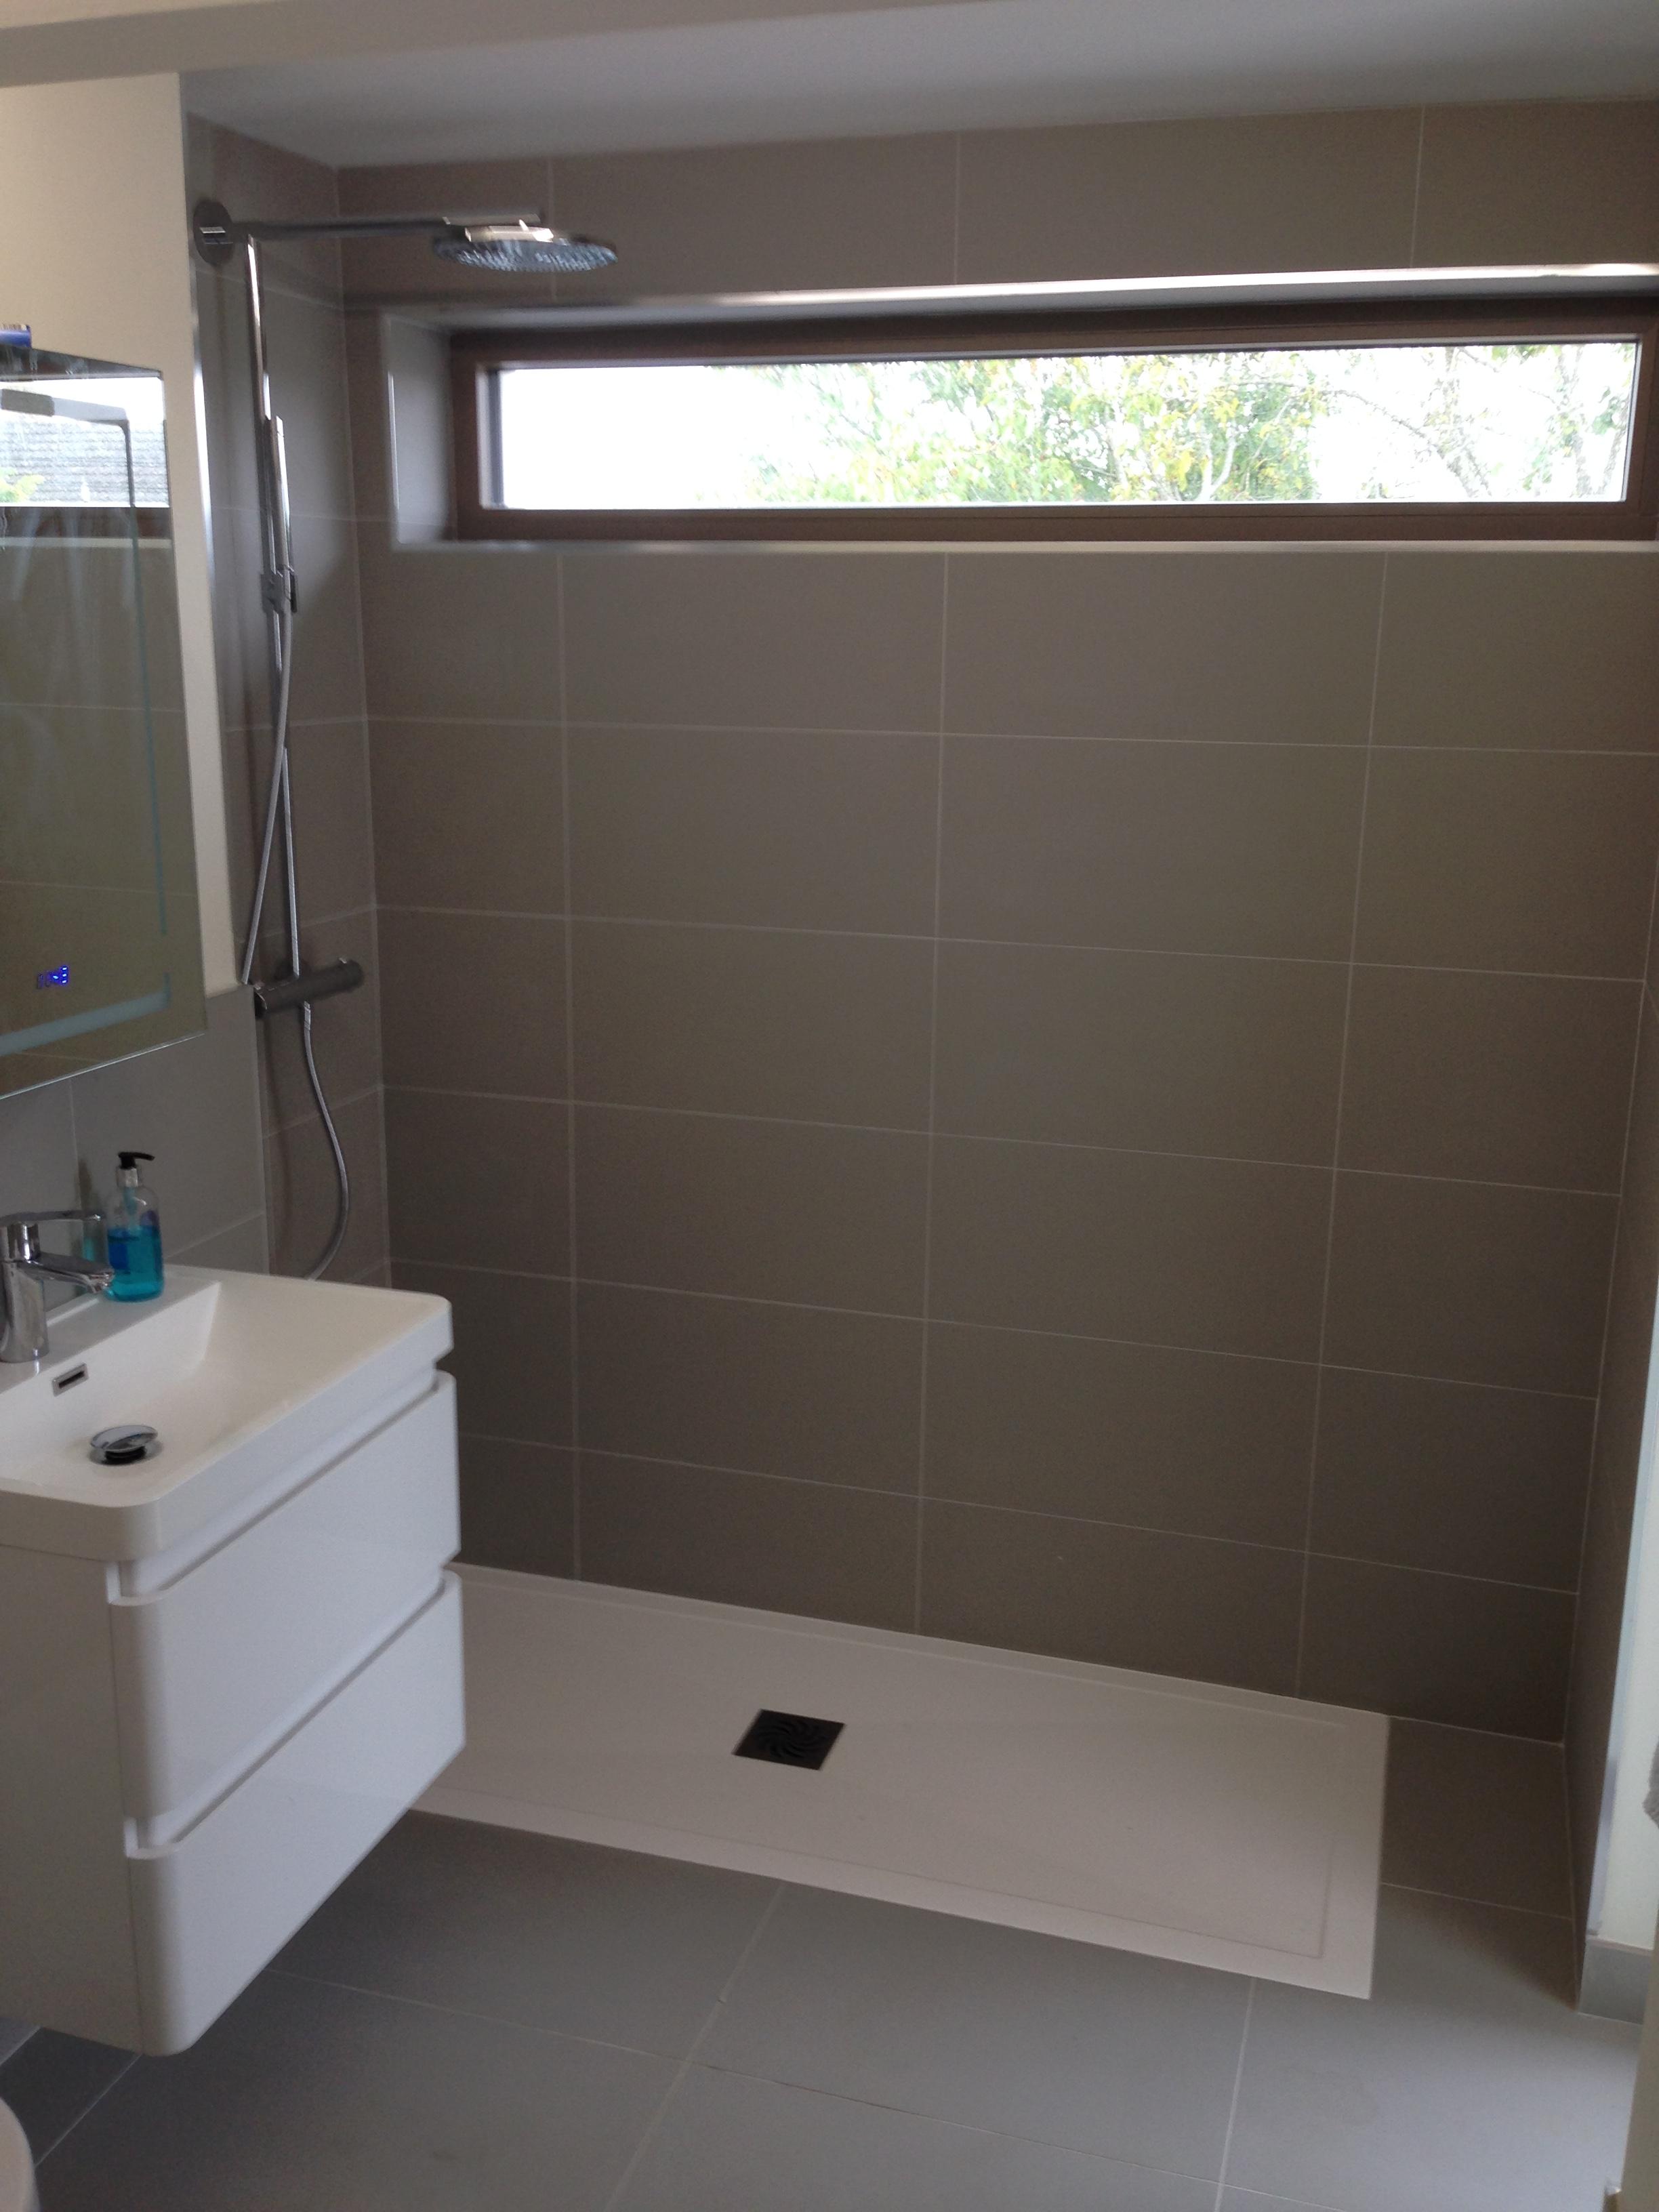
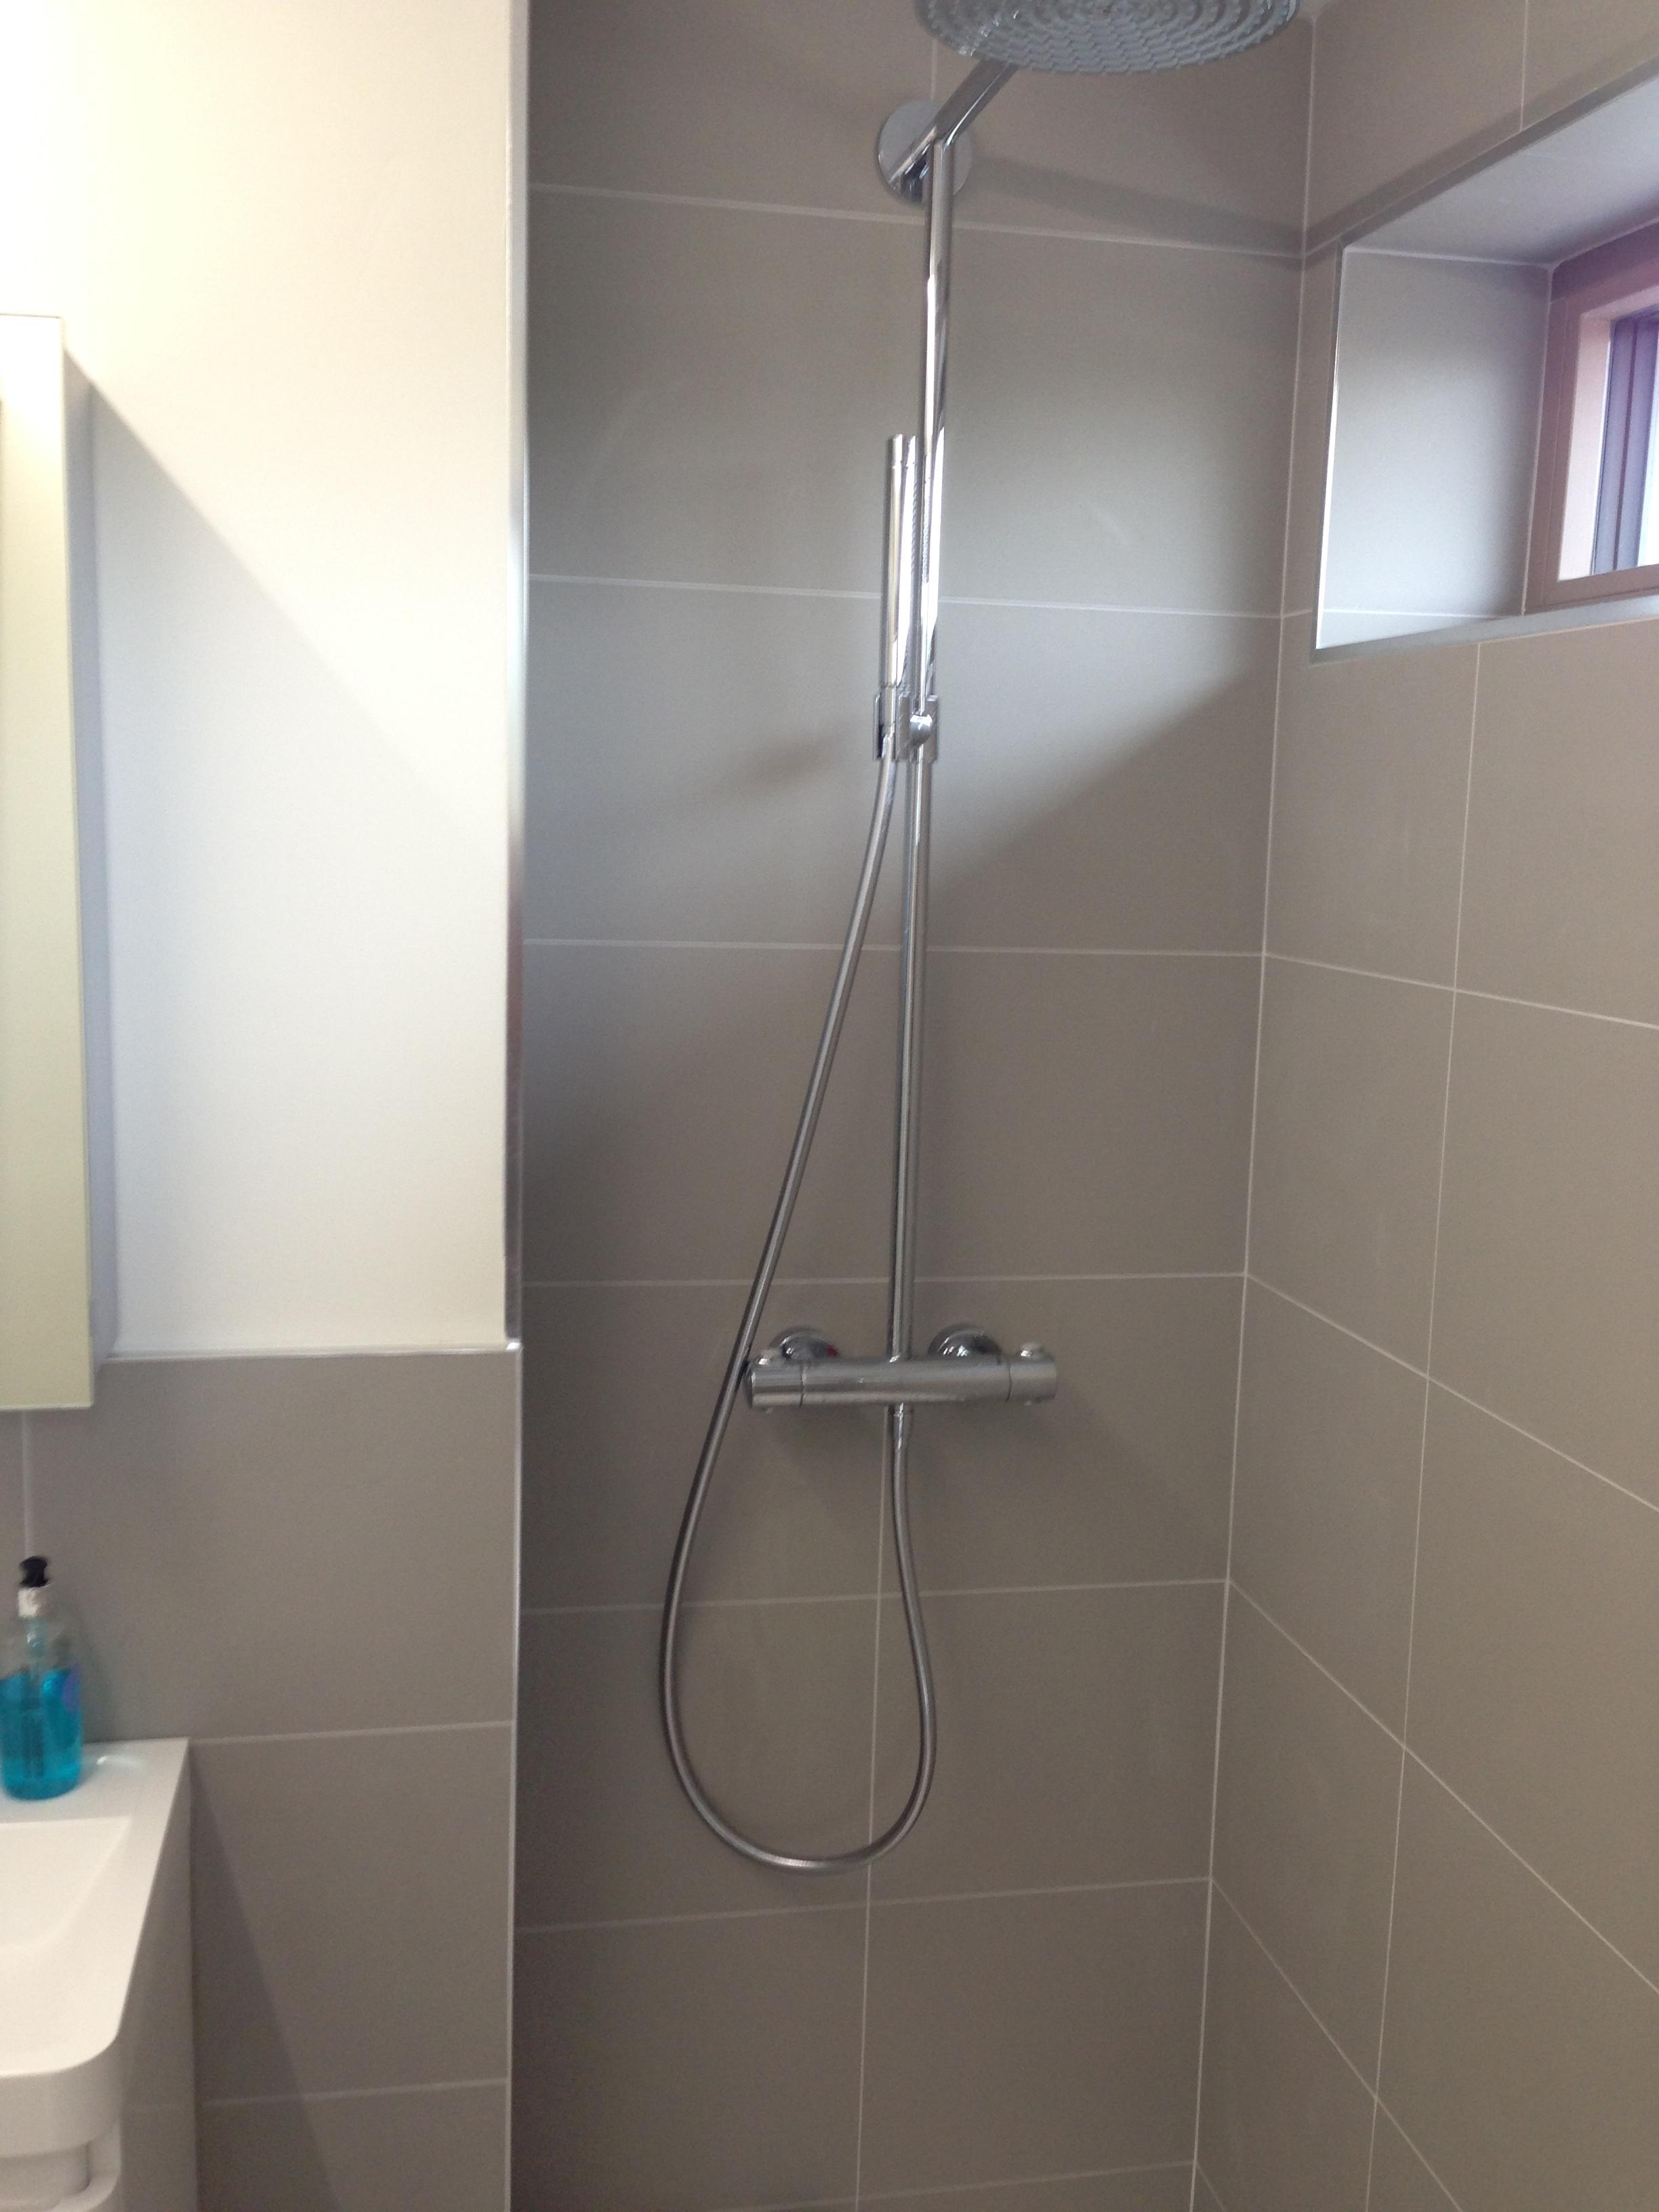
We have a bulk head running through each bathroom and decided to line either side with appropriate temp white LED strips through a diffuser - has worked really well and we decided to treat the rooms in room the same, building a small bulkhead at the apex vs a deeper one to take recessed lights. Our ceiling LEDs are also on a pivot which allows them to wash the wall, rather then straight down.
-
Our electrician came up with a good lighting design for our house (which has a large open plan kitchen, dining & living area) based on ceiling LEDs (on dimmers), wall lighters, LED strips and lots of switched 5a sockets. Looks good, is flexible and did not cost much. He's equally comfortable installing high end lighting systems (KNX etc) but feels that (aside from colour changing) the same effect can be had at a fraction of the cost using standard fittings and a bit of thought.
-
We spoke to our neighbours either side only when the design was complete and submitted to planning, ahead of the notices going up. Both raised objections, some valid (ridge height) some dismissed (brick vs our chosen render, position on plot etc). When we finally got planning I put all of that behind us and made sure they were fully informed about the build process itself - thats the bit that's really going to annoy them on a day to day basis. Our unashamedly modern house on a 50's road was not loved at the planning process but I have now lost count of the number of passers by (of all ages) that complement us on it.
-
I approach most of our neighbours at speed, if they don't leap out of the way then it's too bad...
-
Our plumbers had never heard of it but I made them use it on Nick's recommendation to fix the shower trays and anywhere silicone would have been used. So, our en-suite sink and cabinet were been bonded onto the tiles with Sikaflex. A few weeks later they had to be removed to get at the leak we had. Two plumbers, a joiner, multitool, global fish knife and much swearing and it still wouldn't budge. Finally got it off and cracked the sink in the process (invisibly fixed by MagicMan). Now they swear by it. - I've just used it to fit some 8mm U channel side on to the wall to take the son's shower screen and it's rock solid.
-
Show me your installation!
Bitpipe replied to worldwidewebs's topic in Mechanical Ventilation with Heat Recovery (MVHR)
I'll dig out a few pics and post them up. There have been quite a few posts already on this but the pinch point will be where the flex ducts come back to the distribution boxes - I had a 14 port intake and same for extract and it was very busy - there really was only one place (plant room ceiling) where they could go and also the 180mm duct would not go very far beyond the plant room either. The min bend radius of the flexi ducts can become the key restriction in getting multiple ducts to a given location once they start to overlap, it gets more and more challenging to get the next pipe in. Every MVHR installation should have a swear box, will soon help pay for the build. -
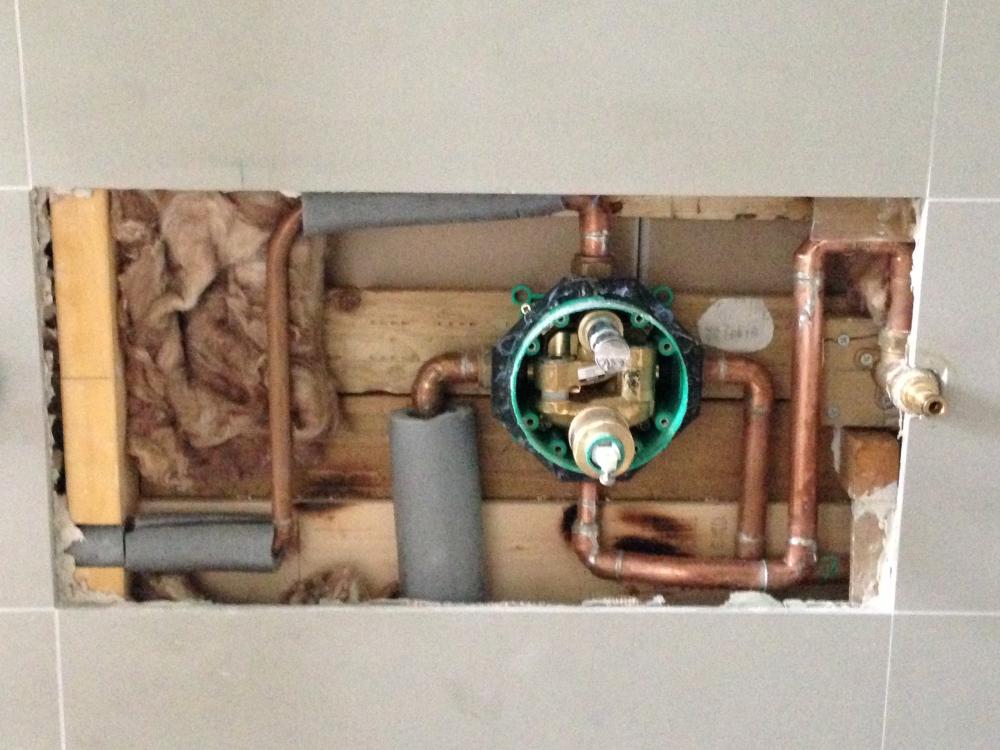
Reason to 1) was that this was the external wall and within the airtightness layer, so we were constrained by that - this is probably the only pipe in the build that runs through the service batten - it spurred off the bath, sink and shower feed (all within the cavity) to feed the WC. 2 is a good point though...
-
Welcome Gary, just about to commission the system I bought from you back in Jan and installed in Feb/March
-
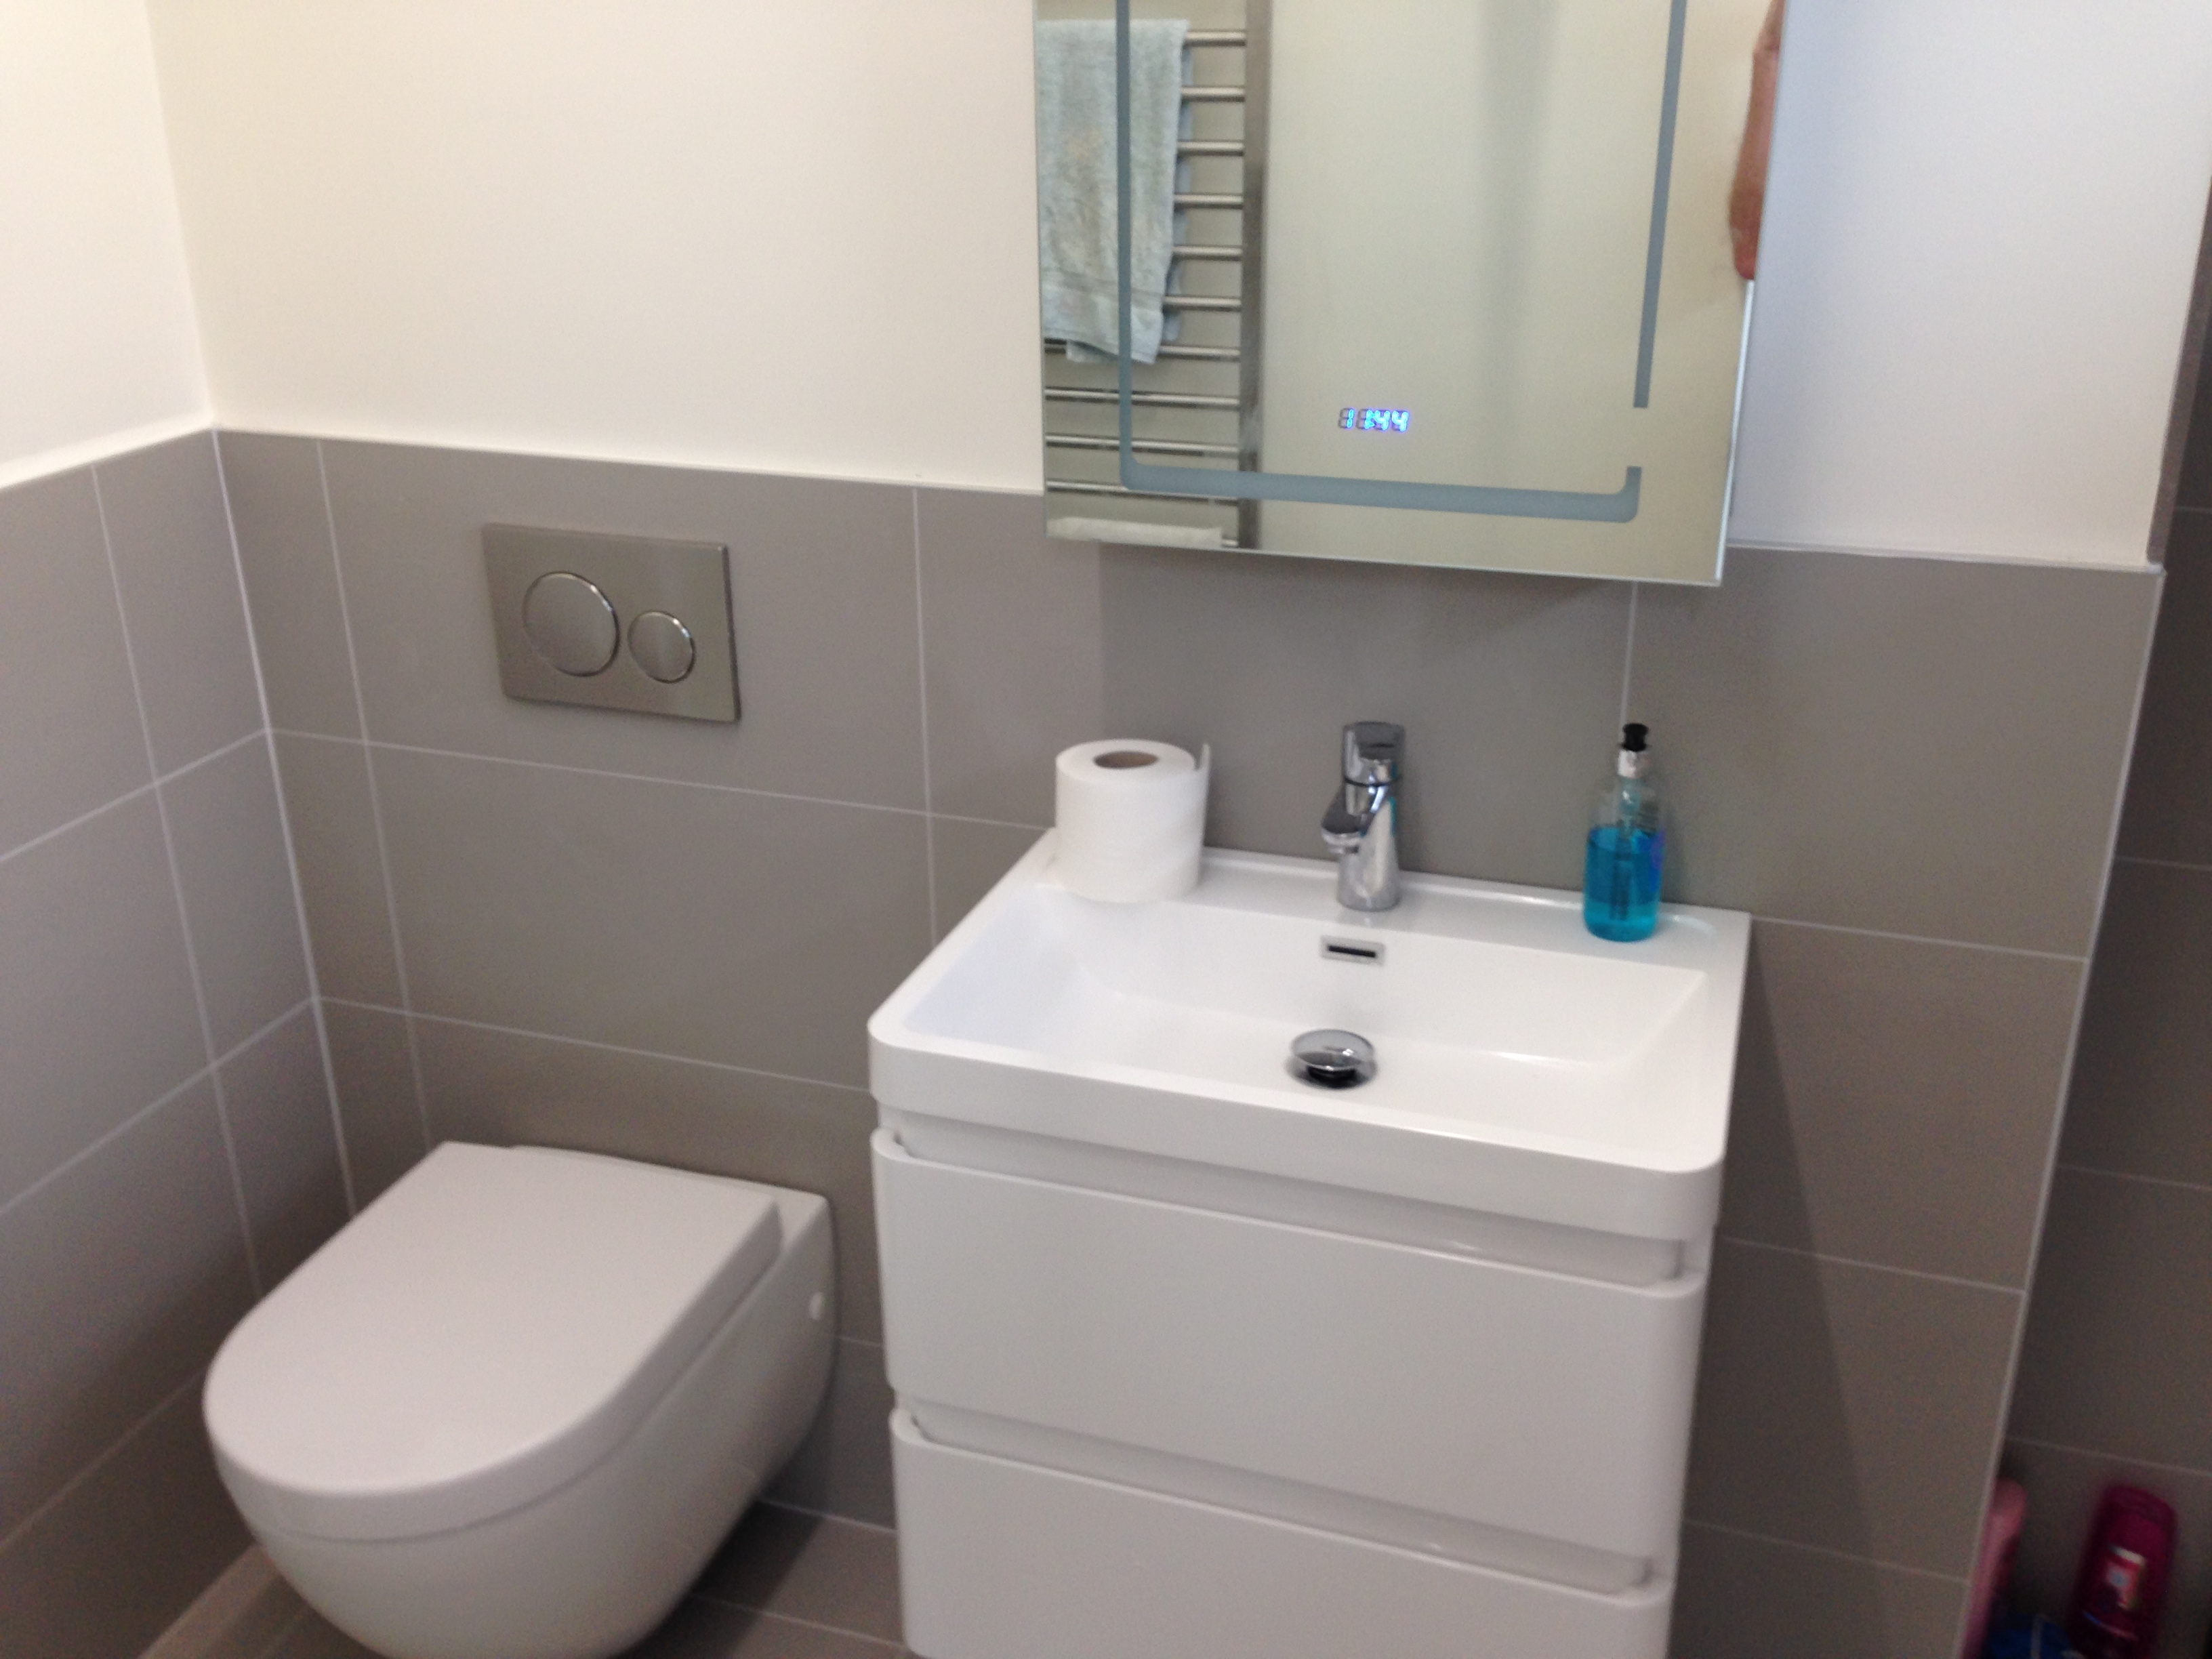
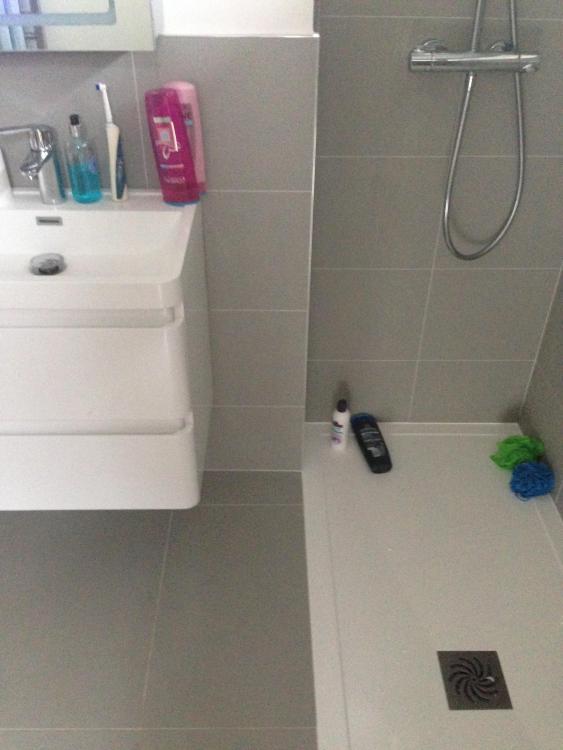
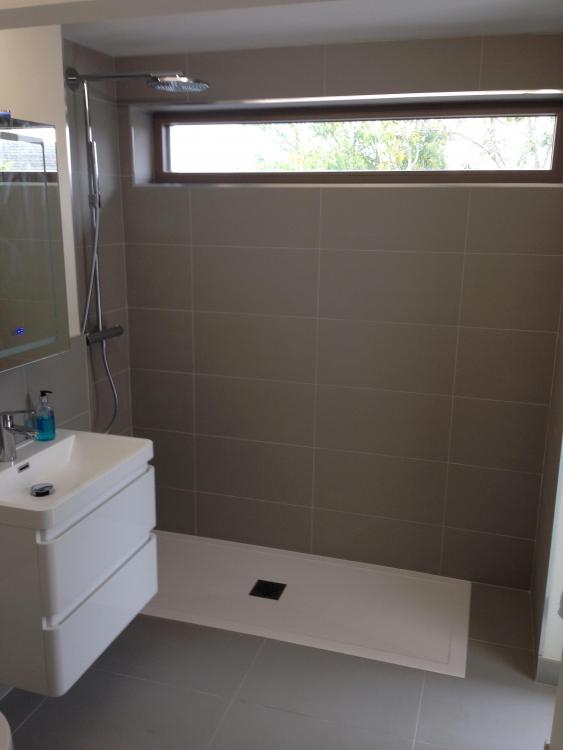
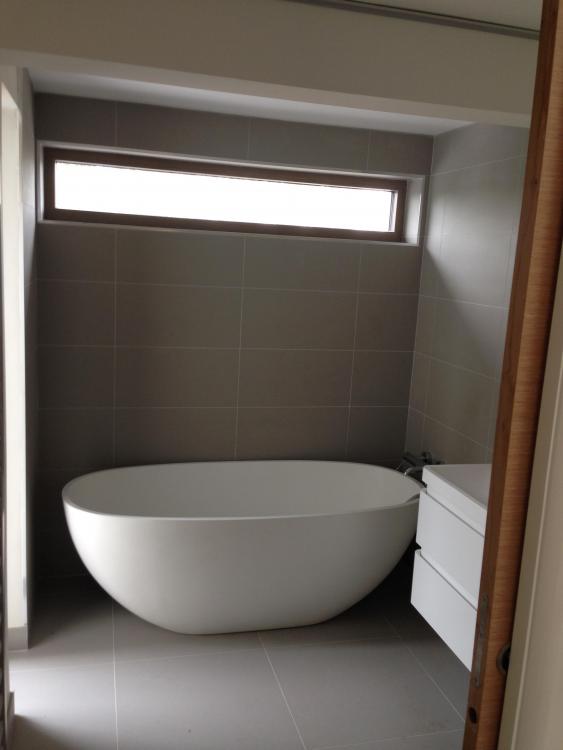
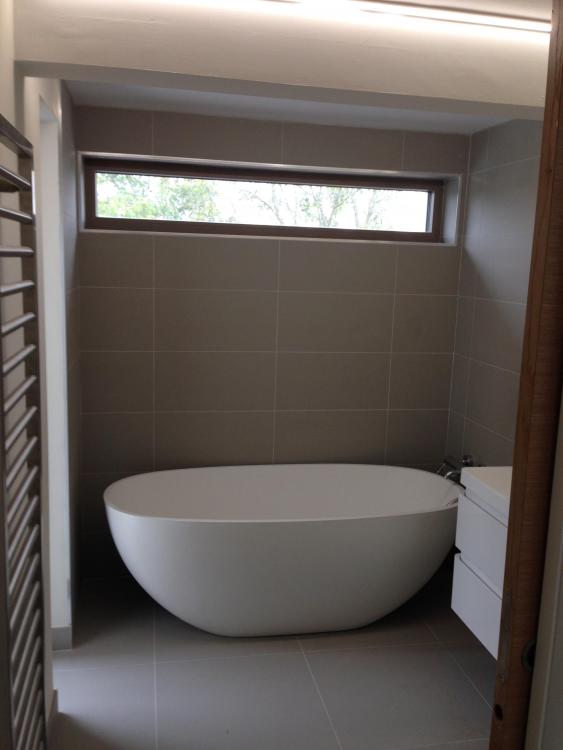
Thanks! All credit to the Mrs who designed them. Bath & cabinets are from Lusso stone, fittings from Hansgrohe via Megabad and the tile were £30/sqm from local tile shop (Spacers) and an excellent local tiler. The sink cabinets hang off the wall and the sink sits on top. Plumbers applied SikaFlex to the sink and cabinet for extra purchase (which, as we found when removing the ensuite sink post leak, is absolutely bombproof).
-
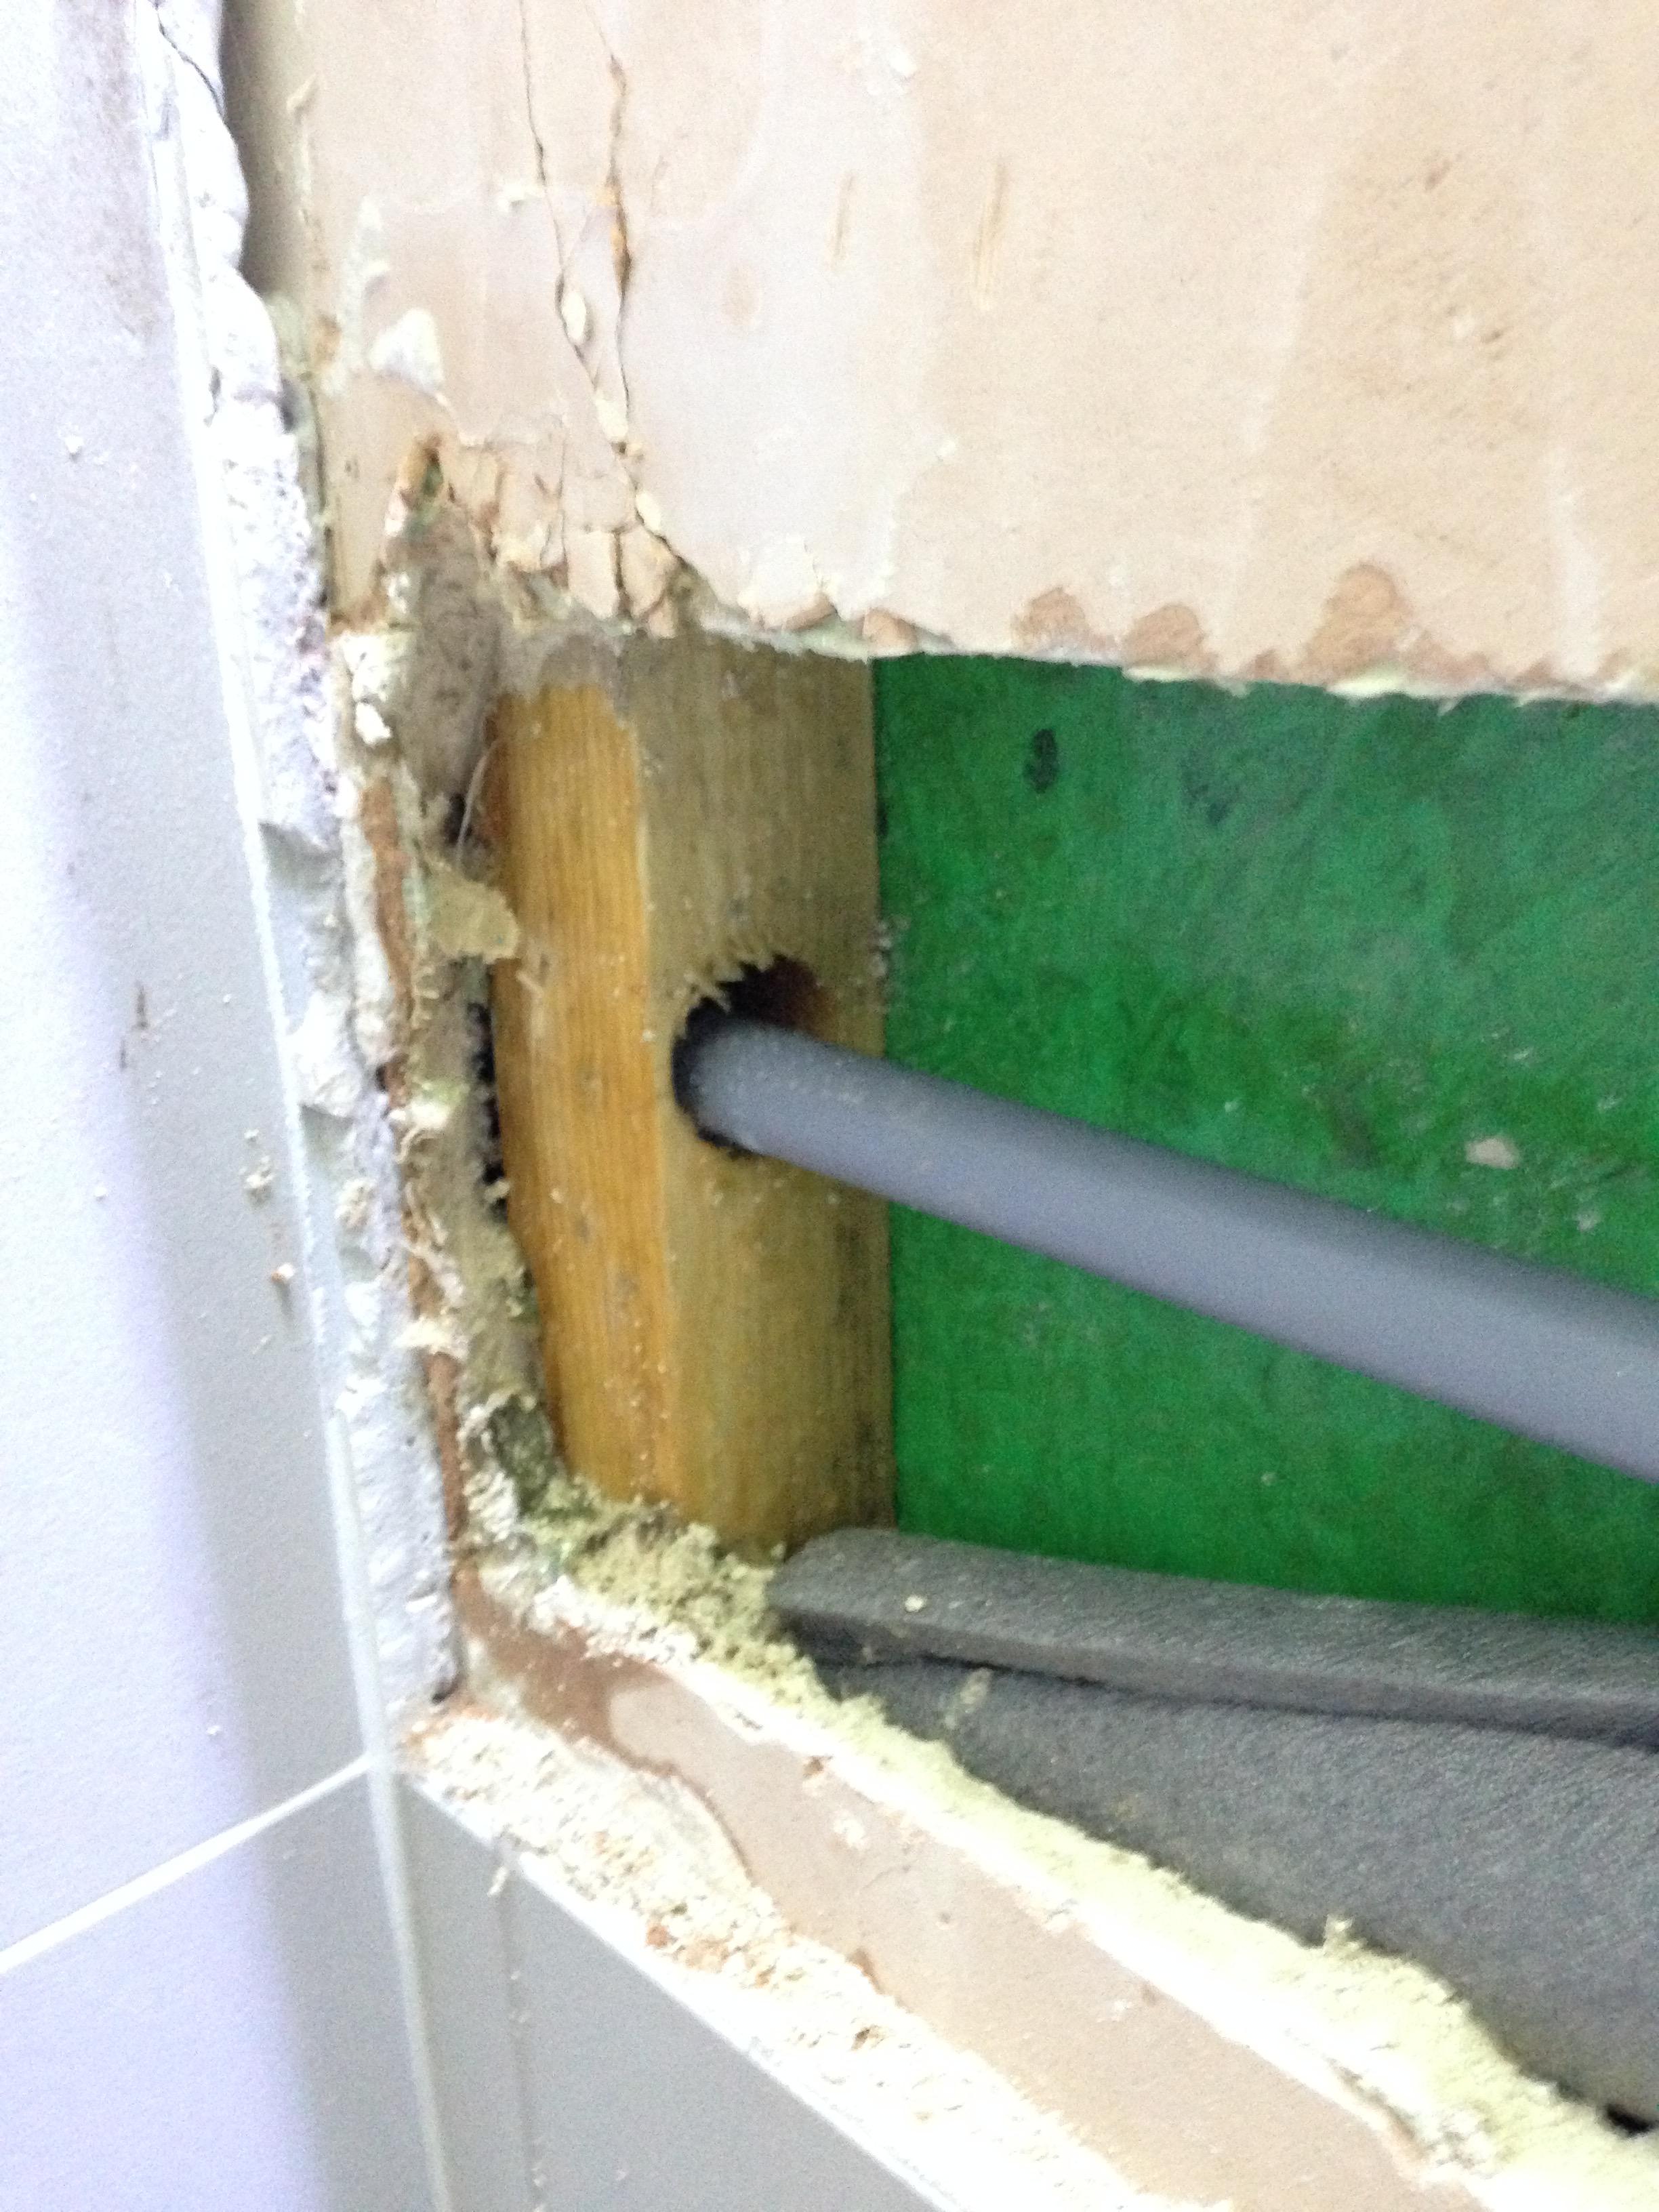
Look closely and you'll see the screw hole in the batten right where the pipe was. About £500 to put right and the plumber and decorators didn't charge for their time...
-
When MBC were detailing the inside of our build, they were gently hacksawing the overhang of the window straps. One lad asked why they didn't just take a grinder to them, turns out they did that once and the hot sparks welded themselves into the window glass! A few weeks later we had a steel worker about to cut plate with a massive grinder right in-front of the sliding doors - just managed to stop him in time and get some protection up. My joiner also nicked a UFH pipe while we were trying to find a squeak in the ply before laying a resin floor - luckily we saw it happen and were able to make the repair there and them. When I was tightening up the alu spreader plates from below ahead of plastering, I also spotted a few very near misses from nail guns and drill holes.
-
Thanks - may just use EBT on the tray then. Plan to use u channel in the bottom of the wet room panel as it won't have a support arm (only 900mm wide
-
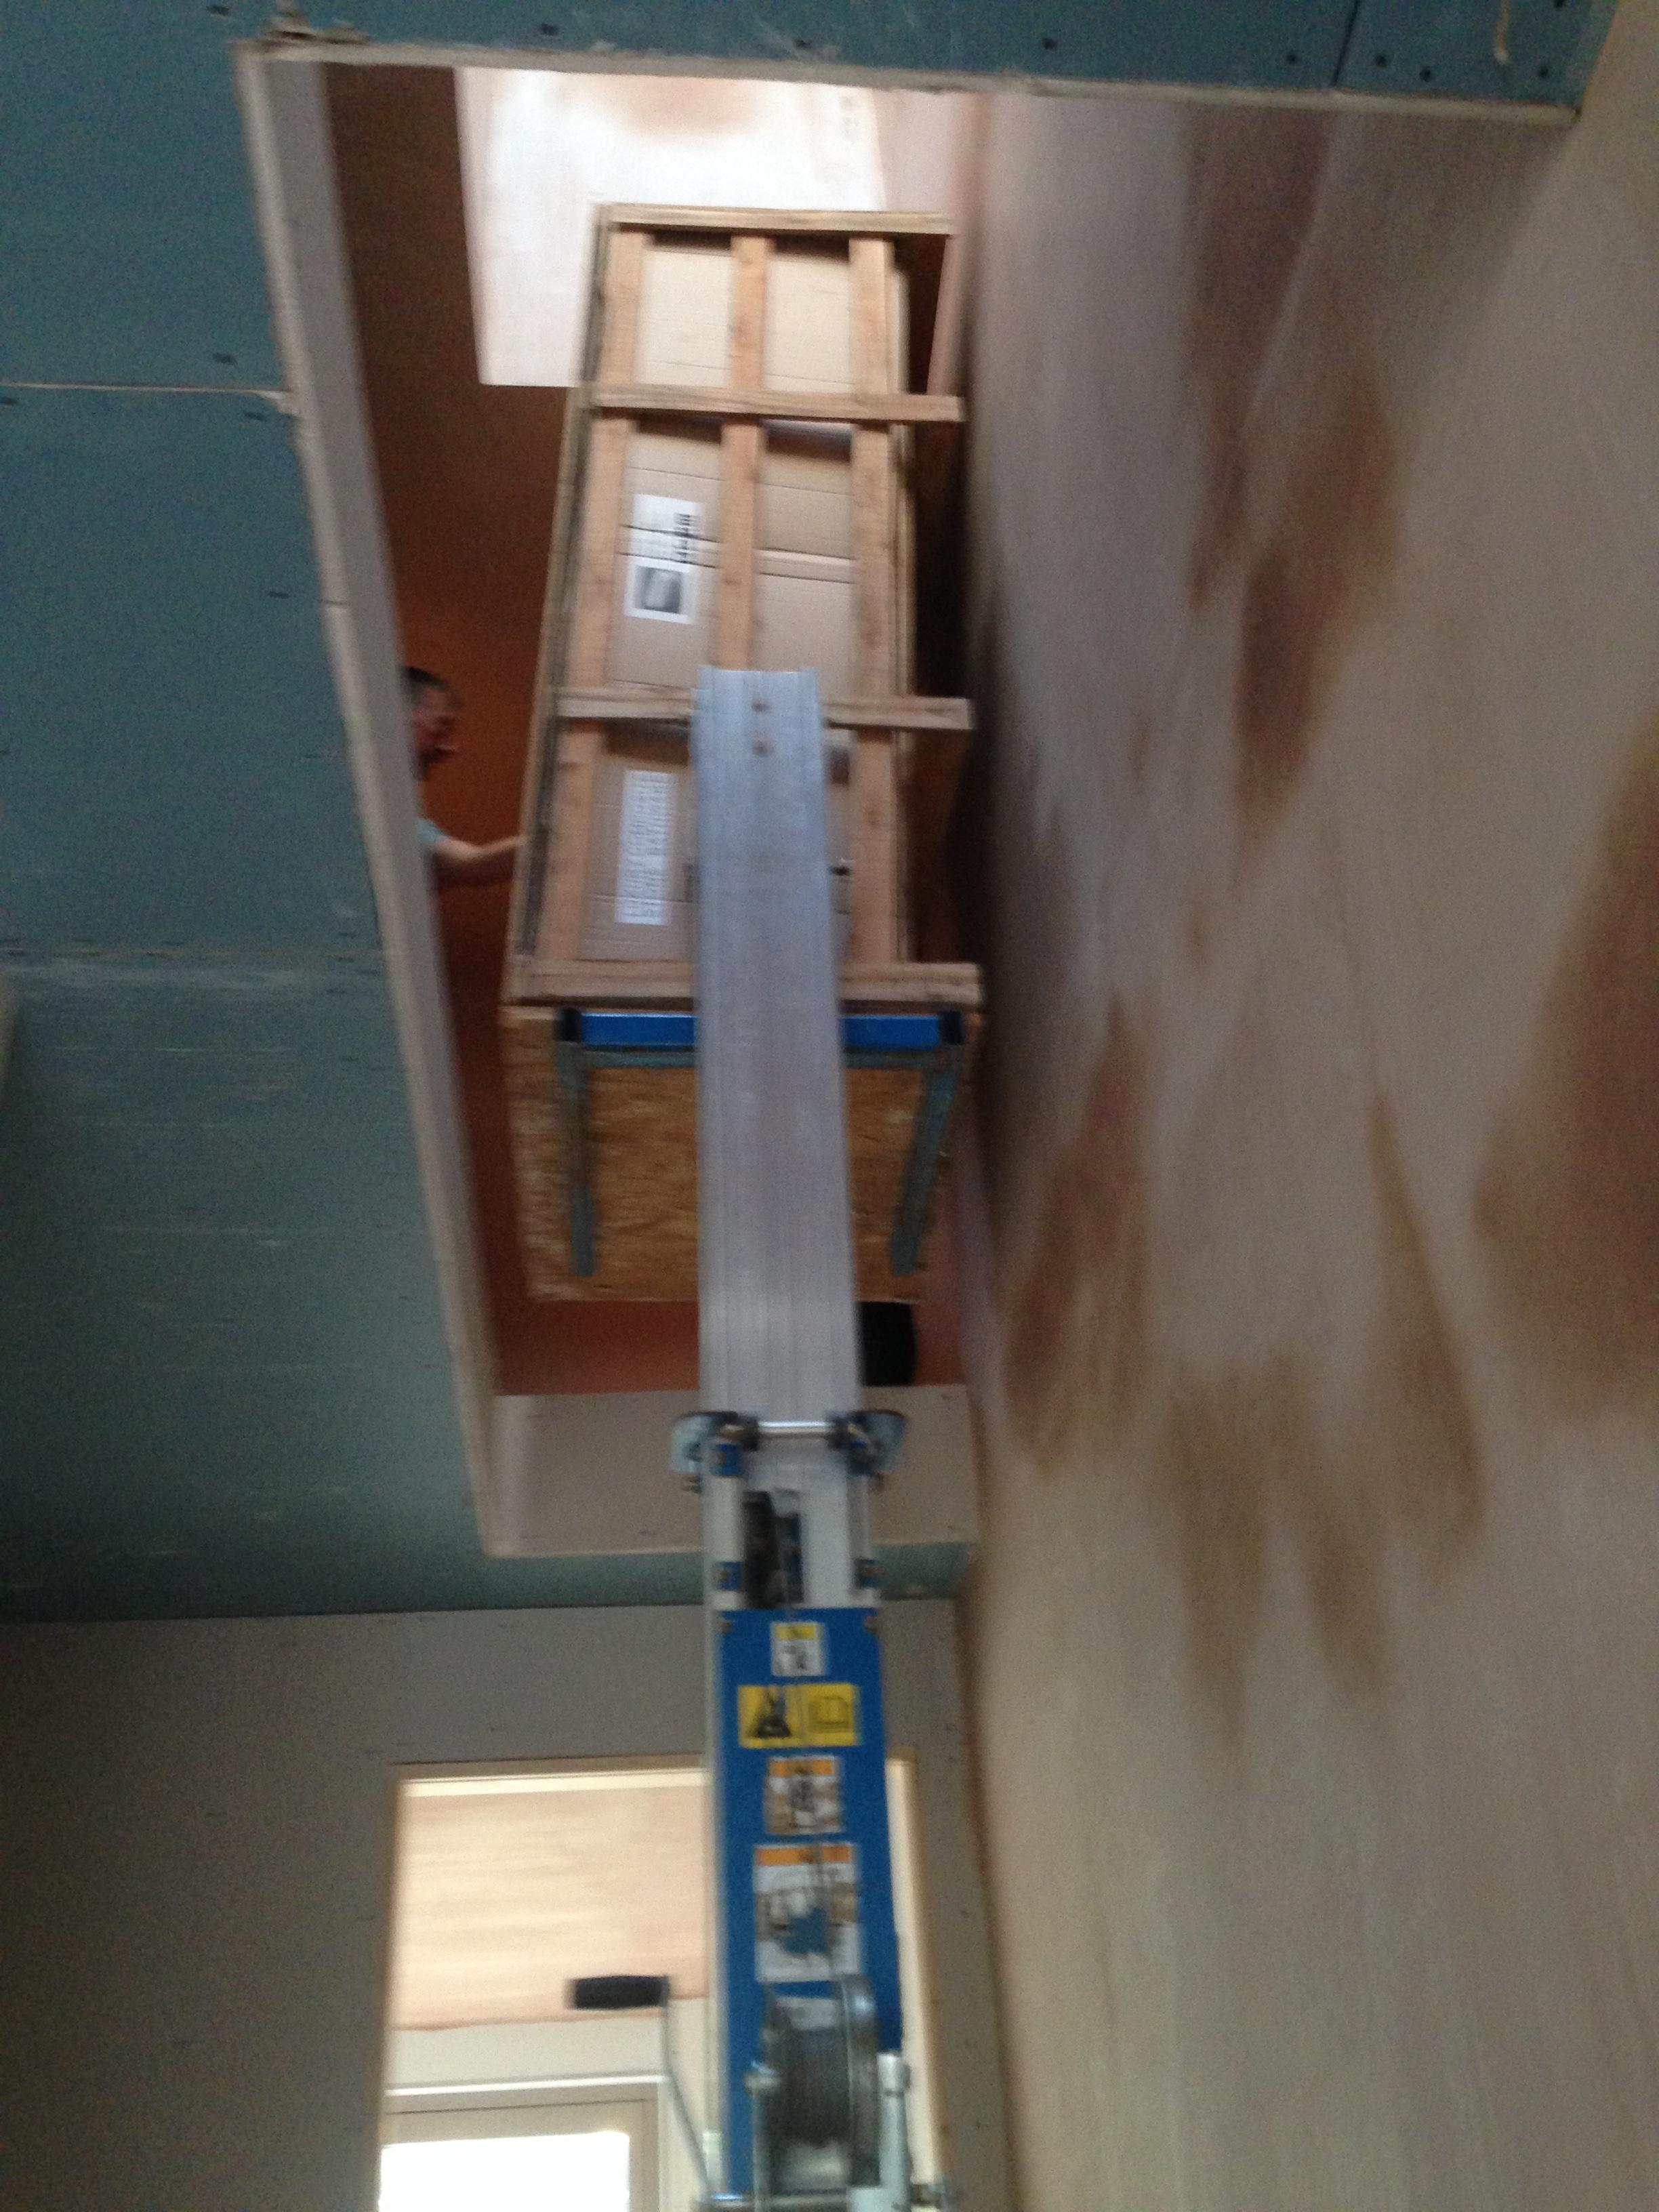
We had to use a genie lift - you may need to take your stairs out to use one. There was no way it was going up the stairs - box was 180kg and add four lads to that and you need beefy stairs!

-
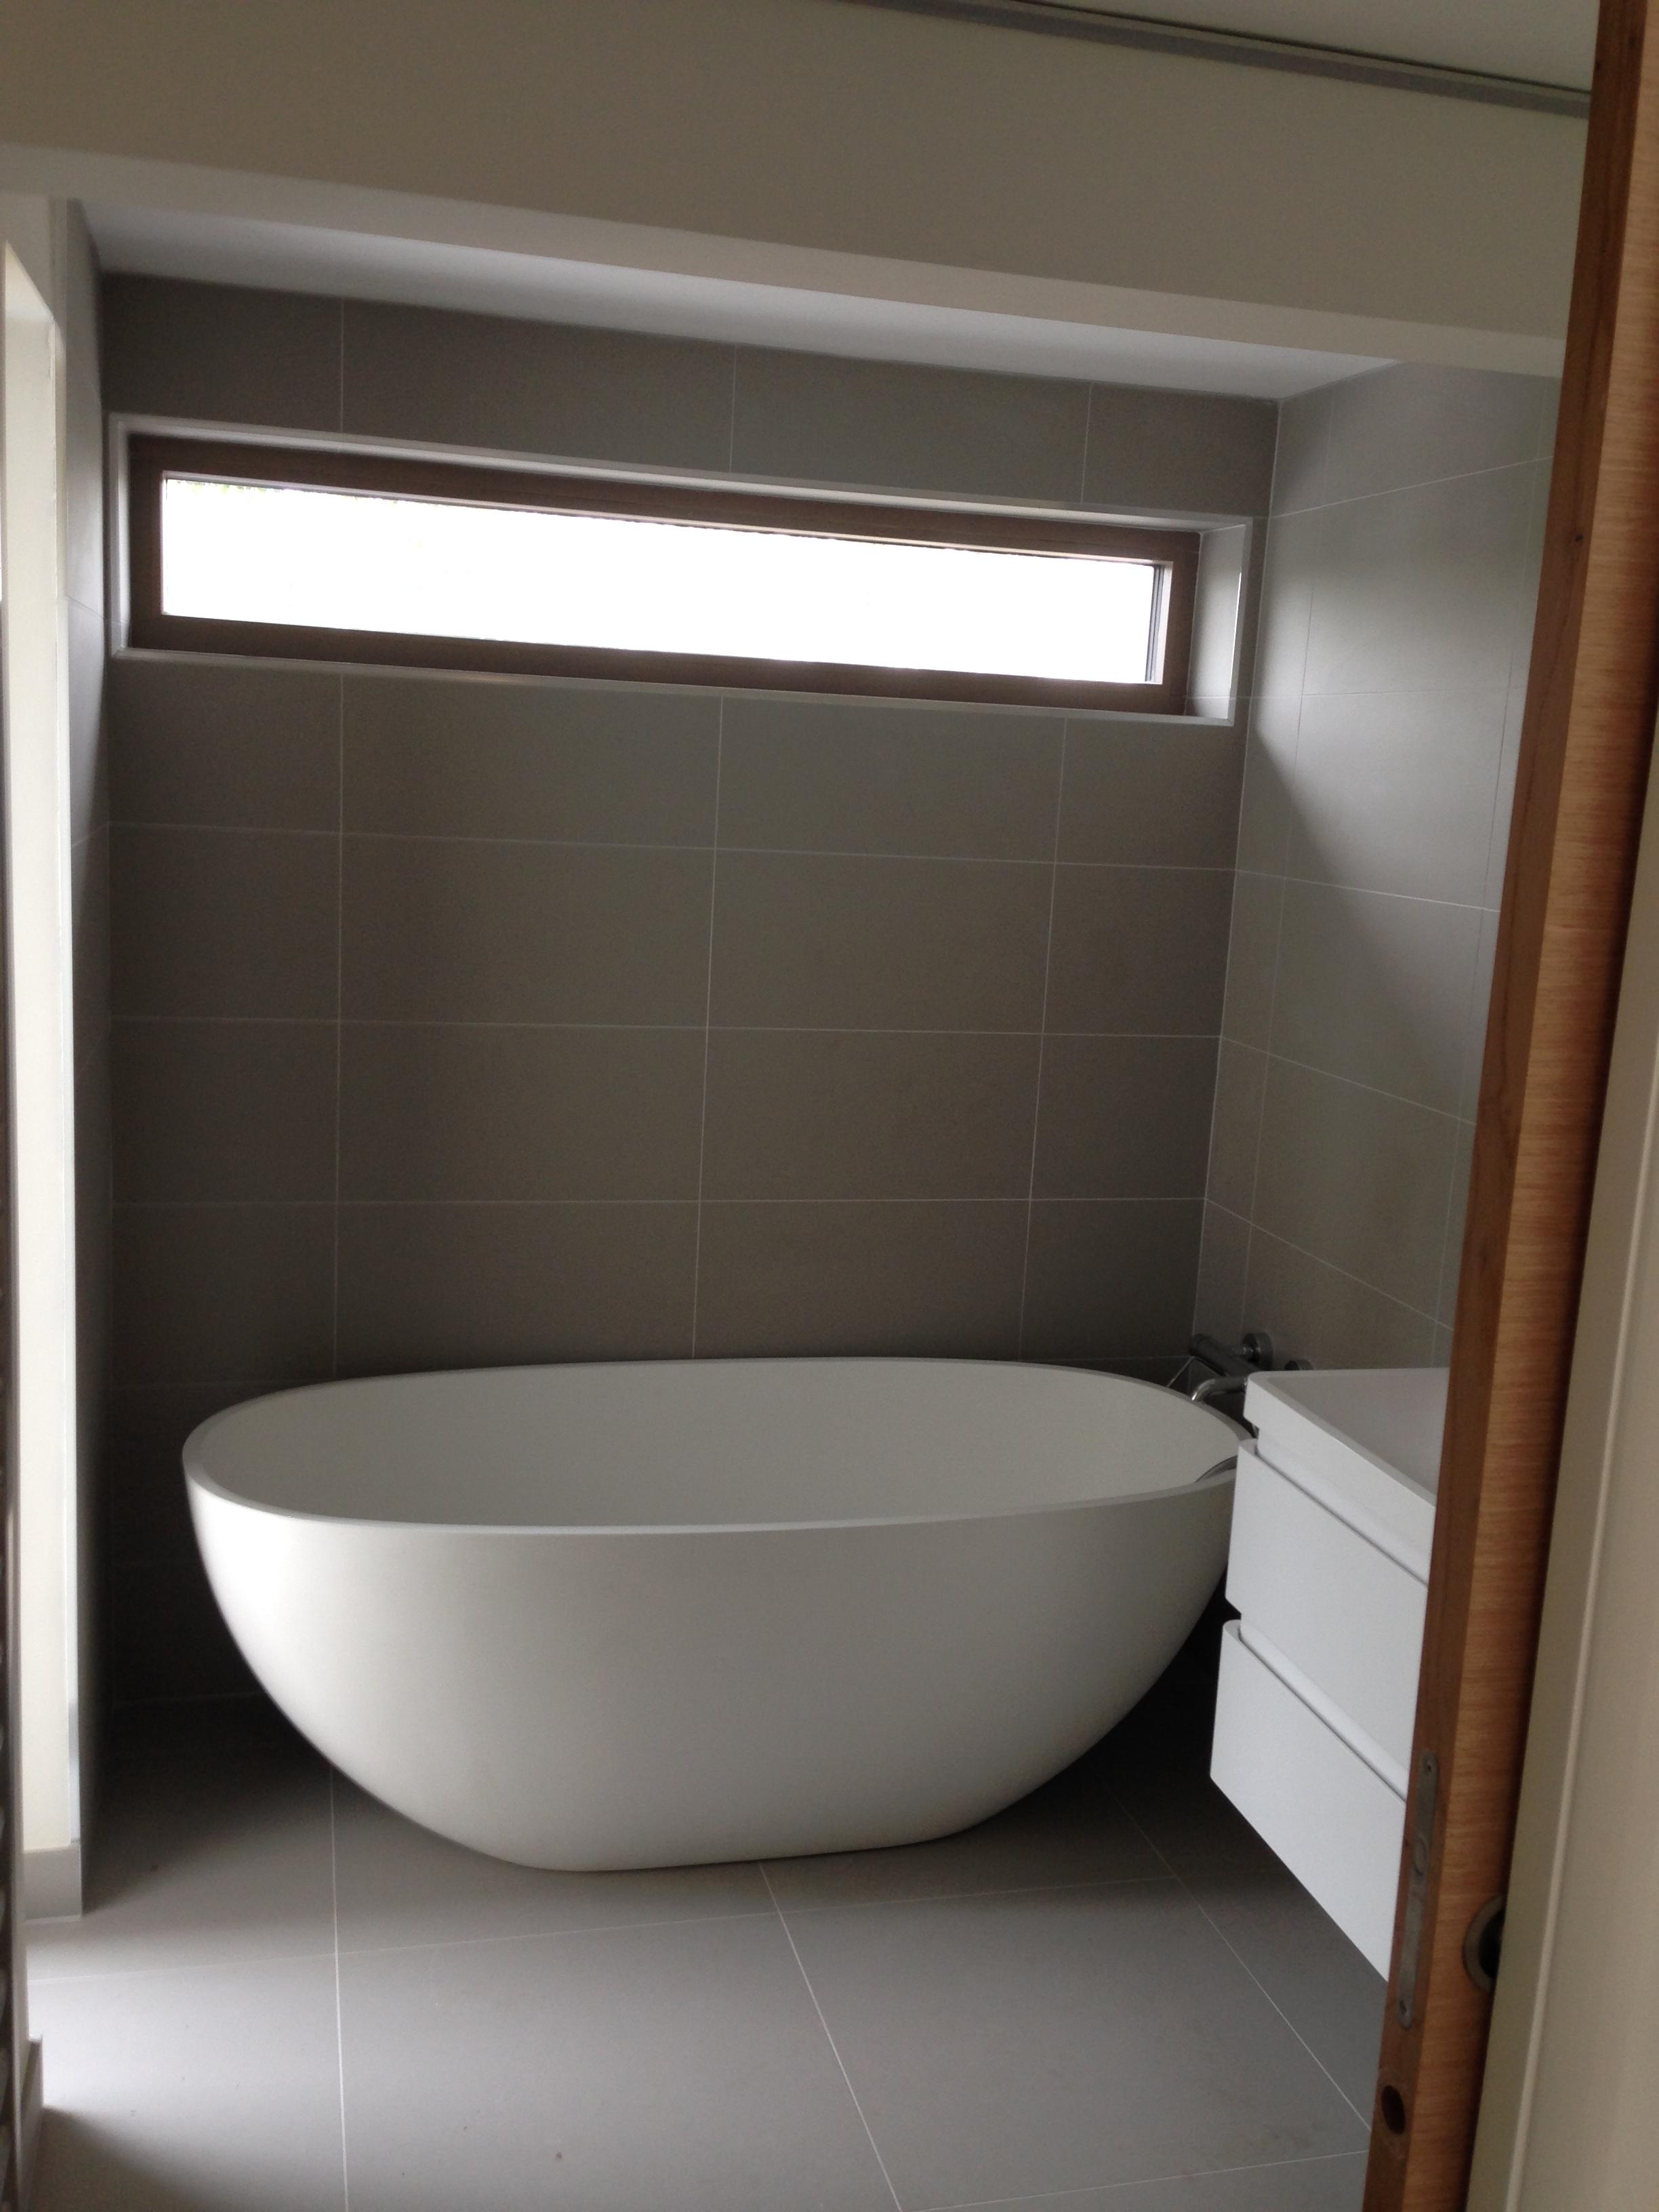
Yes ! Weighs a ton and did not have enough space underneath for the drain plus elbow and a trap so a hole was cut in the floor - the fittings they supply are rubbish. Nice bath though.
-
Question on fixing the screen to tray. On the wall I'm using u channel, although plan to fix this side on rather than from rear as the top 150mm of the tray is in a recess and I don't want the screen to overlap the tiles here as it will be tricky to keep clean. I had found a Y Alu channel that could have been fixed through its flange and then covered with a matching Z profile. However my experience with the Sikaflex EBT shows that it should be strong enough to bond the U channel to the side wall. Will also use a top stabilising bar but do I need a u channel for the tray also or can I just bond between glass and tray?
-
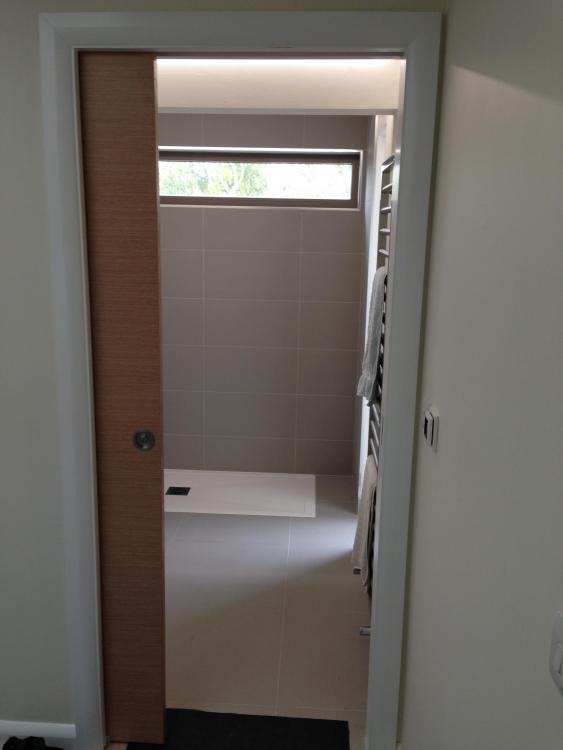
Here's a bunch of pics - first ones are the kids general bathrooms and the last is the replumbed bath filler. Tiles have now been replaces so we'll get everything back Monday.


-
I posted a long thread on ebuild which can be summarised as glue 50mm eps to the roof with low expansion foam to prevent 'cold roof rain'. Ive been through about 3 damp sticks in the year so suggest you buy them in bulk as its a bit cheaper.
-

-
Just keep the screws out of your water pipes and you'll be fine