Nickfromwales
-
Posts
30329 -
Joined
-
Last visited
-
Days Won
297
Everything posted by Nickfromwales
-

Bath Surround / Boxing In, and concealed pipework
Nickfromwales replied to Onoff's topic in Bathrooms, Ensuites & Wetrooms
Yup. You know you have to adjust it with at least a little water flowing through it, yea? -
Bath Surround / Boxing In, and concealed pipework
Nickfromwales replied to Onoff's topic in Bathrooms, Ensuites & Wetrooms
Exp Foam does nothing for sound deadening. The black sound deadening mat that you get from car ICE merchants may be better on the soil, but I don't think it'll be an issue tbh, plus it's a bit late in the day for the soil pipe? Maybe a sheet of this behind the WC to absorb the brief flush noise? The filling isn't noisy at all if you've some flow suppression inline ( only required if you've got a really nasty cold mains ) but as you have a PRedV it should be OK as is. They're really quite quiet when filling up . -
This is quite simple. Let him / them sort out the issue the way they see fit . Before any work commences, explain to them that if the issue returns, so will they, at their cost, to repair it again. The PVA is used to get adhesion, and not to create a barrier. If the new plaster isn't allowed to completely dry out prior to painting this will go full circle. Plastering over PVA also requires two coats of skim in the same set ( minimum ) as the PVA tends to cause the first coat to bubble up, and is then nigh on impossible to trowel to any reasonable finish, hence the requirement to go over the top of the first coat with a second 'top' coat as a finisher. PVA gets reconstituted with water / moisture so ensure this new plaster has time to fully dry with the room getting as little steam / use as possible during that period. If you have to shower, window open, and then door open straight after to ventilate the room. The fan alone won't be sufficient. It would be a very good idea to hire a dehumidifier, but don't be tempted to use that until the plaster has gone light pink. Some nuggets will say that's dry, but it's not fully dry, as in dry enough to paint with a non-breathable paint. Lastly, I'd look long and hard at the paint you choose to apply. Go for a top quality paint which is vapour permeable if possible. I for one, would never use a silk paint in a bathroom, but that's your choice, and would instead use a scrubbable matt paint like the Dulux Diamond range. That again is dependant on what is over the other walls already and how far your going to go with this. . Tell them the buck stops with them, and the problem won't go away, and you will pursue them if it's not resolved in the next visit.
-
Bath Surround / Boxing In, and concealed pipework
Nickfromwales replied to Onoff's topic in Bathrooms, Ensuites & Wetrooms
FFS Hes easily led ok, so pack it in you lot ✊ You wouldn't say that if you were tiling it Did that in a bathroom showroom once, only to find out that white LEDs through glass actually comes through green To pull that off you need to use Perspex. -
Bath Surround / Boxing In, and concealed pipework
Nickfromwales replied to Onoff's topic in Bathrooms, Ensuites & Wetrooms
What radius? You are mad arching them....you are aware of that, yes? ?? -
Bath Surround / Boxing In, and concealed pipework
Nickfromwales replied to Onoff's topic in Bathrooms, Ensuites & Wetrooms
Arched tops? You'll have to mosaic those. The 2026 deadline is already slipping -
Bath Surround / Boxing In, and concealed pipework
Nickfromwales replied to Onoff's topic in Bathrooms, Ensuites & Wetrooms
Arise.......you are worthy...... Just slow -
Bath Surround / Boxing In, and concealed pipework
Nickfromwales replied to Onoff's topic in Bathrooms, Ensuites & Wetrooms
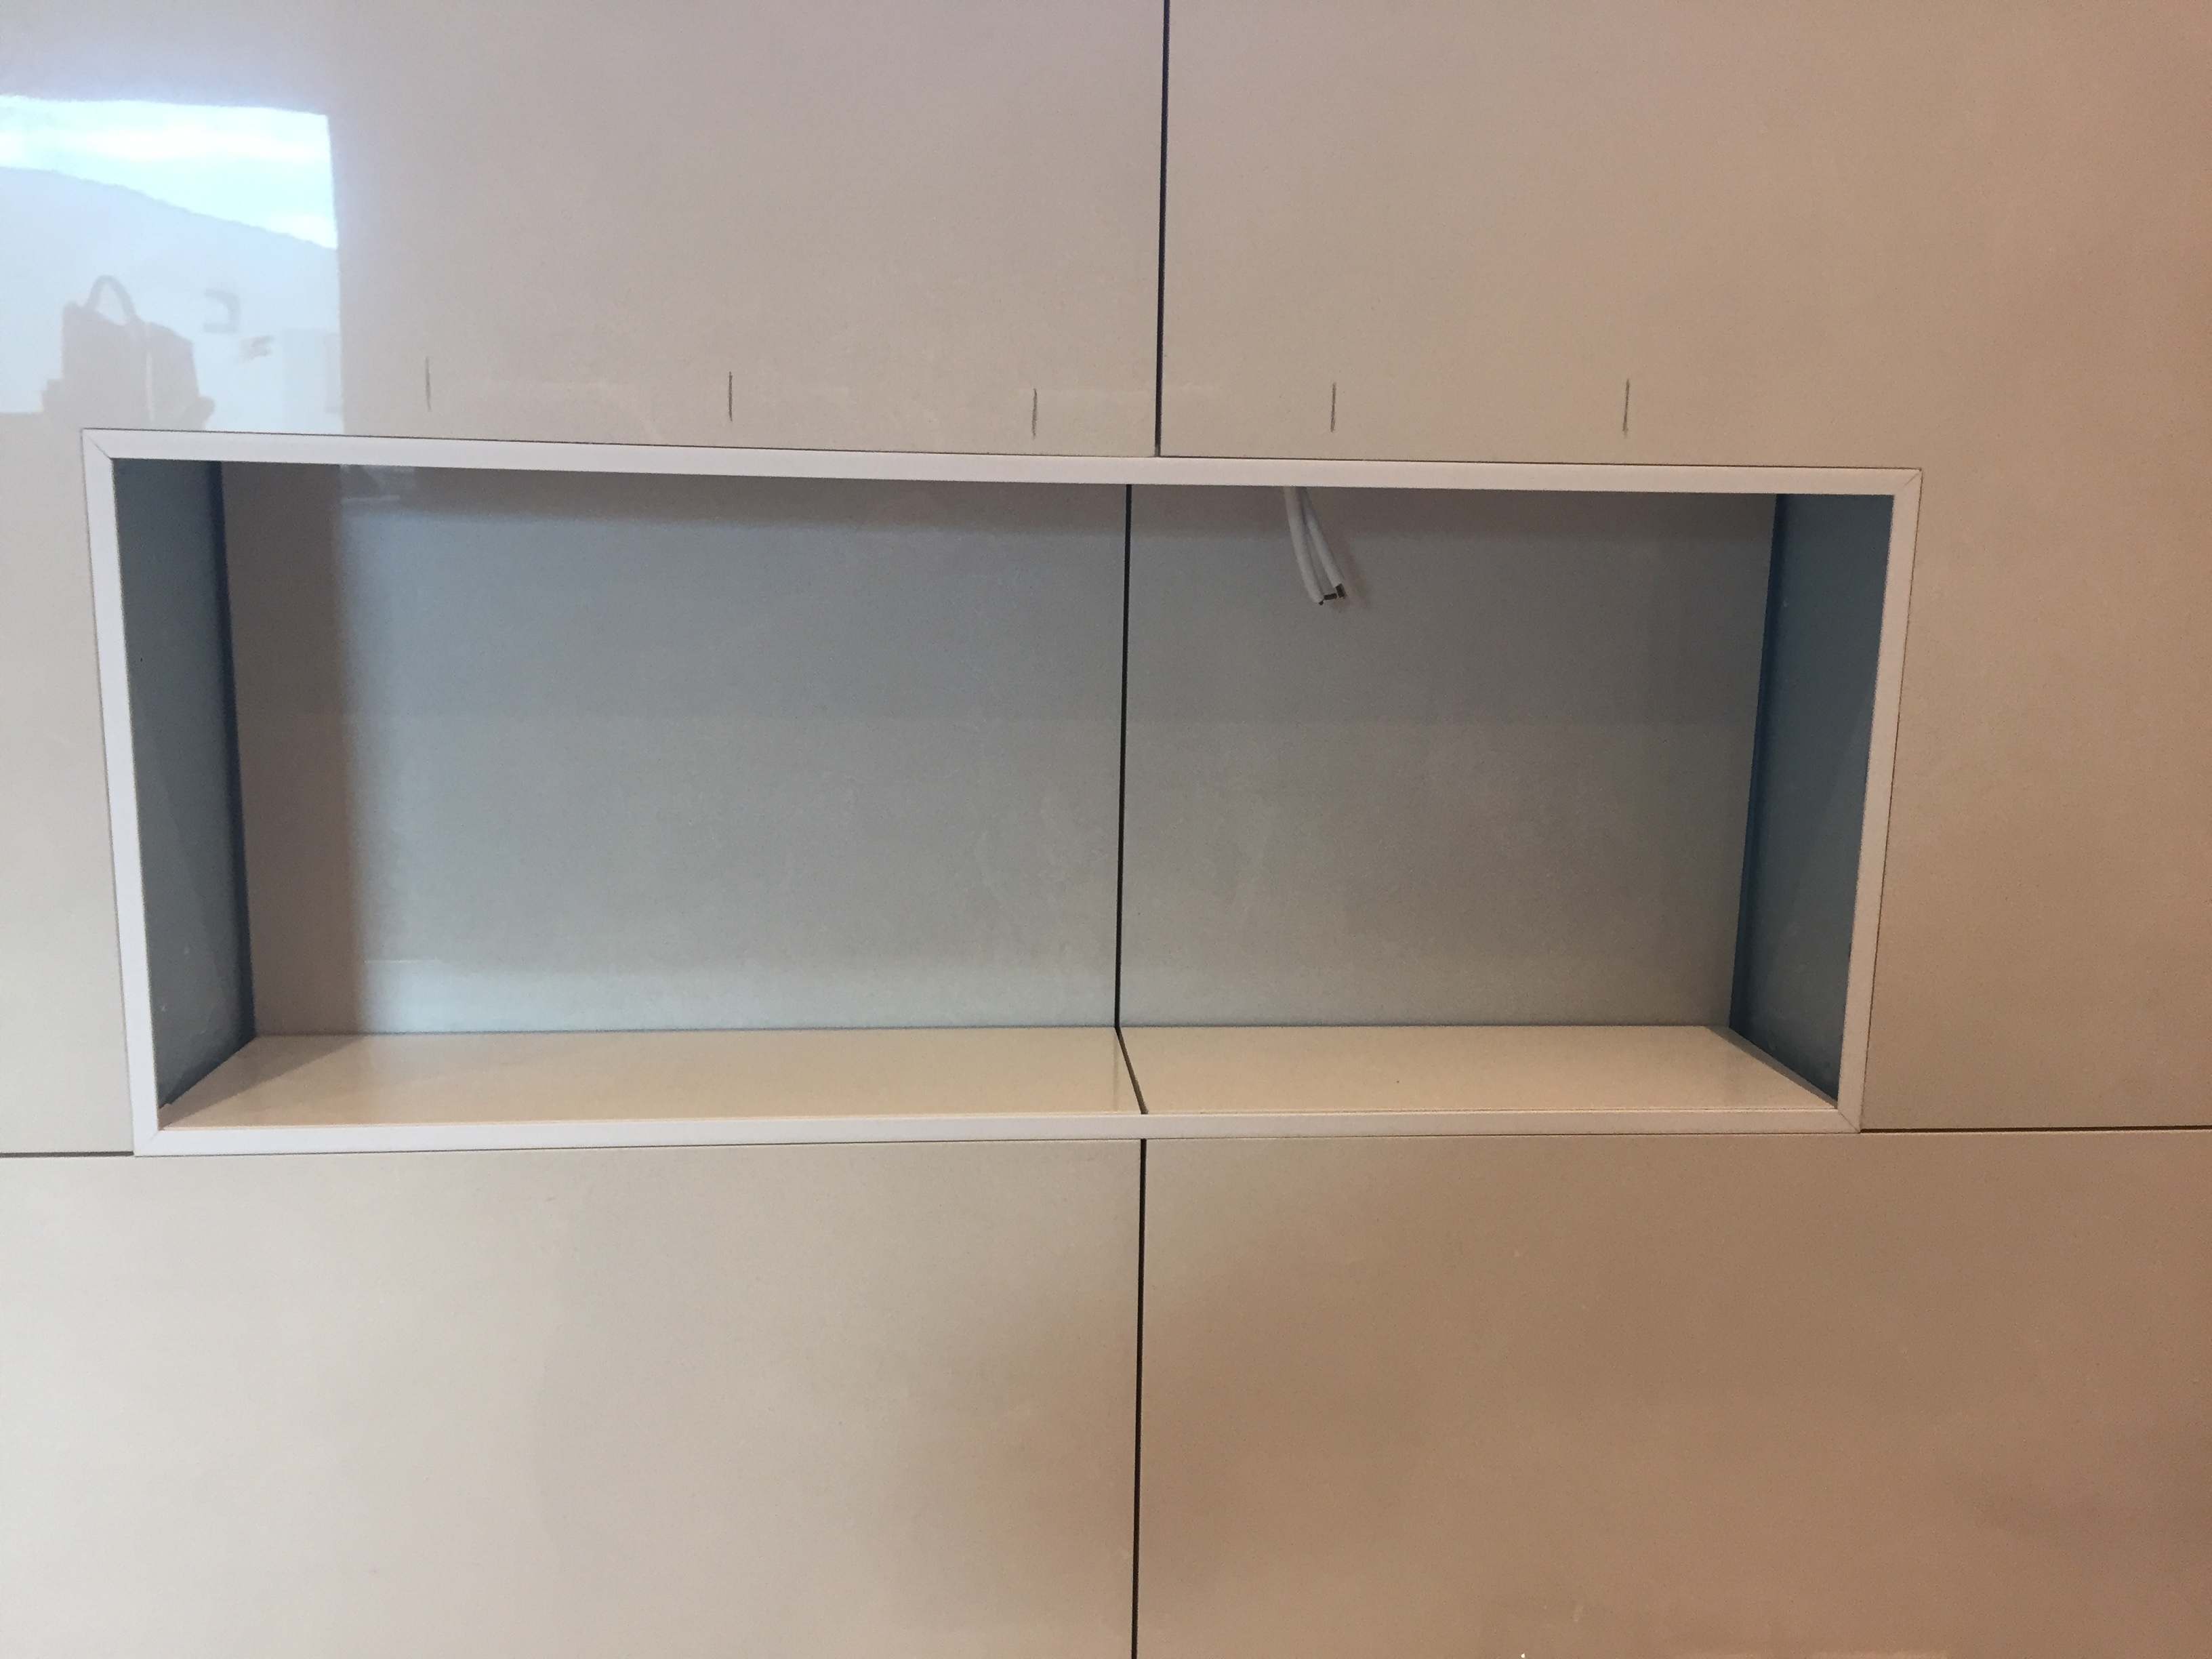
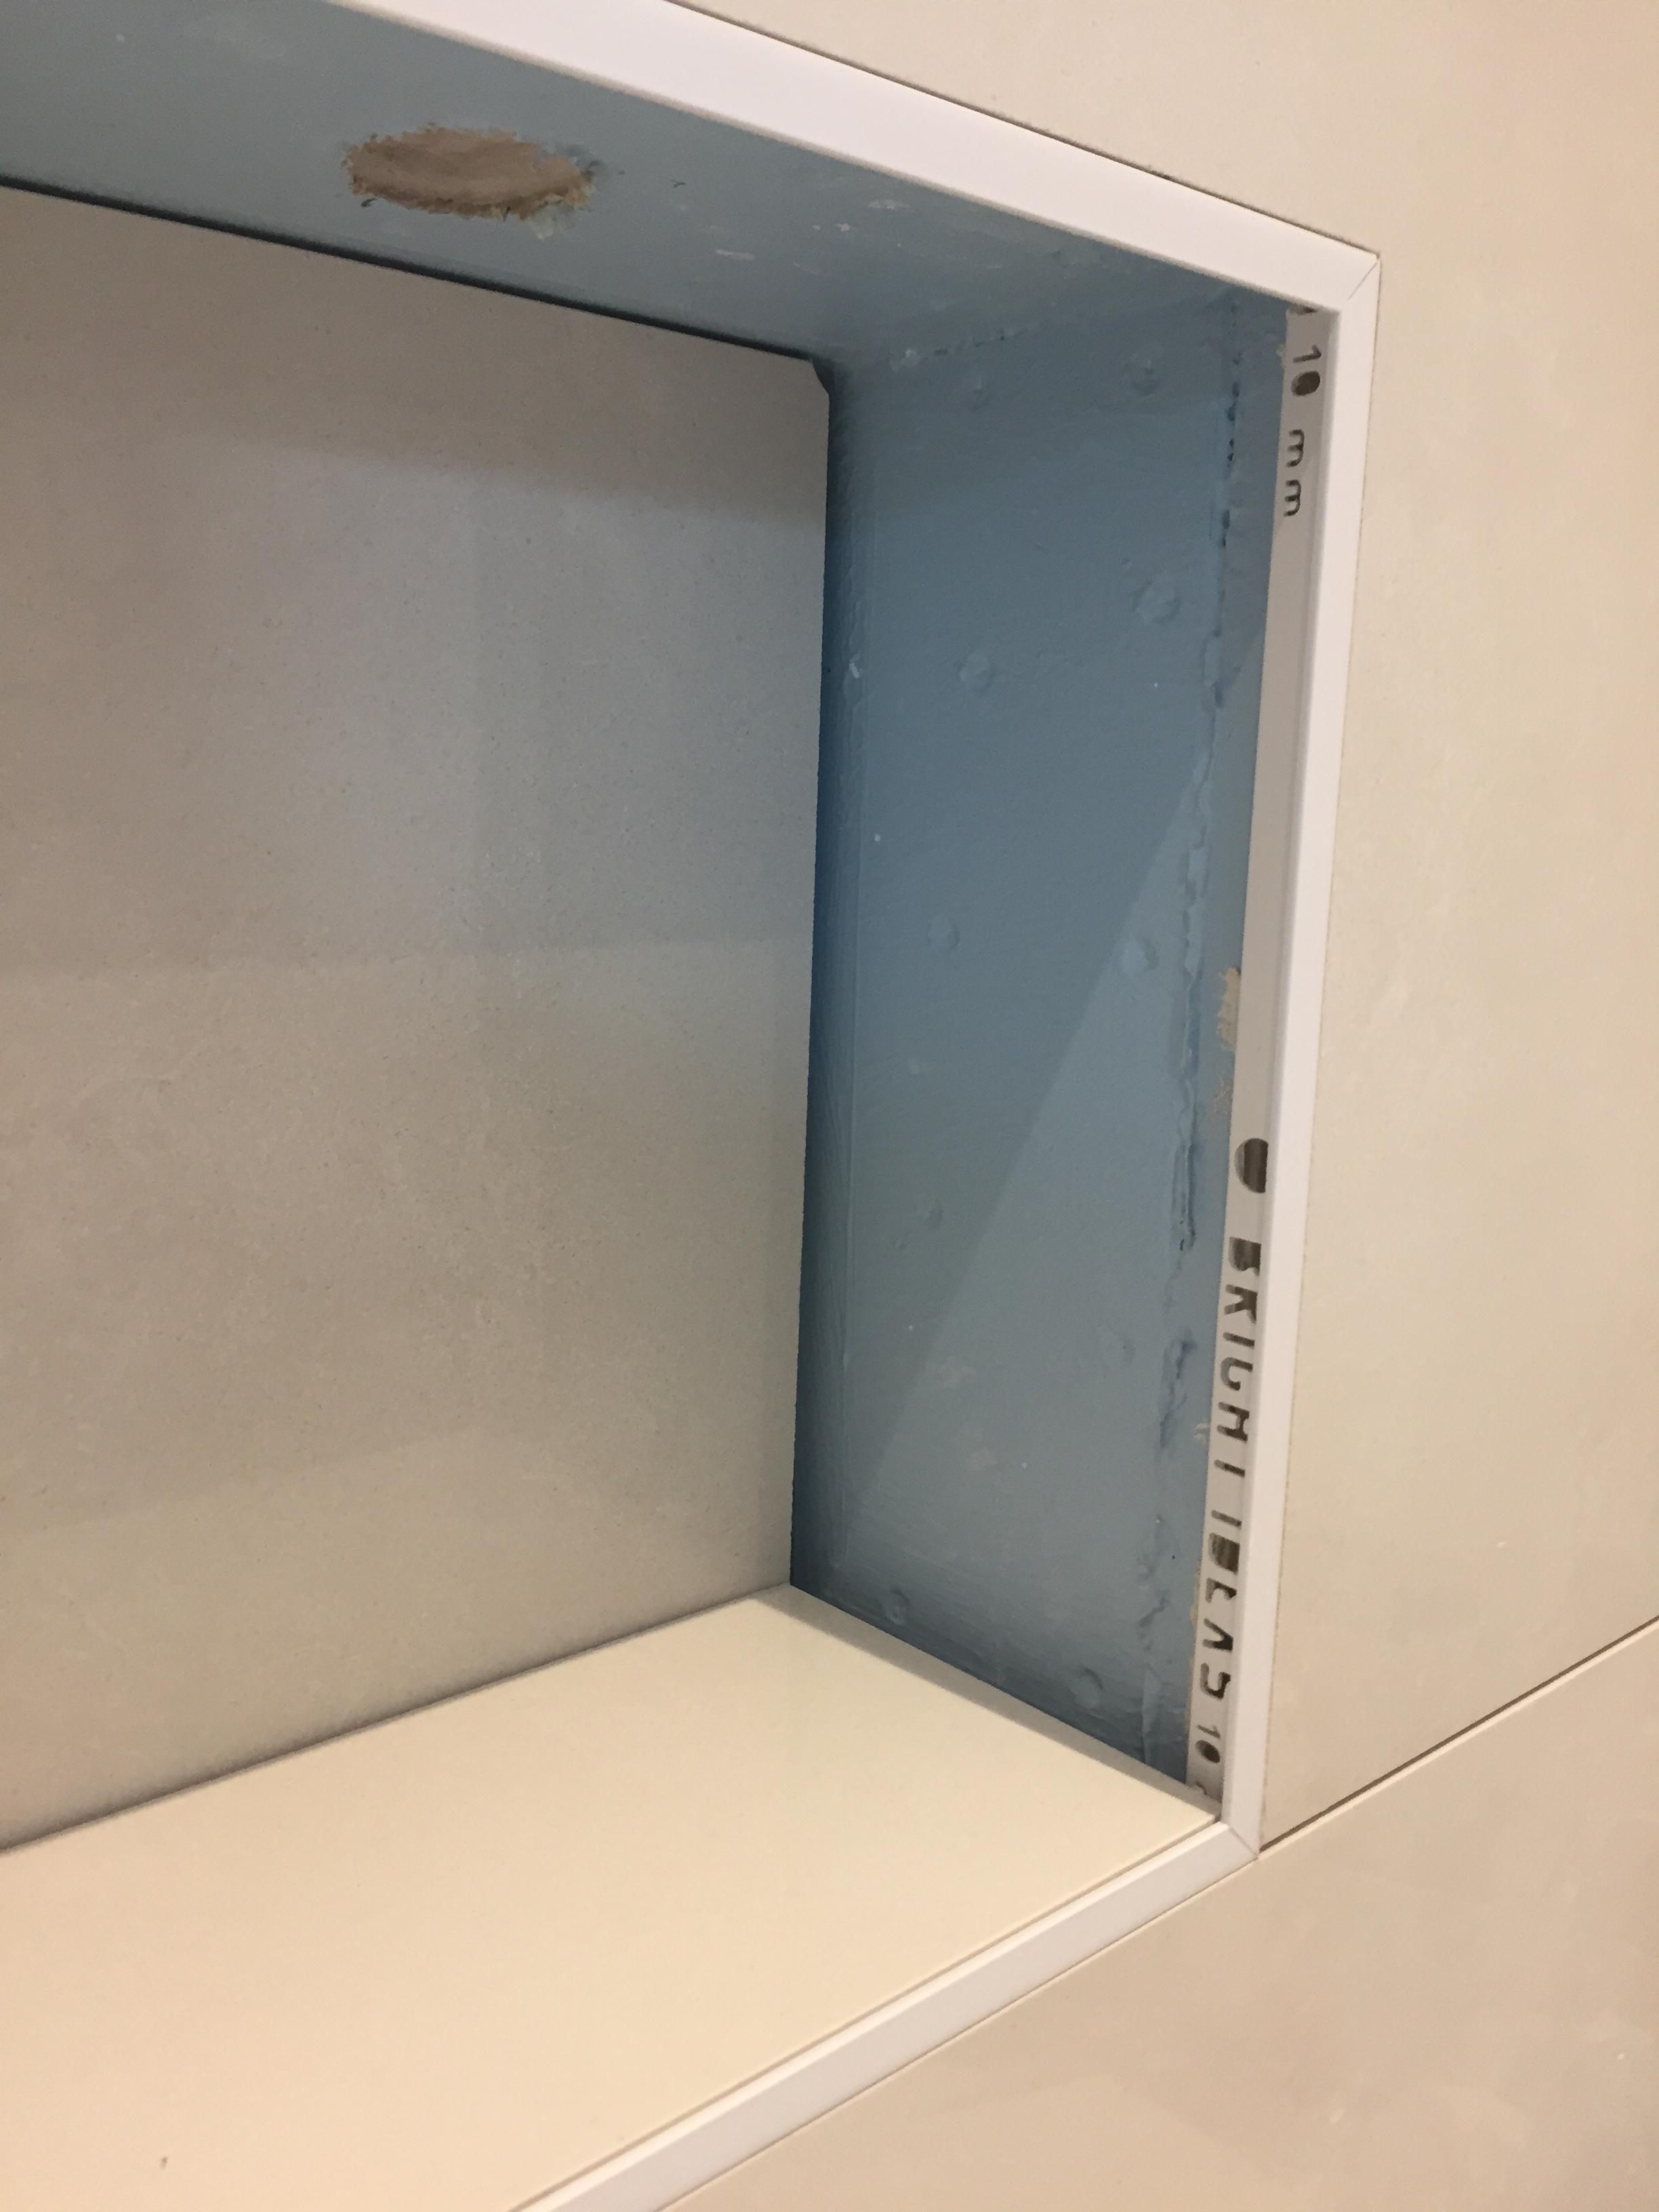
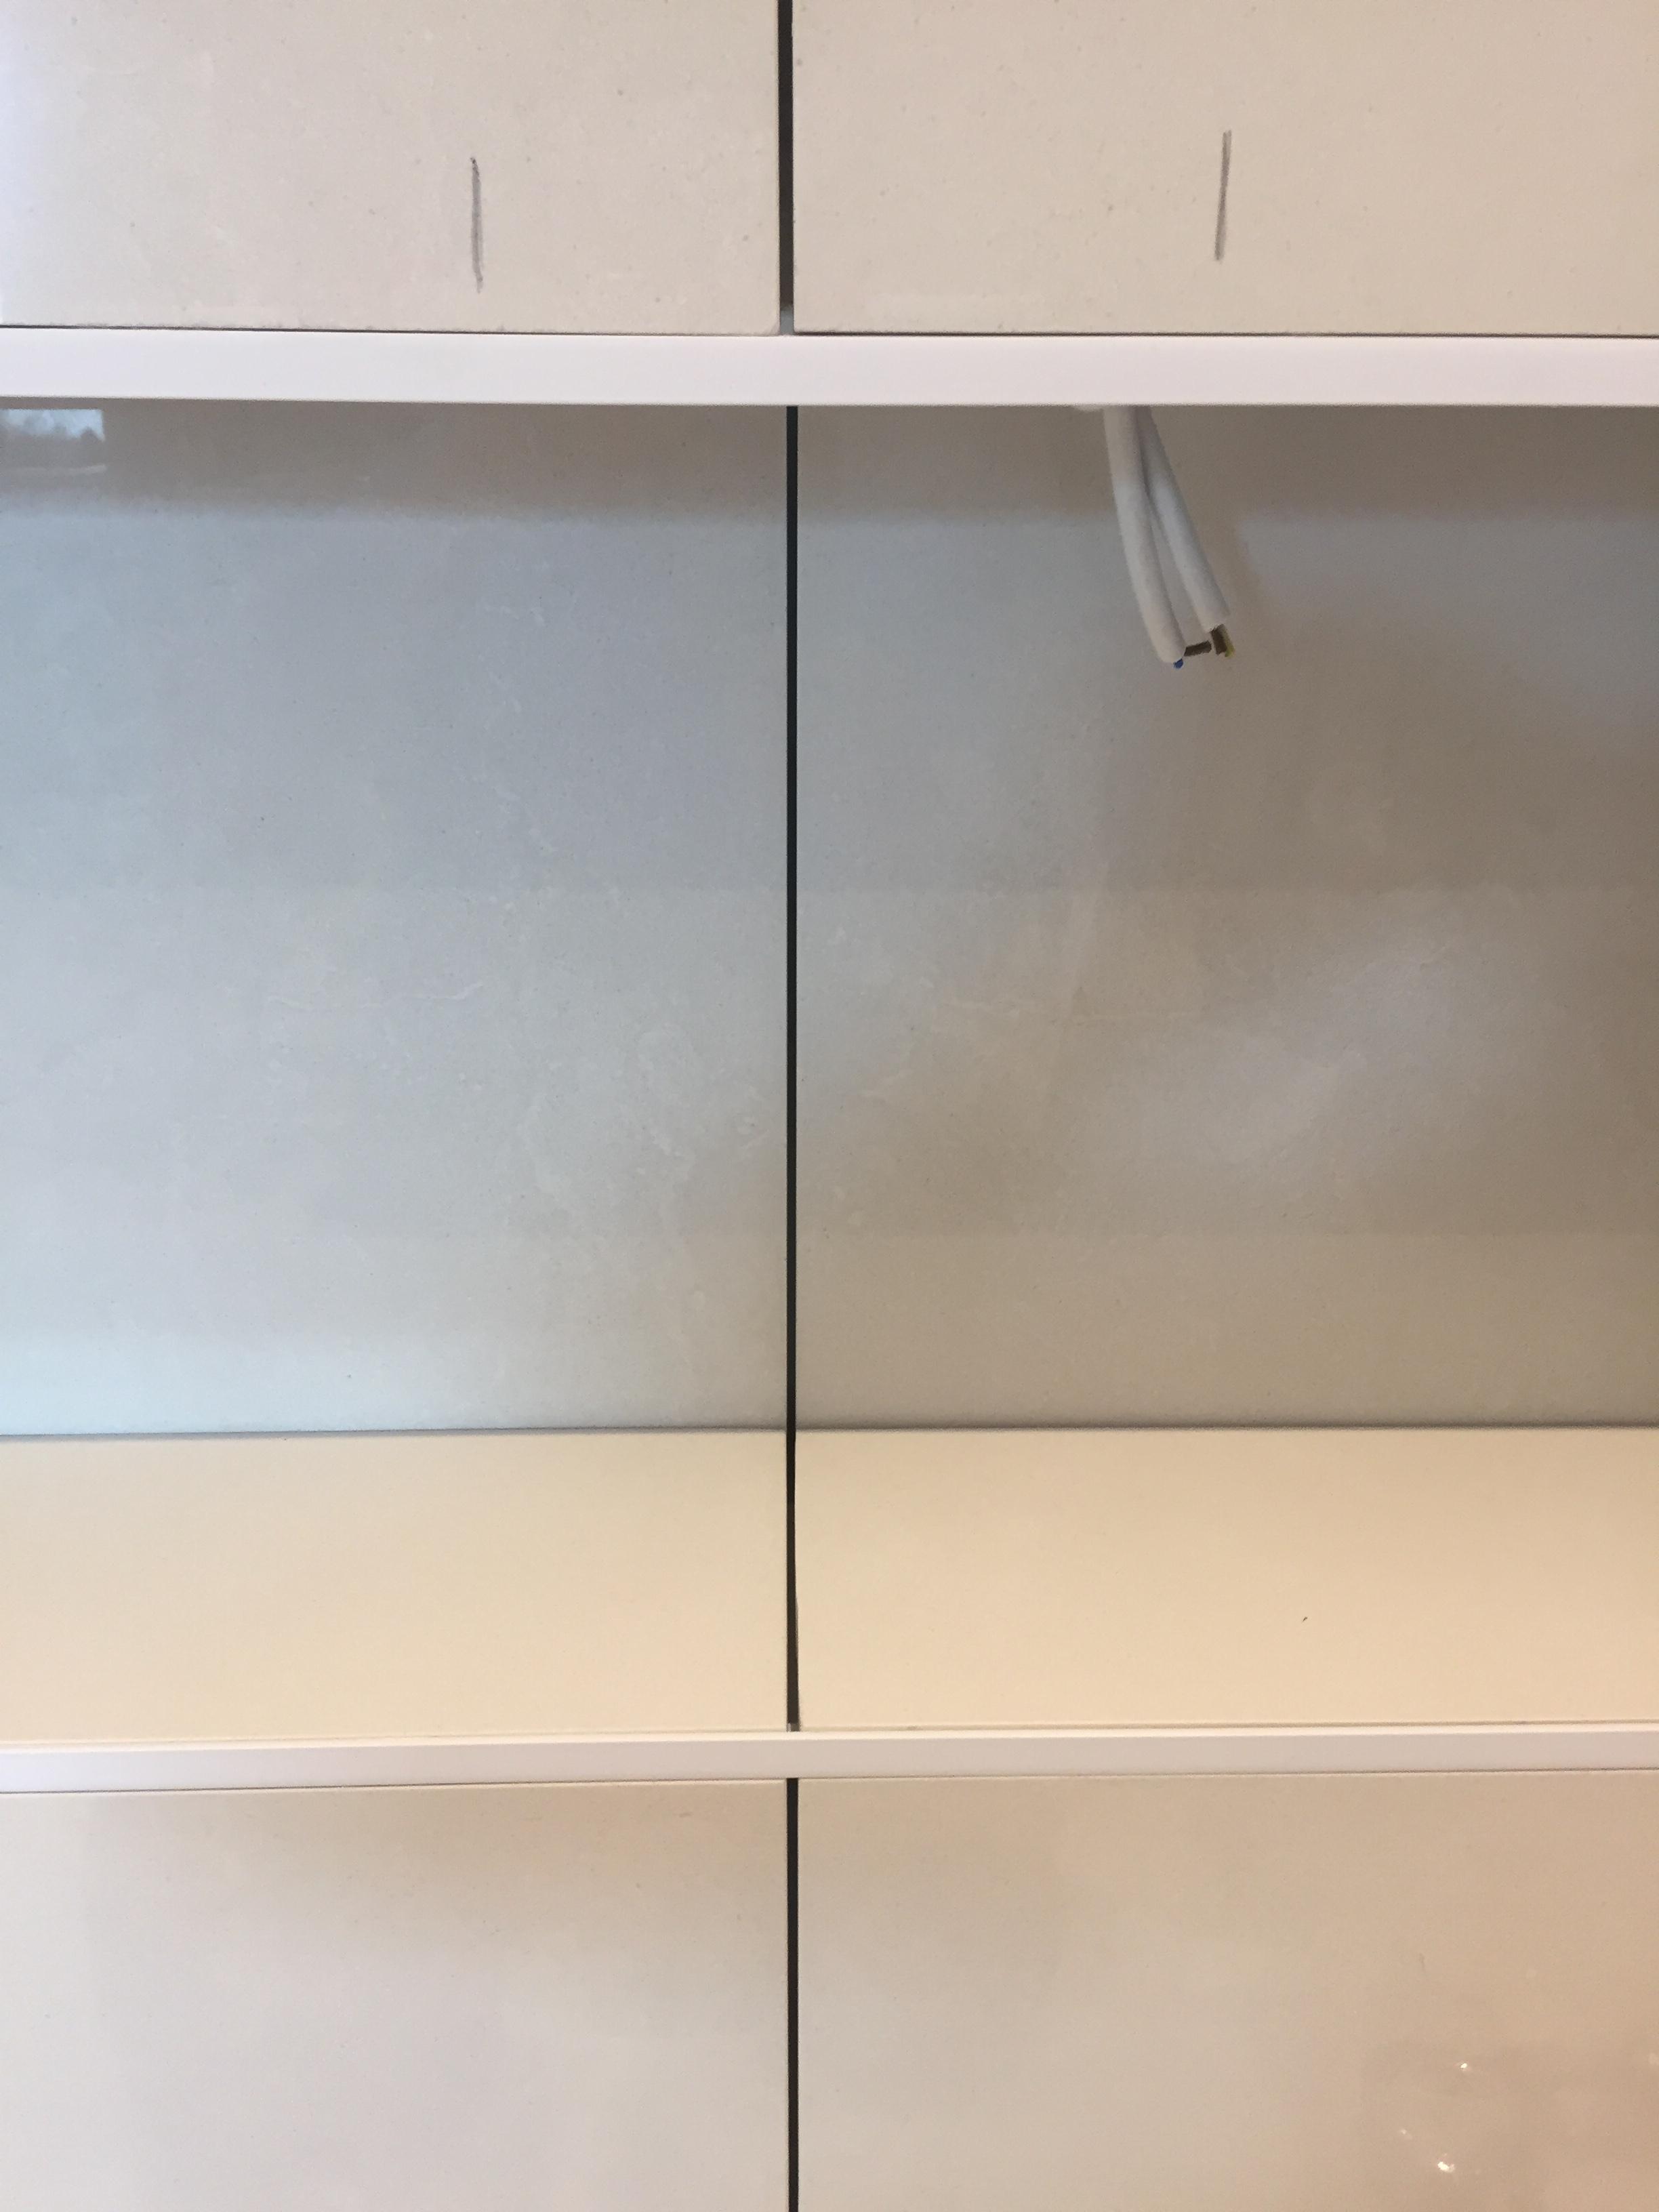
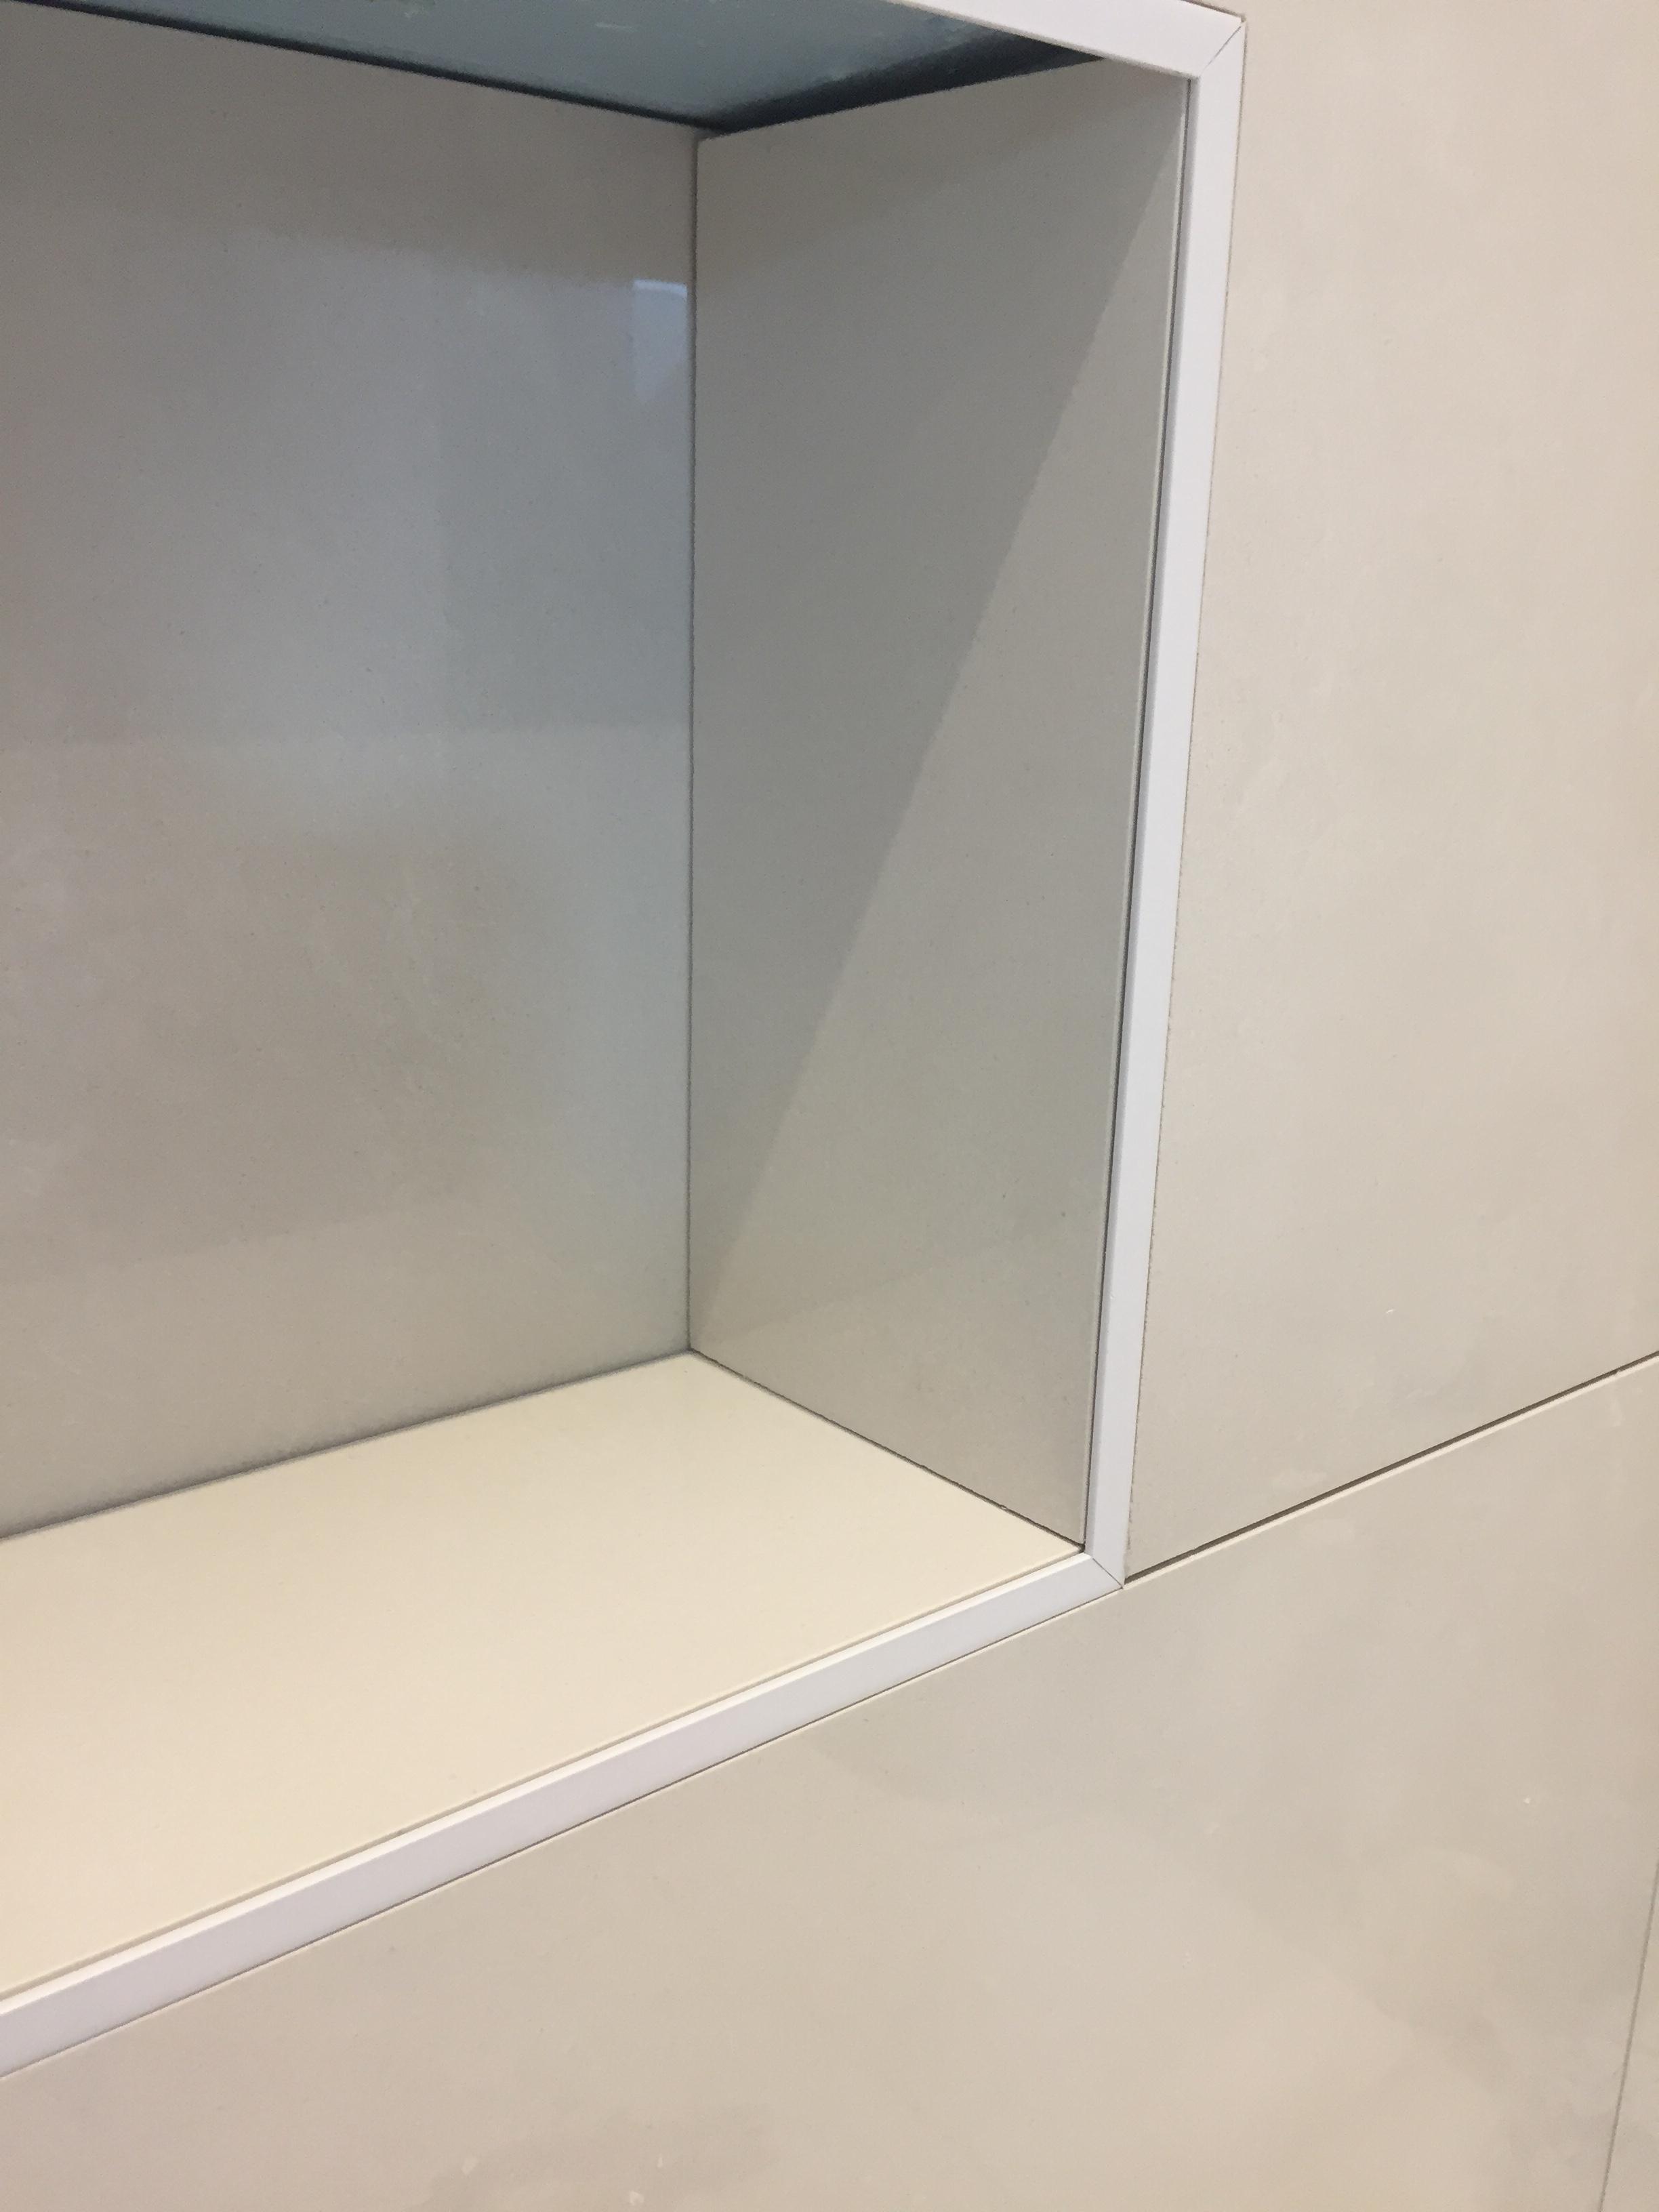
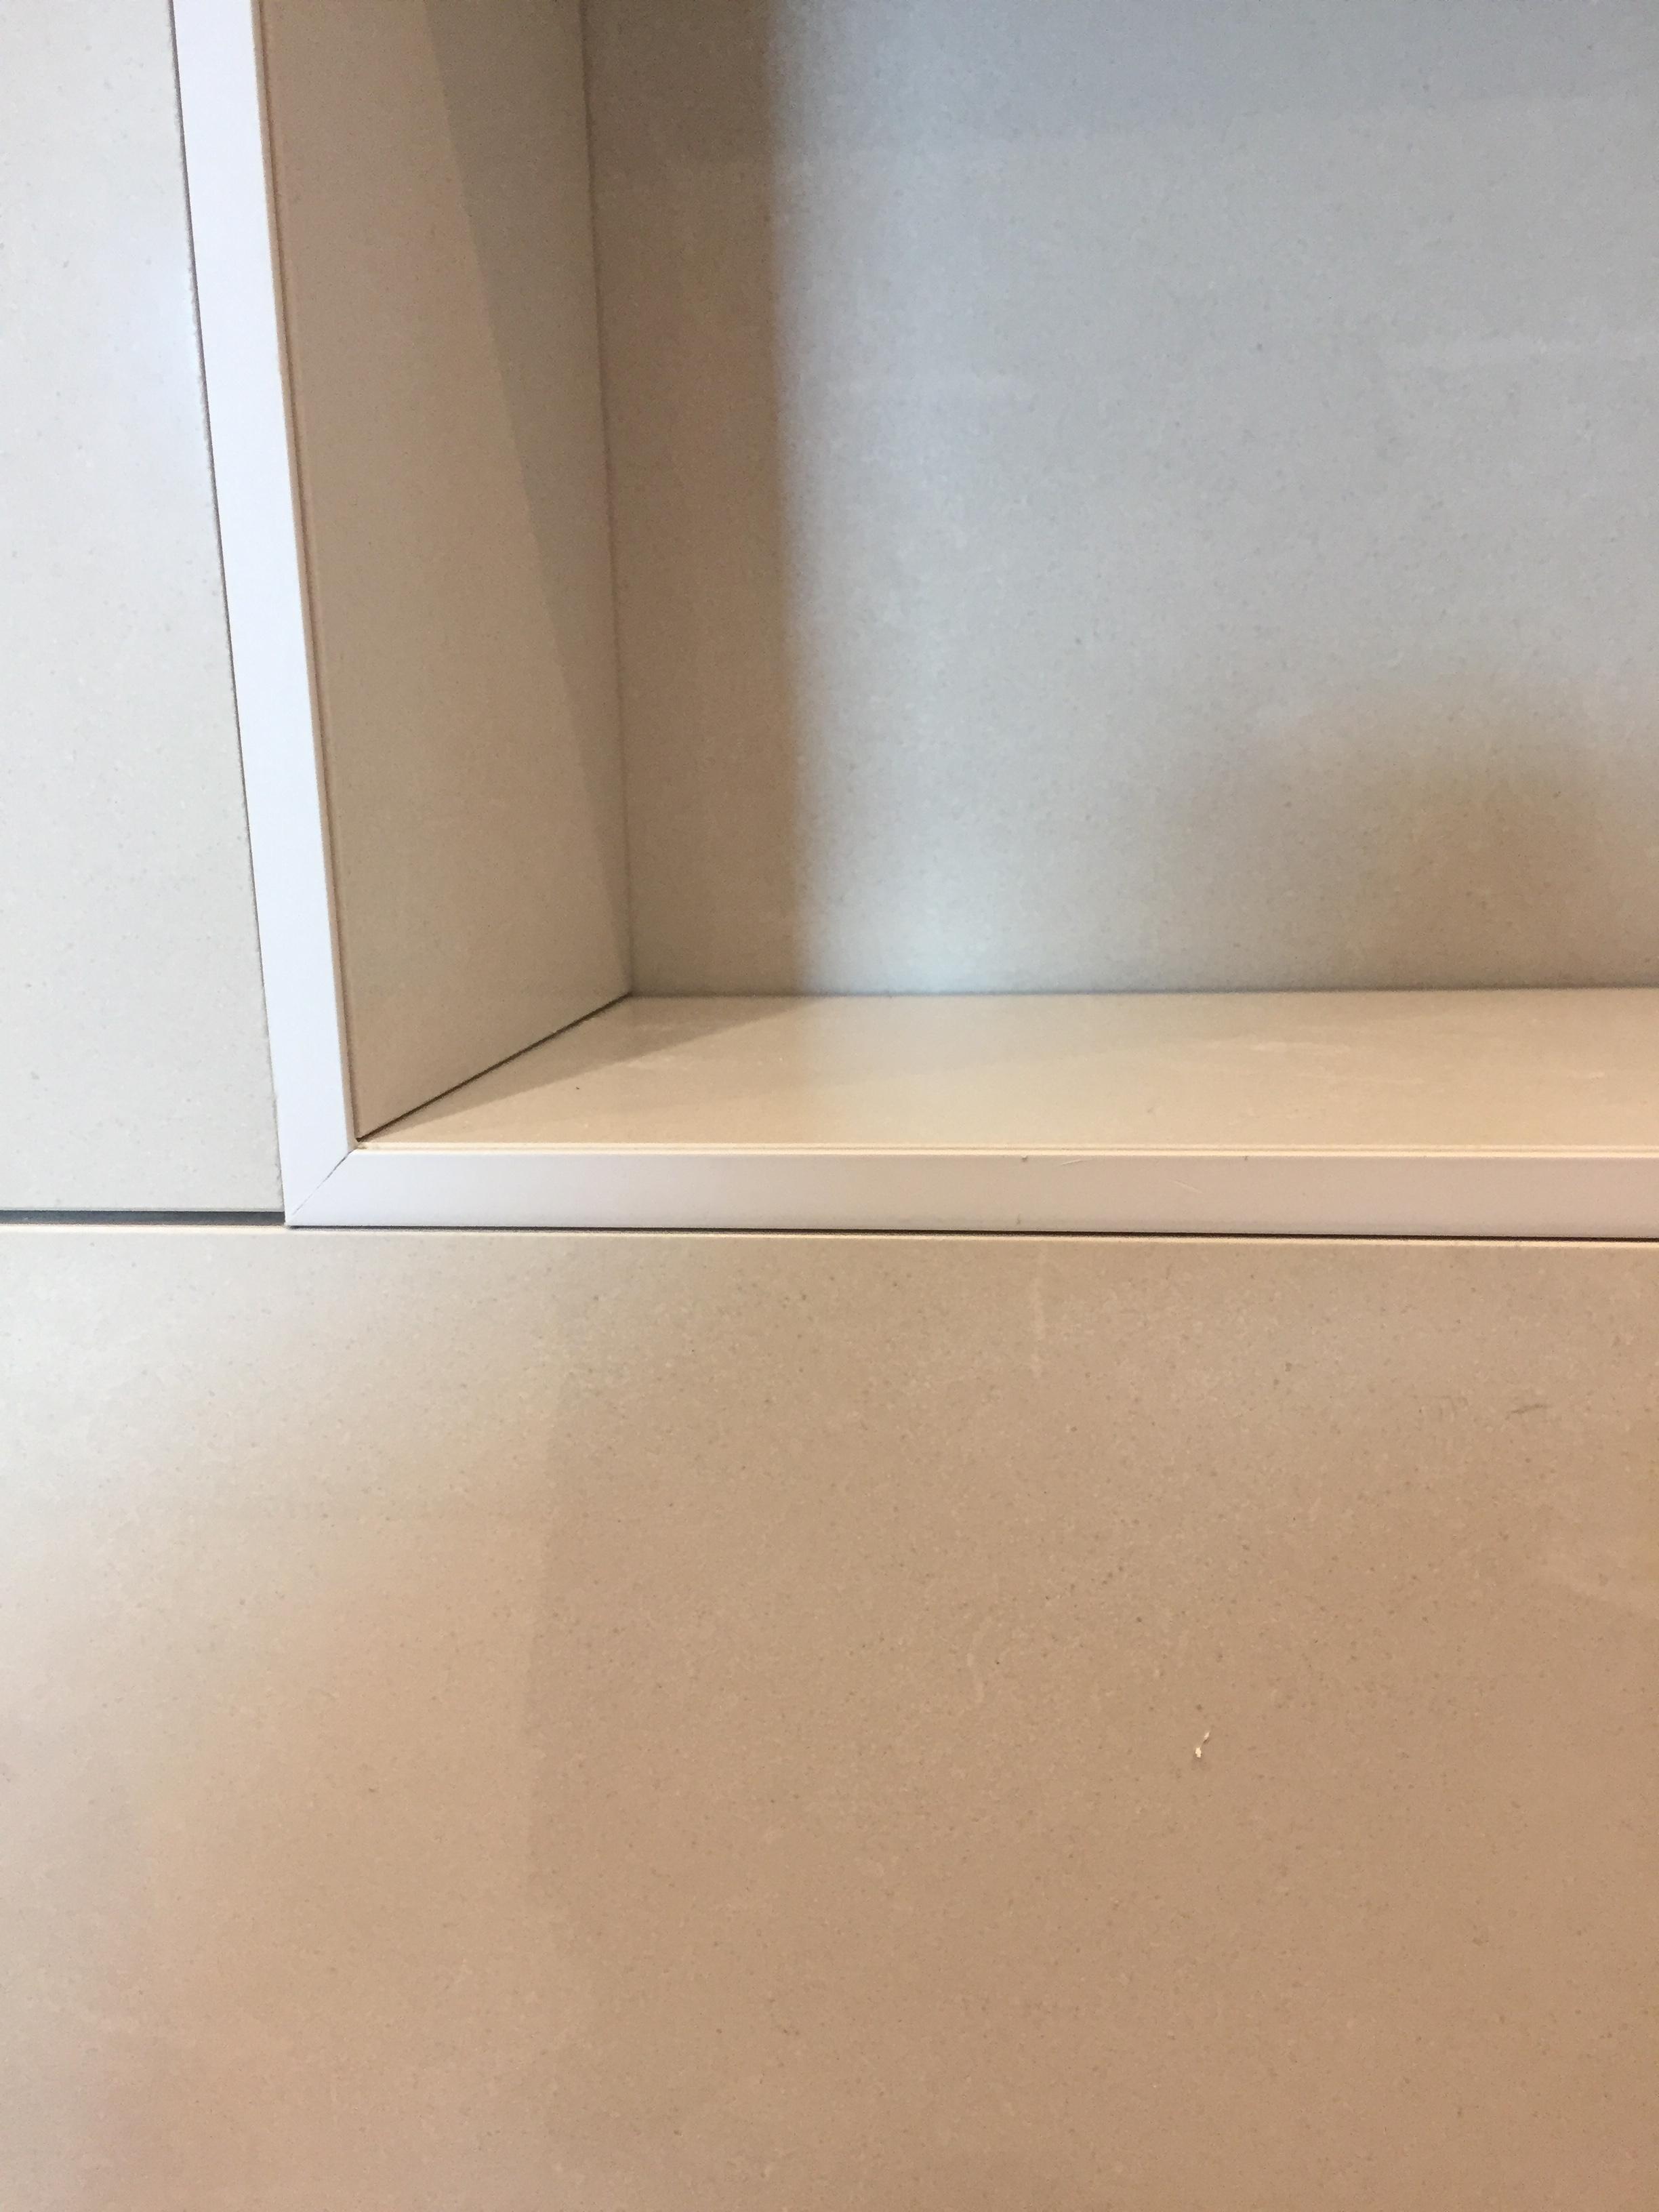
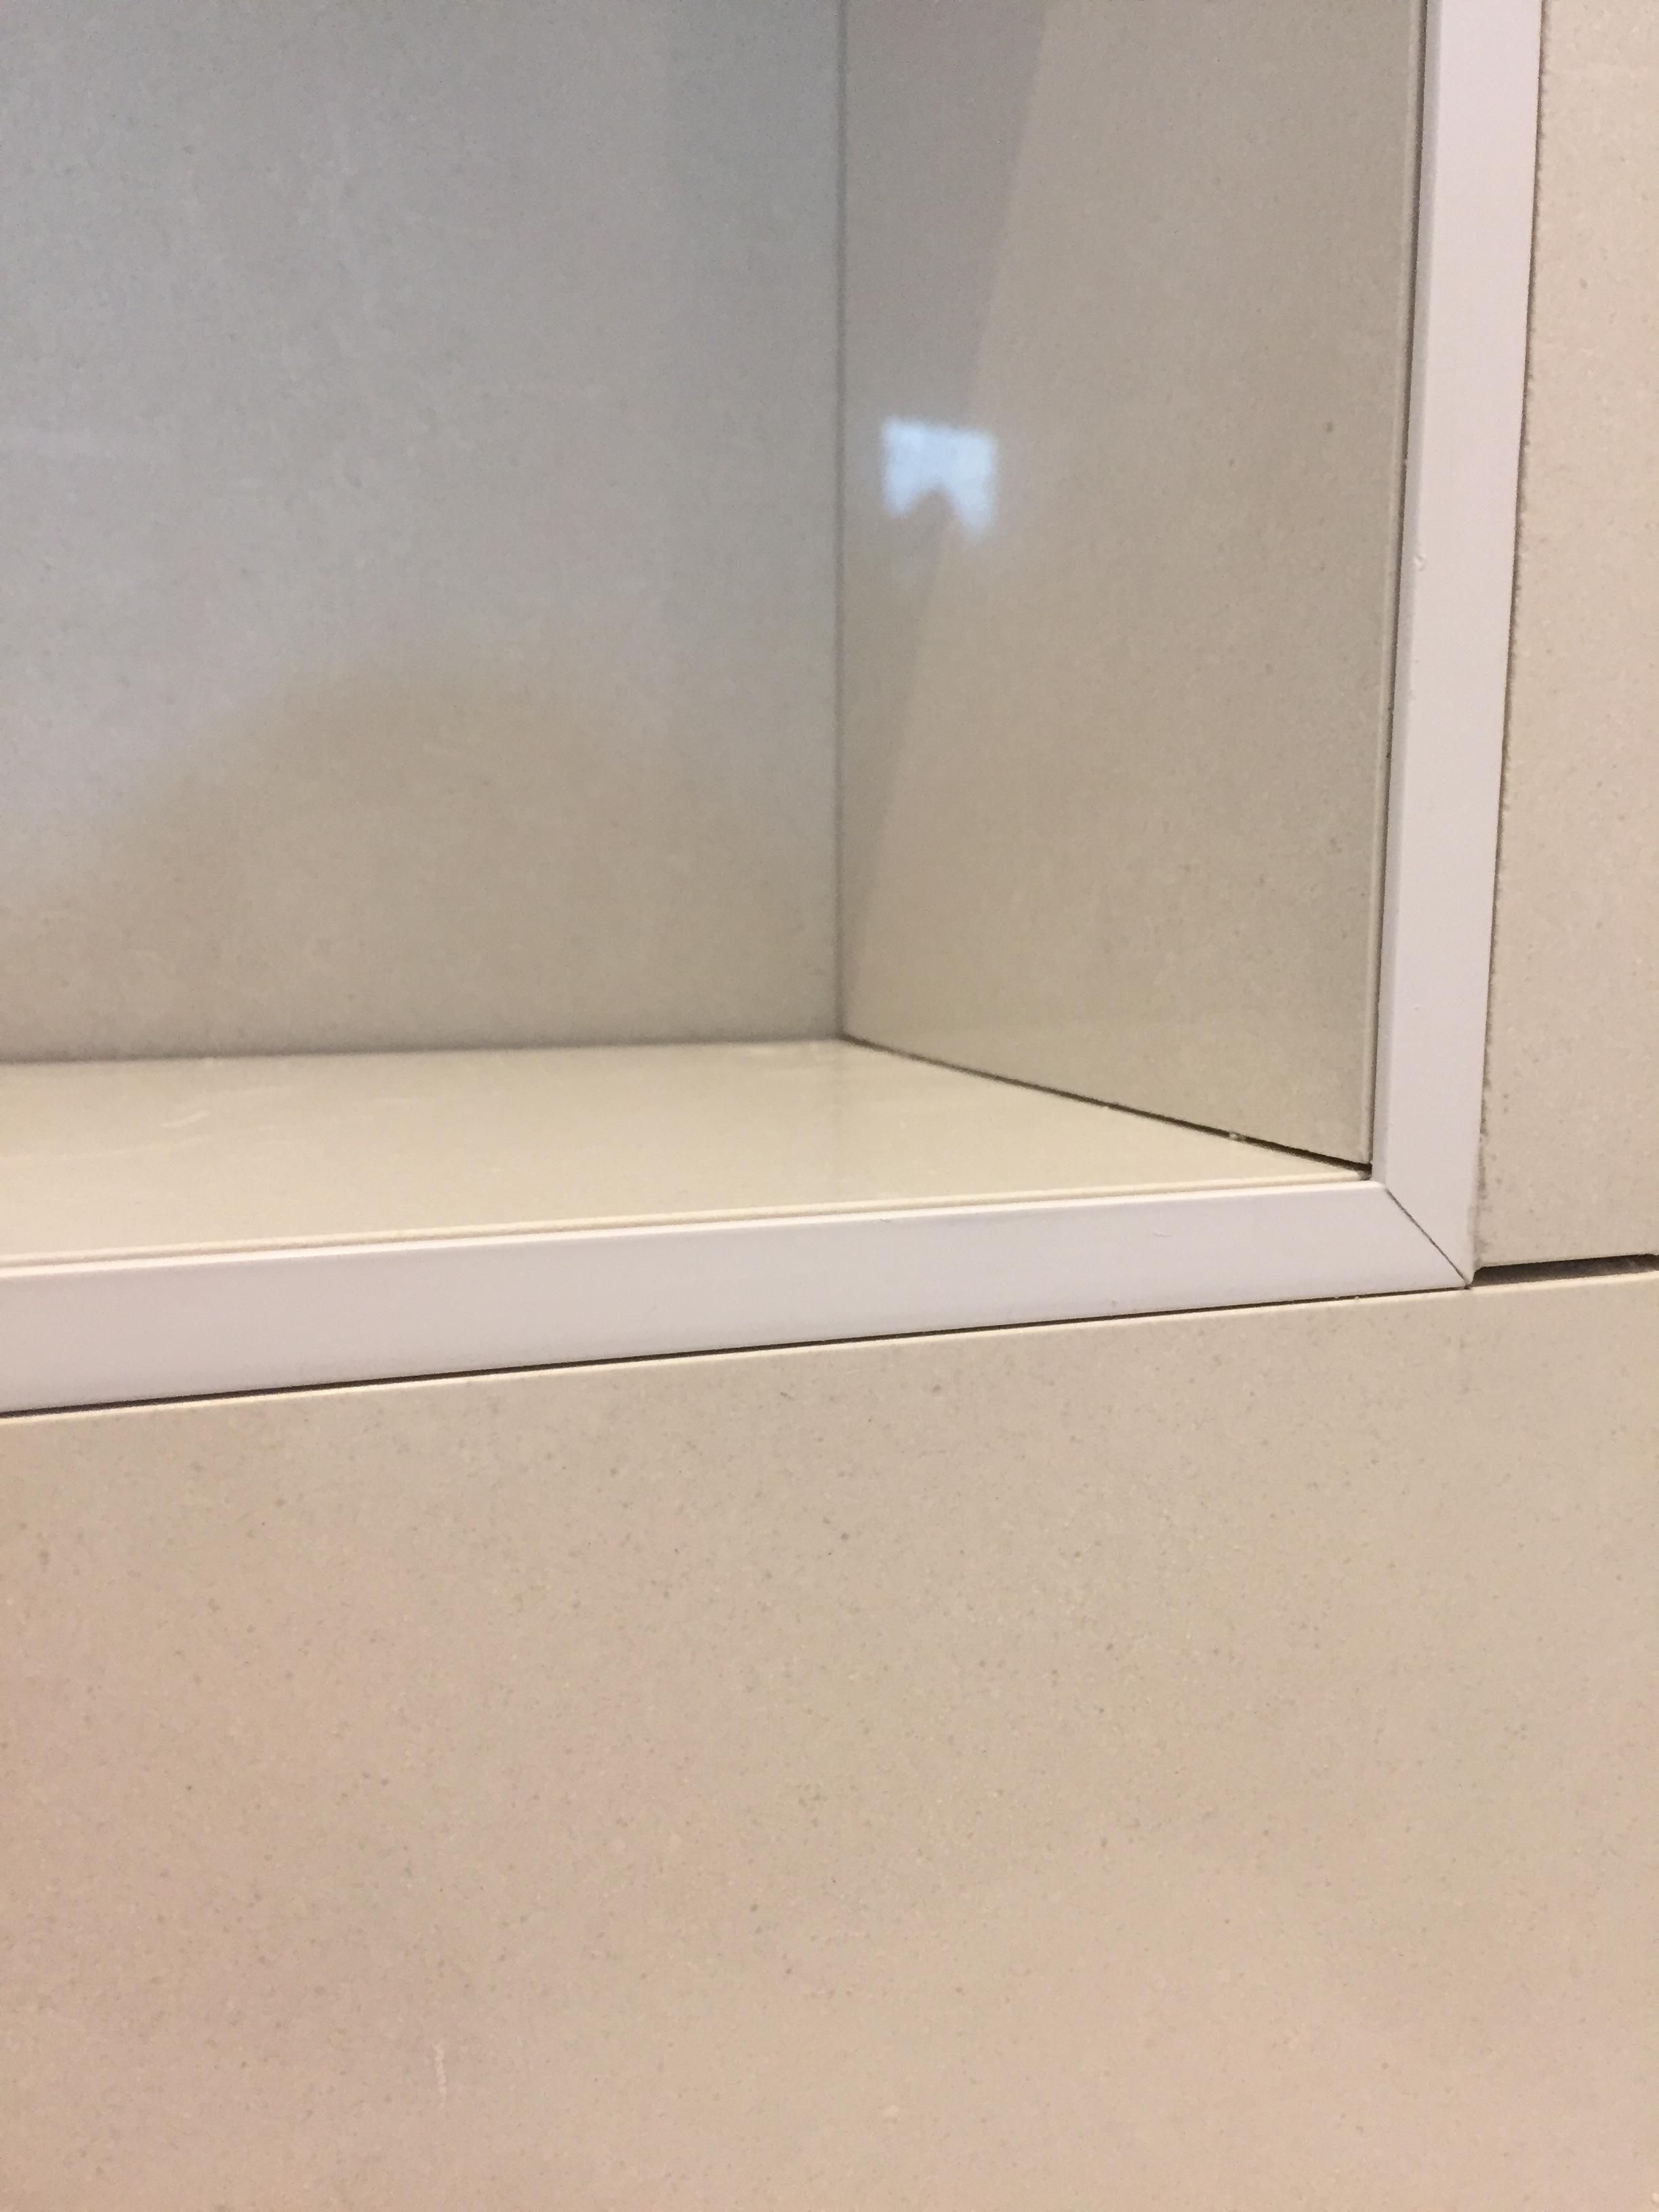
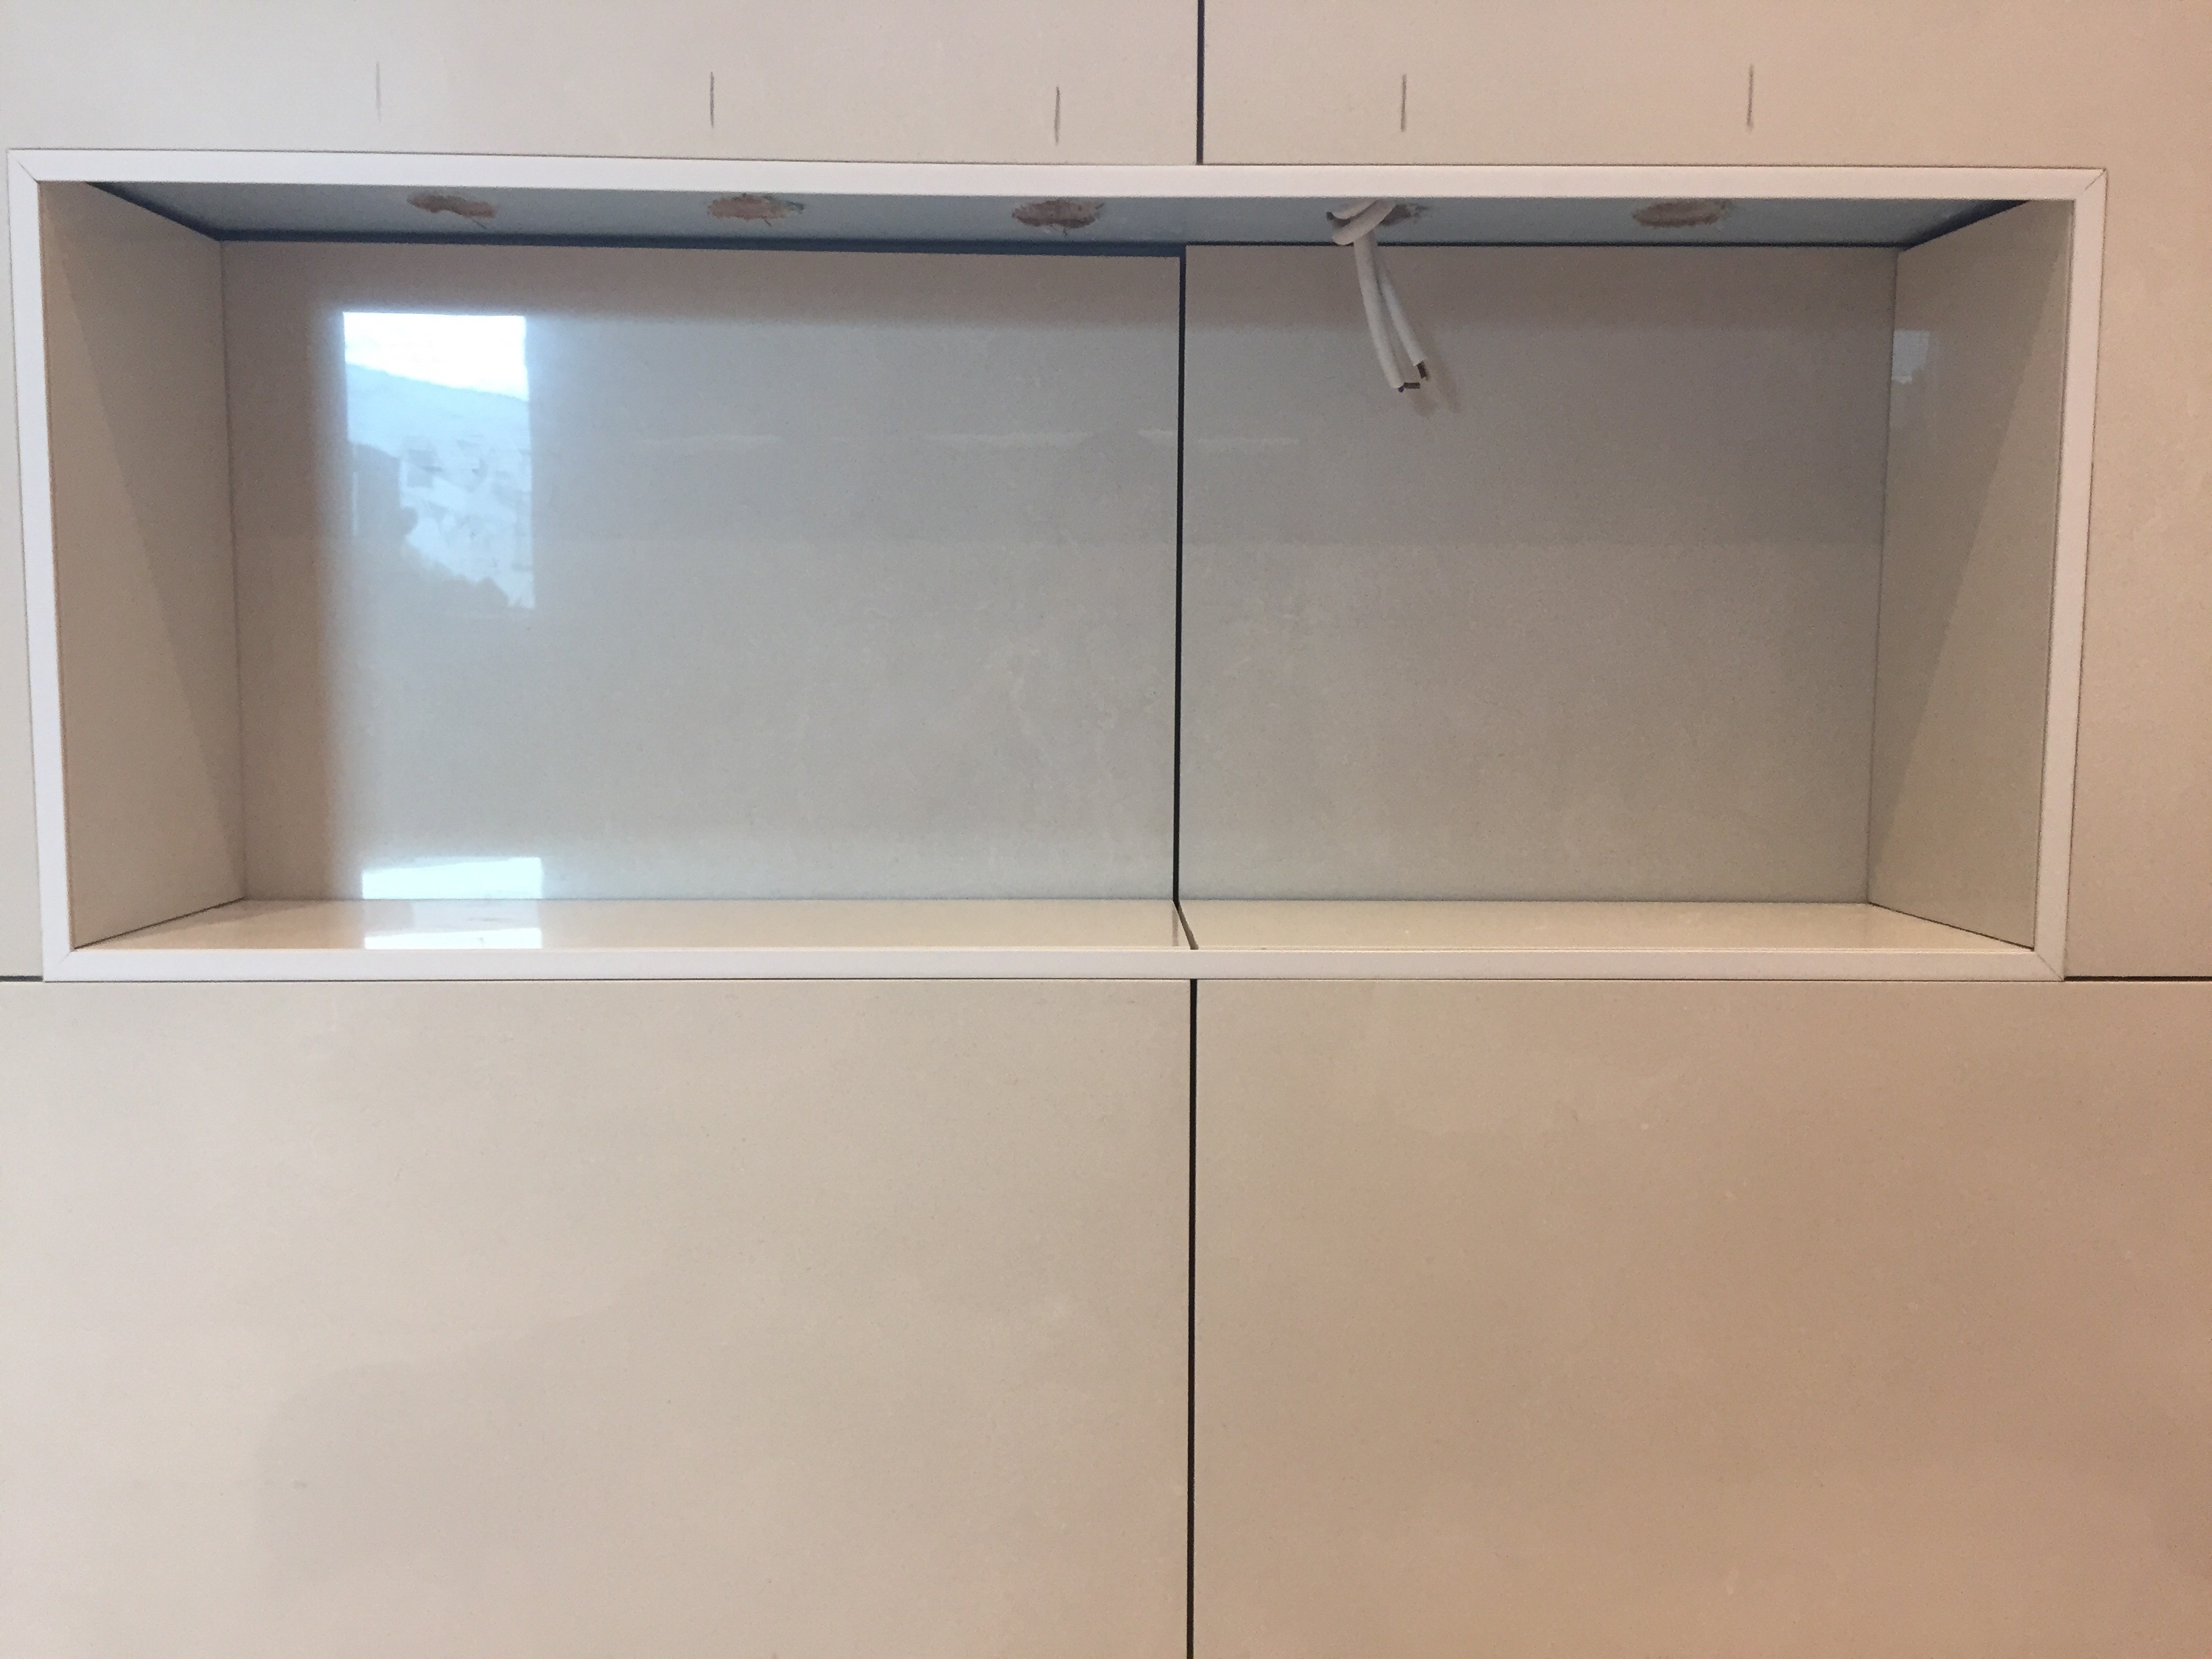
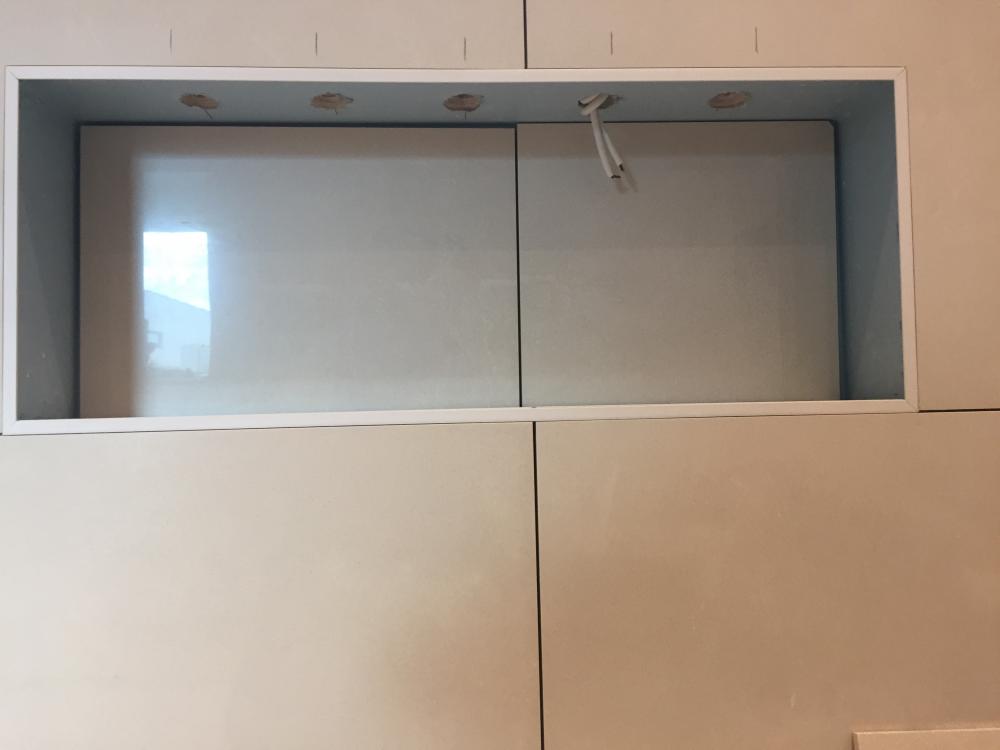
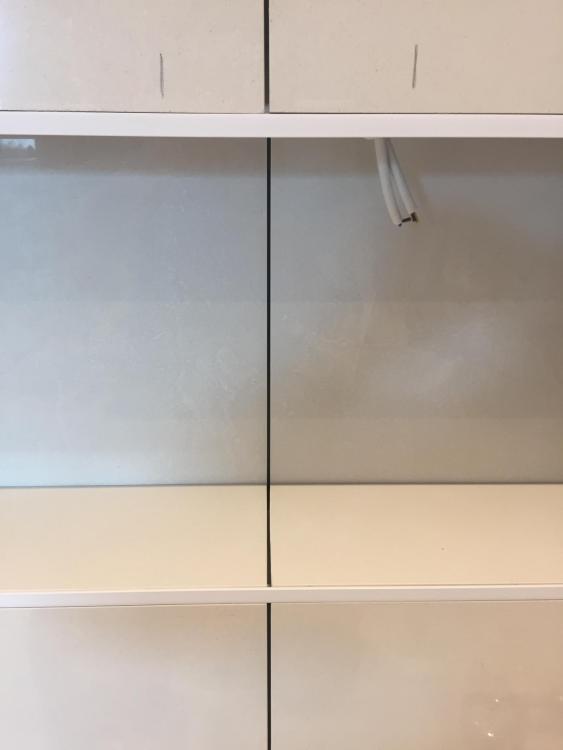
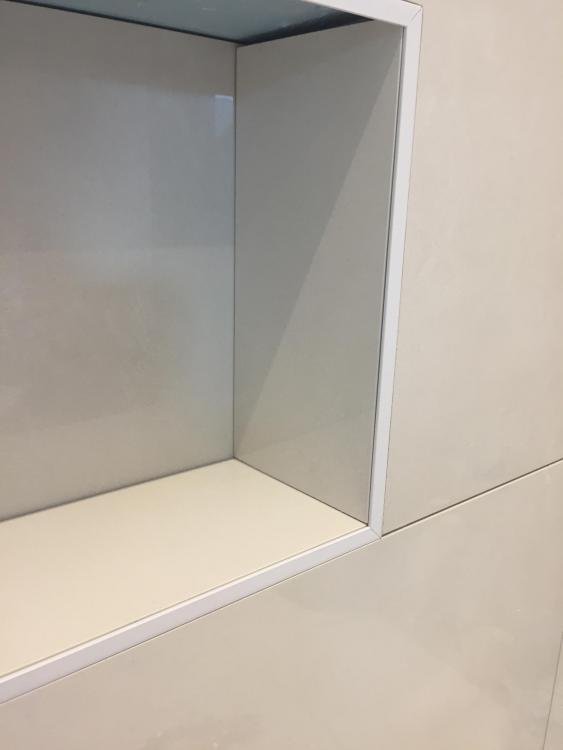
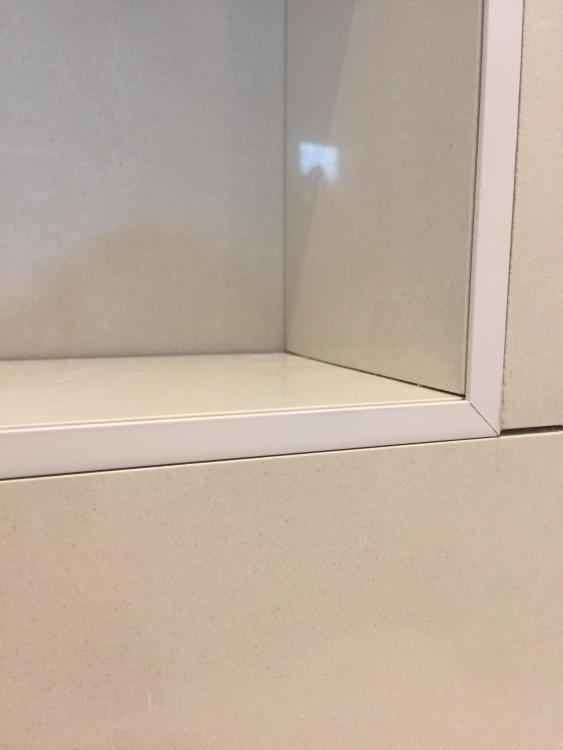
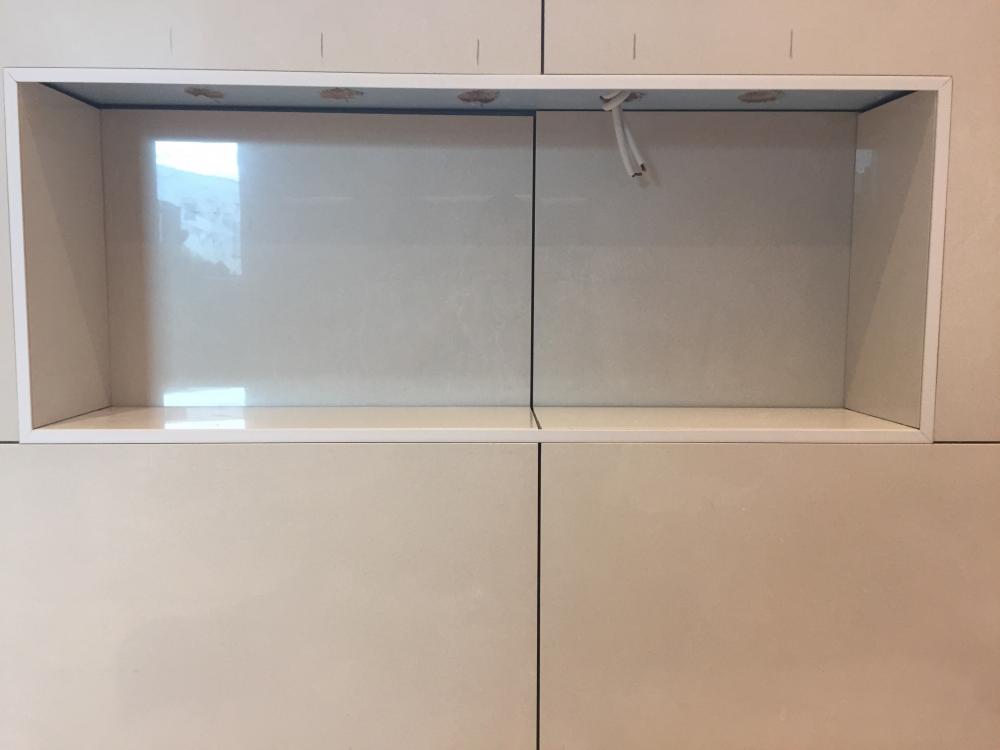
Frame the tiled wall first with your trim of choice. Then tile the back of the pocket, and don't let that set hard before you tile the bottom of it. You have to be able to slide the rear tiles left / right a little to match the grout line running through, so these need to be done in the same set and then left to go off. Cut outs for accent lighting already done and cable in ? Left and right hand cuts go in next. These pics show the trim detail a bit better. I glue these on with mitre bond and activator spray. Don't use to much glue, and keep it away from the face edge or it oozes out of the gap. Less is more. %


-
Bath Surround / Boxing In, and concealed pipework
Nickfromwales replied to Onoff's topic in Bathrooms, Ensuites & Wetrooms
Pointless doing the whole wall tbh, and more to cut out for the pockets. Lay that panel horizontally and do two full passes if it's long enough, and you'll have enough gap under the cistern to put some off cuts in as catchers to stitch the two boards together where they but together. Freeby ply looking good, and within budget . Ill post some pics later of pocket shelves WiP . -
Thanks. So further reinforces the fact that each installation should be unique to the occupants, ( with the ability to provide at least what they anticipate using at the leanest of times ). Quite different advising on plumbing for self builders TBH, compared to Mr. Joe Public who relies on you to take the reigns and design a system that will cope with their needs and pretty much look after itself.
-
The guys at Telford knew that it was low temp preheat and I told them a hysteresis of 30-35oC was to be assumed. In the words of Forest Gump, "im not a smart man", but my gut instinct told me they were over cautious in their response. Most big jobs I've done ( 14 bed student digs, with 9 rooms ensuite and 3 shared full bathrooms ) I've designed myself from my 'sixth sense'. They've all worked either well, very well or too bloody well, but never been a fail, so when I designed a pre-heated system for use in a whopper of a house I decided on a 500L TS for pre heat via a coil, and another 500ltr UVC for DHW. When questioning myself about the size of the preheat tank, as in can it be any smaller, I contacted Telford. @JSHarris. How do you think your setup would cope with a family of 5 instead of you and SWMBO, if you don't mind me getting some feedback on the hypothetical ? Ta.
-
Yes that's the snippet I'm referring to. Just the tech guys were convinced, and could back up the fact that your earlier proposed setup would be the better option purely based on the remit of extracting heat energy in reasonable quantities, e.g. when DHW is being drawn at high volume. Telford weren't convinced about the yield from the smaller TS / DHW coil, as I asked them about an install for a household with reasonable / high rates of DHW consumption. It fear your DHW consumption is far less than the figures I was proposing and wonder how your existing setup, facts now in order thank you , would cope with a couple of teenage girls in the mix. The angle I approached Telford with was "TS plus coil or TS plus PHE" with which they replied with the arguments aforementioned, eg a coil would need to be much bigger, and in a bigger ( min 300L ) TS to be of practical / economical benefit. Just to clarify the coil side of things, do you preheat via a PHE now?
-
22mm TMV Sorry to be a bit late to this one, but if using UFH then you need s TMV as a failsafe in case your thermostat goes wonky and you get full range heat going to the UFH. That can be dangerous, and cause a lot of damage to flooring. If using the buffer for DHW preheat, I would not recommend going for a TS with an internal DHW coil. I know @JSHarris says he would go that route if doing this over again, but I had a very long chat with the tech guys at Telford who said that with a low temp ( for good CoP ) the yield from an integral DHW coil drops off quite significantly. They went on to say that the coils are rated to provide good rates of heat exchange when the temp is above ~55oC and at its best at >65-70oC. When I asked what size TS and coil would give eveninical yield at low temp they suggested no less than a 300L TS with the biggest ( 46kw iirc ) coil that will fit into it. Only then is it really worth doing preheat that way. They went on to say using PHE's as @JSHarris has now would mean a much smaller TS / buffer could be used as they are far better at extracting heat from a low temp source than a coil would ever be. The killer is the drop in set / target temp, but another thing to remember is you can have pv divert to this TS as well as your UVC so maybe better to go bigger with less losses, and you'll need the TMVs to cap the output / flow temp according to how hot the immersion gets it. .
-
Sometimes nightmares are real.
Nickfromwales replied to ToughButterCup's topic in General Self Build & DIY Discussion
I'll keep my eyes peeled for one ? -
Sometimes nightmares are real.
Nickfromwales replied to ToughButterCup's topic in General Self Build & DIY Discussion
Do you know his whereabouts at 1:50 am this morning ? ? -
Sometimes nightmares are real.
Nickfromwales replied to ToughButterCup's topic in General Self Build & DIY Discussion
With a chain being as strong as its weakest link, its not really worth the risk is it. "Head down, arse up" it is then -
Sometimes nightmares are real.
Nickfromwales replied to ToughButterCup's topic in General Self Build & DIY Discussion
In the grand scheme of things, a lot worse could have happened. The glass is always half FULL ok ?? How many of the blocks are salvageable? On the brighter side you now get a bonus visit to sunny ( ? ) Wales ? Dust yourself off and scribble down a new plan of action, engage and push forward. We don't do problems, we do solutions. "Adapt and overcome". Focker, out. -
Forgot to ask, is your build designed for the load? Eg extra big beams at 3-400mm centres? I was stuck with 600mm here. ?
-
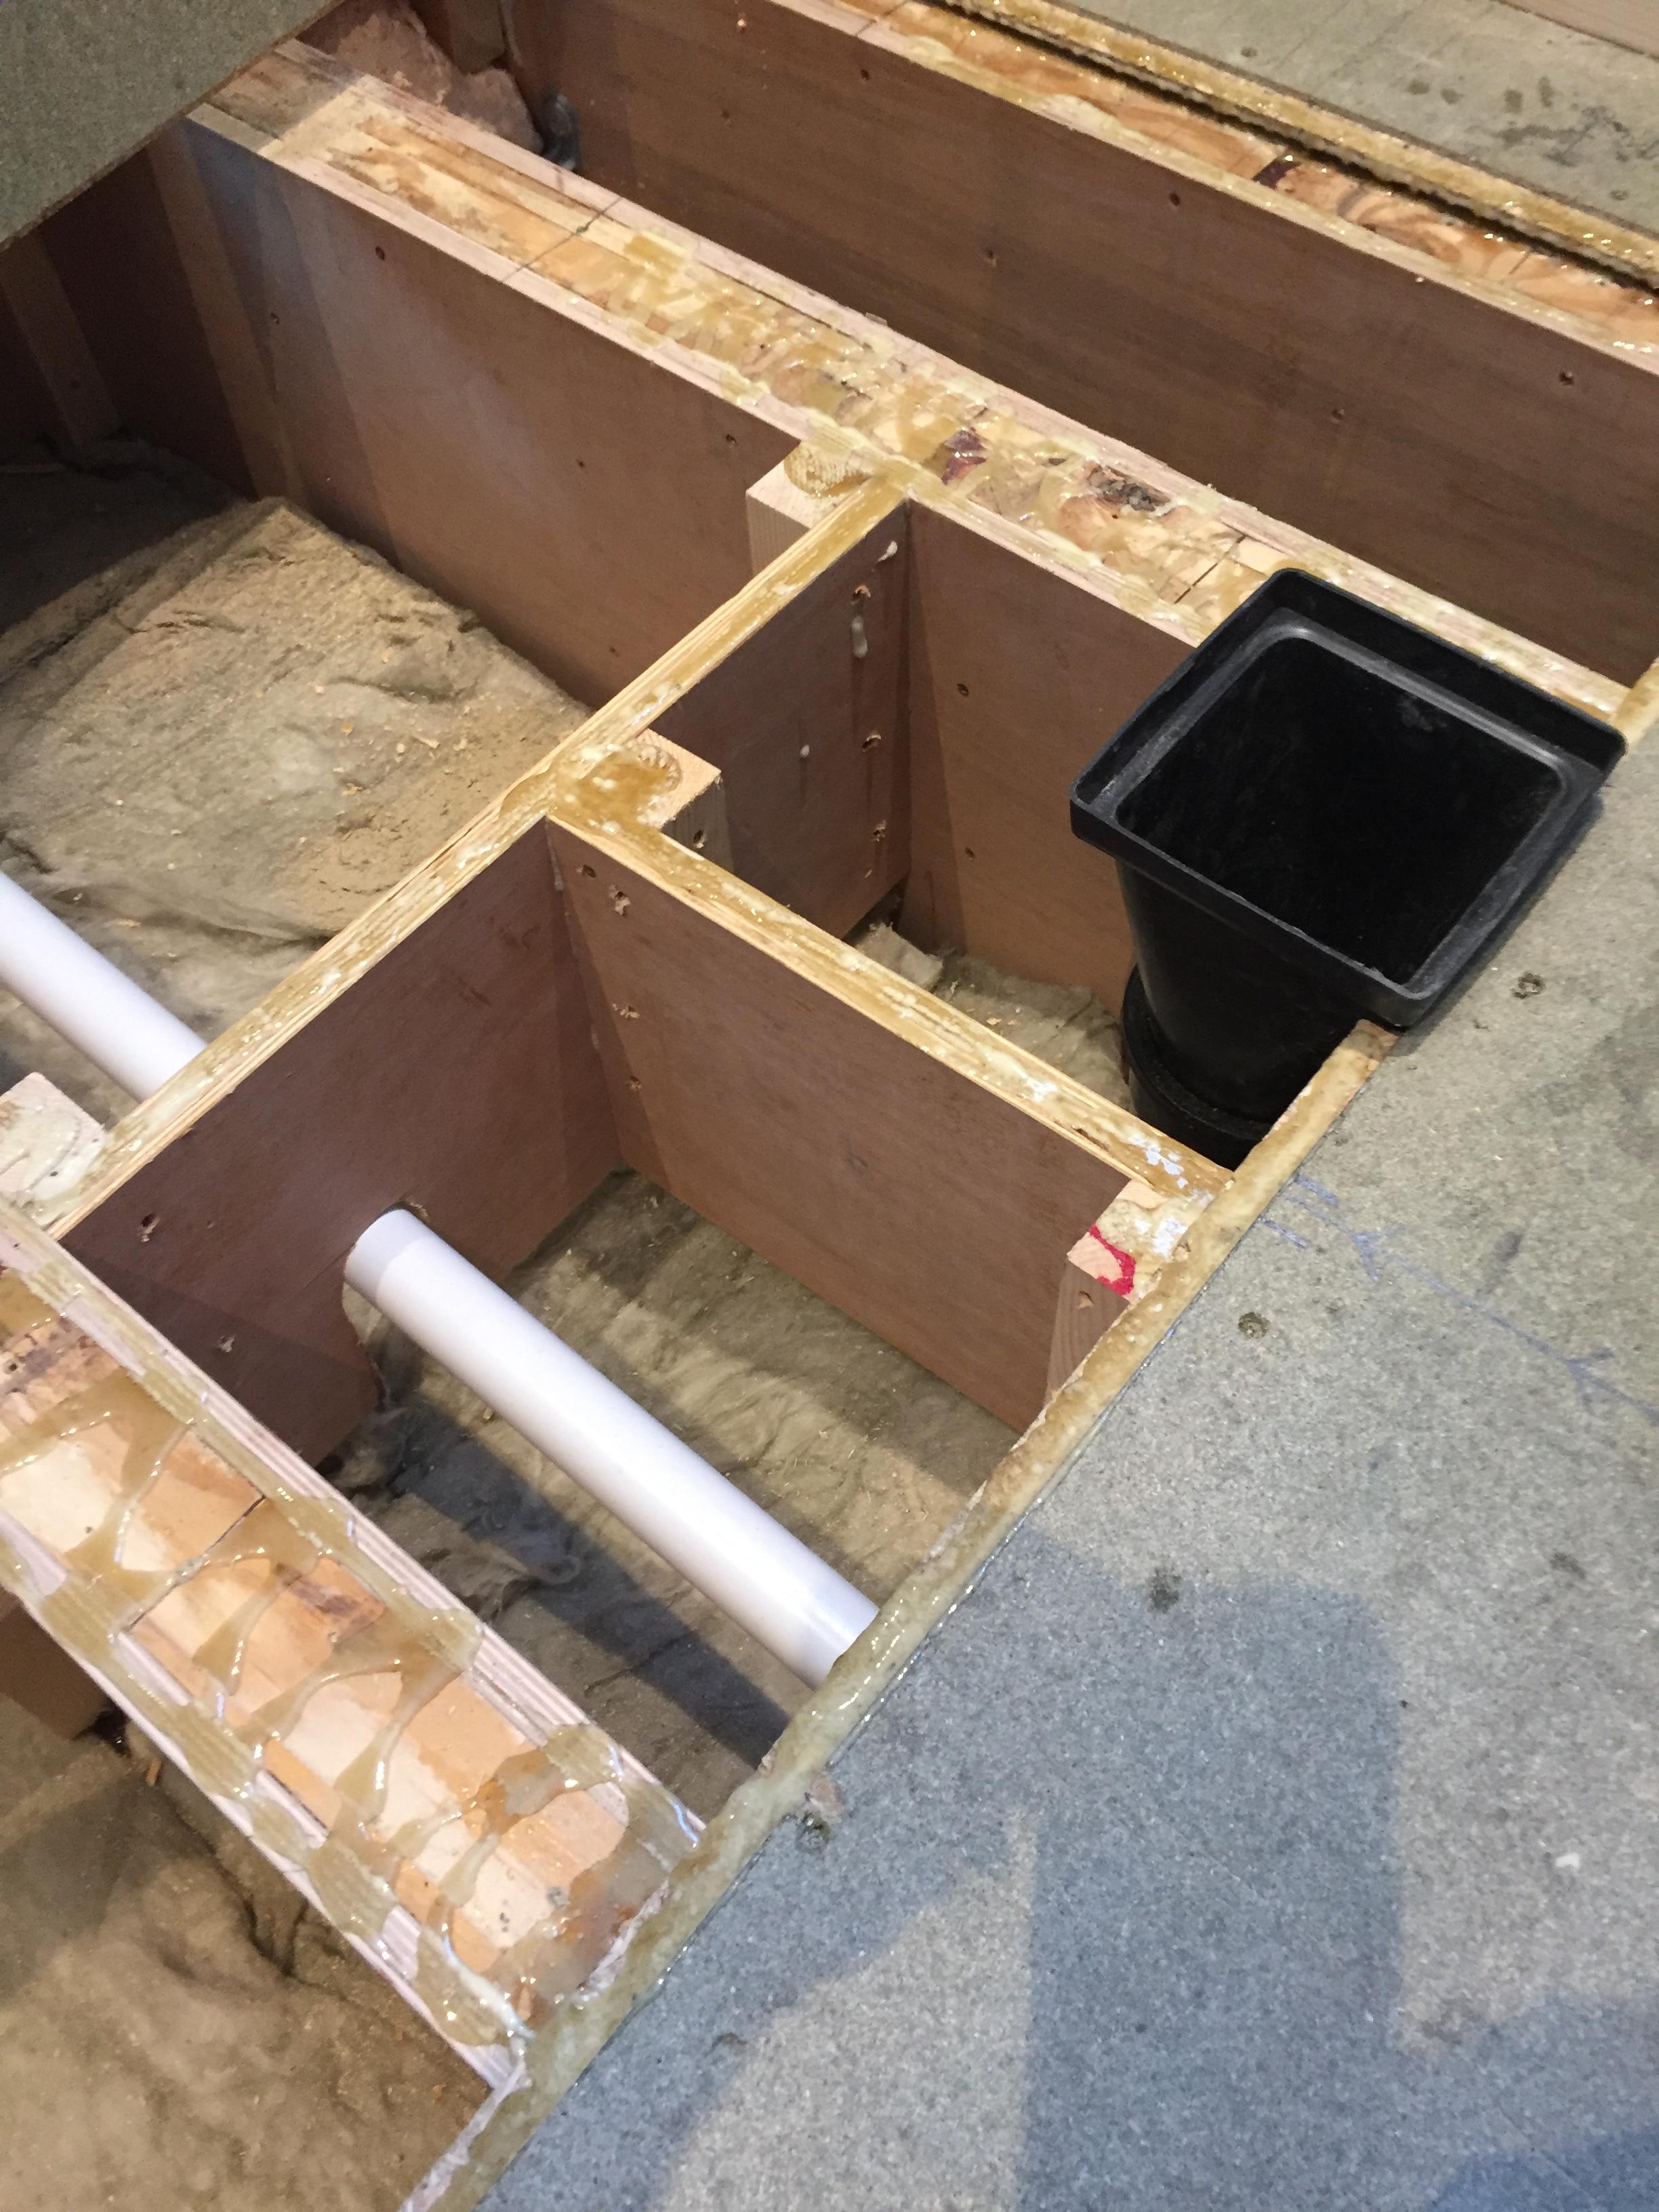
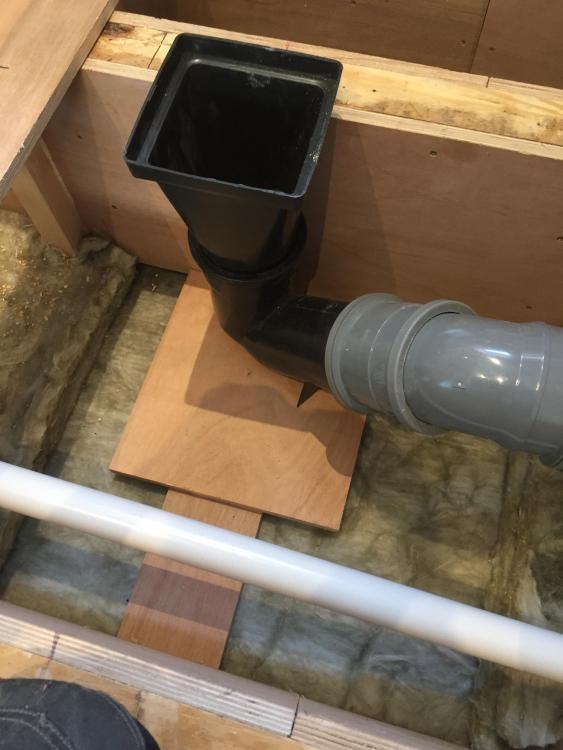
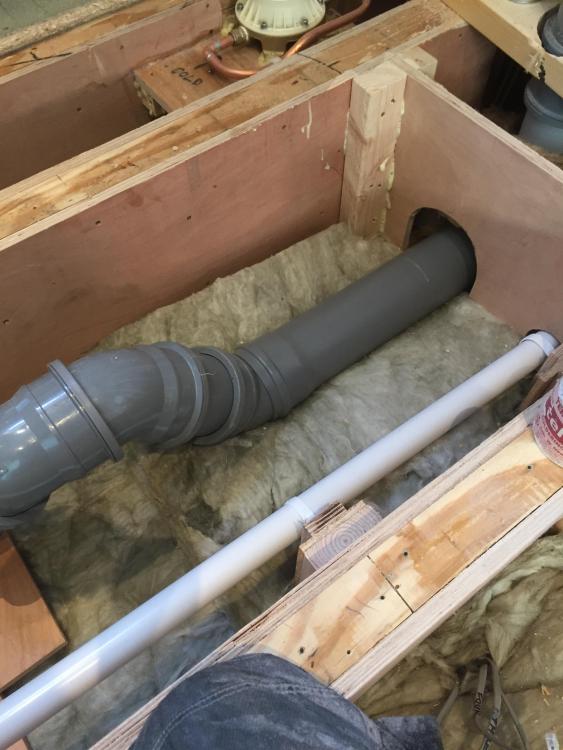
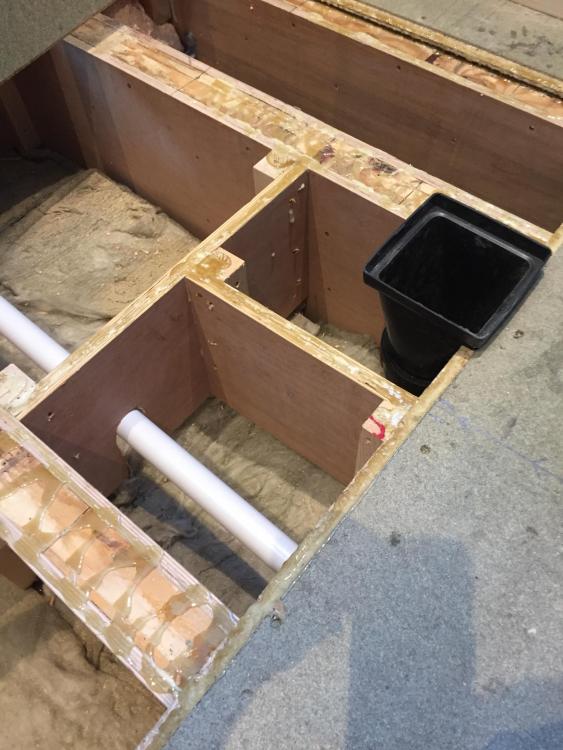
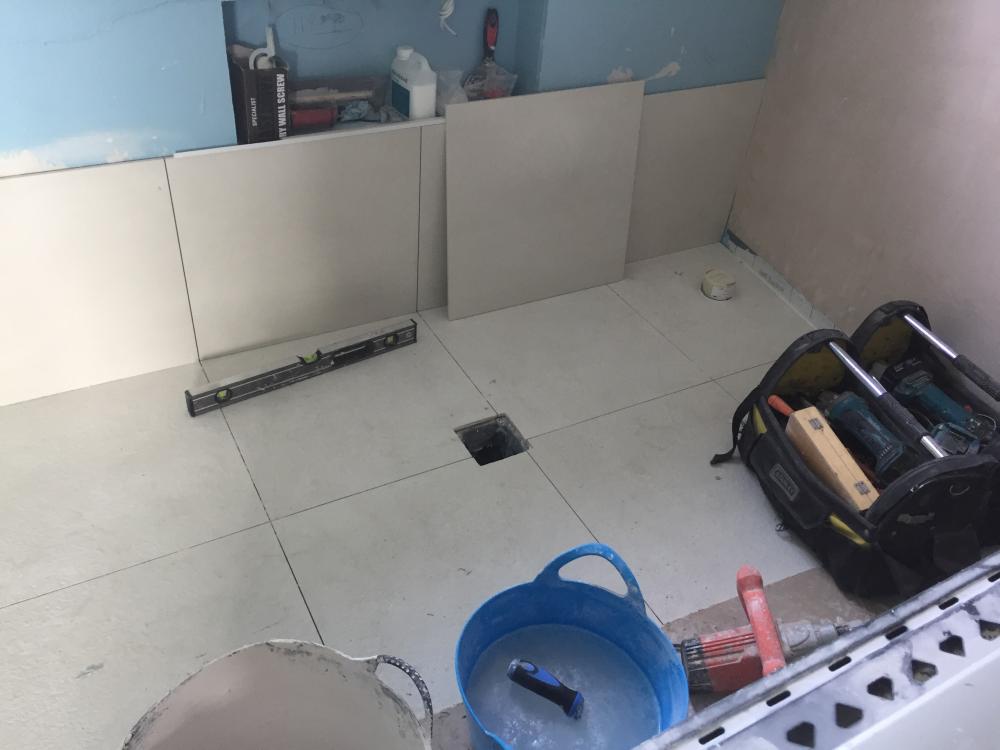
That's a whopper. If your floor is still up then I'd suggest some full depth noggins as I did on this job. As these Ee kinds of baths require you to mutilate the floor to get the trap accommodated, I decided to go back to the drawing board. I didn't like the tanked floor having a bloody great big hole in it so I decided to put a 110mm storm water gulley and trap and make that off to the tanking membrane. The idea being that the coin flip waste on the bath just has a thread extender fitted to it as a dip pipe and that simply directs the bath water straight down into the trapped water below. Rodding will be a piece of cake and the flow rate that it will handle is crazy. This is the first time I've done one like this but what's not to like? ? The tiles will get Sikaflex'd to the membrane to keep it all hydraulically tight, and a ring of SFx will go under the bath to 'seal the deal' by bonding the bath to the tiles, thus leaving no escape route for the water if it ever blocked. Not that it will....it's chuffin 4" dia! Couple more 50p sized blobs of SFx at 6 to 8 locations under the bath and it should be bombproof, and the fastest emptying bath in Britain. Wales at least ?
-
Link ?
-
It's getting the amount right. It's cheap as chips so not worth experimenting imo. .
-
Sense says to scrape it back and do it once. Only problem is, once you start scraping, re-plastering is your only real option. Thistle have a PVA loaded plaster which iirc is only available through the likes of b&q, designed specifically to go over existing painted surfaces. My mate ( plasterer for 30 years ) says it's really good stuff and has used it a few times without issue. It does away with the need for usual 'two coats of plaster over roller applied PVA' so you can put one thinner set on if say skimming to tile trims / other depth sensitive abutting detail like coving.
-
Ignore the mess, but that gulley ( square ) is where the waste will exit from the centre of the stone resin £3k bath that will reside there, all 88kg of it. When full of water, and a human being is sat in it, I recon a good 330-350kg needed to be allowed for. I beefed the joists up to offset the extra weight and then simply 22mm P5, 9mm plywood ( PVA glued and screwed at 100ish mm centres ), and then tanking membrane, UTH, adhesive and tiles. The only thing that would cause cracking would be movement in the subfloor. Firstly, is your bath a claw feet bath or mounted flat on the floor?
-
You on a strict "no distraction" diet .
-
Bath Surround / Boxing In, and concealed pipework
Nickfromwales replied to Onoff's topic in Bathrooms, Ensuites & Wetrooms
Just get a piece of 25mm brass rod, 225mm long, fit a 13mm bit in the lathe and the......... ONLY JOKING. Just buy one ffs