Nickfromwales
-
Posts
31390 -
Joined
-
Last visited
-
Days Won
346
Everything posted by Nickfromwales
-

Fitting a stone resin shower tray on plywood
Nickfromwales replied to George 3G's topic in General Plumbing
Avoid step 2, just damp it with a few tubs of a wet sponge before laying onto wet adhesive. +1 There isn’t a need for the backer board, and I’m not a big fan of it tbh. Flexible TA is fine for a 10mm runoff, and I’ve always used Ultra unless the client has had BAL included with their bathroom / tile order. To get the CT1 done, just seal up after the tray is laid, if you don’t have any ‘wiggle room’ to “goop up” first. -
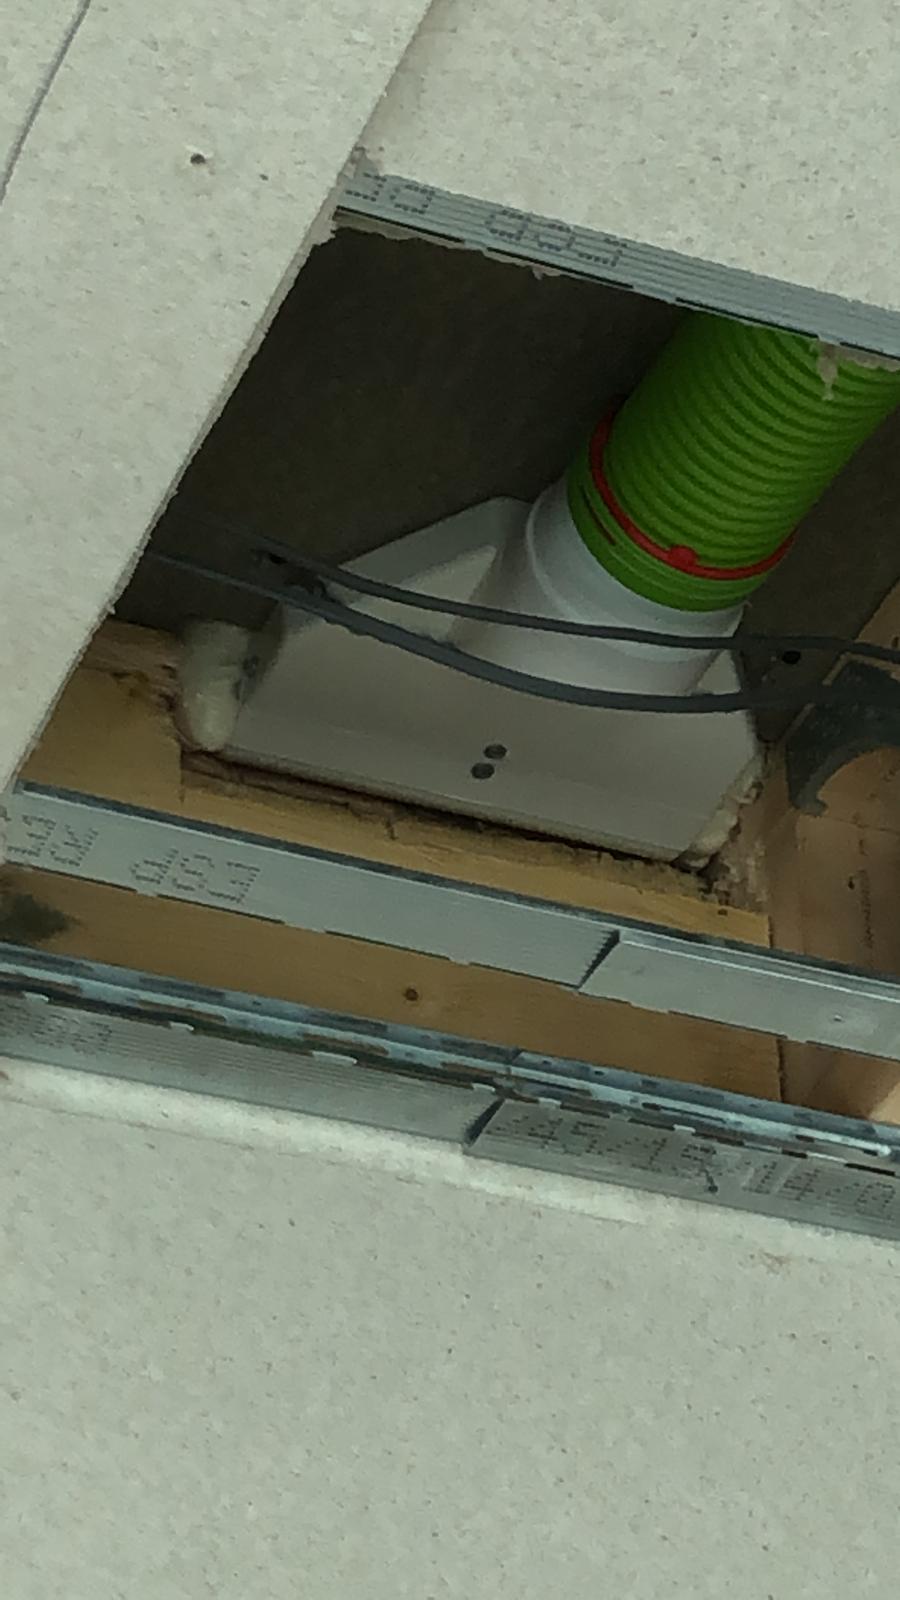
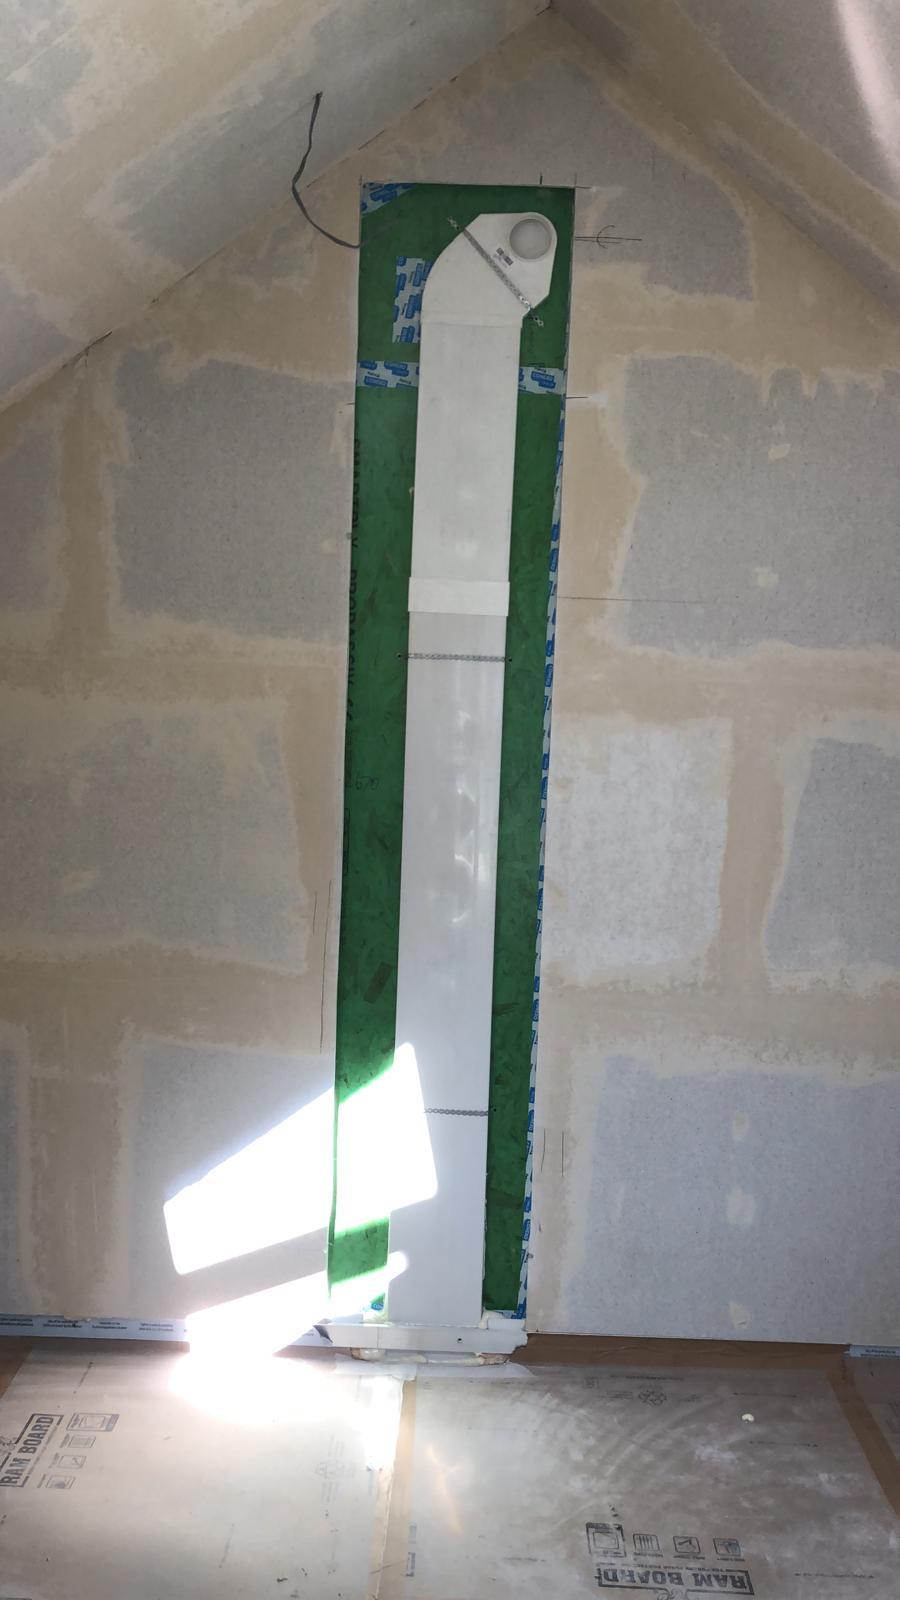
It’s not the depth of the ducting that’s the issue hiding stuff in tiny spaces, but more the depth necessary to fit the terminal on that takes the ( adjustable flow rate ) air valve, so as per the pics, if you go that route then you will need to take a multi tool to a regular 100mm vent cover and fix it on DIY style, plus you need to attenuate elsewhere for balance and commission. Nick @ CVC Systems works with us a lot to get these kinds of issues dispatched, so I use them for provisional design mostly, plus supply and fit when I’m too busy to do the jobs myself. You don’t ideally, and Nick ( CVC ) is PH certified so we both strive got the same outcome, taking WAY more than just airflow into account That job pictured above would have lived quite happily with a Brink Flair 325, but I paid extra to go with the 400 so the fan was less laboured, the duct connections were next size up, and the pressure required for the same airflow was significantly reduced. All that added together equalled a very happy client who stated that the MVHR was inaudible in bedrooms at night, and barely noticeable when boosting to deal with showers / cooking etc. This is about a lot more than “what size unit”. It’s “why that size of unit” and understanding the pros cons and caveats so you’re making properly informed decisions. One system is avoid is series ducted, I’m not a fan of that at all,, so I always go with radial as of all the systems I’ve specified or installed have performed exceptionally well ( so if it ain’t broken….. )
-
Designing 2 such projects atm, so have specified the steel penetrations centres to be at 400mm recurring so the posi joists can drop in retrospectively, manipulated to avoid these locations. The joists will be wiggled about to suit during installation, so best to discuss this with the joist designer as well. Remember that posi joists will be in joist hangers in most instances ( not all ) so you will lose 70mm of each 400mm centre void with the wing of the hangers, so that can mean only 2 ducts per joist void. Can be done with most at 400mm c’s and one or two strategic 600mm ‘service sections’ that has beefier joists allowed either side to compensate. I never spec posis at 600mm centres tbh as most designers will fall to the default deflection allowances and beam count to give the best quote, often leaving deflection factored in at north of 12mm of movement allowed. NO THANKS! 👎. I like a structural floor not a reasonably priced trampoline. Also good to remember that rectangular aka oval ducting is available too, so on one current MBC TF I’m bringing fresh for a bedroom and extract for that en-suite up in a ‘4x2’ stud wall with ‘oval’ ( which is rectangular-ish but what the hell ) to allow those two ducts to rise without boxing in in either of the rooms. Also(!) remember that you can get 225x25mm ducting, which can allow you to hide your MVHR ‘duct’ in a 35mm service batten space. Very handy when you have OCD like me lol. I cannot tolerate boxing in, and many of my clients marvel at the solutions I come up with to get away from that requirement.
-
https://www.toolden.co.uk/sealants-adhesives/expanding-foams/expanding-foams-professional-diy/illbruck-fm330-pro-foam-air-seal-pack-of-12/?gclid=CjwKCAjw3cSSBhBGEiwAVII0Z2aeaxWlZ2NEq0X_5xwDnHpvOKbieG0Bhvxn9-TJV4ewCeAqFFeXIxoCJYYQAvD_BwE Fast delivery. Trusted supplier. I use these a lot.
-
Do you still need a recommendation? PM me if so and I will give you their details. Not sure he wants to "go public" but I will ask
-
A1 reverend. 😎. I’d be priming the surfaces but you don’t want the PVA, so use tile adhesive primer or SBR maybe. Foam will adhere to what is behind, if that’s friable then it’ll be shart.
-
🤣. Short term memory loss lol.
-
🙄. How many wet window reveals do you have?
-
Try one with each and watch the results. The grip on the Illbruck is evil by comparison.
-
For your house, you may need more lol. Remember to soak everything with a 50/50 PVA/water solution 2 mins before foaming with the 330. Cures quicker and harder when you moisten surfaces first. @pocster “No!”
-
That’s more for volume areas, this is more acute.
-
Yup. Goes off way more rigid than standard foam.
-
@Onoff I would stick the heads on first to get level and square, bracing with timber until foam cures. Foam ( Illbruck 330 ) for AT is ample. Cut with anything tbh, it’s easy to work with. Old blade in a battery circular saw ideal 👍
-
Currently in heated debate over this. What is your information source to clarify this functionality, please? Genuine question, not provocation btw!
-
kWhat?
-
Arse! Yes, 420-430mm to top of pan. My mistake, been a long week already . Seat above that, so around 460mm to top of closed seat lid.
-
Yup lol. The penny drop’th. 😎😁
-
Yup, they are a joy, aren't they?!? FYI, I don't ever fit the acoustic gaskets, as they create a friction slip. Instead, I mask around the pan, a few mm before pinching it up for the last time, and pump the gap between the pan and the wall with clear CT1. Once fully tightened, and levelled, the excess CT1 gets removed with baby wipes until it is no longer visible. 48hrs to cure, then a cosmetic seal up with white microban based silicone and job done.
-
Nope. They're fixed on the frames, all you get to dictate is where the top of the pan ends up. Currently fitting 5 Geberit frames all at 520-530mm off FFL aka "comfort height". I only fit Geberit as I've never had a single complaint with them. Fit and forget.
-
A service alteration is usually about £800 to a grand ( chop clean and connect back up ).
-
Jesus! Lucky escape there.
-
Time, effort, who to blame...... They just want zero liability or comebacks from a member of the public getting injured or killed.
-
Never EVER, trust old people. They have a lifetime of cons tucked up their sleeves
-
You can have your close-coupled WC, fear not ! What you need is a bent flexible pan connector LINK and a WC which is not fully back-to-wall ( eg there is no porcelain meeting all the rear of the wall hiding the soil connection ). The grey is a perfectly new 110mm standard PVC pipe, so no worries there. The 3.5" bit you are looking at is a standard reduced sized pan connector, just a bloody long one, a standard off-the-shelf item.