Nickfromwales
-
Posts
31384 -
Joined
-
Last visited
-
Days Won
346
Everything posted by Nickfromwales
-

Sizing MVHR
Nickfromwales replied to sonicboom's topic in Mechanical Ventilation with Heat Recovery (MVHR)
Respectfully, you need to do a test and get the results. If it’s worse than you think then maybe a 450 won’t do it, if it’s much better (sub 1.0 ACH) then the 450 may suffice. -
Pipes behind fridge question. or two.
Nickfromwales replied to TheMitchells's topic in General Plumbing
Or maybe just some Talon trunking? Link -
Heating / Construction type.
Nickfromwales replied to Ryan 2023's topic in General Self Build & DIY Discussion
Nah....Durisol did nothing there to protect the glass in the windows -
Hello I’m Mike and new to this site
Nickfromwales replied to MiketheViking's topic in Introduce Yourself
Fill your boots matey Plenty on here who have renovated / are renovating. Find a subject, search up a relevant thread, and then post there if possible please! Don’t worry about blowing the dust off an old thread btw! Otherwise just start a new thread and folk will chip in . -
Heating / Construction type.
Nickfromwales replied to Ryan 2023's topic in General Self Build & DIY Discussion
You can build cheaper with masonry I expect, vs a high-performance TF, but then spend more over time heating it. If you have the budget to go for a well insulated foundation and frame package (a-la MBC TimberFrame Passivhaus spec offering (they do many different specs btw, worth going to visit the factory)) and then spend less over the lifetime of occupancy. You often have to make sacrifices but these will be yours to make; eg pretty things or insulation and airtightness. -
Both are relevant points. Effectiveness is the most relevant, as with enough downward/other losses and a max surface temp of 27°C, you can soon find yourself pumping a huge amount of energy into the subfloor vs room which means it’s fair to say that it is ineffective in the grand scheme as it’s so perverse to have chosen/be running it. Efficient is where bags of insulation and airtightness makes these things perform excellently. Biggest killer will be the natural infiltration of the dwelling, as each of the above will both be useless maths if the heated air leaves via the clouds. Aim to get airtight with MVHR (go with an option that has heat recovery, it’s really a no brainier if viable) and then you’ll only need a thimble of heat anyways. Shift the problem instead of making the solution fit? Spend money on ‘energy saving’ not ‘energy spending’ via compensating for poor fabric performance.
-
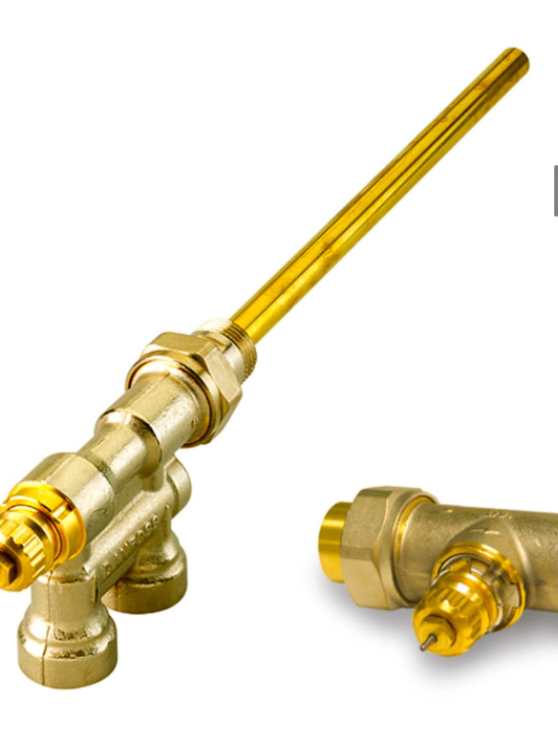
FYI @Dee, the diverters are short / medium lengths of pipe or other to make the flow enter the rad vs just skip in and out like the SAS Same thing you’d get with the old twin-entry valves.
-
Thread tidied. @Dee If you’ve got column rads then these are flow hungry, but will also bypass the flow potential of your pump (path of least resistance yaadaa-yaadaa), so basically try and draw a map of the rads and pipework in distance from pump > rad. Work these as an epicentre and adjust the LS valves according to % distance; eg 10 rads in a row in a straight line would have first LS set at 10% flow, 5th rad 50% flow 10th rad fully open. Are all the rads fed from 15mm pipe work? 10mm to column rads is ‘no bueno’. Do you know how much 22/28mm (if any 28mm at all?) primary pipe work there is? And do you know if no more than 4 rads are fed off a run of 15mm pipework? How old are the TRVs? These things don’t last forever.
-
Teething issues with MVHR
Nickfromwales replied to Tom's topic in Mechanical Ventilation with Heat Recovery (MVHR)
Has your wife caught you looking at @ducthub in the evenings? -
Teething issues with MVHR
Nickfromwales replied to Tom's topic in Mechanical Ventilation with Heat Recovery (MVHR)
Tres bien, Rodney. Yup, as above, the foiled stuff. Or neoprene sheet stuff and use carpet spray glue (contact adhesive) to bond. Penises. -
Teething issues with MVHR
Nickfromwales replied to Tom's topic in Mechanical Ventilation with Heat Recovery (MVHR)
Have they installed silencers / attenuators? -
Probably wants the pre charge set at around 2.0 then with a pressure reducing valve set to 3.5. The water has to stretch the bladder and compress the pre charge gas / air, needs a bit of headroom to do so. https://pumpexpress.co.uk/explaining-cold-water-accumulators/#:~:text=The air pressure inside an,bar below the mains pressure. Scroll through that for a bit more info
-
What’s the static cold mains pressure? 👀. lol.
-
Do it! I’ve never installed one that doesn’t have a fudge on the ‘pressure reduced’ side. Even if the mains pressure is low, you never know if network pressure will go higher or peak at over 5/6 bar overnight or midday.
-
Was it commissioned properly? Has it been checked / inspected annually / bi-annually? I don’t abuse my underpants so they last a long time. Expansion vessels get fitted and forgotten about, until they die….
-
Hire of the kit is less than £100, but some decent plumbers will own one. Just get several quotes for duration and costs etc and choose the ‘best’ one. 🤷♂️. A 1.5-2hp pump will shift a lot more shite than just the heating pump bumbling around
-
I have used both Furnox and Sentinel, as said “Tried and tested”… This is added into the power flush machine, and will do the job if the people doing the power flush are there for the full day leaving the stuff in long enough to do its job. A pour in / rinse out affair is near pointless and would be quite ineffective. Ask the person flushing to go around and vent the rads etc whilst the machine is in ‘flow’ (the flush machine goes in both directions to stir the shite up most effectively).
-
It's down to the manufacturers recommendations tbh, and I have slept MANY times since having to use this stuff last (I only work on brand new installs these days for self-build clientele etc) so if in doubt just read the literature for these products and choose the one that best suits the mix of components and metals etc in your particular system. Just remember to flush it well, a couple of times, and to add in a sacrificial inhibitor each time, even though it's going 'down the drain'. Every time you fill the system back up it is with fresh oxygenated water from the mains and this will instantly start corrosive reactions which is going backwards! Use a cheap inhibitor for sacrificing, and then, when you're happy with the results, drain out for a last time, fit the new AAV, and double-dose with a quality chemical to suit.
-
You just need to know the chemicals won’t attack any system components, so check with the manufacturer’s literature before dosing. Any decent plumber can do the job, but you need a plan of attack. The sludge remover needs to go into the system ahead of any other works, and for it to be run up to temp for a good few cycles of ‘chemical flush’, before the system is mechanically flushed. This chemical is supposed to break down the crud and get it into a solution. Then it can be drained down and rinsed out during the mechanical flush. Then fit a new AAV and look back on these happy times and laugh.
-
Practical spiral layouts for UFH with closely spaced pipes.
Nickfromwales replied to ringi's topic in Underfloor Heating
The last 2 UFH installs I did in near / at Passivhaus standards of insulation had 100mm centres, but that was to drop the flow temps as low as possible, and to have as much water volume in the slab as possible. This was mostly to aid cooling via the slab in both instances, but one was an insulated (aka Passiv) raft with the UFH pipes inserted, and the other was a poorly detailed foundation where the pipes were clipped to the pre-cast constructional slab and then we screeded over. If there is any doubt over performance then UFH should be very seriously considered / reconsidered, as it may well function but may very well be adversely uneconomical to run / operate cost wise. Kitchens / any other rooms with reduced floor space will suffer most, further impacted if theres large glazed areas, so again you may need auxiliary heating from say a vertical ‘decorative’ radiator in there to achieve desired room temps during the worst days of winter. Vertical rads prob not going to do much with a heat pump though so this all needs proper thought and for you to sew some headroom into the final choice / solution. Max floor surface temps will be capped at 27°C, flow temp will be decided by insulation / screed / floor covering type & thickness etc, so at that limit the heat output needs to be more than suffice, so you’re not ‘just there’, and are able to overshoot the stat set temp (eg the room should be able to get north of 22°C without seriously struggling). -
I didn't realise it took so many killer whales to run these things.
-
I didn't see a copyright anywhere, so "play ball"
-
Use the 22mm up on the cold runs first, hot runs last, but preferably use 15mm for the hot feeds wherever possible (10mm where it's a basin and close (less than 10m) to the cylinder). Decide if you want / need to be able to isolate every single run, and if not you can go with the plastic dumb manifolds to save a lot of £'s.
-
The only water you are shifting is what comes out of the jet. Could be fed from the north sea, the same amount of water will come out of the jet. Resistance etc will skew the numbers a little, but most of us will have snuffed it before this matters, in reality.
-
More is more, and doesn't just have to work for the weight of the water it has to be able to deal with heave of the clay. It'll need to be thicker than 100mm and defo very well reinforced. SE on the aforementioned project has this wrecked slab to add to his website pics...... 100mm is for walking on.