Leaderboard


Popular Content
Showing content with the highest reputation on 03/19/18 in all areas
-
You mean how many it might be. Depends how much hits the labourers face ,hair and clothes when he is staring into the mixer. How much spills out when the barrow is full to the limit and how much the brickie drops down the cavity.2 points
-
Now I wouldn't usually buy LAP anything... Long story but the other day I got an Electricfix coupon booklet through the post. A £10 voucher for the next 4 weeks. When you've used them there's a £20 voucher. So £60 off in total. Used the first voucher last week. With my Electricfix discount it brought an MK usb double socket down to £7. Saw these today and I figured that would be a cheap go around the bottom of the bath surround. Down to £14.99 from £50. I'm figuring then a fiver if I use this week's £10 voucher. https://www.screwfix.com/p/lap-apollo-led-deck-light-kit-polished-stainless-steel-blue-0-05w-10-pack/96379 Went to the Electricfix counter. Comes up as £14.99. She puts it through and the final bill is £4.99 WITHOUT having to use the voucher! ??? Then I came home and found a big bottle of Singha beer in the fridge when I thought I'd run out!2 points
-
We have used Jeld Wen windows in our garden room as they more than meet the requirements for a workshop / hobby room and its not fully passive like the rest of the house. I have to say that for the price the engineering of them is very good and although we had a problem with one component being machined wrongly that was fixed in a couple of days by the arrival of a whole new frame, no questions asked. The metalwork is good, robust, and not in any way 'nasty' the sealing did leave a bit be desired but I was able to fit additional sealing sections and have now got the big, 5 fold, door working very well - perfectly sealed and no leaks despite the snow. We had to paint ours as they don't do the colour we needed but the finish was perfect and took the 6 coat system (weather shield) very well. The only frustrating bit of the job was the assembly guide for the big window as this was good up to a point but then fell over in the way it presented inside and outside views of things the wrong way up and it was hard to work out which side was which. Anyway after a lot of head scratching we got it all sorted and the whole job took about a day of fitting. PS we purchased ours through this firm (https://www.distinctivedoors.co.uk/) they seemed to know what they were about, small family run by the sounds of it, you get an impression for a business when the delivery driver, employed directly by them, tells you he has been there years and loves the job. If all he got was grief I suspect he would be elsewhere by now. Naturally my experience may be unique, but I was pleased by the service I got.2 points
-
I have been reviewing the various threads on computer printers for SelfBuild and have concluded the following: On site communication with trades is simplified if printed diagrams can be handed out. Some of the key diagrams should be laminated. Online postal printing services are fast and cost effective for prints over A3 in size. A printed spiral bound collection of plans and diagrams on A3 paper is useful. General IT advice offered through this forum on printers matches mine e.g. avoid InkJets like the plague and colour lasers are good for non photo prints. Which brings me to my question. For £200 to £300 I can buy either an A3 capable B&W laser printer or an A4 colour laser. I can see the benefit of splashing out for A3 but where is the benefit of colour beyond a few landscaping plans that could be coloured in manually?1 point
-
Hi all, please excuse my ignorance if this sounds stupid. I’m looking at options for a single storey dual pitch roof (dual as 5m out from house) When constructing a traditional cut roof with a steel beam, is it possible to fix the rafters to the steel itself rather than having a timber on the top? If so, how can the ridge tile be sat then - more timber? Or is there an actual structural reason as to why the rafters are attached to the timber above? Reason for question, I am really really tight on the bedroom windows so every mm counts! But I can’t lower the pitch less due to tiles. also, what is the advantage/disadvantage of using raised tie trusses over a cut roof? Thanks!1 point
-
Will take some tomorrow night. ?1 point
-
Thats what I always use, and im pretty sure that ive never seen a tapered one. I often turn the shower arm thread all the way into this to start the first fix plumbing, and they spin in finger tight without any force, not how it would be with a tapered fitting Use an end feed one instead of compression and your bombproof.1 point
-
Correct if you have ceiling joists. The question them becomes though why do you even need a steel. Timber ridge board 25mm thick.1 point
-
+1. Just remember not to exceed the REN ( ringer equivalent number ) of 4. Each SLT ( single line telephone ) typically has a REN of 1, so no more than 4 phones. If more are necessary, you can get REN boosters, but most folk will have one base station and a bunch of DECT cordless phones registered to that base station. Have you tried connecting a cordless phone to the socket there and then checking for DECT range throughout the house ? Id do that first and see if you need a remote phone elsewhere. Edit : DECT = Digital Enhanced Cordless Telephony aka signal jumping to use the best signal during the calls.1 point
-
Standard RJ11 phone plugs will fit into RJ45 sockets. You just need BT-to-RJ11 cables, which are widely available. For example, at Amazon (as usual, any tiny kickback goes to our favourite dog-rescue charity)1 point
-
Hello, I am self building 3 natural stone/cedar cladded cottages at my home in mid wales as part of our 'next chapter of life' running furnished holiday lets. I am managing the build bringing on specialist trades as and when required. All 3 cottages are now out of the ground with one of them ready for fixing the slate roof and fitting windows and doors. It is great fun and we learn something new every day, save for diverting the bad weather from mid wales to help the builders.1 point
-
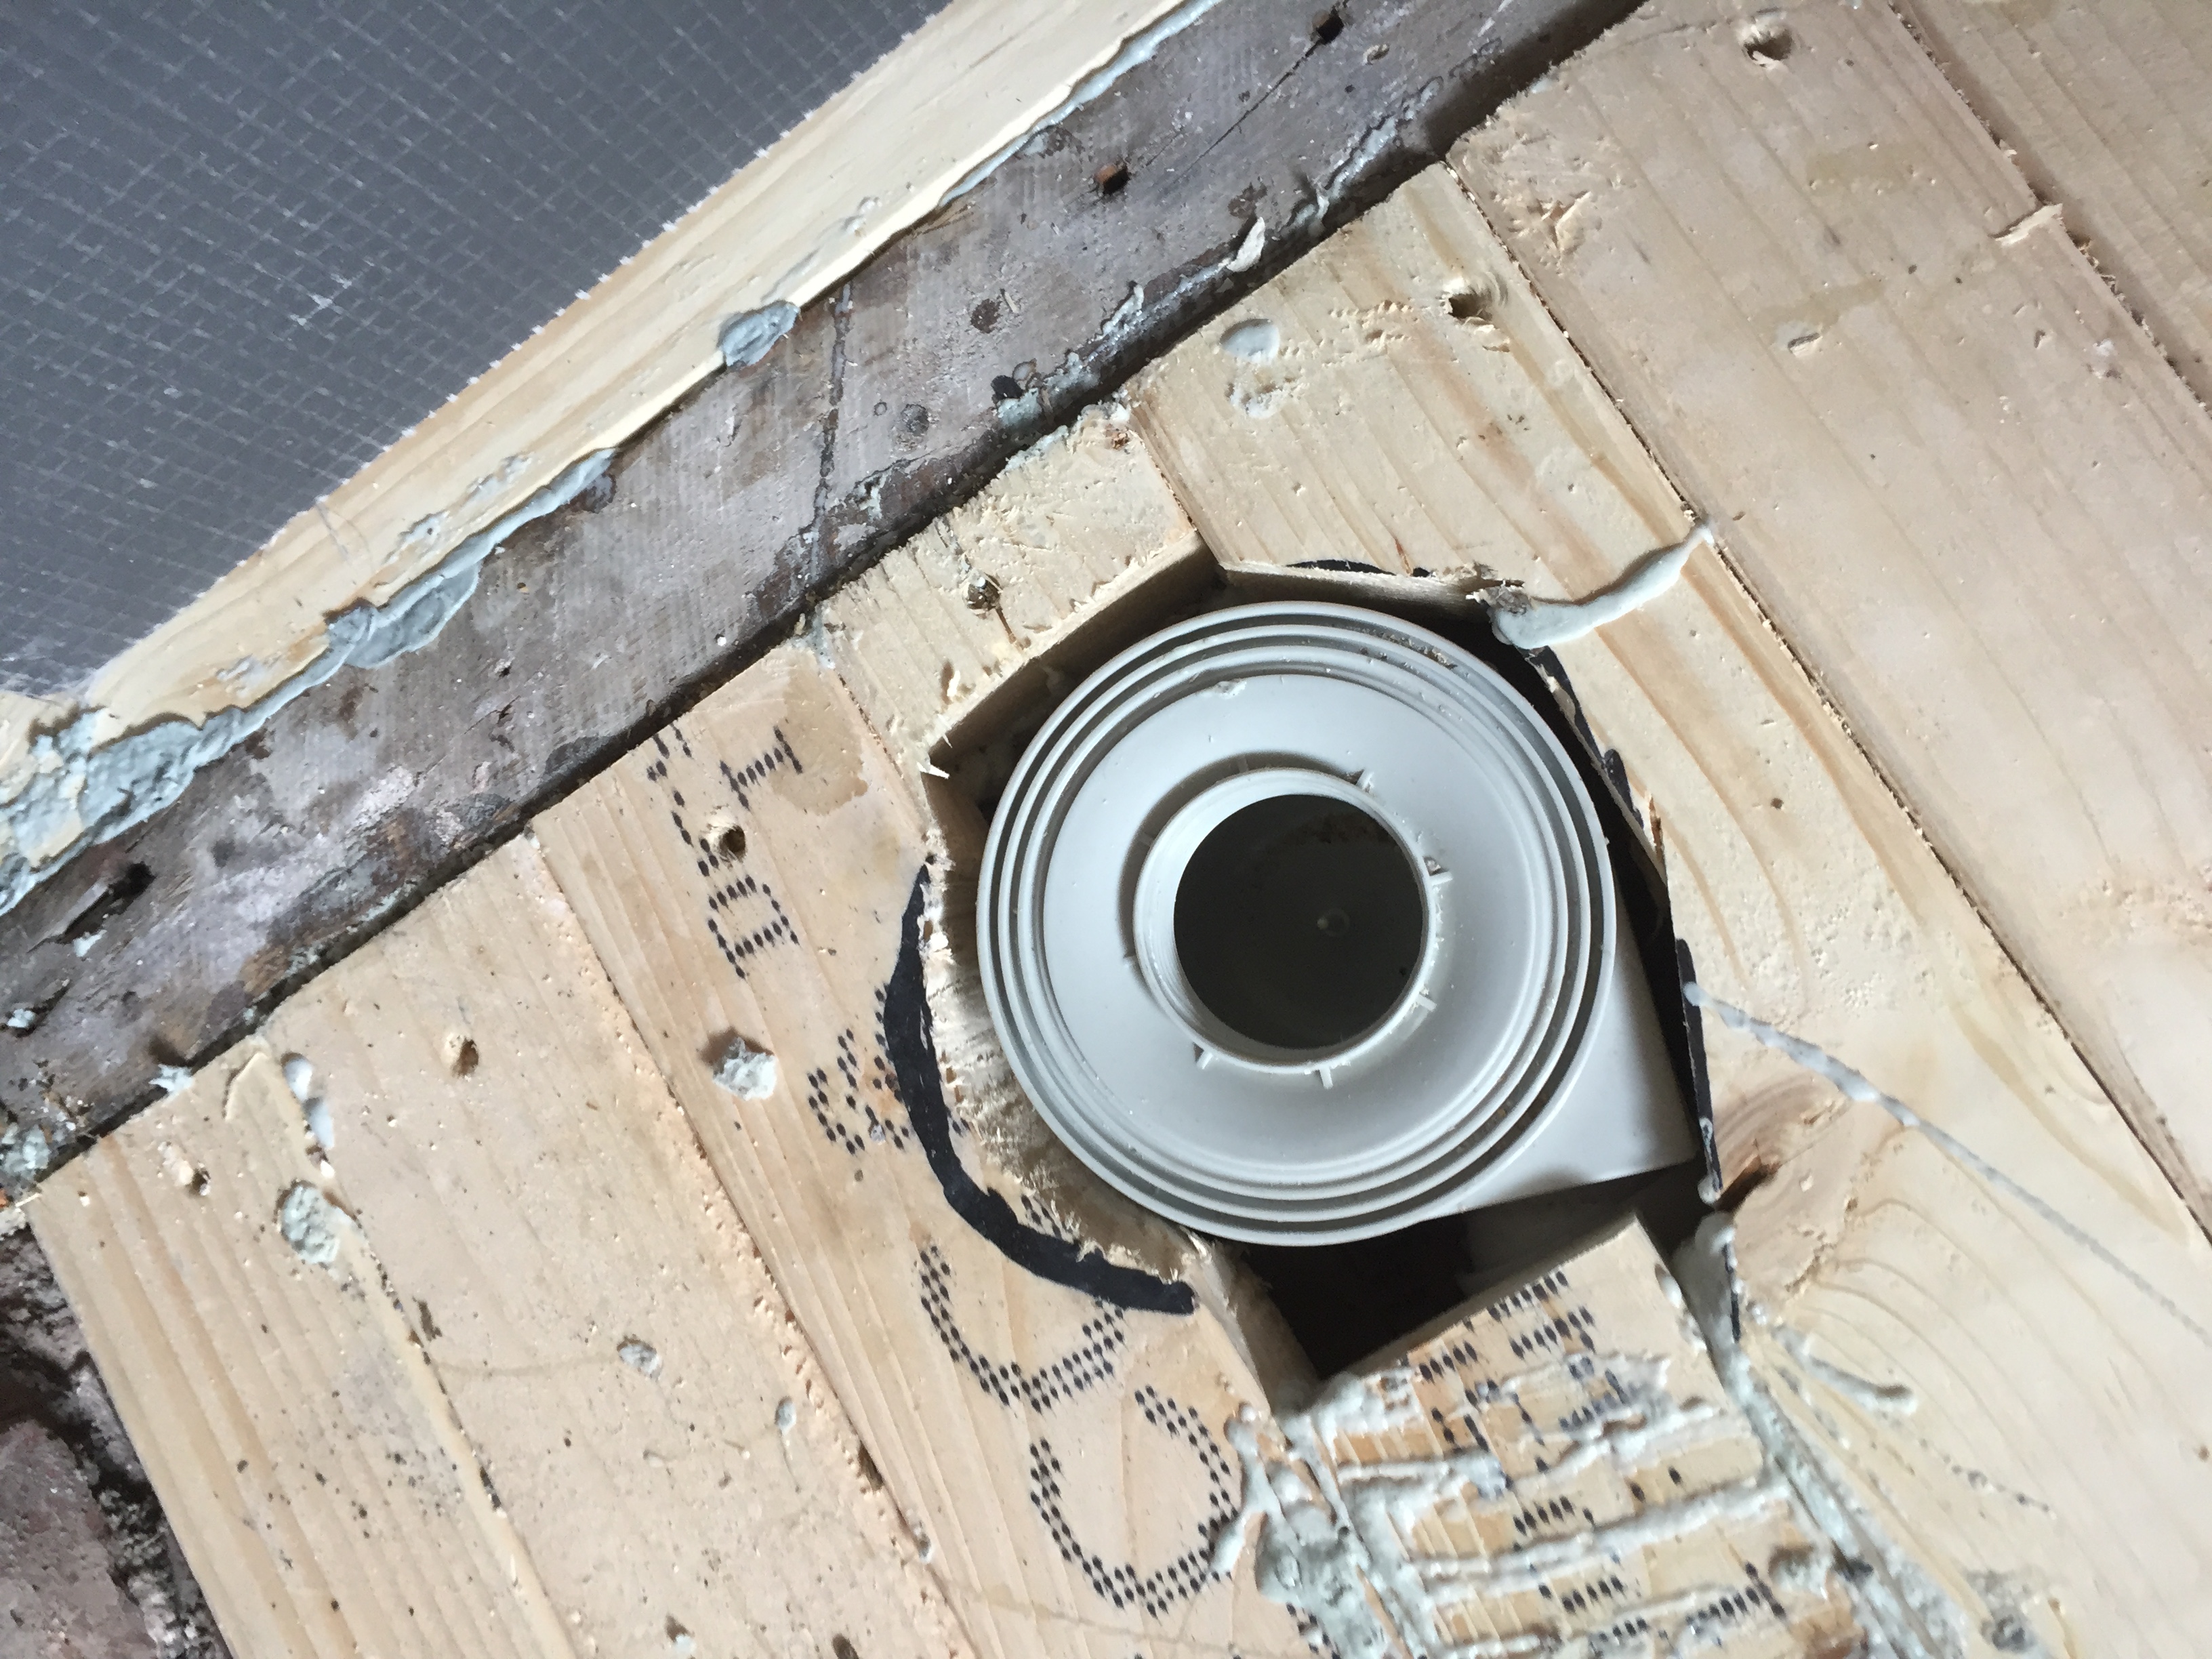
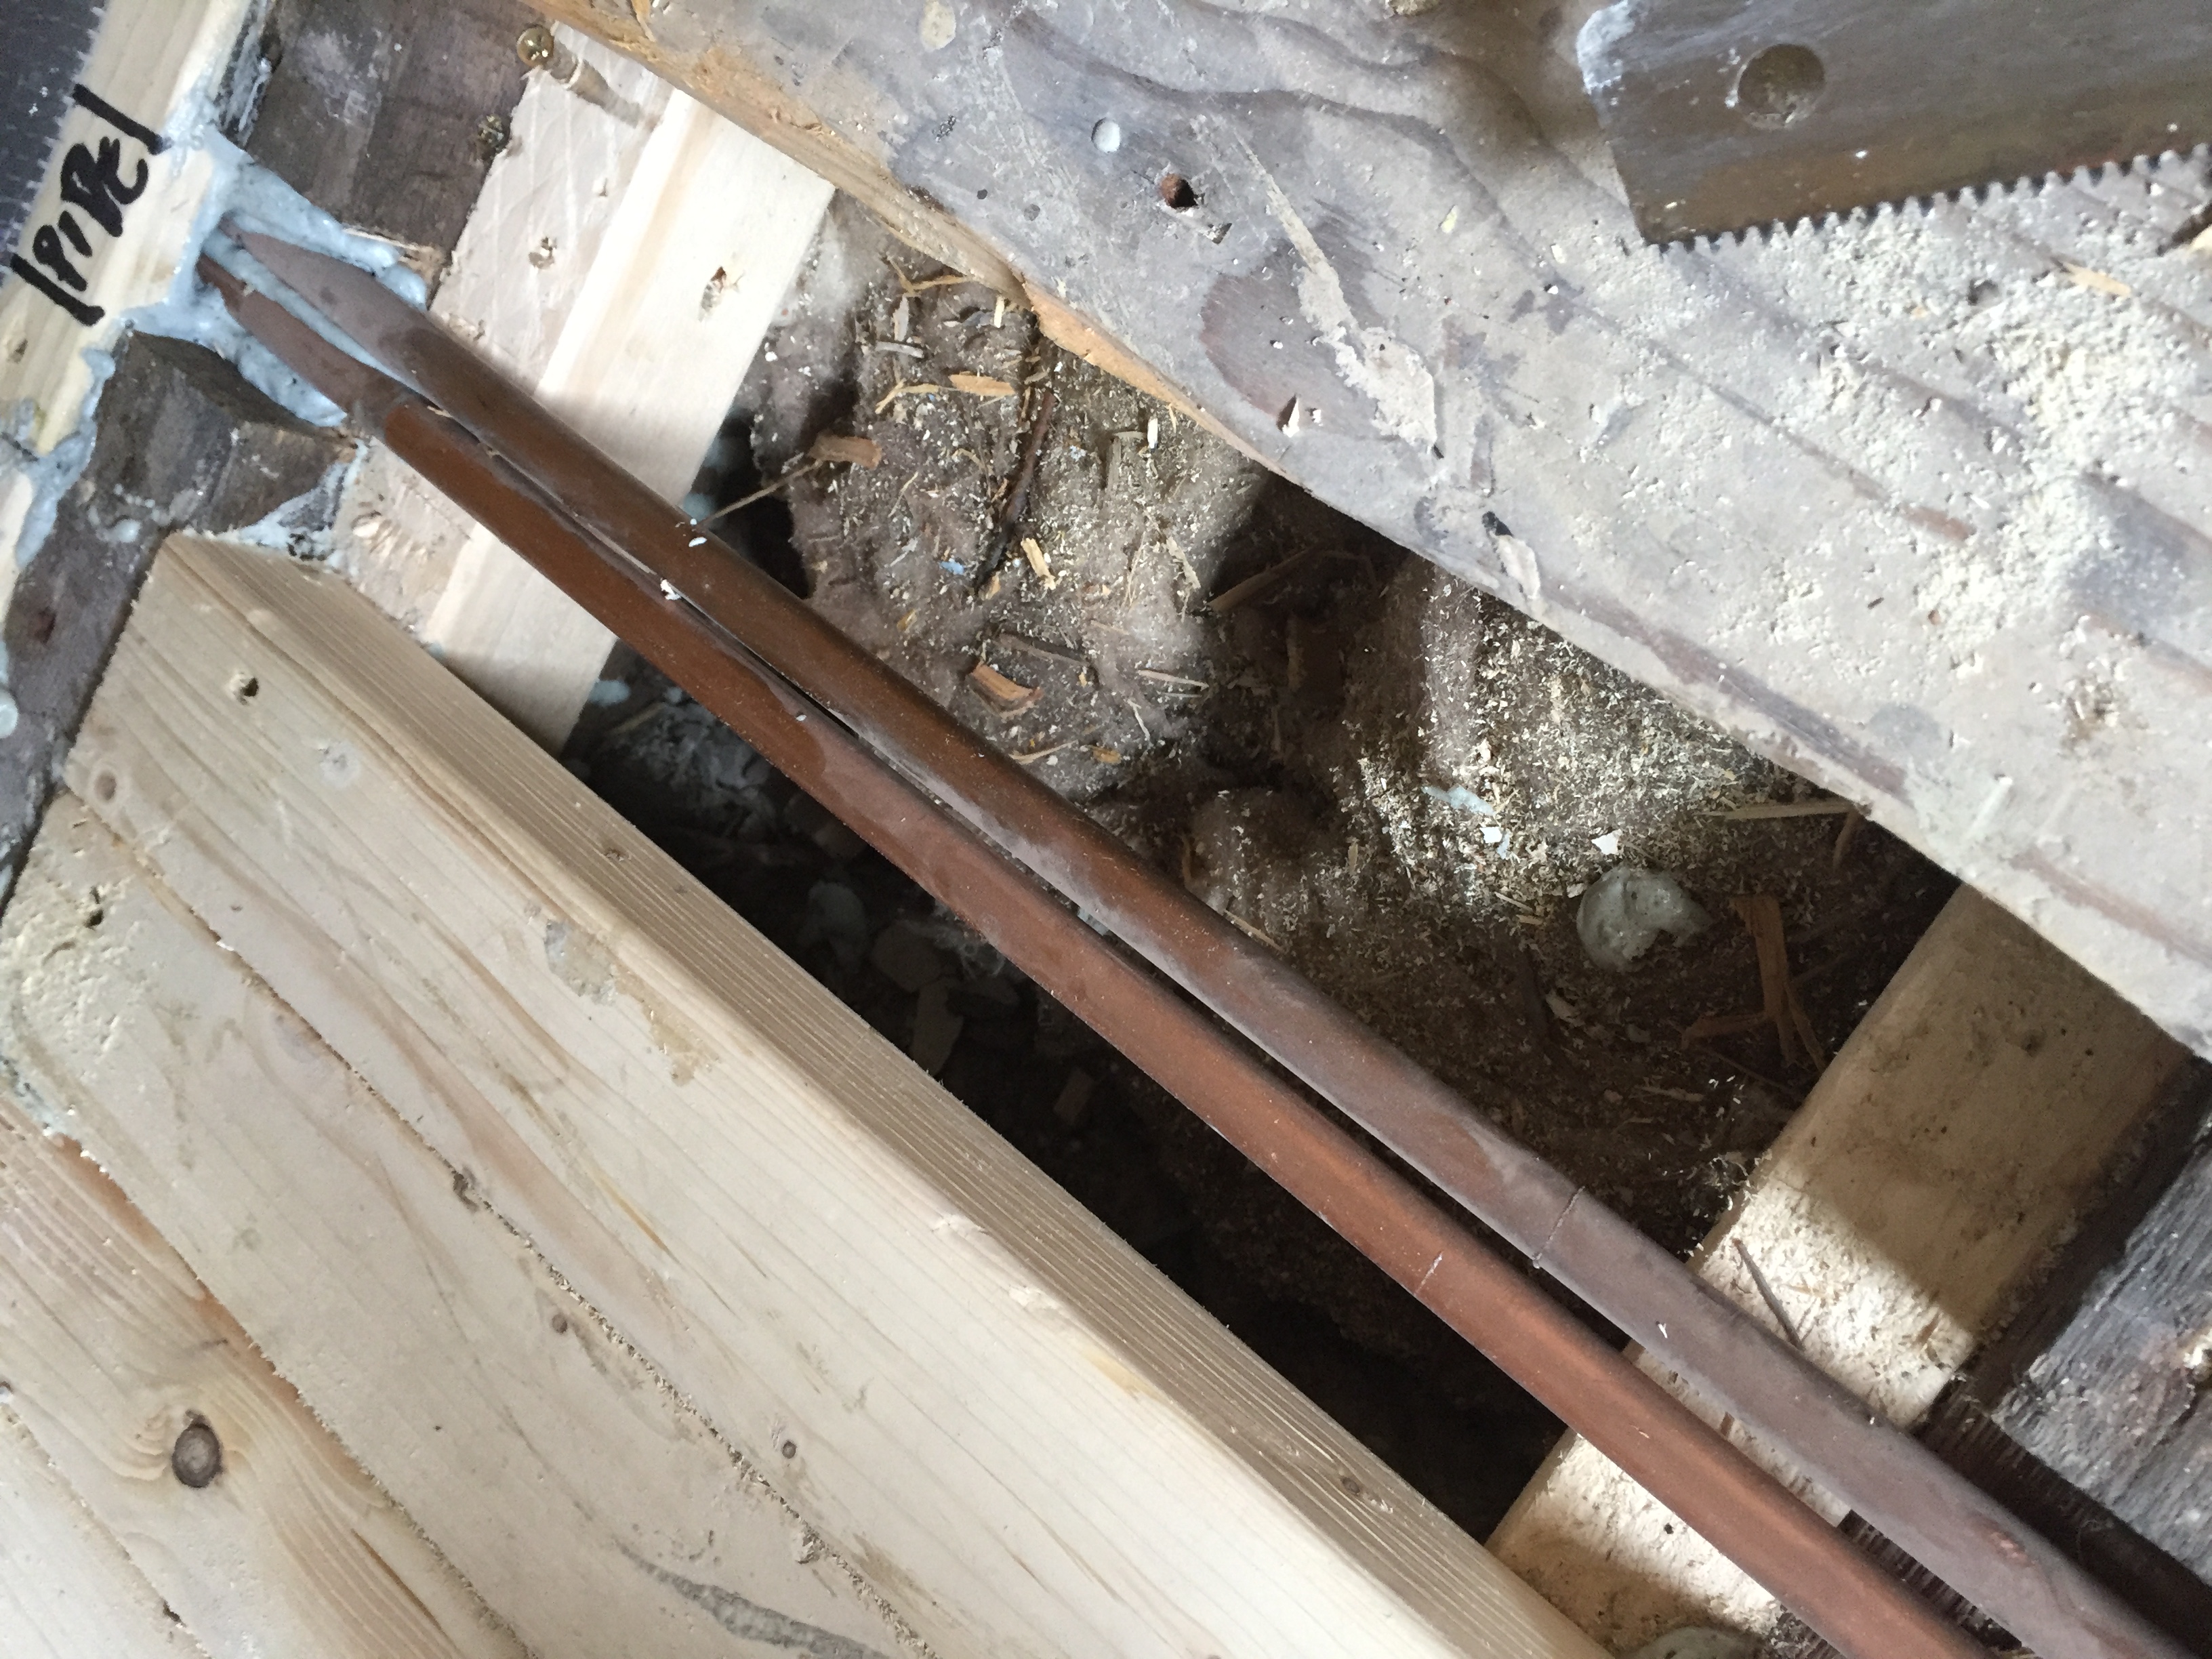
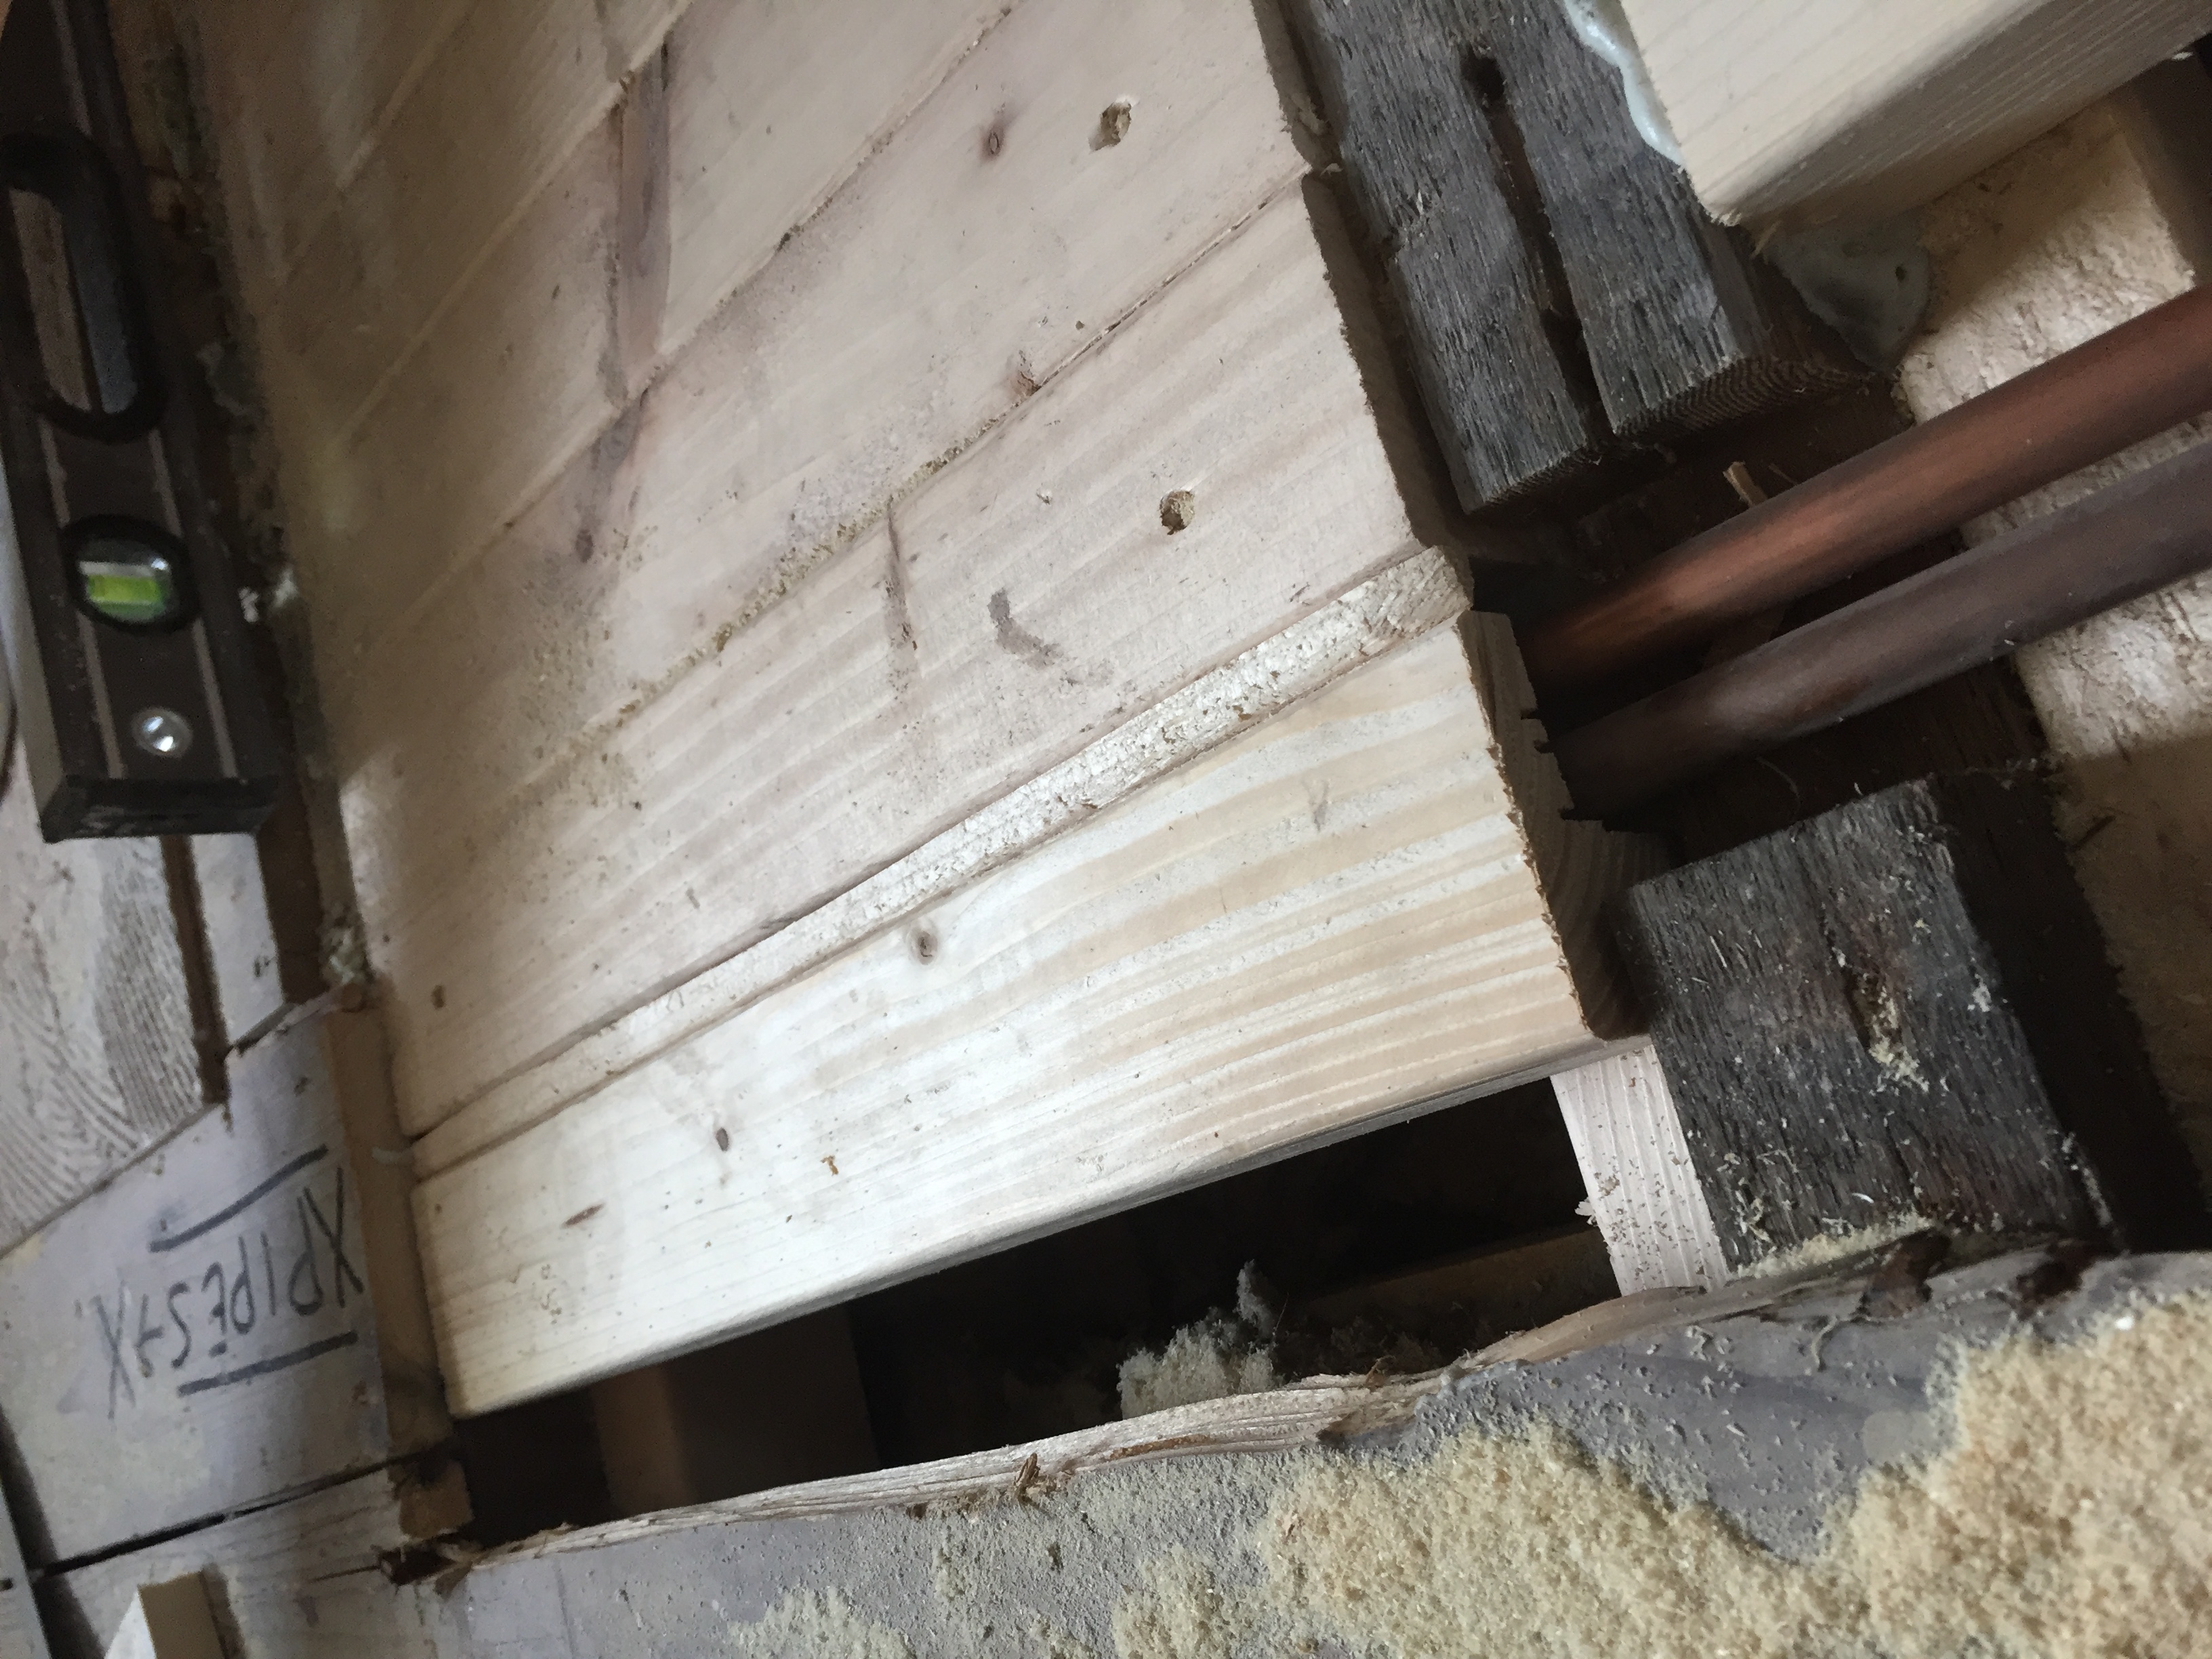
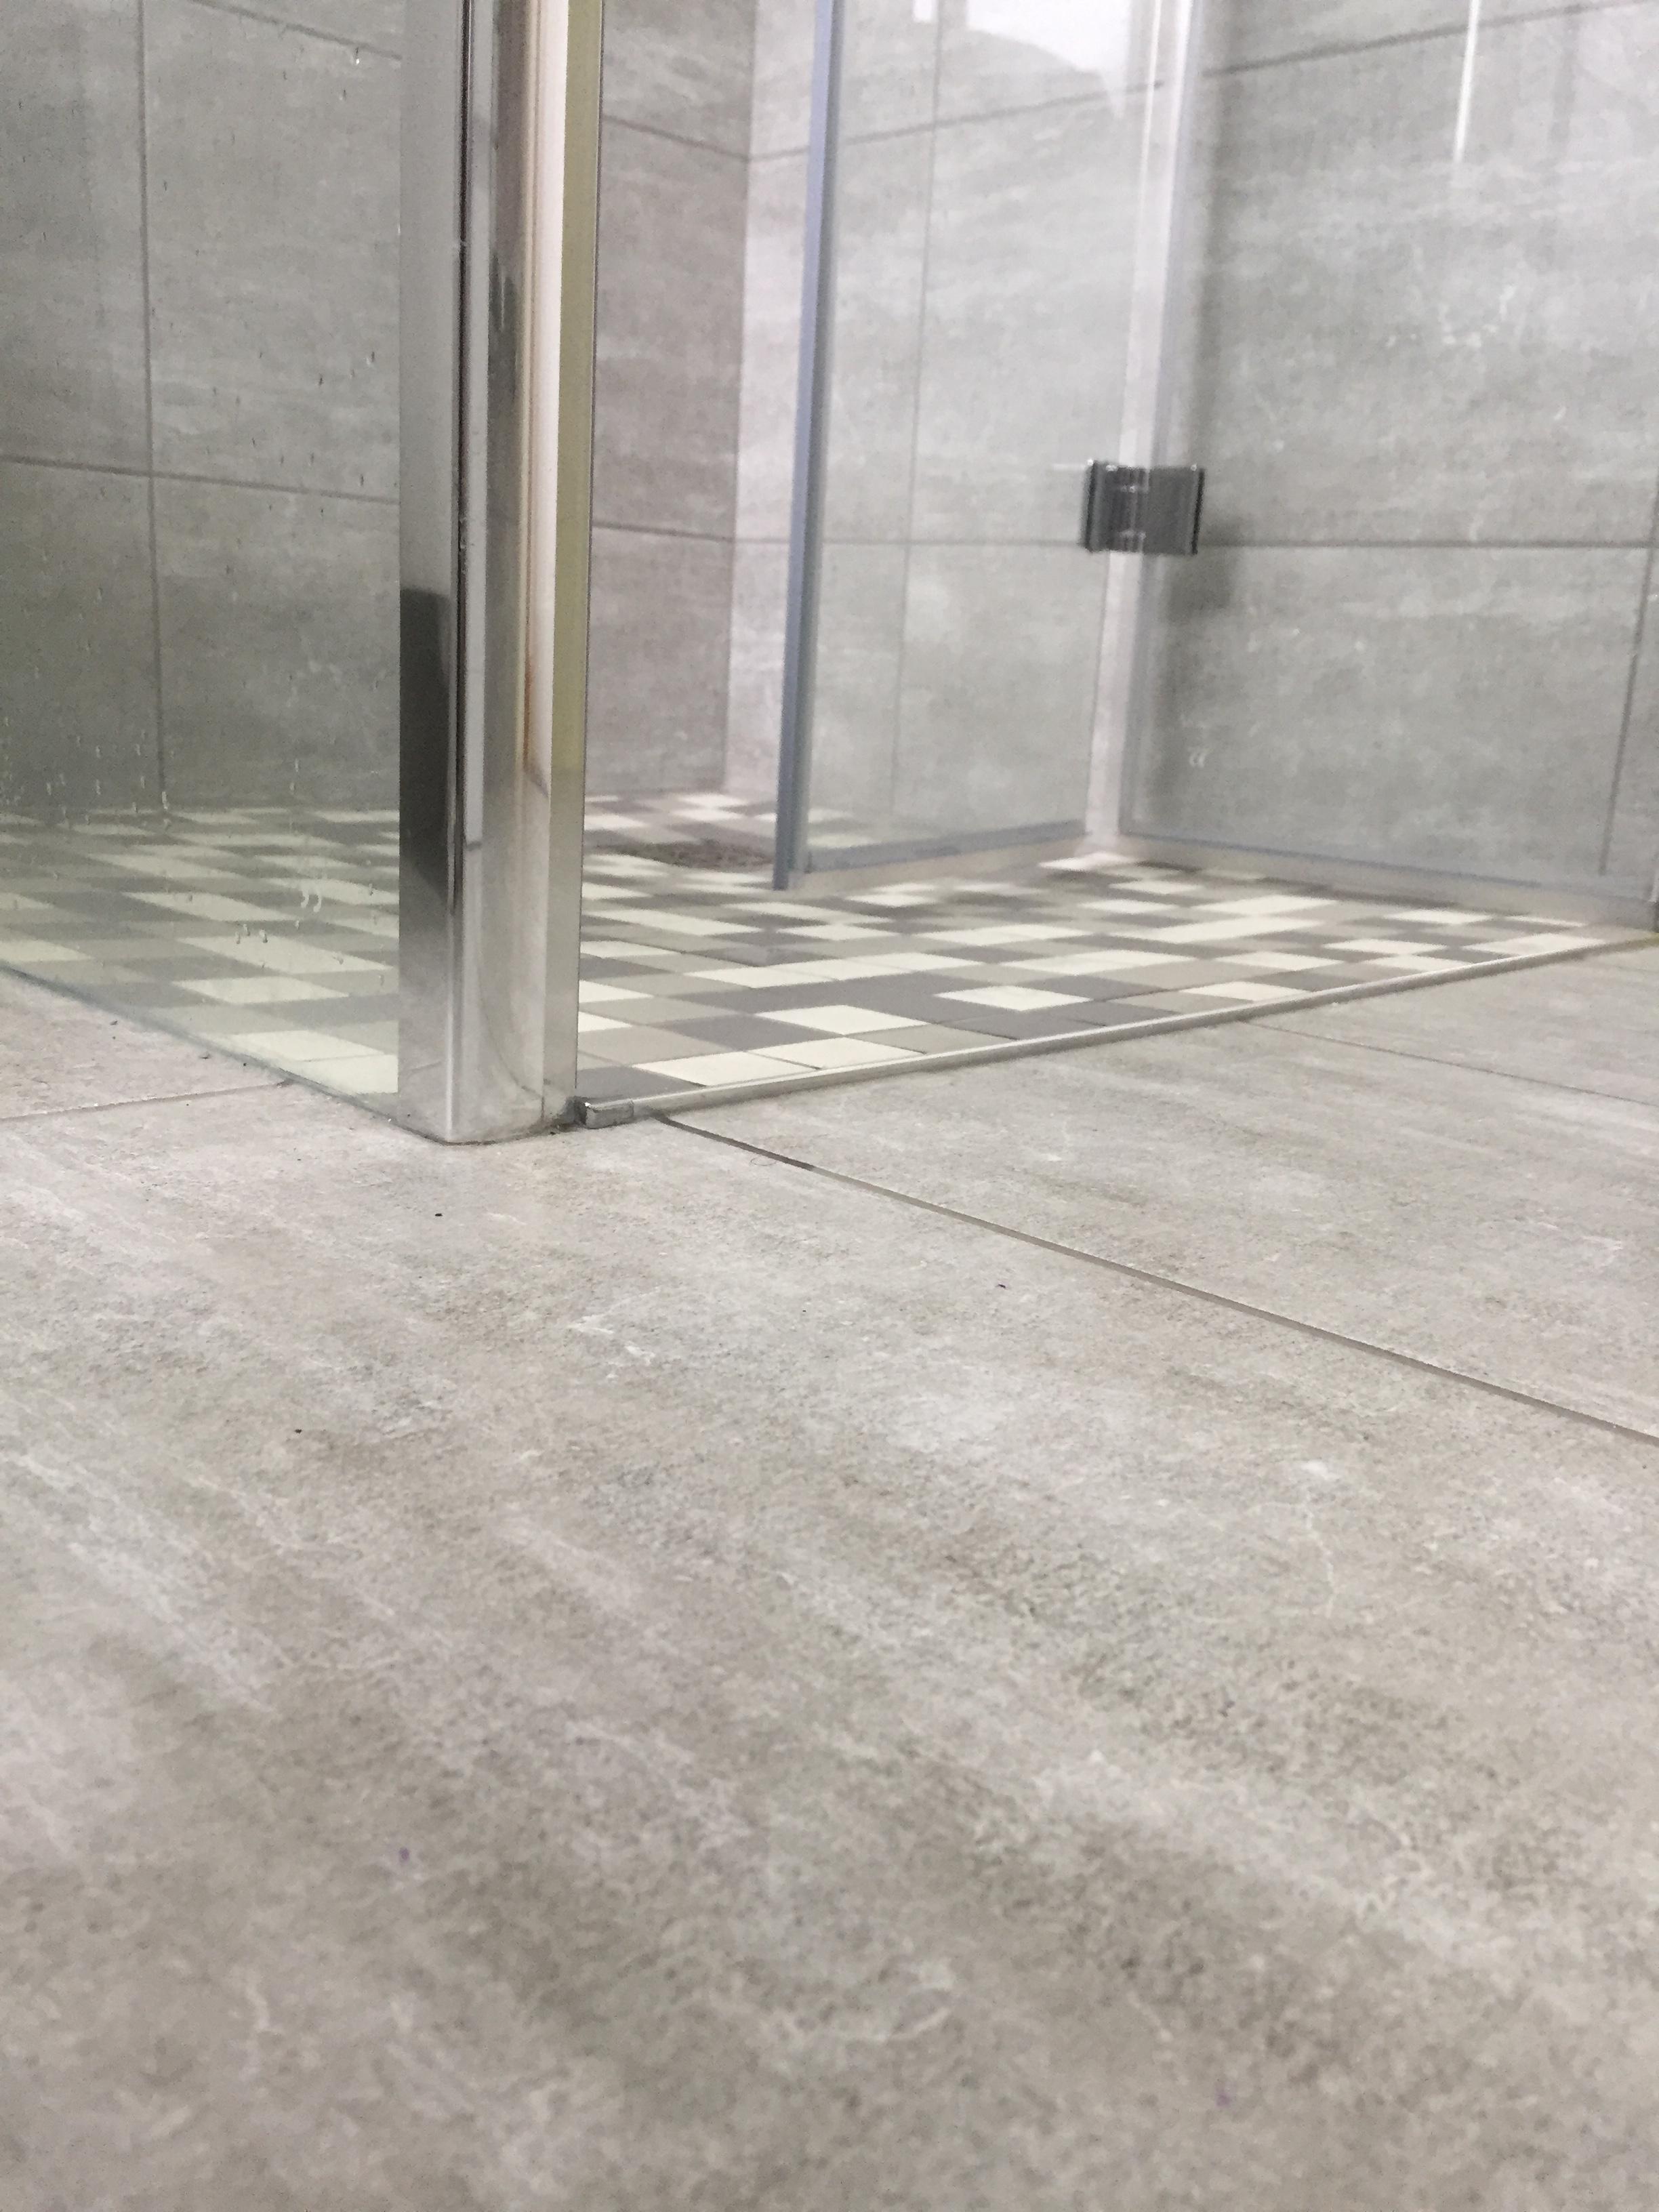
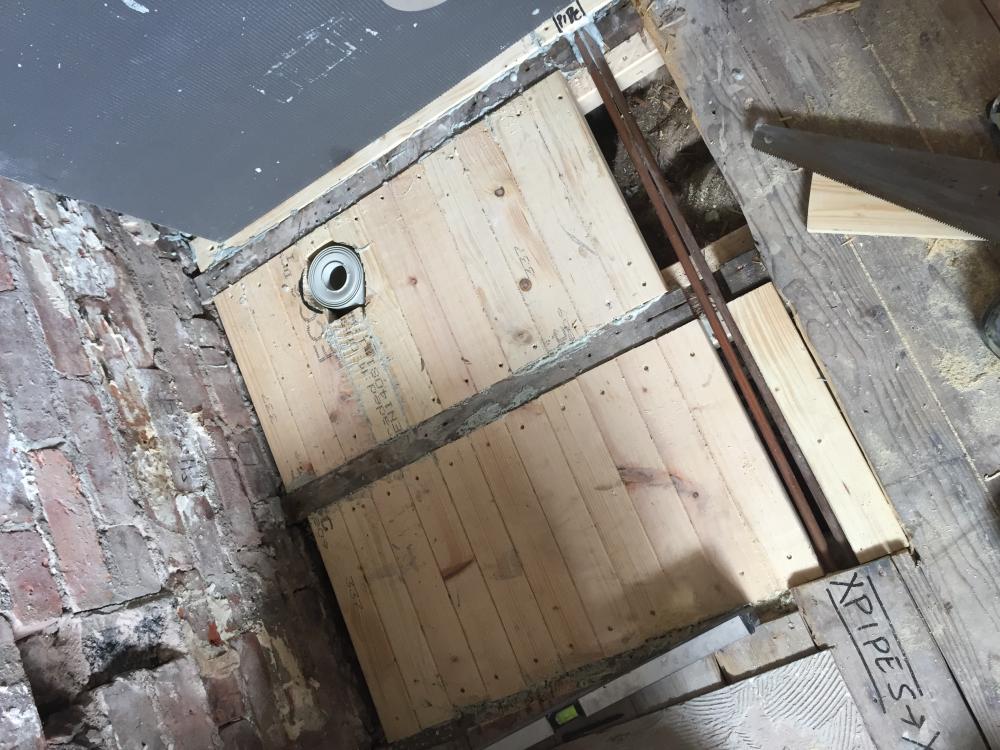
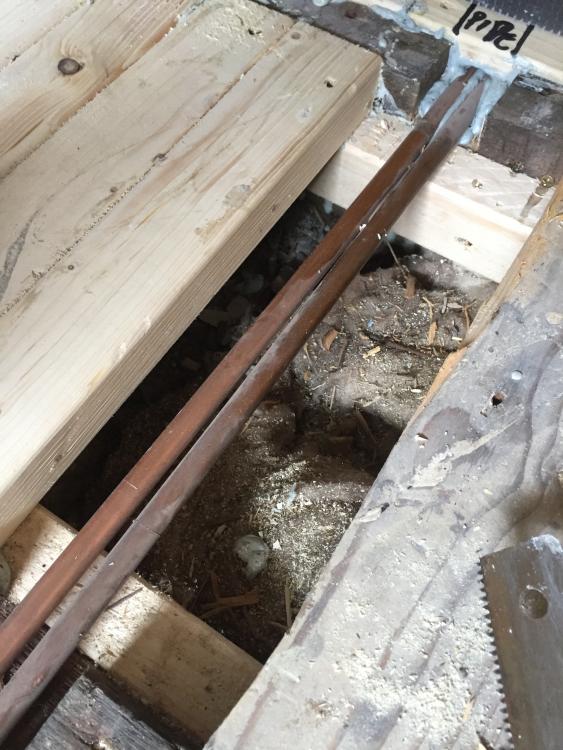
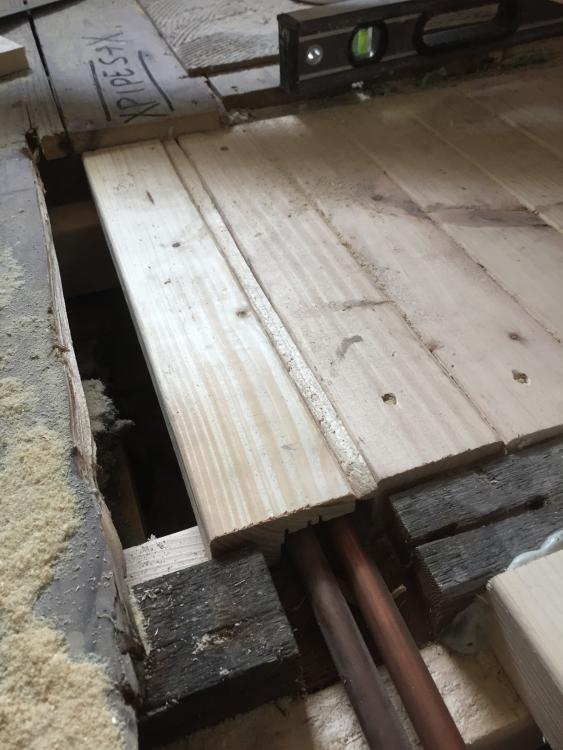
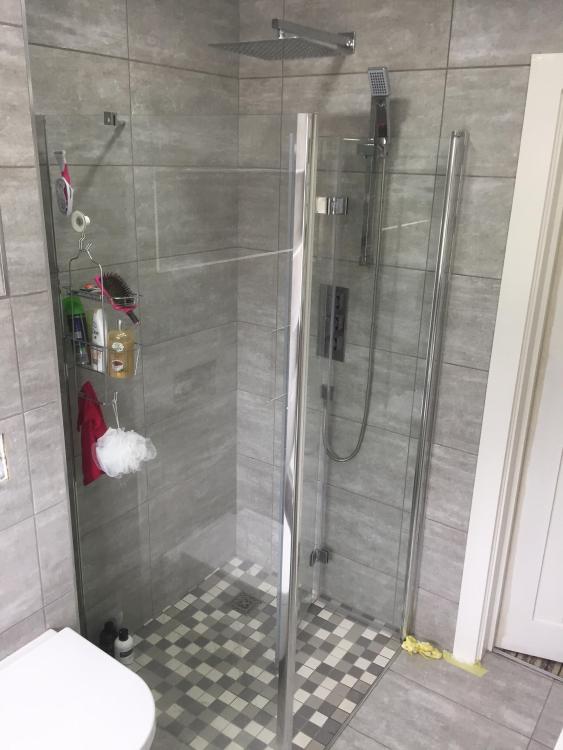
How it looks infilled with 3x2". Cuts around the waste to allow a bit of movement when connecting to the tray. Troughing out for pipework / cables etc. Happy days. Plenty of acoustic roll so folk downstairs can't hear the shower or tall people peeing . End result. Not a wetroom as this was a very small room. But all tanked and membraned so as good as. Nice level entry shower, compared to the 160mm step to get into the old one

 1 point
 -
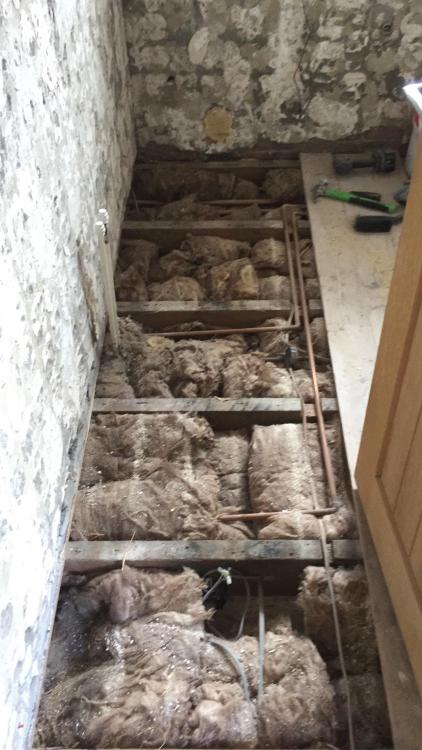
If I'm reading this correctly then the middle of the room is the issue. What I've done previously, so as not to raise the floor level at the door, is to lift all the floorboards and get the room back to the exposed joists. I then fitted full lengths of 3x2" on the inside face of each joist, as parallel ( sister joist ) rails, set to the height of the lowest joist -18mm. A laser is your friend here for sure, but you can use a level and get good results ( like the good old days ). So say the lowest point is your doorway. You measure down 18mm from the top of the joist, and clamp a full length of 3x2" accordingly, level it as required making sure your start point stays exactly where it should be. Double check as this will dictate the rest of the floor level ! Screw that to the joist using 10x3's and put plenty in. Gluing will help too if you can work quickly enough. Cut 2 pieces of 3x2" narrow enough to fit between the joists. Clamp another full length of 3x2" opposite the first one and repeat with levelling. Sit the off cut of 3x2" from the first rail onto the next and then sit your 600mm level onto that. That'll allow you to make sure that each rail on each joist is level with the previous one. The purpose of the 3x2" off-cuts is to allow you to bridge over the joists when you get to the middle of the room, where you should find the joists higher than the rails plus 18mm ply. Repeat until you've railed the whole room, then get a piece of 18mm ply on its side sat on the rails, to use as a guide for trimming the joist tops down to suit with an electric plane. Once you've got level rails throughout, and they're 18mm lower than the lowest point in the room, you can then rip 18mm plywood down to i film inbetween the joists. Once that's done, ( plumbing and tray etc omitted at this point as it's a separate subject ), you can glue and screw 6mm plywood in full sheets over the top of the lot. Loads of PVA spread around with a floor layers comb ( 3mm notch ) and 1"x8's BZP screws at 120mm centres to fix the ply down nice and tight. By the time you tile, and posibly UTH ( under tile heating ) wire too, you'll not have pushed very far past the existing door level. You can plane the joist tops down after the plywood goes down, up to you. My 2 cents. PS if the joists are at all loose or excessive movement is detected, alter the 18mm dinension to 38mm and I fill with 3x2" on flat instead of the ply. You can park a car on that1 point
-
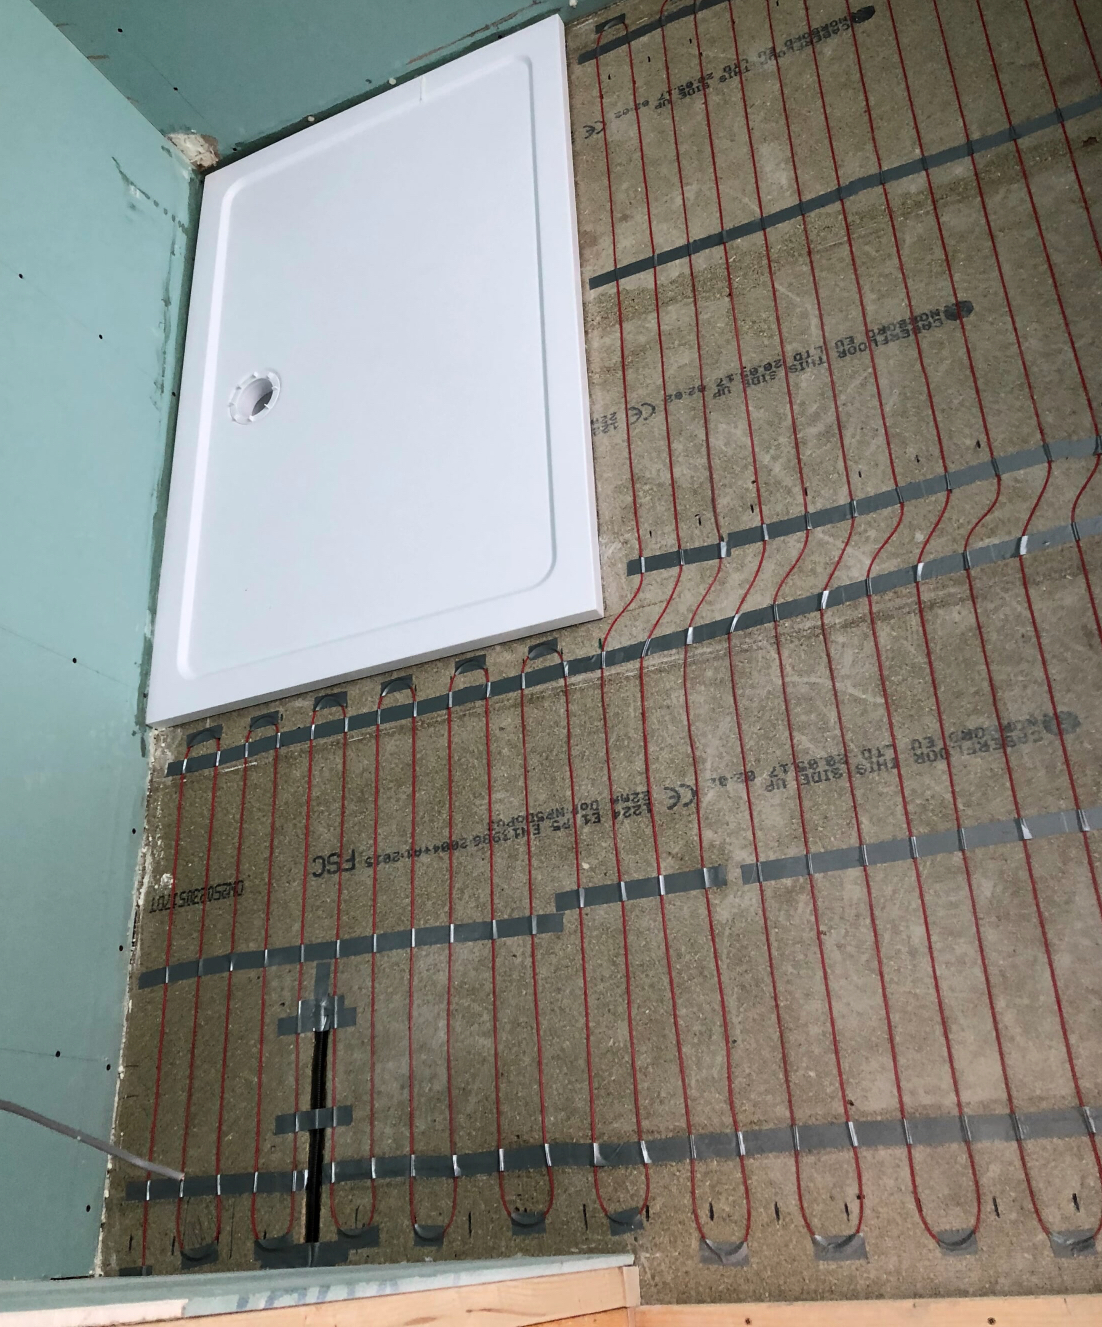
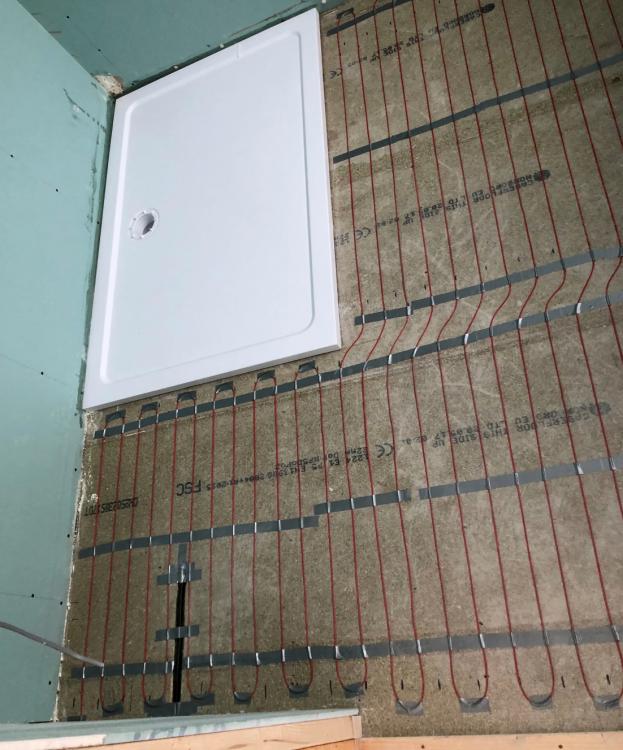
I really don’t like the mats, loose wire every time for me. You can get it exactly where you want it and tape it down well. Then self leveller over the top. Much tidier (done today):
 1 point
 -
Yet another community based IOT air pollution sensor project, http://www.hackair.eu/hackair-home-v2/ - Air quality sensor: Nova PM SDS011, Temperature and humidity sensor: DHT22, Microcontroller: Wemos D1 mini (based on an earlier iteration using an Arduino). They upload data every 10 minutes, and have public maps online at https://platform.hackair.eu/ - looks like a scattering over England and Wales, but none in Scotland so far. They also have a hackAIR portable design, which can be built with SEN0177, SDS011 or PPD42 particle sensors. The code is on GitHub at https://github.com/hackair-project/hackAir-Arduino and https://github.com/hackair-project/hackAIR-PSoC and they have lots of reports at http://www.hackair.eu/deliverables/ (presumably mandated by their EU funding?) including some information on testing the particle sensors.1 point