Leaderboard


Popular Content
Showing content with the highest reputation on 08/13/17 in all areas
-
Well, went to visit Cumbrian Nicks build yesterday. Straight out of Beatrix Potter, site to die for, so secluded I couldn't find it when I was a few hundred yards away, innovative design, more cabling than a Google Data Centre, and within walking distance of a hidden gem of a village. The kind of place where every winter you'd fervently wish to get snowed in. It was a real treat. Thanks Nick. ===================================================== The deed is done, we parted company with the builder on Friday on good if not cordial terms. I went straight out and bought £300 worth of safety gear: harnesses , strops, carabiners. I feel so much better for having done that. Watching the builders waltzing nonchalantly waltzing around on the scaffolding with an unprotected 30 foot drop on one side made my fingertips sizzle. I did point it out several times, but got laughed at. I'm mulling over getting a safety net or two. Durisol Rep is coming on Tuesday, plus one of his mates, and we are pouring at 11. O'Reilly's pump is arriving at 10. I'm busy today making a 'Flush-Pond' for the excess concrete from the next two pours. At least then, we'll have a nice hard temporary working surface for the rest of the build. Builder's mate today? Debbie . Prettier than all the others.9 points
-
In this entry I'm going to discuss in more detail how I came to choose our heating and hot water system, and how it has performed to date. As other forum members have found, deciding which fuel source and type of technology to use in a low energy house, is a challenge given the different requirements each of us has. We had three stipulations – low running costs, hot water available on tap 24/7 and maintenance of the whole house at an even and constant temperature 24/7. Having calculated our heating demand, taking the impact of solar gain, incidental household gain, human occupancy and wind speed into account, I was confident that I had a good indication of the amount of heating I would need. I was also confident, based on historical use, of the amount of hot water we as a family use. Living in an area without mains gas, my options were somewhat limited to using either oil or electricity as my fuel source. LPG was initially considered but discounted due to the lack of availability in my location. As part of the decision making process, I spent a fair amount of time carrying out a cost comparison of both oil and electricity based heating and hot water systems, using 500kWh increments from 2500kWh to 5000kWh. I considered direct electric of various type, oil and air source heat pumps, both air to water and air to air. Solar PV was also considered and costed in terms of each method of heat and hot water delivery. In line with previous cost comparisons that I had carried out, I found direct electric to be the most cost effective in terms of capital outlay and running costs when both heating and hot water demand were less than 2500 kilowatt hours each year. As heating requirement and hot water requirement increases so the balance began to tip in favour of other technologies. Oil was quickly dropped from the list as it became apparent that any rise in fuel prices over then then low point, would significantly increase running costs. Having conducted significant investigation in respect of the viability of Sunamp units, although attractive in many ways, I found that the capital outlay and running cost was simply too high to be able to justify, given that the main benefit (low heat losses) were not as critical for me as they have been for others. Part of that decision was also driven by the cost of fitting Solar PV, which in our remote location was extortionate. I looked into a non MCS DIY install, but couldn’t make the figures stack up, the break-even point being around 17 years. Much as I wanted to install PV, it didn't make any sense financially. In time, I hope to revisit PV, if and when battery storage reduces the break-even point to a more realistic timescale. A wind turbine, given our location and the virtually constant presence of wind, would have been an ideal energy source and paired with Sunamp technology, probably unbeatable. The proximity of nearby houses ruled out that option in terms of planning permission. Air to Air heat pumps were ruled out based on my own experience of them and a road test at a friends house. Neither myself or my good lady found them particularly pleasant as a heat source. Having gone through the list of options, an air to water air source heat pump, paired with a large UVC and UFH for the distribution of heat, represented the best balance in terms of capital outlay, running costs and crucially, comfort and convenience. We opted for a package from Mitsubishi Ecodan, an 8.5kW heat pump and 300 litre pre-plumbed cylinder fitted with the Mitsubishi FTC5 control panel. Given our location, we opted for the coastal model, which is treated with acrylic resin for enhanced corrosion resistance. Whilst a pre-plumbed cylinder is more expensive than a bare cylinder and associated parts, after taking labour (plumber and electrician) into account, I found there was very little difference in cost. I sourced the package from a trade supplier, Secon Solar. I found their price list while searching online and having phoned the company, and perhaps fortuitously speaking to the managing director of the firm, found they were quite happy to sell me package at trade / installer price, the bonus being that delivery to my location was free. The package is configured for the UK market, the only difference to the system as sold in the rest of Europe (AFAIK) being that the cooling function of the heat pump is disabled so that the product complies with MCS approval for claiming RHI. It is however a simple task to activate the cooling function, by flipping a dip switch in the control module on the cylinder. Cooling can then be controlled from the master controller. As stated in an earlier blog entry, the heat pump and cylinder were fitted very quickly with simple connections on the plumbing side – flow and return from the ASHP, cold water, hot water and flow and return to the underfloor heating manifold. Electrical connections consisted of power to the ASHP, a cable from the ASHP to the control module and a plug-in controller. I had initially planned to have the cylinder in the utility room close to the ASHP Monobloc, but changed the location to a service cupboard in the middle of the house, to reduce internal DHW pipe runs. This does mean a 15 metre pipe run for flow and return to the ASHP, but as virtually all is within the insulated envelope, it doesn’t represent much of an issue, and does not appear to be having an adverse effect on performance. The ASHP Monobloc itself is located beside our back door, open to the elements. It seems happy enough where it is, despite the wind that traverses the space between house and garage walls. Locating the ASHP within the garage itself was an option but one I decided against simply on the grounds that I didn’t want to give up floor space within the garage. A timber housing for the ASHP is something we may look at in the future. We opted to fit individual room thermostats to all 3 bedrooms, to give us the option of being able to reduce the bedroom temperatures if we so wished. We have not used these and keep the whole house at one temperature 24/7, treating the underfloor heating as a single zone. At present I only have limited data as to how the heat pump has performed since moving in. On board energy metering (energy consumed and energy produced) shows the CoP for heating has ranged between 3.5 and 4. DHW is maintained at 47C-50C in the cylinder, boosted every fortnight to 60 degrees by the immersion on an anti-legionella cycle. To date the CoP for DHW is 2.4 As members know, heat pumps are best suited to the production of low temperature heat as opposed to the higher temperatures required for domestic hot water. Whilst the CoP for DHW is lower than that for heating, the cost per kWh of our DHW, based on a CoP of 2.4, is 5p, which is significantly better than an E7 electricity tariff. We may be taking a hit on efficiency, but in reality all of the other options would have cost us more. The 300 litre capacity of the cylinder means that we have plenty of hot water on tap and can comfortably run a full bath and still have sufficient left over for another person to shower. The ASHP is currently operating on a 24/7 basis, providing heat input to the UFH and topping off the DHW as and when it determines it needs to, at whatever flow temperature it determines. Whilst that does sound like a recipe for high bills and high flow temperatures, in practice, the heat pump delivers the lowest flow temp it can get away with to maintain our set temperature. If I so choose, the controller lets me set various parameters such as heating curves or set flow temperatures, or indeed a timed schedule for heating and DHW. However,as the system is operating efficiently on its auto setting, and providing the level of comfort we want, I see very little reason to mess around and create my own settings. If say electricity tariffs were to change from a single tariff to a dynamic tariff, then I would have the option of timing the heat pump operation to coincide with lower rate tariffs. After much thought, and indeed discussion on this forum, I opted for an 8.5 kWh ASHP over a 5 kWh ASHP, as I felt happier running a larger unit more gently than pushing a smaller capacity unit harder. A 5 kWh unit would probably have sufficed, and in time, may be what the current unit is replaced with when it reaches the end of its life. We haven’t yet had to activate the cooling function as any overheating (defined as internal temperatures over 23C) caused by solar gain, can, as modeled, be managed by natural cross ventilation. Neither have we found it necessary to constantly circulate the UFH to even out the house temperature / redistribute solar gain from one part of the house to the other. In the heating season, we found that there was sufficient circulation of the UFH during the heating cycle to maintain the house at an even temperature. Outwith the heating season, when solar gain is at its peak, the house zones itself, the bedroom section remaining slightly cooler than the public areas, very useful on a warm summers day. Overall I’m very happy and impressed with our system. It has, so far, delivered everything we have asked of it in terms of comfort and convenience, and the running costs are low. I have the capability to cool the house (via slab cooling) if I so wish, and the option to bolt on a second zone pack onto the pre-plumb cylinder if I ever found it necessary to install a second heating / cooling function – i.e. fan coil or duct heater / cooler. The one criticism that I have is about the controller thermostat function and its hysteresis - 1C increments only. A finer degree of control would have been preferable. Our installation was recently inspected by an MCS accreditor (our plumber is going through the accreditation process). In due course that will give us the option to apply for RHI, although that will be very much dependant on whether the figures stack up.2 points
-
I may be wrong @graeme m but I thought that using a "certified" product just short circuited part of the process as you didn't need to produce the paperwork to support the product specification..? @craig may be able to advise as that's his area of expertise.2 points
-
You've never had soup then ?2 points
-
Hi, Many of us have integral garages. My architect just assumed that we would use a fire rated internal door between the house and the garage. The door has to achieve three things though - fire resistance, security and insulation. Insulation - The garage and garage door are insulated and in my current house that tends to keep the garage temperature above 10C even when 0C outside. Thus the temperature differential between the two sides of the door will be low so heat loss will be less than on an external door. Fire resistance - Has to be 30minutes as per regs. Security - I have commented on many threads re security. In this area the main reason for house breaking is to try and steal your car. The garage has no side doors. I have sectional insulated steel doors being installed. These will use Sommer motors with a magnetic lock which can withstand 300kg of pressure. I am also having shot bolts put into the frames that I can lock if we are on holiday. But what about the door between the house and the garage. I believe that physical security is best. If you can't get into the garage you can't steel my cars, simple. I priced up Hormann steel integral garage doors the H3D and WAT40. They came in at £900 and £2300 which was a shocker. I could get a steel security door for around £300 as linked below. Or am I overthinking it. The door opens inwards into the house. If I use a 44mm solid core wooden fire door, other than maybe protecting the hinges and making sure the lock is secure is this enough as the door will be held against the frame on the garage side so hard to kick nor break through? Any thoughts? http://www.ajsteeldoors.co.uk/en/products/steel-security-doors/high-security-doors.html#/hinge_side_viewed_from_outside-lh/opening_viewed_from_outside-outwards/side_panel_1-please_select/fixing-brick_block_concrete/side_panel_2-please_select/overhead_panel-please_select/rain_drip-yes/security_trim_kit-yes/colour-ral_9003_signal_white_available_from_stock/letterbox-please_select/extra_keys-0/security_upgrade-level_2_stainless_steel_handles_security_cylinder/size_mm-895x20201 point
-
[pedant mode] Nice to hear that you weren't electrocuted (killed by an electric shock), but just got a survivable electric shock.[/pedant mode] MCBs can stick on, as can RCBOs I've found (I had a DP RCBO fail like this), and I suspect any device like this can fail, given the pressure on manufacturers to reduce cost. Personally, I never trust any switch or circuit breaker, and routinely test to make sure a circuit really is dead. Having said that, I've taken risks from time to time, by just relying on a single pole switch/breaker to "isolate" a circuit, but, to be frank, I still tend to treat any single pole switched circuit as if it were live, unless I've tested it to be sure it's not. Maybe I'm just a bit paranoid, but over the years I've developed a healthy respect for electricity, having had a few near misses.1 point
-
Architect can spec what he wants ..!! Building Control will only sign off what is correct so they are the ones to consult. If you say you are building it to the detail as shown in BS5250 as per the BBA certificate for the product then you can't exactly go wrong ..!!!1 point
-
I've just ordered a steel door from AJ Doors as per that link. Will be the second one I've fitted and they are fantastic pieces of kit right from the fitters keys through to the quality of the handles and finish. Getting through one will make a lot of noise - pretty much the only way is a grinder through the door itself or cutting every bolt holding it in. Powder coat finish is very good - if needed you could make it part of a pair with the inner being an "ordinary" internal door and the garage side being this one.1 point
-
Because the big bad BCO says so! I dunno it's just standard1 point
-
No but I'm ordering these ... OxyLED Motion Sensor Closet Lightshttps://www.amazon.co.uk/dp/B01IGRCEIY/ref=cm_sw_r_cp_api_sS3GzbXVZMXP3 Easier than hard wiring and charge them whenever they need it.1 point
-
I've only just started thinking about Windows and I'm now worried!1 point
-
Don't get to hung up on the fact your Windows have to be up to passiv standard unless you are going for the full on certified route. You can quite easily blow a massive hole in your budget with Windows and leave you skimping else where. Set yourself a budget and stick to it. Even 2g Windows now are of a pretty high standard. Not much point in having passiv standard Windows and the rest of the house just meeting building regs.1 point
-
The night ours were delivered, I couldn't sleep due to completely irrational visions of someone backing a truck up and stealing them all from the driveway. I therefore drove over and slept in the freezing cold car. Seemed like a reasonable solution at the time!1 point
-
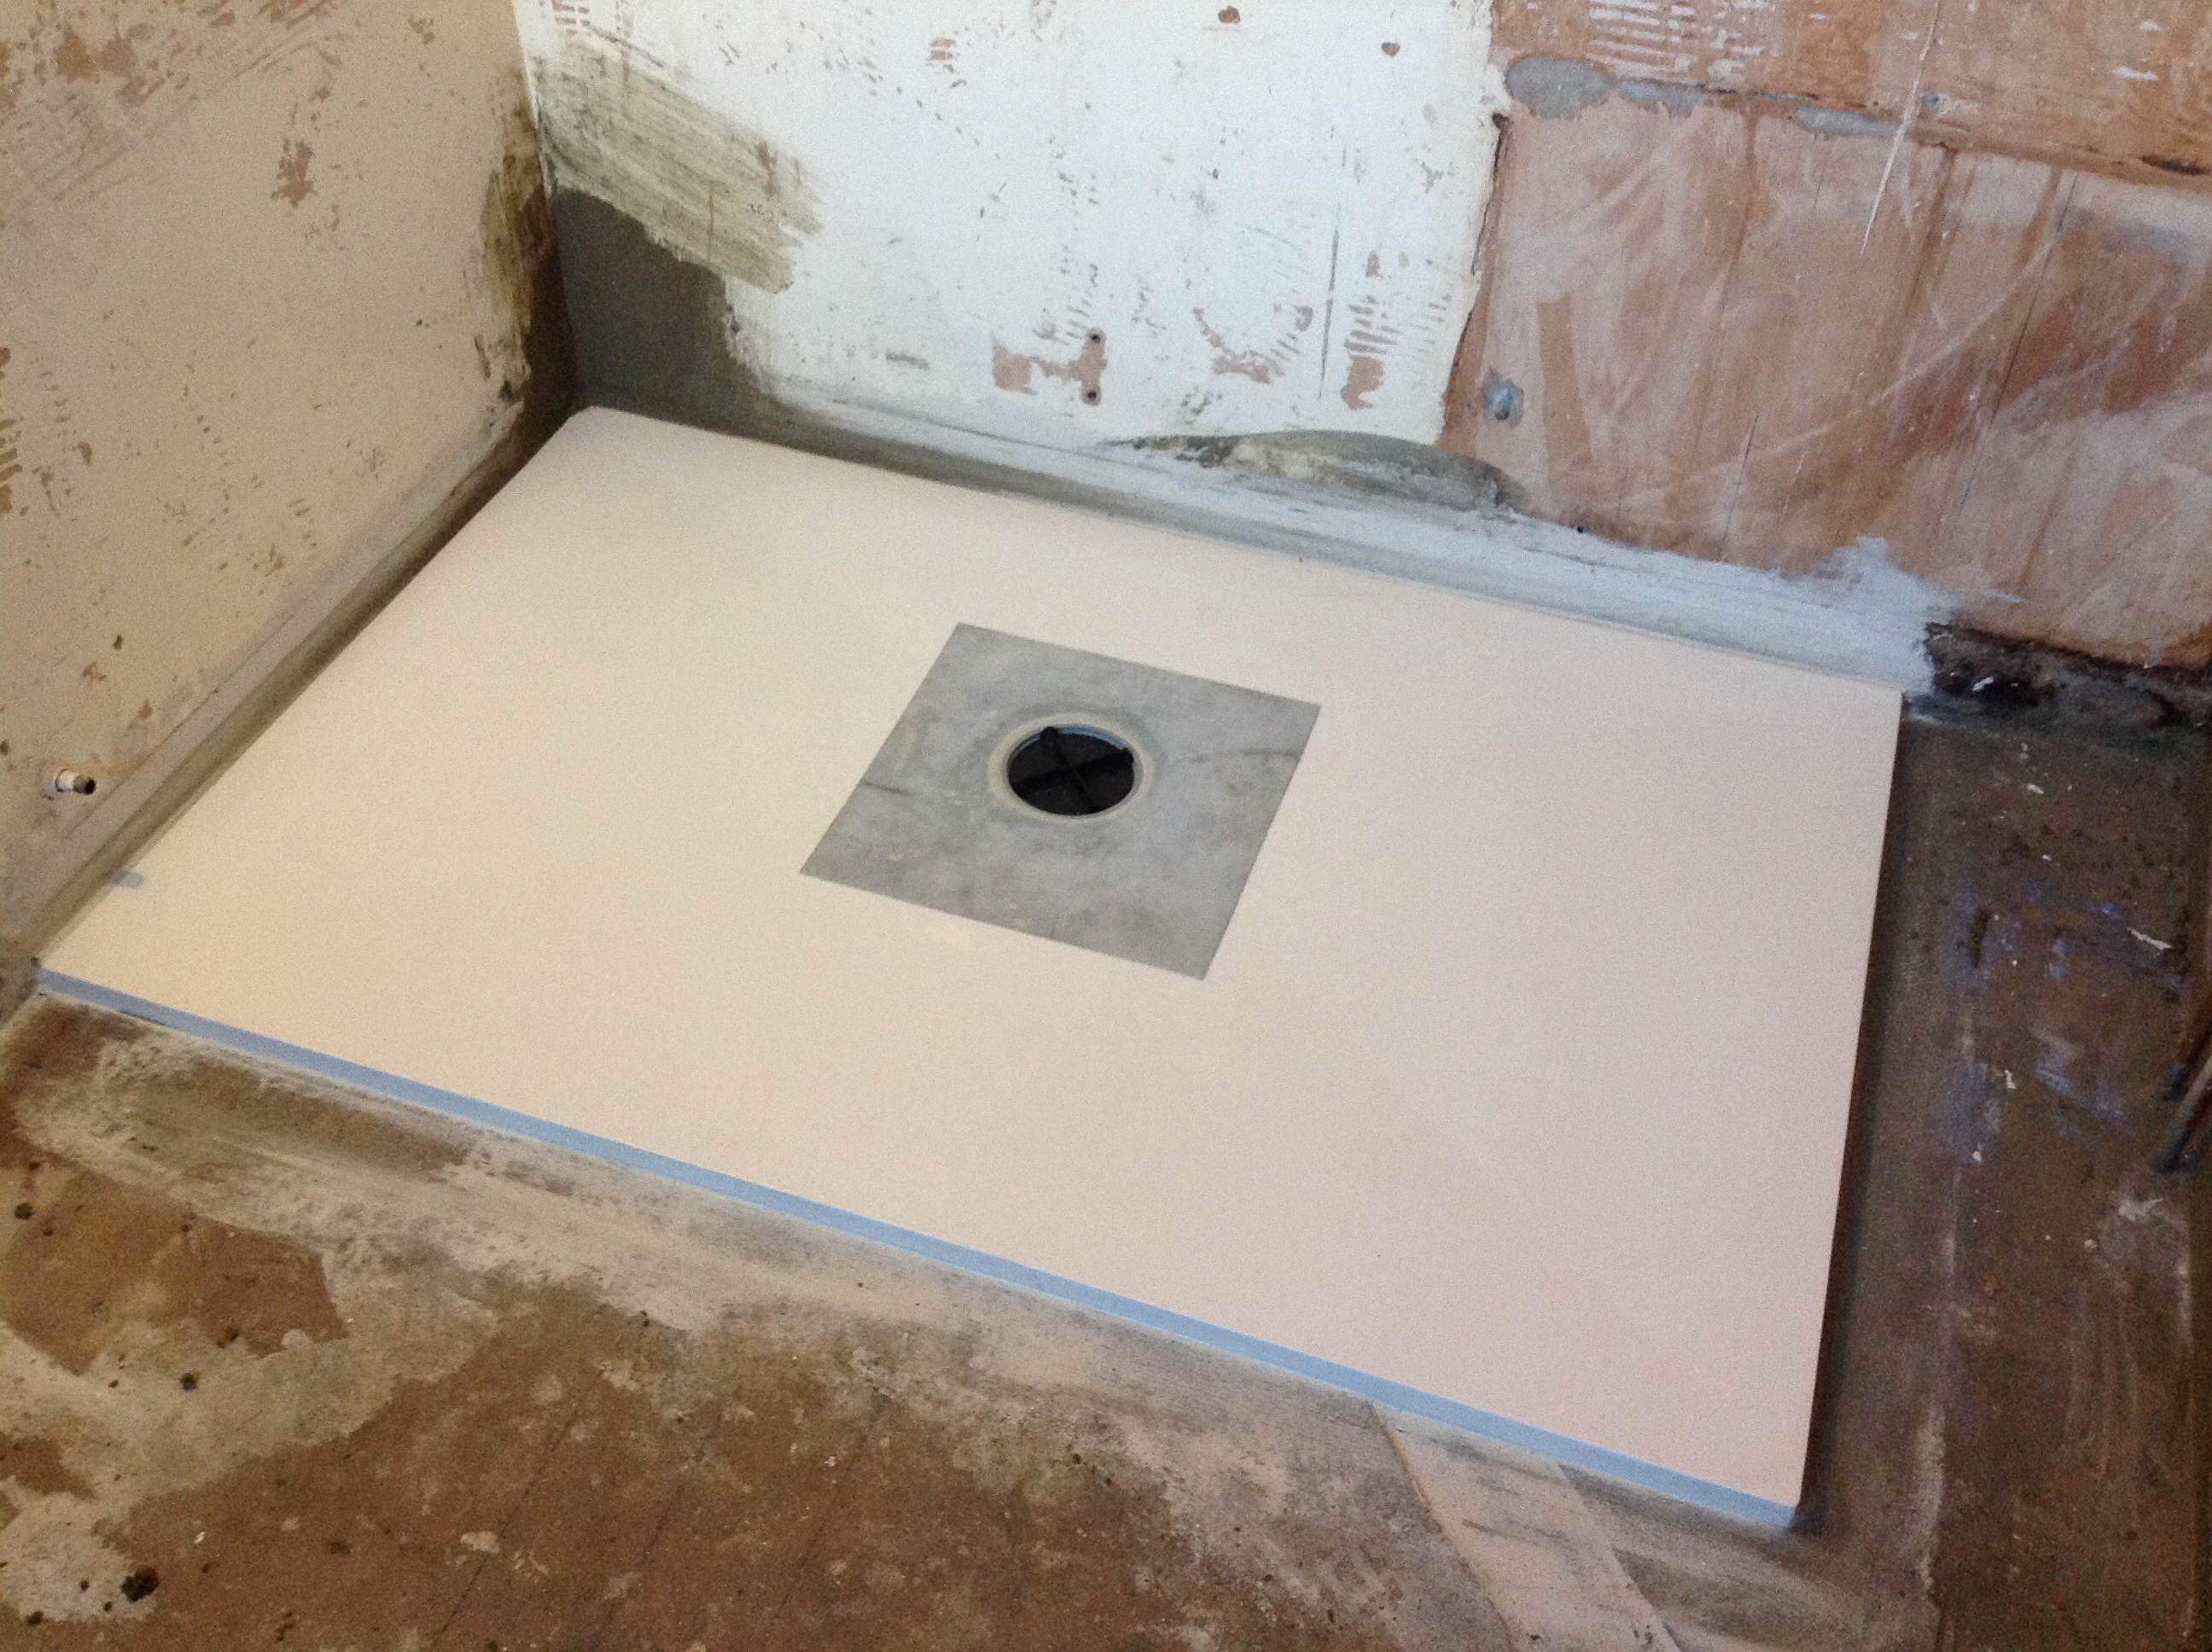
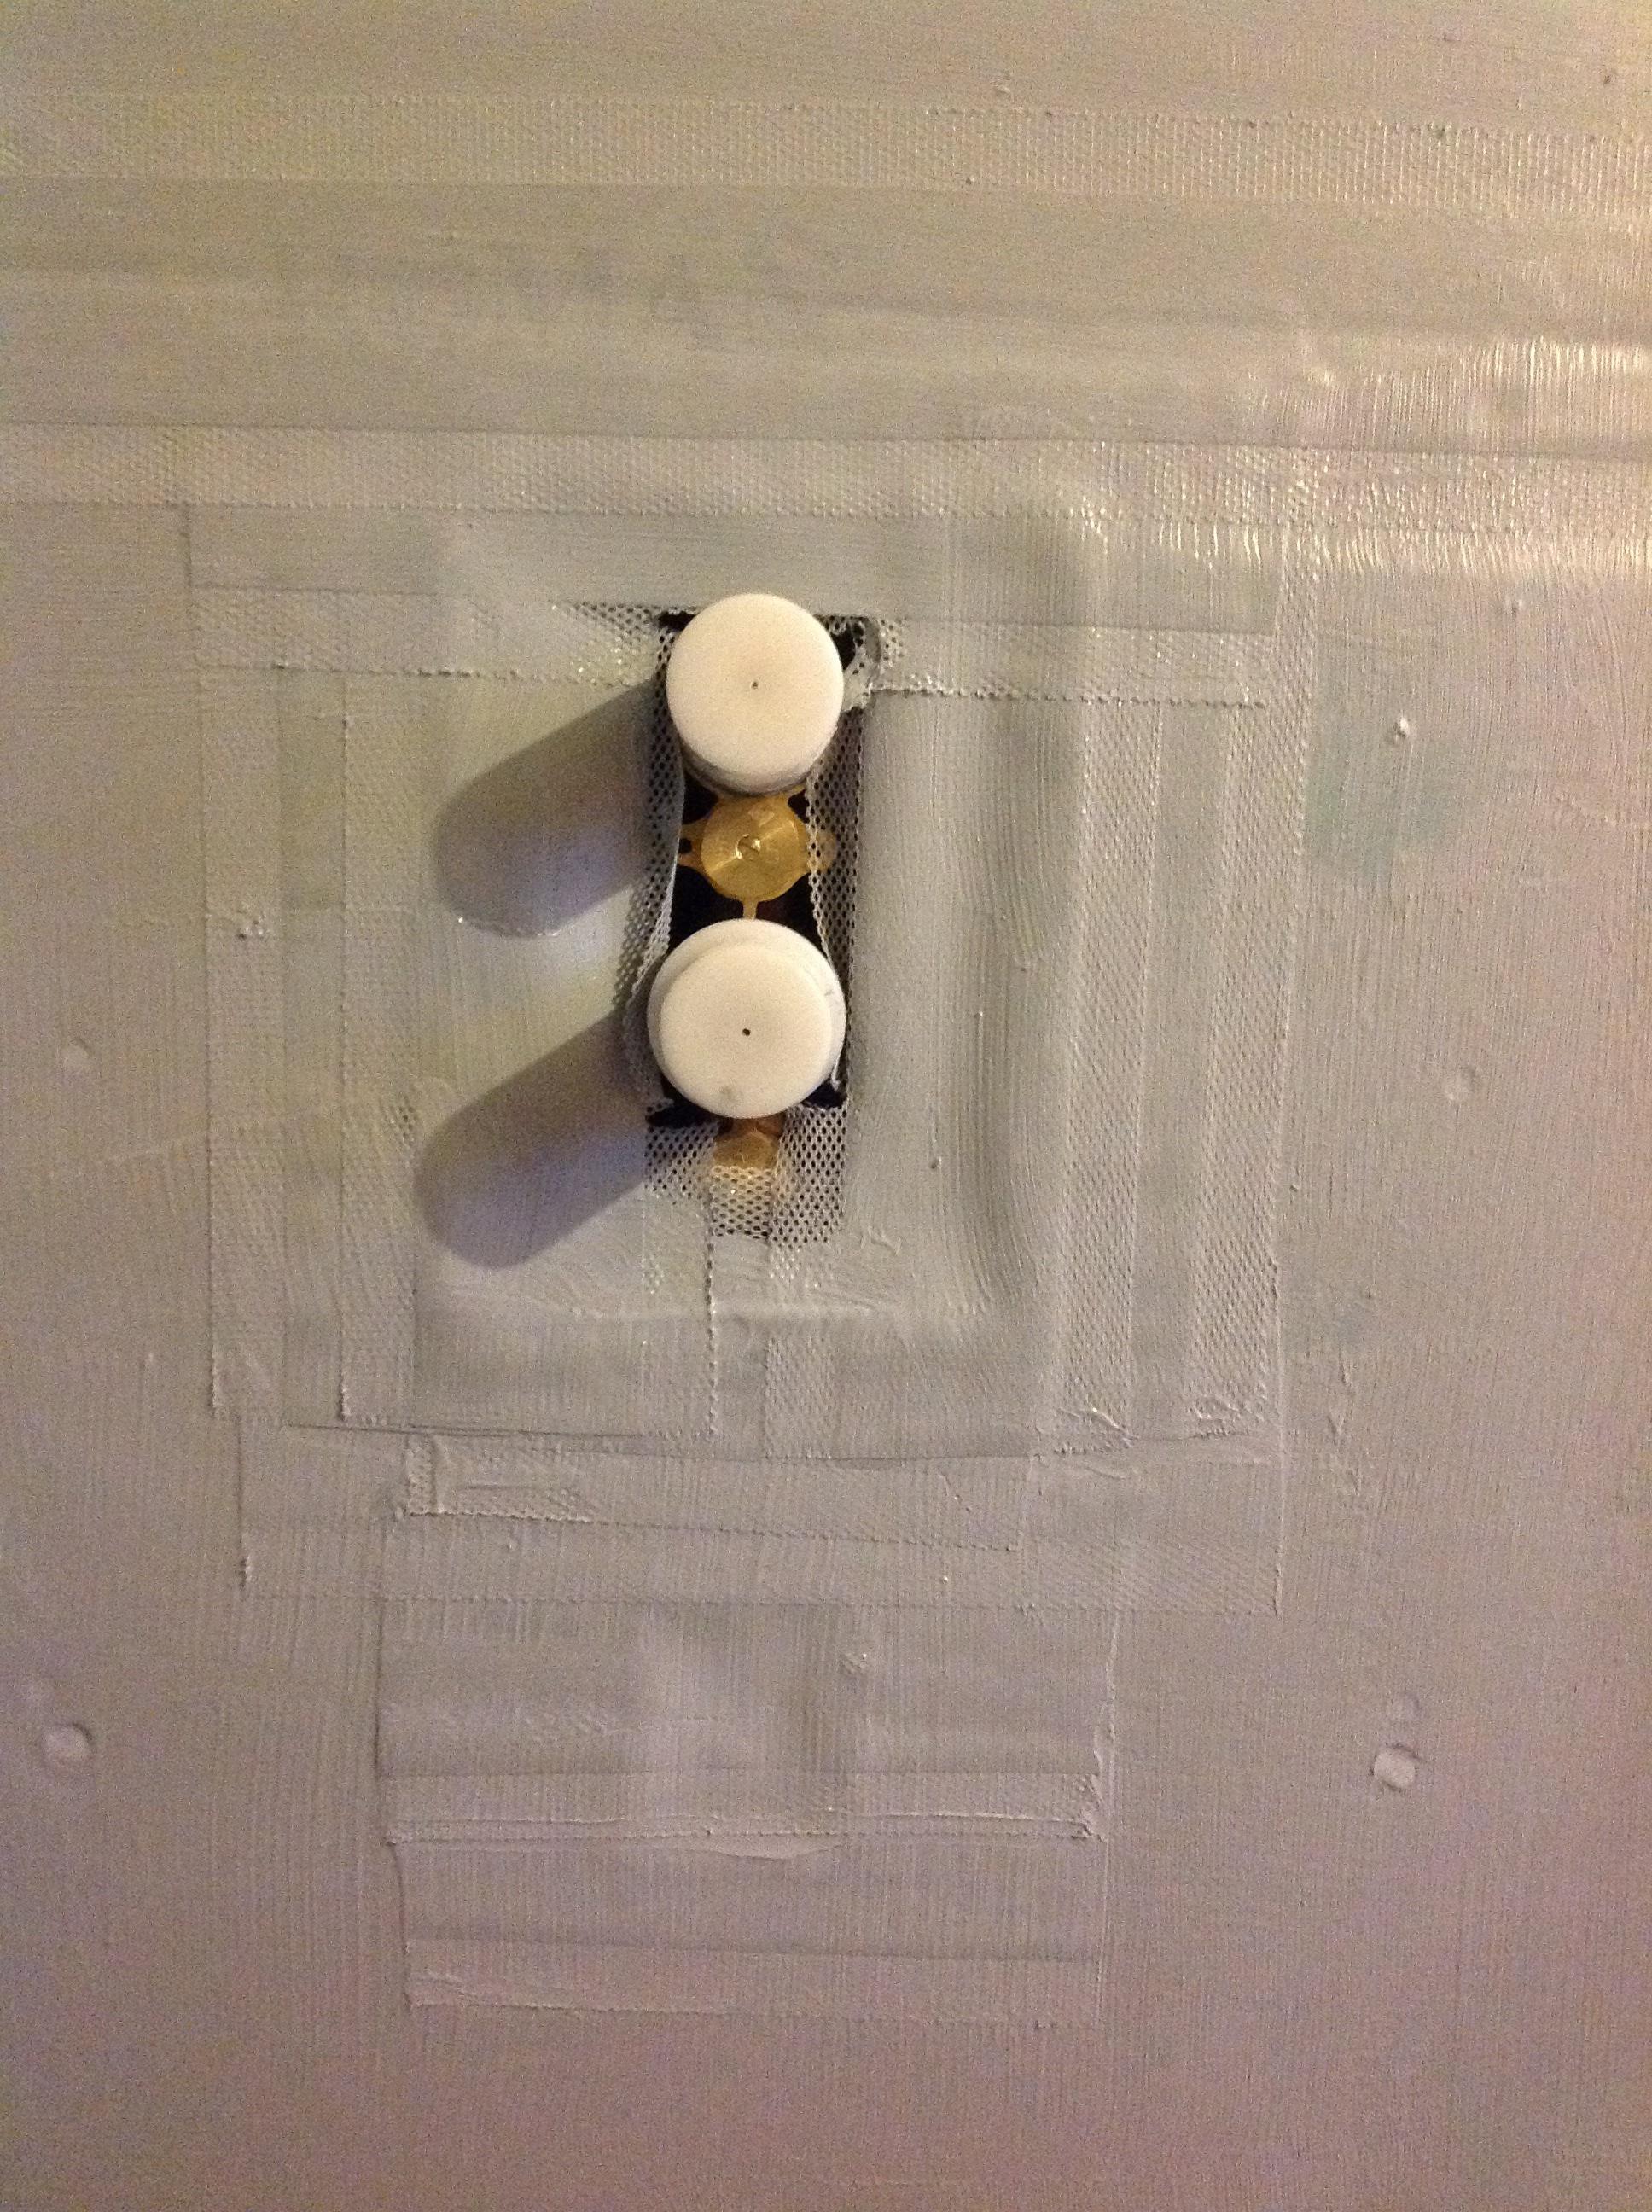
This is a former I'd just laid. The corners made up in sand and cement where an old pipe went through. The light grey stuff is the tanking primer which I cut in prior to fixing the tray into position. That just gave me a nice clean surface to bond the tray to. This shot shows the stud wall in place, blame the bathroom showroom for not having the tray the full width, and with the first coat of tanking applied. After the first coat was tacky, I then applied the 4" strip ( as seen with Roman written on it ) into a layer of wet tanking. That then gets brushed quite firmly to remove excess tanking from behind the strip to ensure it's as flush and flat as possible so as not to hinder tiling. The strips run between the former and the insulation backer boards on the floor ( insulation boards as this had undertile heating on a ground floor ( concrete )), in all the internal angles both horizontal and vertical, and around the turn of the boxing in eg the external also. Leftover strip used around the shower valve. Belt and braces, aka OCD. Finished article prior to grouting. Note the shower valve is dead centre of the border tile ribbon, and also there are two same size tiles either side equally intersecting the shower valve. That's gives the same size cut of tile around the entire valve plate. Aka OCD All of the above can also be observed when fitting a shower tray, just the only difference being that you can't use the strip between the shower tray and the wall. As the tile will only cover 12-14mm of the edge of the tray, you can't have the strip showing so another change of discipline is needed. The next one is a one piece shower tray, so basically you just tank the walls prior to the tray being fitted, which gives an excellent surface for the adhesive ( mastic type ) to adhere to when bonding the tray into its final position. What the picture doesn't show is the masking tape that I put onto the tray to allow me to get a neat edge to the sealant where it sits on the tray edge. That junction is quite important as it's the last line of defence against any water getting behind the tiles. What I do I these circumstances is to pump a load of mastic ( sikaflex for these is best as it's non silicone based and also doubles up as a sealant as well as an adhesive ) between the tray and the wall and then push the tray against the walls thus displacing any excess above the tray edge. This is when you'll be glad you masked it up first . Get a plastic spatula and then spread the excess sealant, whilst still wet, against the vertical wall face. Do this so you get an up-stand of sealant forming a 'skirting board' which is continuous between the tray, the wall, and vertical face of the wall, preferably all in one application. I set the masking tape around 5-6mm in from the edge of the tray so I know I'll get a straight line, and also a bead of sealant that's has a decent purchase on the tray, which then transfers to the wall. The action of tooling the sealant with the spatula pushes it against the tray itself thus forming a good / strong bond to both. After the horizontal sealant has cured, next run a bead up the internal angle for at least 600-900mm up the corner. With the fundamental sealing done, in goes the 45'd shower valve & pipework frame sections which them get plasterboarded and sealed, plus tanked prior to tiling. Roberts your mothers brother The end.
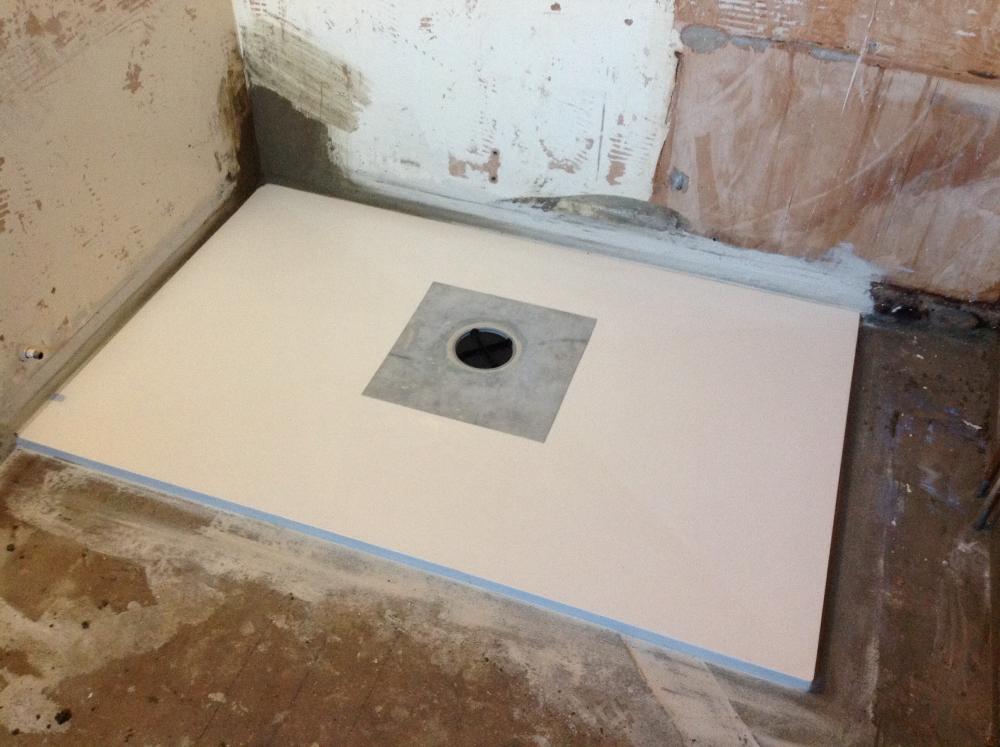
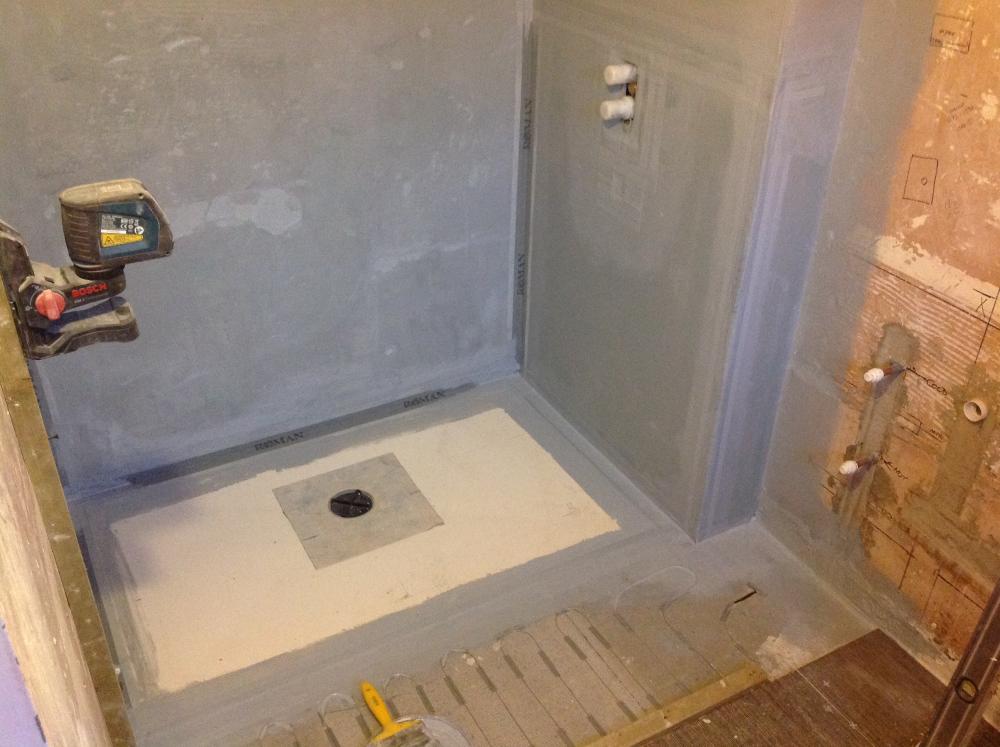
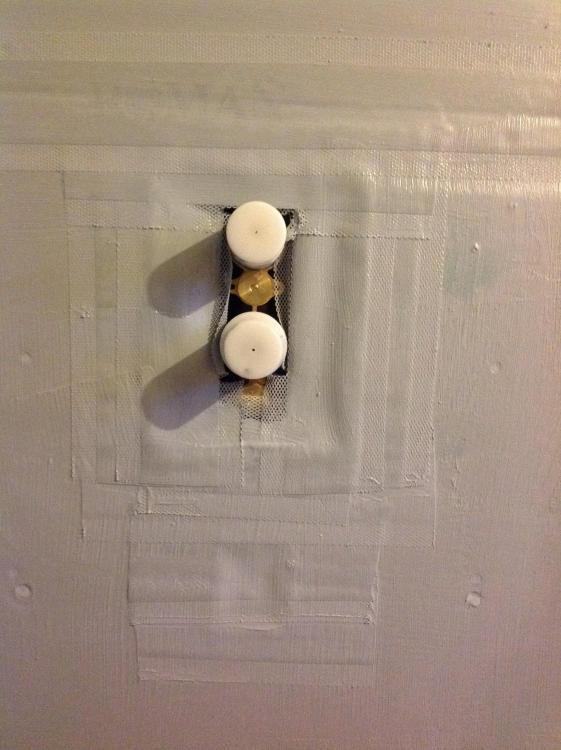

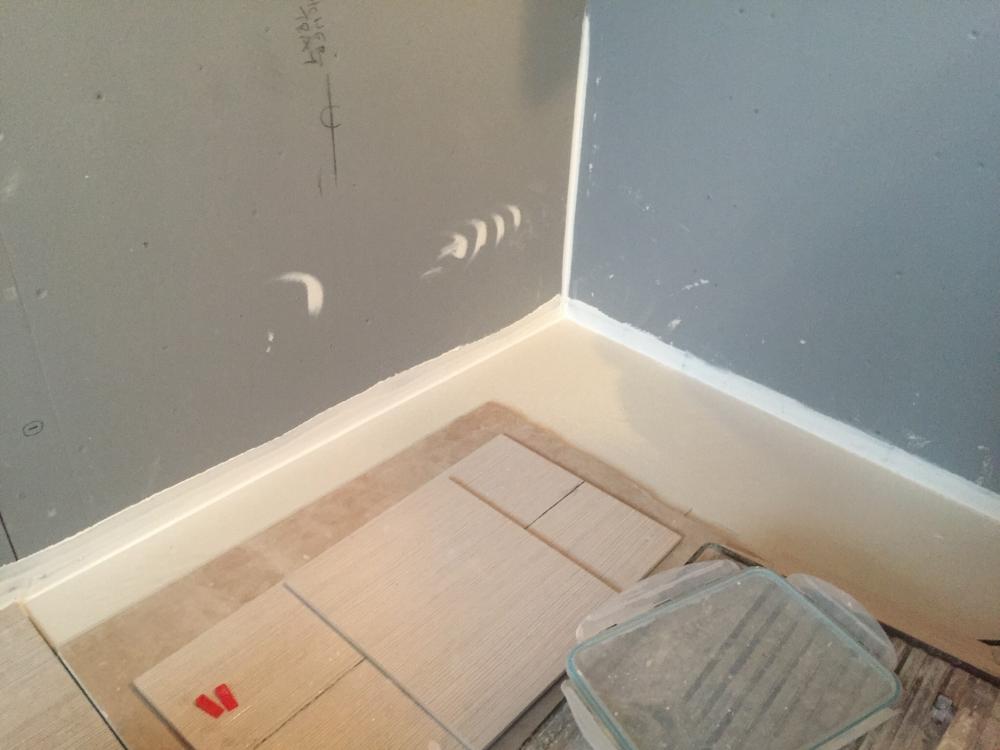
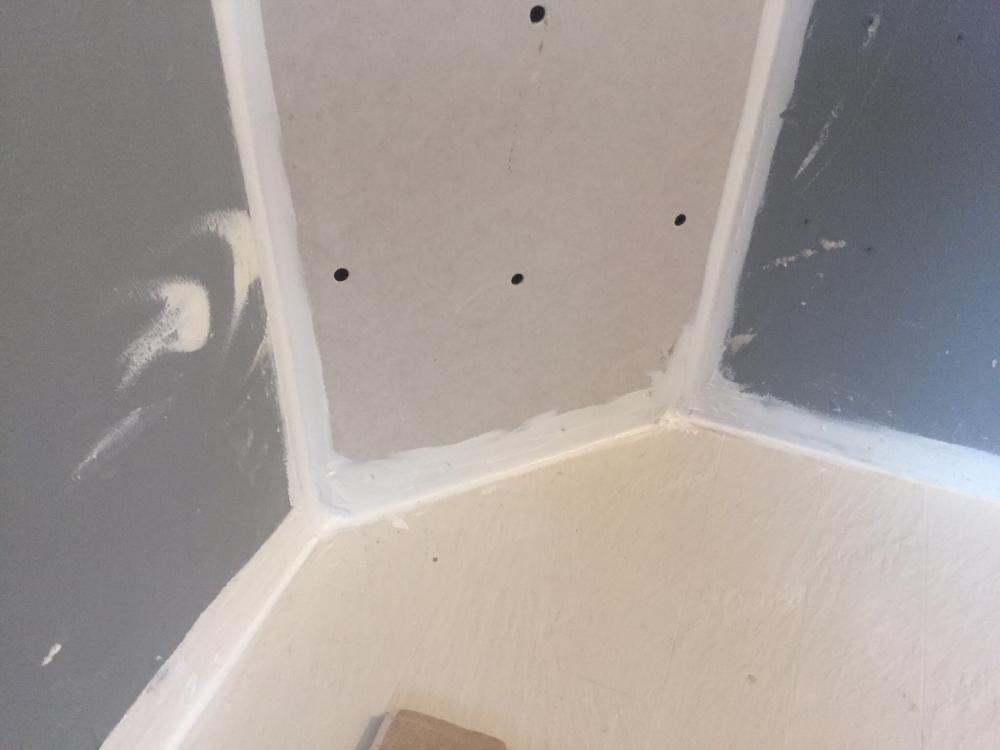
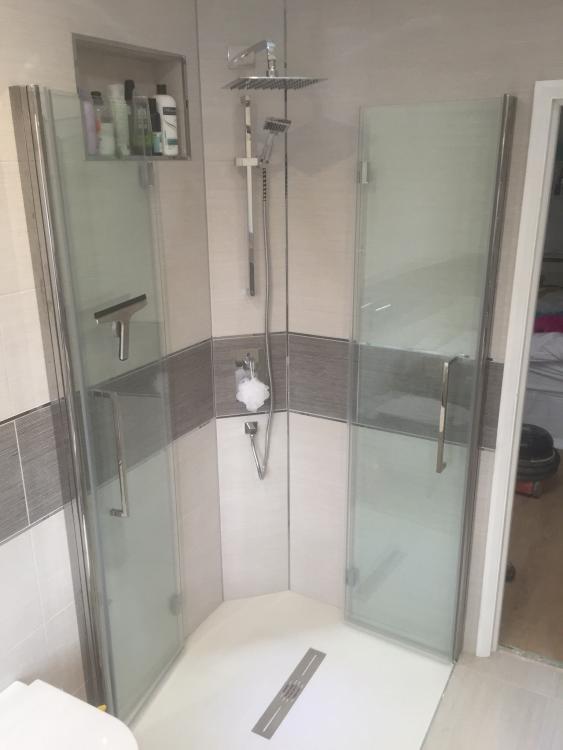 1 point


.jpg.c21f3ac78c9b7efd90cbdcb312744dc5.thumb.jpg.7adcad4c0e384f5ecd7d56b0618df6e5.jpg)