Leaderboard


Popular Content
Showing content with the highest reputation on 04/06/17 in all areas
-
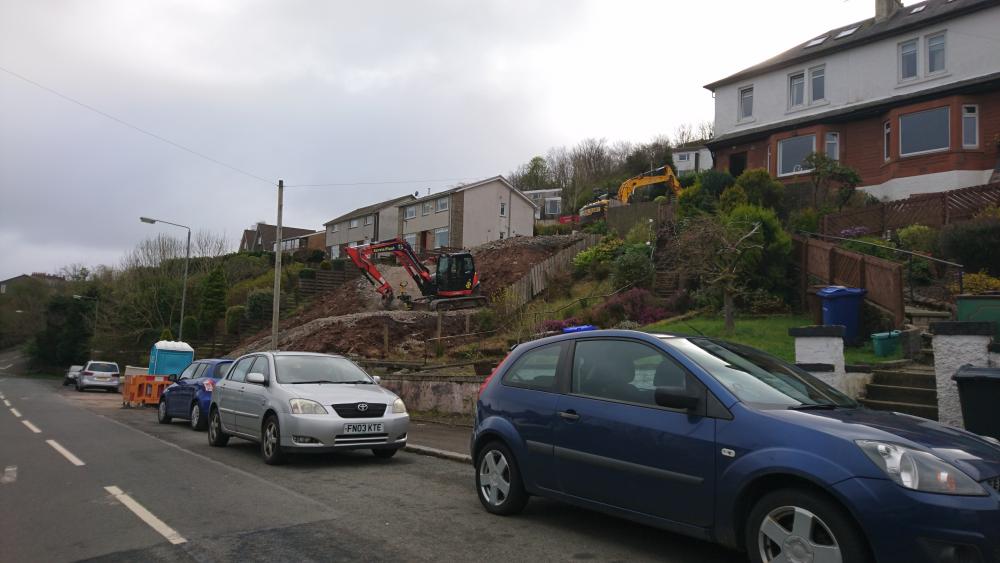
Work has started near us on a house - I wonder how much extra the slope is adding to the cost?!

 1 point
 -
Imagine the various scenarios of living in the house. Arriving home from work. Arriving home with bags of shopping. Coming in from the garden rather dirty. Holding a dinner party. Having family round for dinner. Getting the dishes done after a formal dinner. Watching a movie. Reading a book. Reading a book whilst a partner watches a movie. Friends round with their children - where do they go? Walkthrough each scenario with the various layout permutations and you'll get there eventually - there is no right or wrong answer, just what will work and what will work best for you.1 point
-
Most BM will have 25mm *100mm by 2.4m boards that would get used for Window reveals that you can use but they will be more expensive than using a sheet you cut yourself.1 point
-
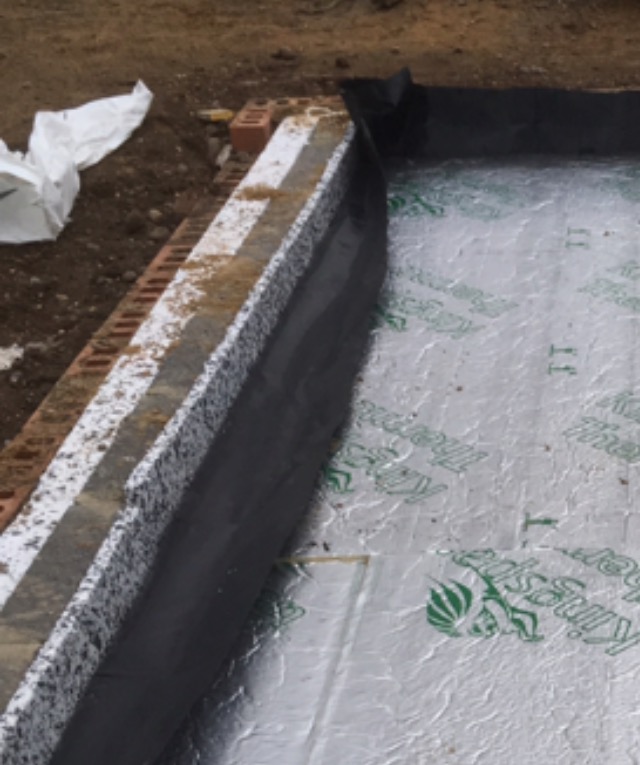
TBH that was about the rates I was getting with the merchant. This is the edge detail - slight difference on mine is that as it's the structural slab the DPM is under the PIR and then there is a slip membrane and then UFH trays on top. We have full filled the cavity below ground with EPS too as additional Insulation. Having the EPS against the block also allows a bit of protection for the DPM.
 1 point
 -
Get a an offcut of OSB the width you want the insulation and lay it onto a couple of sheets of it and cut with a standard hand saw - Its there as an expansion gap more than an insulation layer so doesn't need to be perfect. I cut all of ours in 10 minutes - wedged in tight by the floor PIR. What price have you had on the PIR..? I used Seconds & Co at £24 for 125/128mm and it worked fine, was £7 a board cheaper than the merchants but it does take 10 days for delivery1 point
-
I used EPS and 25mm thick, wedged down the side of the under floor Insulation. It didn't move at all when we poured the slabs out of interest what's your floor make up to get to 0.13 as it doesn't look that thick..?1 point
-
No I mean you don't rip 200mm into 25 you cut 25mm gear to the desired width. You'd certainly struggle at 200mm thick1 point
-
I used of 50mm deep off cuts from insulating the roof and laid them on top of the floor insulation. I cut them at 85mm so sat 10mm high when screed was down. I put a quick squirt of foam and pushed it to the wall. None of them budged a bit.1 point
-
Seen it loads. 100mm rip will be fine. Merchants will do it on wall saw if you ask nicely. The polythene holds it in place. You will prob end up using a lot of 25mm otherwise and more wasteage on your thicker sheets1 point
-
Can't see any problems with that, it will certainly keep it in place better.1 point
-
I won't make any difference but in terms of when they come to do the screed - it will probably stay in place better if you wedge it down rather than place it on top. i.e second drawing.1 point
-
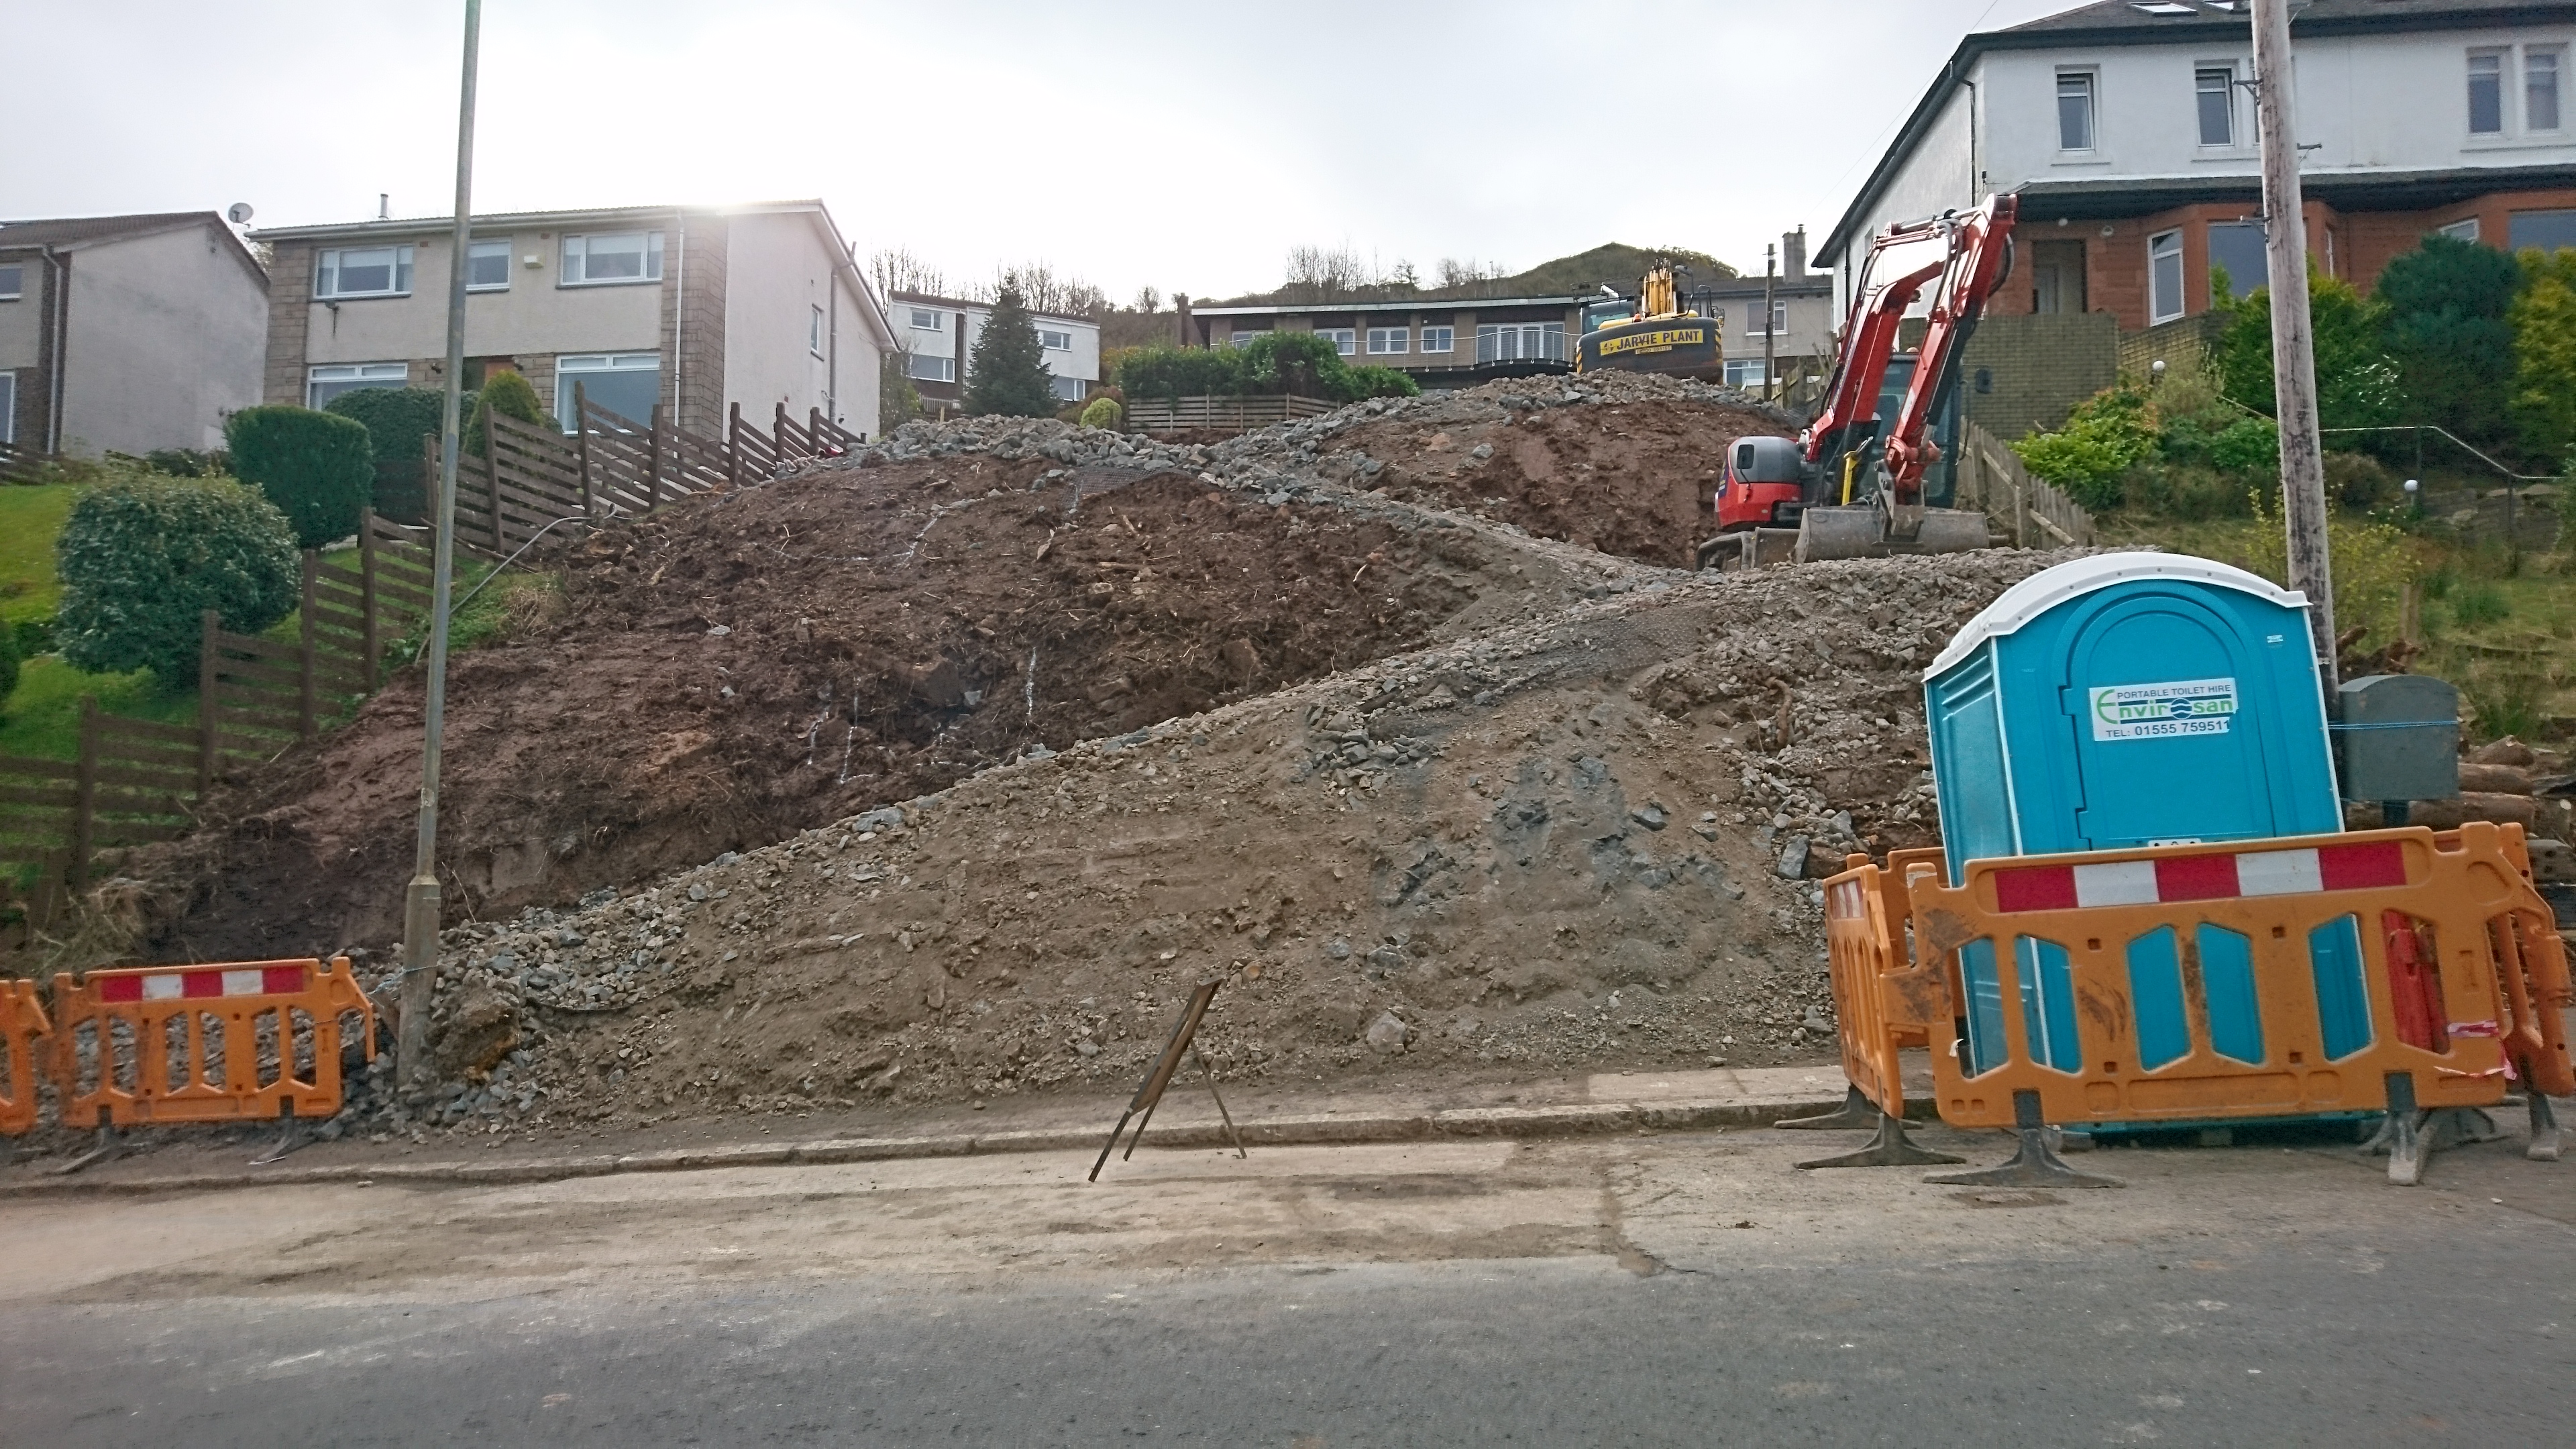
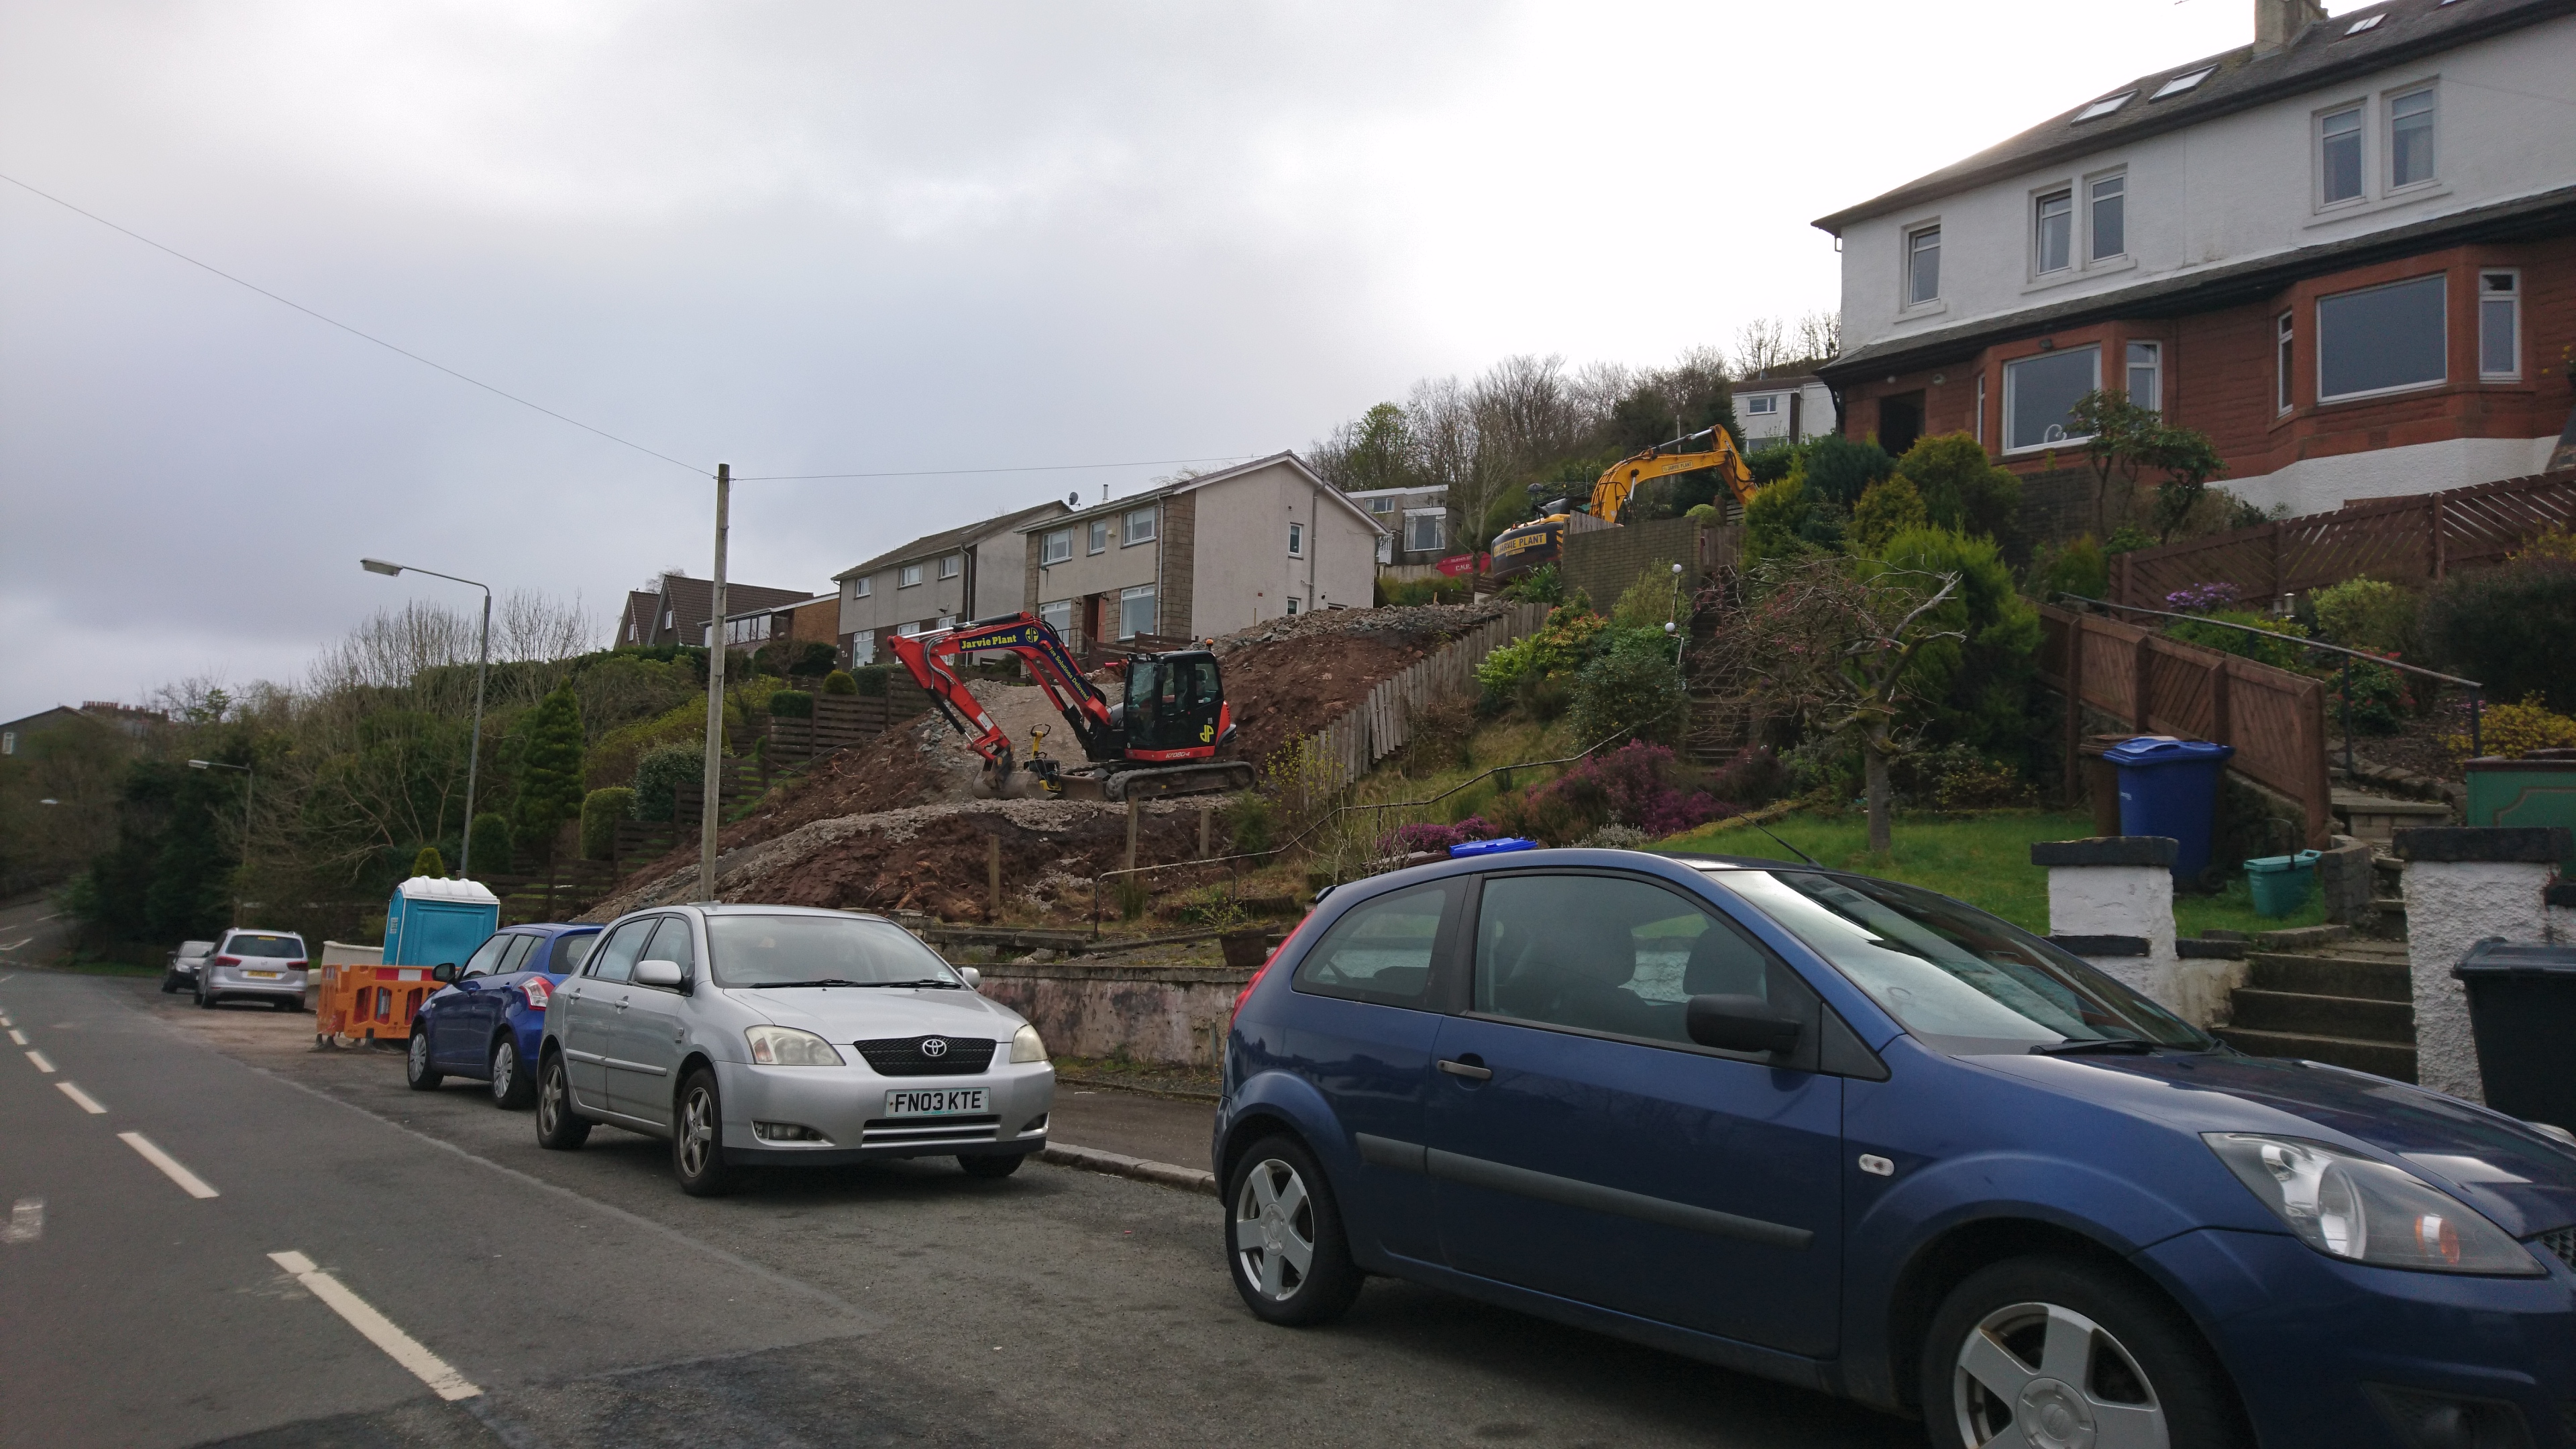
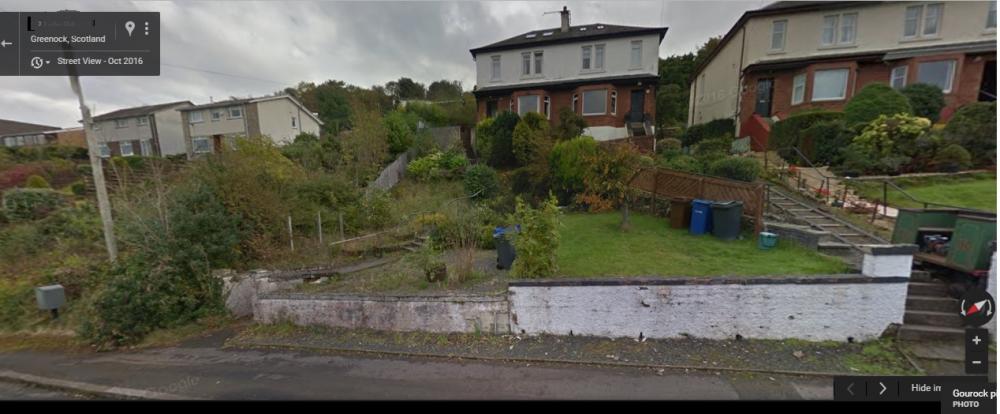
No access to the back - you can see the funicular here - it's the house next door. I wonder if they'll install a tower crane - not a chance they will get anything up there with a pallet of anything heavy surely?
 1 point
 -
On my site the removal of earth to equalise a 1m rise across the depth of the house was a surprisingly high cost. They are going to be paying a lot for simply dumping the earth they remove. As @JSHarris asked is there access at the rear? There are certainly houses further up the hill. There are quite a few houses in Edinburgh built on hillsides like this. There were no access rules when they were built, but I for one would hate having a house where there was a large number of steps up from the street or the garage which is often built at the bottom of the slope. It is just too awkward. My in-laws have a site that slopes by around 3m from the road to the back of the house. This works OK as they simply added an extra storey underneath with the garage in it. This looks like around 10m judging by the fence panels. That is some slope.1 point
-
The first decision to be made with the new architect was how to change the external house design to remove the lack of head height in the roofspace, but stay within the existing footprint. In the napkin sketches, the architect had suggested two mono-pitched roofs to replace the existing dual-pitched roofs and we immediately liked that design. However, he didn’t immediately just go with that design and at the start of July 2016, he sent us through a couple of options, one with a flat roof and one with a sloped roof. Before giving his preference, he wanted our opinion: Option 1: Option 2: I initially preferred the flat roof option, whereas my wife preferred the sloping roof. I'd be interested to hear what others think and I'll share what we went for in the next post. Our brief to the architect had let him know that we liked the open plan living/dining area of the original house design, and the location of the kitchen – although north facing, we like a kitchen that opens onto our back garden as we like to barbecue - yes, even in Scotland! Here were the revised floorplans at that time: We liked what the architect had done, but, as is often the case, its not until you see something in front of you that you realise you want it changed, so we did go back and make some further alterations to the internal floorplan. I'll cover those in a future post.1 point
-
looking good, but it doesn't look like you've put any compo under those bonnets??? Its a good idea to do this as you go, so hopefully you have just laid them loose and not nailed them in!1 point
-
Councils are indeed funny about this stuff. We're outside the village Conservation Area (CA), but because we are within 100m of a listed building we had to comply with slightly more onerous requirements than we would have had we been inside the CA. I'm still not really sure why this bit of the village is outside the CA boundary, given it contains one of the two listed buildings in the village (the other being half a mile away from the CA).1 point
-
More to say on Planning Matters including your deadline, but will do that on the later article thread or separate comment. >Placement of read window - good spot, and you're right that the avatar on the drawing is misleading. Here's the section from a later drawing: I think the basic point here is that you are the Client, and he is the Architect. What do you want when you are leaning on the banister in your pyjamas or walking downstairs? It is your building and you will be living in it for 20 years. IMO one of the benefits of the dentist and teeth like process you are documenting has been that you have learnt (and are demonstrating) how to get such decisions right balancing many different factors. Have the courage of your convictions, in context, whichever way you decide. >I wanted full height glass here (the original design had this), but our architect was adamant it would cause overheating and he liked the drama of the window placement with the landing - I'm still not convinced. There's not a view as such out the north elevation (occasional train and school playing field) but if we're going to change something (and we'd have to go back to planning) this would be near the top of the list. Heh. Perhaps you need to have the architect explain how a North facing window (ie no sun) in a house built North of Edinburgh (= cool climate) on the Scottish East Coast (= cool air) with a largely glass South facing facade (= maximum cause of overheating if there is any) is going to cause a material increase in 'overheating'. With calculations and/or models. Peraonally I would be a little skeptical. If you need to manage the excess sun on your North facing window (or even the South facing ones) there are things like effective transparent solar film available. Have discussed recently on here. >Kitchen doors - the original plans had exactly what you've suggested, with the sink on the north wall in front of a window and a side door leading around to the garden, but we made a conscious effort to change that as we like to BBQ and wanted direct access to the back garden. We also very rarely stand in front of the sink for anything other than a minute or so. I actually meant replace you 5m bifold with one set of patio doors or french Widows (so to keep outside access) and then extend the kitchen units slightly round the corner, but you have thought about this. On BF there is some skepticism about the long term (say 10 year) airtightness of bifolds and people are tending to go for Lift and Slide instead. Switcthing to ome set of French Doors would save several thousand, however. >Rear garden access - this is a bit of a concern of mine - not so much for smaller items, but for during the build, particularly due to the slope. Re. Wheelchairs, we've been advised by our architect that we're passing accessibility regs (we'll see) but i accept its not easy to get someone in a wheelchair up to the living level. We did briefly talk about incorporating a lift (as per a previous comment) but the cost. A couple of comments. To my mind the wheelchair etc issue is not really about tickbox regs, but about your lifestyle and the possibility of your friends who are eg in wheelchairs and yourselves being embarrassed in that situation. Or what happens if you or your partner breaks your back and ends up disabled? In that situation you would not want to be forced to move house. On the lift, I would argue for the *possibility* of incorportating one in future rather than adding 25k to the budget now. That is things like designing your structure so structural beams are not where the hole in the floor would go, putting a more robust element in for the anchor at the top etc, leaving a suitable space on each floor etc. That may not be prohibitive. On the garden access, mitigation is straightforward, but full access is slightly more tricky. 1 - Incorporate a wheelbarrow / bicycle ramp into your side-path stair design. Something like this, which could be sunken as well as proud: (Credit: https://www.yelp.com/biz/vindels-construction-san-diego or this or this (Credit: http://wallswithoutcement.blogspot.co.uk/2006/12/steps-and-wheelbarrow-ramp.html) How you do it depends on your materials and path width and step design, and should cost not too much extra. At its simplest you just mortar in an angled brick upside down to each step, or put a groove in your mini wall at the side. IMO the ramp really wants to be wide enough for a sack trolley, and you want an anchor point for a portable winch at the top. In your setting I might be tempted to finish white concrete mini-side walls in embedded beach pebbles on top so I have a low friction surface for an inclined plane which would just need a board, a cable, and the aforementioned winch. Or put grooves in the top for rails. At its simplest you could incorporate a small depression at the bottom where you wedge a 5m piece of gutter cut to length when you want to use a wheelbarrowm with a couple of stabilising pegs somewhere - which could be a batten to wedge in the path and 2 six inch nails. I would say make the steps as shallow as possible to make barrows easier for smaller people (or it will be delegated to you), and make half landings long enough to fit a bike/barrow and a person who want a rest - say 1.5m. 2 - Make a straightforward path through the house wide enough for whatever - always a good idea when difficult access. Suggest 900mm which is sized for a Type III Mobility Scooter or 800mm which would take a "doorway" sized digger. That depends on your lift to work, and appropriate floor finishes and kitchen layout, but there's no point making it impossible when you do not have to. :-). (You now probably think I am completely mad)

 1 point
 -
One thing I noted in the detailed wording of the CoP linked above is that it talked about iirc "Access Point" to the plot, which could be interpreted as 'nearest point as the crow flies' (ie access for the woodlarks) or perhaps 'plot access point', which is an ambiguity which may be useable creatively if there is a dispute over inches.1 point
-
.... or paying a brickie..!!1 point
-
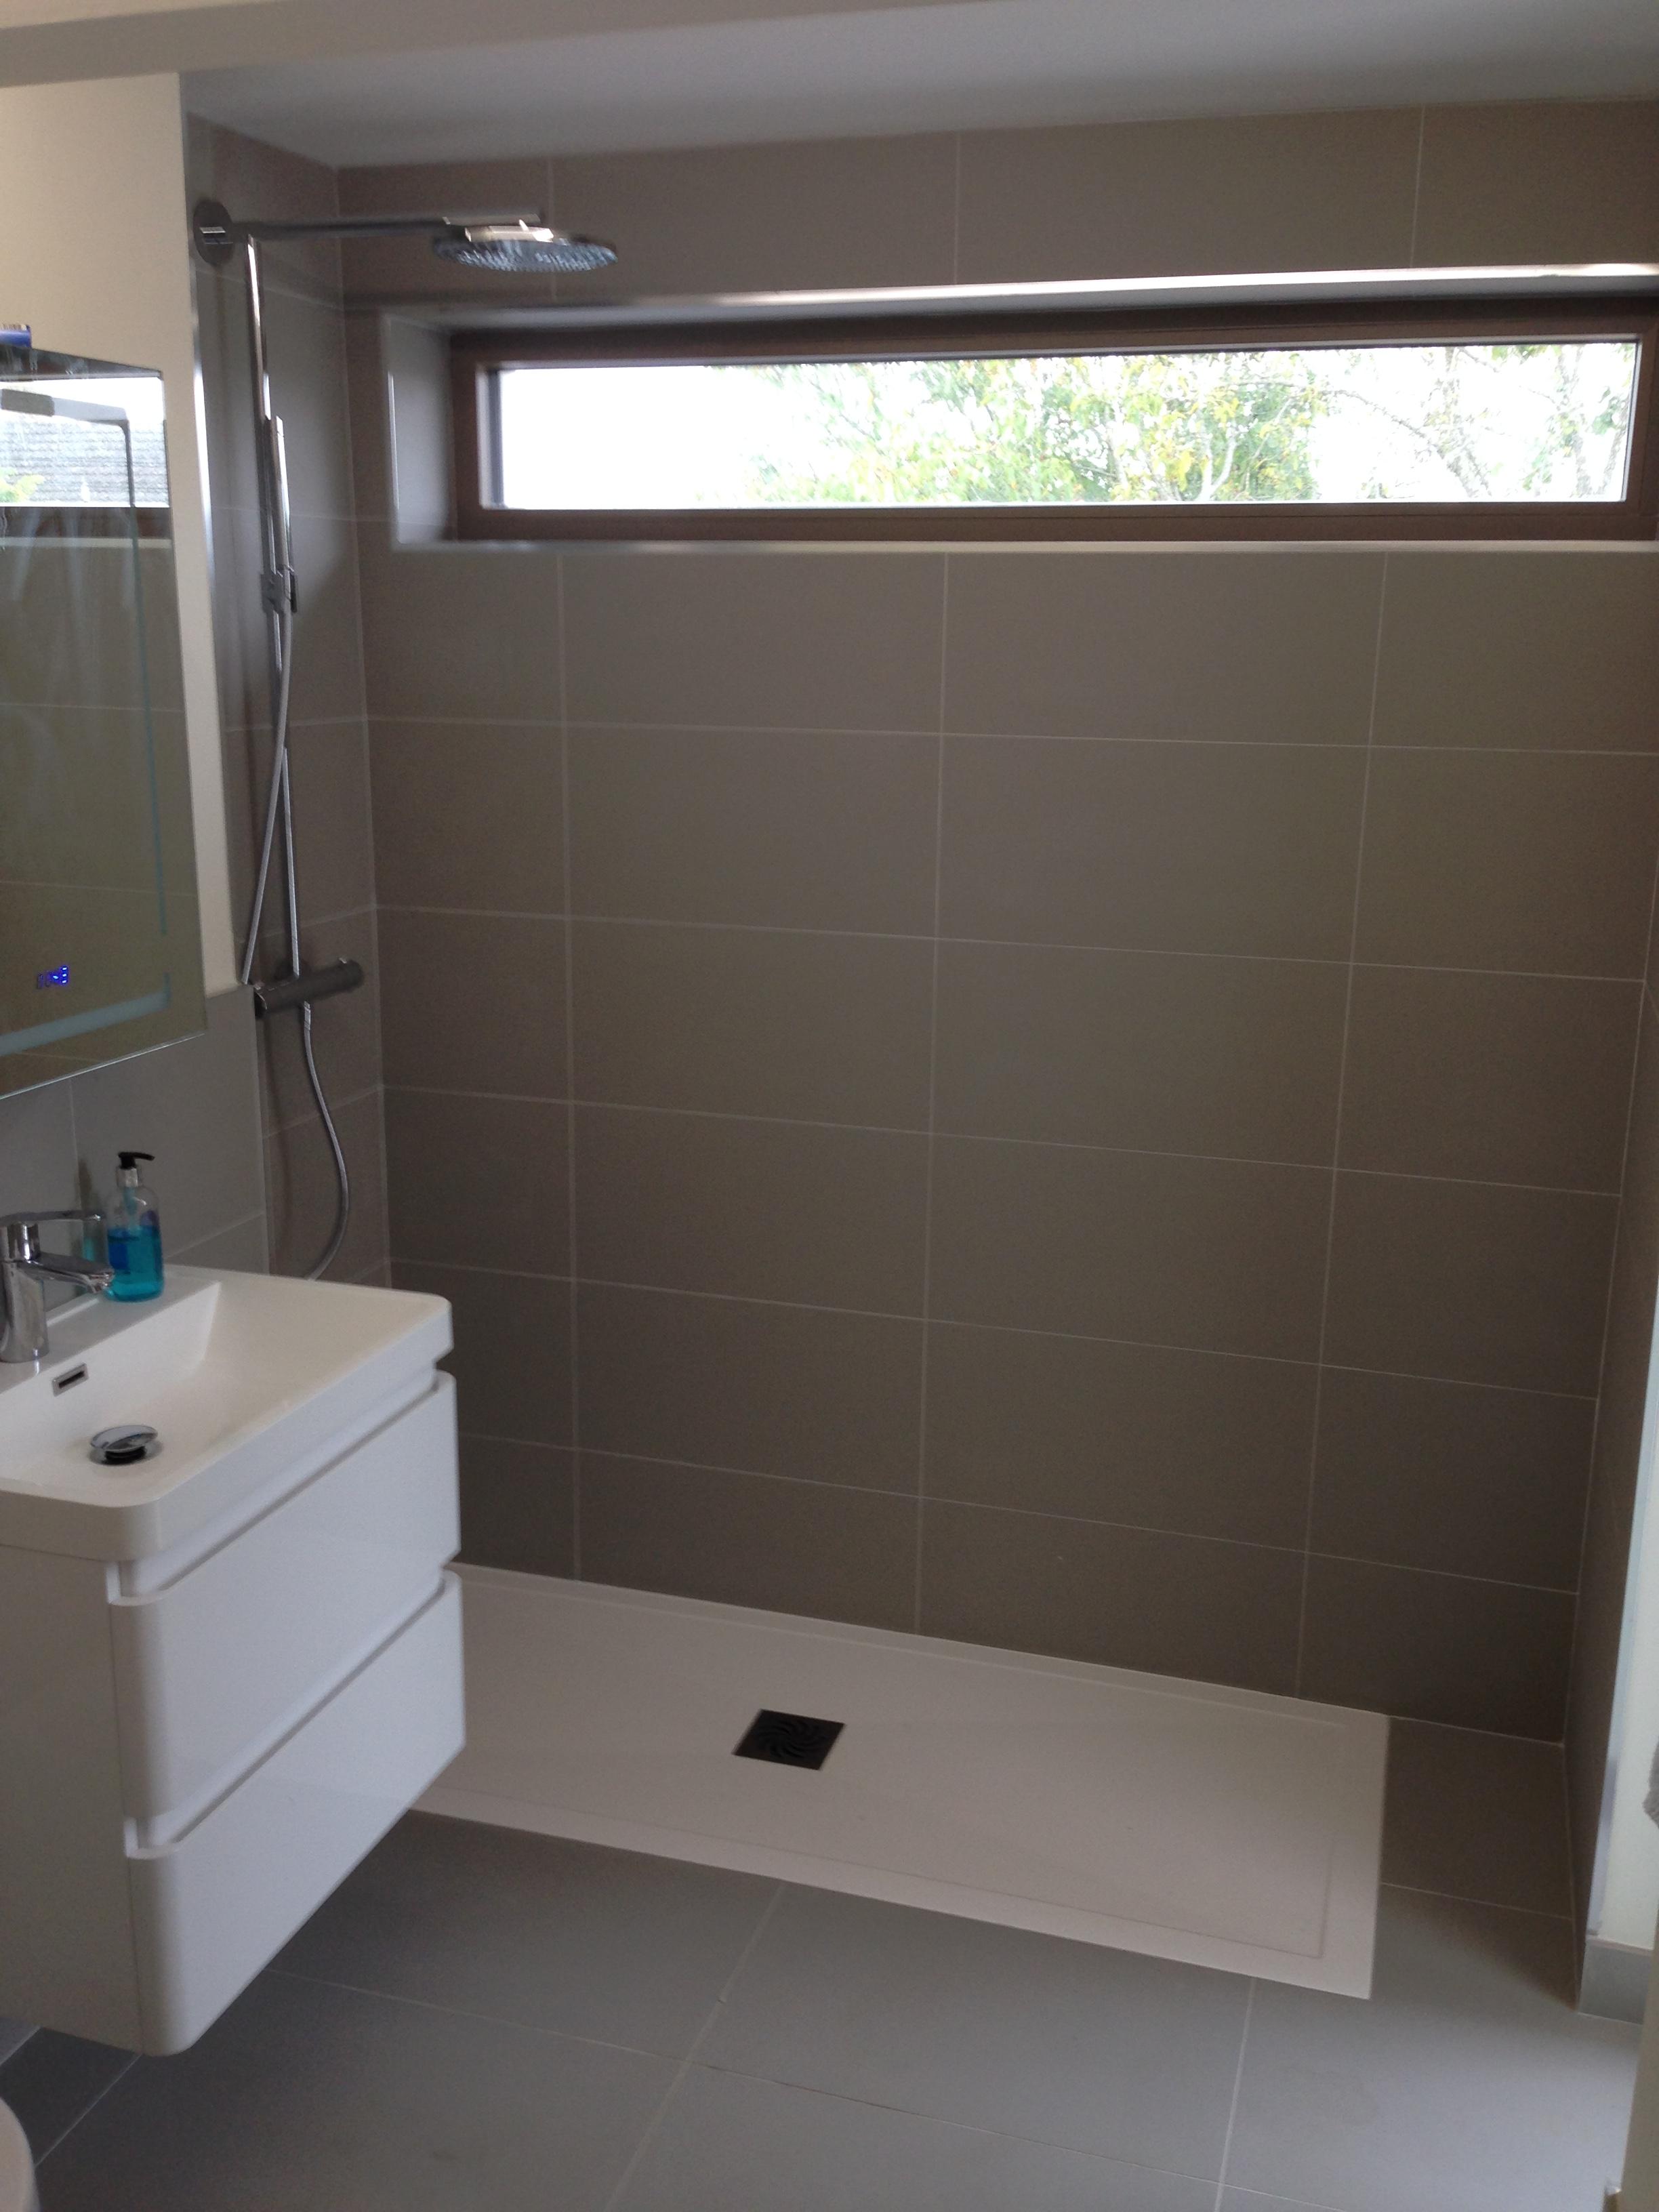
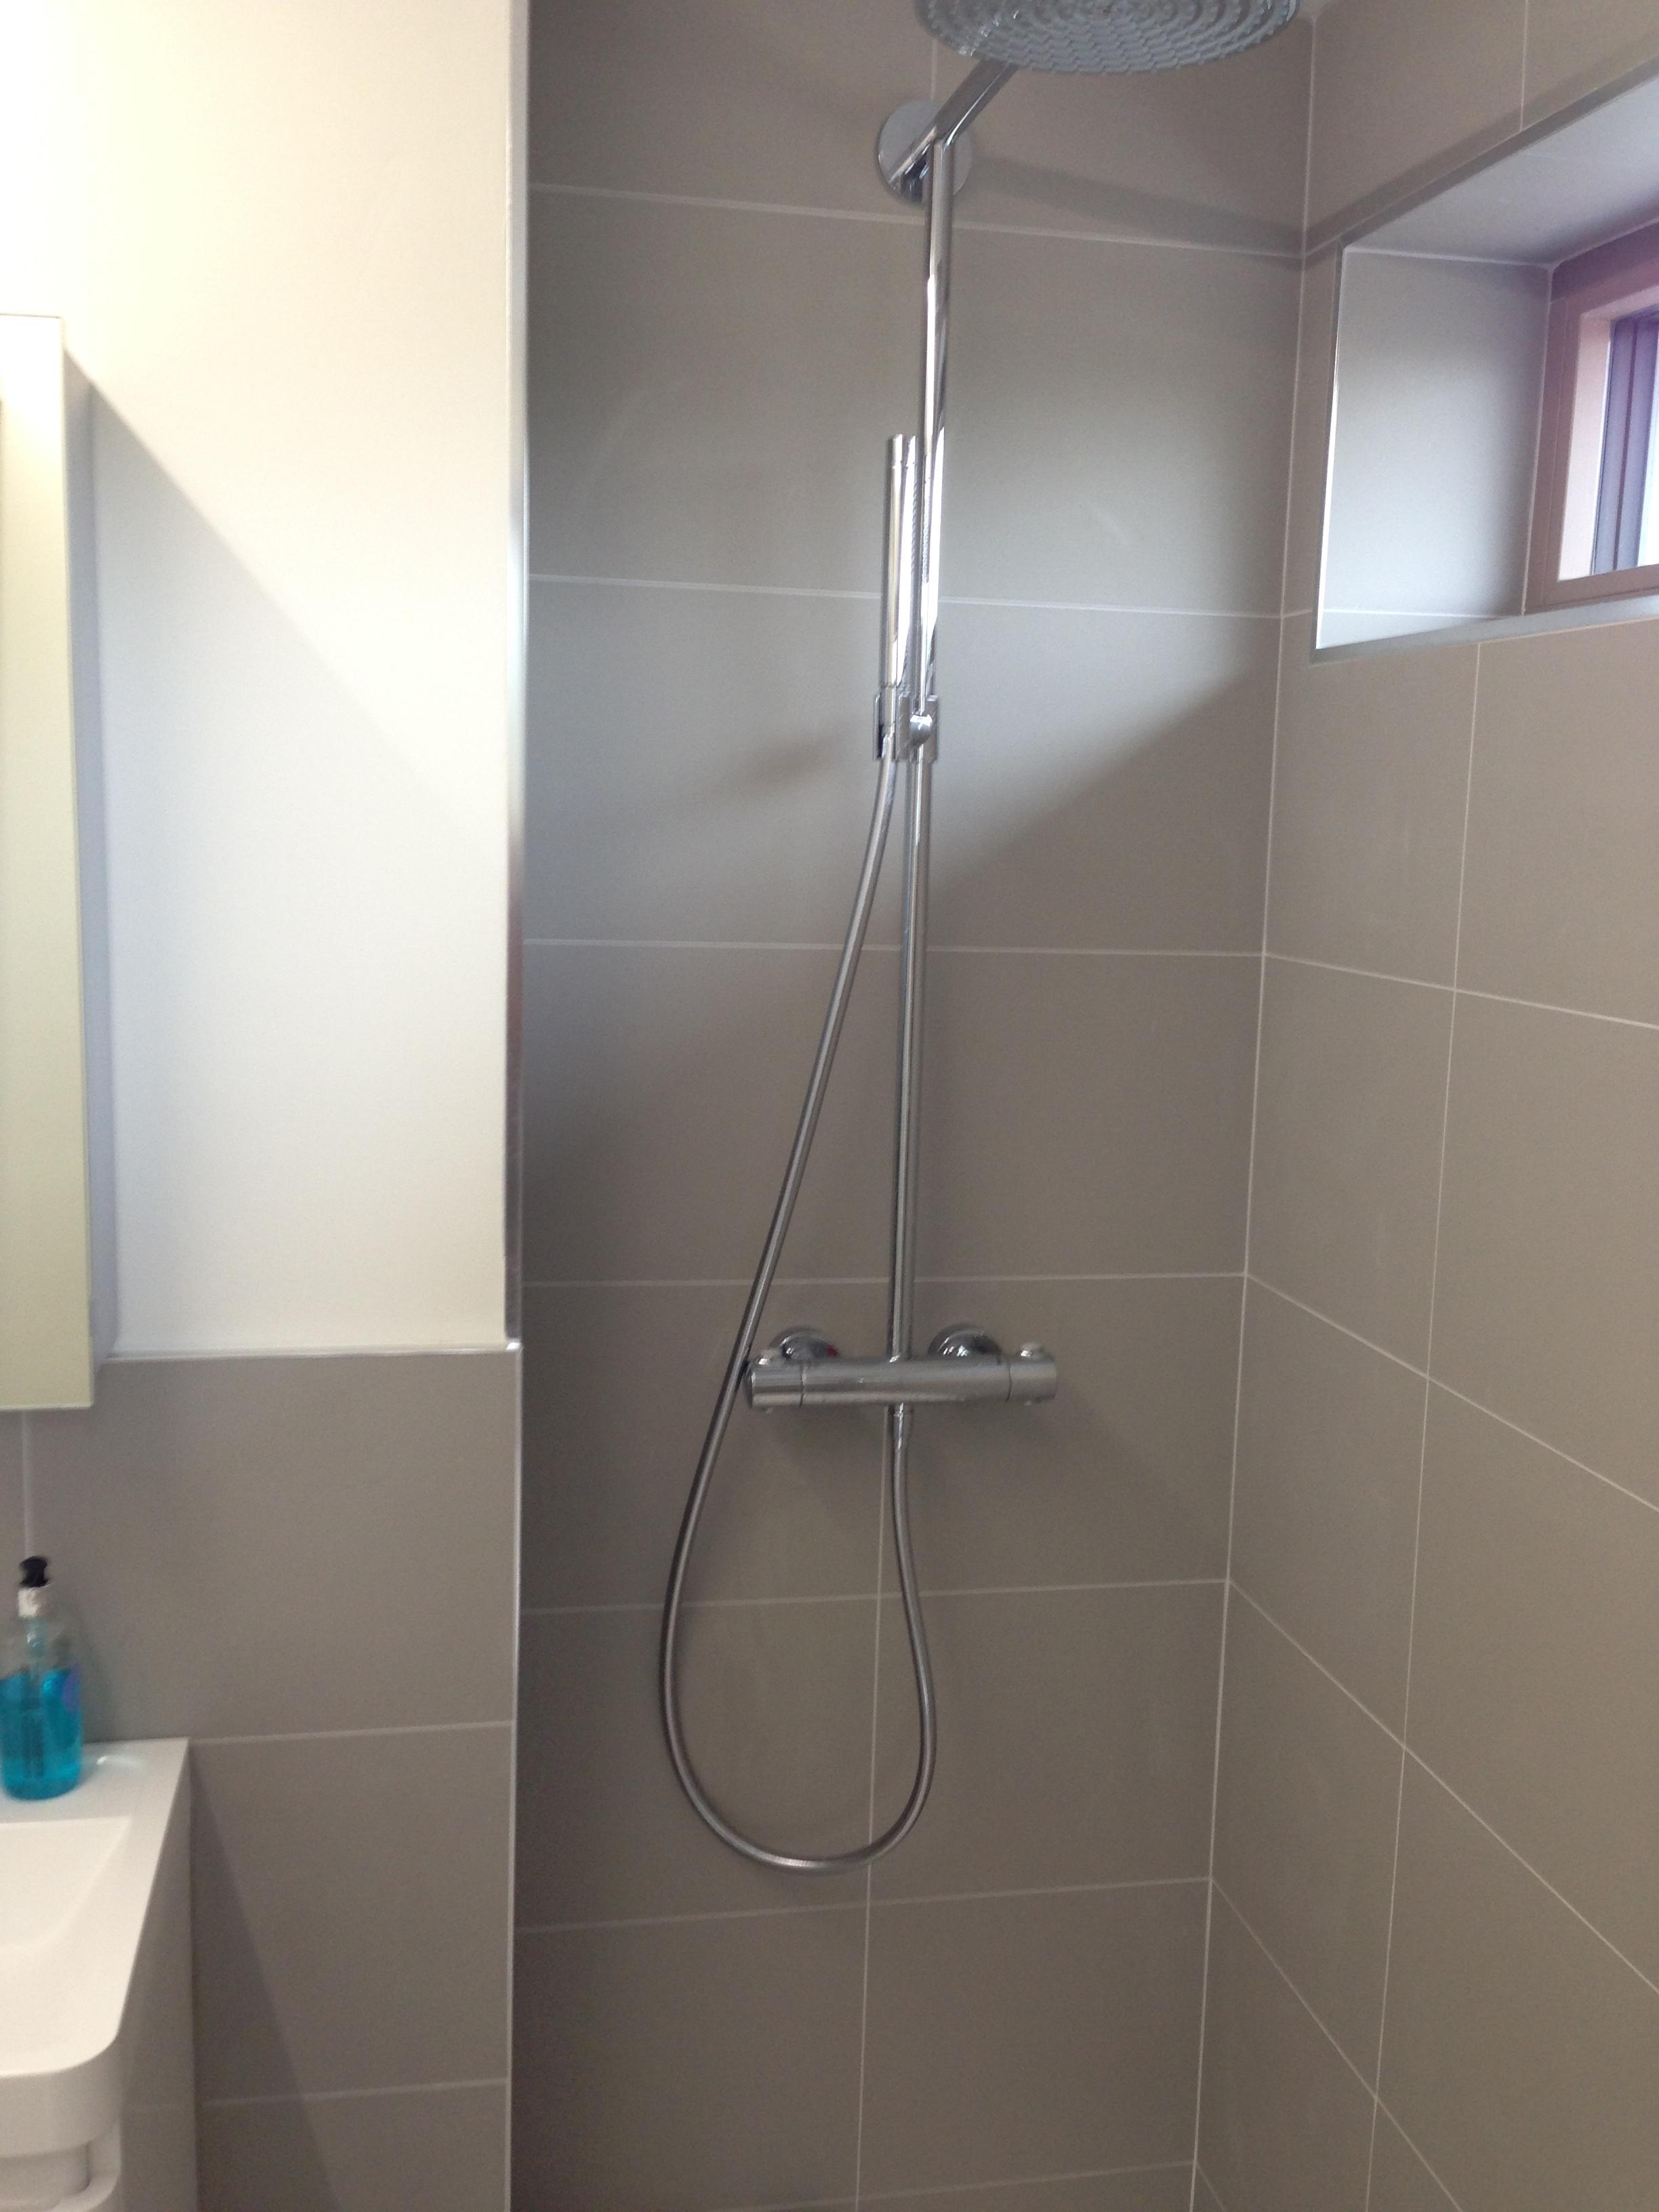
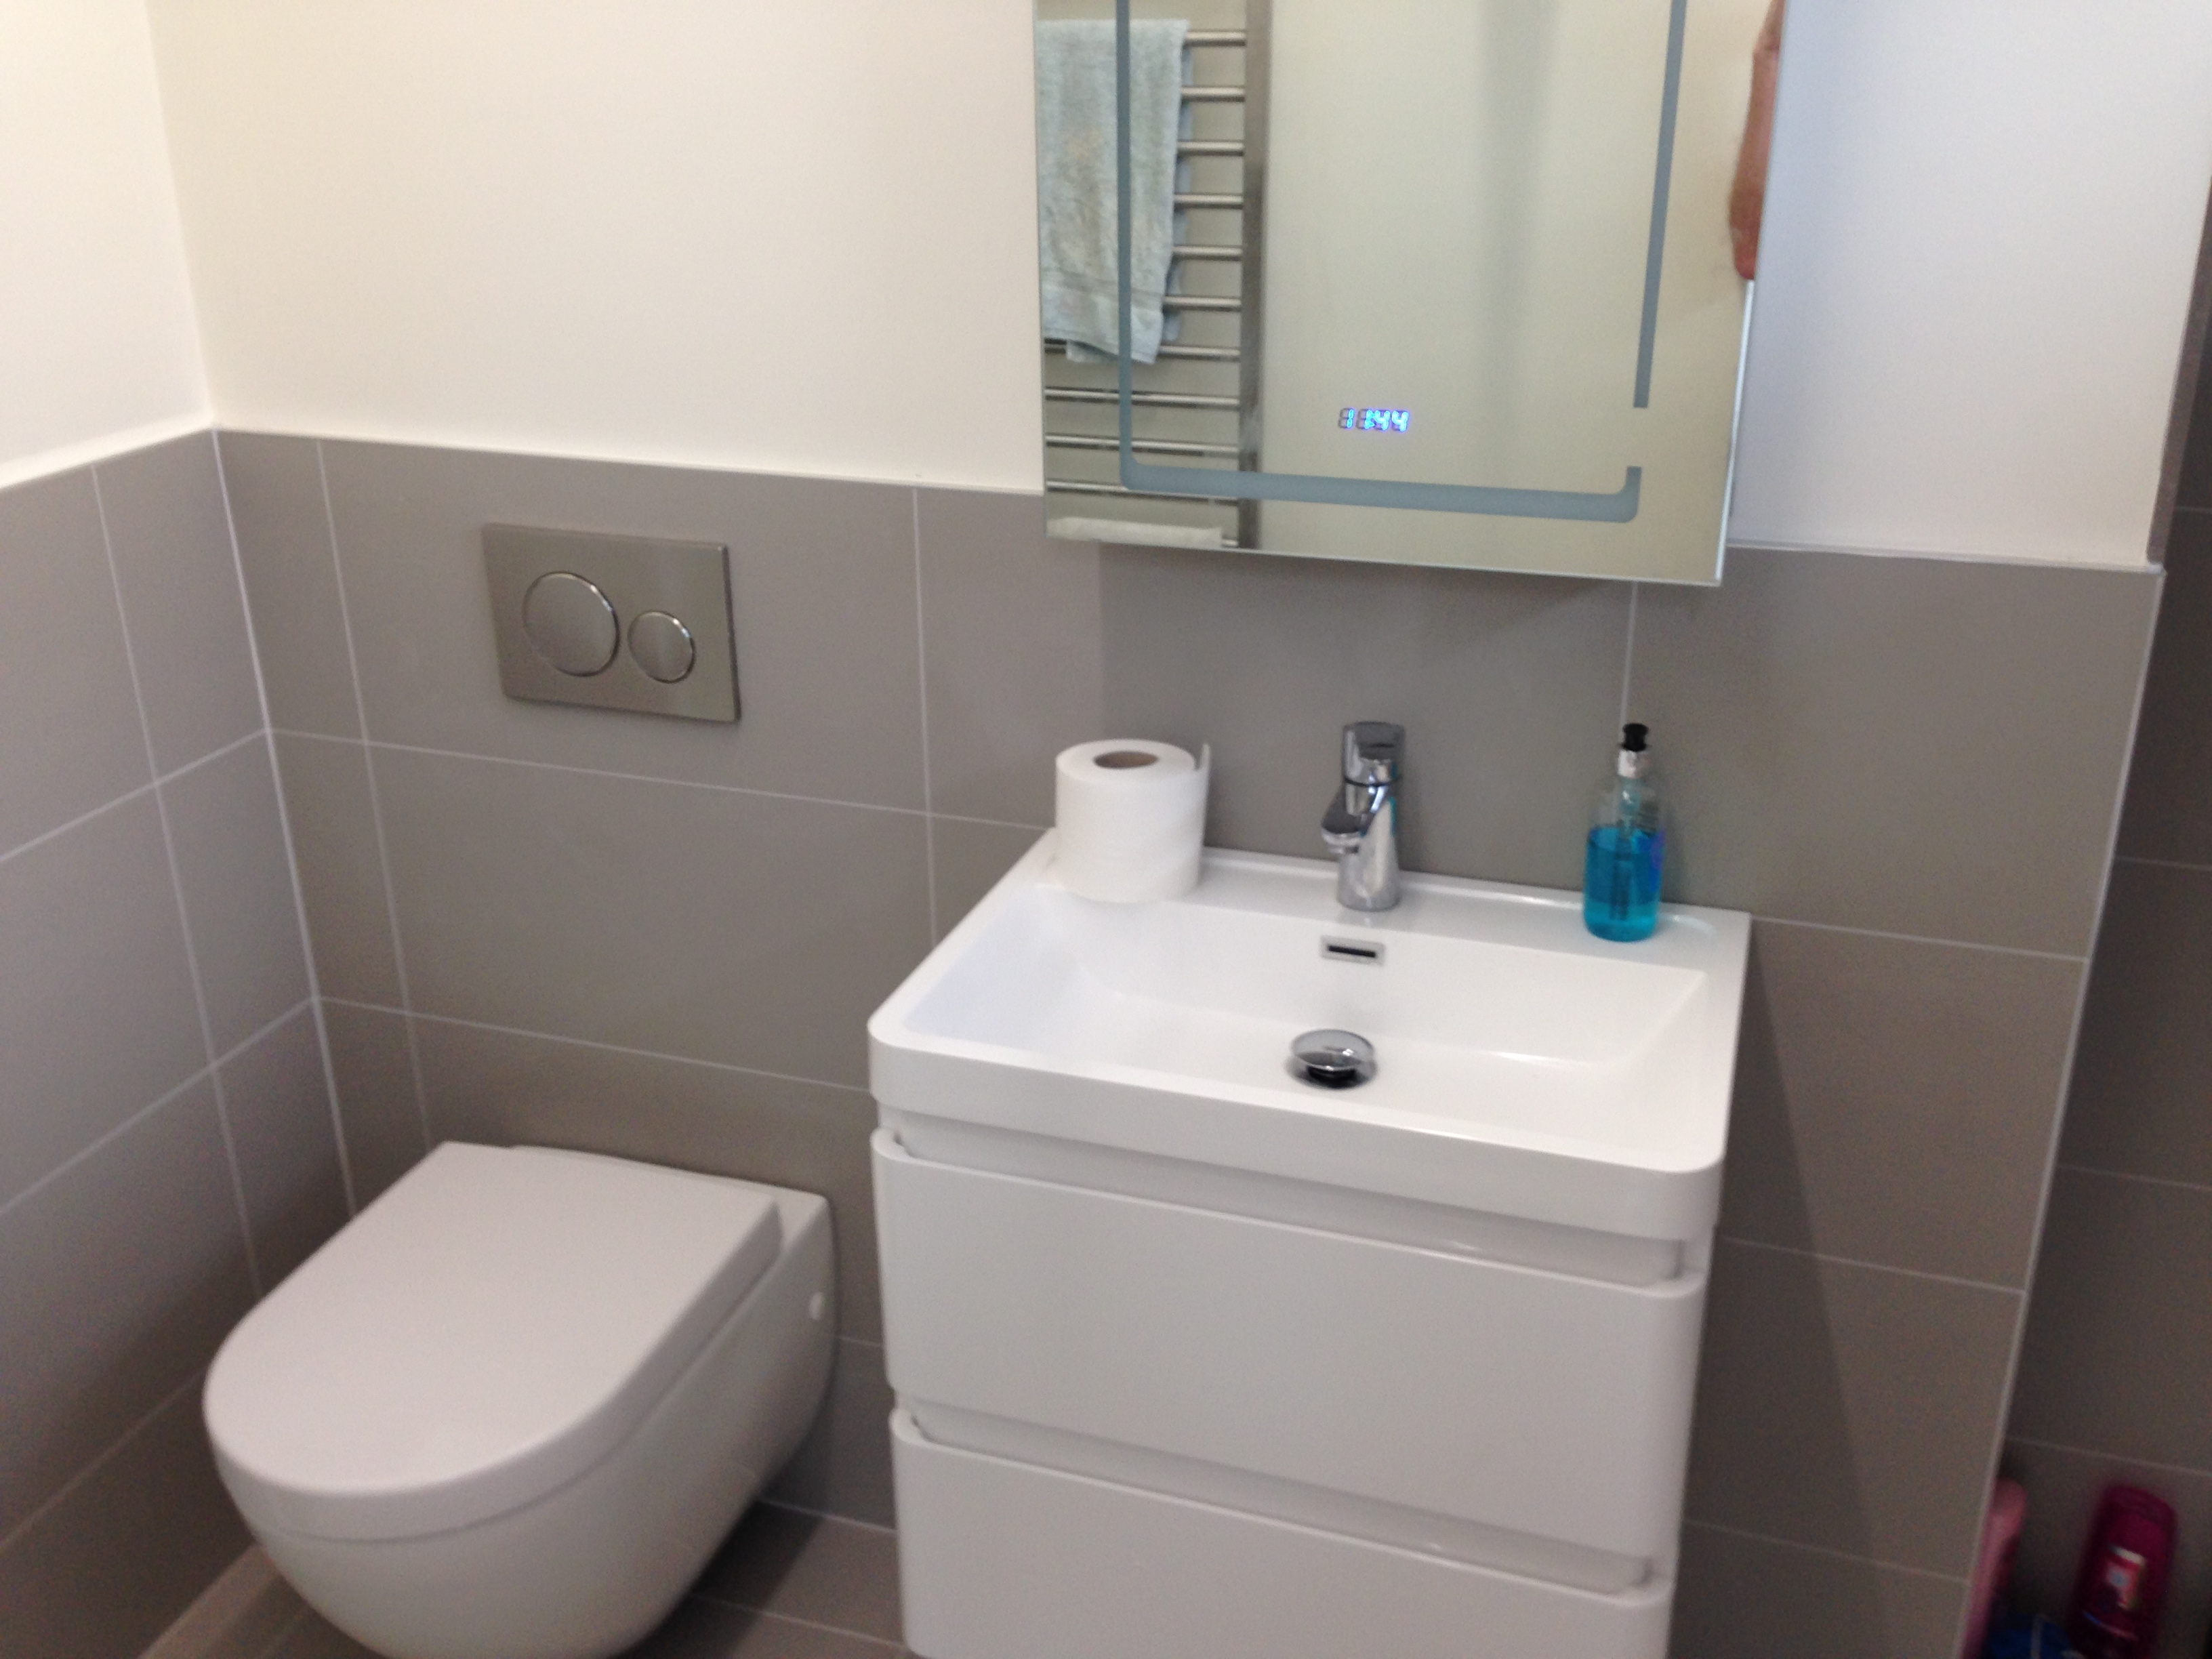
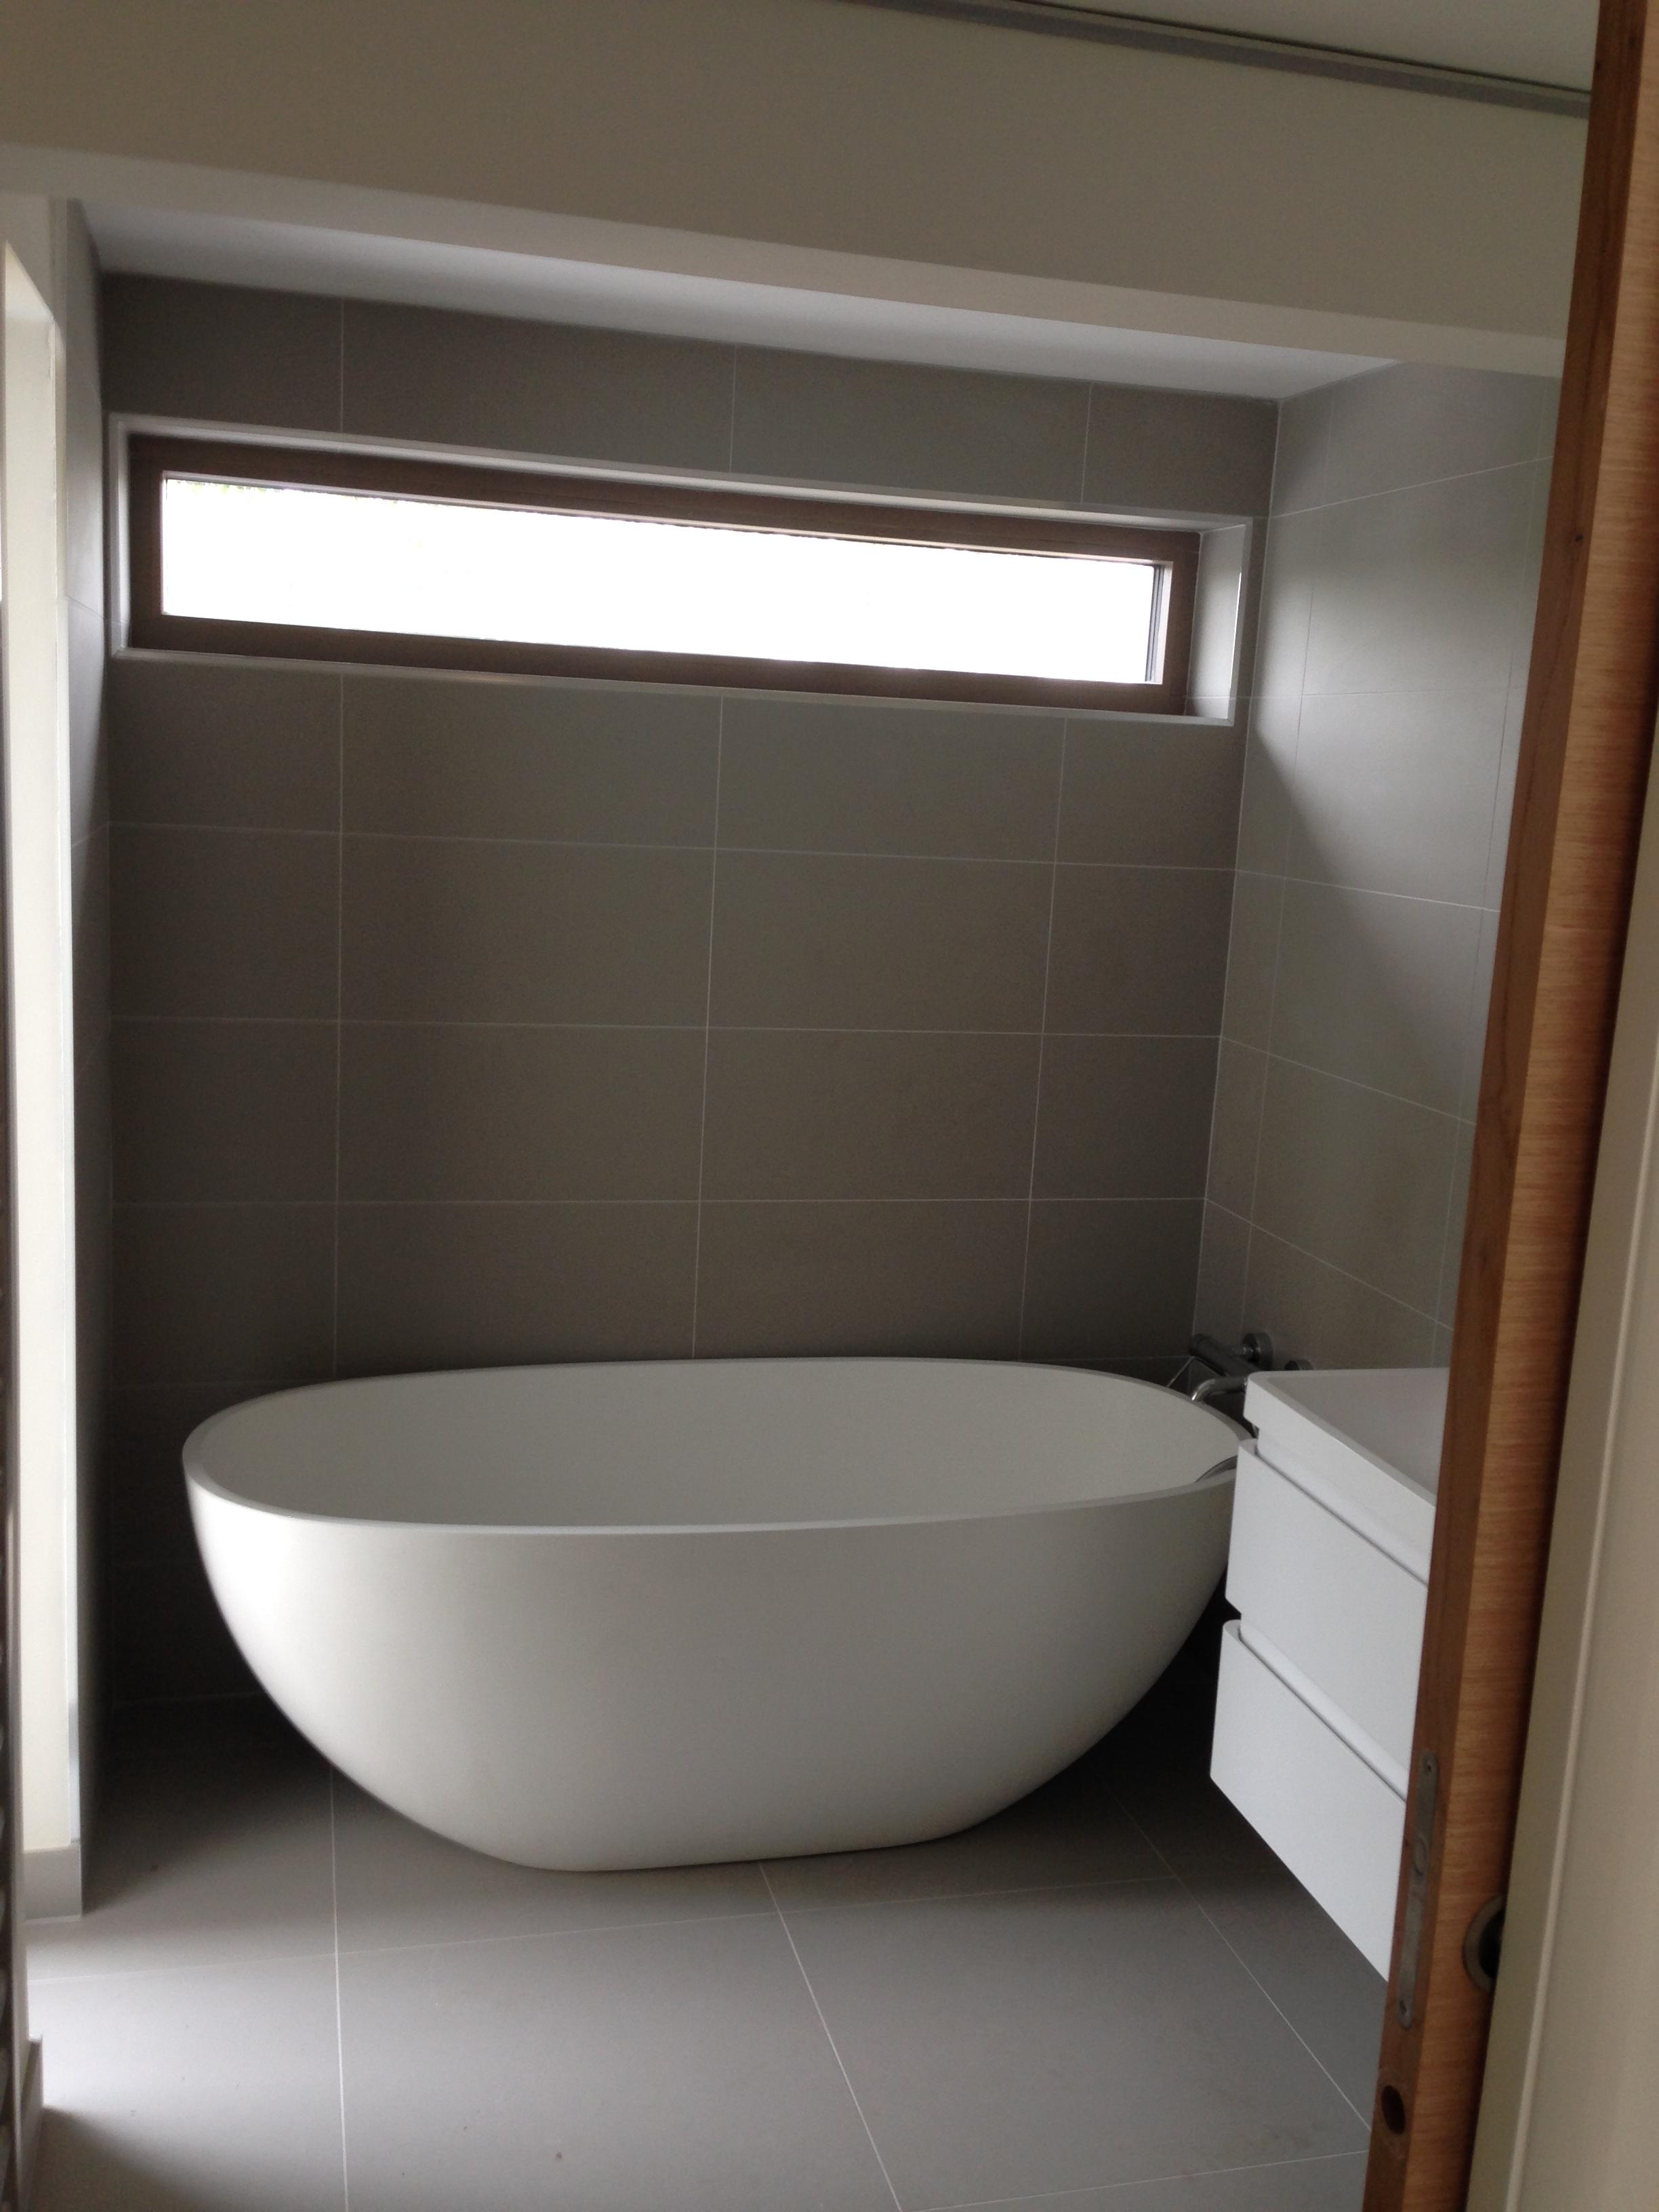
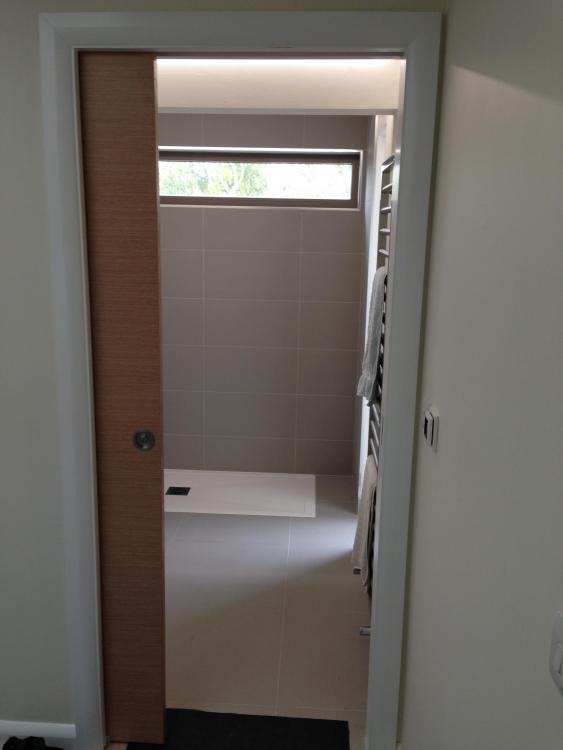
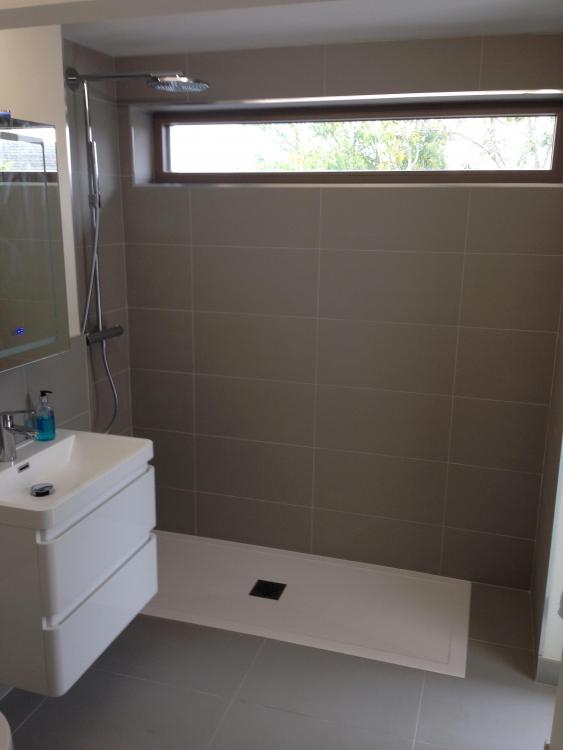
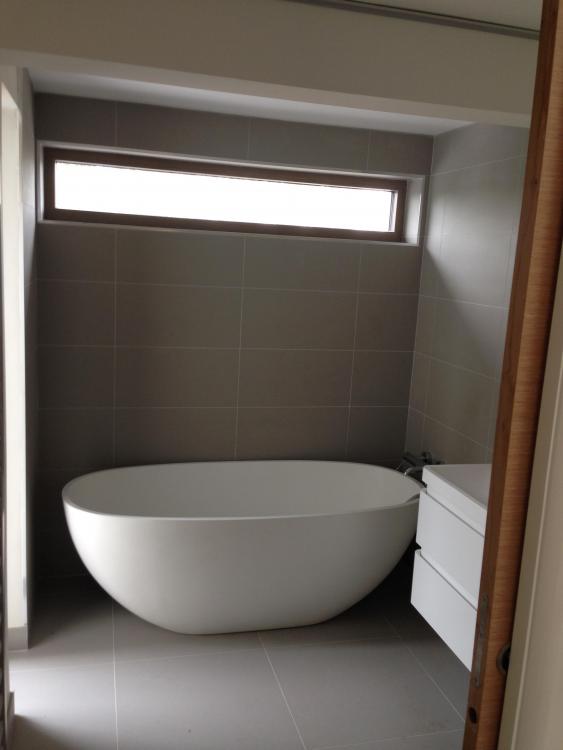
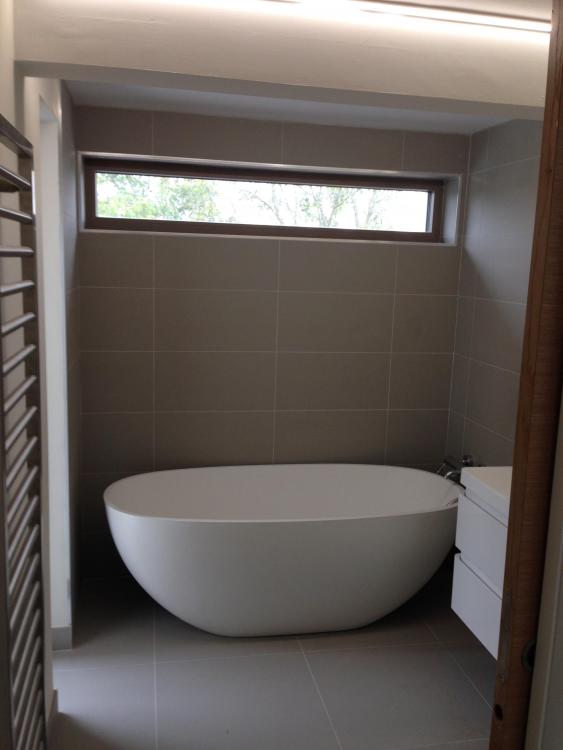
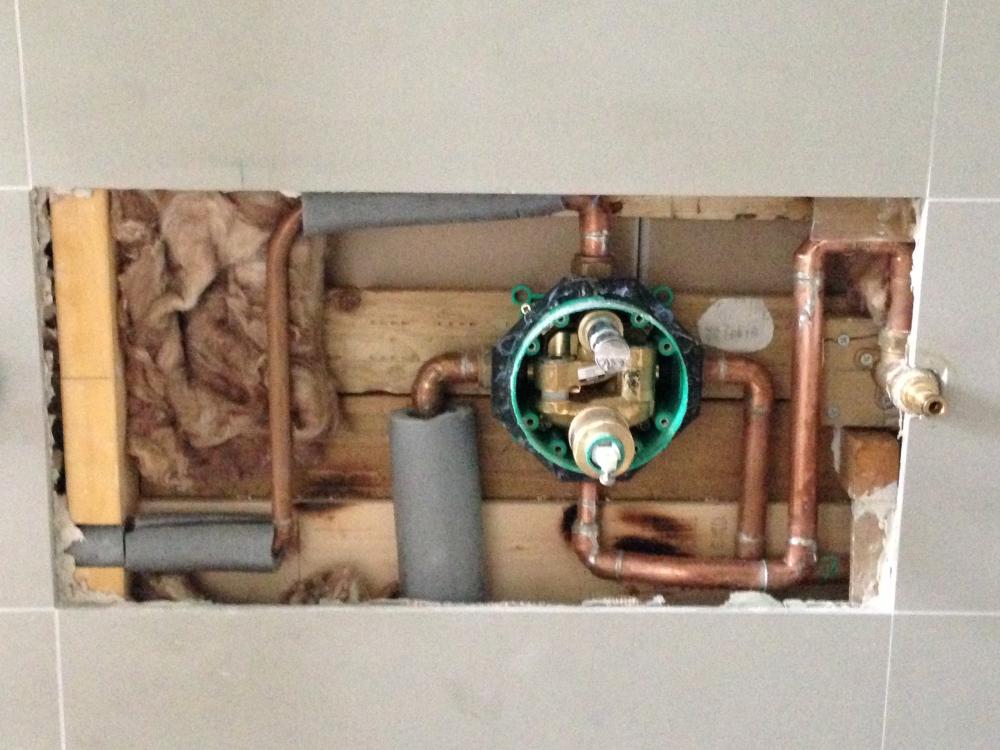
Here's a bunch of pics - first ones are the kids general bathrooms and the last is the replumbed bath filler. Tiles have now been replaces so we'll get everything back Monday.


 1 point