markocosic
-
Posts
979 -
Joined
-
Last visited
-
Days Won
1
Everything posted by markocosic
-
Ever seen this ventilated ridge
markocosic replied to SuperJohnG's topic in Roofing, Tiling & Slating
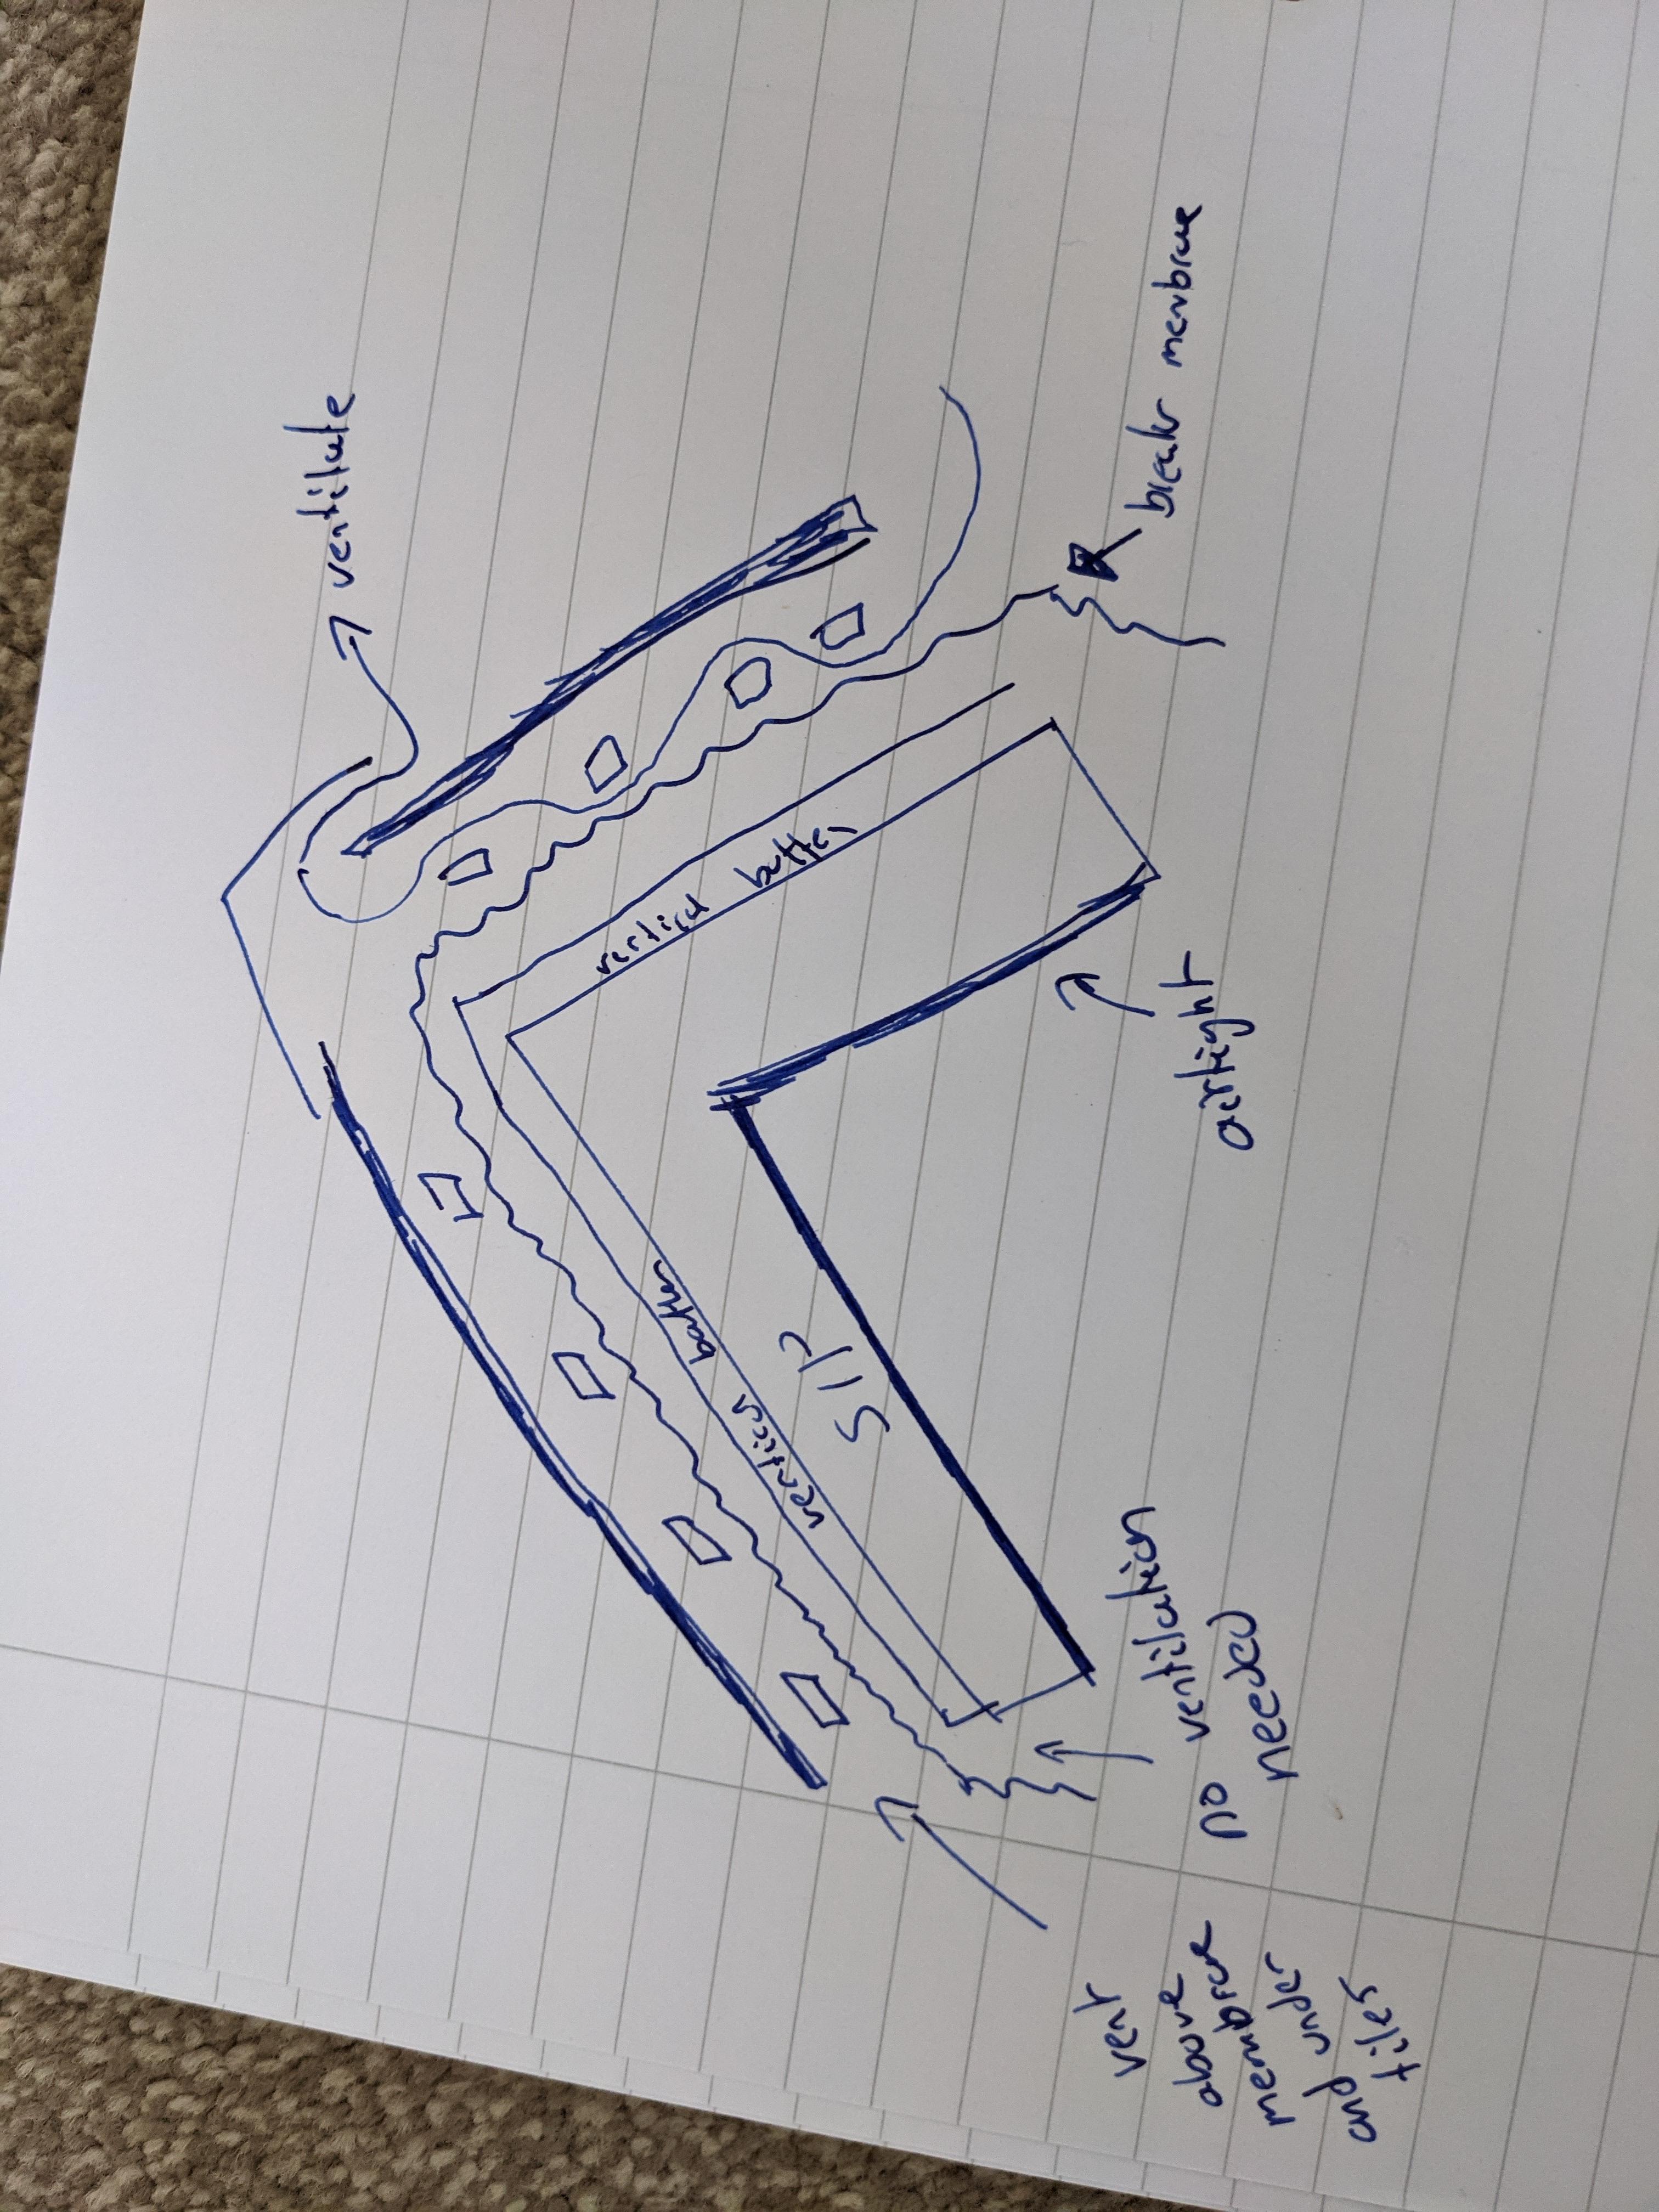
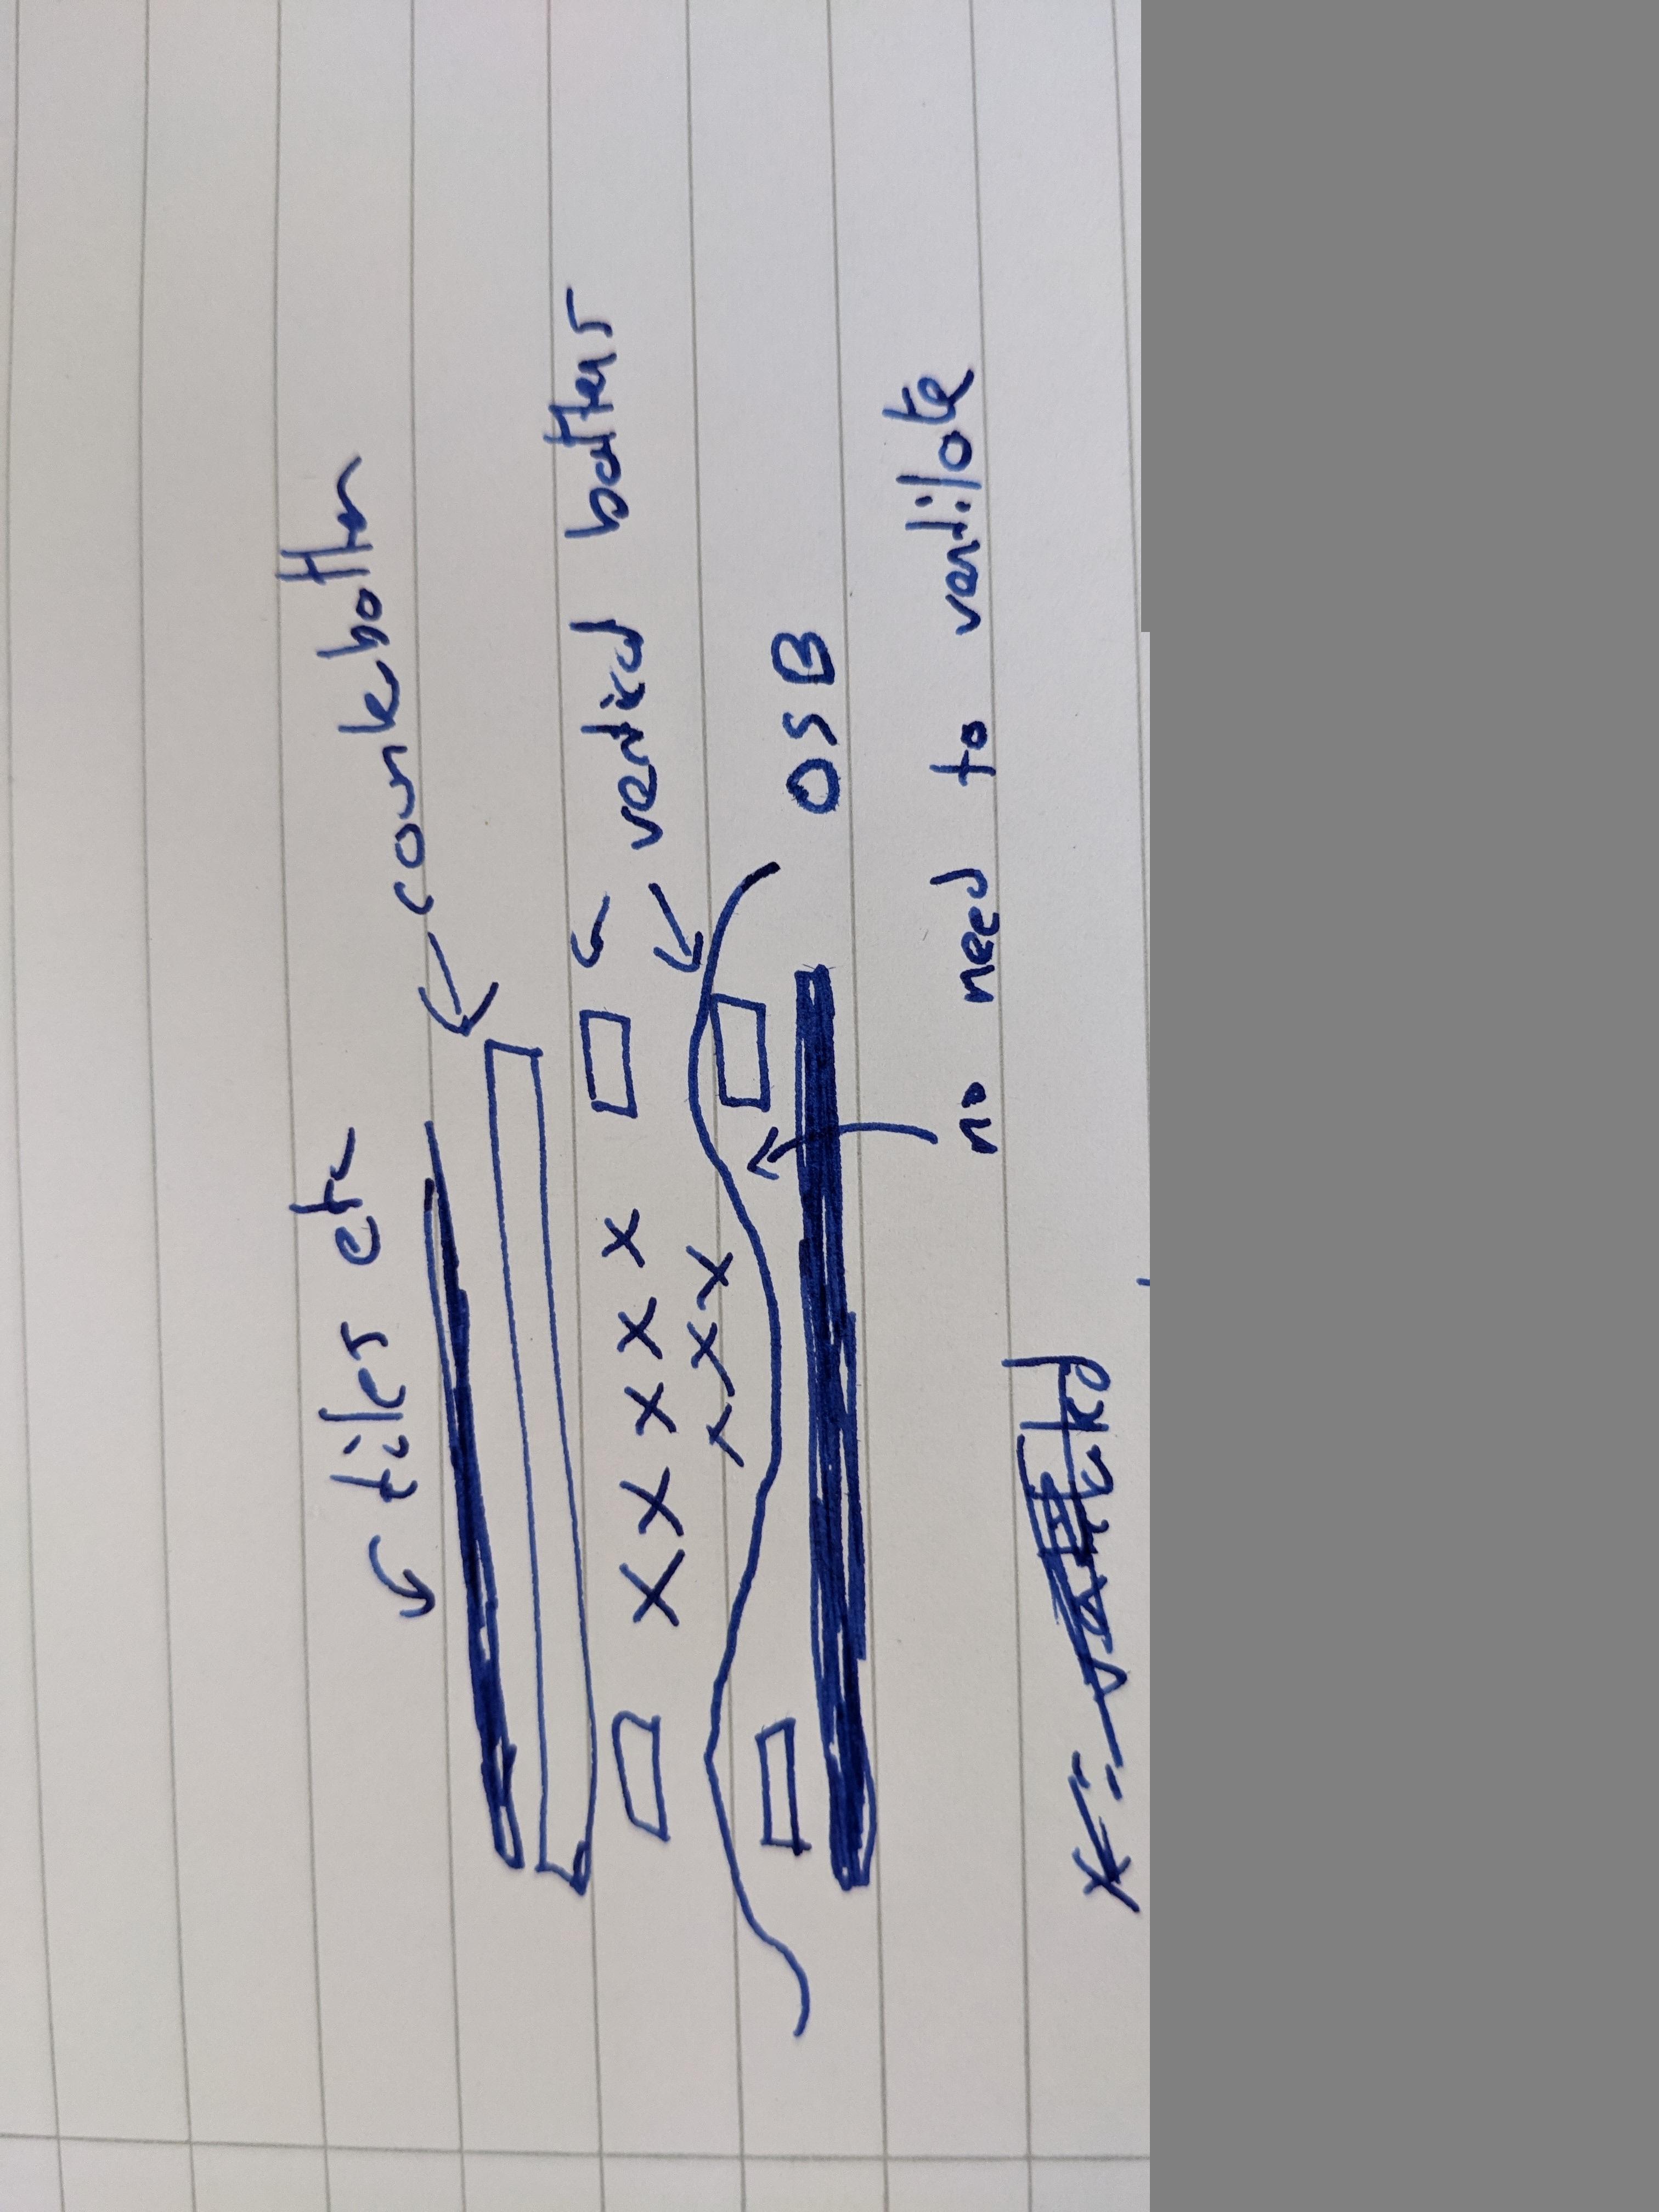
This useful? https://www.wienerberger.co.uk/content/dam/wienerberger/united-kingdom/marketing/documents-magazines/technical/UK_MKT_DOC_TEC_ROF_SAN_Dr_John_notes_roof_space_vent_001.pdf You're a sip structure? Therefore it MUST be well sealed warm roof so that the SIP doesn't turn into wet Weetabix Therefore the breather membrane that you have already that's lapped over the top is sufficient. And in theory no ventilation whatsoever if the roof can breathe (e.g slates with gaps not a standing seam metal roof) unless you're trying to keep the roof cool enough to avoid ice dams (in which case steep roof and lots of breathing above membrane and out of the ridge, and try to avoid breathing in warm air from walls that are heated by the sun etc) If you propose having another membrane above sarking, then battens, the roof finish, with all ventilation above the second membrane, then it's fine to lap this second membrane over the ridge just above sarking. When we were looking at SIPs the detail requested was a breathable membrane over the sip (one suitable for direct contact) right over the ridge; then vertical battens; then either counterbattens and standing seam or counterbattens and tiles or OSB and asphalt shingles etc; with ventilation between membrane and the roof finish at eaves and ridge levels. No additional membrane above this. The SIP folks would provide said membrane held in place with the vertical battens. I don't see why you'd have a second membrane of this is effectively what you have. Tiles and ridge just go on. Sarking kinda overkill given that there's already OSB there for shear strength in the roof unless I'm missing something? PXL_20210822_114836179.jpg -
Ever seen this ventilated ridge
markocosic replied to SuperJohnG's topic in Roofing, Tiling & Slating
sketch of what I had imagined the layup to be

-
Ever seen this ventilated ridge
markocosic replied to SuperJohnG's topic in Roofing, Tiling & Slating
Just looked at photos and see that my advice might be unhelpful. I imagined a membrane on the sip for water shedding purposes - draped between vertical battens so that water doesn't pool on your battens - then vertical battens on top of that plus horizontal counterbattens and a roof cover. You wouldn't vent under the membrane. (So no cut at the top) I think you *would* vent on top of the membrane (and out through ridge) though. Are you imagining a second membrane here? I can't see why you would be asking about cuts otherwise. -
Ever seen this ventilated ridge
markocosic replied to SuperJohnG's topic in Roofing, Tiling & Slating
You should not have lots of warm moist air coming through your sip. (if you do then you have a problem - sip needs to be airtight internally to not transport a bucket load of moisture into three OSB) Your structure should be less vapour permeable inside (vcl) than it is outside (membrane). So that it dries out much much faster than it gets wet. If moisture did get through the OSB then it should be allowed to escape more easily through the membrane than it is to get through the OSB (it will be, unless you're using plastic sheet as a membrane) If water comes through the roof covering it shouldn't get to the sip. (Which it won't as the membrane is breathable but waterproof) So I'd say: Don't worry about ventilation between sip and membrane. (so no cuts where I think you're asking about cuts - membrane is continuous from eave to eave and any moisture under it...breathes through it...non issue) Do worry about ventilation between roof covering and membrane. (so vented ridge) Answers world be different if the membrane wasn't breathable. Then I'd say good need to vent it with cuts at the to. Be thankful that you're not in ice damming areas: https://www.buildingscience.com/documents/insights/bsi-046-dam-ice-dam -
The big London apartment building sites are very Eastern European. Poles went long ago. Romanian these days. Problem you never is that if there are 10 jobs and 9 people to do them then you're going to pay until somebody gives up. But they've all got money.
-
House? Roof trusses at 600 centres? No attic conversion? Mostly to keep bedrooms at a sane sleeping temperature and knock the edge off living room temperature? With the benefit of hindsight: I'd get a single split with a compact ceiling cassette. Stick that in the upstairs landing ceiling. Refrigerant pipework runs through attic and down an outside wall. Condensate drain runs up a little (they have lift pumps inside them) then drops down into the bathroom or tees into an outside soil stack. Doors open upstairs during the day. A/C cools the bedrooms. Doors closed at night. A/C will cool the staircase and rooms off it.if it didn't already do so during the day. Works best with an open plan downstairs. You don't want, or need, individual coolers in each room in a UK climate. They're overkill. They're also noisy and bulky and draining the condensate is a pain. (no lift pumps so you're almost guaranteed to be running it outside) Also blinds. Also a pergola and some grape vines for downstairs. There's a reason all southern grandads have vines. I have an a2a split with wall mounted indoor unit downstairs because attic conversion and because there wasn't a neat route for the lines to get to a wall mounted unit in the upstairs landing in my place and I'd just renovated before deciding that I wanted one. I'll may end up reinstalling to the upstairs landing anyway and surface running the pipework. Or sleeping in the living room on the very worst nights!
-
Screening Ideas to Block Chronic Curtain-Twitchers
markocosic replied to harry_angel's topic in Landscaping, Decking & Patios
Deepfakes playing on screens visible through the window? Childish but amusing and saves you the need to walking around in the buff. ? Back in the real world those willows look ace. Trellis with creepers is also relatively quick and the trellis itself might break up the view enough to give sufficient privacy even in winter. -
There have been cases of much the same in external wall insulation! ? Holes through screed. Water down holes for humidity. Moisture cure foam with modest expansion down the hole so that you're not lifting anything. Call it adequate? Tile finish? Presumably the DPM is trashed and your relying on the for during faster than it gets wet/a floor covering that won't strain if a little humidity dries through it?
-
Roof access / safe trimming of wooden eaves
markocosic replied to markocosic's topic in Roofing, Tiling & Slating
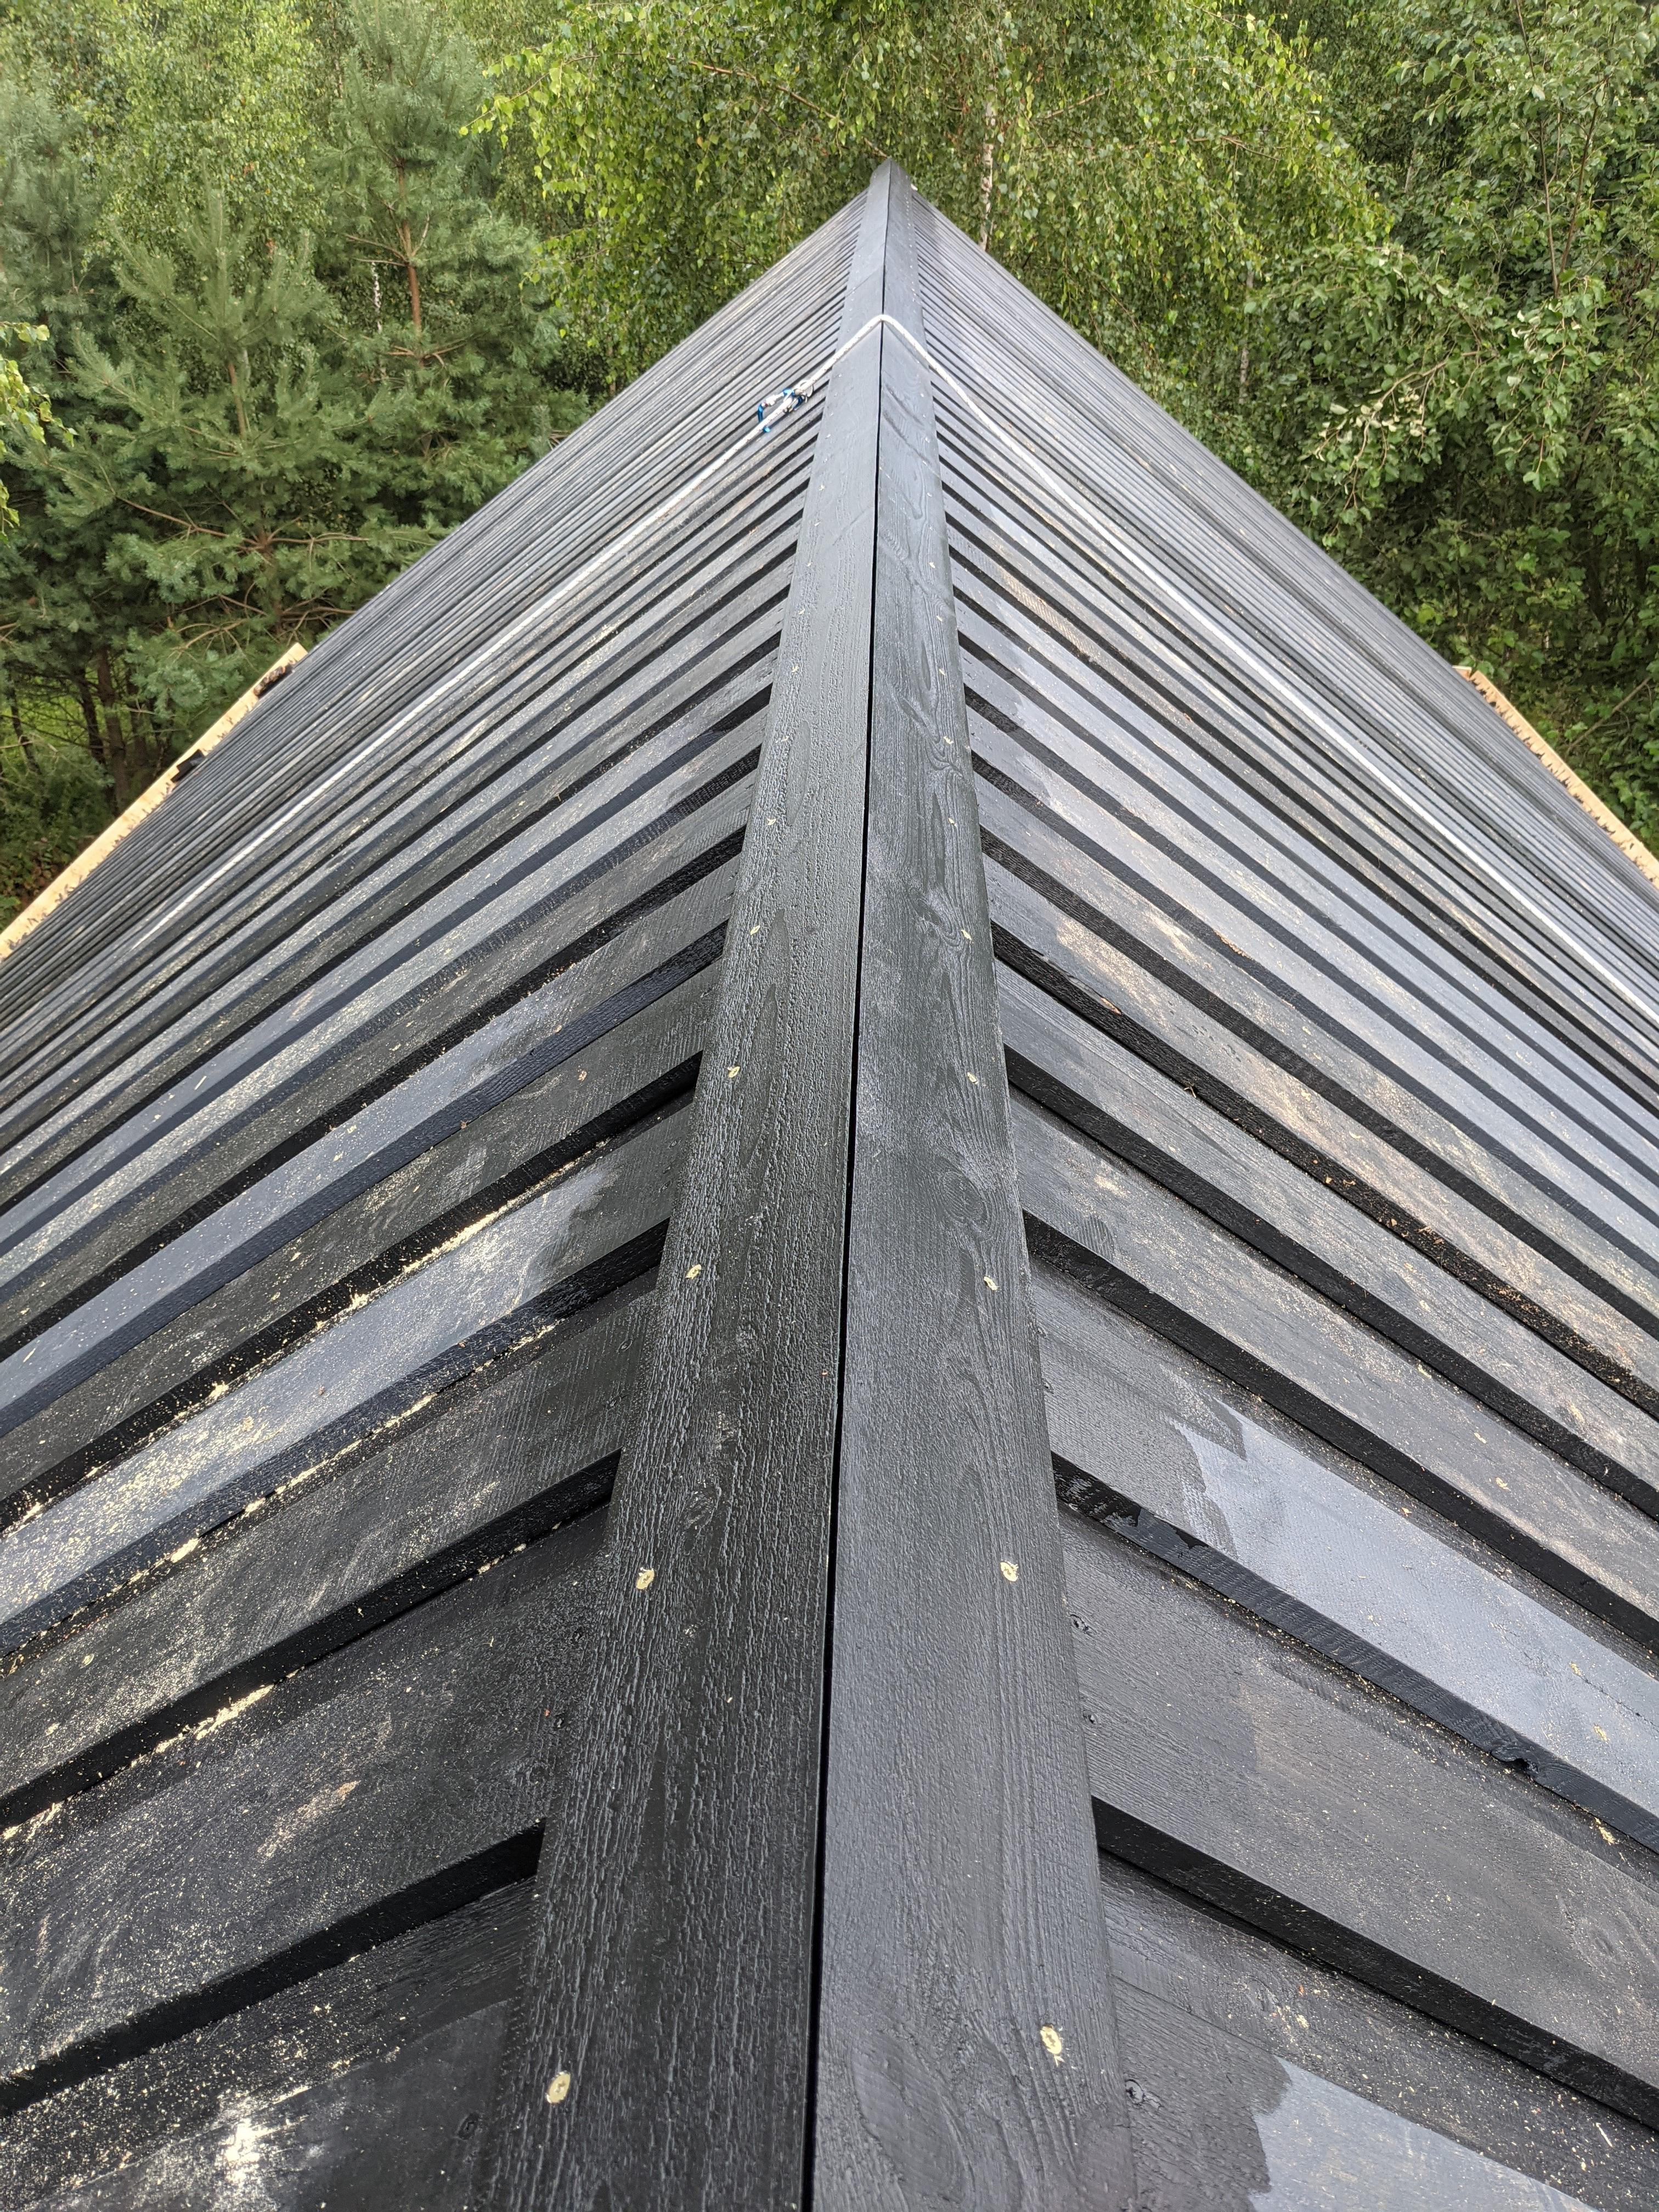
Pleased with how the ridge turned out at the other end. I was dreading fitting "6 metre ridge tiles" but they lined up great in the end. ? Yes rope for getting up to the ridge. Harness too. (save for the no tools photo) Scaffolding that would be epic; ladders are dangerous; spider rig would be amazing but haven't seen them locally.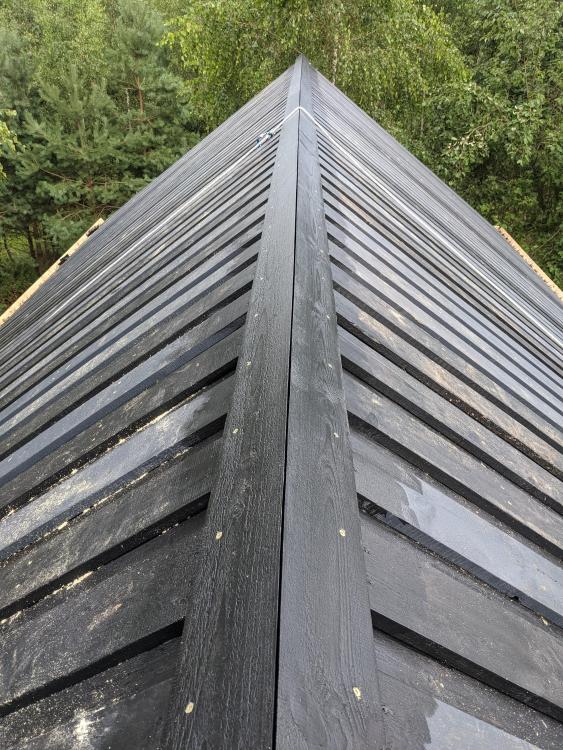
-
Roof access / safe trimming of wooden eaves
markocosic replied to markocosic's topic in Roofing, Tiling & Slating
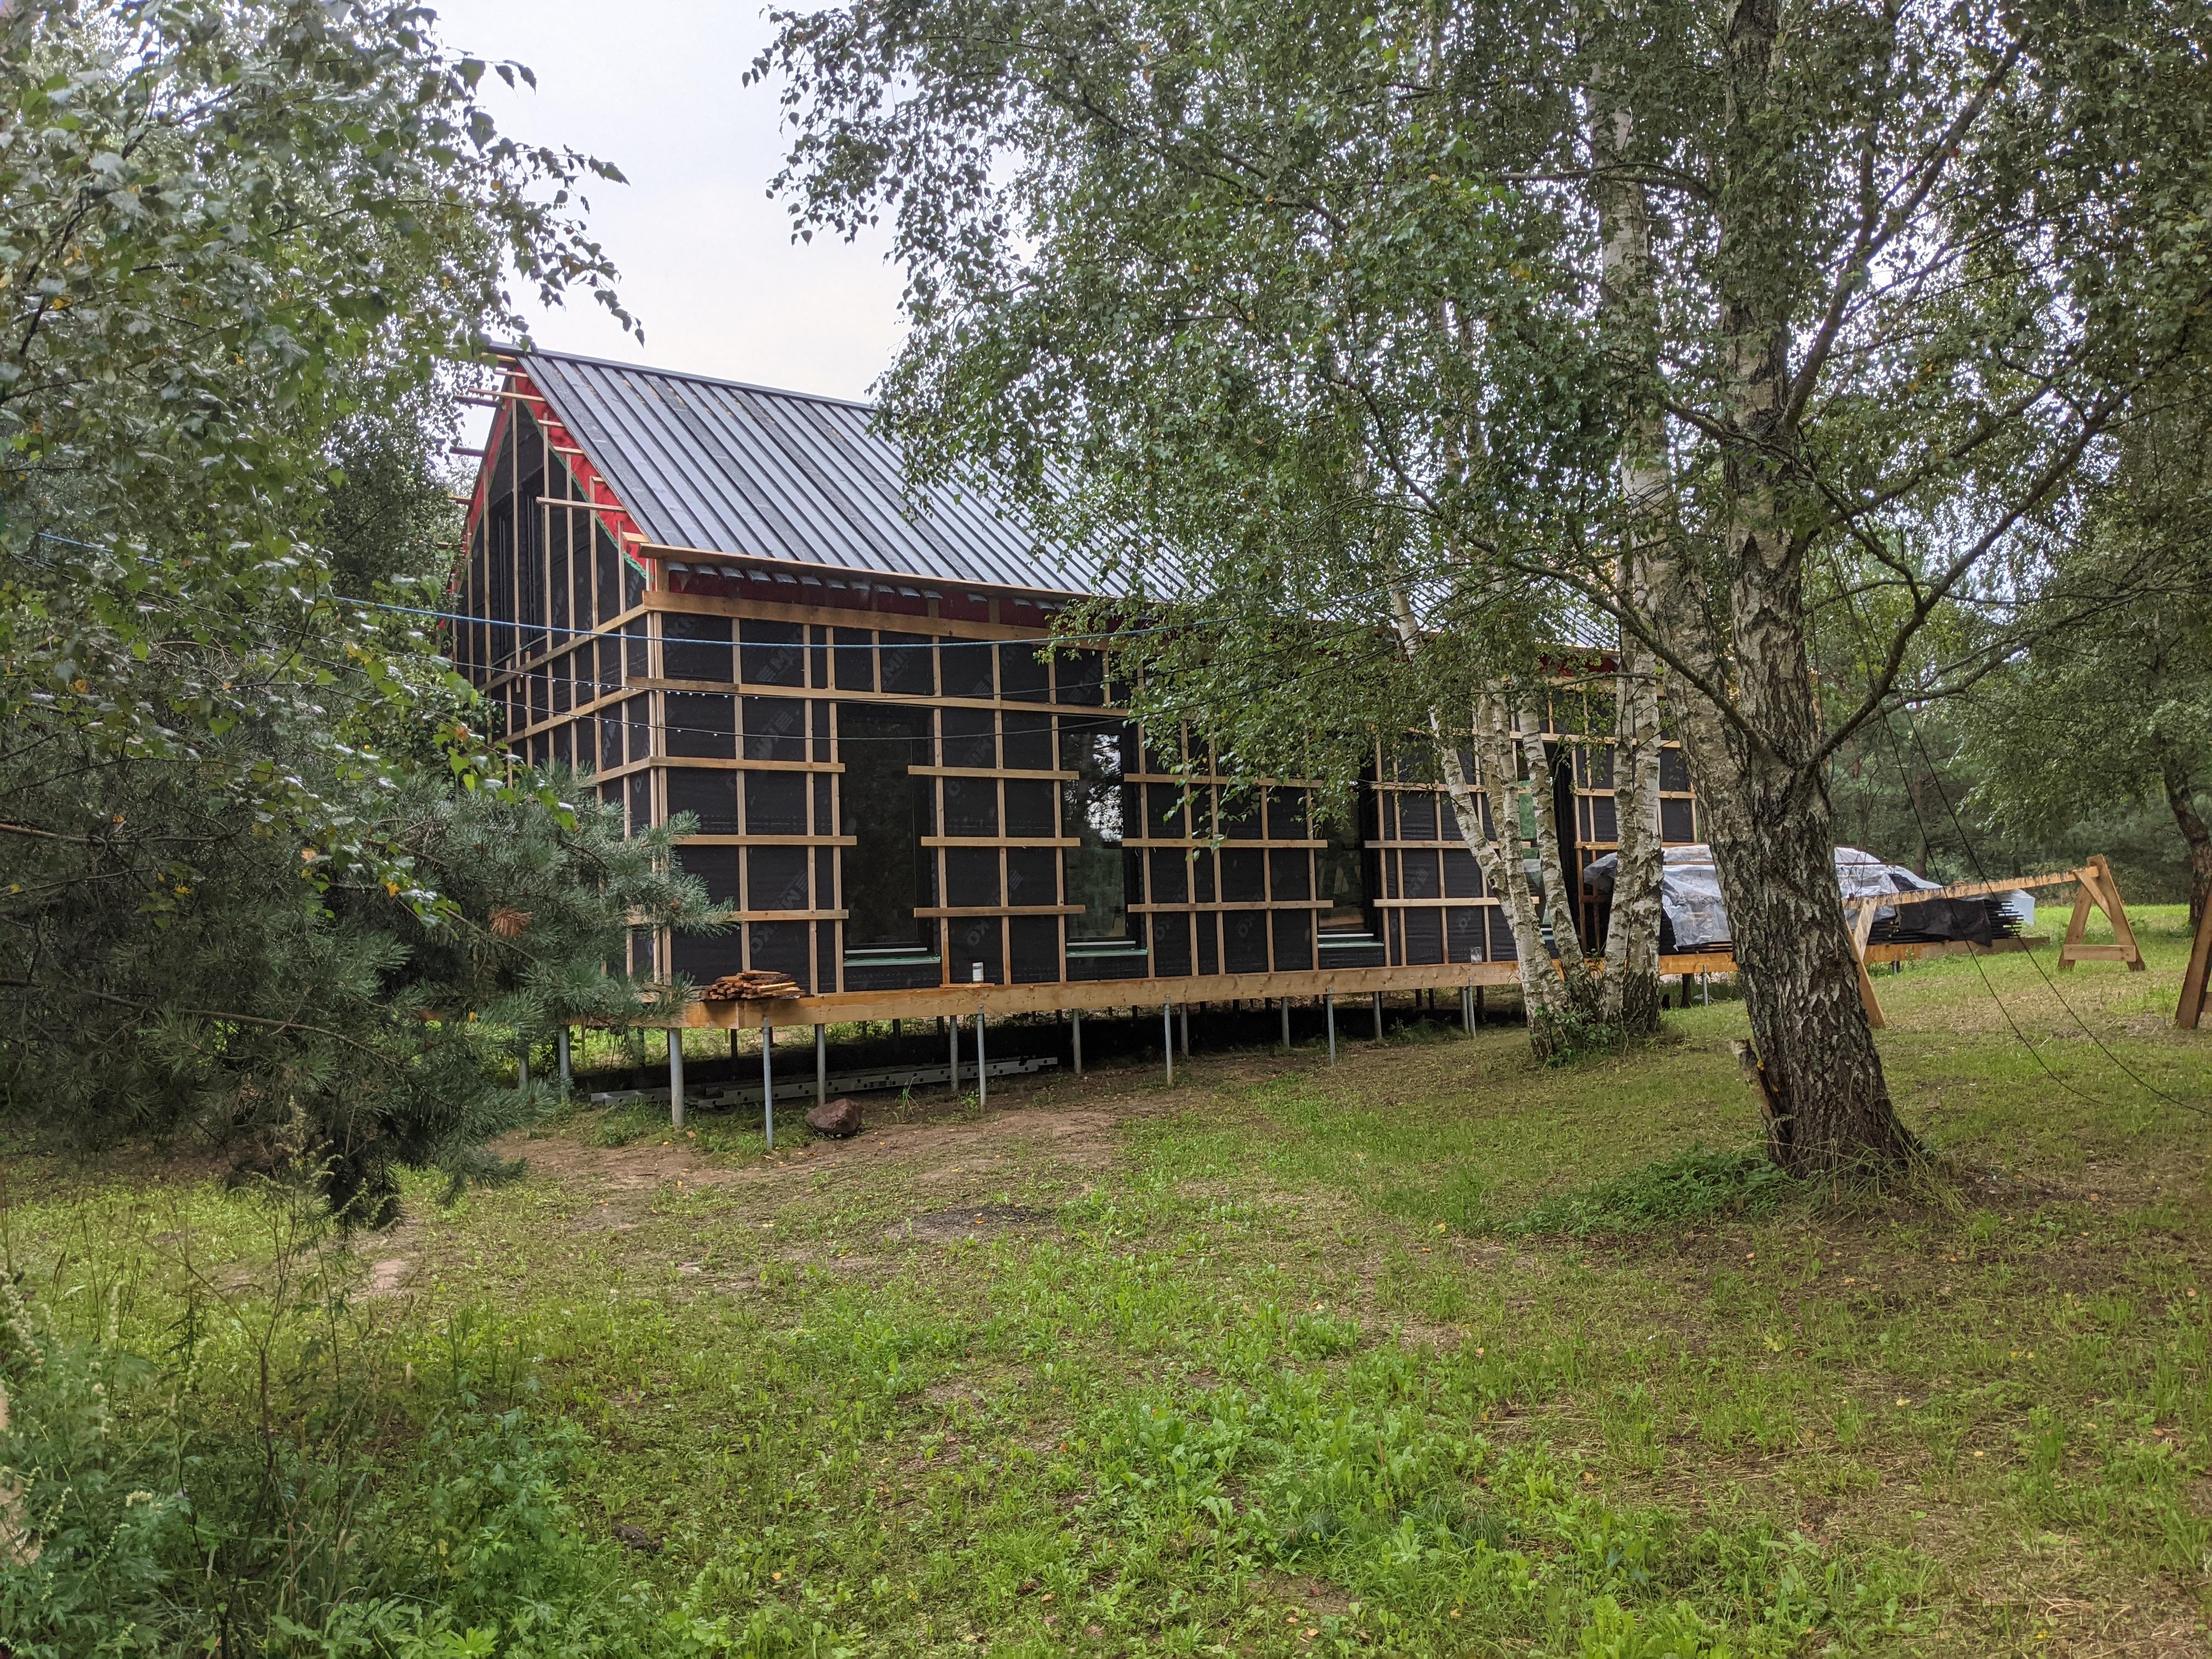
Spider access platforms look awesome! (not seen those before) I've had a play at ground level and decided that I'm more afraid of the circular saw than the gravity. The difficultly in cutting these ends are: (1) there's nothing flat to run the saw shoe over so you're liable to tip the nose of the saw shoe into a valley or are trying to hold the saw in mid air...unless you add some hardboard "rails" to smooth out the gaps (2) there's some force in there from me strong-arming the banana wood where I want it that gets released as you cut and wants to throw the saw at you (3) you'r working backwards in that either the main body of the saw shoe is on the "keep" side but you're staring at the "discard" side of the saw when running it (reaching over the blade) or the main body of the saw shoe is on the "discard" side and you're again trying to hold the saw in mid air (running a narrow strip of the shoe against the keep side...unless you deliberately cut the roof in sections and have some sort of support to hold the saw Therefore: Circular saw...and a track to run it along that can span say a metre...so that you can run the main body of the saw shoe on the "discard" side without worrying about the saw wobbling left/right or the front of the saw shoe dipping into the "grooves" in the roof. Clamp some temporary 70x25 mm battens into the roof "grooves" to support the track. Cut the roof boards between the battens. Move on. And do this from the wall side rather than the roof side. I don't think scaffolding. Not worth the hassle of getting it to the forest vs making a quick "clip on balcony" from scrap and hanging it from the wall. There's a 150x25 mm "batten" at the top that's fixed to each stud with a 6 x 140 mm screws (for carrying the weight of the wall cladding - more than enough for a person) that runs the full length of the roof.
-
It's been a tricky year to be building in wood! Especially if you'd planned timber frame with timber exterior wall cladding and timber roof covering and timber ceiling covering and timber floor covering and a timber deck ? We gave up and are leaving our deck / south wall / similar but less grand open gable unfinished until 2022. The sawmills (in Lithuania anyway) think they will have "satisfied all the silly priced futures contracts" by then. Prices won't go back to 2020 levels though. Maybe only +50% rather than +200%. Here's that miscellaneous teak from the shed FWIW - you should get a trade discount on top of that for tradepoint or visiting on OAP day with a borrowed granny etc. Go crazy bold and thin coat solid colour render onto the OSB? In all seriousness if you can wait I would wait. September futures in the US (which is where all the Euro wood went earlier this year) are down again https://www.bloomberg.com/news/articles/2021-08-11/lumber-falls-to-nine-month-low-extending-retreat-after-boom

-
I wanted to draw a design, have it made accurately, then plonk it onto foundations with no mucking about on site. Call it a over reaction to having had to deal with badly built brick houses where nothing is square or level and you're forever mucking about making things fit well. The more I read on SIPs the less they made sense though. The vapour resistance of the outside is the same as the inside. (Both OSB) The weak paths are the joints. Any airflow or vapour movement through that structure is going to go through the joints. The worst place to have moisture in OSB. If you're VERY good on air tightness - assembling carefully and adding a membrane to the inside of the SIP that you're religious about protecting - and you build a secondary structure outside the SIP (battens, breathing membrane, battens, cladding of some kind) then they work. Price that up and you might as well panel build or even stick build though; and if you go for those routes then you ends up with a structure that's far more resilient to minor f**kups and viable to repair too. The better SIP vendors even said as much. "Our price is supply and erect and includes battens, membrane, and battens over the sip. In the early days we did supply only but people always screw up airtightness, the ridge always rotted first (highest driving pressure for moisture from inside/hardest to fit up tightly), and we got fed up of the warranty claims. If anybody says you can render the outside directly and bash some shingles on top then run a mile!" (or words to that effect) Advantage of the SIPs was speed. (up and watertight in days) We found some framers who were framed, insulated, and watertight in 5 weeks. (and built in snow season rather than rain season) If the choice was panel or sip then panel every time.
-
One could still 'cheat' though? As in it doesn't need to be thermopine or similarly stable it just needs to be look good? Indoor grade flooring as soffit? Glue and tack to OSB? Speedboat style random length oiled teak 30 Inc VAT at one of the sheds. Long bits for the big gable short bits for the regular soffits?
-
Unless it's somewhere windy where you get wind blown rain (though I'd be more worried about the OSB there as that turns into Weetabix fast) Or somewhere sunny with a steep roof and you're worried about unfinished wood weathering differently according to how much UV it sees Or somewhere buggy and you're worried about what sets up home by behind any open jointed boards (boards with gaps between rather than tongued or overlapping somehow) Then I think you have free choice of anything that can stand humidity without falling apart. (so cardboard is out, or hardboard/MDF, but apart from that anything goes) IIRC my parents place has pine fascias and 6mm ply soffits, all painted with "cetol" when built 30 years ago, with the fascias (only) repainted once or twice. It's dry under there as tony says and doesn't see UV either so even the colour stays. What will the detail at the gable end look like? (the vertical edge of the roof) having that not drip onto the underside or OSB probably most important?
-
Plain (ungrooved) decking boards? Light grey (white is never white) painted rough cut softwood? It's purely decorative and hanging off the underside of OSB, so you can use pretty much anything, no?
-
That shower fits to exposed pipes on a standard spacing. You'd remove the whole mixer bar and replace it.
-
US references: https://www.ncbi.nlm.nih.gov/pmc/articles/PMC183576/pdf/aem00061-0260.pdf https://www.phcppros.com/articles/8259-legionella-growth-in-hot-water-systems Too many variables though. Electric vs fossil heating should make zero difference to legionella. IMO it's likely that the electric heating folks simply didn't keep their tank hot at all times. (as I suggest with the heat pump - the heat loss is compensated by the higher COP is the gut feel)
-
Nope! (though I'd love to see one - from a single UK/US type building with individual tank not a european "building" where one tank feeds multiple apartments (probably from a "cold" tank sat on the roof) That's the worst case scenario where you're most likely to get it. Preferably a holiday home for occasional occupancy. Legionella is difficult to grow, not particularly deadly unless you're already half dead or otherwise immunocompromised, and homeowners don't test though. Good luck finding single recorded case from a domestic environment. Yet the legionella police still insist on storing and distributing hot water at scalding temperatures that are inefficient to produce for heat pumps. (and district heating systems) Good business in selling pointless gear to fix the problem you create with scalding hot water. Easy photos of scalded babies dropped into hot baths. Or grannies who slipped from the shock of hot shower water and clonked their head on the wall and were peeled by the hot water by the time they regained consciousness. Else the legionella count in domestic cold water is so low, and the growth rate so slow, that any domestic system with reasonable "turnover" and where pipe velocities are high enough to clear the pipes will flush through anything that does appear quicker than it can take hold. Don't let that stop the legionella police forcing silly storage temperatures and scaring you into lots of equipment to reduce burns though. Most recorded exposures (from plumbing rather than cooling towers) are in hot water recirculation systems that are poorly designed and poorly maintained. If you ensure that the return from these systems is >50C at all times AND all parts of the system are >50C at all times then you won't get it. Even if it's >50C for >20 hours per day that's enough. Balancing large systems (such as in hospitals, sheltered housing) sing fixed valves is a pig though and you often get cold spots. Worse still are dodgy thermostatic mixer valves and dodgy mixer taps with cartridges (installed to reduce scalding risk from hot water) which allow crossover (cold water flows into the recirculation system, invisibly to the users, and creates "pockets" of cooler water that may not (due to how water is drawn off the hot circuit) show up back at the point of entry/return/reheating. Rubber hoses / washers too. (certain agents used to make EPDM are great at growing bacteria) Basildon (poo hole) Hospital (even bigger poo hole) did a classic by testing their water, finding legionella, then trying to kill it by raising the temperature of the hot water system. They made it worse. How? It was in the cold water system which they helpfully raised from 25-30C up to 30-35C thanks to proximity to the now hotter pipes. Enough people died to notice. Not enough people died for the hospital to care to fix the problem though. They pour enough money down the drain to pretend to fix it but never do. Better to spend it on doctors / nurses/ medicines etc in their eyes. (possibly not wrong on an economic basis) https://www.bbc.co.uk/news/uk-england-essex-23961487 https://www.echo-news.co.uk/news/local_news/9810618.10-years-on-legionella-till-a-risk-to-basildon-hospital-patients/ This book is the definitive text for those with an interest. Not much research in the area since as it's of minimal consequence and the marketing dollars all come from the tap vendors. https://www.amazon.co.uk/Legionella-Building-Services-G-W-Brundrett/dp/0750615281
-
Store at 45-48C, screw the legionella cycle, and go no thermostatic. Or ask the OEM to confirm approach temperature. If less than 5C you're fine (it'll do 41-43C at the outlet which is too hot to bear) unless you have shower pipework buried in a masonry wall (so it heats the wall and is cooled en route) Legionella dies from 45C+ by the way - it's just that kill time that varies. Provided that you keep the mains fed insulated cylinder sat on wood hot all the time - rather than filling a vented cylinder sat on cd concrete with legionella infested lukewarm water from an attic header tank at 37C and hoping to kill it before it gets used - you're fine. Guidance (there are no regs) caters for worst case scenario.
-
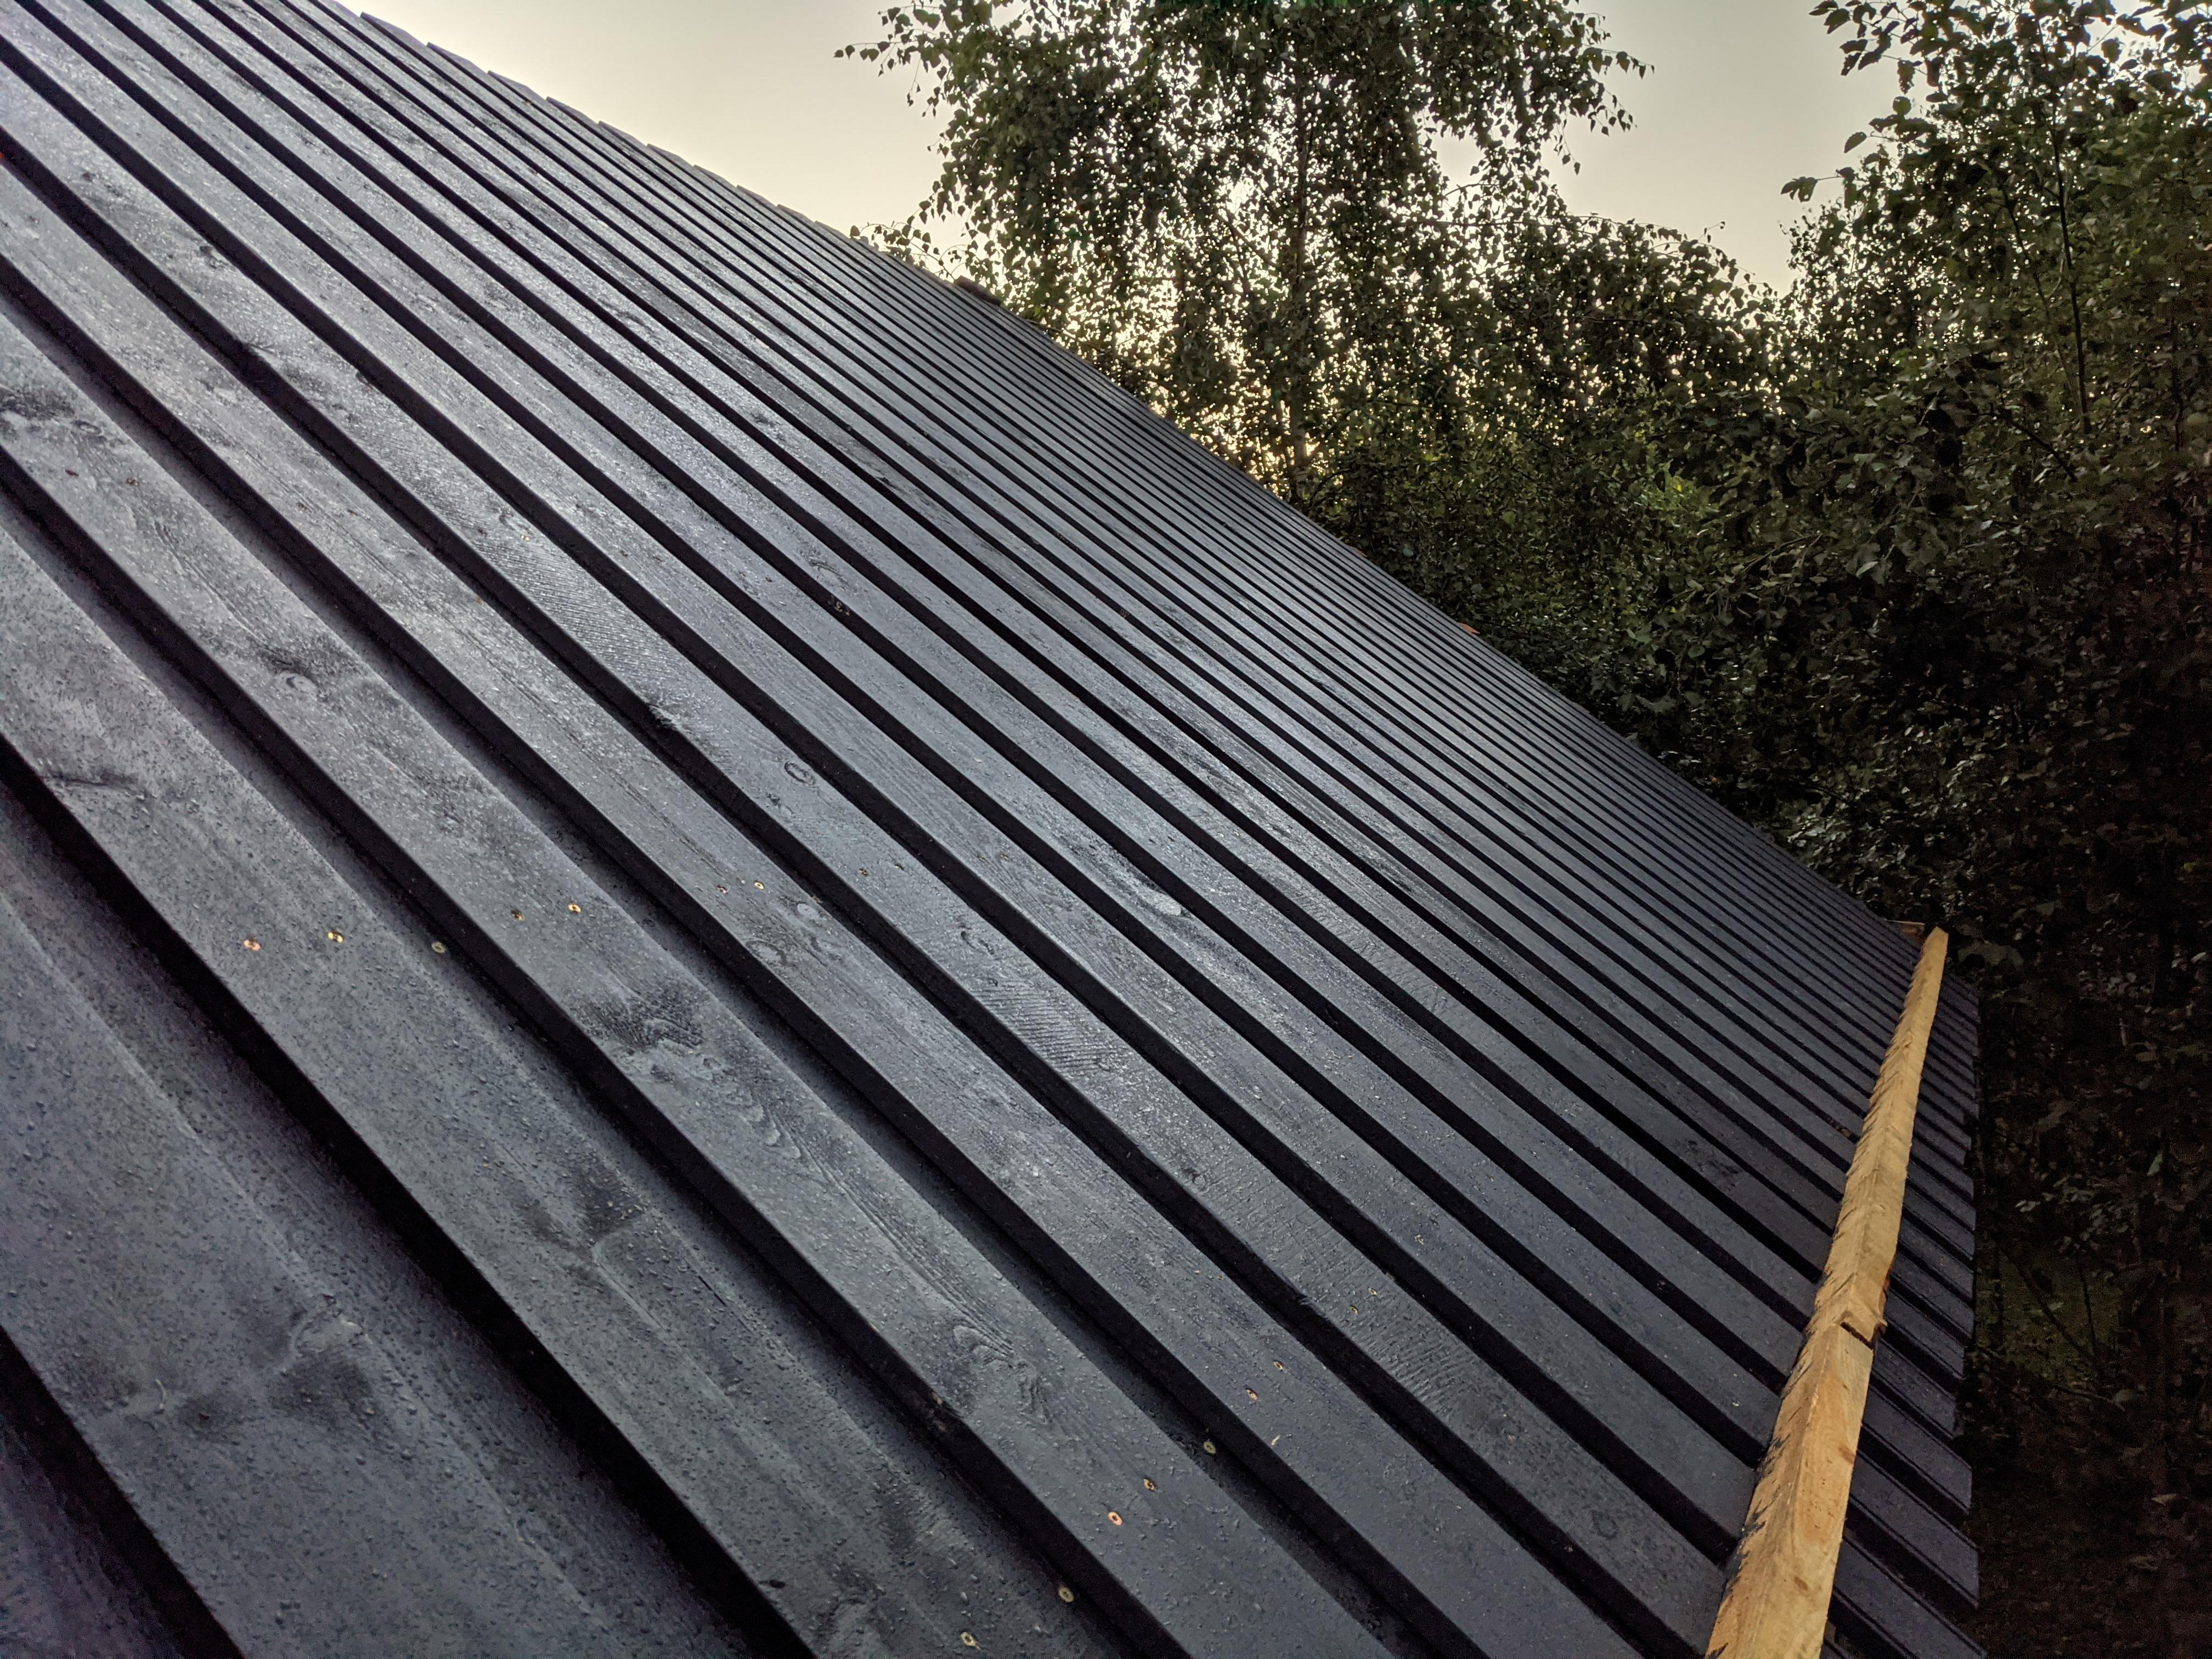
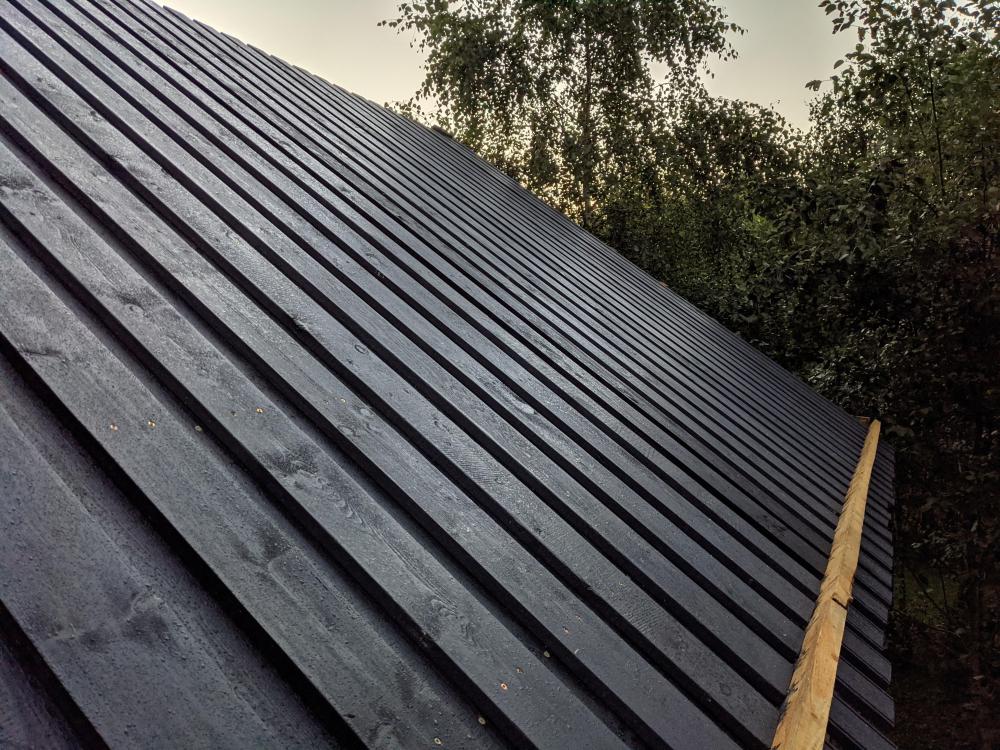
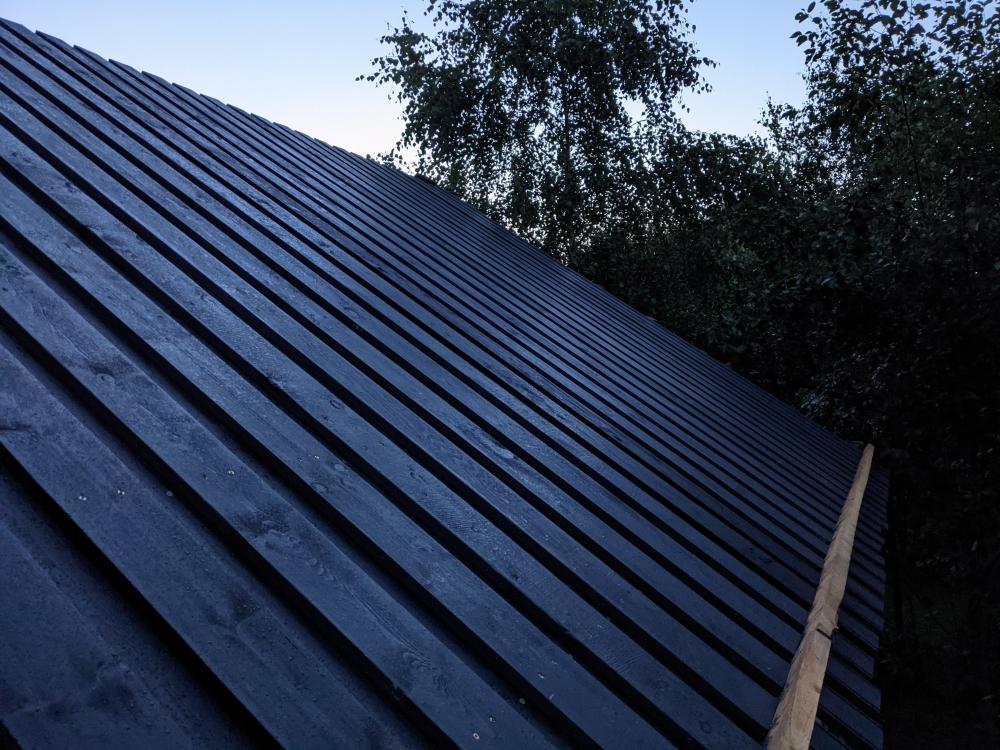
I will need to trim the edge of our (wooden) roof once it's gone through a few movement cycles / settled. I haven't worked out how to do this safely yet. Any advice? It's two of layers of ROUGH cut boards. They are nominally 25*150 but 22-28*140-150 mm in practice so a little higgledy piggledy. (charming as the wife reminds me) I will need to cut both. At the moment the lower layer is LONG by around 200 mm and has a toe board screwed to the "scrap" side. The upper layer is long by 50 mm or so. (I dropped these against the toe board to hold whilst fitting) It's 3.6 metres above some deck support structure (all along house) and 4.5-5.5 metres above ground level. I'm not skilled enough to eyeball a chalk line over the "charming" terrain of these boards. It will need a guide of some sort. The wall cladding will dictate the final cut. There will be a "trim" perpendicular to the underside of the roof. I could probably drill screwholes for this trim through the roof boards, screw into a guide batten on the top of the roof, then remove and reuse screwholes for the trim piece. I could also rough cut to say 75 mm projection then make some kind of guide that reaches under the free end and runs against the "trim" underneath the roof. (the boards are to overhang the trim 50 mm) How would you approach this cut? We have ladders. Cantilevering a "scaffold" off the wall is also an option. The ridge is structural and I can throw a rope over it and comfortably squat on the roof in a harness Cut is ~16 metres long each eaves. How would you approach this? The framers...used a short bar petrol chainsaw for final trimming of rafters. No ta to copying that! Coming from underneath with a circular saw sounds insane. Maybe not. The good side of the cut would be on top too. Never seen it done and there's probably a reason. I can't decide whether harness and chop off loose ends (I'm right handed so the bigger flatter part of the saw would be on the "keep" side this way) or ladder/scaffold and reaching over the bits you're removing (would need to work left handed to keep bigger part of the saw base on the "keep" side) will be better. (New) hand saw also an option. Slow but safe and I suspect easier to eyeball to a chalk line on lumpy wood. Maybe this for 2x 16 metre cuts in softwood? Get a nice flat angle on the saw from up on roof to span multiple boards? Answers on a post card welcome!
-
I should caveat that removing the backs works for 'everyday access' cupboards with shirts etc hanging on rail and drawers below. For 'grandma cupboards' with a tog rating if 9,000 from all the might be useful one day duvets shoved in right to the back...don't just remove the backs!
-
Also consider making "I" beams (Z beams) using some OSB and thin sticks if the layout is amenable. Say 250*2500*9mm OSB screwed every 300 to the side of the existing truss at ceiling level - including the bottom beam of the truss - then say a 38*63 mm batten to the side of the OSB at the top with the existing truss and the OSB screwed to it. Now you have an "I joist" that doesn't bend and you can run insulation between.
-
Remove the backs of pax cupboards that're going against a wall IMO. You'll get better air circulation for clothes freshness thanks to the gap at the back too and (if an outside wall in an older house especially) less damp. Bead the bottom edge to stop jewelry falling down. Cupboard comes with two brackets at the top. Two fixings into the wall. Washers or plastic packers to make up the gap. Hide the lot with the plastic cover that comes with the cupboard. Side gap personal preference. I think they look better with skirting past them and a ~15mm gap that makes the wall being on the pish less visible. Check that skirting is lower than door if you're planning to run skirting up to cupboard. Else you'll have fun fitting and then opening that door. You can also put the whole cupboard slightly on the pish (lean it into the side wall) if carpet hides the gap at the bottom and there isn't anything on they other side.
-
It's a (board on board) roof. The timber does the same job as tiles. Back in the day there'd be nothing underneath. We've added a membrane just as you'd with tiles. Partly a quick way to get watertight. Partly to catch any wind driven rain or seepage through damage. The membrane isn't the primary waterproofing though. You've got to keep the timber dry (using pine tar in ye olde days, or acrylic paint these days) if you'd like it to last, so the coating on the timber is the primary waterproofing that you seek to maintain.
-
Board on board cladding - fixing advice / critique
markocosic replied to markocosic's topic in General Joinery