Tin Soldier
-
Posts
258 -
Joined
-
Last visited
Everything posted by Tin Soldier
-
Ceiling height for open-plan room
Tin Soldier replied to Dreadnaught's topic in New House & Self Build Design
If it helps I've gone with 4m ceiling height in a similar sized room. I don't live in yet, but I sure like being in it. -
I used THCL, from perth for my sips Build. best price by far and a fantastic company to work with. Also, provided all the internal partitions.
-
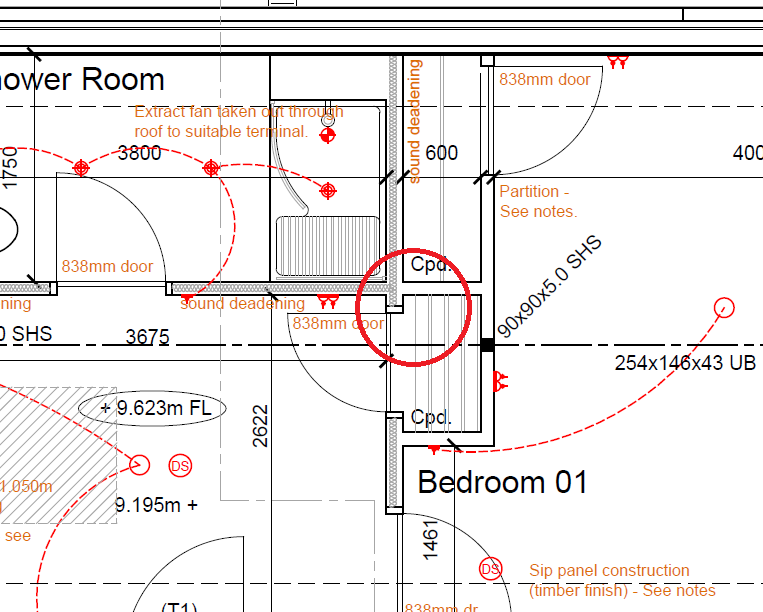
So, I've not previously mentioned that one of my underfloor heating loops leaked. I turned on the underfloor heating for the first time circa a month ago, and after a few hours a wet patch appeared in the concrete slab ( It happened the second time too.), roughly where I've circled in the picture. no problem I thought, I know why there would be a leak there. despite trying my hardest not to kink a pipe, I kinked a pipe running the last loop to the manifold, I didn't have time to strip it all off and re do the whole 100m loop, so I took a shortcut, rather than routing through the door way, I had just enough pipe it I nipped it under the built in wardrobe wall in a straight line. the panel company had been well warned where not to nail, but I guessed someone forgot and stuck a nail in it (and then removed it) anyway fast forward to last night, as I trekked home from work with a $6000 Thermal imaging camera to have a look and see if I could spot where the leak originates/exactly where the pipe is I had great fun looking at all the loops and happy to see all 10 loops working , warming the floor and house to an uncomfortable level (I set it as high as I could). Great fun as I wait for leak to reappear, unfortunately the leak has not reappeared. no wet patch, not even moist- left overnight, and still nothing. I'm not sure what to do, where to go form here. The concrete had been down for months before test, and the wet patch was very very localized, so I cant see it being moisture/condensation. It was sopping wet? I surely cant take the risk and floor over it, as it will inevitably leak. any suggestions?
-
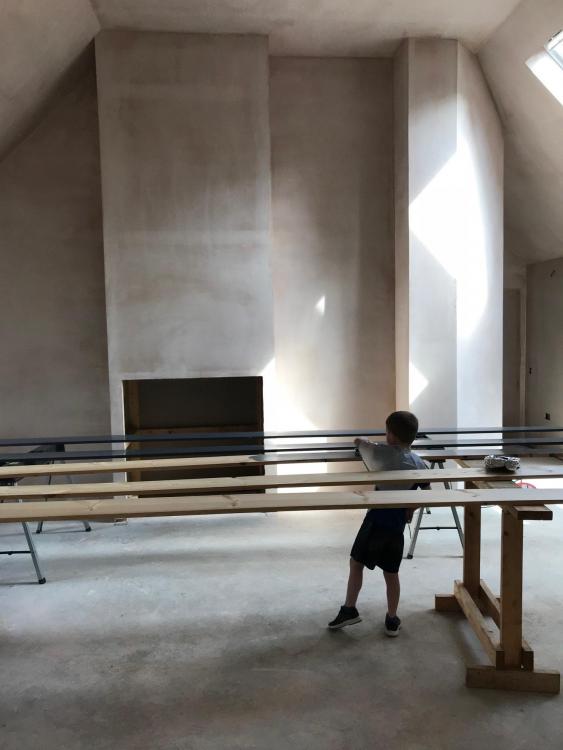
its less exciting that it seems the alcoves to the left and right of fireplace will be filled with shelving, essentially making it a normal wall, behind the boxing on the right is a massive storage cupboard with ufh manifold and consumer unit and pretty much enough space to house a nuclear missle silo, The reason it is angled is there are large sliding patio doors to the right (under the velux) and the angle allows more light, more space etc to and from living area. there you go, told you it was not exciting.
-
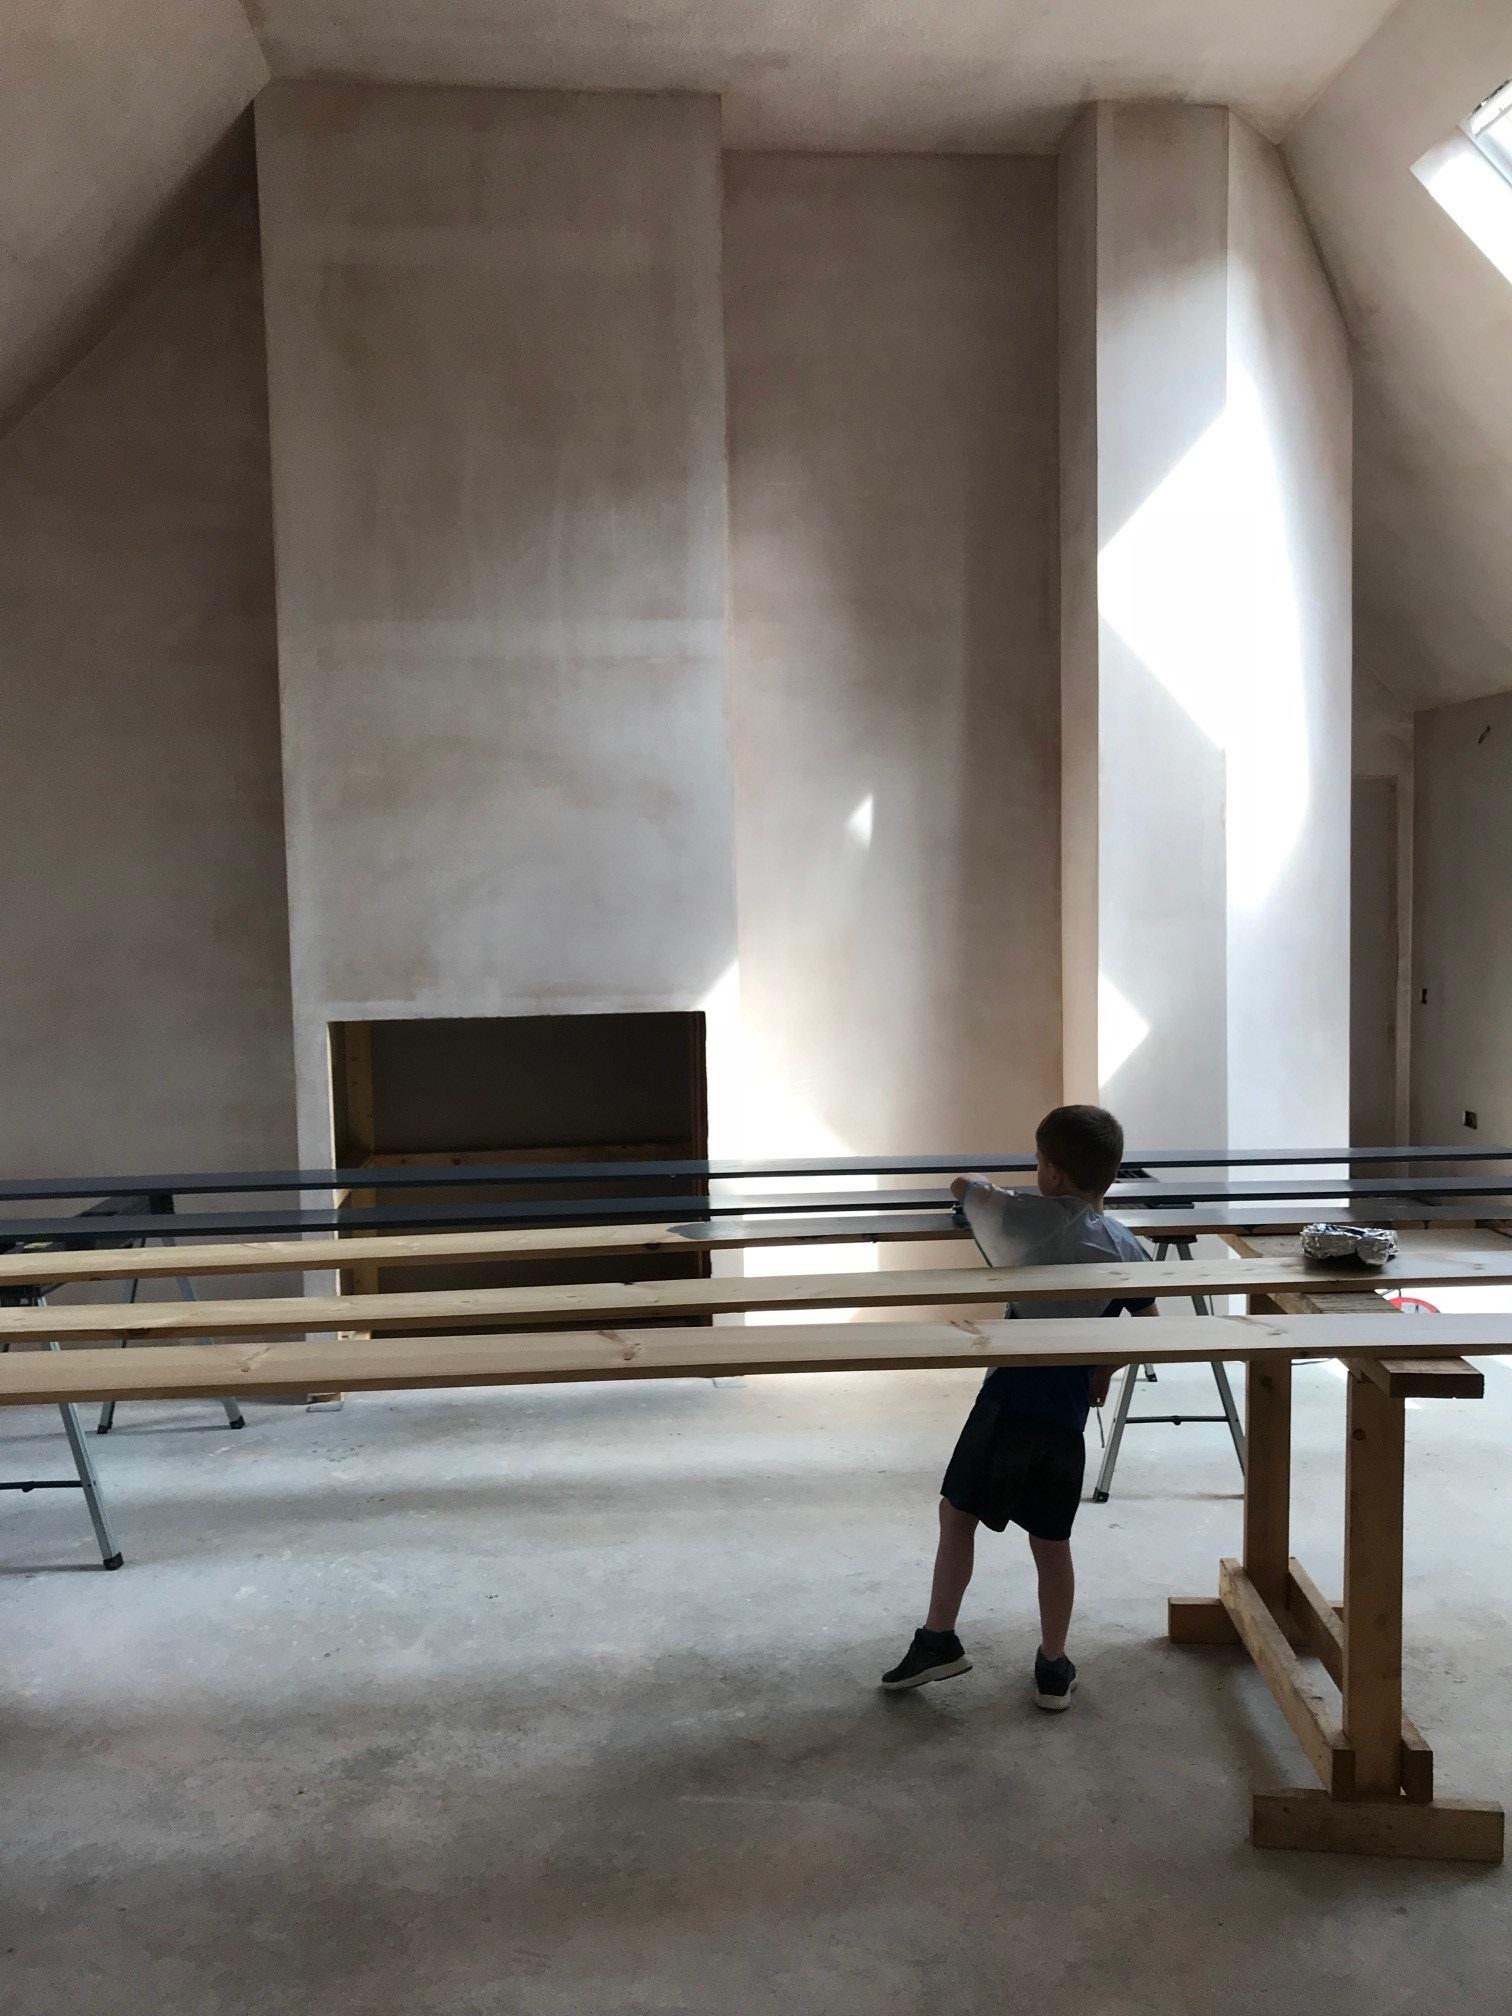
Here's some inspiration from my current state, looks lovely even without paint on it (please no one point out any flaws)
-
Guaranteed to cause a row....
Tin Soldier replied to Jeremy Harris's topic in Electrics - Kitchen & Bathroom
my current consumer unit (in the original house) is in a bathroom, housed in a cupboard within a cupboard. Weird set up, but apparently within the regs. -
Yes Skim for definite, which does seem to become less common- any trades that have been on site have expressed shock and awe that my place is skimmed and not taped. funnily enough I was in a rather plush hotel in Edinburgh a few weeks ago and noticed, whilst lieing in bed that my room had been taped when decorated. looked crap.
-
Morning comrades, I'm looking to get my concrete slab ready for bonding down bamboo click flooring. My slab is not the most even, and I've already identified a dip of circa 20mm in one corner of the open plan space. I've bought some self levelling to sort this out (setcrete deepbase) my question really relates to minor imperfections/unevenness off the 3-6mm variety. I want the floor to look good, but I don't want to spend unnecessary effort trying to get it flawlessly flat if I don't need to. do I need to even these out? or will the adhesive BONA R844 help out? cheers Scott
-
I had to fit a 40ton soakaway, roughly 24m3 I think not the best ground conditions mind
-
How to put in fascia for slating without blockwork?
Tin Soldier replied to Tin Soldier's topic in Roofing, Tiling & Slating
I'm awaiting feedback from him, not holding out much hope in terms of a quality response -
How to put in fascia for slating without blockwork?
Tin Soldier replied to Tin Soldier's topic in Roofing, Tiling & Slating
I've added some 'rafter feet'/fillets as mentioned above, worked out ok on my test wall. -
well I had a bit of a nightmare, documented on here as I crush the tops of two fingers shifting 100kg window only just recovering now, but has knocked me back a fair bit
-
How to put in fascia for slating without blockwork?
Tin Soldier replied to Tin Soldier's topic in Roofing, Tiling & Slating
Jeremy/ mr punter, I'm not understanding, any chance of a drawing? -
How to put in fascia for slating without blockwork?
Tin Soldier replied to Tin Soldier's topic in Roofing, Tiling & Slating
theres no overhang of roof panels at all. -
How to put in fascia for slating without blockwork?
Tin Soldier replied to Tin Soldier's topic in Roofing, Tiling & Slating
architect detail below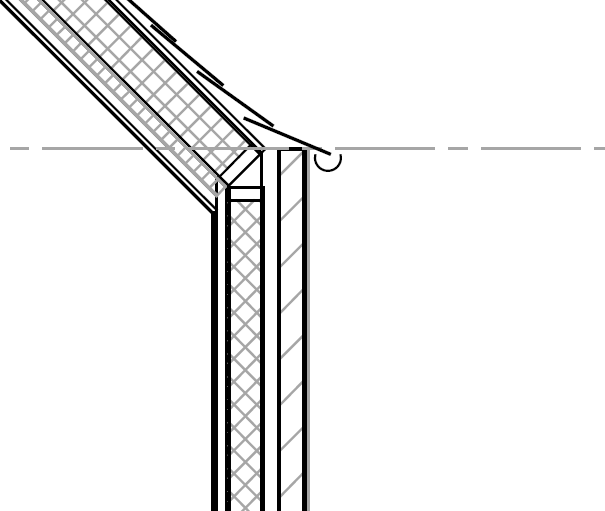
-
How to put in fascia for slating without blockwork?
Tin Soldier replied to Tin Soldier's topic in Roofing, Tiling & Slating
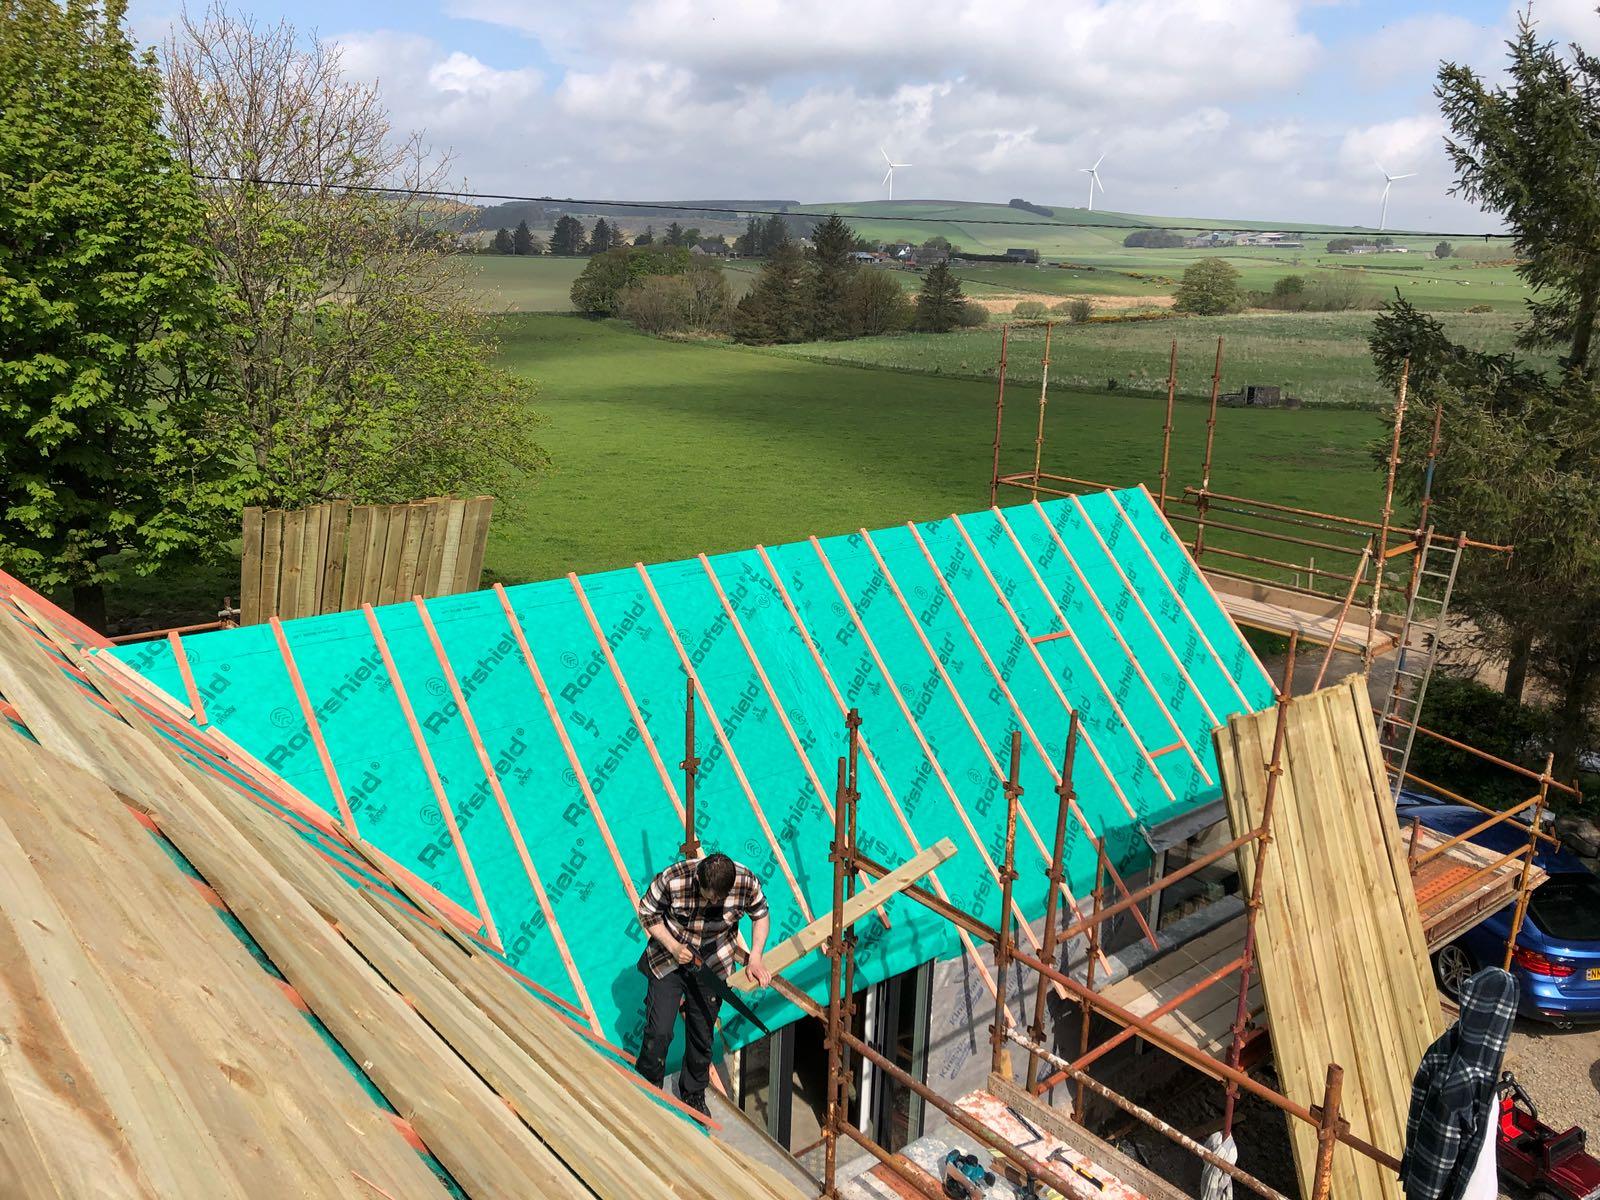
only photo I've got that kinda shows it battens put on before sarking. (the green roof) sarking on (the wooden roof) another membrane to go over sarking.
-
How to put in fascia for slating without blockwork?
Tin Soldier replied to Tin Soldier's topic in Roofing, Tiling & Slating
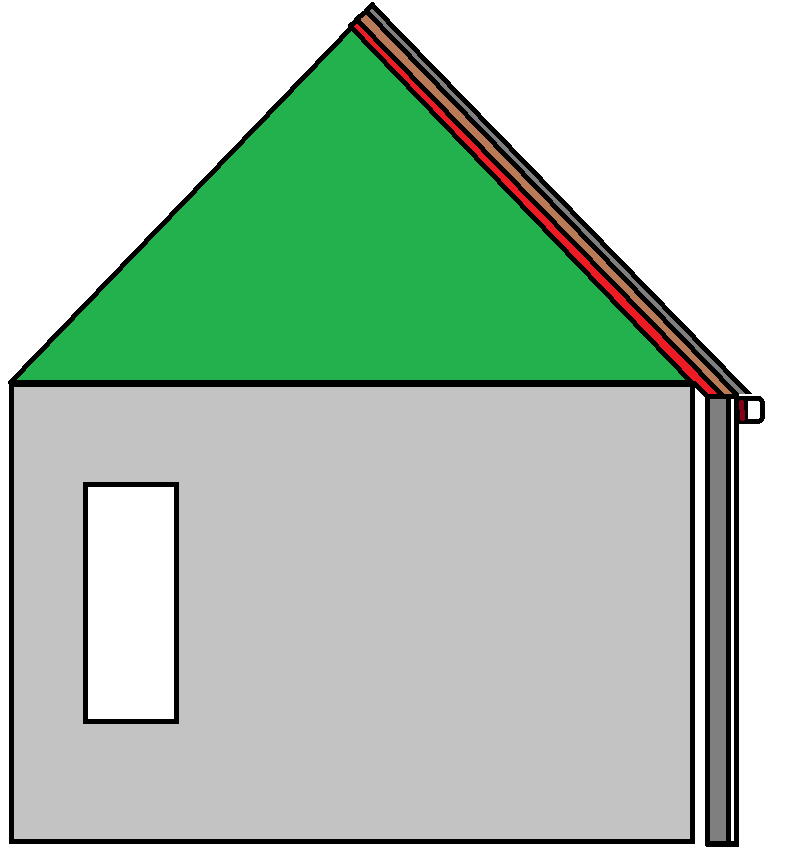
there are no rafter ends, its sips panels, so its very much shaped like the green/light grey -
So I'm a bit stuck I have my house kit up, blockwork guy says blockwork goes on after roof to allow for settlement. roof guy says how can you start the slates without the fascia in place? I'd rather start slating asap as scaffolding is in place and blockwork isn't being done for another month. I hate boxy fascias and overhangs etc so I'm aiming to just have a very simple timber fascia (painted 2x6) to pin the gutter to, or ideally no fascia at all and blockwork all the way up. the current house is shown below in a simple graphic. the roof is as per the green. I have battened it out (the red) and attached sarking board (brown), with a 250mm overhang. The reason for overhang is the 50mm gap and 100mm blockwork to go up, render and along with any timber and the overhand of slate to gutter. I've screwed on the last sarking board so I can take it off and cut to size or extend if needs be. So how to I start the slating. just start with an imaginary overhang. or do I attach something to the building that allows a temporary fascia/gutter to be put in place? Am I making any sense? Scott

-
Acoustic Roll as Roof/ceiling insulation?
Tin Soldier replied to Tin Soldier's topic in Heat Insulation
Great means I can just use what I’ve got -
Hi there, got a few rolls of earthwool 100mm acoustic insulation. enough for probably 3 layers above a ceiling that I am putting in. Can I use this as the required insulation above, or is it very different from normal wool insulation? the u/r value figures I can find online seem to be the same, but just thought I'd check
-
so, the SIPS panels company threw up the panels and wrapped the house in nilvent on walls and daltex roofshield on Roof I didn't expect membrane to be put on at all so when questions the manager said Yes membrane is on, but you'll have to batten at 600 centres to leave a ventilation gap, then sarking board on top. I've put a second layer of membrane on the sarking (or I will once finished) as the roofshield has plenty holes it in where the lifting straps etc for the roof panels were cut off.
-
its Scottish roofing practice to nail slates direct to sarking board.
-
Roof Panel Makeup from top to bottom. Slates Membrane Sarking Battens Fabric SIPS Panel
-
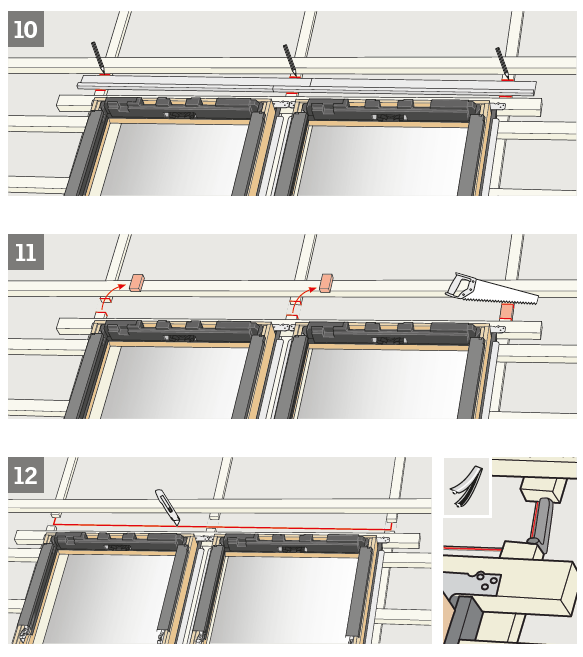
I hope I've got the right flashing, Coupled Slate flashing, 100mm centre gap - that image above is taken from the installation instructions.
-
Morning another stupid question I'm looking to install two velux windows onto a roof with 22mm sarking boards over 25mm battens. the velux windows have a gutter at the top, run at a slope. The instructions show the cutting out of batten/counterbatten so there is none, with the gutter sitting directly on roof screwed into rafters. My roof makeup is sips panel, 25mm batten at 600 centres and then 150mm wide sarking boards. so without being up there and trying it out I'm struggling to see what to do here. do I put the gutter just on top of the sarking board, which means its higher up the window than shown below, do I remove the sarking board/part of it to attached to the batten below which would be at the same depth on the window as picture below, or removed sarking board and batten and have it at a lower depth.? confused. help appreciated.