Adsibob
-
Posts
3604 -
Joined
-
Last visited
-
Days Won
10
Everything posted by Adsibob
-
Neff also make this. https://www.hughes.co.uk/product/kitchen-appliances/integrated-appliances/integrated-hob/neff/n23ts29n0?gad_source=1&gbraid=0AAAAADl7YmsCNhKQ2VPkQ-bxh-6uuNH6t&gclid=Cj0KCQiAnrOtBhDIARIsAFsSe539VZ9m5Z5bBuG7WWSUBeX_JRAbxMNnUZcd5RCYnIwN3jYI5emEZNMaAhxQEALw_wcB AND https://www.theappliancedepot.co.uk/graded-neff-n53td40n0-31cm-black-2-zone-flex-induction-hob-wi-348?gad_source=1&gclid=Cj0KCQiAnrOtBhDIARIsAFsSe51EVmqZJOuXqd2m9w0RgdJhfezmy9SHvtDTrIzOypW9zONeFcmJKl4aAvGcEALw_wcB But I think if you want them to match exactly, you need both of them from their “domino” range. Alternatively, do you have space for this: https://ao.com/product/hdb95623nb-aeg-induction-hob-black-97093-39.aspx?ef_id=Cj0KCQiAnrOtBhDIARIsAFsSe51F-V2A8P_3DDvXbGtDciTbMREB6vAGbXA8rQK6BoJ8XnH1lsf01QMaAgiaEALw_wcB:G:s&s_kwcid=AL!8149!3!!!!x!!&&utm_medium=cpc&utm_source=google&utm_campaign=shopping - mda - hobs - performance max|shopping - mda - hobs - performance max&utm_term=smartshopping|HDB95623NB_BK&utm_content=|paidpla&gad_source=1&gbraid=0AAAAADmq13-GM_1688-WZ-nAkfrz6Quza&gclid=Cj0KCQiAnrOtBhDIARIsAFsSe51F-V2A8P_3DDvXbGtDciTbMREB6vAGbXA8rQK6BoJ8XnH1lsf01QMaAgiaEALw_wcB&gclsrc=aw.ds
-

casting a concrete plinth for a wood burning stove
Adsibob replied to Tom's topic in General Self Build & DIY Discussion
Maybe. Alternatively, can you ask the flooring polisher, to polish your plinth as well? -
casting a concrete plinth for a wood burning stove
Adsibob replied to Tom's topic in General Self Build & DIY Discussion
I really doubt this is going to be raised by building regs. They just leave these things to the stove installer. -
casting a concrete plinth for a wood burning stove
Adsibob replied to Tom's topic in General Self Build & DIY Discussion
Looks fine to me. Very similar to what we did: ours is also sitting on a cast concrete plinth, save that we have a steel tabletop between the stove and the plinth. You can’t really see the plinth in this photo as it’s the same colour and finish as the floor: microcement.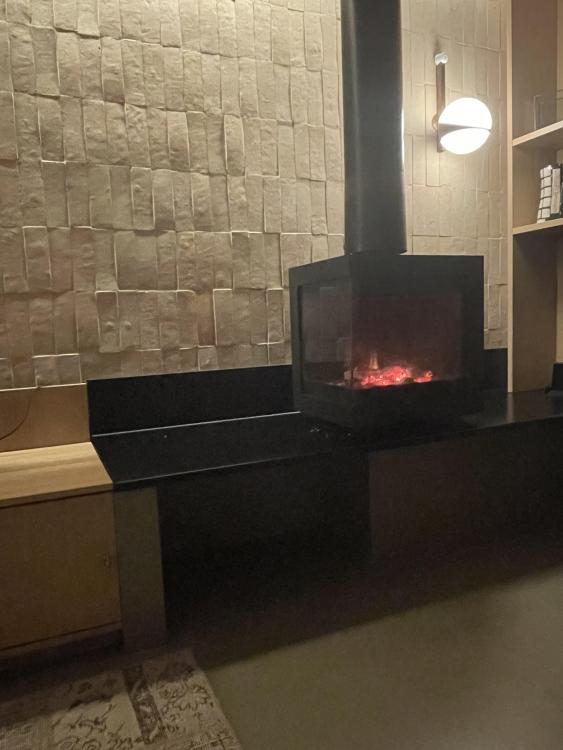
-
Anybody used ultra wide monitors
Adsibob replied to Adsibob's topic in Networks, AV, Security & Automation
This may be true, but having now committed to a single screen for my home office I’m determined to learn all the keyboard shortcuts to make this work. The version of windows which I’m running, I think is Windows 11, has a clever way of splitting the screen up for you which seems to be working quite well, though learning the keyboard shortcuts detailed in this article on screen splitting will make this better. -
Anybody used ultra wide monitors
Adsibob replied to Adsibob's topic in Networks, AV, Security & Automation
Ended up going for a more standard 16:9 ratio but in a rather huge 32” size, so that there is plenty of width if I’m so inclined. The screen is slightly curved, which will be interesting. Deciding what to choose from all the options available was utterly mind boggling. Didn’t realise the tech in this field had changed so much since I last bought a monitor, some 14 years ago. Hasn’t arrived yet, so no idea if I made the right choice. -
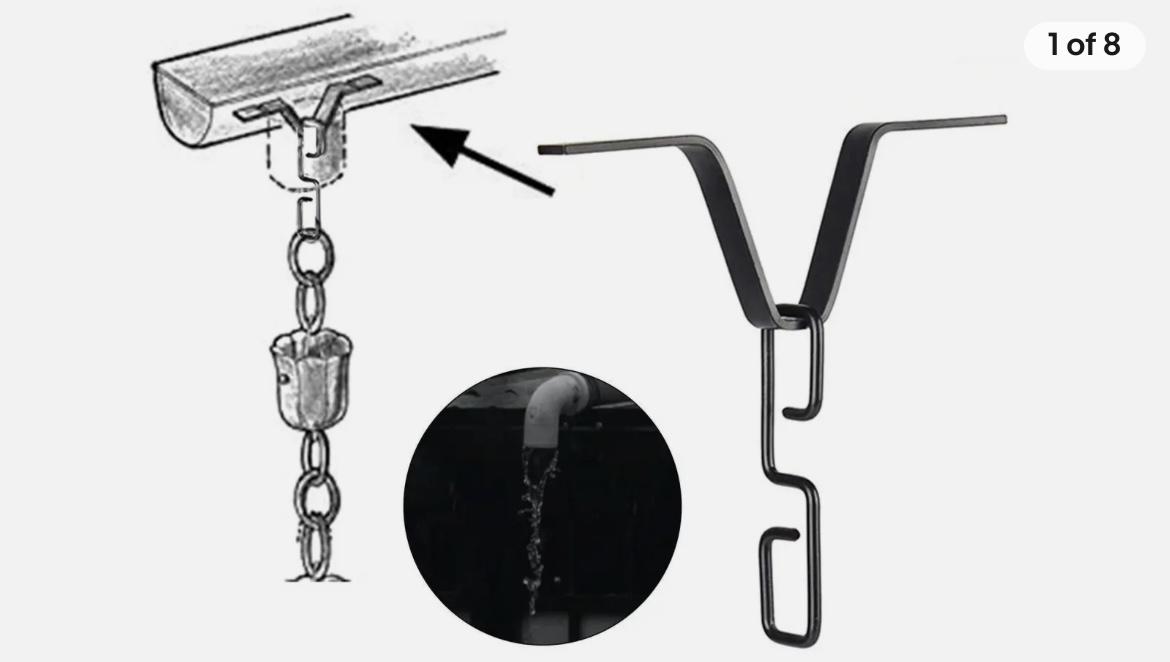
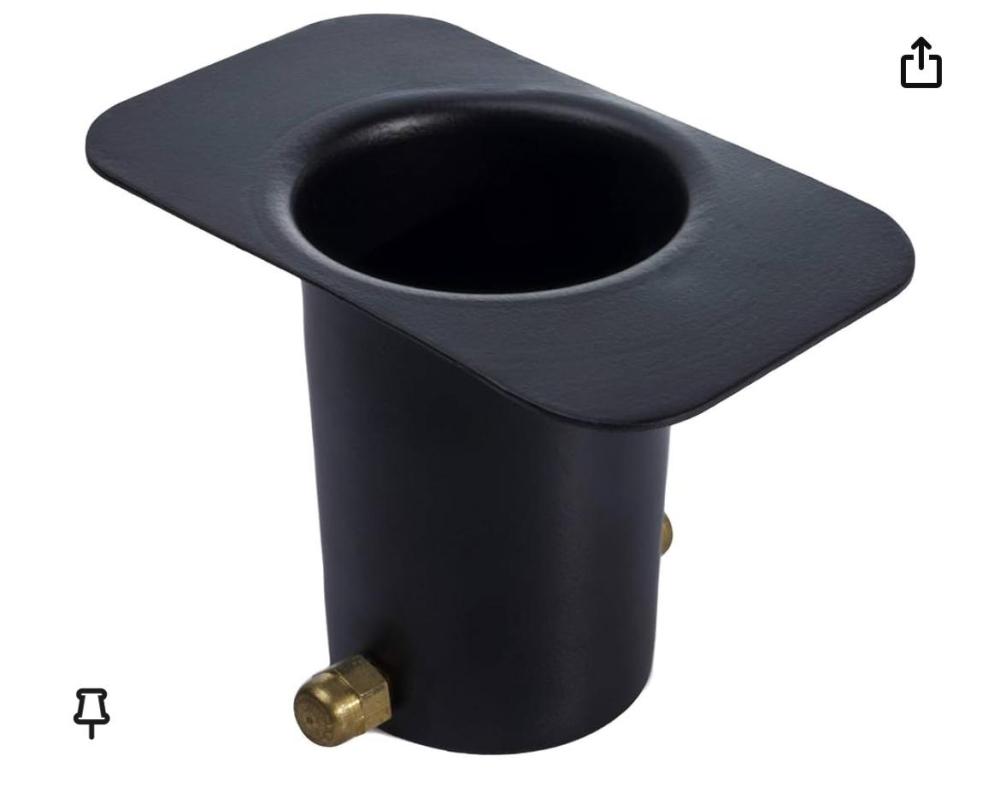
We have a rain chain suspended from a gutter. The hole in the gutter is 50mm wide. The rain chain is suspended by way of a V shaped piece of metal like this: However, it doesn’t work well as the rain does not transfer from the gutter to the chain, instead it drops down from where the V touches the gutter. Indeed, the rain chain manufacturer does not recommend this type of hanging kit, and instead recommends something like this: using something like this is meant to give a much better connection so that the rain falls into the funnel and then onto the chain that is suspended from the brass pin that is threaded through the bottom end of the funnel. The problem I have is that I cannot find such an adaptor that is small enough. All of the adaptors are too big. This one pictured for example, has a funnel diameter which is 2” at the top and 1.75” at the bottom, but my hole in my gutter is only 49mm or possibly 50mm diameter, so about 8mm or 9mm too small. There may be just enough space for me to drill a bigger hole in the gutter; it is cuboidal in shape so should be quite easy to drill (though I’m sure I could f@ck it up) but I rather not do that in case it weakens the gutter. That said, the gutter is 10cm wide, so doing a 59mm hole over where the 50mm hole is should be ok. The rain chain probably only weighs 500g. Is drilling the way to go, or can anyone think of another solution?

-
I was hanging some cupboard doors today. Using a drill with a flat head screw driver head, I drove some flat head screws onto the MDF wardrobe carcass to hang the doors. Two of the screws broke just before reaching the end. The heads just cracked off. I now have the majority of the screw, without its head, embedded in the only place I can fix these hafele hinges. I assume there is no way of getting these pieces of screw out - not enough to get sufficient purchase with my pliers, and even if I could grab them I’m sure they wouldn’t pull out. Picture attached, though so little of the screw is showing you can’t really see it. FFS!

-
Anybody used ultra wide monitors
Adsibob replied to Adsibob's topic in Networks, AV, Security & Automation
I currently have a flat 32” display, which is 16:9 and has a screen resolution of 2550 x 1440. It is a fairly old low spec machine, only 75Hz and doesn’t even have vesa mounting points. I am trying to work out what the difference is between this same size but higher resolution, or wider. If you could explain the reason behind your preference that would help immensely. -
I’m looking at getting a 21:9 aspect ratio monitor, probably in the 34” size with a slight curve at either end (1500mm radius). Just wondered if anybody had used such a setup as their main/sole office computer and whether they liked it. On the one hand it’s meant to be useful for having three documents open side by side. But on the other hand, it’s not quite high enough for some applications.
-
I wish they still made these. Not sure why they discontinued the old school ones.
-
I wasn’t aware of this. Can you explain why and how much power?
-
Not as good as Grundig. Ours was so good that it could withstand being hit at with a baseball bat when it would lose signal. My father kept a baseball bat by the side of the TV for just this purpose. Hitting it usually brought the signal back. Not sure why, but it worked. Until it didn’t.
-
Can I cure it with a hairdryer?
-
I was going to use CT1 Clear to seal some potential sources of water ingress at the top of a parapet wall and also a small gap between some brickwork and and a window frame. I'm a complete novice working when it comes to working with these types of materials, so I thought clear would be better as it would hide my messiness better, and I can use the same product in multiple areas, rather than get different colours. But your comment @Nickfromwales concerns me slightly. Is it that hard to work with CT1? Other concern is whether the CT1 will cure quickly enough. Temperatures are not very high at the moment, even in the South.
-
@readiescards how have your Crompton LED bulbs faired since? I’m looking for a particular e14 bulb, and my choices appear to be Crompton, Integral or a bunch of unbranded options. I went for an unbranded option previously, but that bulb has a quiet buzz which is somewhat annoying and also suggests to me it’s not as efficient as it could be.
-
Drying and re-insulating a 2.5 year old damp cavity wall
Adsibob replied to Adsibob's topic in Heat Insulation
It is a bit more complicated. This is a single skin brick parapet wall, because only the outer wall of the cavity wall rises up to form the parapet. In this way, the roof space was maximised to allow more green (seedum) roof. So the membrane which is under the sedum was overlapped up the parapet wall and over the single brick, but not fully over, due to a mistake in my view. Then over that brick that was partially overlapped with membrane, some plastic tiles were layed and over those tiles, another layer of membrane, but again not fully covering the tile.- 44 replies
-
- 1
-

-
- damp
- cavity wall
- (and 1 more)
-
Drying and re-insulating a 2.5 year old damp cavity wall
Adsibob replied to Adsibob's topic in Heat Insulation
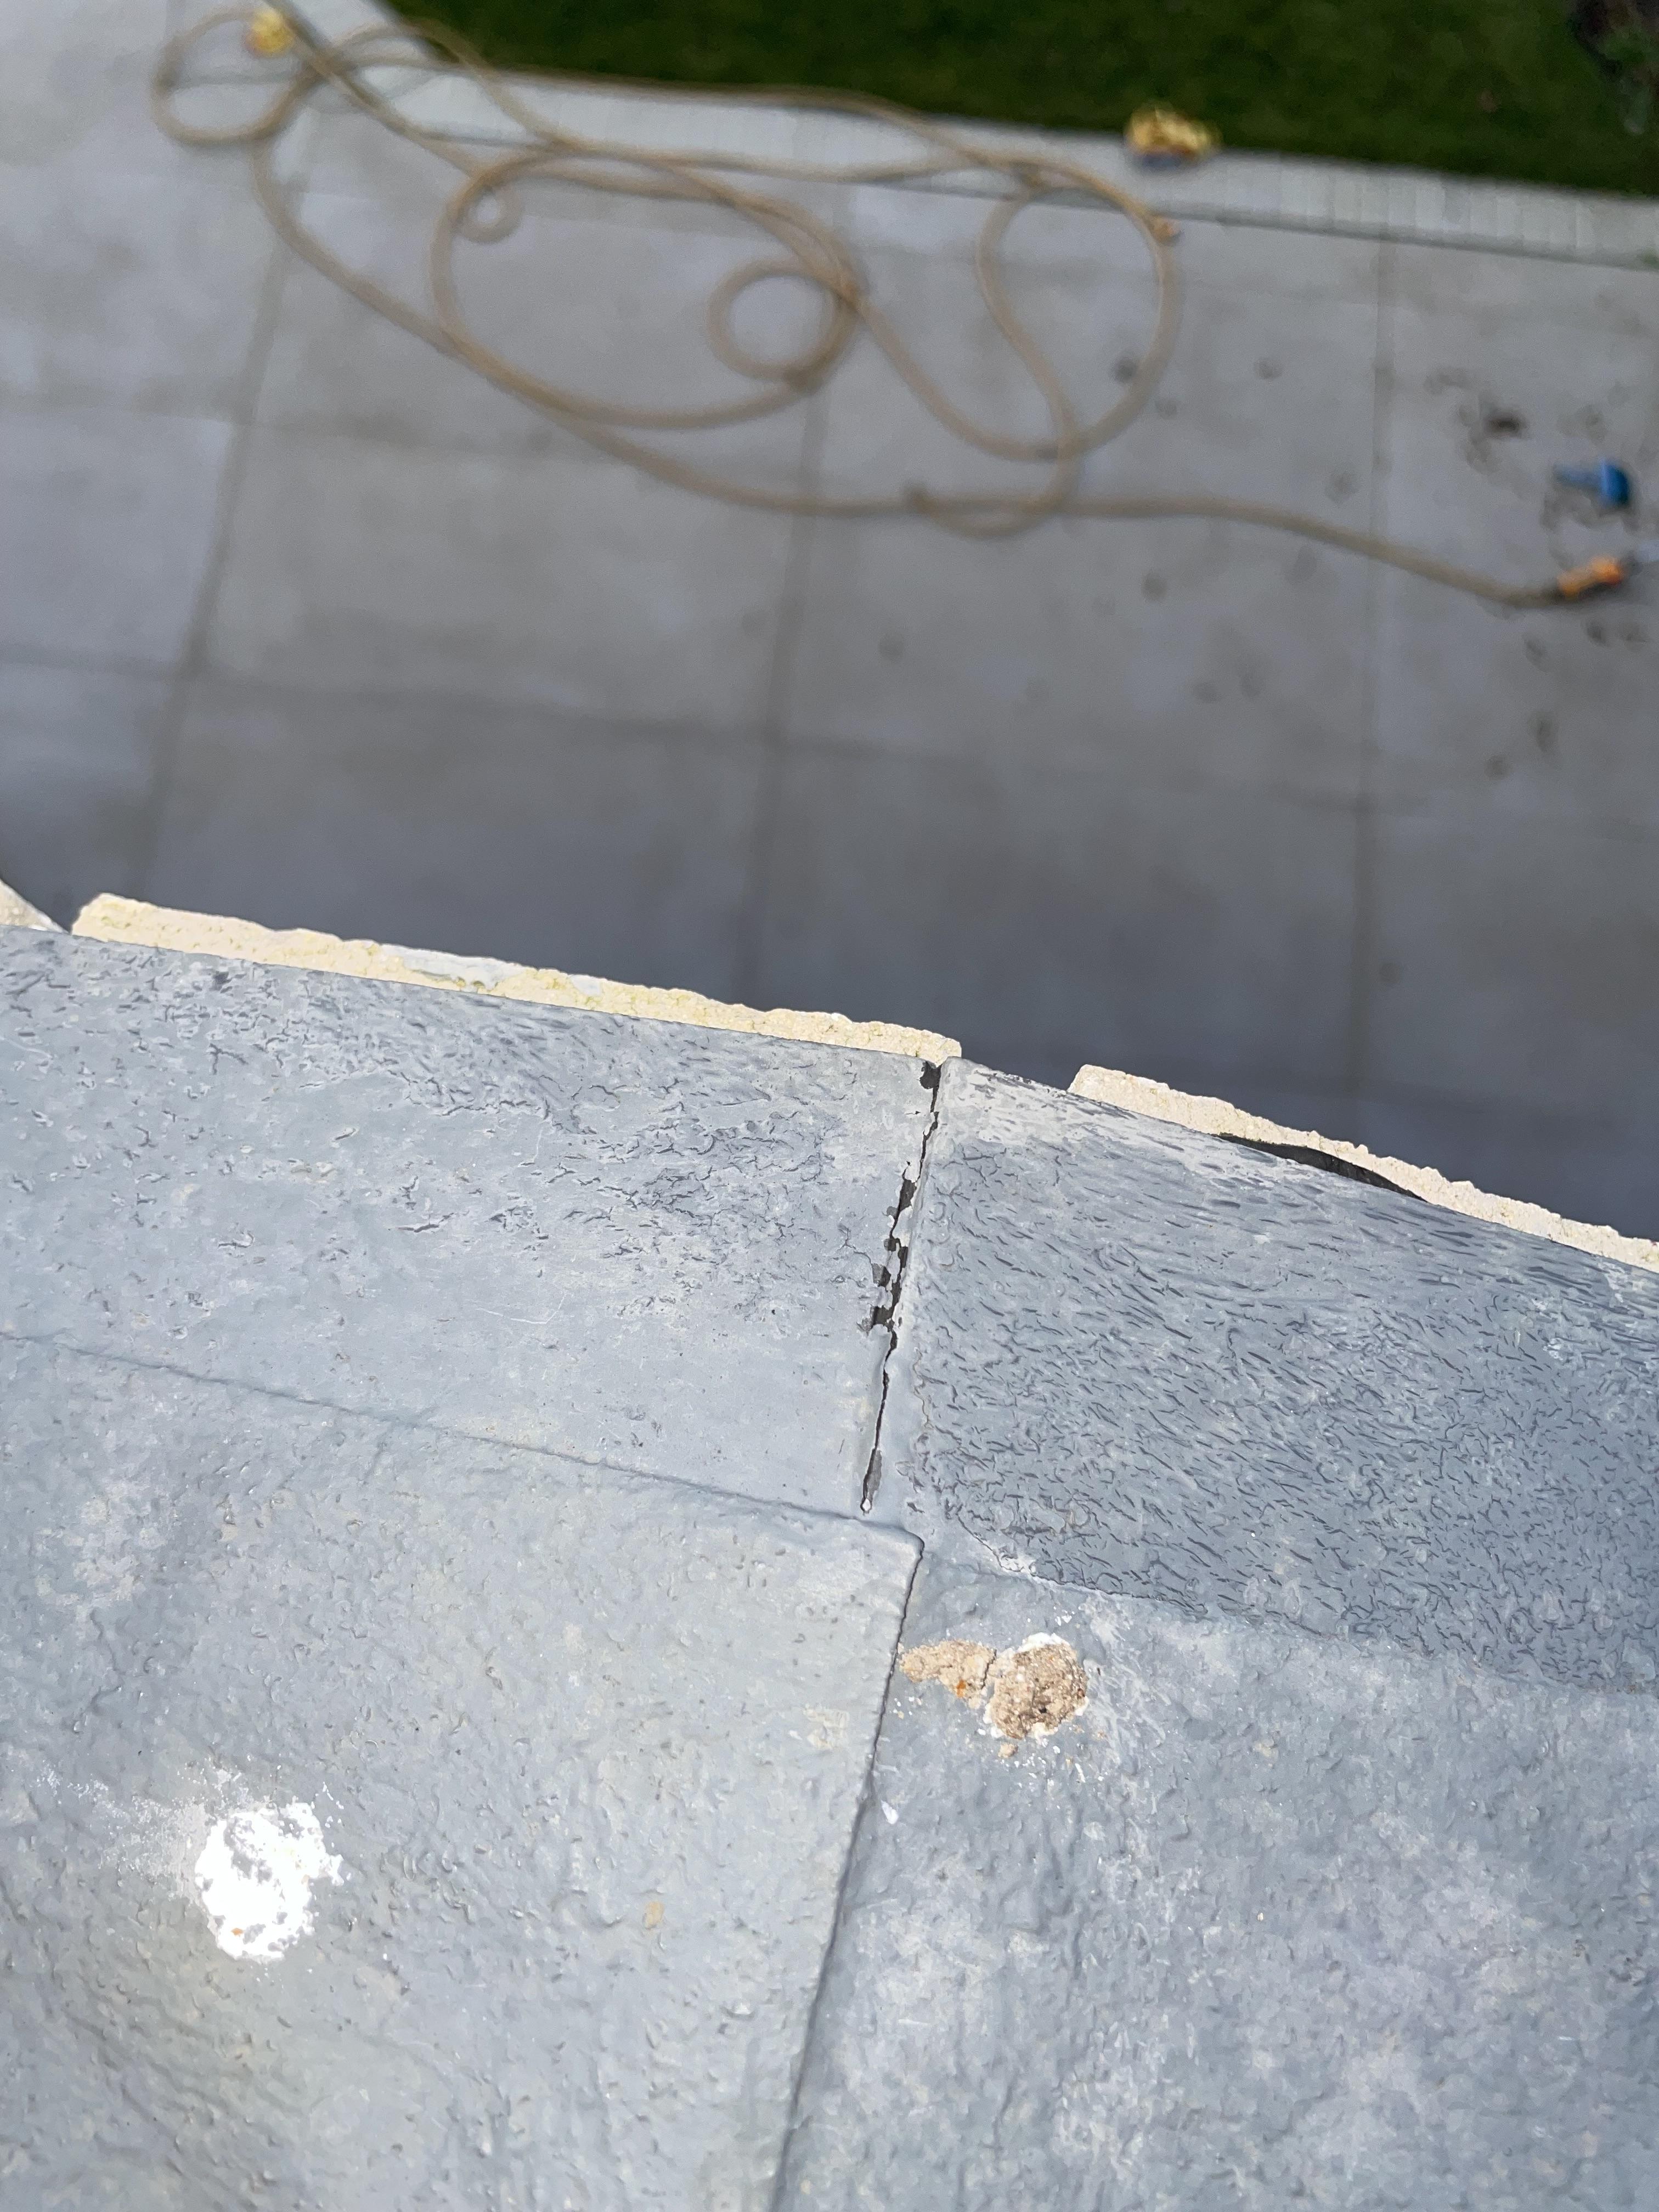
Thanks guys, all good suggestions. I think I need to get my hands dirty and do this myself. I’ve only used a sealant gun twice before, but both times it was fairly easy, so I reckon I could do Plan B myself. I will mull on this over the next few days of dry period and see if I feel the same way. It still beggars belief that of all the professionals involved, they thought this was an acceptable way of leaving the top of a parapet wall: This is the apex. Cracked grout between two tiles. Every joint is like that. Two tiles don’t even cover the brick, let alone overhang it. Then membrane does not cover the tiles fully!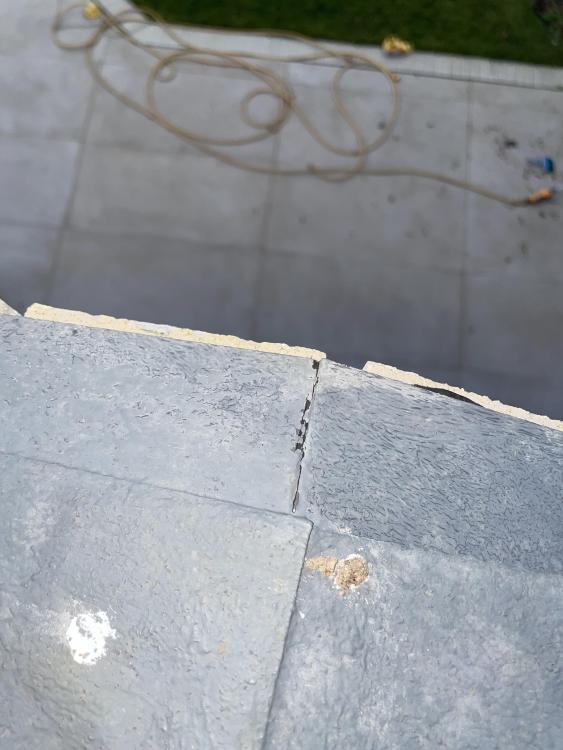
-
Drying and re-insulating a 2.5 year old damp cavity wall
Adsibob replied to Adsibob's topic in Heat Insulation
So I have a few ideas about what is causing the water ingress. I’m 99% confident it’s a poorly specified parapet wall, that, to make matters worse, was built worse than that spec. There were many to be two DPMs but neither travels across the full width of the brick wall, only two thirds of it. Then on top of that, a plastic capping has been laid, but the tiles don’t overlap each other, so there are grout joints between the tiles which have now cracked, allowing water through. Finally, the tile capping doesn’t overhang the brick (let alone have a drip profile. I keep flip-flopping over what to do (still lots of anger messing with my thoughts). I have 6-9 days of dry weather during which I’m going to let it breathe, but I really need to figure out what the plan is. Long term, i will install an aluminium coping or capping that is properly specified. I may also put in lots of additional weep vents to let more air into the cavity, or swap a couple of bricks with air bricks temporarily. But in the short term, I need to decide which of the following two plans to execute: PLAN A: Cover the top two or three courses of bricks of the parapet wall (on both sides) with a DPM and clamp it to the parapet with some simple Irwin clamps which I picked up today - this should immediately fix the water ingress (I hope!) but has two potential downsides: 1) it won’t let those rows of bricks breathe, and as these are very damp and quite mouldy, the mould will get worse - I can possibly clean off the mould first, but it is so damp it may just grow back, encouraged by the shade provided by the DPM 2) it is perhaps not going to give me accurate evidence of the exact source of the leak, because several components of the wall will be covered at once; and 3) there is a small chance the clamps could damage the roof membrane which returns up the rear side of the parapet, causing even more problems. PLAN B Apply sealant to the cover the cracked joints (and even the ones which don’t look cracked) in the tile capping and also apply sealant all along the small width of brick that is exposed. This should give protection in respect of two of the three concerns about the parapet, but doesn’t solve the lack of overhang issue. The advantage of Plan B is: 1) it gives a more accurate result, as I will know that if this solves the issue for the next few months, we know the exact cause, whereas if it doesn’t then it is some other aspect of the parapet that is causing the leak. 2) it lets the wall breathe 3) no risk of damage to the roof membrane -
Your son is very talented. This looks great and functions so well. The light is only where you need it; looks so nice and warm.
-
I’m a big fan of layering a lighting scheme with multiple sources of lights, mainly wall lights, floor lamps and table lamps. The table and floor lamps can be plugged into a 5A circuit so they can still be controlled from a wall switch, by wiring the fitting with one of these I pretty much hate downlights, and only use them in our build where it was an absolute must. I don’t mind a couple of pendants though. LED strip lighting has its place. Good in a couple of shadow gaps, or for under the wall units in your kitchen to illuminate the counter or in wardrobes. I wouldn’t over do it though.
-
2.5 year old brick wall, not specified properly and now has some spots of mould, mainly on the pointing, but also on a few bricks. Was going to use Cillit Bang mould remover, which states it can be used to remove mould from the grout between bathroom tiles, but doesn’t specifically say to use on external bricks. Looks to be more of an internal use product, not sure how UV sunlight would interact with it long term.
-
Drying and re-insulating a 2.5 year old damp cavity wall
Adsibob replied to Adsibob's topic in Heat Insulation
I have the DPM and grips/clamps ready to cover the parapet wall. I was going to do it this weekend, but I’m wondering whether it’s worth leaving it uncovered as we now have a forecast for zero rain over the next 9 days. Obviously the weather could change, but as long as I monitor the forecast daily for any changes, I’m wondering whether it is worth leaving the parapet wall uncovered so that it can get some sunshine which may assist drying, or is it not warm enough for that? Temperature is forecast to fluctuate between 1C and 7C over the next 9 days, but that is taken in the shade and this parapet will get sunshine for half of the day. Or is that not warm enough to assist with drying? -
Drying and re-insulating a 2.5 year old damp cavity wall
Adsibob replied to Adsibob's topic in Heat Insulation
Yes these were added to the first row of brickwork immediately above the window two months ago. Is that what you meant, or did you mean to add it to several rows to try to increase ventilation? -
MVHR newbie.. help needed
Adsibob replied to Savage87's topic in Mechanical Ventilation with Heat Recovery (MVHR)
Sounds like a good outcome. Well done!