Carrerahill
-
Posts
2132 -
Joined
-
Last visited
-
Days Won
10
Everything posted by Carrerahill
-
Where is the kWh price heading in 2022?
Carrerahill replied to epsilonGreedy's topic in General Self Build & DIY Discussion
If I stop using the oven, the dishwasher and the washing machine on warm cycles, oh and stop welding things, I think I could make it work fairly soon. Wife doesn't seem to care about the latter, only the former. I just need to solve those key appliances, welder first actually, then I think I could make it happen. Big battery capacity and big inverters to lead a normal life. -
Where is the kWh price heading in 2022?
Carrerahill replied to epsilonGreedy's topic in General Self Build & DIY Discussion
I can believe it. People are so oblivious and disconnected from reality. I have some neighbours who if I talk about brown/blackouts they laugh it off, "that will never be allowed to happen" they are so brainwashed into believing that they just need to do what they are told and someone will look after them. Mind you, they were the same lot that took the Covid restrictions to real extremes, made their kid strip after school. in the porch, his clothes were removed with gloved hand and mask and washed, he was sent to the shower unable to touch anything as he went. Clueless. Poor child, he is 5/6! They clearly have faith that those running things actually have a clue, where we all know generally they screw most things up. -
Where is the kWh price heading in 2022?
Carrerahill replied to epsilonGreedy's topic in General Self Build & DIY Discussion
Yes, indeed, but they also hammer up the standing charges so people like me who use little energy still get hit. I am 50p a day for electric standing charge! However, I am now playing a game, as they increase the costs, I find ways to reduce my imported electricity and keep my bill about the same. I might need to speed up my off grid electrical system and tell them to come and take their meter away. Oh how I would enjoy that. -
You can paint any object in any orientation, however, it does make it more difficult overall. Can you not unclip the hinges or just back off the two screws and take them somewhere you can work on them flat on a trestle? Are you planning on painting the insides of the doors too? If yes I would lay them all out on their fronts, paint the backs with some primer and give them a coat, make that your test batch, if not perfect, you might be able to live with it. Then after that backs have had 3 days to cure well, turn them over and do the fronts and sides keeping the gun pointing at a downward angle at all the times to stop paint hitting your newly finished backs. If you really need to do them in situ, I would get some masking and mask off the cabinets themselves, mast the hinge up to the point it meets the door and using a scalpel or Stanley knife blade, cut round the hinge perfectly to get a nice finish. This way you can then open the door, spray round the back and sides and get it all in 1 go, but take longer between coats and reduce your thinner a bit as runs will be much more likely for a beginner painter. I personally, would not paint them in situ, I think you might be creating a fair bit of hassle for yourself, unless the hinges are so crusty you fear touching them.
-
Where is the kWh price heading in 2022?
Carrerahill replied to epsilonGreedy's topic in General Self Build & DIY Discussion
228%! Makes you want to cry. -
Is the power source live? But seriously, extension cables and circuits and breakers all on for sure? Can you check the motors spin freely first to prove they are not seized or nests in them? No humming noises or anything from the units? Then I would start doing tests to check continuity if doing it safely, or if like me, live power to the motor, prove power to the motor first, if none, work your way back to the issue. If motors are getting power to them then check brushes, if brushed. If brushless there is generally less to check but looking at the motors for signs of overheating or burnout etc. Depending on the motors, could be a start capacitor, but that would lead to a humming noise on power up usually. Could be corrosion on the switch terminals if been sad unused for so long. Might just need a clean internally.
-
Where is the kWh price heading in 2022?
Carrerahill replied to epsilonGreedy's topic in General Self Build & DIY Discussion
Yes, this annoys me no end. They must start to learn to work in percentages - but that wouldn't give them the scare tactic headline. Ejits. My monthly bills were no where near the national average before the hikes and are still less than £100 a month for gas and electric, so even if my bills went up to £200 (over double current prices), I would be on £2400 a year - so telling me bills "could" be £4200 really doesn't help me. -
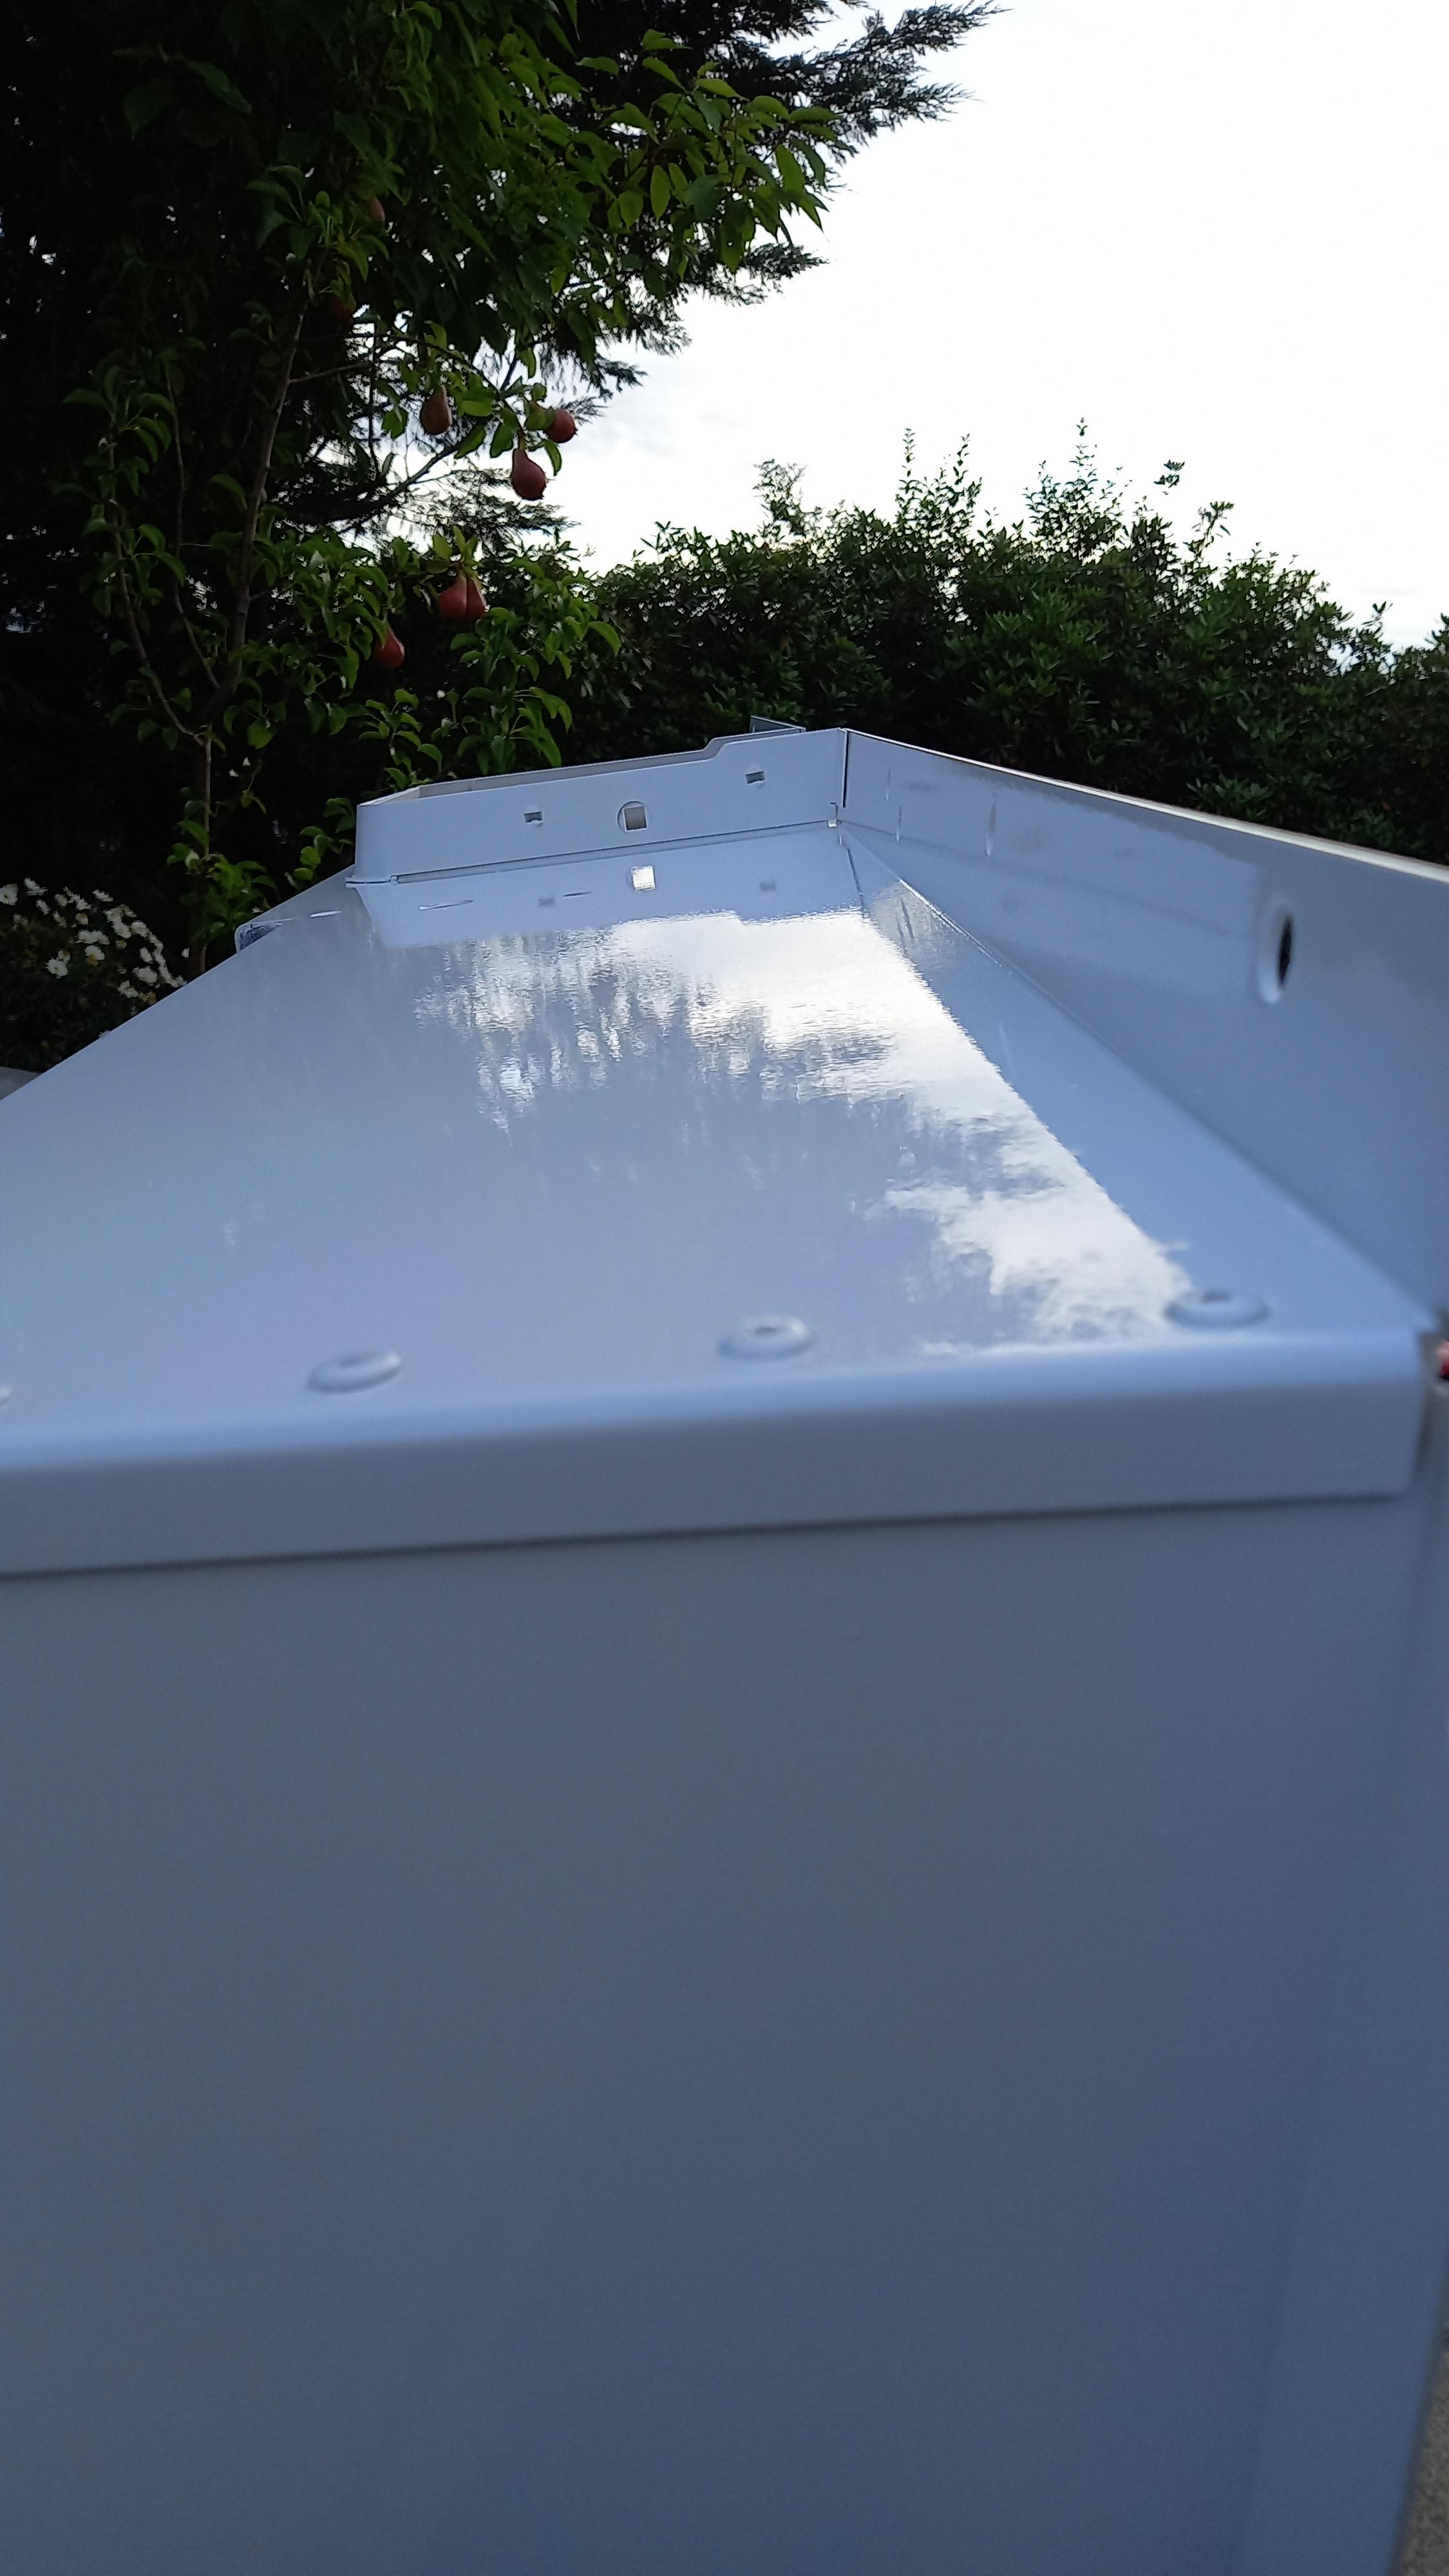
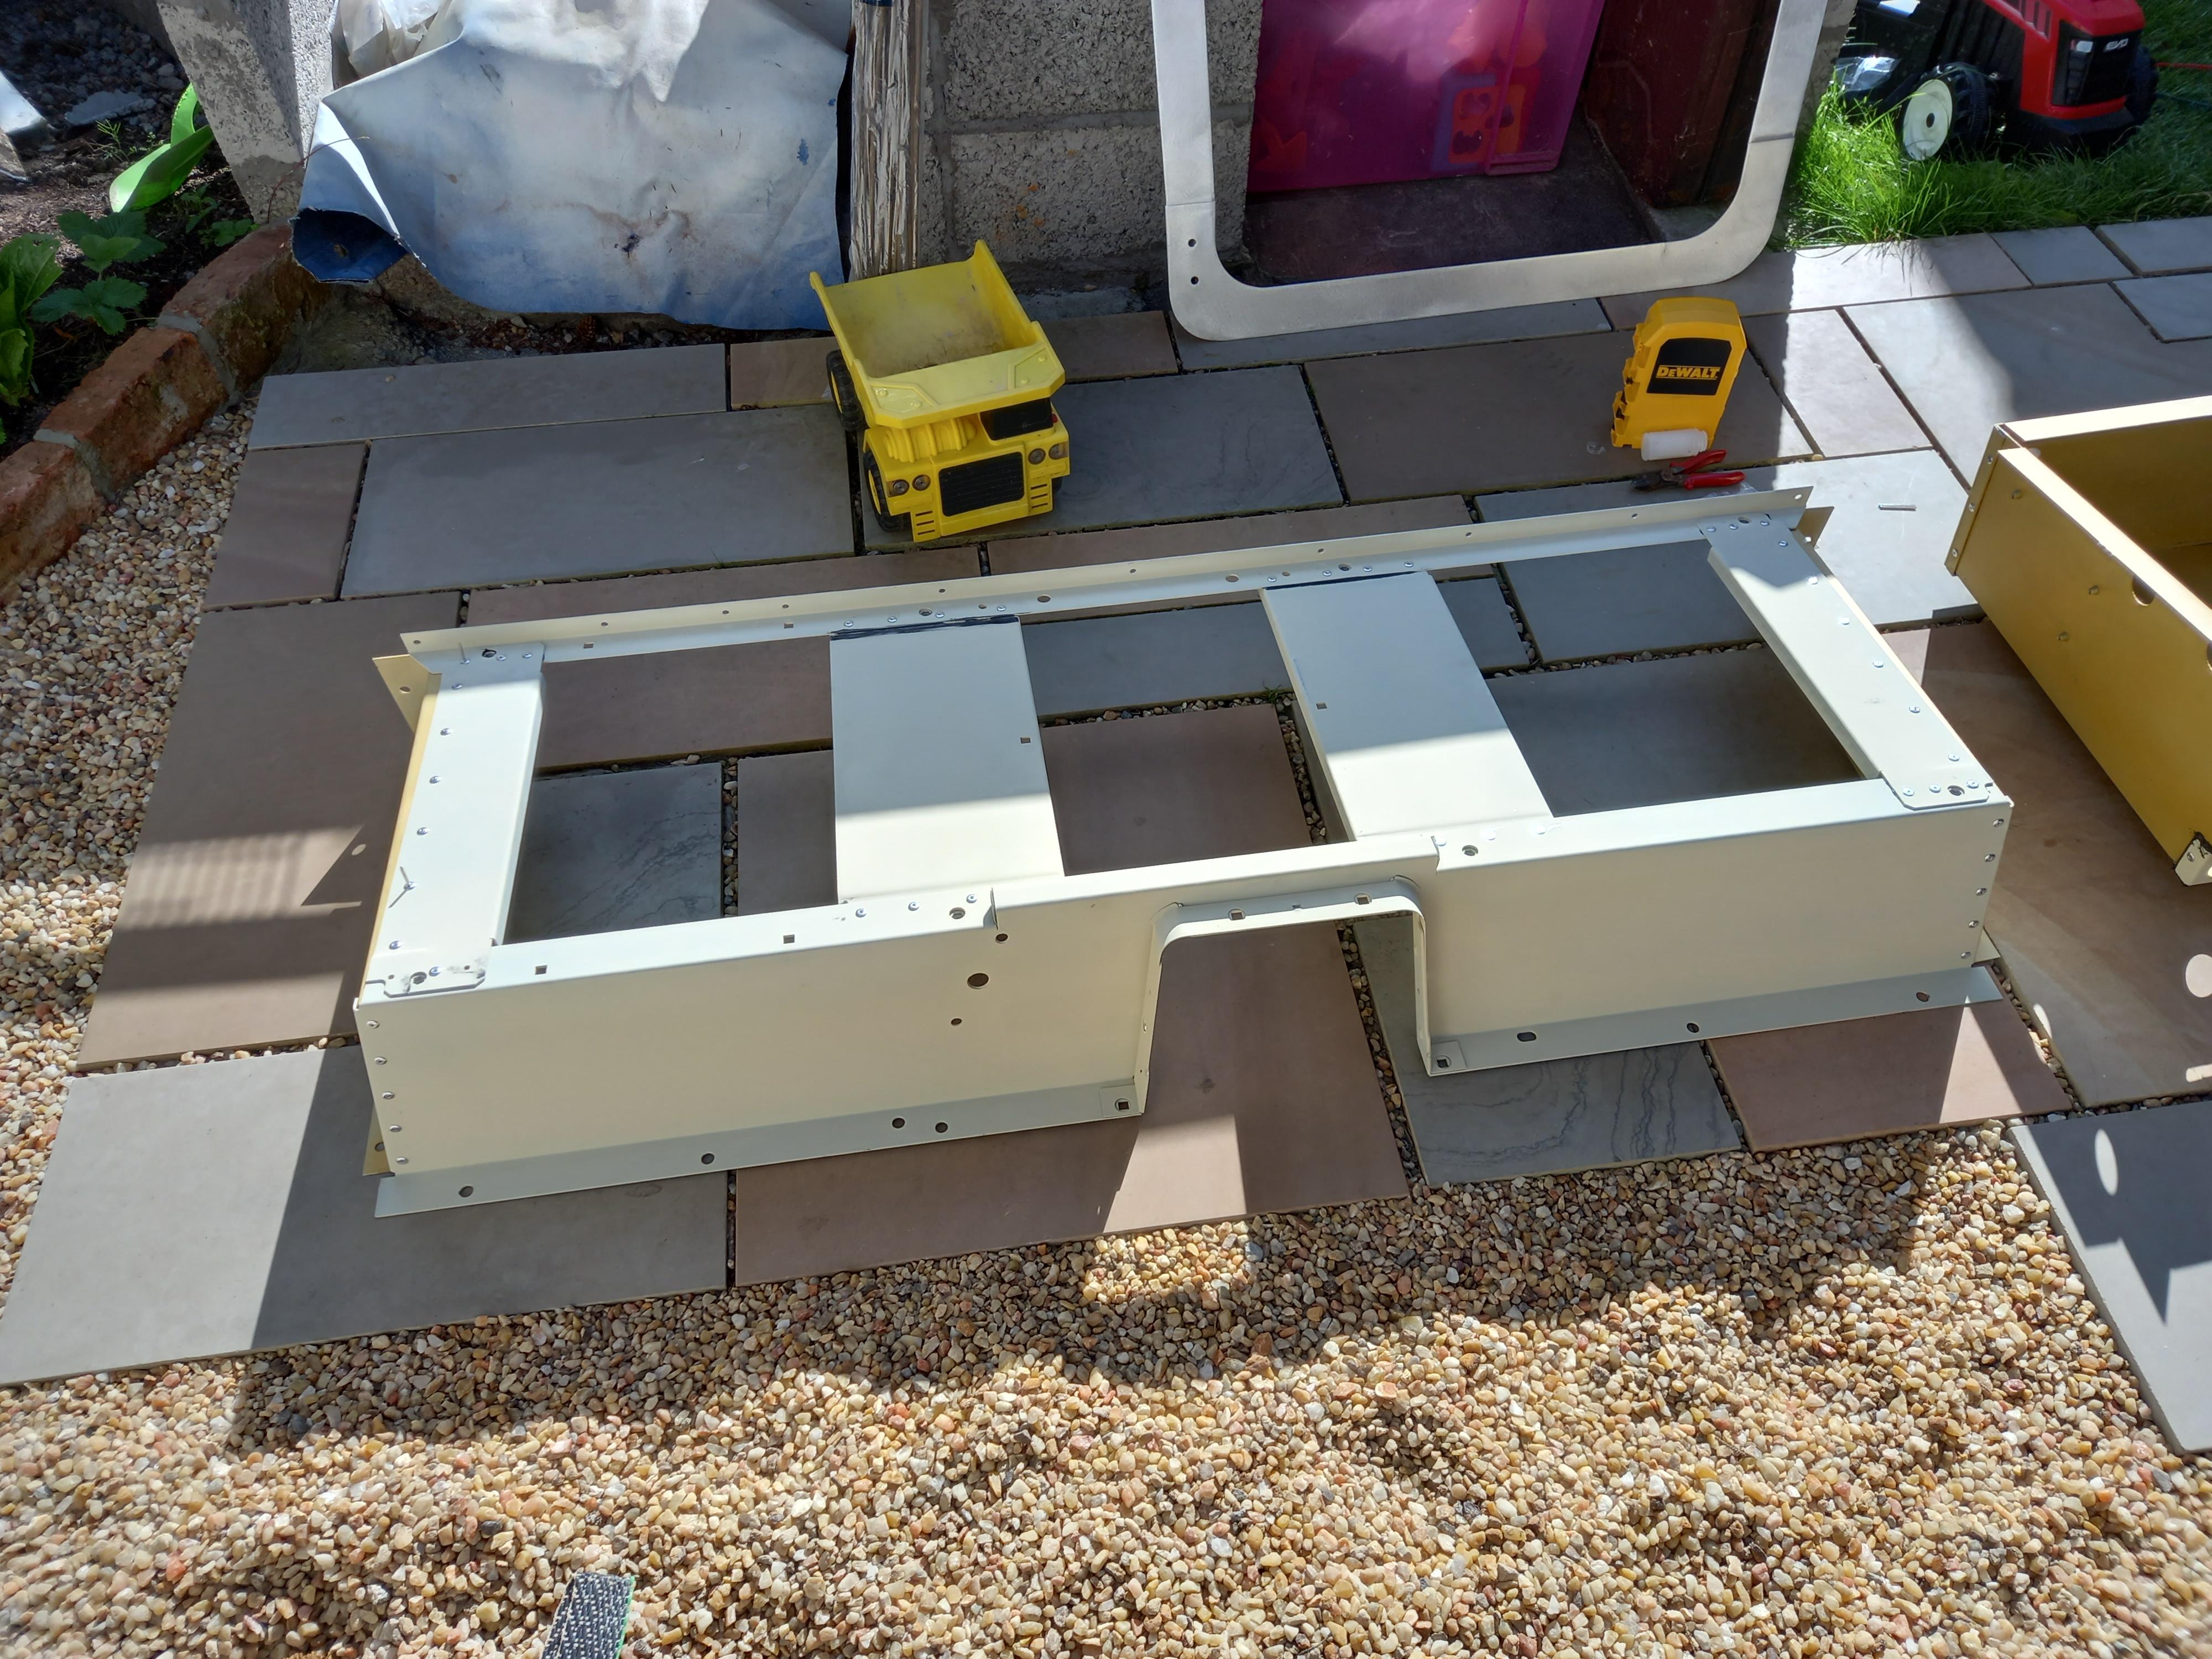
This was last night, perfect painting conditions, light breeze, warm evening, wife and son & dog out, bit of sun, I sprayed the patio with the hose before I started to dampen it, helps reduce dust, finish is about 98% perfect, I have 2 defects on "seen" parts, both tiny and once installed I don't think I could even find them again. If it was a bonnet or door or kitchen door, both of those defects would be resolved with localised 2400 grit paper, then some rubbing compound followed by finishing over the whole panel or a local fade depending on the result. For that seatbox (from a Land Rover) it took about 120ml of paint, that included the battery box under the passenger side seat area, the last coat was 10% more thinner for a high gloss finish, also easy clean! I am very pleased, and if I had not been, I have more paint and a lots of sanding paper/discs in stock!
.thumb.jpg.6df85f2e6aea654806491f14a6700dce.jpg)
-
It is actually fairly common to add more panels than the inverter rating, the idea being that say 20% more panel peak capacity than the inverter can handle will mean that when you see 80% peak generation on the panels you sort of end up at the full rated output... I seem to see about 83% of peak panel power as a norm during this current sunny weather.
-
That mask looks reasonable enough, but I think those filter caps are just a dust filter, it would stop the paint particles but not the vapours and gases from the various solvents and chemicals in the paint. Check with the manufacturers datasheets and see what filter it is and what cartridges are available. If unopened and not suitable I’d keep it for general dusty work on your house, or flog on eBay and get a 3M full face mask as you should really protect your eyes too but not critical if you paint outside or in well ventilated areas – I used a ½ face 3M mask like that for years before I upgraded to the full face. The paint looks fine, it will be good tough paint for sure, my only comment would be don’t use 2k primer going forward, you have it now, fine, just use it, but 1k primer is easier to use, you can literally just thin some, tip it in the gun in any quantity etc. no need to mix up properly. It also means you are reducing your exposure to isocyanide products. If clean you can also tip spare back into the can as it won’t harden in a sealed tin, catalysed 2K will begin to cure immediately.
-
Off the top of my head I think the 3M 6057 will do organic gas & vapour - which is basically your petrochem based solvents and paints but also inorganic gas & vapour which I like to have because etch primers etc. can have inorganic chemicals in the makeup. There are so many in the 3M range, make sure you add a dust filter on top of the cartridge, on the 3M 6057 I list above, you then get a little pad of filter material that click on top with a retention bezel, get the best filtration which is FFP3. You can change these more frequently but the cartridges are good for 12 months or when breathing feel laboured through them. This setup is also good for doing MDF/PLY because it covers the dust but also any formaldehyde (or other resins) or off gassing from cutting the material.
-
Kitchen Hatch - keep and modernise or cover it?
Carrerahill replied to Zak S's topic in Kitchen Units & Worktops
See my answer to your other post... you might need a coffee! -
Kitchen Hatch - keep and modernise or cover it?
Carrerahill replied to Zak S's topic in Kitchen Units & Worktops
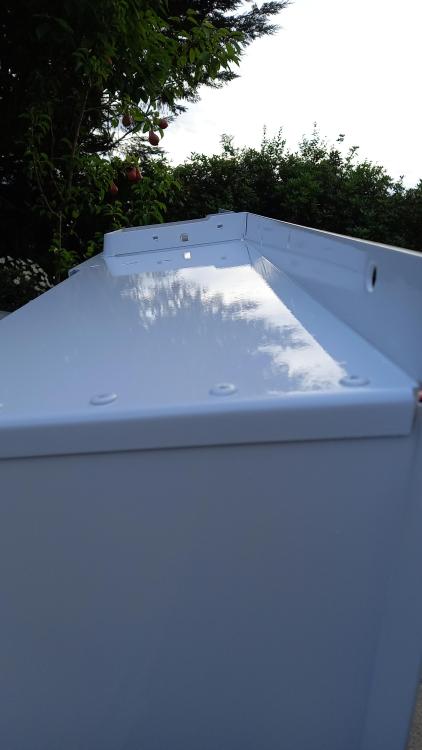
We will see how the weather holds up, if nice I will hit the top half of that (bottom done last night) with the 2K solid white paint - I'll post the results as I suspect you will be doing all this soon! I really enjoy painting but it can be stressful, so do it when you have time, there is no such thing as a quick paint 5-10minutes to build the gun, mix the paint, 5 minutes for final degrease of items, maybe only 3 minutes of actual painting, with waiting time between coat, then you can spend 15 minutes cleaning the gun! In that time you also don't want anyone harassing our or even present without a mask - I usually do it when I am home alone and like a breeze to help carry away the fumes/paint dust. Allow an hour for even 1 door, oddly, allow about the same for 4 doors. -
IF loaded with the right filters yes - read my big post above.
-
I have been painting for nearly 20 years, started out with a cheap gun and some white Hammerite to see what I could do and slowly progressed from there. In the early days a very friendly, former painter turned paint salesman gave me a lot of guidance on paints and how to work with them and the actual painting bit was just time and practise. The first thing is prep, doesn’t matter what I am going to paint I always clean the whole lot with thinners/panel prep (thinners is better unless over 1K paints, but by that stage you shouldn’t be needing to degrease). Ban all silicone procuts from the area, even silicone sealant when off-gassing can contaminate a panel and cause it to fish-eye. After that I sand, if you sand greasy or contaminated substrates you are only spreading the contamination and pushing it into the scores created by the sanding. Scotch pads are fine for giving a generally good condition item, painted or not a rub down. The rest of the time I would use a combination of what is needed for the surface could be bad, 80 grit then 120 then 240 etc. Maybe just a light 400. Once clean degrease with clean lint-free cloths and thinners – keep using clean bits until you can see the panel is actually clean. You will be surprised. For Something like a kitchen door I would hit with a 240 grit random orbital for a nice keyed flat finish, I might go up to 400 but doubt it. Gun setup is a skill in itself, a gravity fed cup gun would be best, there are quite a few settings. First thing I do is wind the air control in until it is very low, then wind it out till I get what I know to be right, difficult to explain, but you want it to carry the paint in a fine mist, but not so much air that you create a dust cloud, you can actually paint with low air volume but it’s not great for the finish as the mist is not fine enough. The other setting is paint volume, you need to wind this in quite a bit so that when you pull the trigger 100% you don’t just shoot heaps or paint, I use trigger control to initially do my light mist blow in, then more trigger for the final coats. You also have a pattern control, narrow is great for very lightly blowing in an awkward bit or an edge but must be used carefully so I advise any novice painter not to. Go for about a 4-6” pattern. You can also control the pattern angle by rotating the front air cap, I always set my gun up with the spray pattern fan sitting vertical, so as I hold the gun naturally and pass over a panel side to side the paint is hitting the panel wide, if you set it the other way and go side to side you will cause runs and is only really good for painting tall things you cannot move so you are going up and down. As you move the gun keep it back about a foot from the panel and when you move keep the gun at the same distance to the panel, people often swing the gun resulting in the mid-point being close to the panel and the outer of the swing being further back which changes so many variables as you go that you will notice it on the paint. Start painting furthest away from you, this means if anything falls from your overall-clothes you get the chance to blow it off (pull the trigger enough to get air, but no paint). For paint volumes for an average kitchen door, depending on paint, you would want about 30-40ml – for your first rodeo have a little extra to allow for some waste, but don’t be tempted to get it all on the door, its paint not plaster! A thin film of well adhered paint is all you need as long as you cannot see any shadowing or bleed through from primer which is why it is a good idea to use the right primer for the job, for light colours, like white, I like an offwhite or beige primer, white primer for white topcoat is bad because you cannot always see what is primer and what is topcoat and may miss bits. I would then use a 1k primer or filler primer for these doors, I would however need to check adhesion of the primer on the melamine because you might need to use a plastic primer or get a direct adhesion primer. Do some tests, I’d use a dab of primer from the can onto the door and leave it for min. 36 hours, then use your fingernail to see how well it adhered, do not panic if fresh paint just comes off, the chemical adhesion is not good until full cure which is why new paint is so delicate. The primer is the easiest to work with because it tends to lay down nicely and has good coverage so your not tempted to overpaint it. I use a 1.2mm nozzle for primer and mist it on finely to get the initial bond, round the edges or any tricky bits first, then the top (face of door), cross the panel across the shorter length and keep the paint flowing as you start and finish on the panel, overlay it a little, then lay it on in 2 slightly heavier coats after that tacks up and flashes off. If the primer starts to look quite glossy while you’re putting it on, you are putting on too much too soon, it should only ever look sort of satin/med gloss which is about right, matt is even better but that is very thin fast flash off territory. You can leave primer for a while if you want, but once primer appears dry you can move on, depends what I am doing will depend if I flatten it, if the prep was good then the primer will look good and so will the next coat(s). I use IR lamps to speed things up but the garage door open on a summer days with air moving will have it touch dry within 20-40minutes. I am assuming you will use a solid 2K colour, if not, apply basecoat with similar technique to primer, then treat your 2k lacquer as the following. If the primer is perfect, I just move on. 2K paint is almost always 2 paint to 1 hardner and then I use about 10% thinners, if painting the doors on the flat I would paint them with 10-15% thinners. I use a 1.2mm or 1.4mm nozzle for 2K. Hit the doors edges first quickly with a light coat, then proceed across the door, same as primer really, let that tack, you should still be able to see primer after this coat, it is just a mist, then come across with the gun flowing at a higher volume of paint (I use trigger control but you can wind the pin in or out to control volume) keep the spray pattern wide for a novice as less chances of runs. After the first coast back off and wait, look across the garden or think about something else, even be tempted to hang the gun up, walk away, take your mask off and just look at something else for 1-2 minutes because human nature is to keep blasting on paint, there really is no rush. Now add another coat. Once the panel is basically fully covered and looks “done” tip your paint back into your mixing cup and add a dash more thinners, swirl that up and tip back into your gun, on a high volume spray and wide pattern, mist the whole panel with over lap briskly (but not too fast) from side to side, the extra thinned paint will land on the existing coats, the solvent will help to level the paint and you should, if you get it right, be left with a really really smooth and if gloss paint, really really glossy finish. However, be very careful, too narrow a spray pattern or too slow and you will cause a run at this stage. If when you think you are done the panel looks dry or matt, its not “wet” enough. You need more paint on it, that will dry as orange peel. I have intentionally created a textured or “dry” finish before and that is lots of paint, wide pattern, lots of air and too far back, result can be almost chalky with the right paint, not good for kitchen cabinets! If it looks dry, get another pass on it with higher paint flow, even if you have run out of paint, go quickly mix up enough for 1 more pass and you will be fine. Have a bright light or torch handy, when you’re done, shine it over the panel looking for dry bits or bits that are a bit thin, quickly just mist over that whole bit again once the last coat has tacked a bit, 2-3 minutes. Now, screw ups. If you make a mistake on primer, don’t worry, it just means you will need to flatten it, let it cure well (too soon it will bog down and clog the paper or peel/rub off), and then 1200 it to remove specks or runs, flatten it and blend it all, you should not need to blow in more primer if you are careful. If you make a mistake on 2k, don’t panic either. Just leave it, do not even think about trying to rectify it at this stage. Walk away and clean your gun. After about 12 hours you can take water and 1200 or 2400 grit to 2k no bother, dampen it down, little block and sand out any runs or imperfections, always use a block or your fingers might cause the paper to rub through the paint. Once the defect has gone you can use Farecla rubbing compound (basically like a very fine sand paper) followed by Farecla finishing compound (Halfords do their own version in little tubes too) OR you can lightly rubdown the whole panel/door etc. and hit with a very fine, 20-25% thinned 2K and just mist it on to refinish the door. H&S – 2k paint hardener contains isocyanides and 2K will set like jelly, if you breath it in you end up with that in your lungs, you may fall over and end up in a very bad way, some people cannot cope with it at all. So, you need to take care. They recommend you wear an airfed mask, but I use a full face cover 2M mask with FPP3 filters over organic/inorganic gas and vapour filters which will cover all the nasties. When wearing the mask, I cannot even smell the paint. Make sure you spec your mask up with the right filters. Not sure what you mean by radioactive style, radioactive protection is just dust protection so you don’t breath in radioactive particles, for painting 2K you actually need higher protection believe it or not. I would also consider painting outside on a slightly breezy day, this does bring with it issues though, but I quite often paint outside, I painted outside at the weekend and didn’t get a single bit of dust or anything stuck in the paint, if outside conditions are not good I paint in my garage, I raise the door about 2 feet and have plywood boards with huge car fans mounted in them, then get jammed in to extract from floor level, I then open the side door, with the fans running I can sand and paint in the garage and there is not even so much as a hint of a haze in the garage, I still of course wear the mask. Also wear gloves at all times and ideally lint-free long sleeves because the paint landing on your skin can be absorbed. These H&S tips are not perfect, but it works for me. I would get your gun setup with some cheap thinned emulsion and practise, practise the spray pattern adjustment, practise the air volume and the paint volume (pin) control. Anything else, key to your painting, just ask.
-
Kitchen Hatch - keep and modernise or cover it?
Carrerahill replied to Zak S's topic in Kitchen Units & Worktops
I was spraying 2k at the weekend, more to do tonight. I spray paint most things that I need to paint, I work with everything from waterbased, cellulose, 1k and 2k (my favourite for a tough finish) - always have a fairly wide range in stock in my garage at any given time ready for most eventualities! Weekends efforts in etch primer:
-
Solar Panels Integrated within roof tiles
Carrerahill replied to cowsgomoo's topic in Roofing, Tiling & Slating
Google and download the GSE Configurator tool - I have it here but cannot attach to the post. Find your panel size, then use the GSE configurator to produce a full spec/shopping list. Very good and makes it dead simple. I used it for spec'ing my in-roof system. -
Kitchen Hatch - keep and modernise or cover it?
Carrerahill replied to Zak S's topic in Kitchen Units & Worktops
I think I would revise my budget/programme and not waste time tarting that kitchen up. It may appear cheaper just now, but in the long run that will transpire to be the wrong move. -
Steel post installation design. Help needed
Carrerahill replied to Marvin's topic in Landscaping, Decking & Patios
First, I would get them galvanised or cancel and reorder galvanised steel posts. If it is all too late for that I would weld a cap onto them, then pour some thinners into it and swish around to degrease, then use something like Galvafroid paint or a good zinc chromate primer tipped into them, thinned a bit and swished, or get Dinitrol type stuff, swish it around until fully coated and tip out the excess. Let that dry. Then drill a vent hole, about 12mm (bigger on any side you wont see) just below the cap on each side, recoat with paint. Drill vent holes around the post about 100mm above what will be ground level, paint the holes. Sand and degrease the post and paint it properly, I would personally spray it with Etch primer and then primer it then 2k paint it, but DIY store products applied well will work too. First fill your hole with clean gravel and set your post, then backfill for the first 100mm of the post with gravel, this will stop the post just rotting out in damp concrete and let it breath. Then fill with concrete. That should last well. Thing to consider, when this post is cold and air temps rise condensation will form inside and out, this cycling over time can lead to the inside slowly rotting away, so internal protection from good paint products is a must. You do not want to seal the post at the bottom by concrete or a cap as moisture will run down inside and pool and the rot will start. Essentially you want to do the opposite of what may seem logical at first, you want it to breath. I have seen raw steel sit outside for decades and never come to any real harm past surface rust because the steel has been able to breath internally and dry out quickly. -
How to decide between ASHP or Gas boiler for New Build
Carrerahill replied to Meabh's topic in Air Source Heat Pumps (ASHP)
I would say this technology has many hurdles, one of them is certainly installers who don't know enough about them therefore, so it is 'technology the industry is frankly still having issues with', however there are many more issues with them from size, space to install them (block of flats, where do you put them?), some can be noisy, low temp issues on some models (creeping up now), not a good direct replacement for gas systems etc etc. In a new build with a properly spec'ed system they will be fine, but this is not the majority of UK housing stock, the industry needs to solve the retro-fit issue and they need to become more mainstream before the industry will come to grips with ASHP's. We still have issues with gas boiler installs! Nearly every plumber you talk to always says, "We will just put in the big one and that will cover everything" which has lead to many issues over the years, including reduced efficiently, short cycling, boilers not condensing because they are running too hot etc. etc. -
How to decide between ASHP or Gas boiler for New Build
Carrerahill replied to Meabh's topic in Air Source Heat Pumps (ASHP)
Go Gas Boiler with PV - but with a caveat. I'll give you my thoughts based on my personal home situation and my professional observations (we have the gas/ASHP/PV/Sunamp debate for new buildings weekly). I have PV and a gas boiler, the boiler is relatively cheap to run, its not even a year old (I made the call to replace with gas and not go ASHP last Feb). On a crisp bright winters days I can also heat some space I am using with some small electric heaters, for free if I want. For example I am looking at electric UFH for the bathroom and adding an electric option to my office and maybe loft room so I can make use of day time sun for heat in the room I occupy most, I can whittle away at my energy import and balance things out a bit through the year. I then have the gas boiler for the simple hot water production and on demand space heating when needed. I am currently working on building services designs for a 4 residential developments ranging from 7 storey flatted development in London to smaller blocks of flats in Glasgow and a house, some will be gas boilers with a PV allowance per house, some will be ASHP some will be Sunamp's charged straight off the grid. When looking at heat loss for these flats or houses and the heating method we cringe at the cost some of them will cost to heat. The fact is electricity is expensive, things like ASHP's are expensive the whole lot will just be painful until electricity becomes cheap to produce nationally/globally. If it was me building from new, I would stick a gas boiler in, a hot water cylinder with a water coil and element fed from PV, more PV than I need, and electric heating options in various spaces, I would spend a bit more on insulation and try and create a building which needs little heat. I would leave in allowance in space and technical spec for more PV and battery storage when prices come down and my long term plan would be to lose the gas boiler, well, if that is the way things go, maybe we will see an alternative gas supply and boilers to suit, in which case I will be pleased I have the gas infrastructure. My thinking is that this will give me green credentials and cheap electricity to use however I wish, but the low capital cost of a has CH system but with options further down the line. If I go ASHP now, then to my mind, I have just signed away a lot of money on technology the industry is frankly still having trouble with, I also diversify my energy sources, I do think we are going to see more energy issues in the coming years, it could be gas or electricity shortages or sever price hikes. If you had told Germans 2-3 years ago, look boys you might run out of gas and struggle to keep the heat on most would have laughed, it is very real now. Which is why I am keeping my options open, it is why I have a diesel and a petrol car, at present my petrol is cheaper to run as Petrol is 20p a litre cheaper round here and my Petrol & Diesel get almost the same MPG. Spend some of the ASHP money on future proofing, make allowances for things you might install so you are sitting pretty and can, if you want, when technology and prices improve and maybe electric costs stabilise, go ASHP in the future. High temp versions are coming through now that will work as a direct replacement to a gas boiler without rad changes, maybe even increase panel size so that come slightly lower temps you still have good heating from them. -
Just done this. Based on the value my account is in credit, my current monthly bills, the £66/67 payments starting in October, the big pile of seasoned firewood and the new solar panels I think a DD reduction will be wise for us.
-
I was on a site visit a few weeks ago and the guys were plastering aerated block, they had dampened the walls (maybe PVA was involved too) floor was all wet walls clearly damp. They were using Thistle Browning directly onto the block and had bags of multi on a pallet near where they were working. I think Thistle Hardwall would ensure adhesion as its designed for even higher suction backgrounds - but they seemed to use Browning. Given they were about half way through a 3 storey care home and had 1000's m² to do, I reckon they knew what they were doing and it would not be falling off. My plasters that I have used for the renovations and extension are good, I like them, I have often discussed plastering weird and wonderful substrates and things they have plastered before and they reckon they can make plaster stick to just about anything (sensible) you can throw at them and have proven to be right with some oddities in my house. Waterproof PVA I reckon would ensure you would get good adhesion. The mechanical key is there, it is just the suction that ruins the plaster bond as it dries it out too quickly.
-
Would this be possible - Temp power to barn
Carrerahill replied to Space Race's topic in Consumer Units, RCDs, MCBOs
All sounds reasonable to me. Just make sure the electrical installation is properly designed and executed to BS7671. -
What happened to Jeremy?


.jpg.6b0dc772743b9c2109f01e63a2b2525a.jpg)