Space Race
-
Posts
62 -
Joined
-
Last visited
Space Race's Achievements
Member (3/5)
3
Reputation
-

Warm roof conversion
Space Race replied to Space Race's topic in General Self Build & DIY Discussion
Is this in response to my posts or someone else? If mine, I'm not sure what your referring to, I'm talking about insulation on top of the roof -
Warm roof conversion
Space Race replied to Space Race's topic in General Self Build & DIY Discussion
Yes, They looked promising but make for some awkward detailing and cuts on the valleys. Much easier to deal with the insulation and sheeting seperately. If I didn’t have the valleys these would be a no brainer. That said I still have a fixing problem. The 4x2 solution in a prev post seems like best option so far with some sort of twistfix fixing but open to further ideas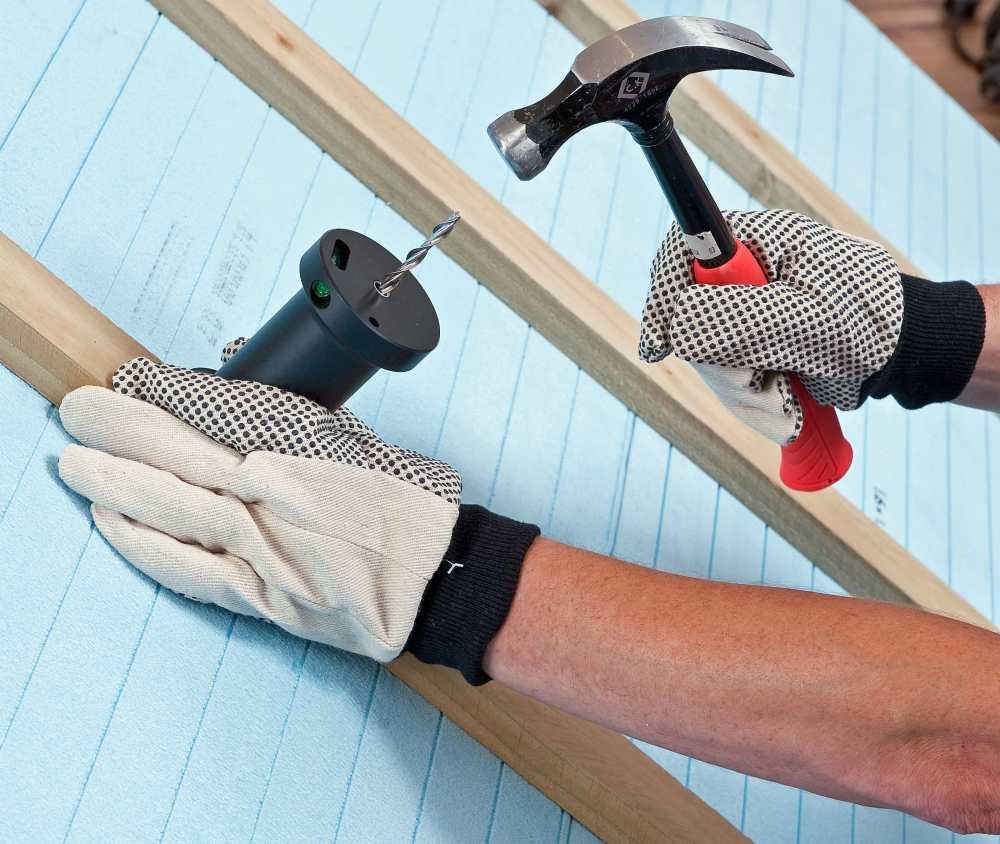
-
Warm roof conversion
Space Race replied to Space Race's topic in General Self Build & DIY Discussion
Wrote reply in notes on phone. Copy pasted. No idea why size is all over the place and cat see how to edit size -
Warm roof conversion
Space Race replied to Space Race's topic in General Self Build & DIY Discussion
Home office and hobby room with all year round use. I’m aware it would have a deep profile. In terms of overall aesthetic, The walls are being insulated & clad from outside to protect and preserve the building. These interlocking cabins can be problematic with rain and this one’s certainly suffered. The building already needs a new roof with metal being my first choice. Even without insulation I’d be fixing the roof battens regardless. If I can resolve the fixing method it’s easier insulating continuously over the top than internally though I haven’t completely ruled it out. Inside there are effectively three rooms but only one is fully enclosed. Basically it’s open plan but with Partial internal walls to support the purlins. Insulating inside would be very bitty rather than continuous. Ventilation would possibly need to be mechanical and I’d need to cladd internally to cover it all. -
Warm roof conversion
Space Race replied to Space Race's topic in General Self Build & DIY Discussion
Or rather than ply sheet, Add some 4x2 at say 500/600mm centers with the timbers laid so their widest face 4" was up against the sarking giving me 18mm t&g + 45mm timber to go at.
-
Warm roof conversion
Space Race replied to Space Race's topic in General Self Build & DIY Discussion
Another option, I could add some ply board from the underside of sarking (between purlins) just to give the fixings more purchase -
Warm roof conversion
Space Race replied to Space Race's topic in General Self Build & DIY Discussion
I could certainly get a some fixings into the purlins but the majority would be in the 18mm t&g only and that's my worry -
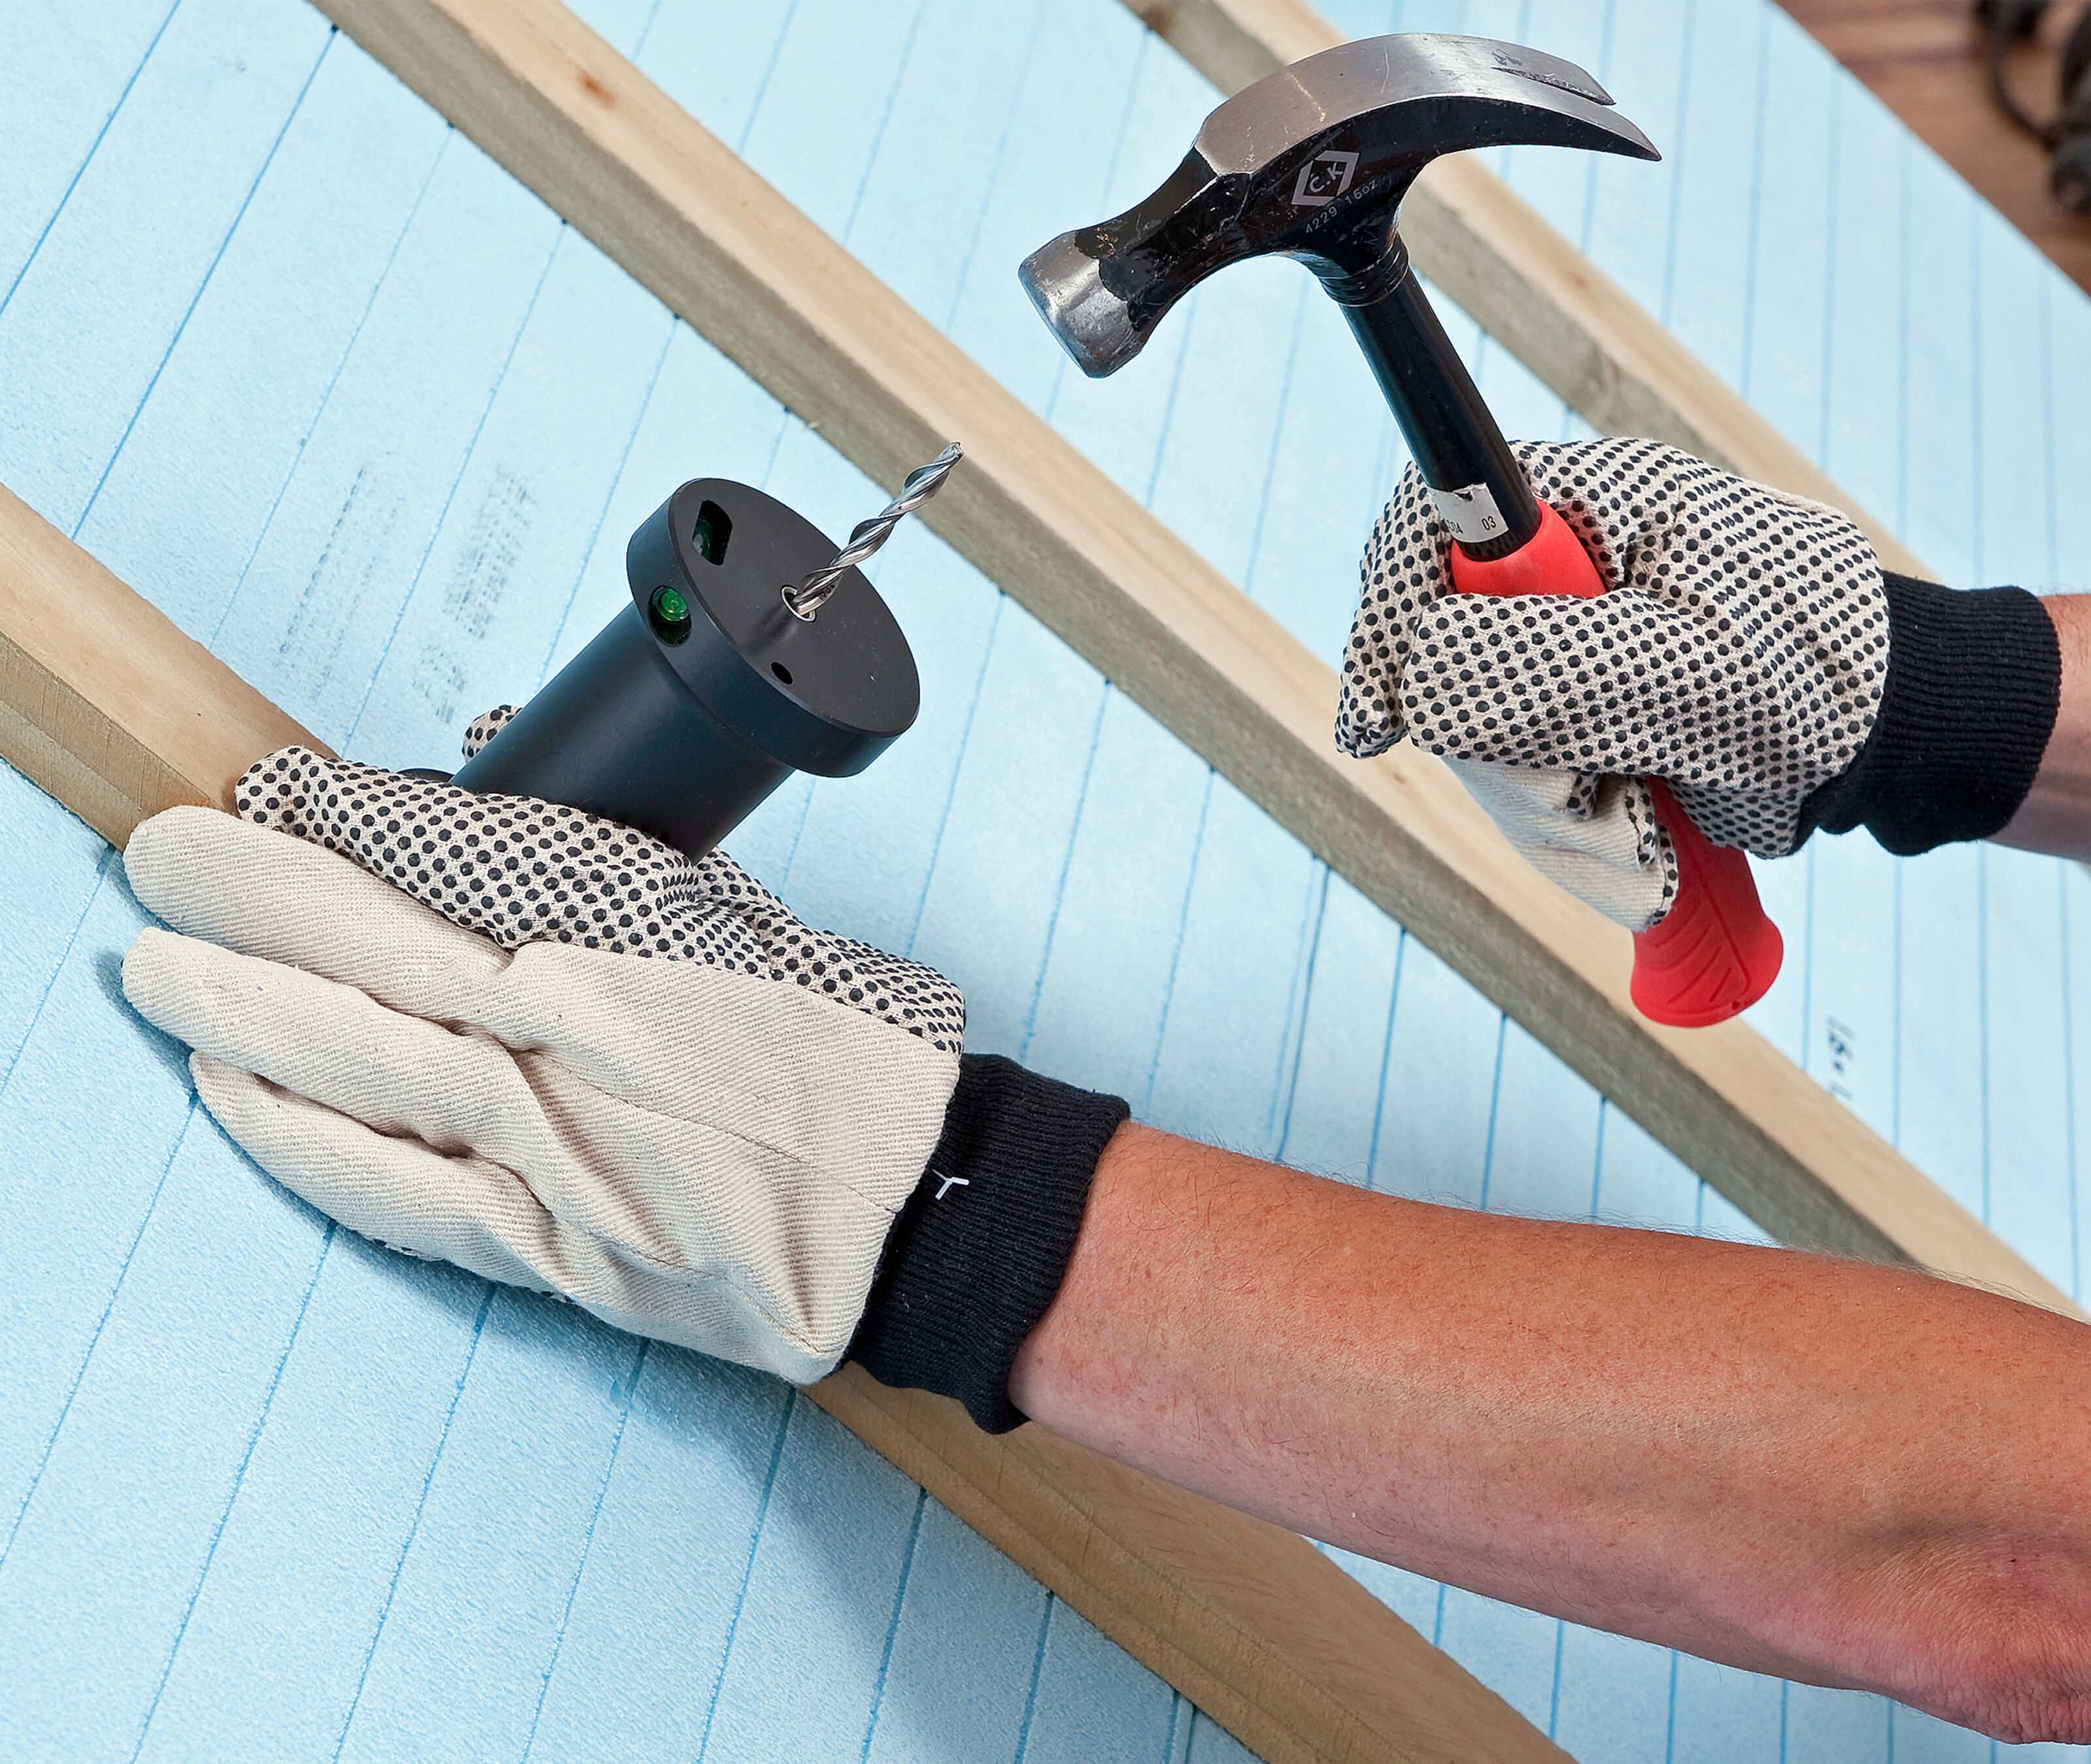
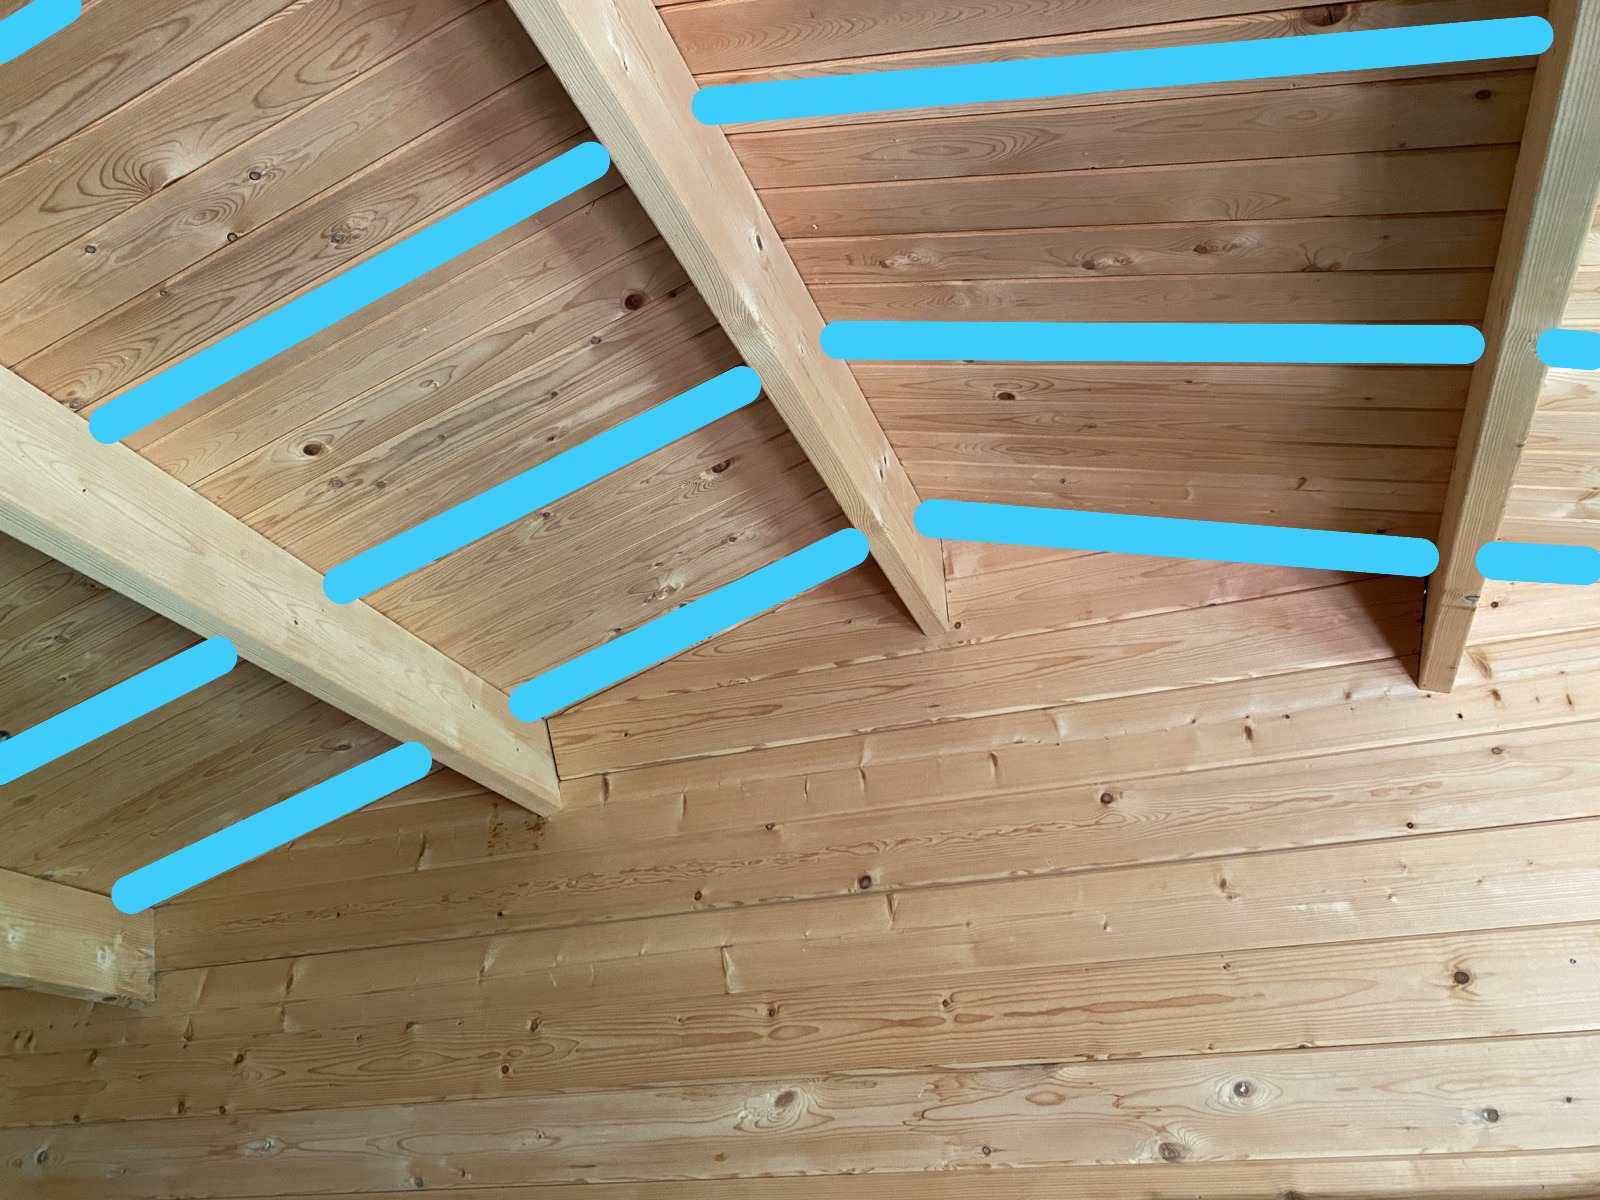
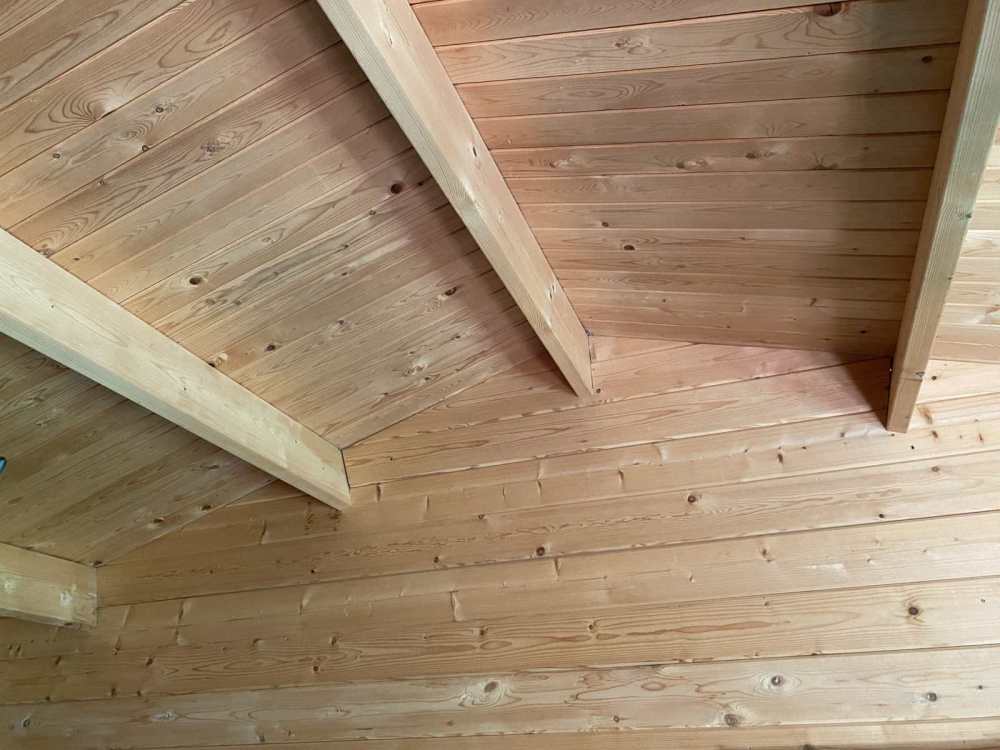
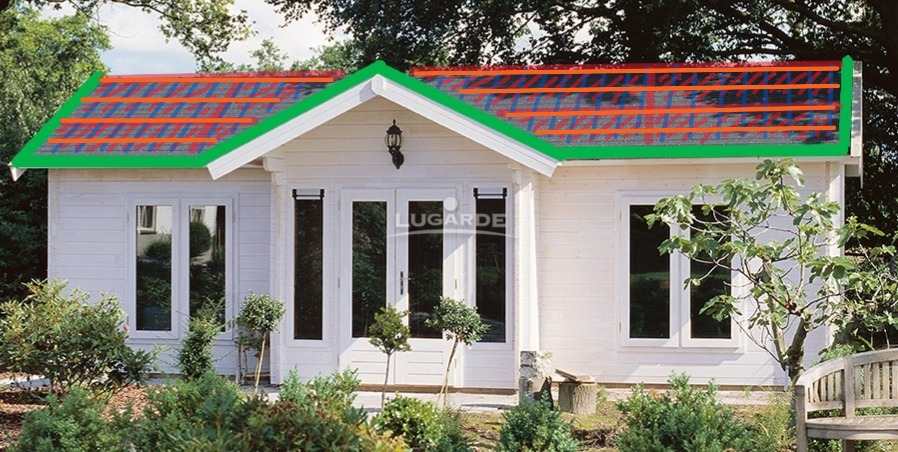
Looking to remove the old asphalt roof tiles from our log cabin and create a warm roof off the existing 18x94mm tongue & groove sarking. Roof pitch is 17 deg. Initially I’d fix a 2x4 timber ontop of the sarking all around the edge to create an upstand lip, I’d screw both materials but also use galv angle brackets along its length. The 2x4 is shown in green on my pic attached. Starting from the outside 1) Box profile metal roof sheets 2) Roof sheet batten (ORANGE IN PIC) 3) Counterbatten fixed through 90mm PIR into 18mm sarking (BLUE IN PIC) 4) Breather membrane 5) 90mm PIR (RED IN PIC) 6) VCL 7) Existing 18x94mm tongue & groove sarking If I’ve missed anything blindingly obvious let me know but my main concern is fixing the counter batten/PIR to the 18mm sarking. What would be the best fixing for this and would it be enough? The way this log building is constructed, The roof is supported by 2x8 purlins rather than rafters.
-
Ventilation under & above windows
Space Race replied to Space Race's topic in General Construction Issues
Lost track of websites visited, videos watched. Glad I asked here -
Ventilation under & above windows
Space Race replied to Space Race's topic in General Construction Issues
I was thinking the (vertical) frame timbers would be fairly snug up to each side of the window but actually they could stand clear. Then my vertical battens would be spaced as you show. Thanks! -
Ventilation under & above windows
Space Race replied to Space Race's topic in General Construction Issues
How small was the gap? -
Looking at using board on board vertical cladding with a ventilation strip/mesh at the bottom and top of cladding. I'm struggling to find any examples of how these vents are detailed under and above windows. To form a vent over the head of the window seems easier (much like at the base) but I've not found a single example for under. Is this not done? Am i overthinking this If anyone can point me in the direction of ventilation details above and below windows that would be much appreciated
-
Vapour barrier thoughts on renovation
Space Race replied to Space Race's topic in General Self Build & DIY Discussion
Yes. They started with a log building (similar to mine), 3rd pic down is their vapour barrier, 2nd and 4th pic they have added the timbers in which batts will sit, 1st pic shows batts being installed. 5th pic shows their breathable membrane and battens ready for cladding. -
Vapour barrier thoughts on renovation
Space Race replied to Space Race's topic in General Self Build & DIY Discussion
Thanks, I'll take a look at that Intello. Assume it's one of these smart membranes. The pics are not mine but the clear plastic looks to still be there after the insulation frame has been fitted, Assume its their vapour barrier. Someone else used Ekovilla Smart X but I've not seen this as readily available to buy as the Intello you suggest. Because I'm working on this part time and solo (slow A.F), dealing with Highland weather and all my layers are external, I'm concerned about trapping in moisture