MortarThePoint
-
Posts
2168 -
Joined
-
Last visited
Everything posted by MortarThePoint
-
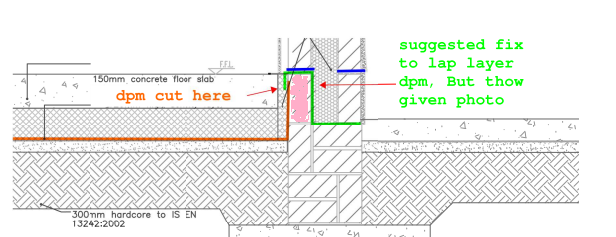
Ah, that's very different then. To protect against gas you need to have it continuous across the cavity. You either have to have a radon barrier or not and if you have to have it it has to be installed correctly. Could be very expensive to correct later if building regulations get worked up about it, or your Warranty provider. Is the material you have referred to as DPM actually a certified radon barrier. To key options come to mind: Take down the first course of bocks to expose the orange DPM/Radon barrier and make a good solid joint to new sections. Apply a Radon barrier on top of the concrete floor slab, across the cavity. This would require a cavity tray on top of the radon barrier which is a nuisance.
-
That answers my question, the first course of blocks is in place (pink in the sketch below). Drastic, but you could remove that course of blocks to join to the orange DPM, but I'm sure someone has a better idea
-
I suspect the orange DPM would only really need to extend up another ~100mm join with the DPC (blue) to perform its function * . The DPM doesn't need to cross the cavity as far as I understand. You have a break in the damp protection between the top of the orange and the blue DPC. Is the first course of blockwork against the concrete floor in place yet? * Please confirm it is only against damp not gas (eg Radon etc)
-
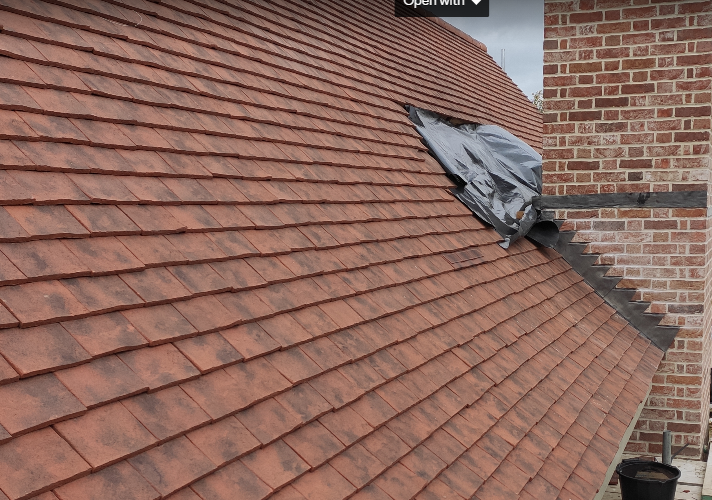
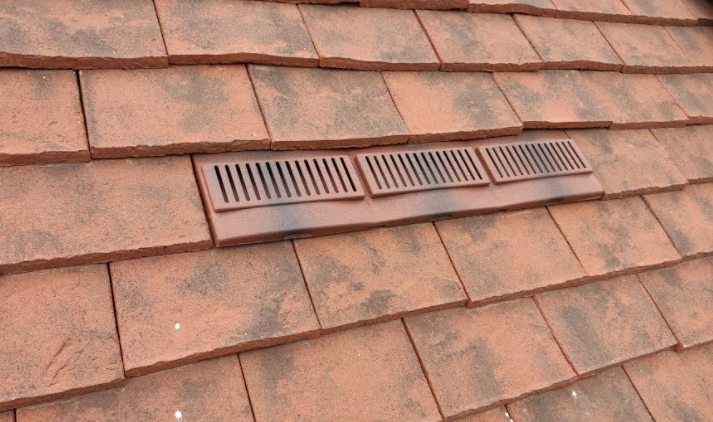
I'm trying to make up my mind between roof tile vents or wall based extractor fan outlets. It would be the roof option all the way if not for the possibility of condensation being an issue. Does anyone have any experience they can share. I've copied below some pictures of what the roof tile vent looks like (in this case for an SVP vent). I've also copied a very good video about installing such vents. He advocates having a horizontal section to allow any condensation to pool and then evaporate naturally. In many of my instances, the insulation will be at rafter, not ceiling, level but I expect a horizontal length is still a good idea. I probably have an irrational fear of ducting with mould growing on the inside.

-
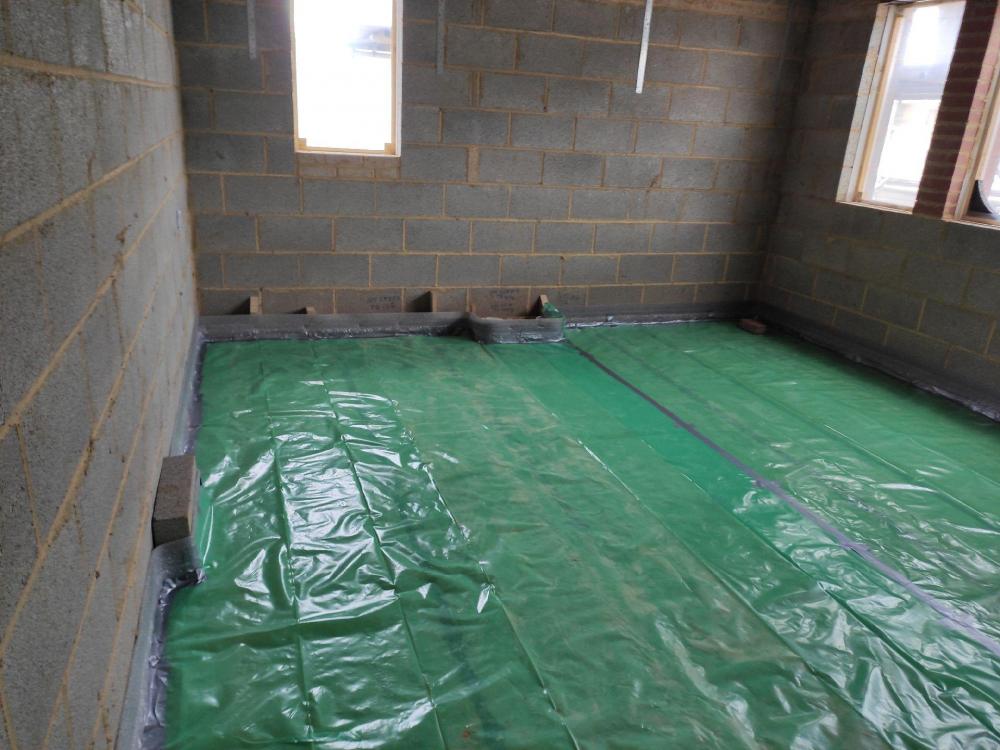
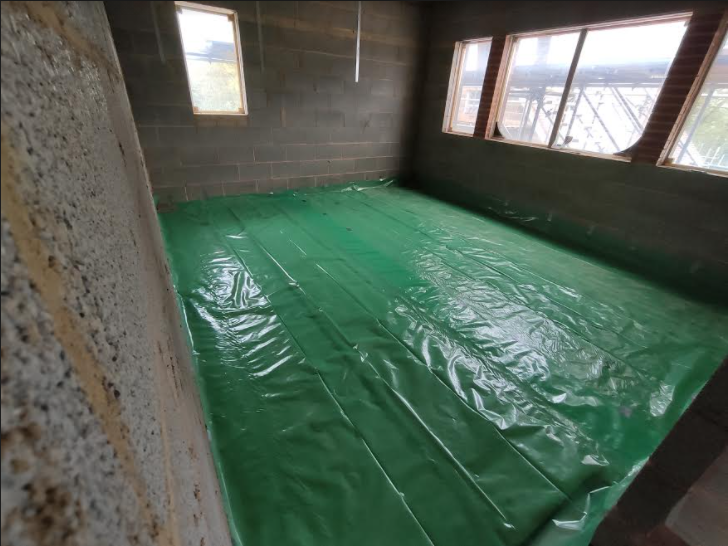
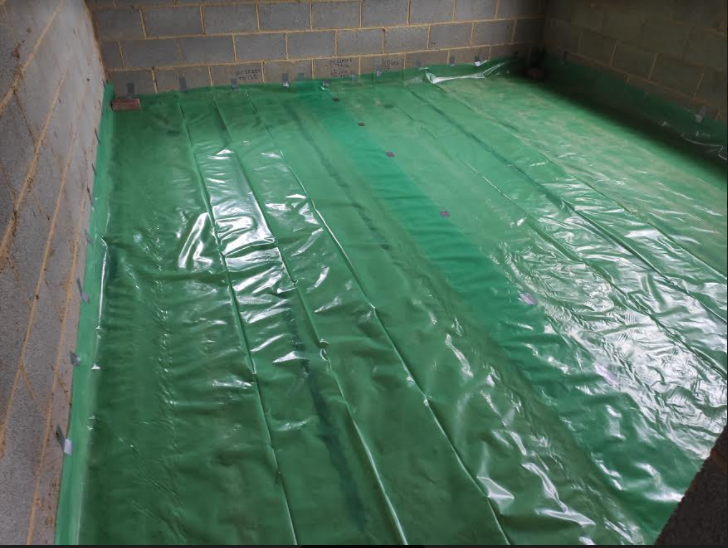
Is the current DPM between the insulation and poured concrete? A sketch or photo would help understand
-
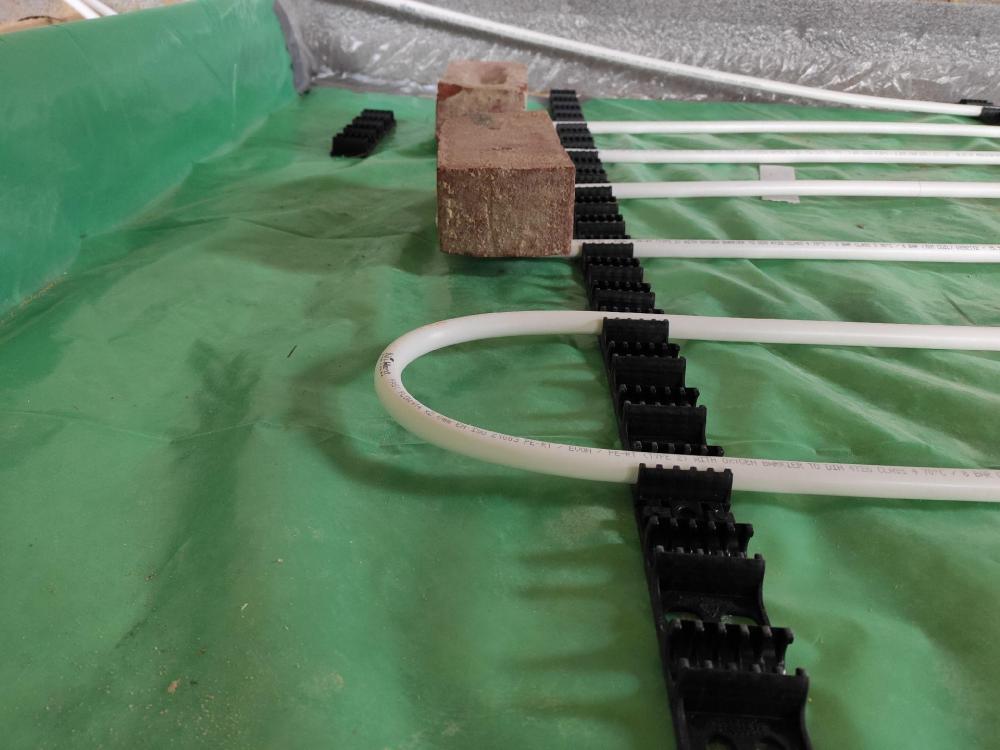
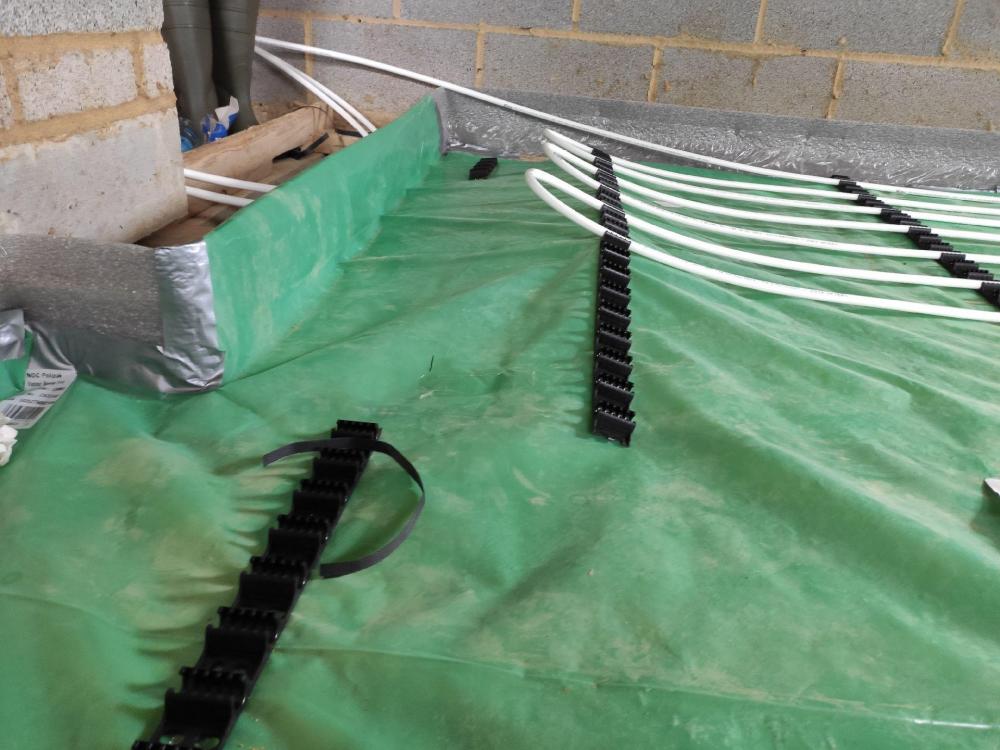
This is looking promising. I weighed down the closest pipe with a brick overnight. I may also try a heat gun at around 100C (testing on membrane scraps first)
-
Would be OK upstairs but not with the gas barrier
-
I was pleased to get the keep outs, edge strip and membrane down But unfortunately the UFH pipes are pulling up Any ideas as to how to solve this? I can't use anything that penetrates the green sheeting. It's not insulation underneath, it's concrete and, on ground floor, a gas membrane too.
-
I think you'd be lighter after releasing it as it is under pressure inside you and so more dense than the air your extra volume would displace. If you were underwater though, you would become less buoyant after releasing it.
-
Rats, I think I should have done the perimeter strip before the membrane
-
Interesting talking to one screed supplier who said liquid screeds can react with concrete, so definitely need the membrane. She also said that liquid DMs are not suitable. I had read before that screeds can react with aluminium (e.g. on insulation) and know that wet cement does too. I recall reading about an unfortunate prototype aluminium cement mixer. Looks like I have to carry on with the vapour barrier. I'd bought some spray adhesive in case I wanted to bond the membrane down against gusts of wind etc. I haven't used any of that yet though.
-
On the ground floor I have a gas membrane over the top of concrete and on the first floor I have hollowcore concrete planks as the floor. On both levels I'm going to have 40-50mm liquid screed with UFH in. I've started putting down 125um polythene* and it feels pretty pointless. Downstairs there is already an impermeable membrane. I'll discuss this with the screed guys and see what they think. Upstairs is different, but still feels like there could be something better. I don't have insulation on top of the concrete (GF it's below the 50mm concrete, FF don't want it as not worried about responsiveness). On the first floor, the hollowcore (HCF) is largely 'waterproof' with a few scattered holes. What have others done here. It's impossible to not have some voids under the membrane and it feels unnecessary. It occurs to me I could do some of the following as an alternative to membrane: Paint some form of sealant on the floor and add edge strip Apply a thin layer of self levelling compound (1-3mm) to form a seal and add edge strip Just fill any holes that would leak and add edge strip All would give a more intimate connection between the HCF and screed as well as being much faster than membrane. * https://www.toolstation.com/green-vapour-barrier-125mu/p86538
-
I did wonder about that, but when the roofers fitted a tile vent it took me a while to notice it
-
Bit of a tangent, but what do people think of roof mounted vs wall mounted bathroom extractors? I don't have MVHR.
-
I did ask before if I could jus have an AAV and he said at least one SVP needed although it's a single house and package sewage treatment plant situation
-
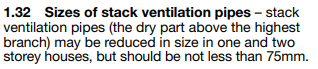
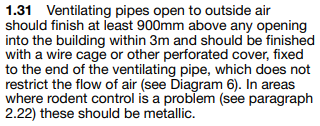
I'm sure a 15mm pipe would work by 75mm is the reg. (copied in my previous post).
-
For reference, I thought I'd add some extracts from Part H:
-
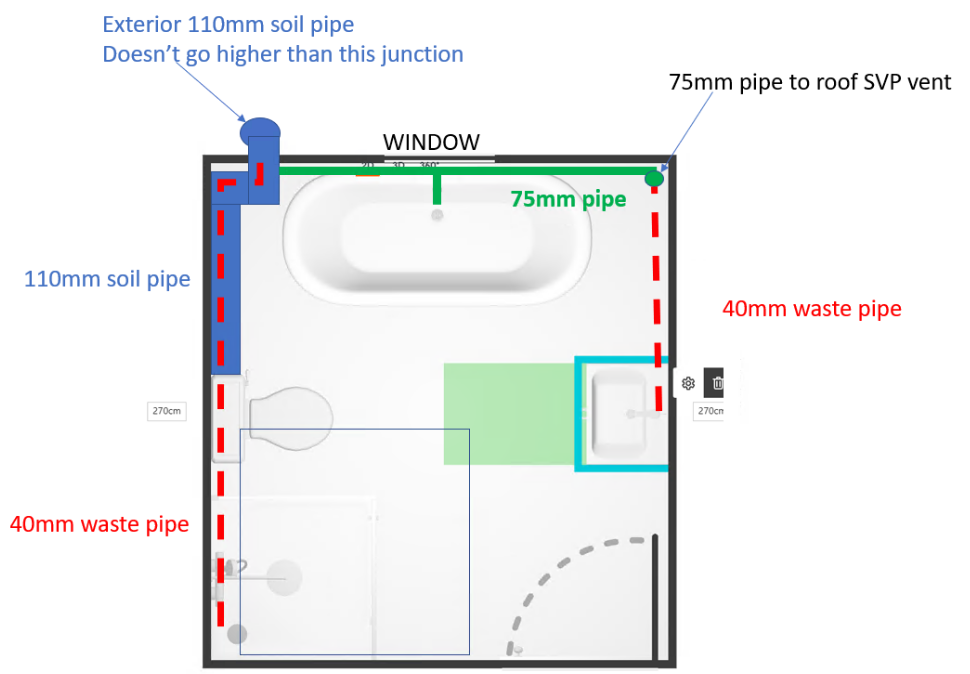
Which route would you take? OK not you yourself, but which route would you let the foul smells take. The Architects plan was to send the soil pipe down through the floor in the right hand corner of the bathroom (as viewed below) but we not have open space below now so don't want to put it there. As it's now going externally, we moved it close to the side of the chimney to reduce its visual impact, and that position is shown below. This is the furthest extent of the foul water system and so needs an SVP (not just AAV). We don't want to continue the stack outside and offset round the eave. We don't want the vent tile too close to the chimney so it likely needs to be towards the top right corner of the image below. I see two main options: Route the main stack to SVP tile vent connection as shown below. 75mm horizontal run at floor level junctioning to a 75mm vertical run up to the vent. Route a vertical run of pipe (e.g. 75mm) up the top left corner of the image below and the turn horizontally in the roof space track along and the back to vertical above the right hand corner and to the vent tile.
-
Interesting to see how these sorts of things are done in other countries. They made the hourdi blocks onsite. https://youtu.be/lF7aSes4gcU
-
An alternative shutter approach is to use some short lengths of narrow rebar, some wire and some OSB3 strip (about 150mm wider than gap. Pass a loop of wire through the gap and round the OSB. Secure the wire tight to the rebar on top of the planks. Do this at each end of the OSB. Then fill the created pocket with a cement ballast mix. Guess you could use timber rather than rebar if you the cut the wire later. Otherwise you can just leave the rebar in place
-
Sink, bath and shower wastes in concrete floor
MortarThePoint replied to Triassic's topic in Waste & Sewerage
Yes, but was this because of using a concrete pour rather than a screed? -
Sink, bath and shower wastes in concrete floor
MortarThePoint replied to Triassic's topic in Waste & Sewerage
Cool shower waste. You did go for UFH under the shower. Was you floor concrete with rebar? -
Sink, bath and shower wastes in concrete floor
MortarThePoint replied to Triassic's topic in Waste & Sewerage
I don't know why but I had presumed the UFH would not extend under the shower. I'm not sure I'll do it. Other than your good point about the trap, I can't think of any pros or cons as the shower water will be hot. -
Sink, bath and shower wastes in concrete floor
MortarThePoint replied to Triassic's topic in Waste & Sewerage
Is it standard to have UFH under shower trays? -
Looks the part. At £5/m2+VAT I'd rather DITRA though even if it's a little more expensive.