Onoff
-
Posts
21125 -
Joined
-
Last visited
-
Days Won
206
Everything posted by Onoff
-
 O/S MK2 Capri door, 28" CRT telly, soldering iron burns on the carpet etc.
 -
Indeed, Merry Christmas! Doing my best to support local business:

-
It's actually a UC 😂 Flanges are 11mm thick and the web 7.3mm. 9" grinder with 2mm discs all day long.
-
Where abouts in the country are you?
-
Tight git! Around a tenner on eBay. https://www.ebay.co.uk/itm/265214398973?
-
Other side of the coin, same coin. Good insulation works to keep heat in as well as out. If you've an already cold room that's well insulated it'll stay cold. Put some heat in there and it should warm up quicker and lose heat slower than an uninsulated room.
-
The pub is the same. Solid flint walls about 500mm thick. Always cool in the Summer.
-
Yes. In particular the most insulated rooms feel much colder in Summer. It's a pretty good indicator of the value of insulation, it works both ways. The study is insulated, walls, floor and ceilings. It has one small radiator. It is the warmest room in the house. However it has just an open doorway/arch so your feet can feel cold due to the draughts. We've put a curtain across it. It often gets too warm. The "new" bathroom is cool in Summer and near freezing in Winter. Biggest issue is I've multiple ceiling penetrations. When they are sorted, even without heating I have high hopes for it being much better as it'll be a near airtight, insulated envelope around it.
-
Well at least starting...but yes.
-
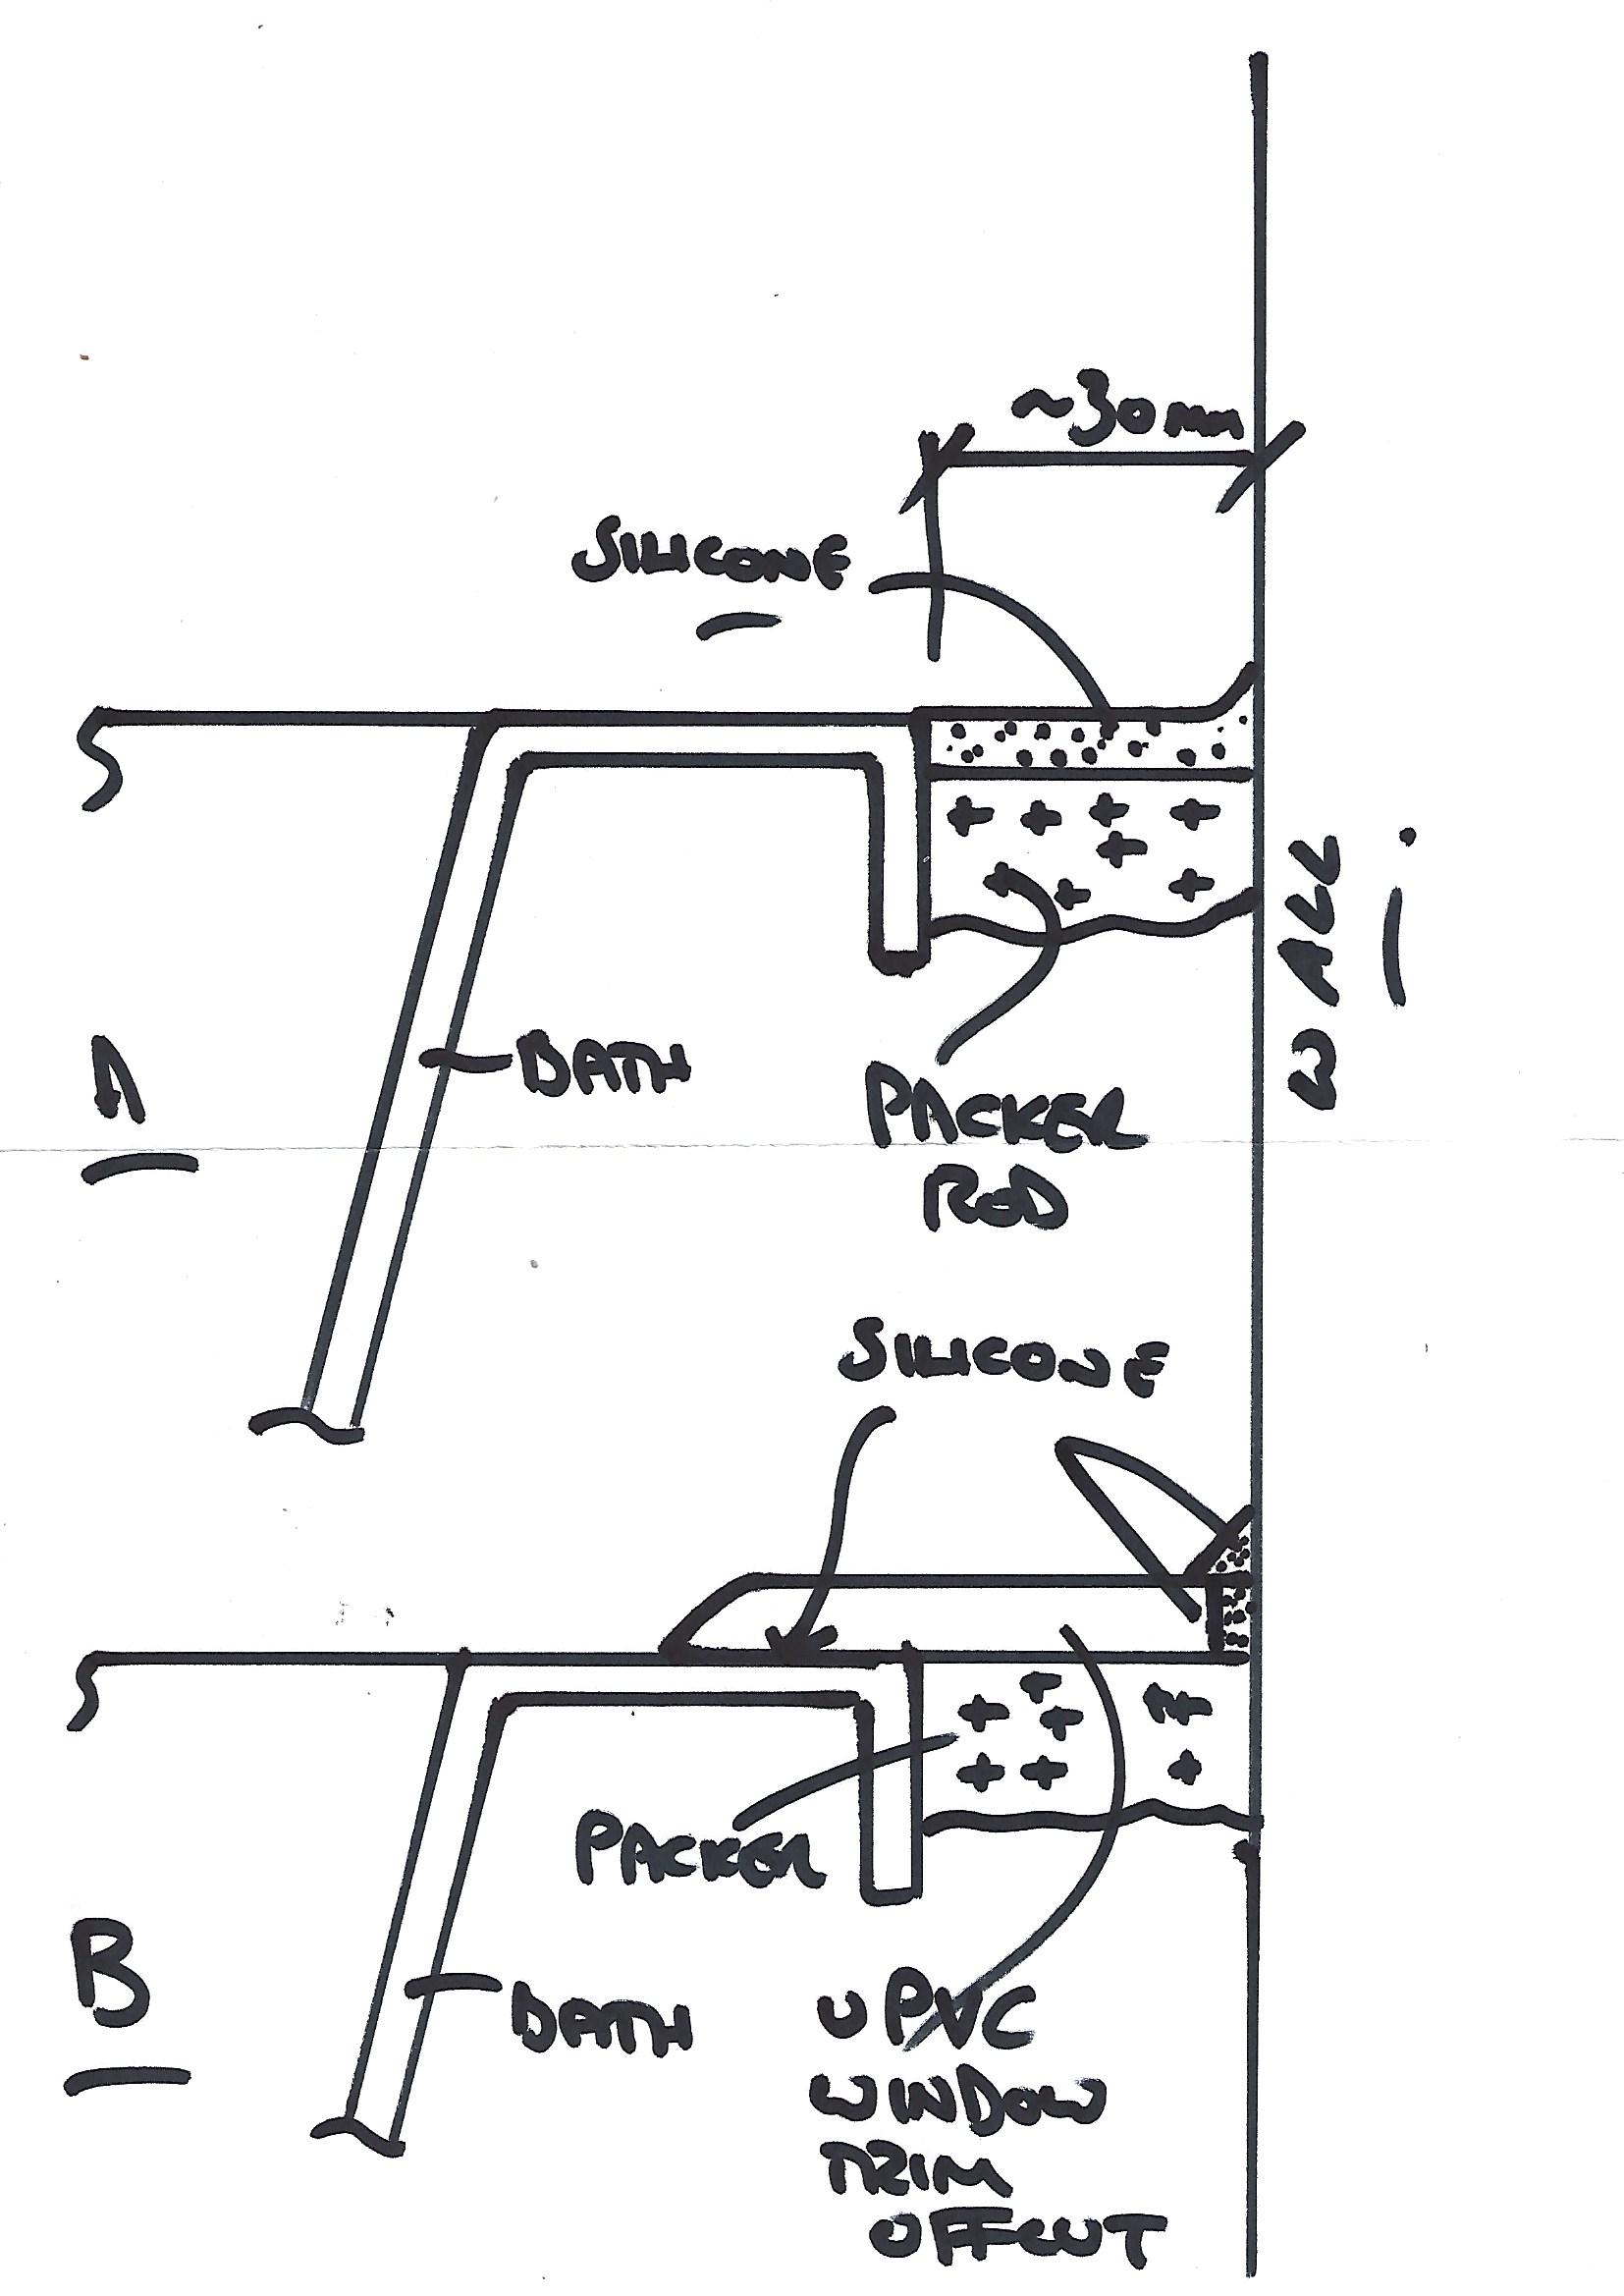
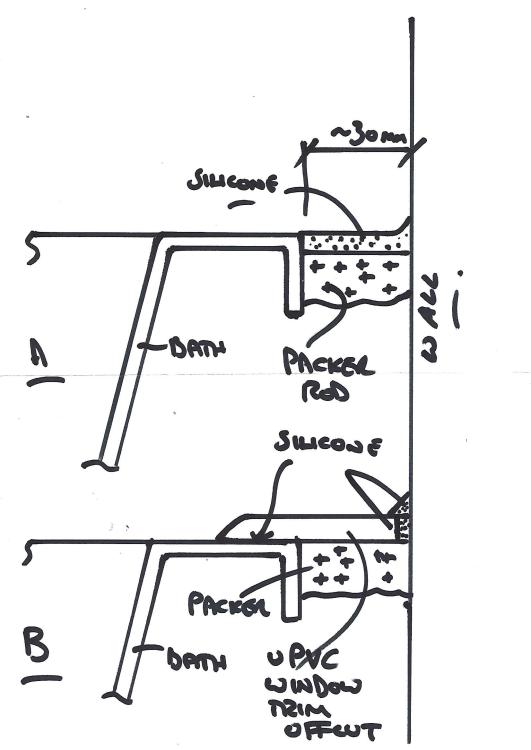
You can just cut ordinary grey pipe insulation to shape with a box cutter, like I did. Cut it square, triangular, whatever. "Packer rod" is used to give some insulation to a gap as well as stopping you pumping copious amounts of silicone (or foam) into the void behind the gap aka under the bath in your case. In my case I used it to make cavity closers that conformed to the shape of the cavity around the window. Cut in half / pushed in: Foamed over with Illbrück FM330: Cut flush:
-
Would it be less mess to take the tiles off and insulate from outside?
-
The increase in floor area is I reckon, approx 30m2 by bringing the dormers out front and rear. Doesn't sound a lot but will massively improve the "liveability" of upstairs. That plus an increase in loft space volume going from hip to gable ends.
-
Sorry, GIA?
-
I see massive, silcone beads on site. Like 50mm wide. Have you got any upvc window trim left over? If so go B) below. The packer rod will help support it whilst it sets. Cut the plastic trim to suit, nice rounded edge towards the bath 1/2 fill the bath with water or more if you're a FC. Fit the packer rod - it'll help support the plastic whilst the silicone sets and stop it from sagging Clean the bath edge and trim with Multisolve Run a line of silicone along the bath edge Run a line of silicone along the back of the plastic trim Push the plastic trim down onto the bath and against the wall Wipe off the excess with a baby wipe. Tbh a Fugi Cramer kit here would help remove most of the excess and cleanly too There is zero need for "soapy water" or a British Standard wet finger. When set run a decent bead against the wall You could use BT1 for both the sticking down and finishing bead.
-
Do I need to worry about CIL on such a project?
-
https://matadornetwork.com/abroad/15-slang-phrases-youll-need-know-cornwall/
-
I presume it's a fire safety consideration. If there's a fire in the bedroom with the access to the stairs then trying to traverse that from the other bedroom could be an issue. I'm guessing of course. If the guy reckons it's a possible lever to pp I'll use it.
-
It potentially is under Part B I think.
-
Let's see what happens.
-
I could have told you this would happen some day....
Onoff replied to ProDave's topic in General Alternative Energy Issues
If we tow their line they will. I believe pre the Ukrainian thing Belarus paid something like 6x less to Russia for energy than less subservient neighbours. A document from a while back: bp0501gas.pdf -
Well the architect has come back with his fee for surveying, preparing planning drawings along with his input & assistance as it's AONB etc. The fact the place is badly insulated, the roof in a poor state of repair etc can play into it. That along with the fact you have to cross one bedroom to reach another is apparently a health and safety issue. He reckons what we want are minor alterations but our LA is notoriously funny. Fingers crossed.
-
Cast a concrete ring beam, 40mm high?
-
Yes, my brother has one. Uses it primarily for making stencils for copper etching.
-
I while back I bought a K40 CO2 laser. Yet to set it up, its massive for a start and I need a decent dry workshop etc. (Tbh by the time I get around to it the tube will likely have degraded and I'll need to replace it). Meanwhile...it's my lad's birthday today. Got him a few bits but nothing memorable. A few years ago I got him the 3D printer. Best present ever tbh. He's learnt loads, improved his CAD and coding skills and even made a few quid printing prototypes and replacement parts. With his birthday and Christmas do close together it's always a mission what to buy him. Too late for his birthday but I've been considering a 2 in 1 milling machine / laser engraver. Something like this: https://www.amazon.co.uk/Engraving-Machine-Control-Engraver-300x180x45mm/dp/B089GW19XD/ref=asc_df_B089GW19XD/? Any thoughts? (Or where to get cheaper 😂).
-
Near Disaster Avoided kit : what's in yours ?
Onoff replied to ToughButterCup's topic in General Self Build & DIY Discussion
Ah yes, because madcap ideas will save me come the Apocalypse! I can only hope the zombie hordes are delayed by tripping over all the unfinished projects.