Onoff
-
Posts
21125 -
Joined
-
Last visited
-
Days Won
206
Everything posted by Onoff
-
Google "Appendix 15 of BS7671".
-

Recommendations for good landscaping rake
Onoff replied to machtucker's topic in Landscaping, Decking & Patios
About 30 degrees... -
Super quick this X1C!
-
You don't often see / hear anyone refer to an MCBO...miniature circuit breaker with overload? Tautology methinks! Changing to "Consumer Units, RCDs, MCBs & RCBOs" would be better.
-
More foundation fun - straw bale garden room on clay
Onoff replied to Nick Thomas's topic in Foundations
About 21 feet each then, that's wide! -
Bet you've never said that before!
-
Whoops...Bambu have a sale on. X1C incoming.
-
A wrap of Denso tape move on.
-
Fitting a long steel in a short hole...
Onoff replied to Del-inquent's topic in Lofts, Dormers & Loft Conversions
Take the ceilings down downstairs. Make a hole in the eaves, slip the steel in and support from underneath as you go. -
3D print in ABS. You could likely get away without any support if you kept all the angles above 45deg. Solvent weld should work on it. A little Y piece I did for my gate conduits. https://flic.kr/p/2mmDsvX
-
More foundation fun - straw bale garden room on clay
Onoff replied to Nick Thomas's topic in Foundations
As great as it is, I thought there were rules about how close to a boundary you could build a flammable structure? Is it the case that once lime rendered it sorts it? -
My restricted water supply ...
Onoff replied to Ferdinand's topic in General Self Build & DIY Discussion
At one point we had two water meters. We had a water meter already, inside our boundary fence. Other properties didn't as our plot was originally part of a bigger small holding. They wrote to everyone including us saying they would be fitting meters. We wrote and said we already have one. I came home and found they'd fitted another at the roadside. It got very confusing bill wise. Any way, the original meter: Then after me having got them to remove it. Looks very similar to what you have now: -
More foundation fun - straw bale garden room on clay
Onoff replied to Nick Thomas's topic in Foundations
Is it thatched places have to be wired in pyro...or was that churches...? -
More foundation fun - straw bale garden room on clay
Onoff replied to Nick Thomas's topic in Foundations
Maybe I missed it but what's the plan for lights and power? -
You sometimes see discoloration & rusting on stainless steel around welds.
-
Lad up the pub is always lamenting you never see it in the UK anymore: Need to come up with a witty comment to write on the back. He's a raconteur & prolific teller of tall stories. If I leave it a couple of weeks it'll be "Steve, Happy 4th July!" Or maybe "Remember the good old days?"
-
3 coats of Satin Black Bedec Barn Paint on my new/second, scaffold board gates. Paint still looks like new.
-
Black Jack.
-
Discount Offers of the Week
Onoff replied to Ferdinand's topic in General Self Build & DIY Discussion
Lidl. "Mmmmm".....wasnt my first thought.....
-
More foundation fun - straw bale garden room on clay
Onoff replied to Nick Thomas's topic in Foundations
Chat up line? -
@onoff’s been on the silicone again
Onoff replied to Pocster's topic in General Self Build & DIY Discussion
He had been for an Indian and been served by a robot waiter. -
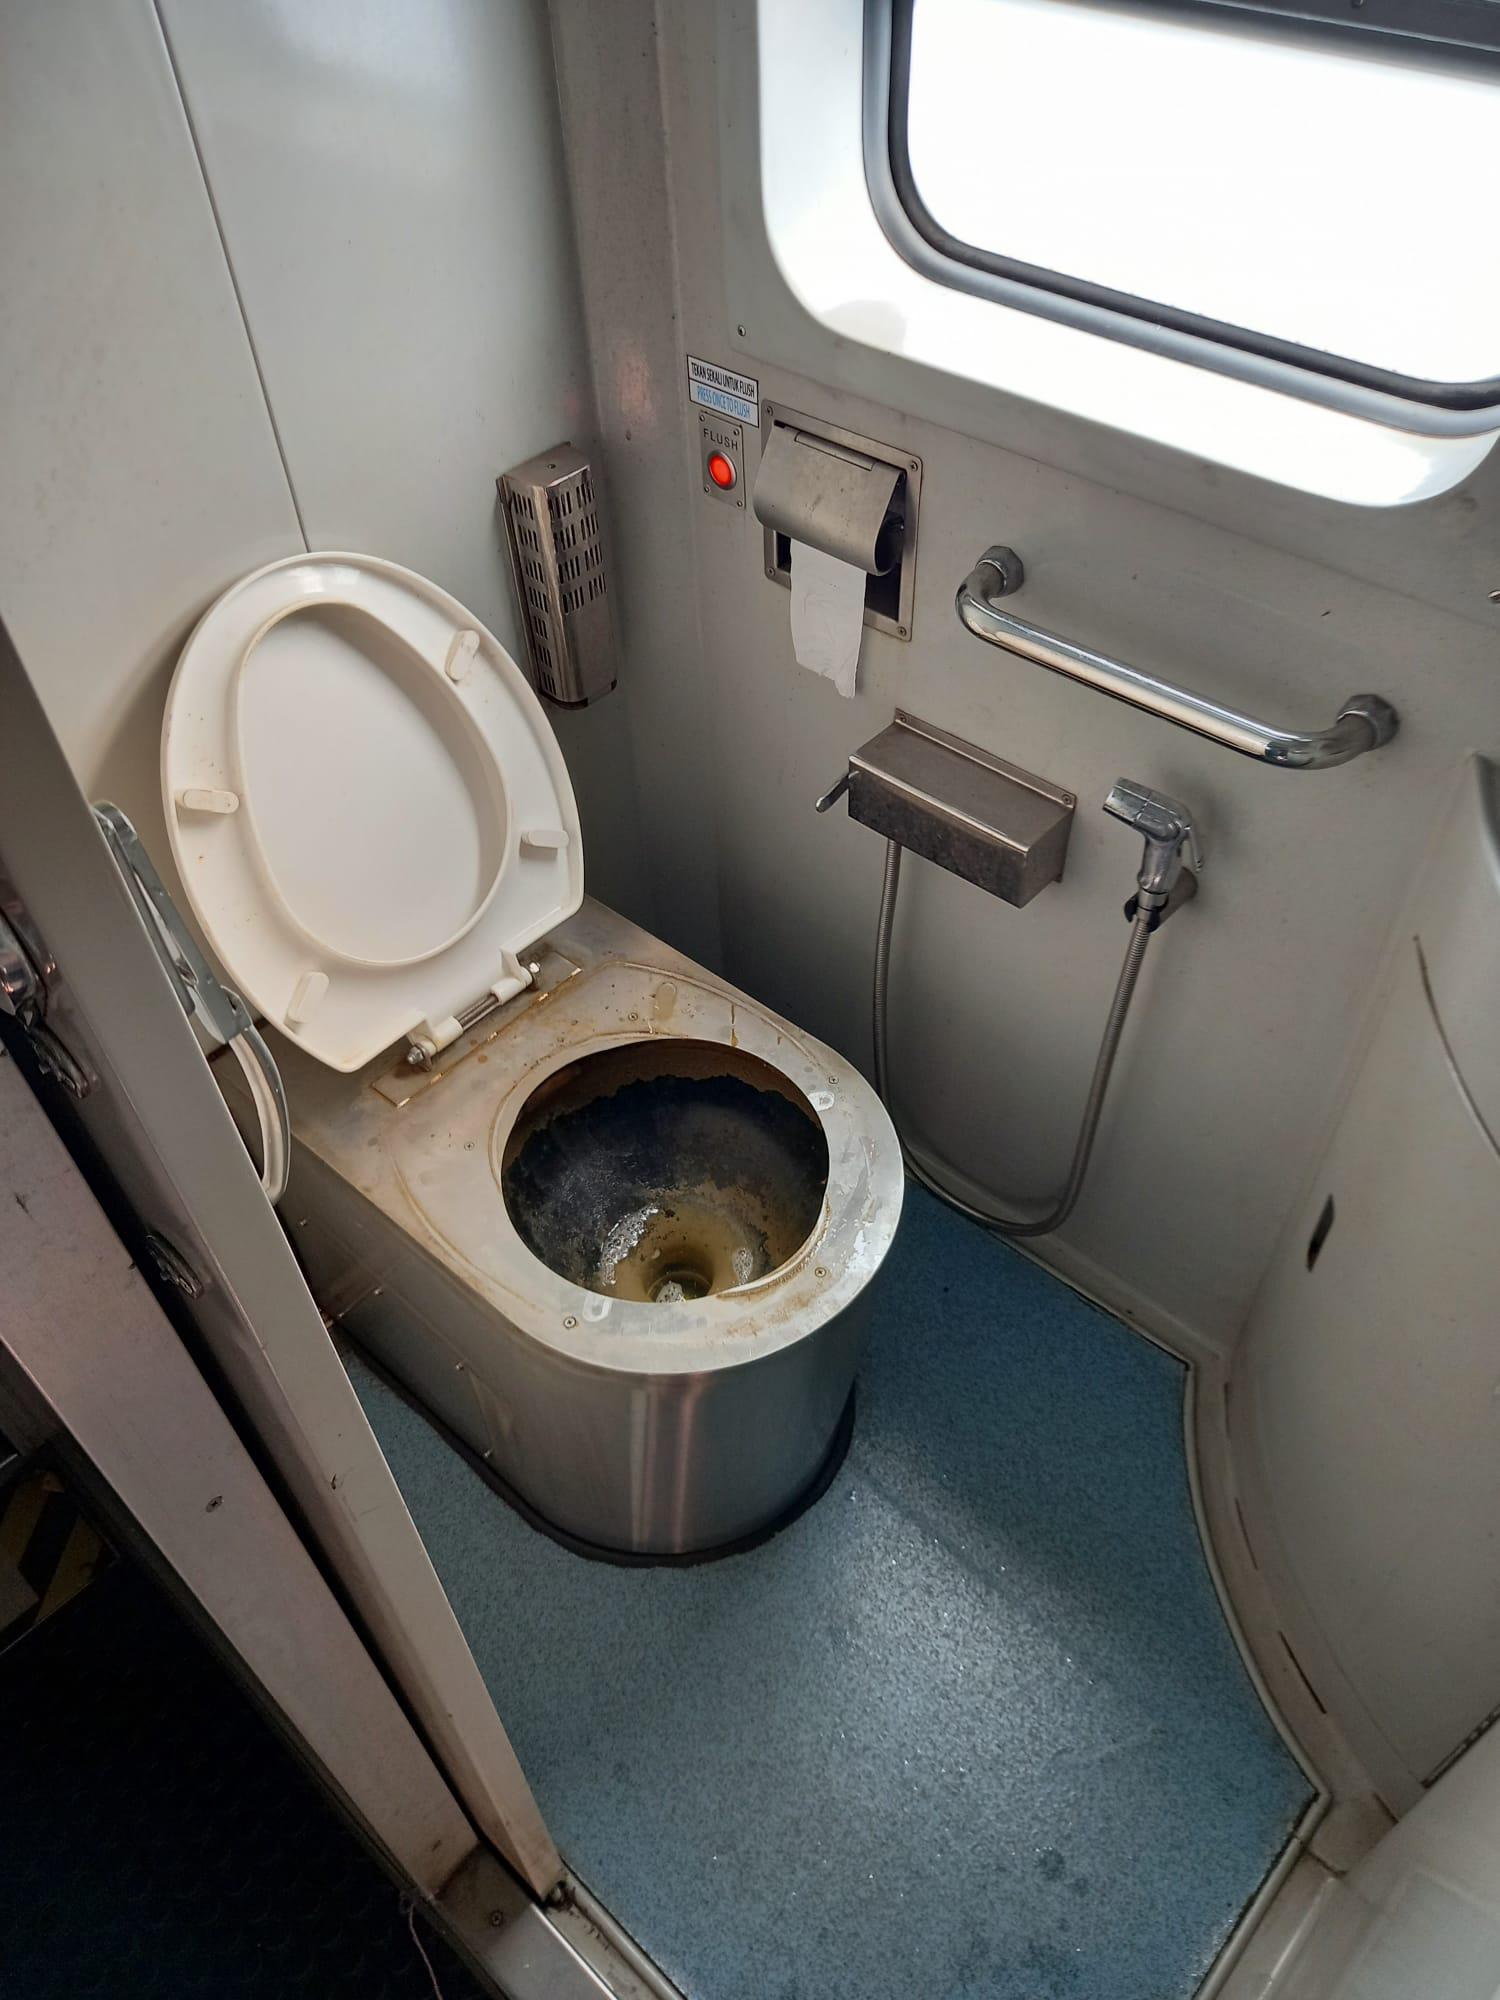
@onoff’s been on the silicone again
Onoff replied to Pocster's topic in General Self Build & DIY Discussion
My mate's on a train in Malaysia:
-
Any links to a good, cheap MVHR unit that would do the one bathroom? Room volume nom 9m3.
-
Not easy. To get a duct to the other side of the kitchen would mean clearing an upstairs bedroom, carpets up etc. Possibly an option for later though. Would have to drill though the wall where the copper pipes go through. Not sure on joist levels etc. Would my idea of the fresh air duct just outside the bathroom work?
-
Still got to do this so thinking on options and tbh ease of install and maybe future planning: Option 1: Simple extractor fan. place directly above the shower end of the bath here (Zone 2): Duct through the wall: To vent here: Or ducted to a tile vent: With the above, potentially no drilling. No MVHR though. Option 2: Vent Axia Lo Carbon MVHR unit, 12V: Mounted here, again in Zone 2: Ducted through the wall to here: Thinking the heat recovery aspect and bringing fresh air in would be good. Or a combination of the above, or something else...no drilling is appealing. How about. A "proper" MVHR up in the loft space. Fresh air intake and warm, wet extract tile vents on the roof, one each end. Warm, wet intake in the bathroom, same place, above the shower. Fresh air ducted into the lobby ceiling just outside the bathroom? Would I need to insulate any ducts?