Onoff
-
Posts
21125 -
Joined
-
Last visited
-
Days Won
206
Everything posted by Onoff
-

Another year...another room
Onoff commented on MikeGrahamT21's blog entry in Back on the self-build waggon...
Presume you'll be getting a new telly? Won't that one on the wall be full of dust and soot? -
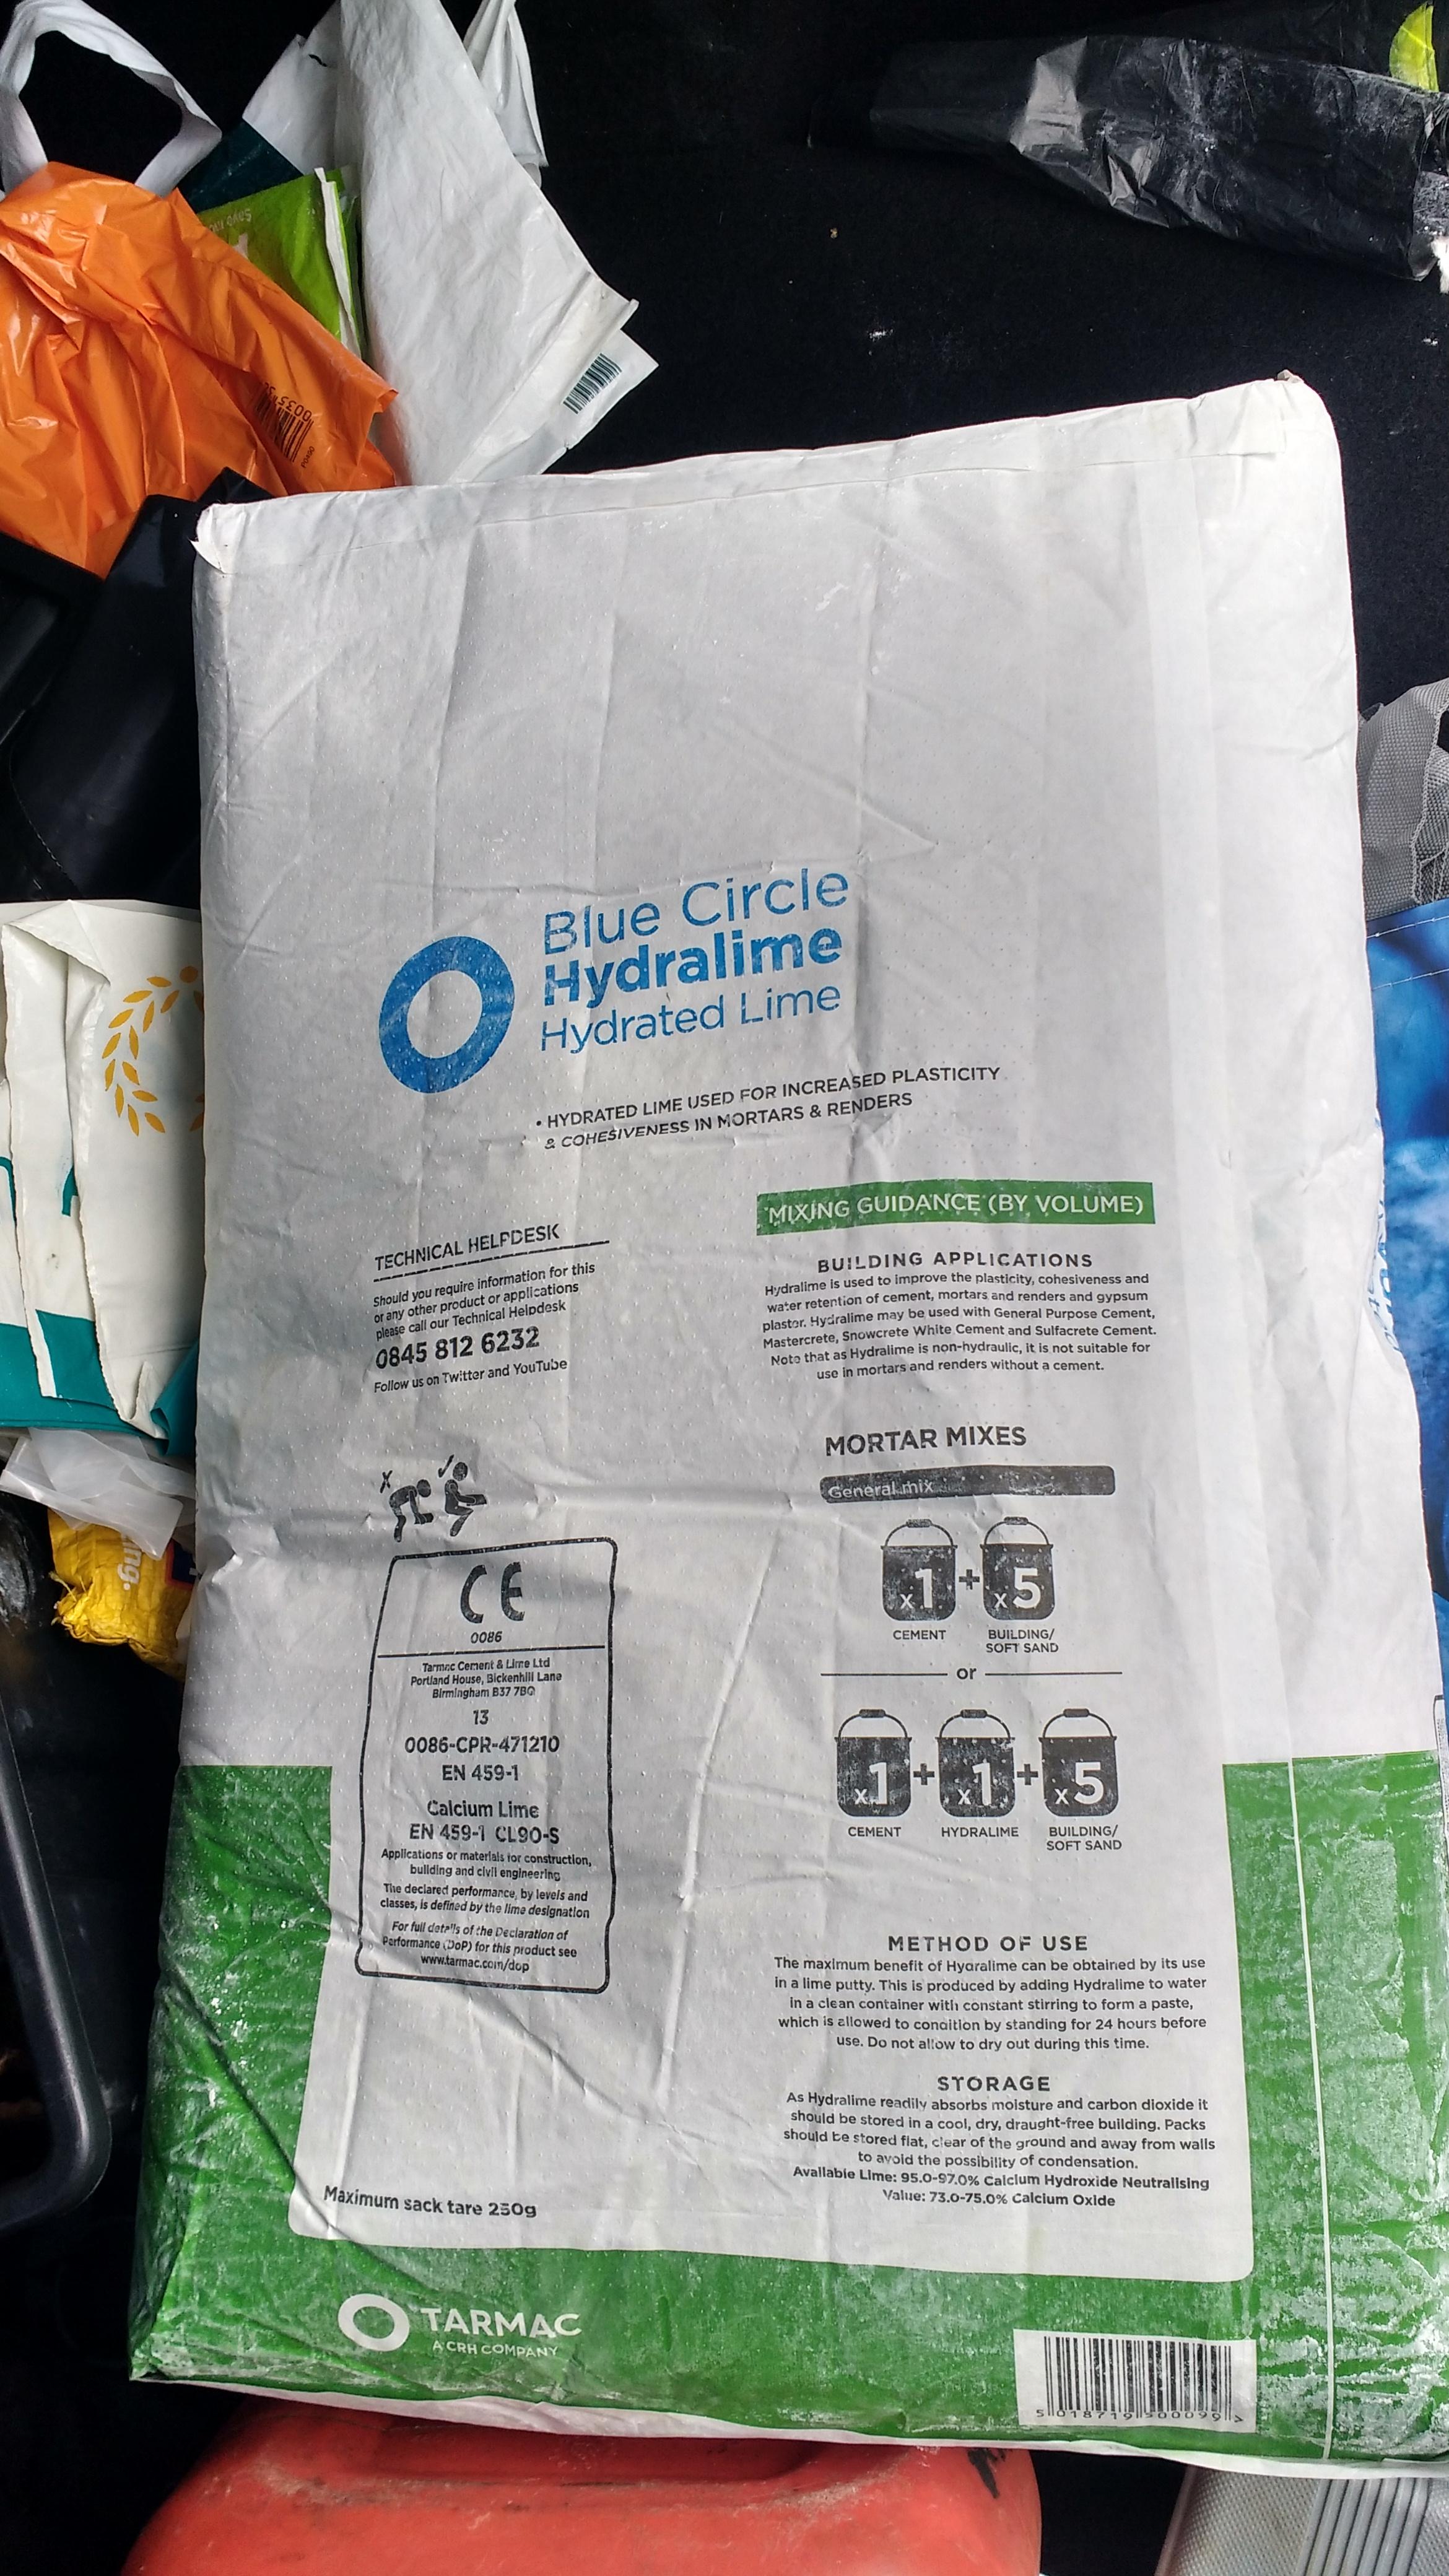
@Stewpot as I understand it, with the hydrated lime I have here then that's calcium hydroxide. It will, over time turn back into calcium carbonate aka limestone?
-
Here's a mad thought... Time and techniques have moved ever onward. The issue with using normal cement mortar is one of shrinkage around the flints, frost action and cracking. Could I perhaps lay them in the same 4:1 mortar mix I used for the pillars then when cured just spray them with a water seal like Thompsons or Permagard?
-
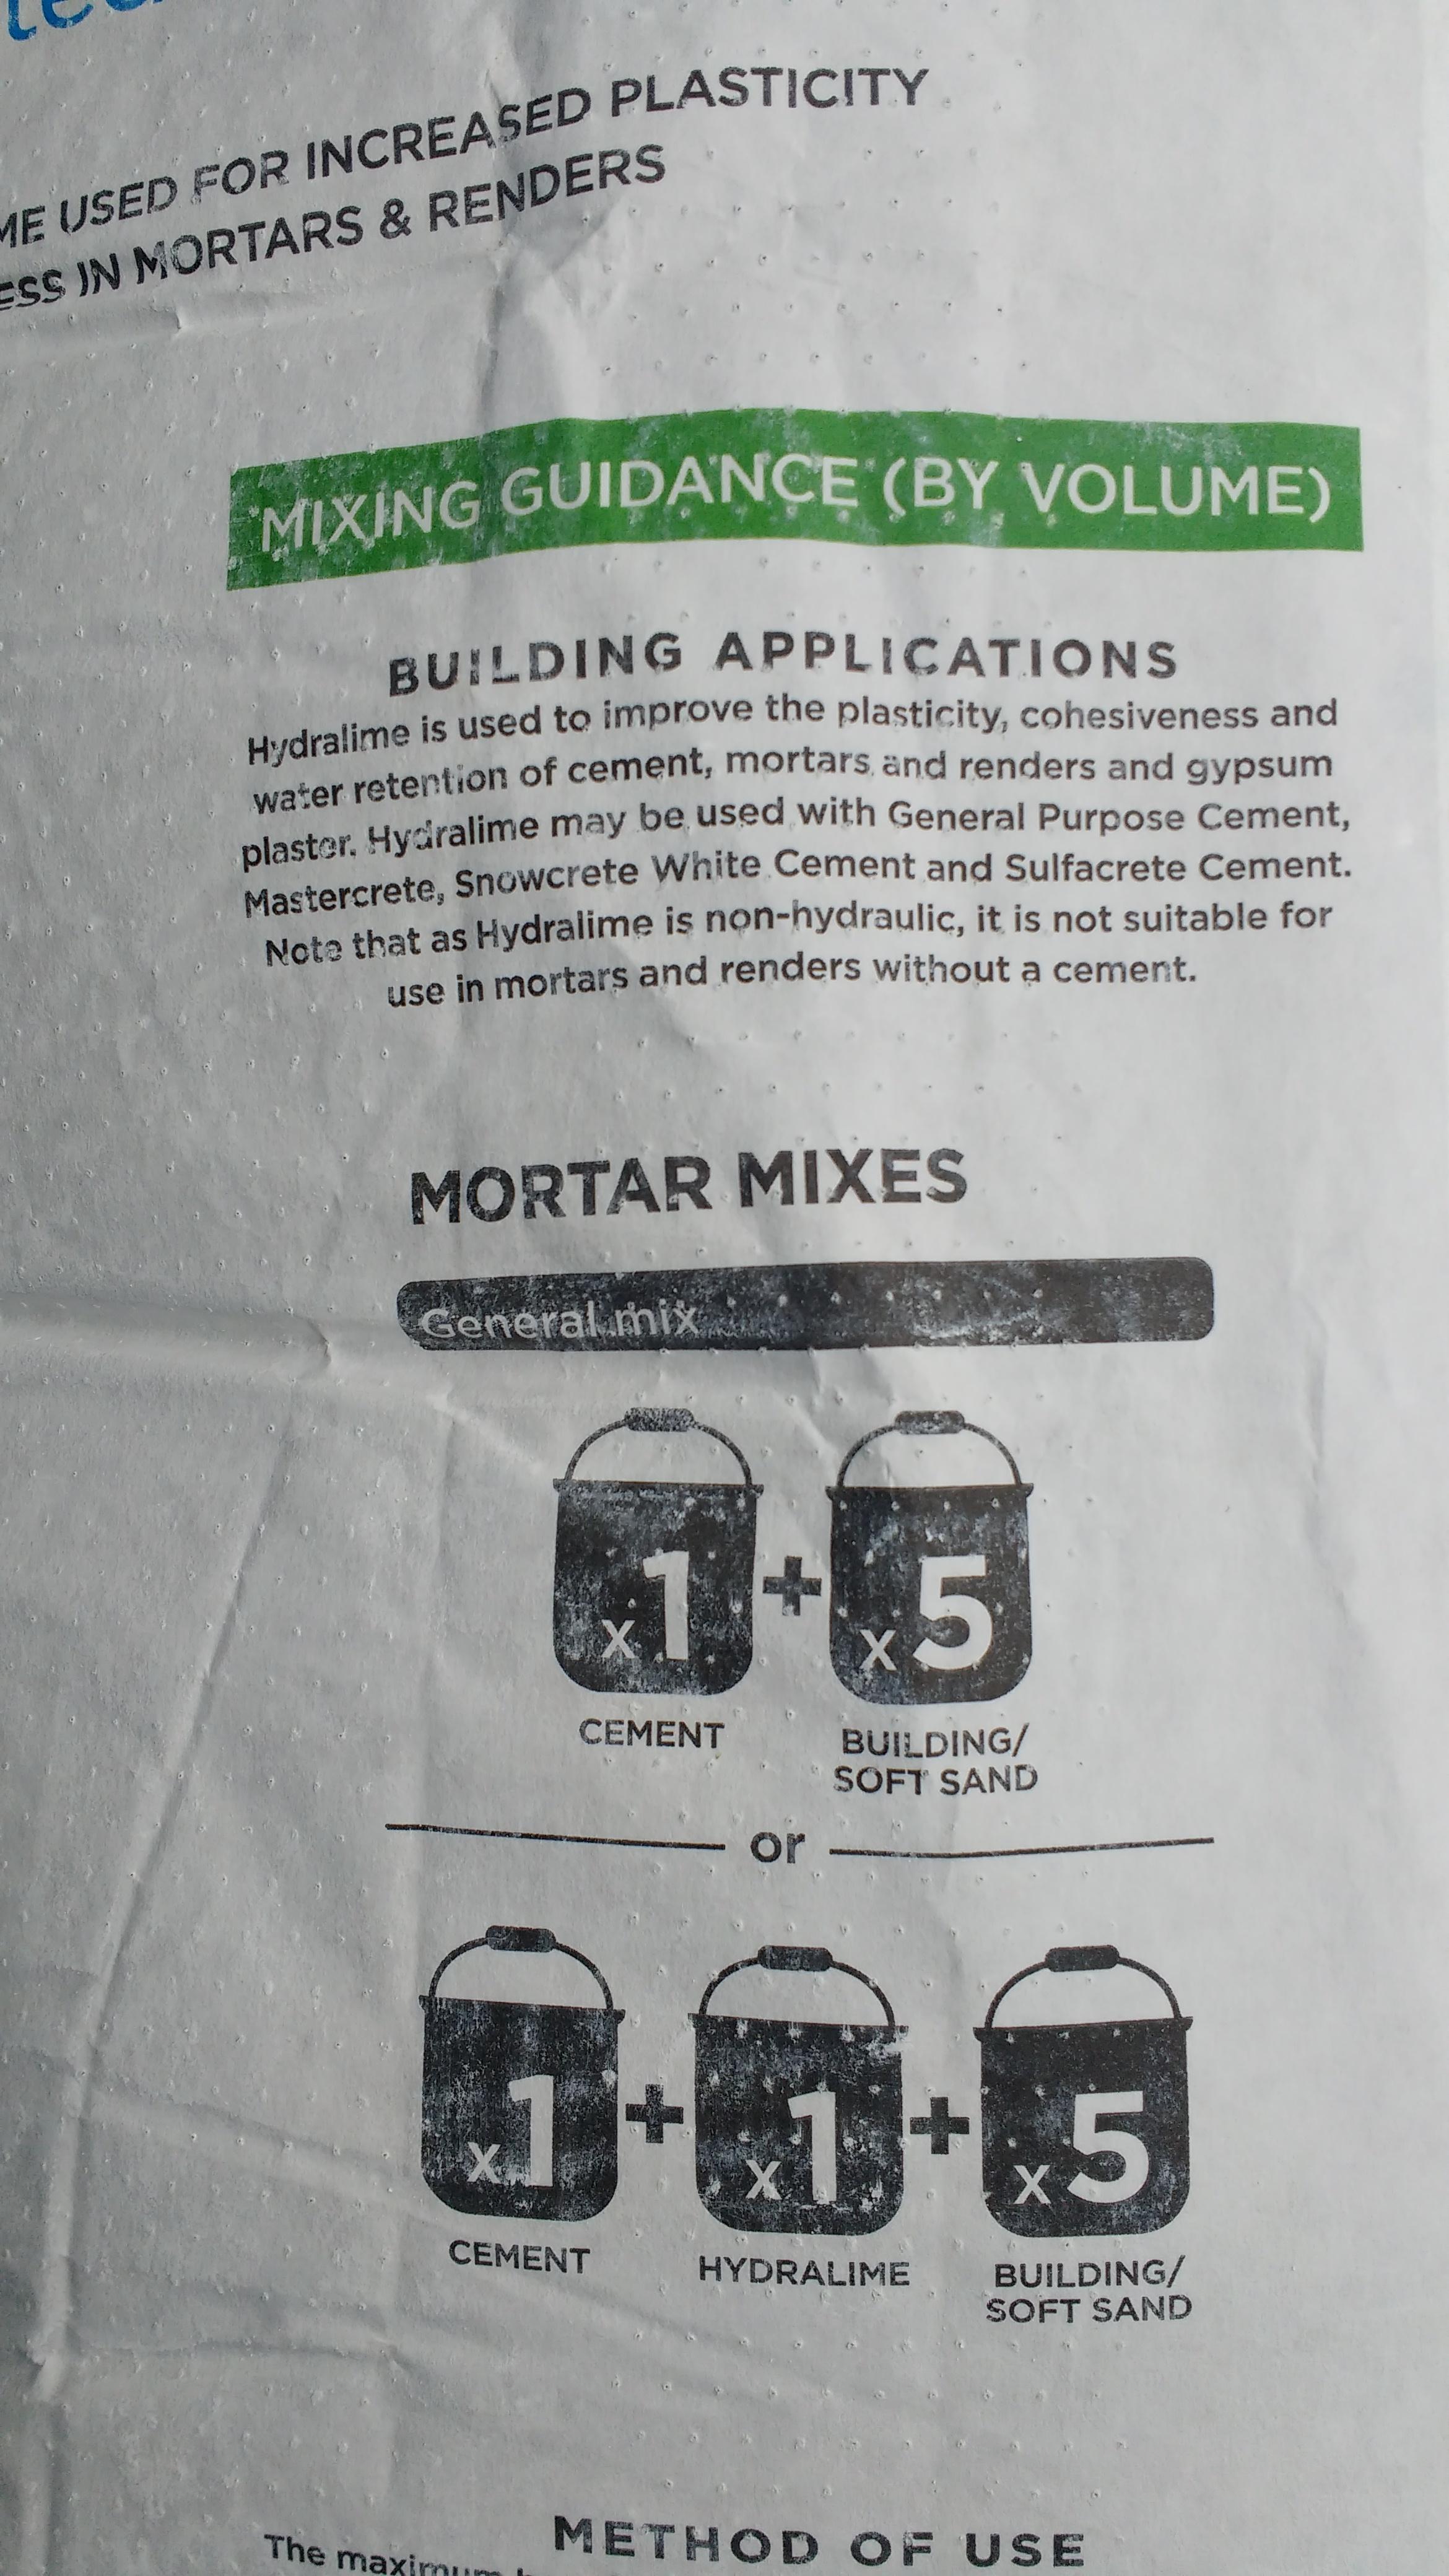
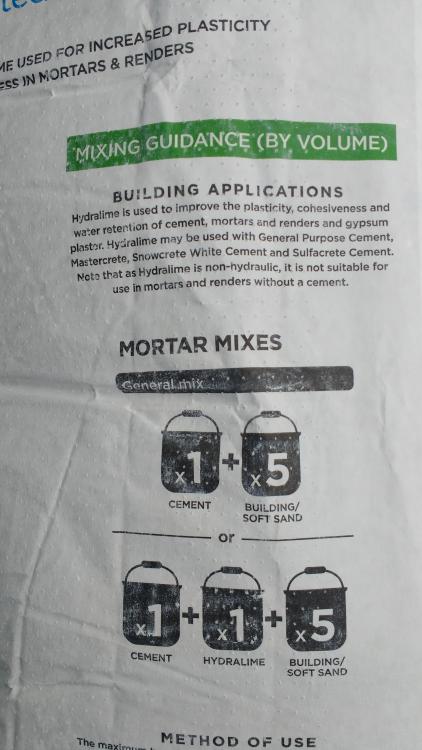
I have seen that before thanks. It would mean changing to natural hydraulic lime and binning the hydrated I have here. I see Lawsons builders merchants near me do it. Certainly not cheap down this way! https://www.lawsons.co.uk/search?q=Hydraulic lime I'm shortly going to knock up a test of: 4 sharp 2 soft (orange builders) 1 lime (hydrated) 1 opc ...and see what that looks like. I am concerned I won't be able to get the demarcation between brickwork and flint panels neat hence back to thinking about a trim.
-
I quite like the complexity of this mix suggested on another forum: "When doing flint work I use 4 sharp sand, 2 soft washed(building sand), 1 lime and 1 white cement".
-
Dunno, back to the potential shrinkage/frost pocket worry. So many options. Got myself in a bit of a pickle, a... ...you might say!

-
Tack some 50x6 ply strips over that bottom OSB up the line of the trusses? If that OSB is just to hide the battens/felt, then cut pieces that sit between the truss ends rather than on them? You'd need a little batten either side flush with the truss tops then screw the infill up to them. Overall though I'd agree, OSB the lot and counterbatten. I'm in the SE too btw. Has other benefits, felt sag allows vermin in. Ask me how I know! ?
-
I'm coming round to the idea, I can keep the new bag of lime for getting for getting rid of the body... ? The one thing I will say about these sand/lime mixes only is they seem to be getting harder by the day. Is it something to do with them absorbing atmospheric CO2 and eventually reverting to limestone? Video of the 2 sharp / 1 lime sample: Then the 1.5 sharp / 0.5 soft / 1 lime: As I understand the method of laying flints I need to place a board against the wall then hold the flints tight against the board and infill from behind. Quite how that'll turn out when I remove the board I don't know as I'm guessing an opc mortar might dry quicker. Maybe there's an optimum for removing the board with slump and still being able to tidy round the flints. Yet again, soft sand or sharp if I go with opc and no lime? Aiming to start tomorrow whatever and hope!
-
Bonkers idea or a great idea?
Onoff replied to canalsiderenovation's topic in Landscaping, Decking & Patios
Gotcha! It did look "sprayed" around the plates etc. Würth Zinc Light is an excellent "silver" cold galvanising paint. For a darker zinc then their Zinc Dark. The term "cold galvanising" is a bit misleading tbh - they all come in a can but some are better than others. Zinga is very good. Galvafroid is the old favourite. -
Bonkers idea or a great idea?
Onoff replied to canalsiderenovation's topic in Landscaping, Decking & Patios
If it doesn't kill you! -
Bonkers idea or a great idea?
Onoff replied to canalsiderenovation's topic in Landscaping, Decking & Patios
I've watched a jack burrow through a bag of feed to get to the rat's nest behind. -
Bonkers idea or a great idea?
Onoff replied to canalsiderenovation's topic in Landscaping, Decking & Patios
Bin store is another thing I've seen pallets used for..... -
So the trespassers don't get offended? ?
-
Bonkers idea or a great idea?
Onoff replied to canalsiderenovation's topic in Landscaping, Decking & Patios
Like getting an answer from SWMBO! ? Did he buy the lengths of steel "mill finish", weld them together then get the whole assembly galvanised at a place that specialises in hot dip galvanising? Did he weld on plain finish mesh and send the whole lot to the galvanisers or did he get the galv frame back etc? Is your Dad on here, can I ask him??? ?? -
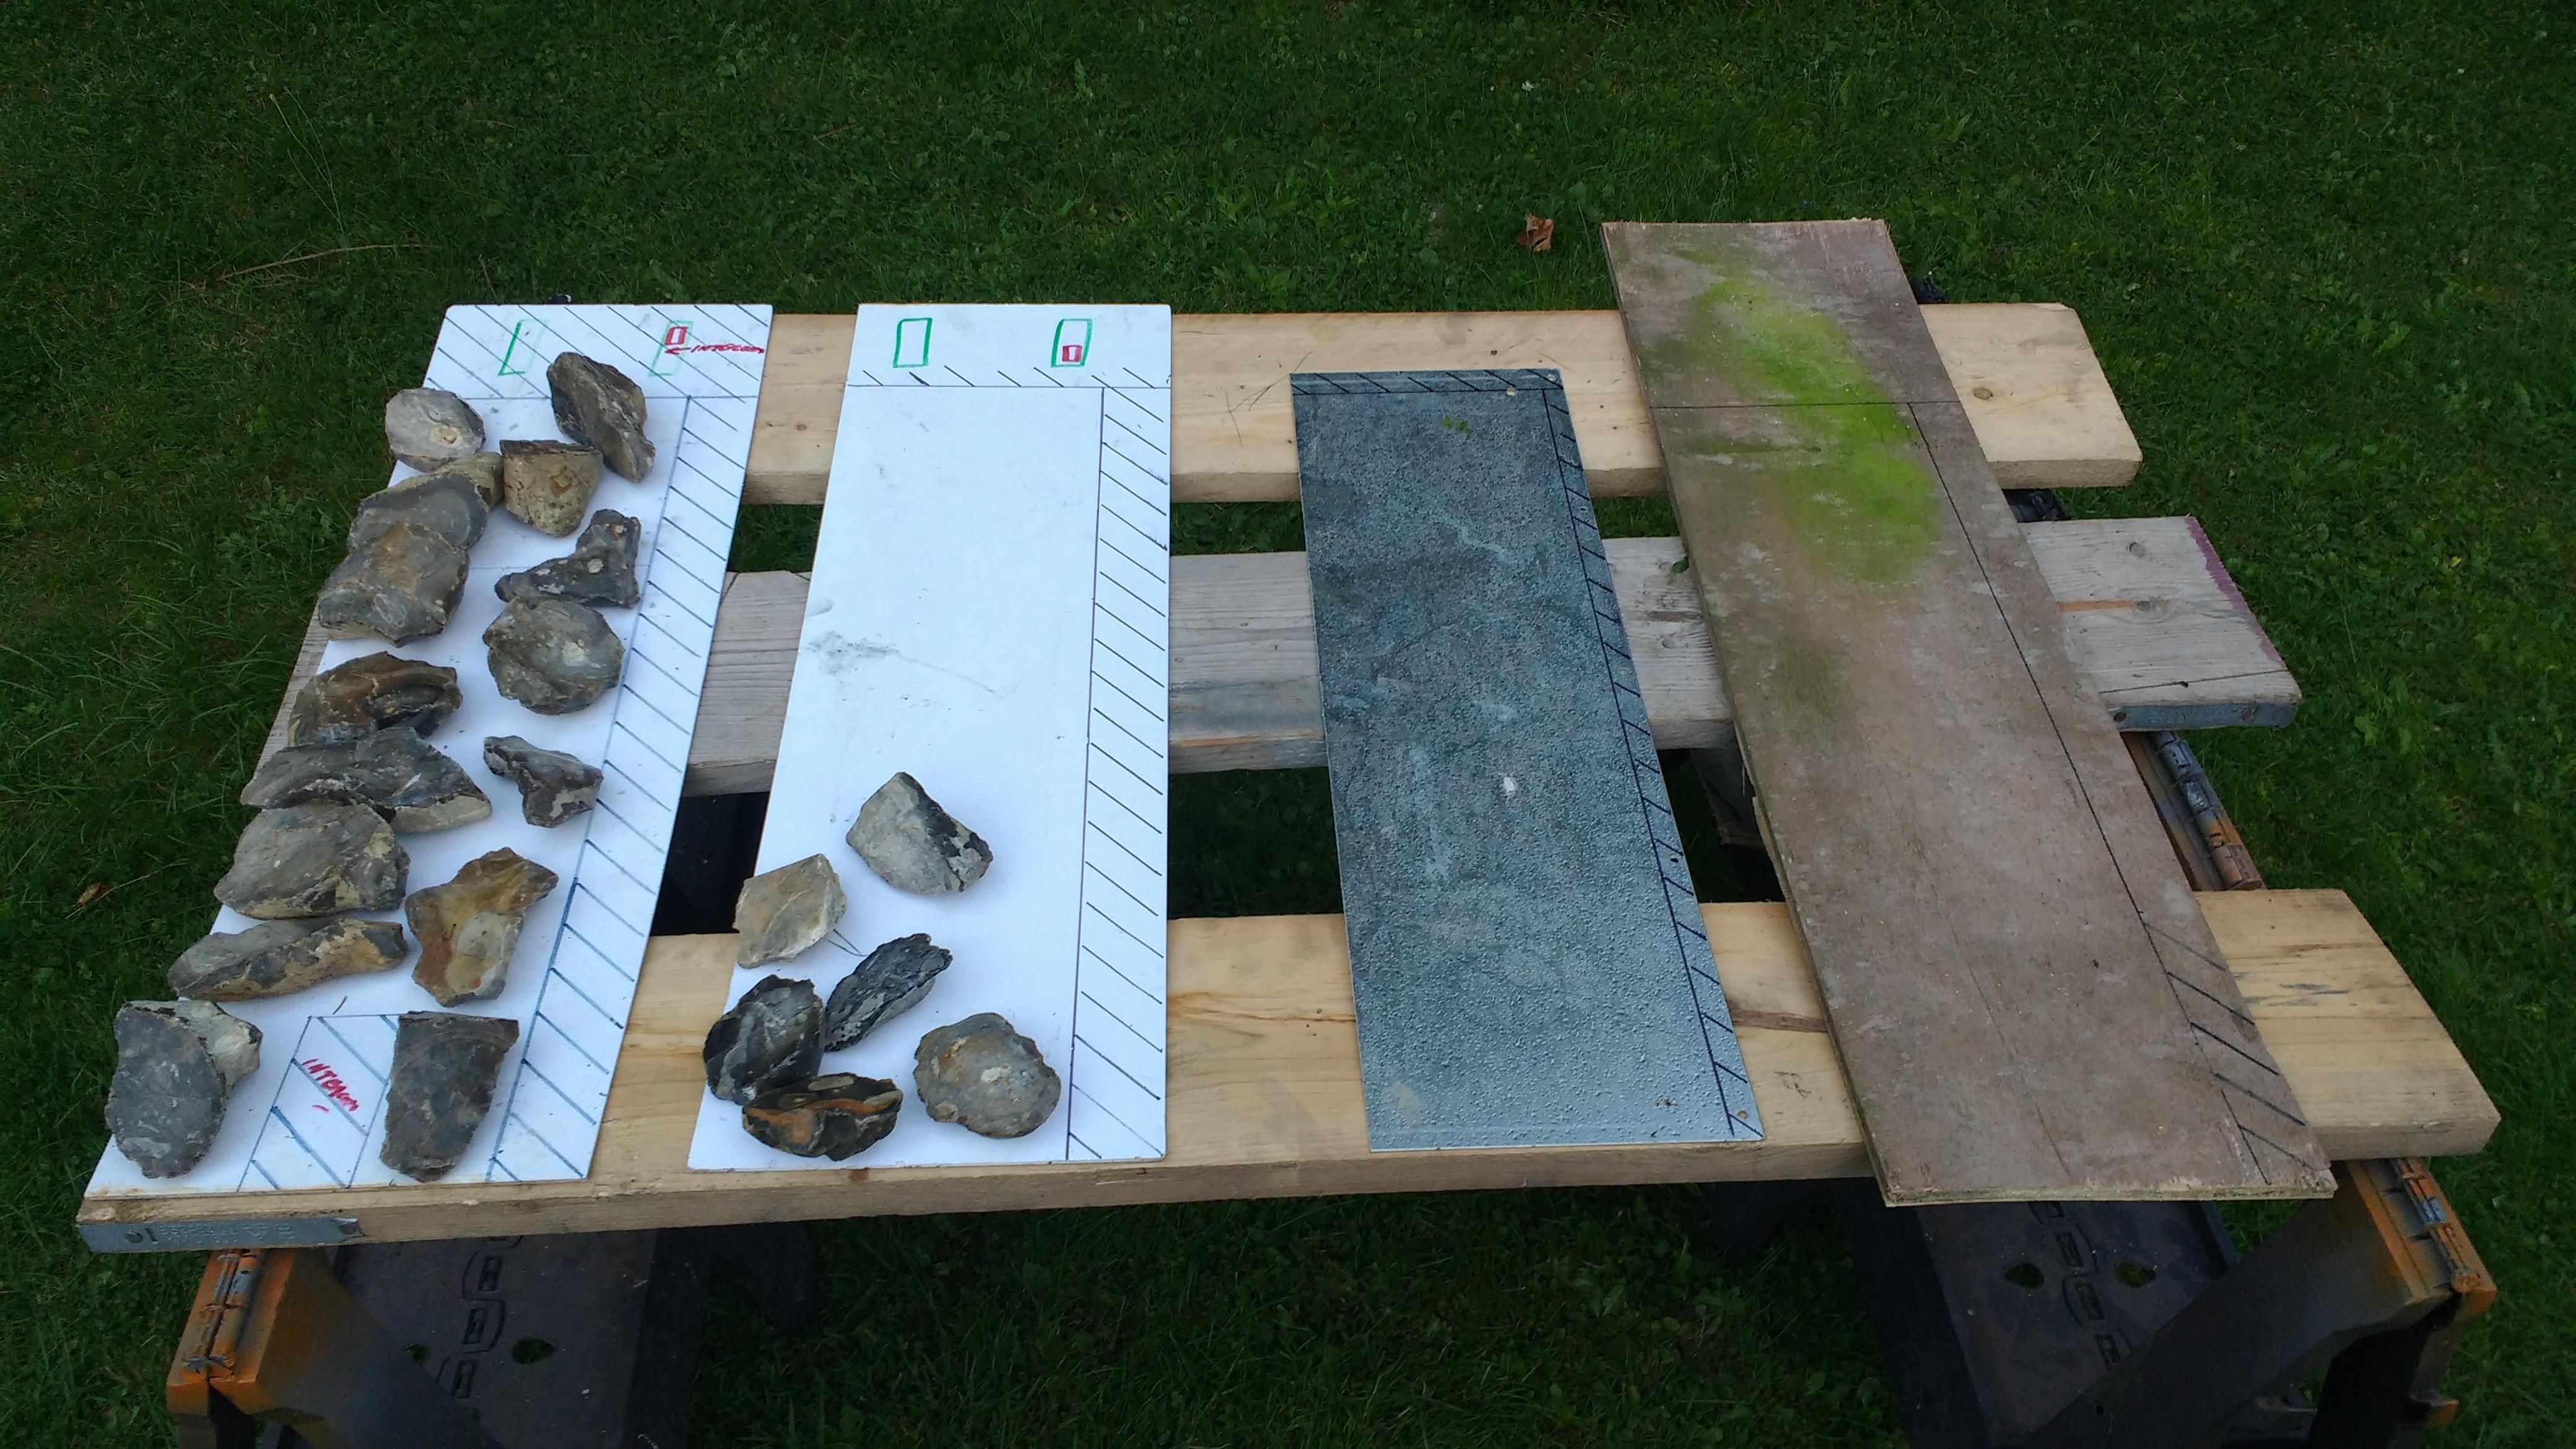
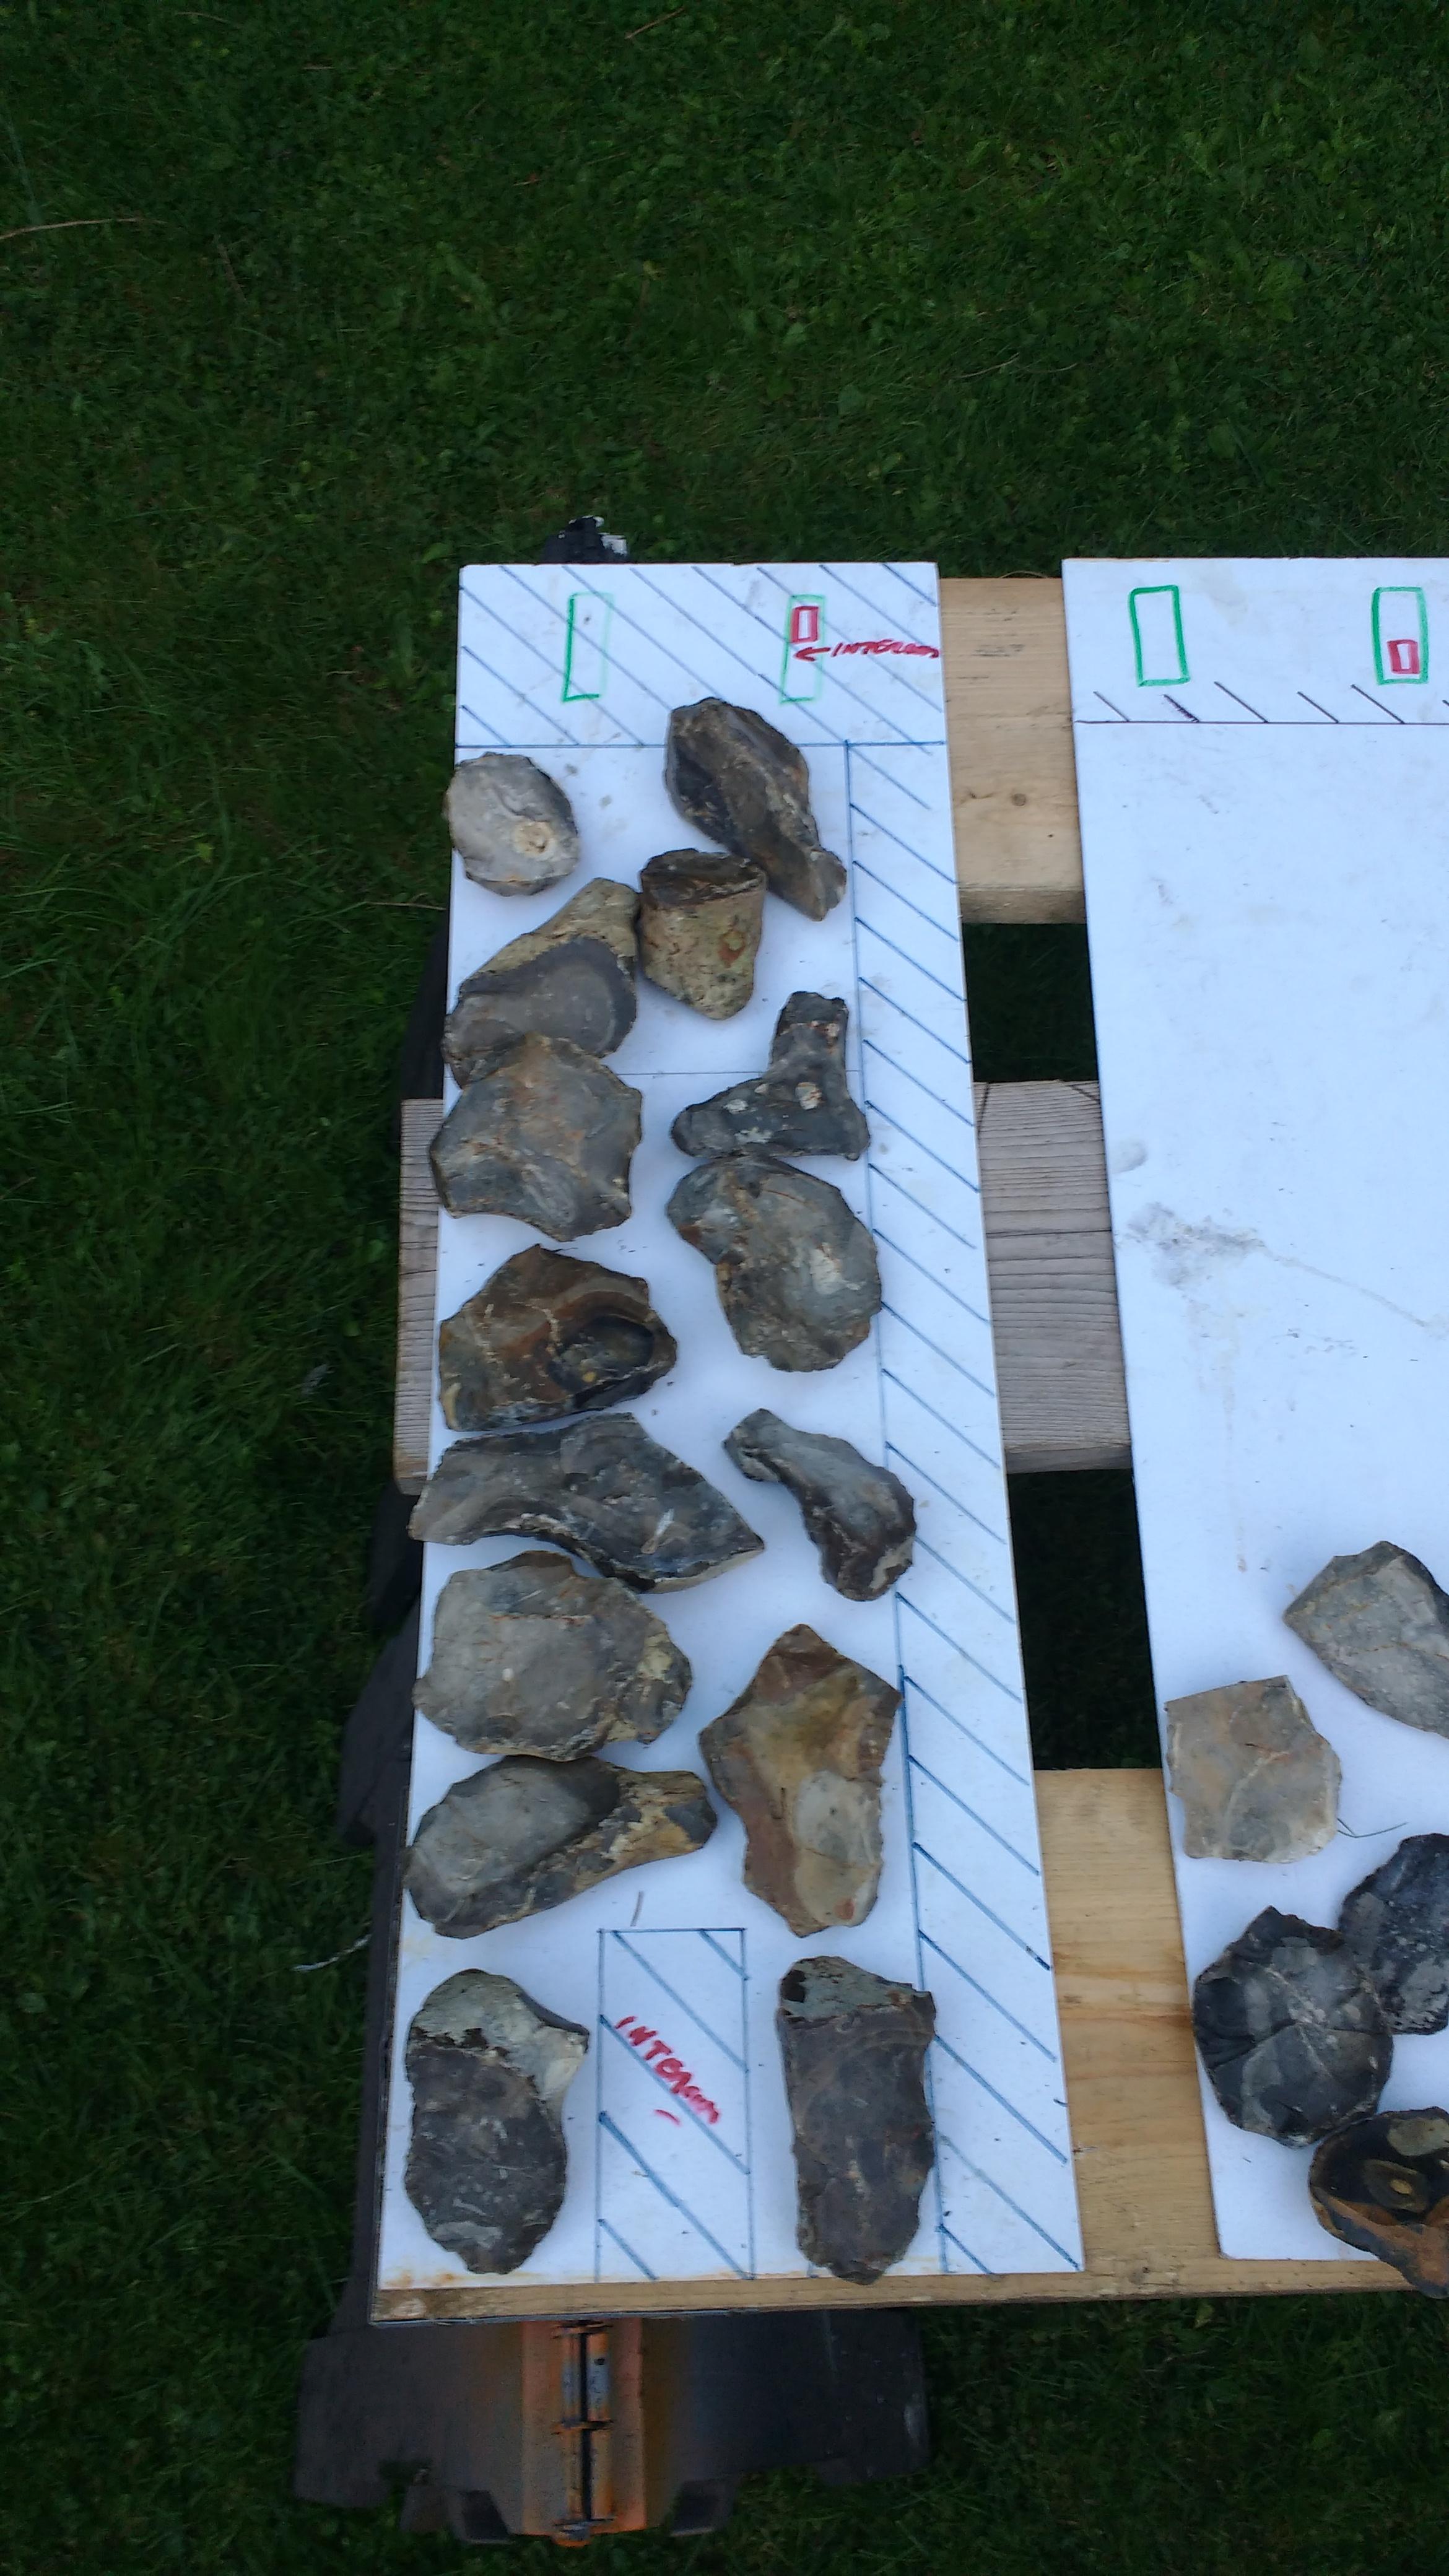
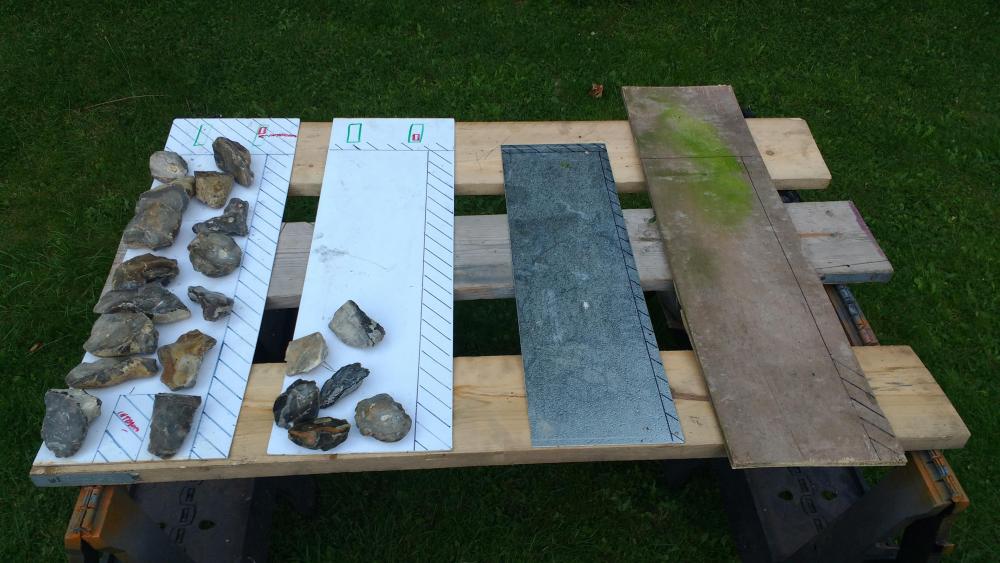
Just playing (again) with laying out the flints I have. Basically got 4 boards and marked the areas to fill. Vague recollection of someone saying aim for a finger width's of mortar between the flints. I do have a set of copper boppers I bought but struggle to shape the flints tbh. I think, in all honesty I'd prefer the mortar for the flints to match the 4:1 I used for the bricks. Is there any way to make it (the mortar) "flexible"? Adding lime I believe acts as a plasticiser, is that the same thing? Tbh I'm not at all happy with the strength of my sample mixes containing just lime & sand. Reading the new lime bag and I'm not sure how I missed where it says it's no good for mortar without cement in the mix! Wondering therefore if a mix containing cement and lime will give strength but also flexibility so the mix doesn't shrink away from the flints?


-
I remember reading about it as a kid when visiting the Underground Hospital on Jersey.
-
Bonkers idea or a great idea?
Onoff replied to canalsiderenovation's topic in Landscaping, Decking & Patios
Galvanised steel frame? Nice! Did you buy ready made or have commissioned specially to size? -
The Germans used I believe coal furnace ash on Jersey etc due to shortages of other materials. A handy by-product was it made for a really strong, long lasting concrete. As evidenced by the still standing fortifications today.
-
Ask me how I know... ?
-
Post a picture of the bag the sand came in is easiest sling with a good pic of a handful of the sand. Trying to render with a pure sharp sand mix is a bitch.
-
Seen loads of cheap FCUs burn out when being run at their limit for long periods. Fitted an MK to the last one and it's lasted.
-
Try here for obsolete / reconditioned circuit breakers etc: https://www.reconelectrical.co.uk/distribution-and-circuit-protection/reconditioned-circuit-breakers
-
Thought I'd seen you under Amateur in Categories... ?
-
A useful, generic "concrete" is nominally 3:2:1 - 3 of sharp (aka coarse) sand, 2 of aggregate that is "stones" up to 20mm and 1 of cement. Alternatively you can mix cement and "all in one" ballast which is a mix of aggregate and sharp sand. Never use builders sand for concrete. Builders sand is for bricklaying mortar and render.
-
As I understand it a mix containing ordinary cement mix can shrink away from the impermeable flints causing them to go "loose". Water gets into these pockets, freezes and blows the wall. Others here have said the hydrated lime is OK to use I think. Washing up liquid should never, ever be used as an admix.