MarkyP
-
Posts
153 -
Joined
-
Last visited
Everything posted by MarkyP
-
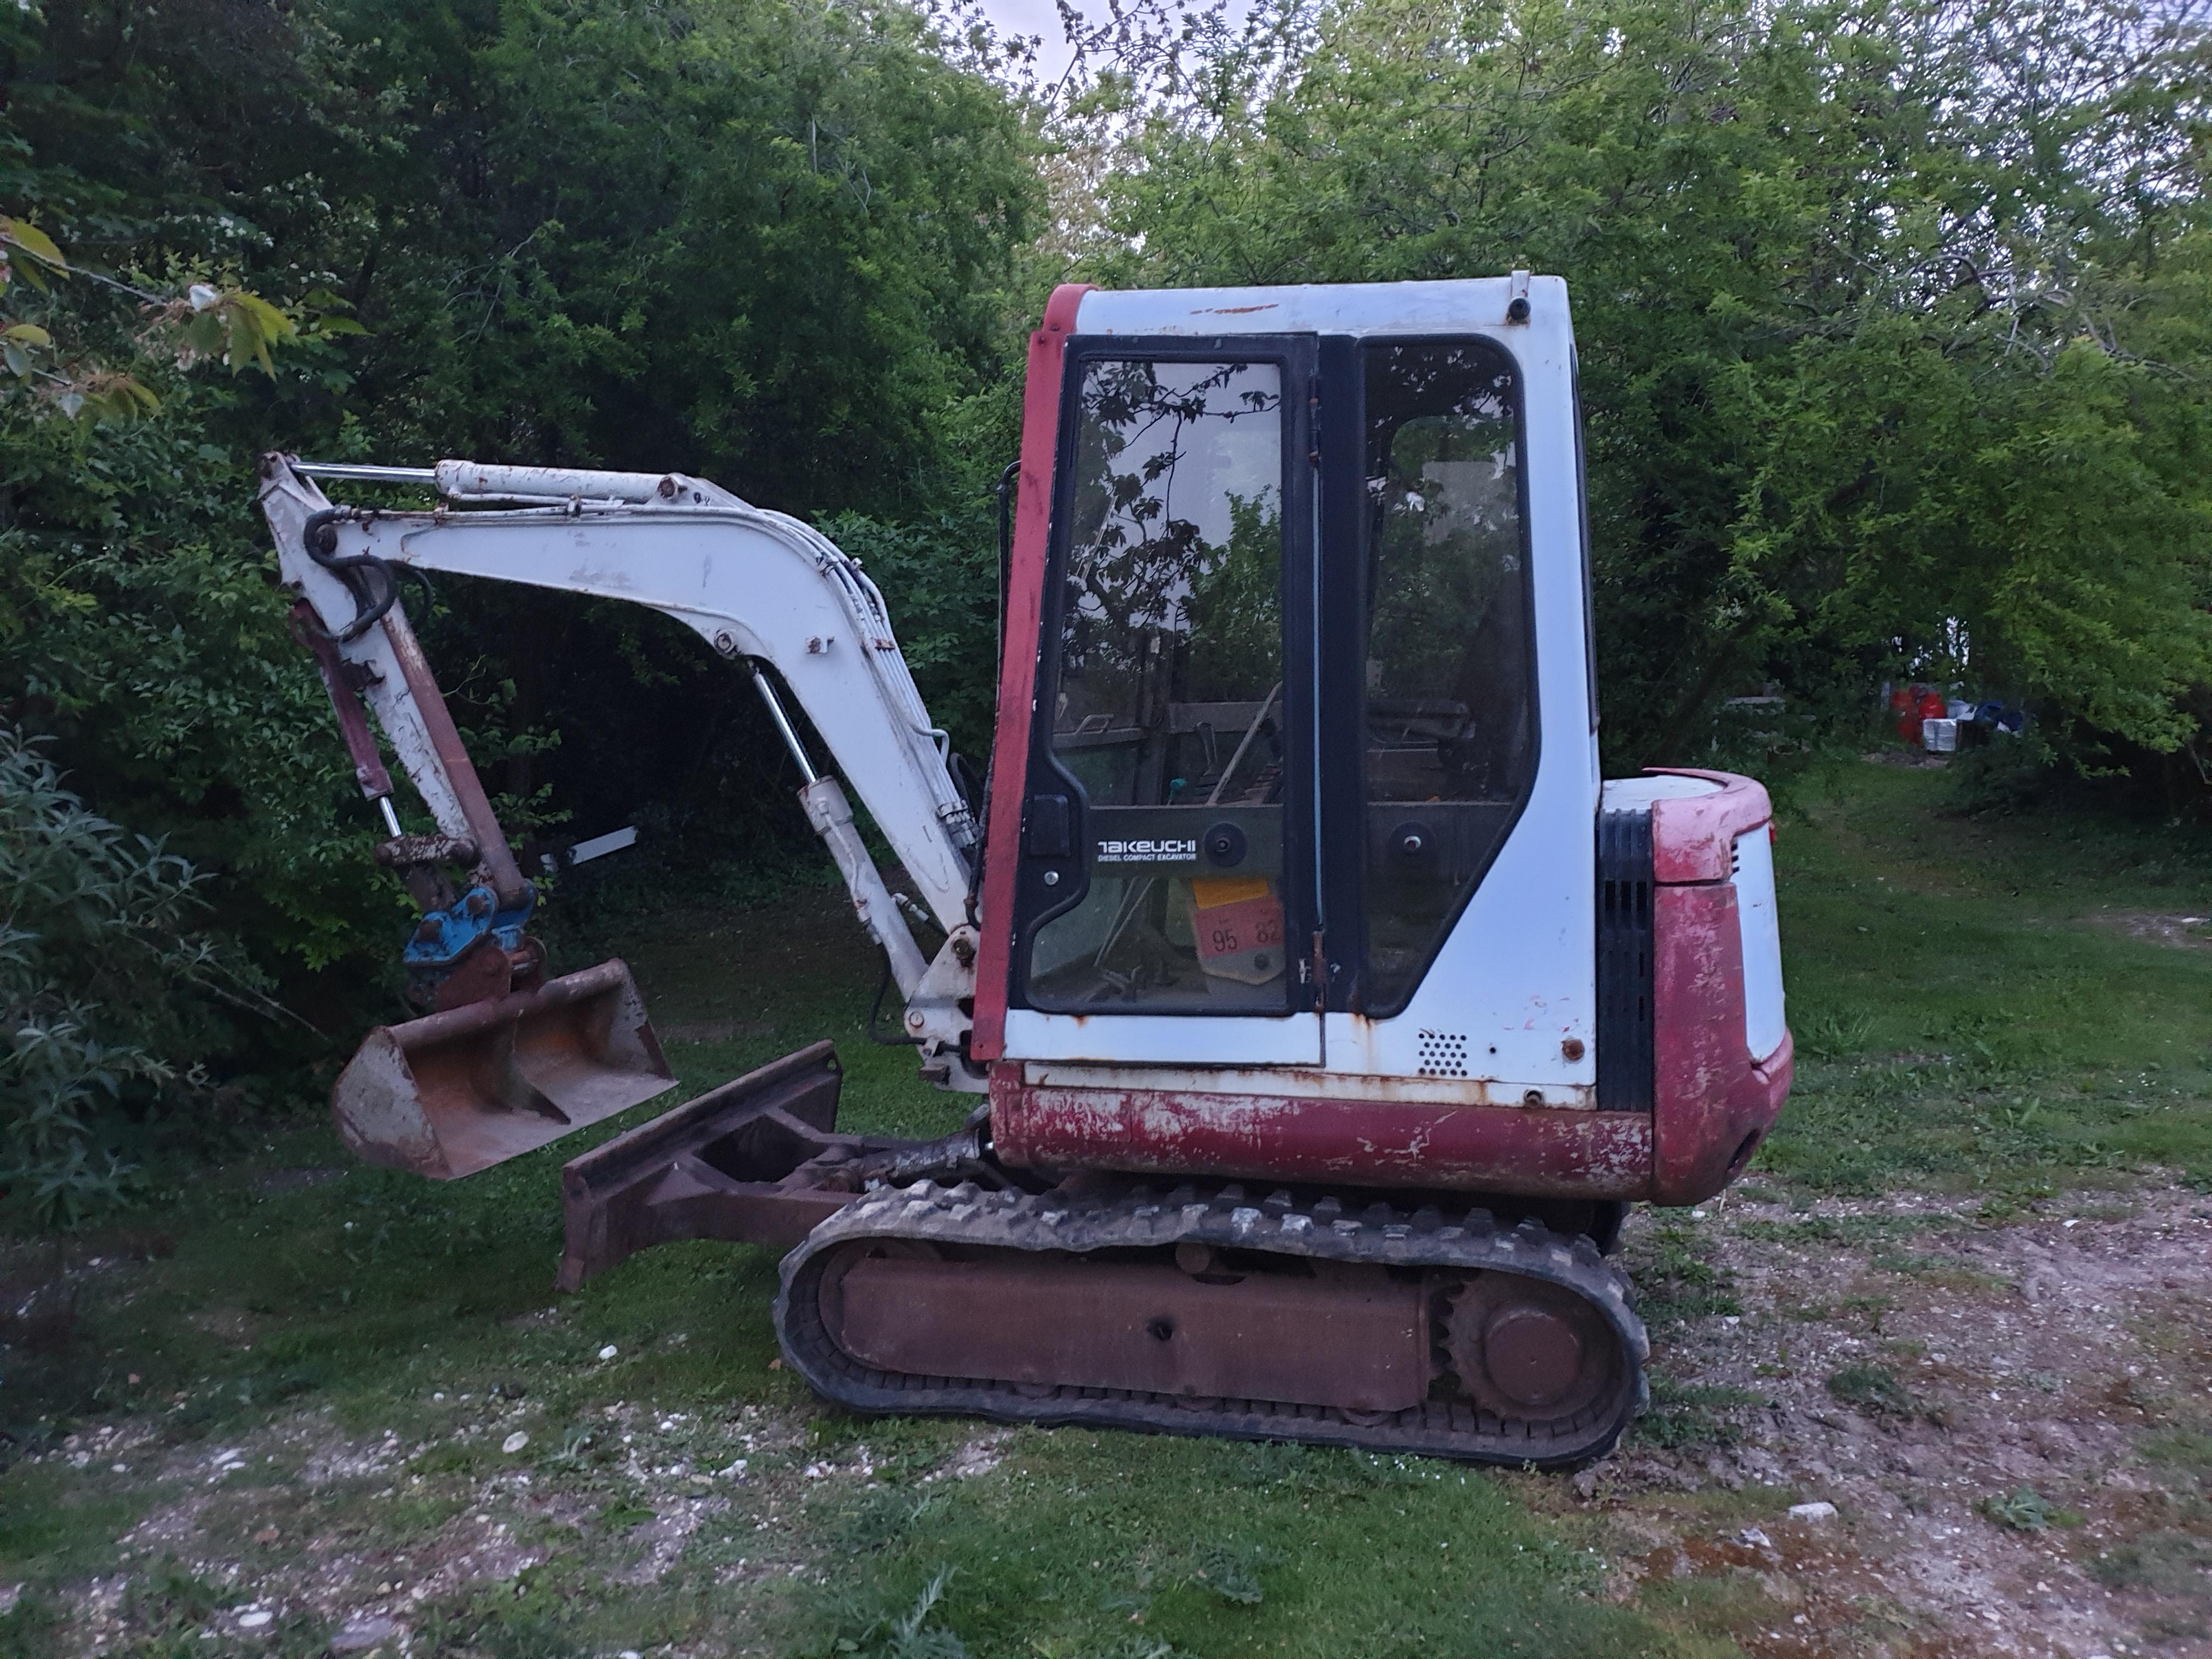
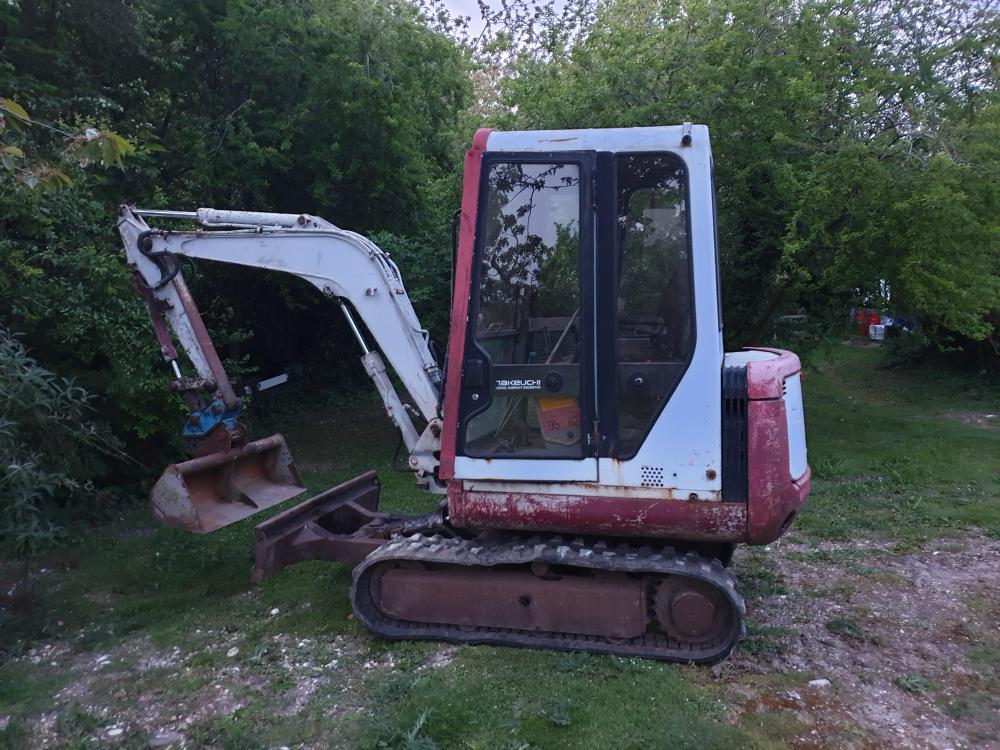
I bought an old Takeuchi TB125 digger a while ago as I have a plot of several acres which was neglected for decades is in places very over grown and is in need of lots of work to get clear and under control plus loads of landscaping to do, drives and old hard standings to dig out - all sorts. The digger has been brilliant and I've done jobs that I wouldnt have dreamed of tackling before. But, as a few friends warned me, the issue quickly arises where you have great piles of spoil to shift over distances or deliveries of top soil or aggregates to move about. "you'll need a dumper" they said. So I'm seriously considering buying a used dumper. I learned a lot about the used plant market when buying the digger and already have seen some rust bomb 30 year old dumpers which have been re-sprayed signal yellow and put up for sale on ebay for £3k! Any tips or suggestions on what to consider? Is 4wd sensible (large sloping plot)? I am not considering the old manual tip machines, has to be hydraulic. Size is another consideration - 3t would probably be most the most versatile but I need to consider storage, those 3t machines aren't small, so wondering if a 2t would be a good compromise. I guess a machine with a roll bar would be sensible, but wonder if I could retrofit as many older machines dont have them? Any other suggested things to consider? Also budget - there are a lot of machines from £1k to £4k, with some looking like complete sheds, others sounding like they've been on a farm under cover and looking half reasonable on original paint. I guess ideally I'd like to spend less than £3k.
-
What EWI for 1930s solid brick (215mm) wall home
MarkyP replied to tanneja's topic in Heat Insulation
it was two or three years ago now but when I did my EWI my research concluded that EPS was the best product. There had been some issues with PIR boards warping post installation under EWI, many major system suppliers dropped them and only support EPS, mineral wool or wood fibre. Worth checking out the green building forum for EWI threads, there's been some very comprehensive discussion over there over many years and there's some really good advice. I'd caution use of PIR unless you can be sure of a comprehensive manufacturuer backed warranty (even these are very dubious in my opinion). Even 70mm EPS will make a huge difference in relative terms (if you can go thicker then do, you dont need much soffit overhand and deep recessed windows look good in my view). Could you manage to sequeeze in 90 or 100mm EPS? Since my EWI the walls no longer feel cold and the temp variations in winter are much lower. You'll also note that when the heating goes off, it isn't freezing cold 40 mins later! Whatever board you use, make sure they install them well - I actually did a course in EWI (to learn how to apply the render, I can plaster a bit so it was pretty easy to pick up) But on the course, we did a morning doing some boarding and instructor actually said if you have any large gaps, fill them with basecoat! I challenged this and he sulked for the rest of the course but doing this is really bad, it creates a cold bridge, but worse it will mean that the render may dry unevenly (heat loss path will show the joints in the render) and in the long run there are examples of the joints staining through the render, I would guess because differential algae growth on the facade due to variable moisture content of the render. You want all joints to foam filled and also use thermally broken fixings recessed below surface with a cap of EPS to close - they work brilliantly and remove the cold bridge and also remove the risk of a fixing "grinning through" the render if sat a bit proud. Not sure what lambda you are using to calculate the u-values but worth checking you are looking at enhanced (graphite EPS) which is considerably better than standard, in the order of 0.031 (vs 0.038) from memory. Also worth noting that EWI grade EPS is cut from aged blocks to ensure dimensional stability - I used a mix of Kaycel EWI EPS and also some EPS supplied by Baumit. But be careful to ensure it's stuff for EWI. Do consider taking EWI down to the top of the footings (builder may not understand this or may be terrified of doing things below DPC so you might need to do some research and show some details) but do a search for plinth EWI (again masses of disucssion on GBF). Many of the large system suppliers now have details for plinth, the taboo of going below DPC seems to be fading which is good. Chose render carefully - your builder will likely plump for the cheapest acrylic finish coat unless you specify otherwise. Typically you will see a basecoat in two passess with a mesh embedded but then a thin coat finish. Worth paying a bit more for a silicate premium mineralic thin coat finish in my opinion (most manufactuers give this option) - it is a nice matt/mineral finish and can be readily painted with mineral paint in the future, otherwise you'll be looking at a film based paint over silcone or acrylic once it gets tired. Also silicone and acrylic can look a bit plasticky in my opinion. Also consider the grain size as well, the standard grain sizes again can look a bit tacky. I used Baumit nanopor fine - 1mm grain size and lovely flat matt mineral finish. (I ran a thread tracking my DIY EWI installtion over on GBF http://www.greenbuildingforum.co.uk/newforum/comments.php?DiscussionID=15355) -
My installers suggested a long pole scraper after a day or two. They said otherwise your finish floor installer will need to sand it. I tried a hand scraper after a day or so and the laitence came off as a very ovious crumbly skin on the top. Laitence wasnt present everywhere but it was fairly obvious where it formed. I thought I'd save myself some money by not having the whole lot sanded and I'd scrape it off myself. I left the screed to dry and then realised the laitance had set rock hard and wouldnt scrape off so I had to pay extra to have it sanded. Some anhydrite firms will offer a service to come back and remove laitance for you with a floor sanding machine.
-
the screeders should be working to a specified tolerance (SR2 is normal), ideally you want that in the contract. Self level would be something your finish flooring contractor might use if they were really not happy with the screed, but I wouldnt mention a plan to do that to the screeder, might be licence to do a sloppy job because you said you'd flatten it out later! We used microtopping over the screed, it's only a few mm thick and needs a nice flat sub-base. The installers said that over anhydrite it's fine because the screed is so flat, but over s&c they nearly always have to apply a smoothing compound first.
-
We had an anhydridte liquid screed on the extension (over 150mm of PIR). My anhydrite is 60mm with ufh. It doesn't feel as solid as I would have liked. Stomping teenagers cause a noticeable tremour on the kitchen island. If i had my time again I would have gone with insulation under slab and either polished concrete or a thin smoothing screed over slab. Anhydrite is super fast to install. The pair of guys who did mine were good and prepared laser set levels thoroughly, it's flat as a pancake and there can't be more than a couple of mm variation across the 80m2. I laid a large slate hearth and it just sat perfectly flat, not so much as fag paper crack between it and the floor anywhere. We topped the screed with microtopping as a wearing surface. The anhydrite surface laitance is easier to remove in the first days after install, it scrapes off. If left longer it then bakes on and needs machine sanding. Guess which option I naively took?! Sand and cement will feel a bit more solid at 70mm but compare the cured dry density, I can't recall there was much in it. Finding good sand and cement screeder isn't easy, its a dying art and back breaking work. I've seen several local jobs which I scouted when trying to find a screeder (before plumping for anhydrite) and the quality wasn't great, curling up at edges and not very flat, maybe OK to tile over but not good enough for microtopping without first sorting with a generous coating of smoothing compound. There are a few screeding crews still around but check carefully any jobbing builders or plasterers who offer it as it's a real art and a good flat finish is hard won through lots of experience. Fibre reinforced screed ready mix delivered to site would be my pref over a pile of sand and a shovel. Both anhydrite and s+c take ages to dry! L , I left mine a full 8 weeks and even then gave the ufh a tickle for a few days to sure.
-
choose decrement delay over u-value for room in roof?
MarkyP replied to MarkyP's topic in Heat Insulation
well, I could get a u-value of around 0.12 with 100mm PIR between rafter ( now leaving ventilated void of 40mm from my 140mm rafter) and 100mm PIR under. But dec delay would be around 5hrs. I could put more PIR under rafter and get closer to 0.1 but the room space is getting tight. Is u-value really king? I have build ups above with very different mass profiles, and much longer dec delays. -
choose decrement delay over u-value for room in roof?
MarkyP replied to MarkyP's topic in Heat Insulation
that's fine for new build Tony but I'm converting/renovating so somewhat constrained (note I've re-roofed and so I'm limited by rafter depth and what I can reasonably accomodate under rafter without compromising the room space). 0.1 isnt realistic here. the point of my question is less about the absolutes and really the relative merits of the two build ups. I've got a relatively high mass, good decrement delay vs lower mass slightly better u-value decision. If I had a magic want I'd lift the roof off and replace with with 350mm i-beams at 600cc fully filled with celllulose and enjoy the u-value and decrement delay, but sadly depite a few waves the wand isn't working ? -
I used graphite EPS for my bungalow renovation but that was rendered over. Works really well, annedotal but even having not yet insulated the rooms in the roof (see my other thread) we barely use the heating in winter. I think EPS is considered somewhat vapour open (if that matters) and is dimensionally stable (if using proper EWI EPS cut from aged blocks - I bought EWI grade KayCel for this reason, lots of no-brand stuff out there which I was dubious about).
-
I'm in the process of a loft conversion and extension (4 years into the process to be exact!). My loft conversion and side extenion was timber 1st fixed and re-roofed ages ago and am finally getting around to looking at insulation of the new upper floor. I cant recall the value off hand (and I will check with BC before I commit) but I think I've got to achieve at least a pitched roof u-value of 0.18 for renovation/extension regs. I've got 140mm deep rafters and really can't afford to go much thicker than 100mm under rafter before it will start to encroach too much into the room. I'm looking at comparisons of a couple of insulation build ups. Having read various posts about decrement delay, and having a large south/southwest facing roof in an exposed spot I am worried about overheating the upper floor which is all "room in the roof". build up option 1 15mm fire grade PB/skim 100mm dense wood fibre under rafter (0.038, 110kgm3) 140mm flex wood fibre between rafters @ 400cc (0.036 Steico Flex, 60kgm3) OSB sarking counter batten/breather, batten, slate tile u-value around 0.17, decrement delay around 11hrs (just scrapes regs I think but not a great u-value) build up option 2 15mm fire grade PB/skim 100mm PIR under rafter (0.023, 30kgm3) 140mm flex wood fibre between rafters @400cc (0.036 Steico Flex 60kgm3) OSB sarking counter batten/breather, batten, slate tile u-value around 0.13, decrement delay around 8hrs (better u-value but at cost of reduced decrement delay) taking the conventional view that a lower u-value is better, I'd choose the option with PIR under the rafter over dense wood fibre. With regard to decrement delay I think I've grapsed the summer overheating bit but still puzzling over which build up would perform better in winter. My conventially influenced mind is pulled to the PIR under rafter option. I used the concrete centre thermal calculator but not 100% sure I've captured the bridging effect of the rafters, perhaps at least the decrement values are comparable relatively if not in absolute. any views on which is the better choice?
-
Measuring RH and CO2
MarkyP replied to MarkyP's topic in Mechanical Ventilation with Heat Recovery (MVHR)
thanks, I follow the forum pretty closely so not sure how I missed that recent thread. doesn't seem like there's much in the way of plug and play available which is a shame. -
I'm resuming the design work on my mvhr and want to get a sense as to the current situation with RH and CO2 in our home. Ivev renovated extensively and we are pretty well air tight and we are having some condensation issues in a few places so keen to get a baseline before i do any work. Are there any suggestions for meters to measure these? Looking for plug and play ideally.
-
We have two wet system UFH zones in kitchen/sitting room side extension. They are heated via our main oil boiler currently. The UFH system is Uponor and seems standard with a manifold mixer to regulate flow and supply water temp, mixing hot water from boiler with return water from UFH to provide a feed into water at around 38 degrees. The boiler also heats hot water in a pressurised cylinder and also conventional rads to rest of the house. I used a plumbing firm for the UFH but have since read on here that it is a good idea to use a buffer tank to stop the boiler short cycling ( which it does when running only the ufh). Should I retro fit a buffer cylinder? Is there any rule of thumb on sizing it? I have some space in a downstairs cupboard near the manifold but not much.
-
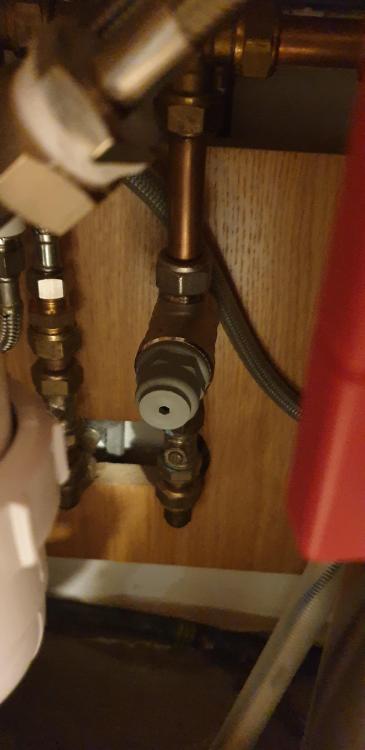
Having had another look, I think it says 2bar on the side of the valve, I wonder if this is a fixed pressure type and cannot be adjusted. Might need to replace it..
-
should that plastic cover come off? Have given it a bit of a twist just now but it didn't want to budge and being plastic I didn't want to try too hard. The hole isn't very large, I managed to get a small flat head in there but didn't find a screw head. I've already had a look from my wife which says this is going to end in tears.
-
Any advice on this valve would be appreciated. I do the odd of bit of plumbing DIY but our kitchen fitters used a plumber and a pressure reducing valve was fitted, I think to meet requirements of our Quooker hot tap for a 2 - 3 bar supply. However, the cold water from the Quooker mixer tap is down to a dribble. It was always a bit low from installation but plumber assured us it was fine, but since then it's gradually slowed to a trickle. We did have a mains leak in the village last winter and when that was fixed it seemed that our pressure to the house fell quite a bit, it's still fine in the other rooms without valves, still good strong pressure in showers and various other cold taps in the house. Are these valves adjustable? Can they suffer with limescale (hard water here)? In the pic below there is a hard plastic nut/cover to visible side and I can feel a metal nut of some kind on the other side. But have resisted the temptation to start fiddling so far! Any tips?
-
I'm going to hire a post hole auger attachment for my digger when I tackle some fencing at scale. Did I mention I'd bought a digger? Doesn't hurt to mention again, you know, just in case anyone missed it. There's so much that suddenly becomes doable with this thing, everyone should own one. And I'm having so much fun operating it that I may need plastic surgery to remove my smile.
-
well, after months of searching I finally took delivery today of a 2.8t Takeuchi! Excited would be an understatement!

-
Grand Designs at Graven Hill starts tonight on Channel 4
MarkyP replied to ProDave's topic in Property TV Programmes
And I'd love too see a new sister show of GD, it would be called Shit Designs and be a fly on the wall doc of a large volume house builder and show just how rubbish most new built stock is. -
Grand Designs at Graven Hill starts tonight on Channel 4
MarkyP replied to ProDave's topic in Property TV Programmes
I enjoyed it. I agree much better than some of the more lavish GD output. The woman was a tad irritating, I suspect there may have been an almighty bust up with the other couple off camera. My wife didnt like her because she constantly had her eyes shut when talking to camera! But showed I think that self build is within the grasp of mere mortals with more modest budgets. And the woman clearly had to cash in every asset to fund the overspend, shows the harsh reality of self build budget, rather than the usual GD wealthy professional couple giving the money tree a shake or finding an extra 250k behind the sofa. The structural issue she encountered was horrid, I really felt for her there, that gap in the ridge looked awful but I guess could have been worse - those rafters were seated by a wafer, imagine if they'd completely separated! Would have been good to have understood the root cause of that - was it design, the beams not meeting spec or installation error? . Perhaps at time of filming liability was in dispute so they had to gloss over it. -
I have an 18m run along a wall with EPS EWI and Baumit star contact white (cement/lime hybrid) base coat finished with silicate mineralic thin coat (nanopor fine, 1mm grit). No movement joints and no cracks and this is with multiple thin sections of render over window reveals which are often where cracks will appear. Choose carefully the finish, acrylic and some silicone thin coat looks cheap in my view, has a plastic sheen nature to it. Silicate thin coat is mineralic and looks far better in my opinion, also could be mineral painted later in life to refresh or change colour while retaining the flat, mineral finish. I was very impressed with Baumit products and technical support. I asked Baumit about expansion gaps and were told none were required. You'd need to follow the recommendations of whoever manufactures your render but the logic Baumit gave me was that they only place expansion gaps where there is a underlying structural movement joint or expansion gap. They said that joint beads placed in elevations where the underlying structural base is continuous are pointless. Your render boards would be staggered jointed, and the basecoat will have a mesh embedded, and the render base coats are polymer modified to allow far more movement than sand/cement. So I think if you needed an expansion gap, you would need to incorporate it through the render board as well to ensure the movement was focused there, right through the build up.
- 33 replies
-
- 1
-

-
- render
- renderboard
- (and 5 more)
-
I have a 1st fix hitachi, it did a lot of work during my roof framing, sarking fixing, counter battening and so on, saved me many, many hours. It's paid for itself in time saved, I really ought to sell it on but it's handy now and then, and I think I have a bit of a tool addiction. Has been reliable, good tool. The joiners I used to help me with some of the framing and 1st fix used paslode however they were impressed with my hitachi and it takes the same nails and gas. It's amazing how quickly you can get through a bit of 1st fix timber work with a gun and a cordless skill saw. You have to shop around for nails though as they can be expensive. When I was last buying I followed my joiners and bought Fox NailMaster nails, a lot chepaer than paslode and they worked fine and were decent quality.
-
I think I got the idea from the Denby Dale passive houses. Mine looks exactly like your picture, albeit with a lower external ground level.
-
Or chat your BCO and see if they will agree to dispense with the lean fill altogether. In my case ours was fine and I used 150mm eps to full fill the cavity below the tray formed by the dpm down to top of the footing. If I recall the leanfill detail is to prevent high loads from vehicles or high earth build up from pushing the block/brickwork and collapsing into the cavity. I think it's a bit of a belt and braces old fashioned detail unless there really is a build up of earth or risk of crushing. In our case the soil was 150mm above footing, sometimes less. Insulating to top of footings will improve the thermal performance of the wall by extending the heat loss path of the inner leaf.
-
glad it went well. Only just spotted your earlier comment about the primer - when used dilute on porous surfaces it doesn't dry universally green, it does look a bit patchy and is mostly translucent, the green bits are usually where it's gone on a bit thicker. When used neat over non-porous, it comes up thicker, tackier, and more obviously green. Obviously an after thought now but may be useful for others
-
Plasterboarding on yer lonesome ....
MarkyP replied to ToughButterCup's topic in Plastering & Rendering
I used one of those board lifters to board out my extension - about 80m2 across two ground floor rooms with 15mm fire rated PB. Was a doddle on my own, the board lifter was great. The hardest bit was lugging all the 15mm boards in from the drive on my own. I've still got it for when I get to lining the upper floor in the loft conversion, £100 well spent and will get something back for it on ebay when I flog it. They are surprisingly well made and sturdy for the money but it is a bit heavy and unwieldy, wouldn't fancy using it off a flat, smooth deck. I didn't realise you could get an extension, should think it would be fine with one, they are very stable.