oranjeboom
-
Posts
698 -
Joined
-
Last visited
-
Days Won
1
Everything posted by oranjeboom
-
Hi All, I've managed to get a contractor quote me to pour and level our slab. It's a 'renoextension' jobbie (Extensions are up and old slab removed from current house) so all internal walls are up and I won't have any other brick/block walls going up on the new slab. Only major load will the the stairs. Buildup: Elevated A142 mesh with UFH cable tied 300mm EPS Insulation Compacted MOT T1 I therefore don't regard this as a structural slab. With the mesh in the slab, the mix will be a GEN1. I know others here like @JSHarris had C35 mix but that's only as they are true structural slabs, so I don't think I need to go that way. Would you agree? Some people around here keep on ranting on about not forgetting to add fibres.... Did someone forget??? looking at--> @Onoff Also, do I still need to add fibres? £15 extra/m3 seems to be worth adding I guess. I called the concrete company the aforementioned contractor uses and I was quoted £2130 (inc) for 15m3 so not too bad seeing that includes the pump. Nice bit of profit for the contractor who says the job will take 2 days with the two of them with the total cost being £4000 (excluding fibres)! So labour charge comes to about £400each per day! Is that realistic? Said he'd come rounf the day before to set up lasers and mirrors etc, but I bet he'll end up doing that 1/2hr before concrete arrives! I'm asking for a breakdown of his figures, but that does seem a bit high. I've called another national concrete firm and their price with fibres is £300 cheaper but then does not include the cost of a pump (which is likely to cost at least £300-£400 around here. So it's just his labour cost that seems excessive, imho. Guy seems to know his stuff at least and came recommended by a local architect and having found it difficult to find someone to pour the slab I may just have to bite the bullet. OB PS special offer at waitrose: https://www.mysupermarket.co.uk/tesco-price-comparison/Breakfast_Cereals/Kelloggs_Fruit_n_Fibre_500g.html
-
What mix are you going for? And how about your company giving buildhub members some discount too???
-
 Andrew Jones.
 -
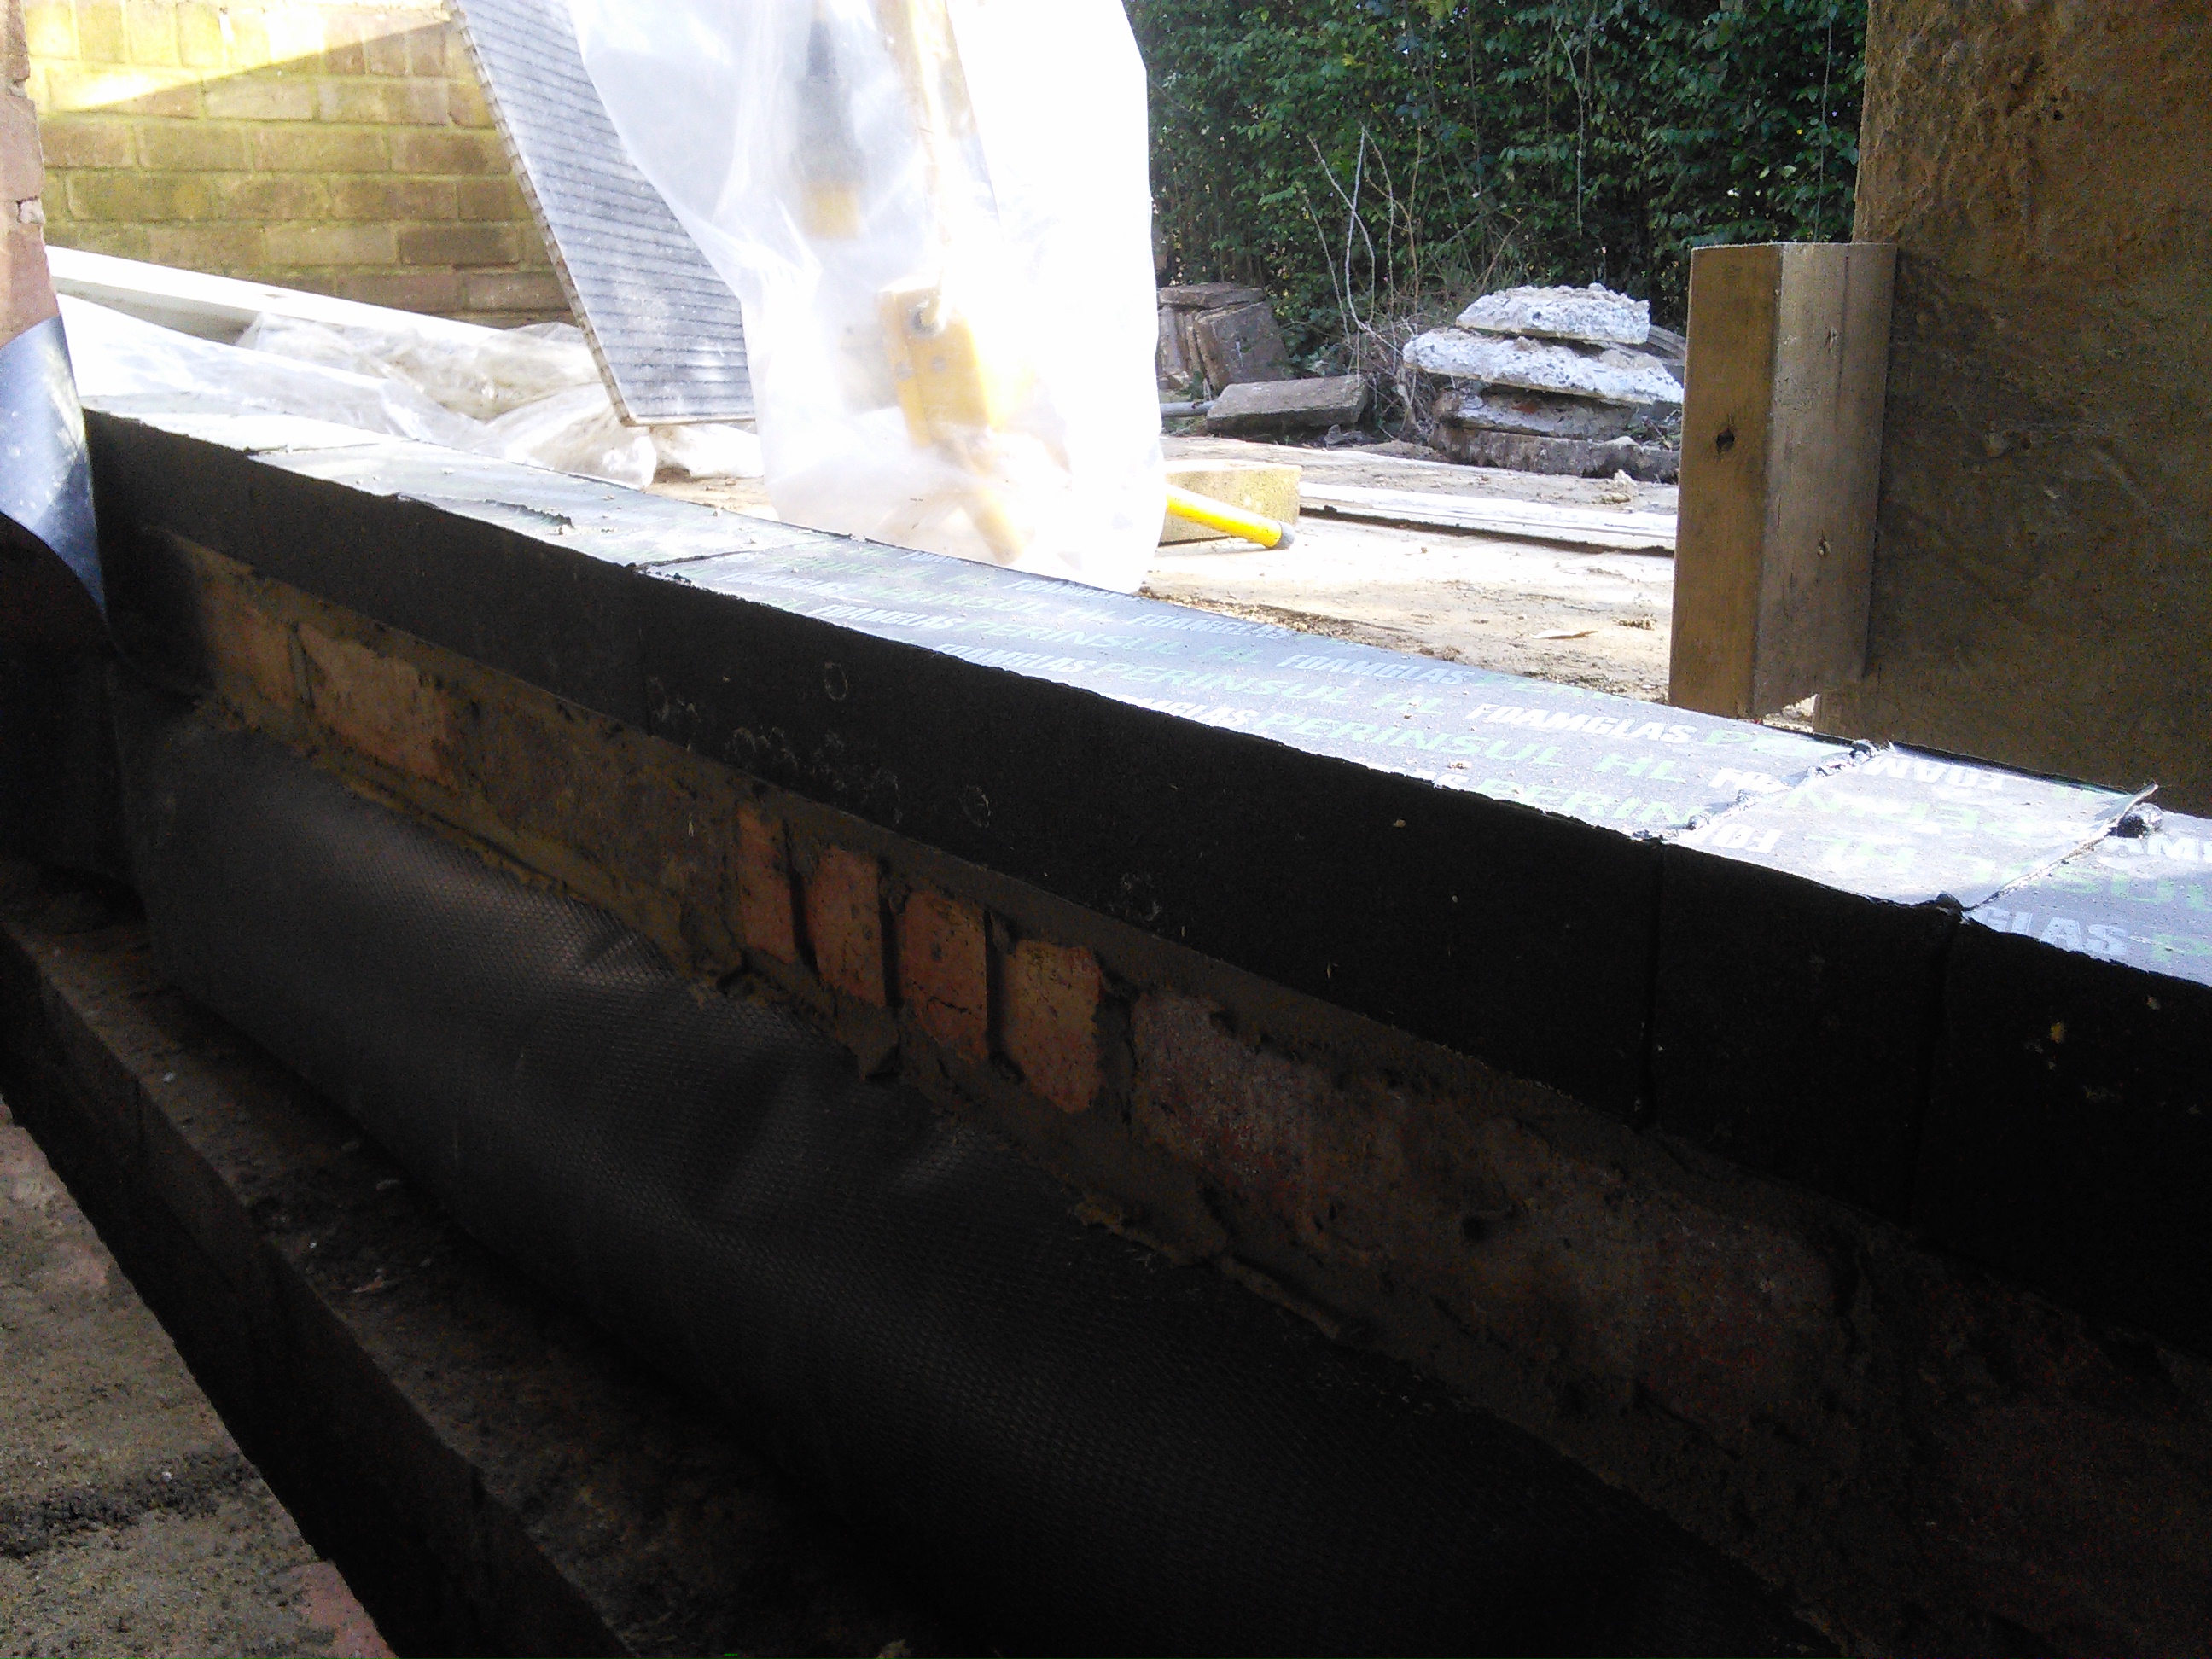
I have a contact at Foamglas (given to me by someone on here I think) if anyone needs it. I did have a nightmare getting hold of the correctly sized Marmox blocks thanks to Jewson's ineptitude. But who needs the business from a self builder???
-
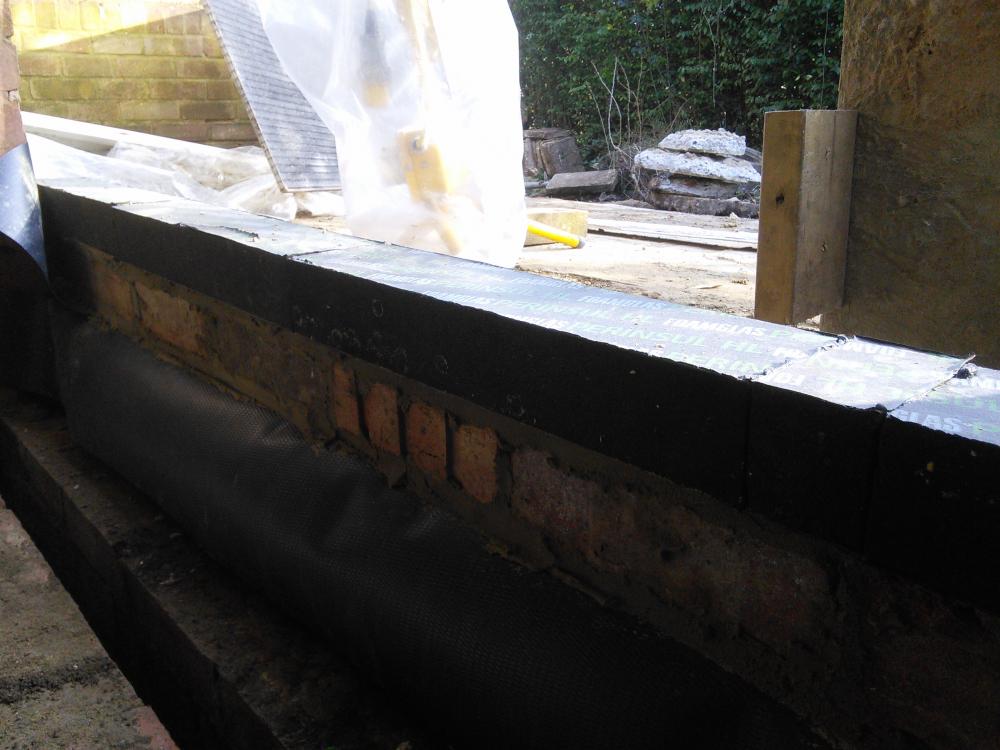
If you look carefully in the pic above, you'll see that's a Foamglas (Perinsul) block. The one above is either around 65 or 100mm high. I've also used Marmox blocks for my SIP foundation walls and they are either 50 or 60mm high. I had to drive to the continent where the blocks vary in width a bit to the ones that were available here in the UK. And you can't stack them on top of each other like a normal brick i.e. one course only. http://marmox.com/products/61.pdf Not fitted my doors yet, but the intention is to screw through the blocks and into the brickwork below.
-
That's what some of my doors will be sitting on. Slab insulation up against it together with some perimeter upstand insulation.
-
Would you recommend margarita? Thin crust would probably be better as less chance for those air bubbles to appear? I better start ordering.... Yeah, when I had the piled slab done, I had to go round and replace all the squished supports as they do just collapse. I think you can buy premium ones though. The slabs I have lying around were going to be used for my below ground EWI protection, but it may be worth ordering some more and cutting those up for supports.
-
I think I have read you need 4-6 stands/sqm of mesh. Expensive little critters too. Cheapest I have found are on fleabay so far. Most local BM don't stock 25-30mm stands it seems so a hefty shipment fee slapped on top of their £30 cost. I'll need circa 1000 of the buggers. If you are having 100mm slab, then 40/50mm spacers may be too high: Pipework: 16 Mesh (A142): 16 - 32 Spacer:40 So from insulation to top or pipework could be 72-88mm high. Depends on pipesize of course, and also whether you have any areas that have overlapping mesh. Depends on how you lay the mesh and whether you arrange it so that any overlaps 'fit in' (16mm + 8mm) or 'double up' (16mm+ 16mm). That kitchen looks as though you could get away with two carefully large sheets (4.8m x 2.4). If you can leave the sheets as big as you can and have them ready cut around walls, corners etc, that will mean less addotional bits of mesh here and there. Even with my careful cutting, I ended up with some areas of mesh that are 32mm thick, so I'm going for the smaller 25/30mm stands that should give me 30mm clearance from the top of pipes to surface of concrete: Where I have a double overlap of mesh (27mm clearance) Pipework: 16 Mesh (A142): 32 Spacer:25 Where I have a 'mesh and a half' overlap of mesh (30mm clearance) Pipework: 16 Mesh (A142): 24 Spacer:30 I went with standard DPM for the areas that used PIR as it's a bit tougher when you're buggering around with the mesh. I'd also lay the mesh on top of the DPM, add your UFH and only then fit the spacers underneath. No point tripping up whilst laying the UFH that way.
-
Would agree there. "which one will fill up first" as in fill up before it starts pouring over / pouring into another tank? In that case it would be A.
-
Not sure how Mrs ProDave would react to this idea, but in terms of temporary stairs, would a pallet staircase be an option? Depends on dimensions etc but if you're not looking to get the whole place signed off by BuildRegs yet, it may be an option. The ones I have in my pallet collection are German engineered and all the same size. With a bit of a scaffolding pole as hand rail, it could look quite good. I'm still trying to persuade my boss about this... I do have to admit I have a pallet fetish.
-
Just finished laying my UFH pipes and have not gone up the wall route. I'd be asking for trouble...I'd only have someone drilling something nasty in the wall. I may as well put them next to her bed so she can turn them on before she gets up in the morning. Far cheaper than some remote device. And I'd be able to roll over and turn them off after 2mins as well!!
-
Sounds like a good idea. I had actually considered extending my ufh pipes up the wall of the shower enclosure and also underneath any wall pocket shelves. Dries up any pooling water on the shelves and gives a nice warm ambiance as you step into the shower. Now the wife wants a remote to turn on the shower so she doesn't get wet by having to turn on the taps to get the water running warm before she starts to shower. I did say that's only her arm that's going to get wet, and very likely that's going to get anyway when she does step in eventually.
-
Thanks Jeremy. Seeing the floor sensor's don't cost a lot IIRC I'll put in a few...just in case I really need them in future. Thanks Mike. I'll see how I go with my contractor hunt. Guy who I had lined up last year is now not responding to messages so I guess that's a 'not interested anymore'. Mesh not elevated yet and still needs extra ties on most loops. I thought it was easiest to lay the pipework with the mesh laying on the floor rather than tripping up every other step, falling through the mesh etc. Just need to do a final measure up to see how high the pipework's going to end up within the 100mm of insulation. Think I decided on 40mm from surface, so with 16mm pipe and 16mm of (A142mesh) gives me approx 30mm to elevate beneath. So looking to get this type of spacer (http://www.lemon-gs.co.uk/shop/reinforcement-accessories/plastic-spacers/plate-spacers.html) as that will minimise risk of puncturing DPM in those areas that I have it. Expensive buggers for a bit of plastic! Hopefully I won't need too many per sqm! Also need to create some kind of shower tray former for the bathroom as I want a slimline/low profile shower tray. A bit like the way you'd done it Mike!
-
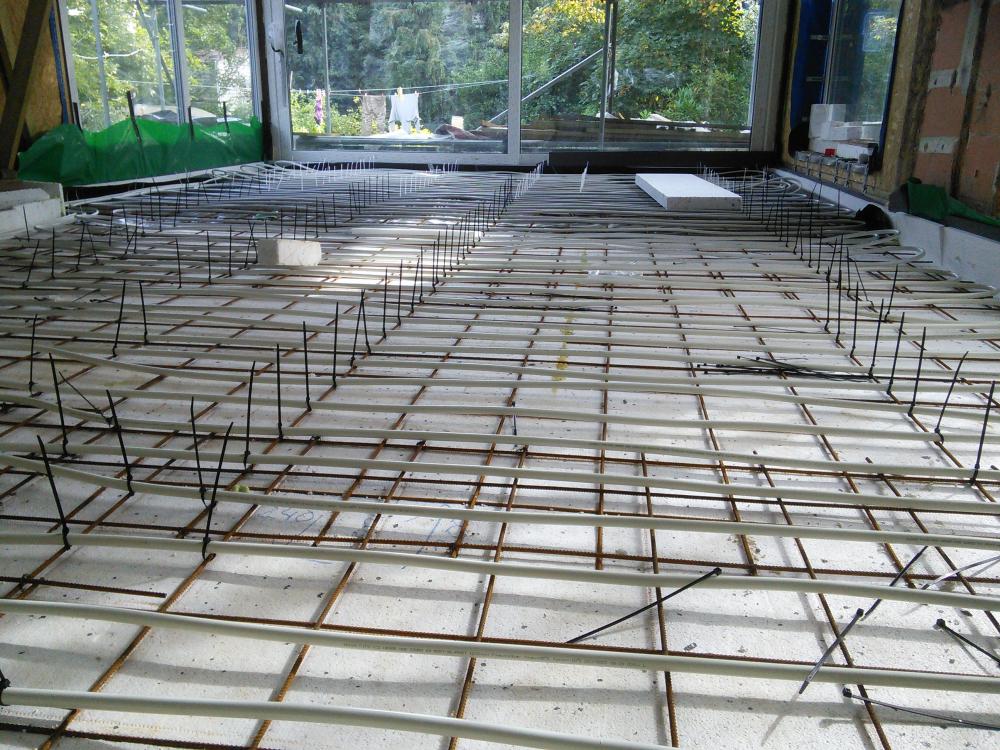
Not sure whether 'active slab' is being used in the correct sense here - what I want to do essentially is to redistribute heat from my solar gain areas in the south of my house to the northern cooler end with minimal sun. So all my UFH pipework is in and I'm hoping to get hold of a contractor to pour the slab in the next few weeks (If I can get hold of someone I have faith in!). Prior to the slab being poured, what do I need to do before? Obviously I need to pressure test all of the pipework and ensure there is no major drop, leaks etc. Anything else I need to do in the actual floor area before it gets covered? I've read with interest Jeremy's Active slab option and also found TerryE's blog entry of use: The figures are a bit over my head at this stage, but all I want to do right now is to have all gadgets and gizmo's in place before the concrete sets! I have a 12 port manifold serving the entire ground floor which has a makeup of: · Concrete (to be done!) · UFH tied to mesh (150mm centres) · Elevated mesh · DPM/Radon barrier (under top layer of insulation) · circa 300mm EPS insulation · Compacted Hardcore At this stage I will be fitting a gas boiler (ASHP may be an option in future years). I have a large southern glass facade which is fairly well shaded by the trees in summer, but in winter with less foliage and a lower sun, the slab in the lounge/diner and kitchen should pick up some decent solar gain that I am hoping to re-distribute to colder areas of the house. I will have EWI installed also in addition to the PVs and planned MHVR). 1) Where do I place the floor sensors? I was thinking to have one in the lounge/diner in a spot where I know the sun's going to hit or somewhere not directly in the sun and away from a pipe? I'll also place one in one of the bedrooms that will never see any sun (along Jeremy's method: "deliberately placed around 150mm to 200mm away from the nearest UFH pipe on the "cold" side of the house (the bit that never sees solar gain)." Is it worth placing a couple of spare sensors in the slab in case of malfunctions in coming years? 2) What do I need to do on the manifold side with regards to plumbing. Obviously I can do this after the concrete is poured but if I can save from having to do major changes later on? TIA Back to a bit more cable tying....
-
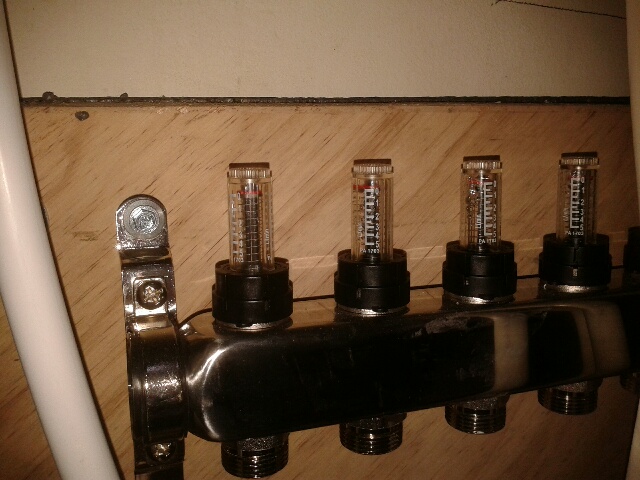
wet manifold flow guage! Is that normal?
oranjeboom replied to oranjeboom's topic in Underfloor Heating
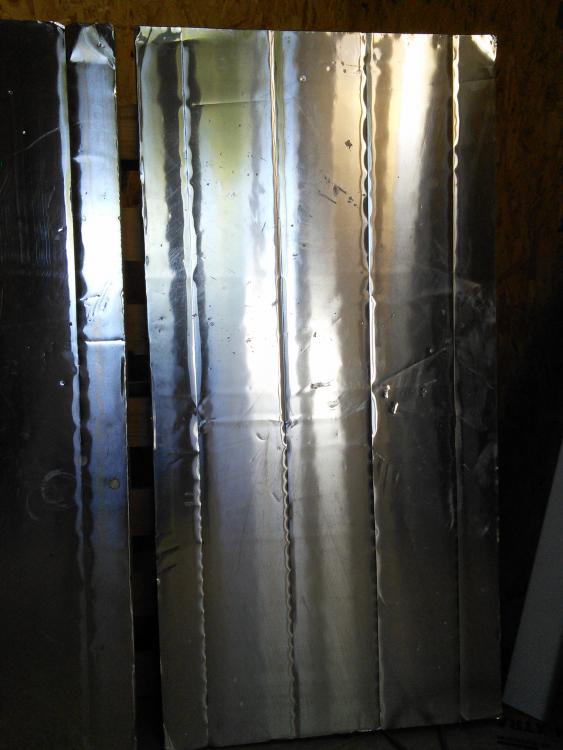
Phoned them yesterday and also told them about one of the 100m coils having dents every 80cm or so which I'm not too worried about but said that the overall impression that I have is that they have fobbed me off with someone else's leftovers (apart from the manifold). Guy I spoke to suspected it was just condensation in the guages after being 'out' for a while (he did not implicitly state it was from testing). Checked my other manifold for the upstairs UFH which was still boxed and that too has signs of moisture in the guages. I just want them to have a record of me contacting them in case it turns out that they have shipped me with returns/rejects etc. He was at least shocked about the panels and asked me to send pics of all of my concerns, so I waiting on a response from them. Apart from the moisture in the guages, the connection ends all seem dry and there are no signs of previous use/connections. Just annoyed that the panels are clearly not 100% new with the scratches and not being flat (may have to weight them down with some breeze blocks when the time comes to install them. Off to lay my last downstairs loop. Quite enjoyable laying all this stuff!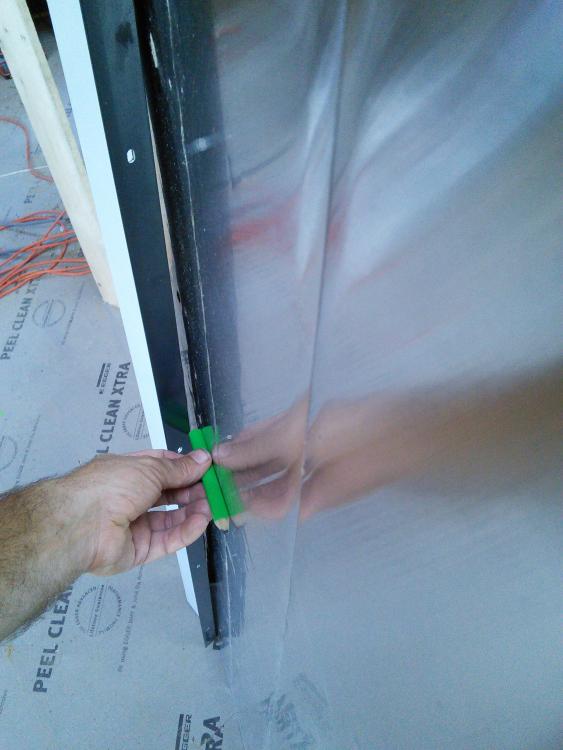
-
Since I need to contact Wunda about some dented UFH pipe they supplied, I thought I would also question them about the manifold they supplied. I noted this when I fixed it to the wall that a number of the flow guages were wet (You may just be able to make it out in the pic). I haven't plumbed anything in yet or pressure tested anything either. So, is it normal that these are sometimes wet? Packaging was all dry. I suspect that they perhaps test their manifolds at some point before shipping to the customer in which case that is fine. I also purchased some acoustic ufh panels and noted that a number of these had scratches/dents and drips of plaster/paint on the foil layer in addition to coffee stains, so clearly these returns from another customer. So I may question them on that also whilst I'm at it. Not even as though these were discounted panels so a bit annoyed about that. So my overall thinking is that a lot of this stuff was returns from another customer including the manifold. Maybe I'm just a fussy old git.
-
recommendations for low profile frame sliding glass doors
oranjeboom replied to Adamantium's topic in Windows & Glazing
Depends what you consider pleasant pricing, but I am so far pleased with my 3G slider from Kommerling which is a lift and slide. I bought it from the continent however, but probably worth considering despite the current crap exchange rate. -
UFH: Spacing between feed and return?
oranjeboom replied to oranjeboom's topic in Underfloor Heating
Thanks for the replies. The panels won't work as the doorway is only circa 800mm with the panel being 1000mm. Obviously it can be cut, but if the pipe spacing is 100mm that would mean I need to have a a panel length 24000 wide to accommodate my 24pipes. And I also want to place the pipes midway in the concrete slab, not on the bottom. I could place the panel on top of the elevated mesh, but I'd have to ensure the concrete gets underneath the panel also. A pipe spacer/rail may work as the spacing is less than 100mm apart. But measuring and carefully spacing the pipes apart means I may end up with 36mm between pipes and tightly tying them to the mesh. With 40mm of concrete above and below the pipework (as well as in between) I don't think this is going to case any structural issues. Just 4 circuits to go when I get back from the mother-in-laws....if I survive 'sunny' Wales.... I'll have more questions when the time comes to set up the manifold! -
UFH: Spacing between feed and return?
oranjeboom replied to oranjeboom's topic in Underfloor Heating
All too late. Cloakroom is the only room that has not had the original slab removed - with wall on slab. I'm halfway through putting the pipework in and the manifold ain't movin'! I was seriously peed off that Wunda screwed up with their inability to realise that their manifold (circa 1000mm) would be too big for my 850mm hall cupboard. So what I have now is as good as it gets locations. It's all looking a bit like I've dropped a giant's plate of spaghetti in that room at the moment. Pic to follow. Better start labelling those pipes before I forget.... Thanks, but I'm 1/2 way there now. I don't think the panel would actually fit this particular space in the WC. I have 24 pipes fighting for space. -
UFH: Spacing between feed and return?
oranjeboom replied to oranjeboom's topic in Underfloor Heating
Thanks for the pics. Mine is beginning to look like that now. Good to see you had plenty of help there though! -
UFH: Spacing between feed and return?
oranjeboom replied to oranjeboom's topic in Underfloor Heating
Bit of a strange one...Wunda screwed up with their plans. My intended location for the manifold was in one of the hallway cupboards and despite me sending them scaled drawings in was only much later that they admitted the manifold would be too big to fit their. So I had to come up with another central-ish location. Cloakroom still has the old slab in situ, so I have had to conduit the pipework through the base of the wall/slab floor and up the wall to where the manifold is now located. Thanks for the piperails, but I've got the mesh in place already, but can use the pipe rail spacing as a guide then.Is that approx 25mm spacing? Hi Mike, yes, I was suddenly forced to start looking at toilet options/designs and started looking for templates as to where exactly the screw holes would go. I then tried a few layouts when I was laying the pipe and rather risk anything, I have opted to go for a wall hung toilet. A bit more expensive but easier for me right now! And it's a small room, so a wall hung will hopefully make it appear a bit larger. I've always wanted a urinal actually, but the boss doesn't like that idea, despite there being a WC next door in the bathroom. Not an option here, as the slab is in situ in this room. Was intended as a 'cool room' at some point - but not any more with the manifold in there. It's also got on of the walls built on top of slab, so not touching the slab! -
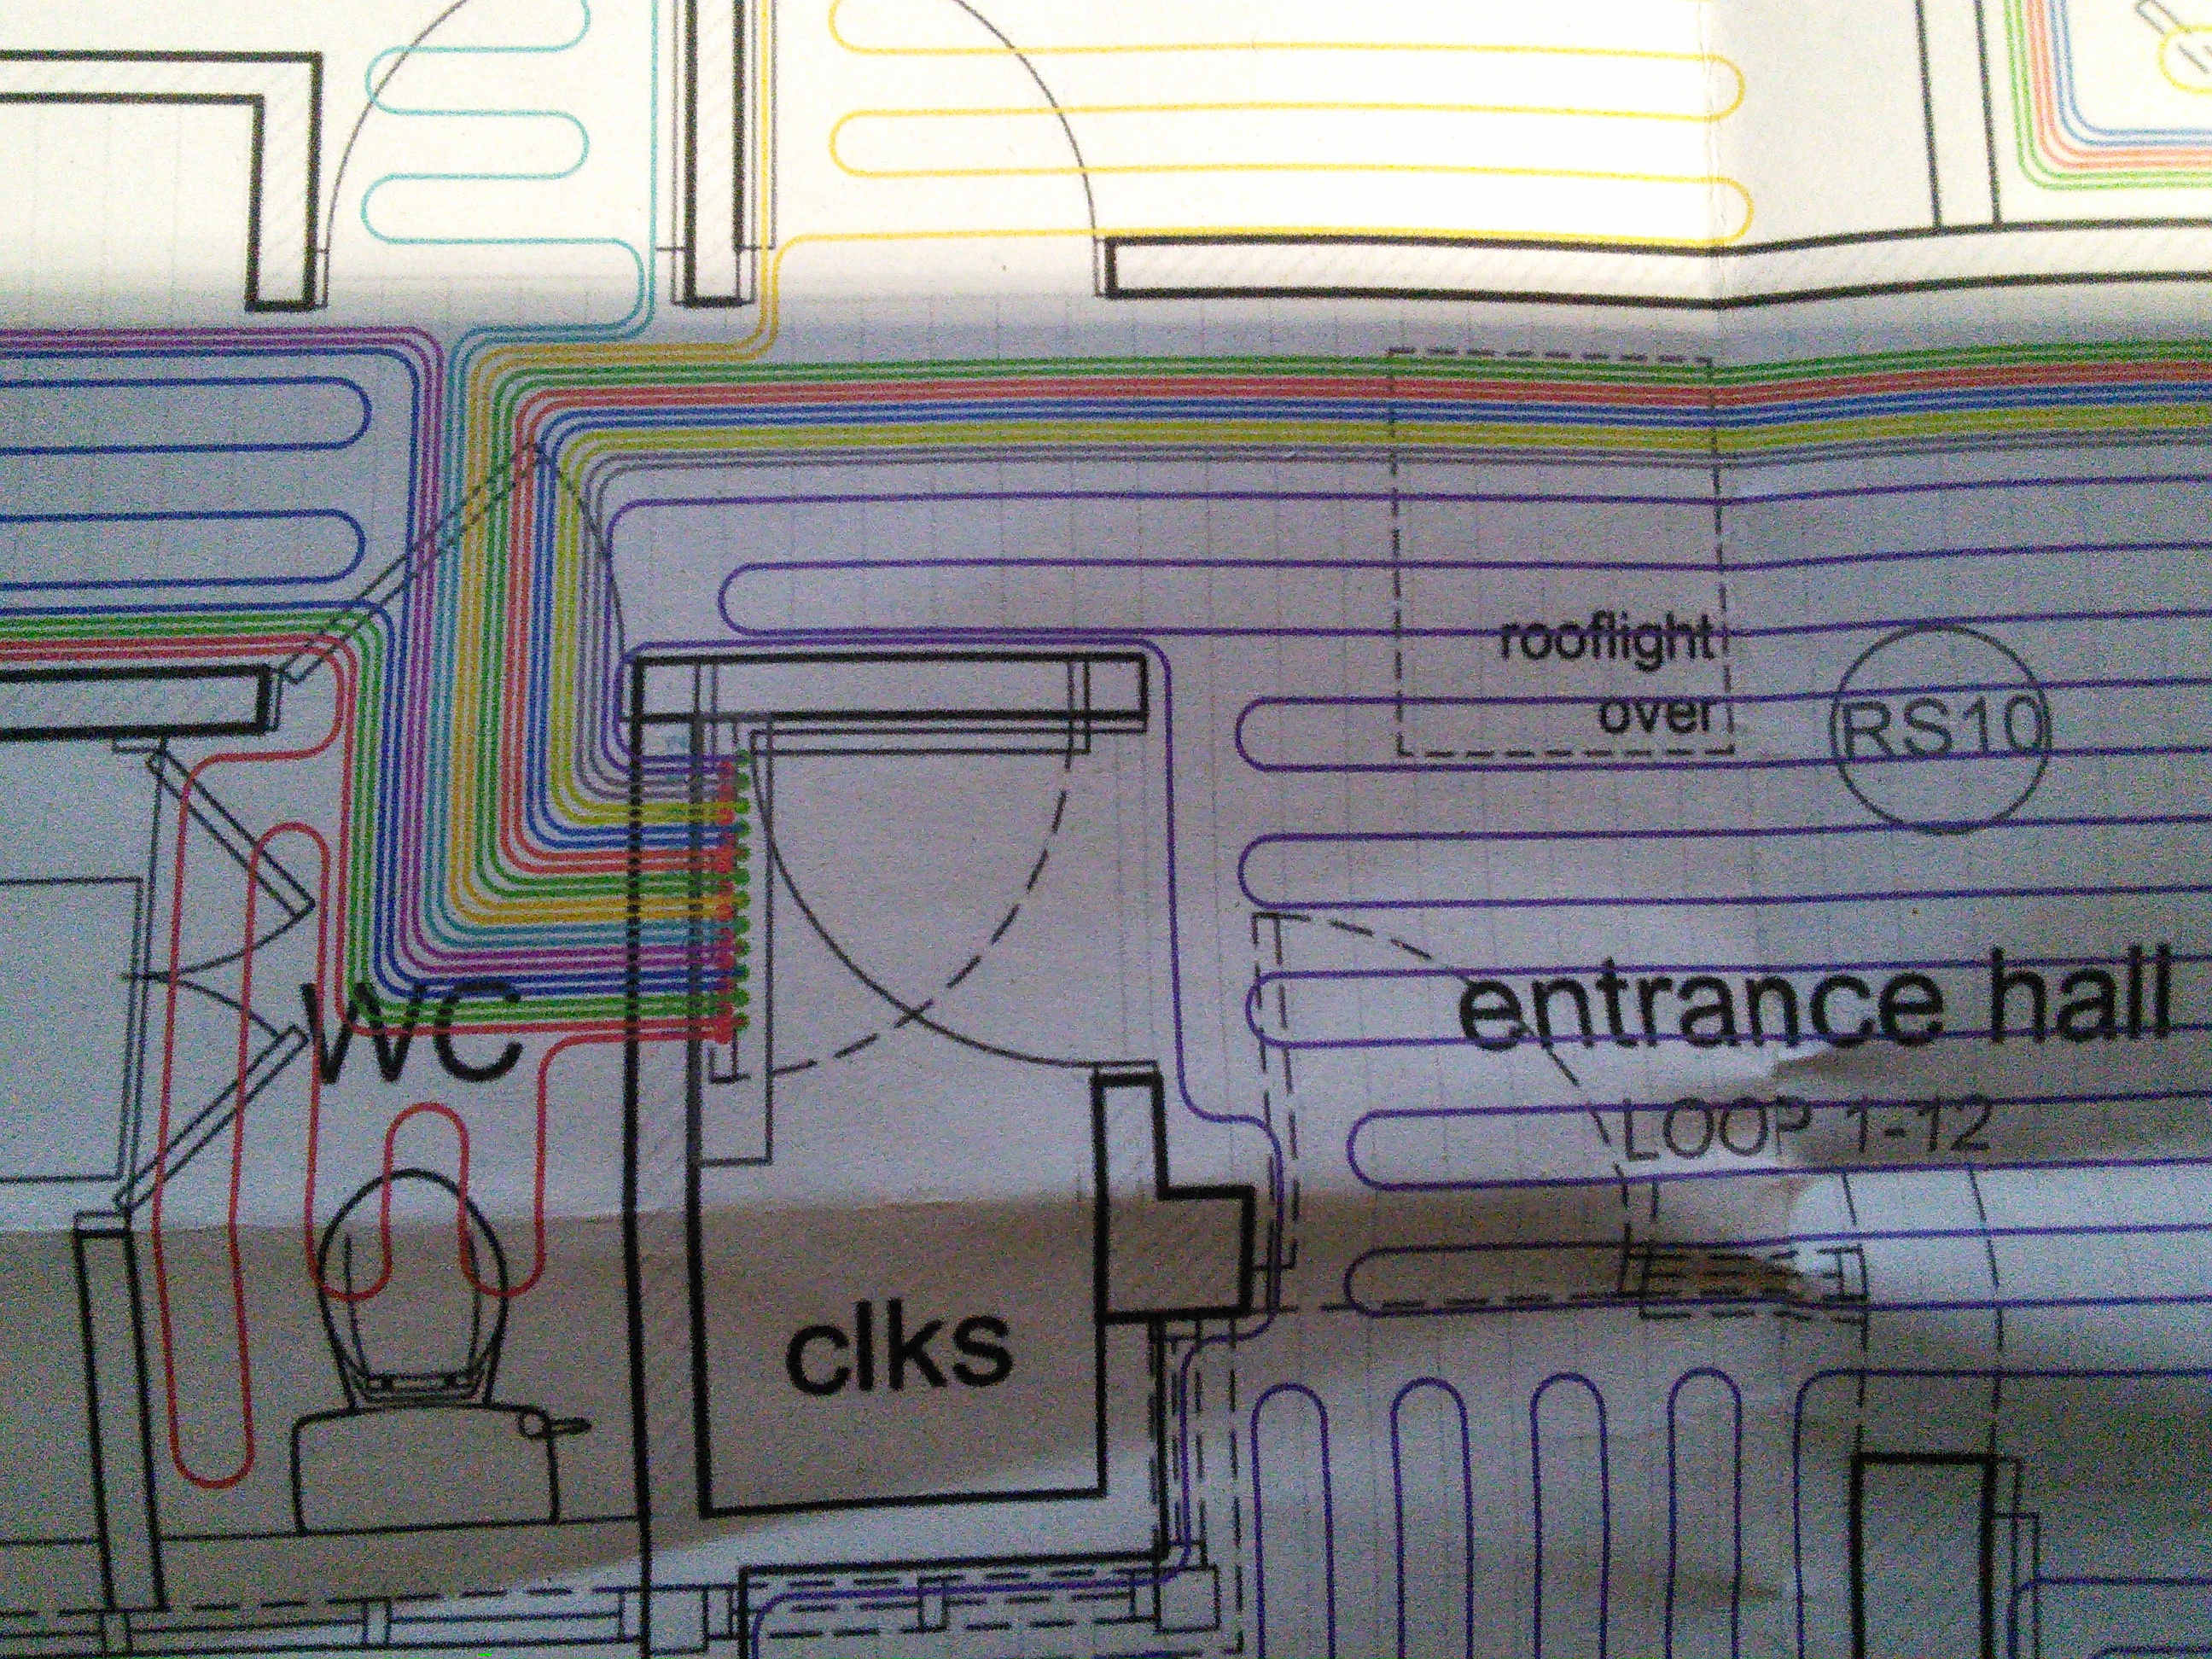
Hi All, Been asked before I know....don't shoot me. But didn't see a definitive answer. So I have started laying the pipework for my 12 port manifold. Areas are getting pretty congested with the feed and return pipework. As you can see from the pics, the WC room is worse than the M25 on a bank holiday. So it may get a bit warm in there... Should I try and space them out equally and as mush as possible? What is the optimal min distance? Or should I "just insulate every other pipe in the congested areas with 9mm wall armorflex" a la @Nickfromwales? Only hesitation is I'm not sure whether I have sufficient room to insulate every other pipe. Also I'd need the slitted stuff which looks a bit pricey too. I also don't wanto end up with a very thick diameter as my concrete slab is only 100mm thick. Also, 16mm pipes are cable tied to A142 mesh. I have some long feeds and return legs as well, and I am tempted maybe to leave 30-40mm between the pipes. I don't mind a bit of 'overheating' along the peripheries of some rooms (see entrance hall) as long as there are no implications for the concrete slab. Thanks in advance. OB

-
Two?????? Bugger! Just come in from outside cutting the buggers with one square overlap. Looks like I overbought sheets so can also recut if needed. http://www.pavingexpert.com/reinfrc1.htm: "Where sheets need to be overlapped, the lap should be at least 350mm and the two layers should be lashed together with tie-wire." Elsewhere on the web it ranges from 1 square to 300 or even 600mm lap! Will contact the BCO to see whether I can get a response from him this time. Yes, will tie up all pieces. And yes, will add protection to the new doors/windows. The weighed a tonne and I don't want to do that again! Thanks Onoff. I have plenty of plastic sheeting left from the insulation, but really can't be arsed with taping it all up and hoping it's all good. Wouldn't want to go for the bin bag option for the same reason - surely only a small gap will enable the concrete to get in and do its reaction thing with the foil??
-
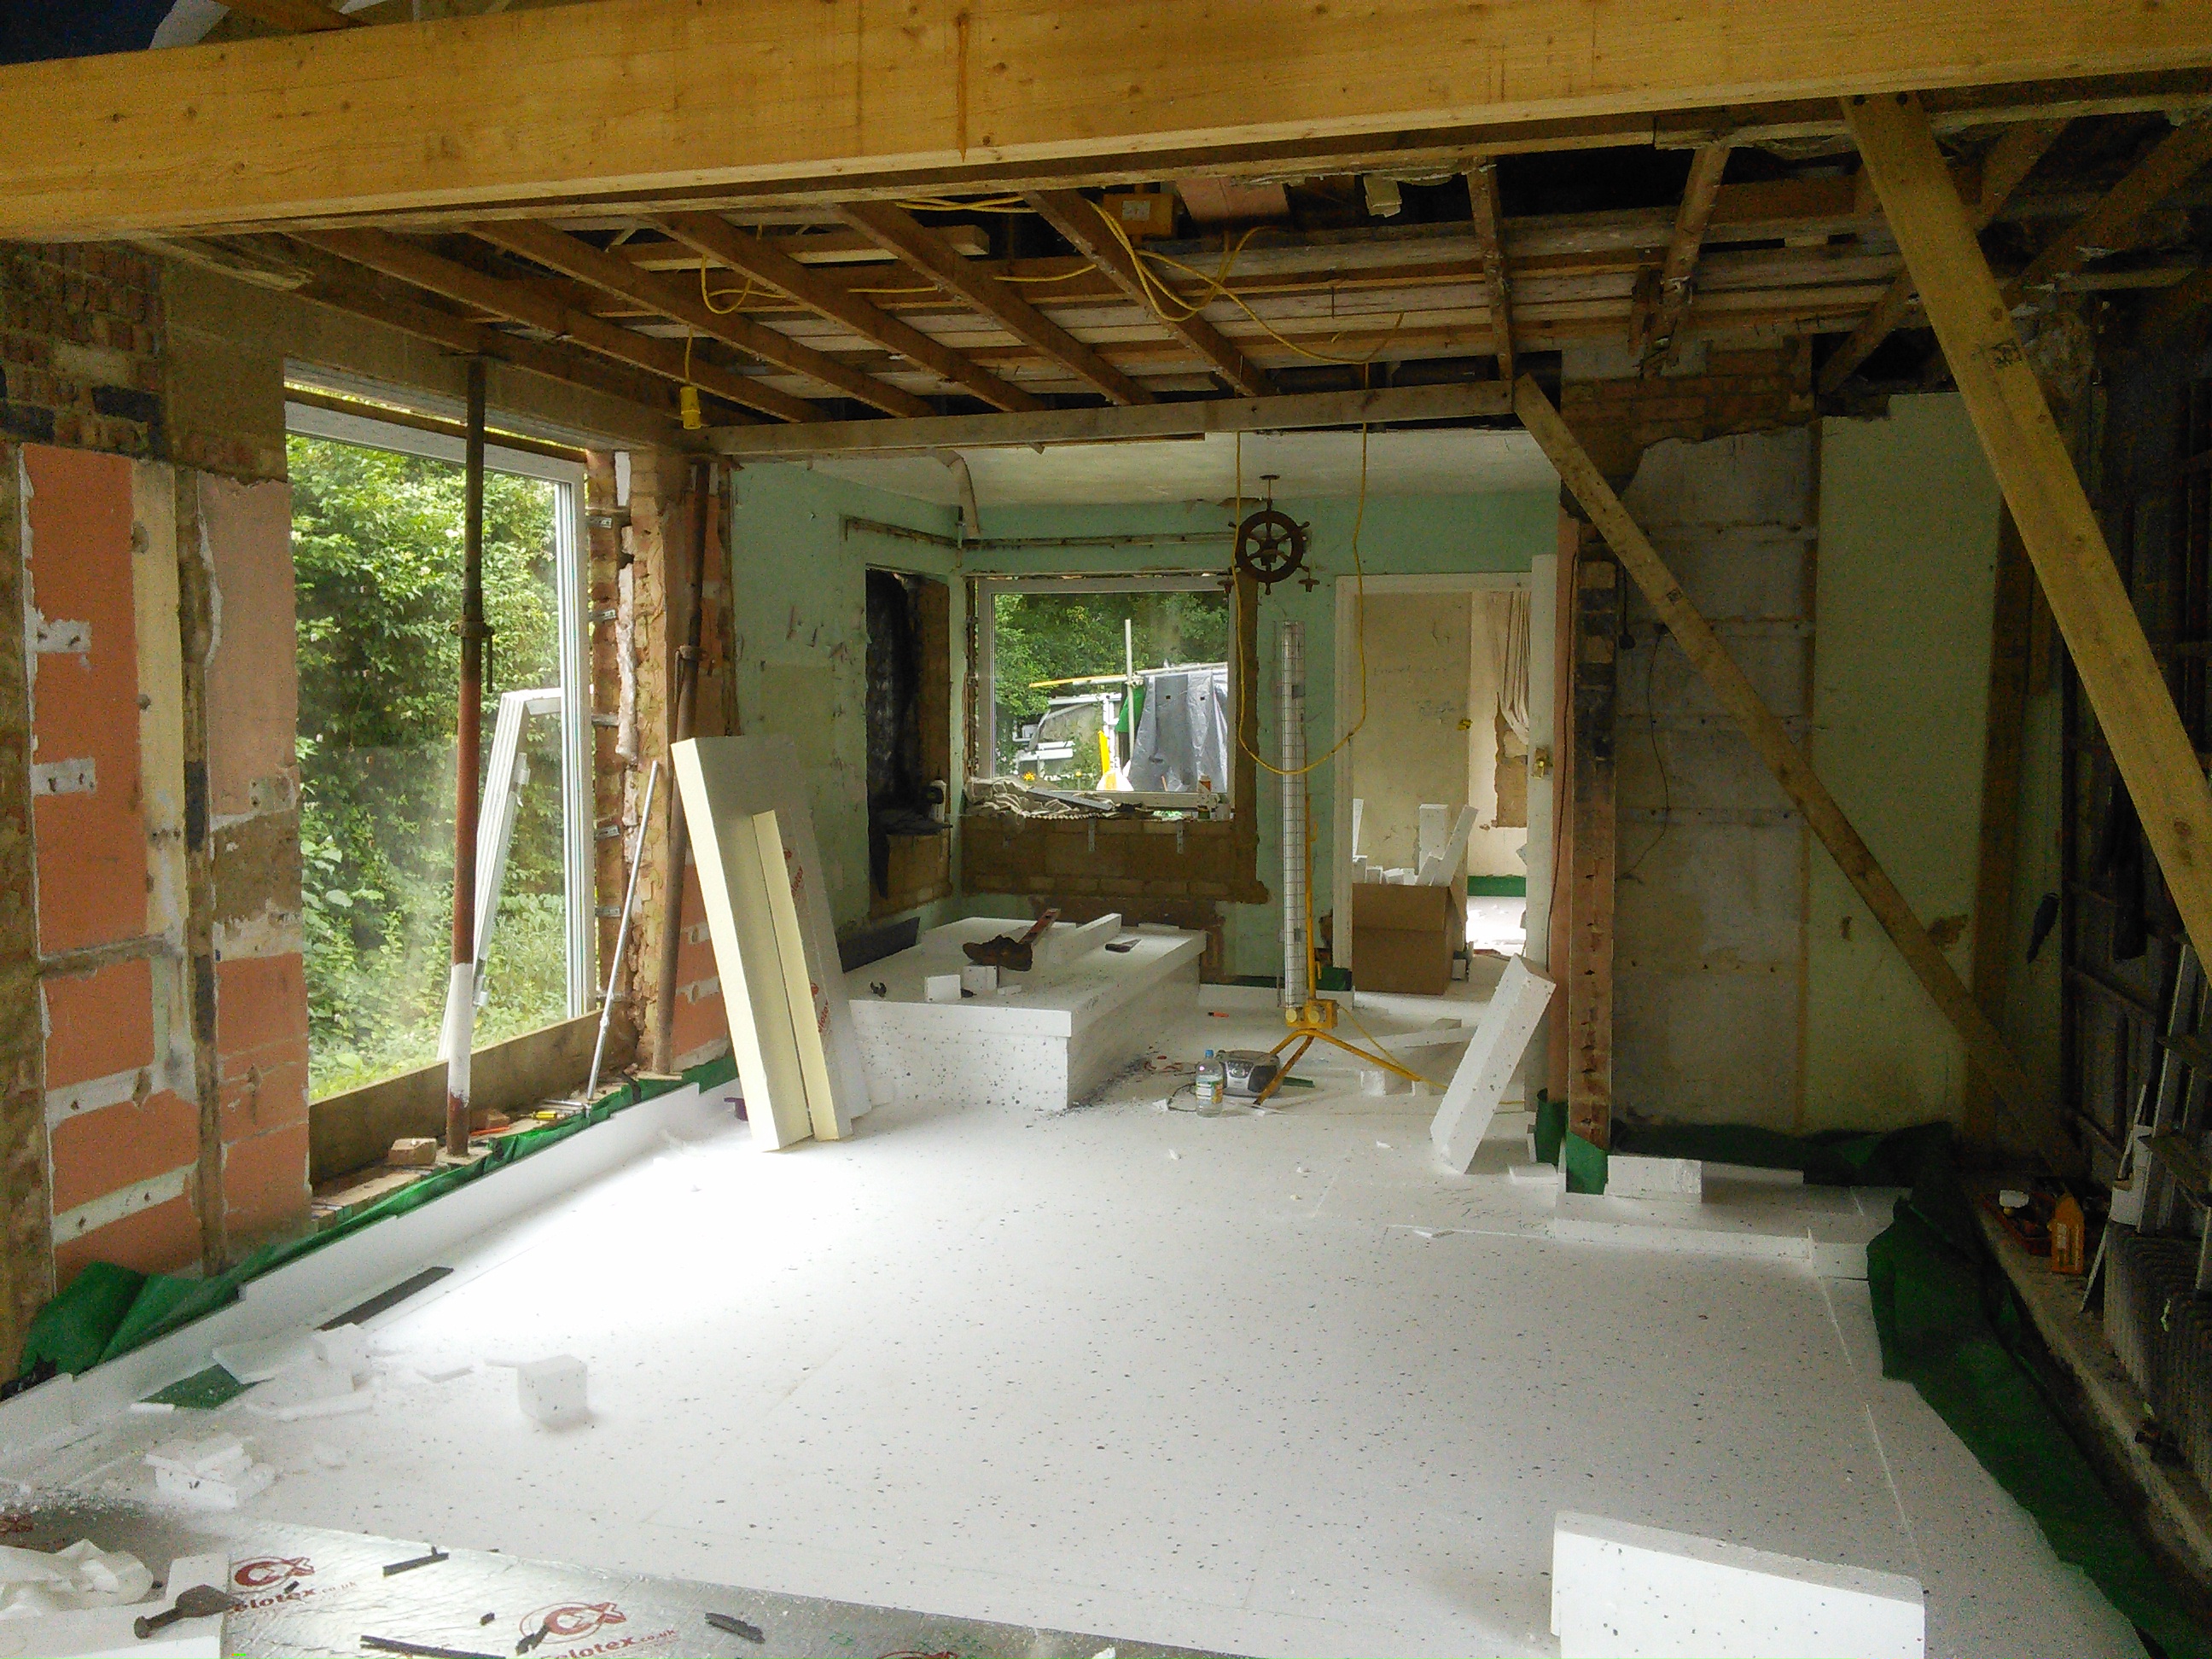
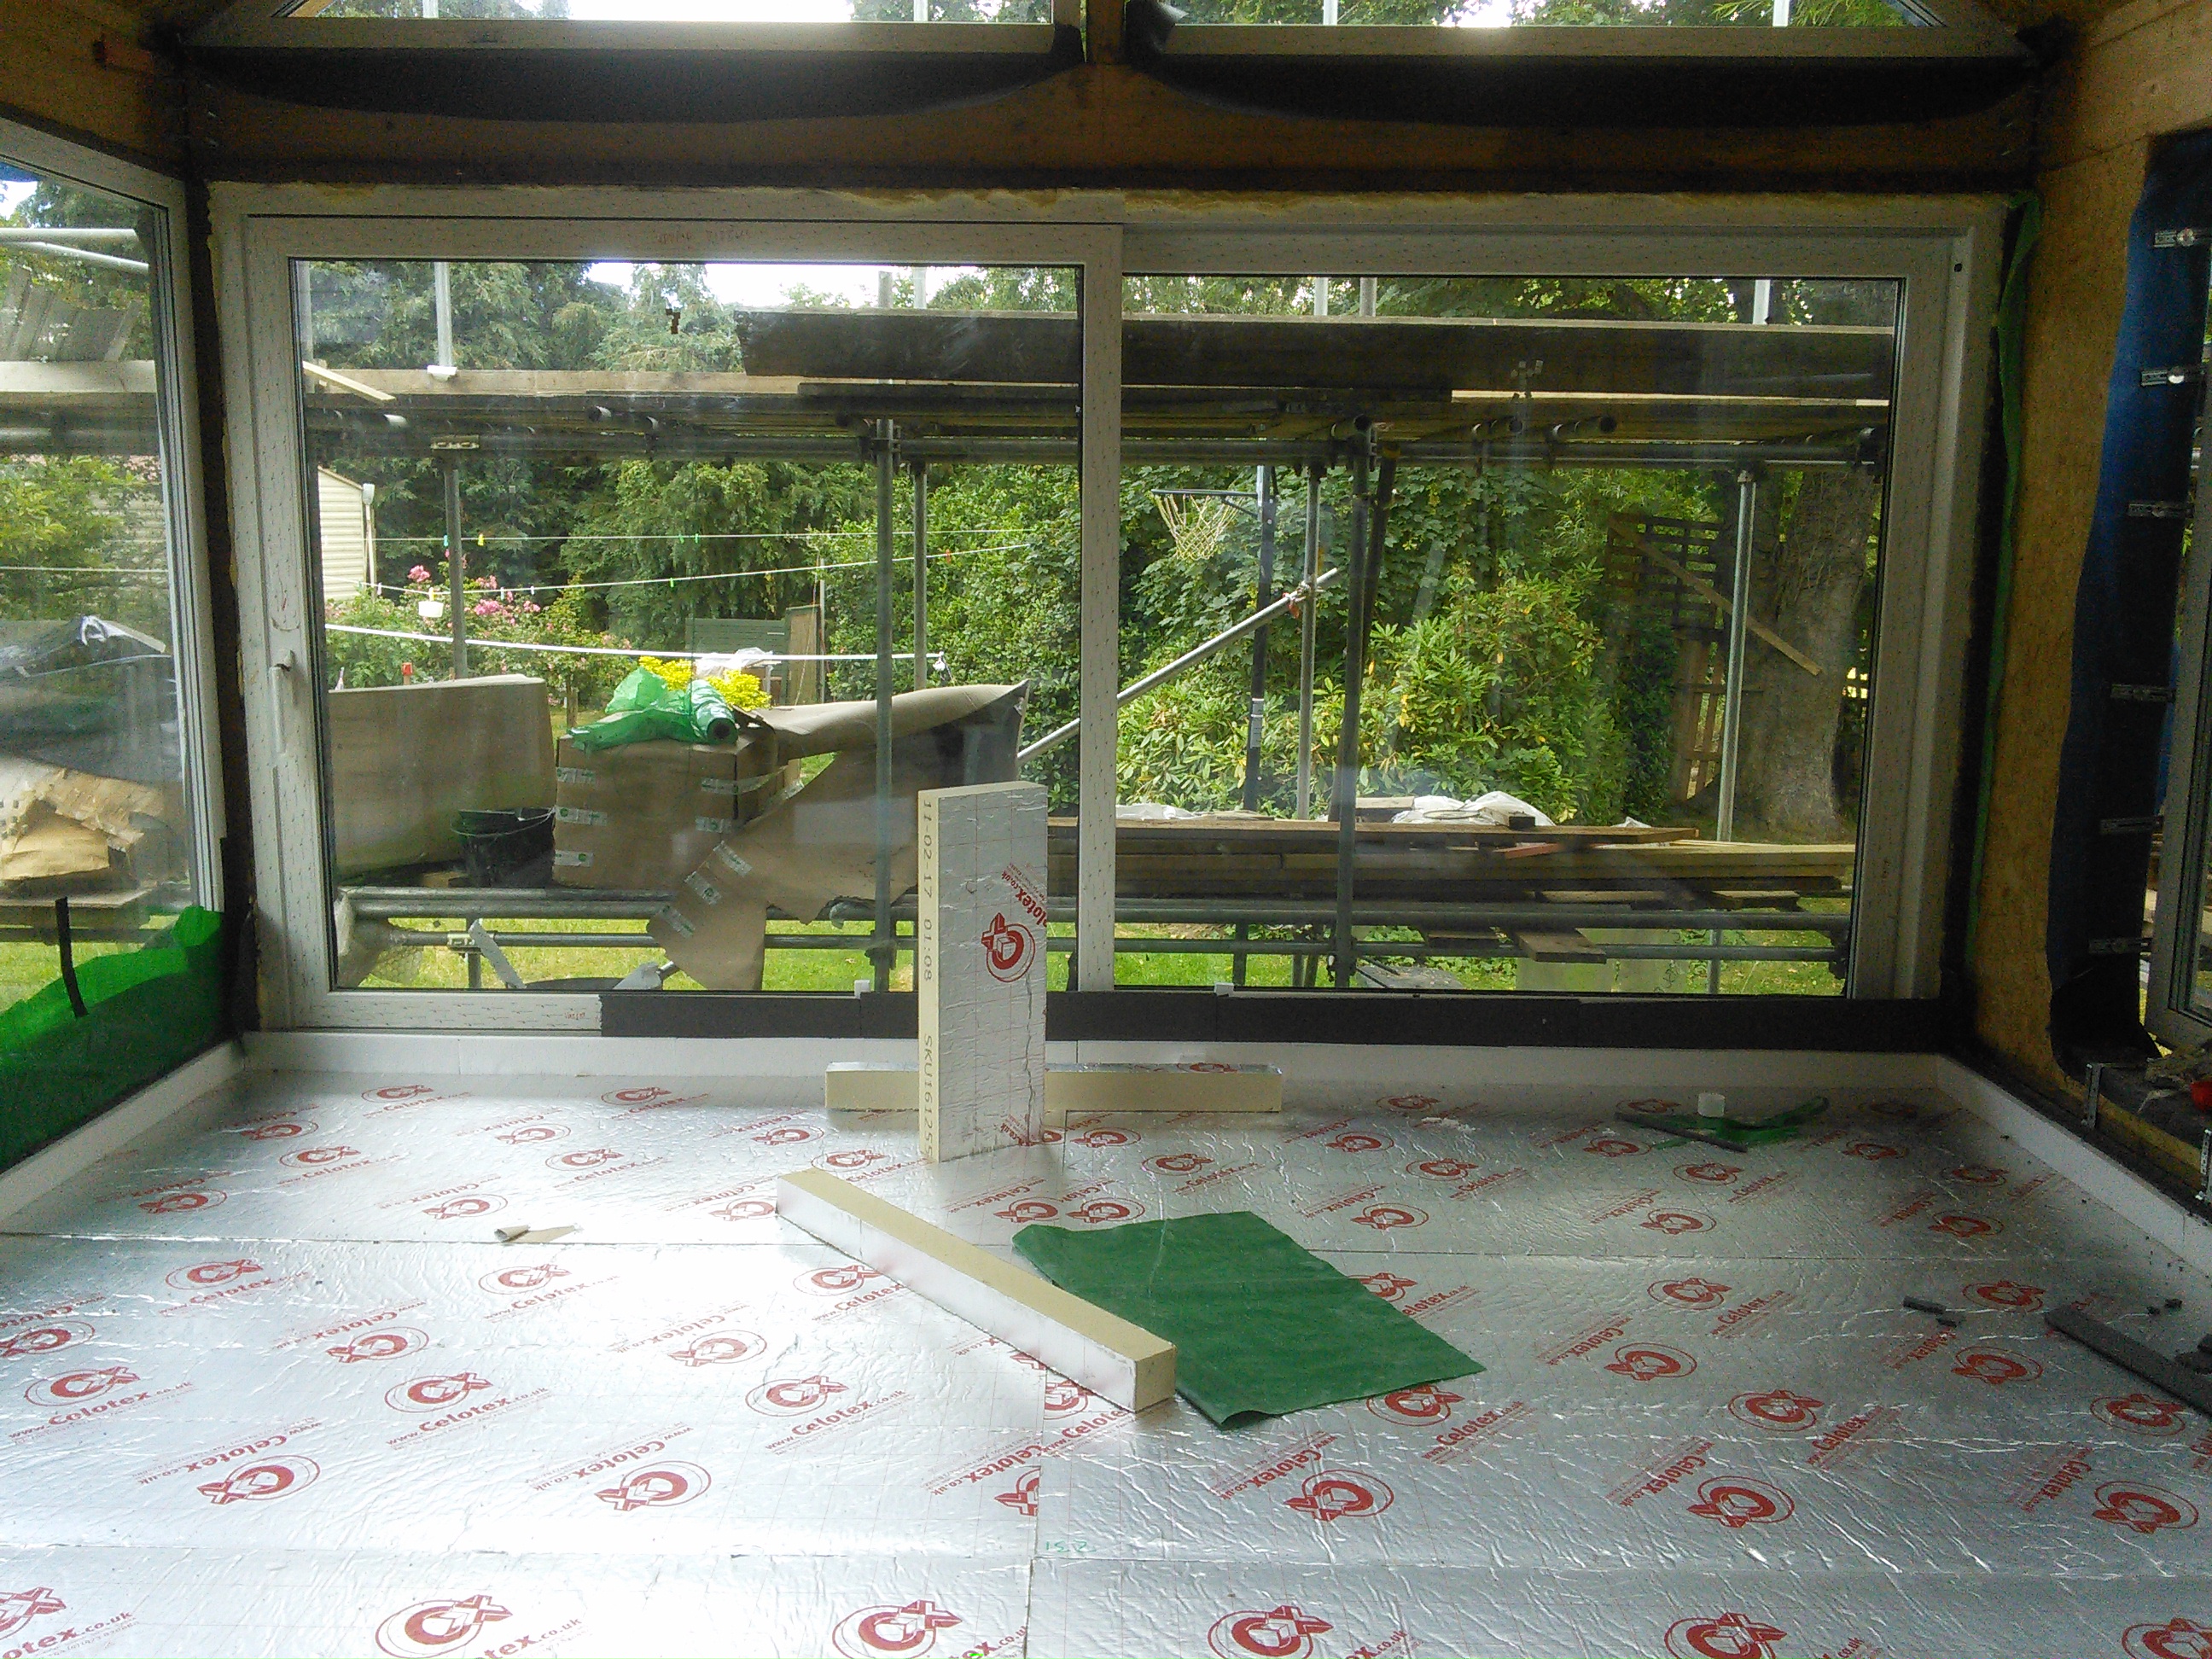
I've just about completed my slab insulation for my extensions (EPS + Celotex) and old bungalow (EPS). I've used 25mm of EPS perimeter insulation and will probably stick on the 8mm roll stuff that I will get from UFH supplier. So I'm just about ready to get my 2.4x4.8m mesh sheets into place (will have to cut most of the buggers in order to get through door ways. Luckily I should at least get them through the larger sliding door at the rear. The plan is to have UFH cable tied to mesh and then have a wet mix concrete pour. No final screed! Before I start cutting and laying them, i have some questions: 1) How much overlap should I have? Is one 'square' overlap enough? The mesh has 200mm squares. 2) How far from the walls should I have the mesh? I know there should be some distance and I think I read somewhere 150mm? 3) Tying wire. As it's just a case of keeping the mesh in situ whilst concrete is being poured, would cheapo galv wired be sufficient rather than defacto tying wire? e.g. https://www.toolstation.com/shop/Landscaping/d130/Wire+Fencing+%26+Tools/sd3333/Galvanised+Straining+Wire/p40640 4) Should I continue the mesh through doorways? 5) Not mesh related, but if I am supposed to cover the celotex top layer (in the extensions only) with a poly sheet (vapour barrier) or should I use something more heavy duty like a DPM? (I have the DPM/radon barrier in already but further down the layers. My only concern with the lighter vapour sheets is that it is more prone to being punctured / ripped with the mesh (I will be using chairs) and people (i.e. me!) repeatedly tripping over the mesh. 6) I intend to tape up the celotex joins (not the EPS sheets). Can I use any tape to do this or need the foil type tape? Thanks in advance.


-
Could potentially make your own with celotex sandwiched with OSB either side? There are some suppliers that now also sell them online, e.g. http://www.sipsdirect.co.uk/spline2.4x97.html but you have probably seen that.