Iceverge
-
Posts
4462 -
Joined
-
Last visited
-
Days Won
32
Everything posted by Iceverge
-

Which heating and hot water solution(s) in 2024?
Iceverge replied to Jane W's topic in Other Heating Systems
@dpmiller Did you install the Harlequin Heatstream in the end? I really liked the idea but thought the storage volume too small. If they could make an really big one it would be ideal for an ASHP. -
Mixing wood fibre sarking with PIR in pitched warm roof
Iceverge replied to DonnaP123's topic in Roofing, Tiling & Slating
It can be done safely IF you are fastidious with airtighness. Almost nobody is, hence the fear of hybrid roofs. You only get issues when you have more moisture getting in Vs getting out. Airpaths through the structure are the real risk when drafts carry moist internal air into the structure to below the dew point and it condenses. I have never ever heard of a structure failing purely through diffusion (vapour passage through materials) so it doesn't matter where the airtighness layer goes IF it is comprehensive. -
Which heating and hot water solution(s) in 2024?
Iceverge replied to Jane W's topic in Other Heating Systems
Interesting topic this one. I laboured over the best DHW solution for ages. Ended up at a direct 300l UVC, mostly because I was sick of all the sales nonsense and high capital outlay. It works fine and doesn't cost too much to heat. Hopefully very little whenever I put in some PV. On my plumbing research travels I became quite attached to the idea of Thermal stores. I subsequent installed a 250l maxipod thermal store in my parents house to merge an oil boiler and a solid fuel Rayburn to deliver pressurised hot water. It works really excellently. Instant hot water, no G3 or discharge pipework to worry about. However It needs to be kept at a high temperature to deliver any reasonable amount of DHW. Not ideal for an ASHP. You could just get a massive coil in tank TS (say 600l) and it'd work fine I bet. -
Mixing wood fibre sarking with PIR in pitched warm roof
Iceverge replied to DonnaP123's topic in Roofing, Tiling & Slating
How thick are the rafters and I'll push something cheap and buildable though ubakus. Or you can do it yourself. https://www.ubakus.de/en/u-wert-rechner/? Also what's the planned build up above the woodfiber? This is extra important to know if you plan on a material of very low vapour permeability such as foil faced PIR. I'm not a fan or PIR between timber rafters. It's slow and wasteful to fit properly. Expands and contexts differentially to timber so is a recipe for gaps long term. It's poor for noise and fire Vs minerals wool. -
Welcome welcome. De-identified Pics and plans always welcome.
-
Which heating and hot water solution(s) in 2024?
Iceverge replied to Jane W's topic in Other Heating Systems
I'm thinking we may have wires crossed! I would advocate burying any cash into the bits of the house that can't be changed or added easily later. Specifically MVHR Airtighness Insulation Triple Glazing. -
Manifold system versus hot return system
Iceverge replied to Russell griffiths's topic in General Plumbing
@weslev I had the issue of a long run to the kitchen tap. 10mm pipe is fine for hot water. I have the "times to hot" in the below post. https://forum.buildhub.org.uk/topic/18834-unvented-cylinder-installation-spot-the-problem/?do=findComment&comment=377078 -
Which heating and hot water solution(s) in 2024?
Iceverge replied to Jane W's topic in Other Heating Systems
I'd rather spend more money on the building fabric than batteries. More insulation will last forever and a day. -
Passivhaus in St Albans for sale
Iceverge replied to TheMitchells's topic in General Self Build & DIY Discussion
The design has some perks. The footprint of both floors match. No "magic" bits being held by either giant thermal bridges or sorcery. Theres good grouping of the wet rooms for drainage and short water runs etc. It's a sensible size at 160m2. Personally I'd avoid the flat roof if for nothing more than leaf clearance duties and there really should be an accessible shower downstairs. I'd think the huge window will cause some overheating issues too. Other than that it's fine. -
Passivhaus in St Albans for sale
Iceverge replied to TheMitchells's topic in General Self Build & DIY Discussion
A common mistake by smart people is to underestimate the available depths of stupidity and incompetence. When it comes to making something as idiot proof as possible I agree with @MBT6 a well pitched roof, with good overhangs and no valleys, covered in slate or tiles is one of the hardest to really screw up. -
Agreed completely. Membrane is great for long uninterrupted spans. Cheap, fast very few joints needed but it's not very robust and impossible to tape in tight corners. Use PLY/OSB and airtight paint/sealant here instead.
-
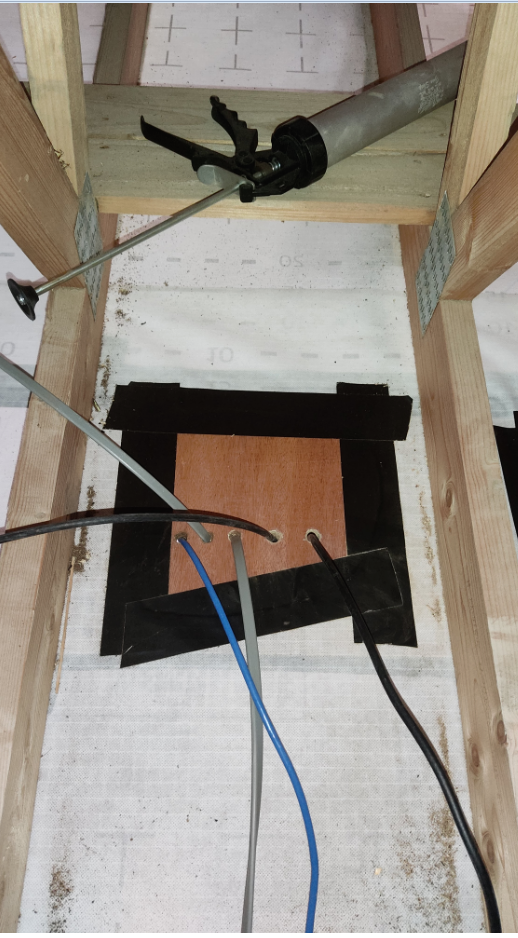
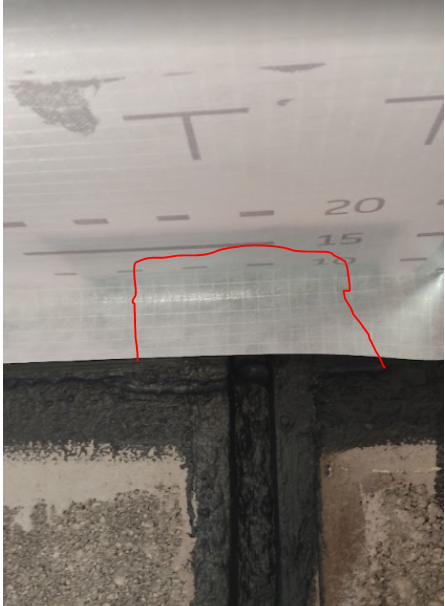
Here's how I did the wires into the attic. The pic is taken looking down from above. A scrap trapezoidal piece of ply screwed to the trusses from below. The membrane cut back and tapes to the ply. It doesn't need to be pretty but it needs to be neat and effective. ONE WIRE for ONE HOLE. No expensive grommets needed, just a squirt of airtight sealant from both sides. The sausage gun can be seen. Note there's plenty of space between the holes.

-
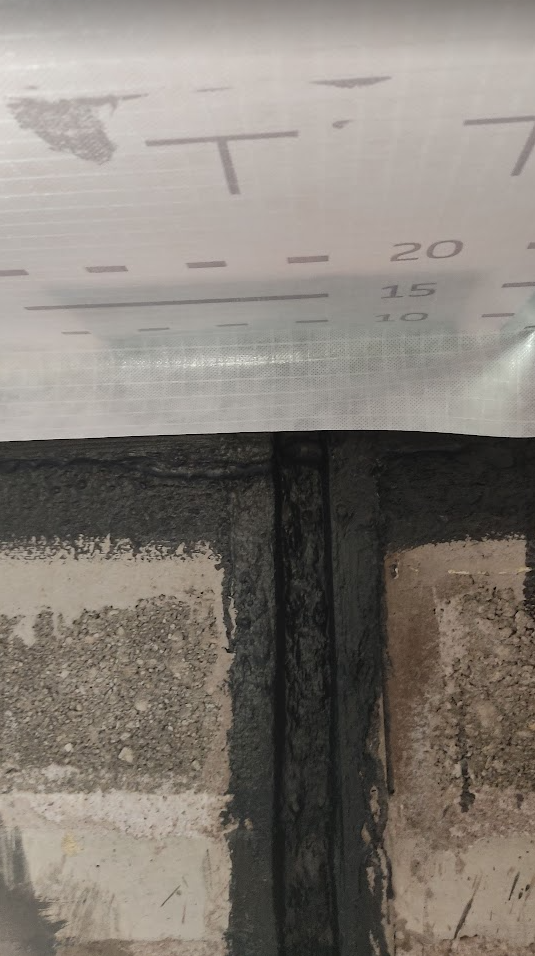
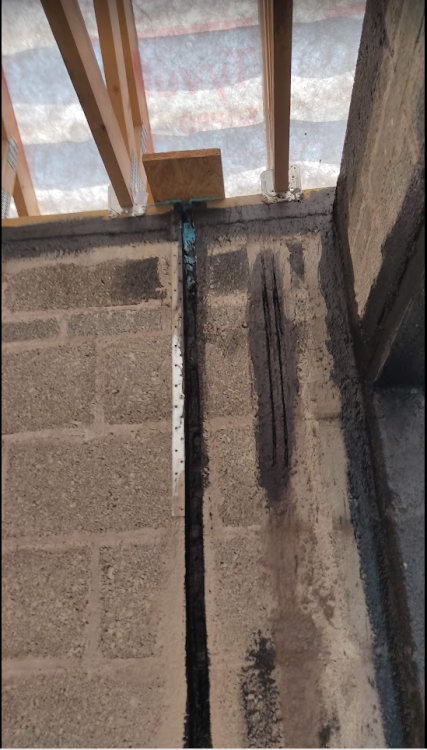
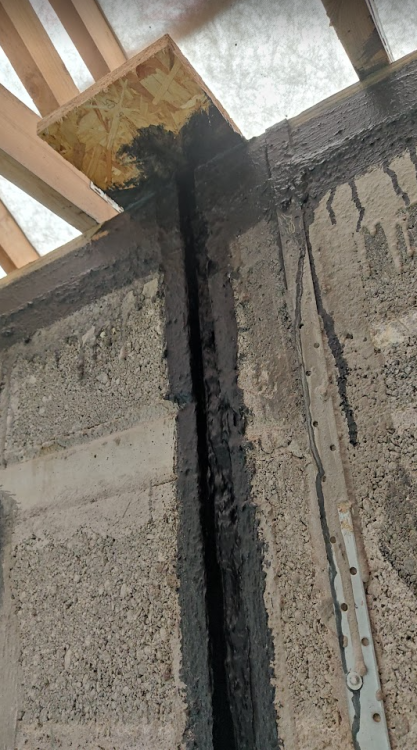
Here's how I did the top of the conduits as membrane is almost impossible to seal into the corner. Continue the chase up through the wall plate. Screw a square of OSB down from the top and seal with airtight paint. Then run the membrane down the wall under the square of OSB. Seal to the wall everywhere with airtight sealant. Cut back the membrane as shown and seal to the OSB with airtight tape. That leave the electrician plenty of space to take the conduit above the level of the plasterboard and bend the wires into the service cavity without any need to go near the membrane.

-
Plan for ZERO holes in the membrane. I did this by. 1. Running a service cavity below the membrane, making everything go in here. 2. Put plywood where ever you need to penetrate and tape the membrane to that. Use the ONE WIRE for ONE HOLE mantra. I even drilled the holes and labelled them for the electrician. 3. That left a very simple set of instructions for the electrician. Don't ever make a hole in the membrane, only in the ply. ONE WIRE per ONE HOLE If there's any accidental holes just tell me. There will be no bollockings, no scolding, no problem. Just tell me and I'll fix it.
-
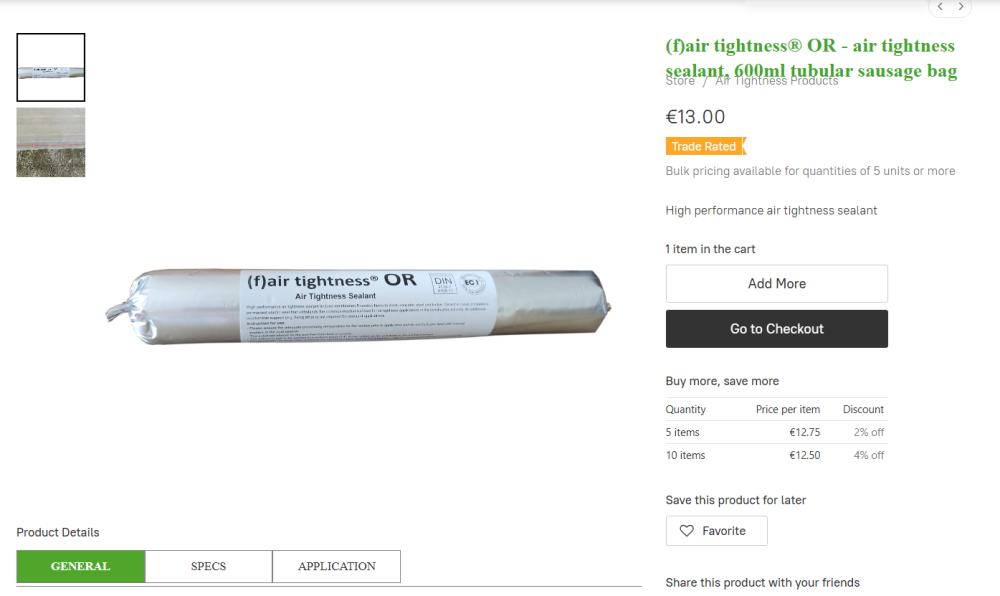
That's a nightmare. Sorry to see it. However not terminal. Nothing ever is. If you're in Cork you can borrow my DIY blower door fan and if you put 2 days in with it and plenty of this you may still get a result. (f)air tightness® OR sealant for air tightness, 600ml tubular sausage bag (prodomo.ie) It'll require the house to be empty of other trades and plenty of patience though as lots of those holes won't seal on first attempt. Wear gloves as it has the texture of sticky chewing gum.
-
Anything wrong with the 22mm Hep push fit? Worked well for me.
-
Did you wrap HDPE tape around the olive too? Just a wrap or two. I find it helps the whole thing slide into place as the tape is really just a lubricant.
-
@markharro Can you use rigid woodfiber boards and render directly onto them? It's an important detail as when you get to really low U values the weak spots stick out like a sore thumb.
-
Of course not, I'm interested in seeing a conclusion as I don't think you situation is isolated. Ventilation and "breathability" are often confused. In fact breathable is a bit of a pointless term in itself I think. Everything is breathable really. It's a measure basically how small the microscopic holes in a material are. At some rate there's a particle small enough to get through every material. Better to think of things as a level of "vapour permeability" this can be measured in SI units. ,Mega (or Giga )Newton seconds per gram metre. All a bit abstract for building, but the point remains. If something is very vapour permeabile like mineral wool it won't trap moisture. Something like Aluminium foil will. Lime render is so where in the middle. However It will do absolutely zero for your Ventilation. This is the air you need to breath in your lungs, and take away moisture in the air and bad gases. This requires a continuously running fan to have any consistent results. All the lime plaster in the world won't help. As a rule I think it's better to keep things public ,if you can, for peer scrutiny and support but if you need to message me there's a little envelope symbol in the top corner of your screen for a PM (personal message)
-
Converting an internal cavity wall to single skinned
Iceverge replied to david86's topic in Building Regulations
Off the wall idea here. Put some UFH loops or heating wire in the cavity and backfill with concrete. It'd be a mega storage heater. -
Hi Catherine I saw that but I wasn't sure if they had done exactly the same detail on yours. Did he have any further information to add? Normal EWI relies on a face of impermeable acrylic or silicone render to stop the moisture so the holes in the Porotherm wouldn't really matter However..... Being so close to the sea I am inclined to suggest something with a cavity is a better plan. EG an airspace behind the externally cladding. Maybe battens and fiber cement siding. Have you done anything to tackle the ventilation of the house?
-
Sorry @Catherine Weitbrecht didn't see this. Perhaps use the @ symbol to tag me in the posts so I'll get a notification. I'll have a look tomorrow.
- 31 replies
-
- 1
-

-
- concrete slab
- lime render
- (and 1 more)
-
Building regs tend to over ventilation but Passivhaus recommends as close as makes no difference 30m³/person per hour. Do you have 720m³ per person per day?
-
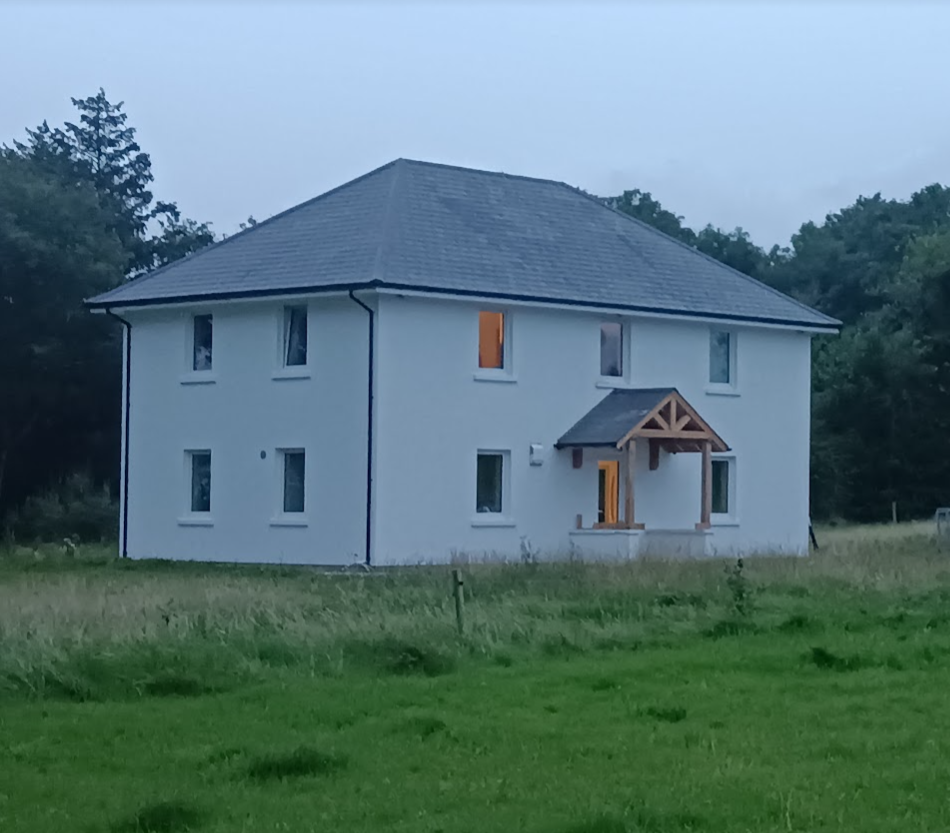
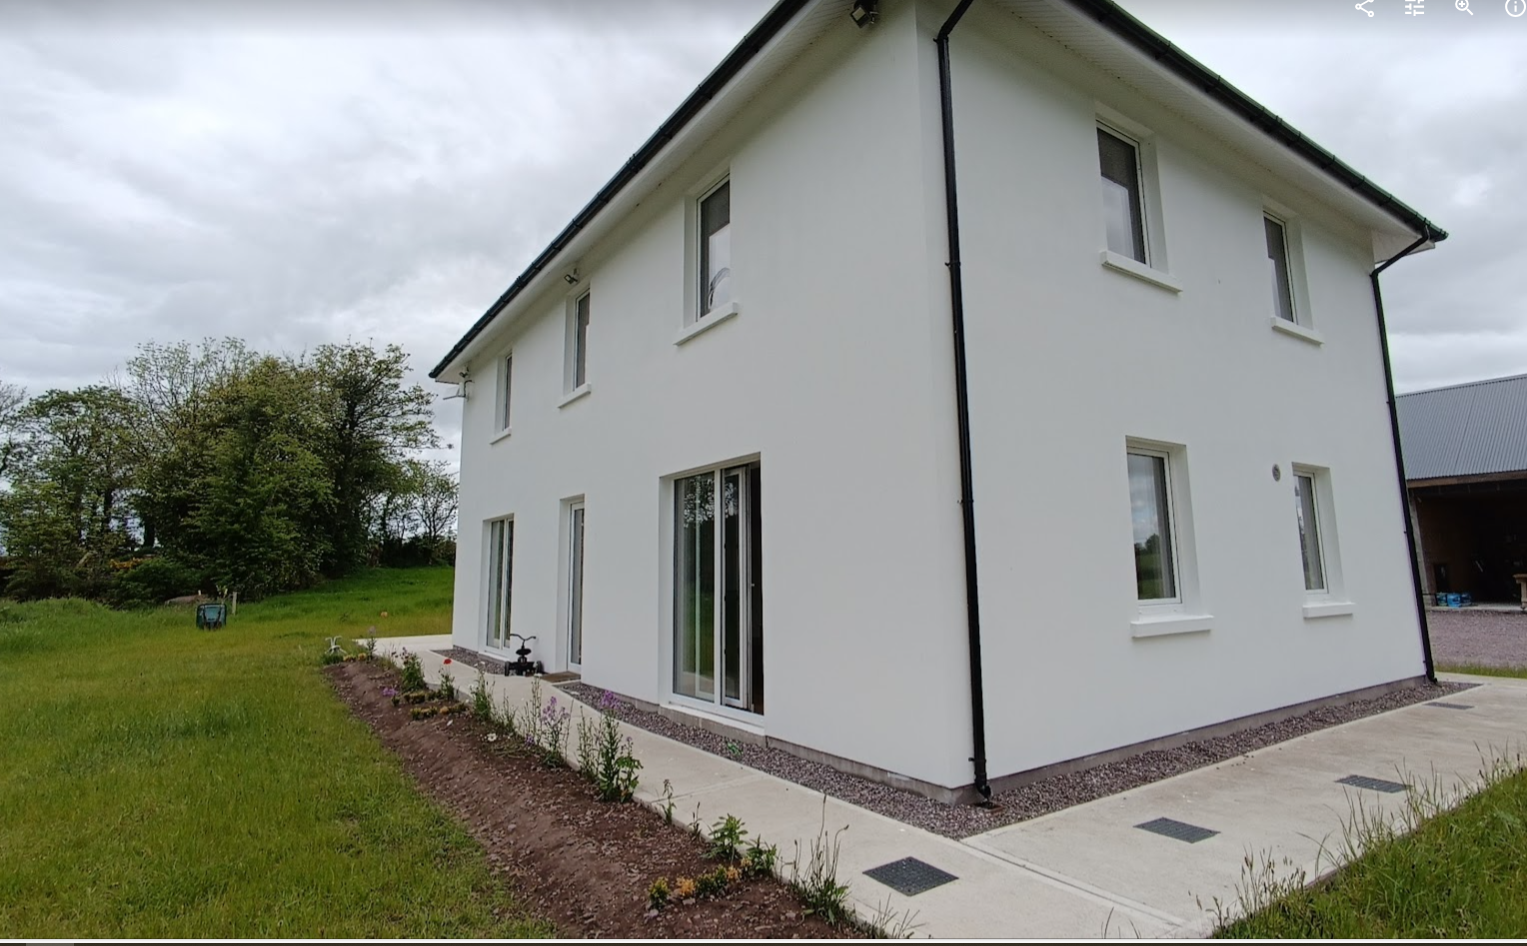
There has been issues with some very high performance systems from the continent being built under licence that too. I think they were omitting thermal breaks and so forth completely destroying any thermal benefits they claimed to have. Plain uPVC windows are often absolute rubbish too. Poorly built with minimal reinforcement. Outward opening casements looked naff with very bulky profiles and trickle vent covers. However. Higher standard ones are available . Residence 9 do some very traditional looking ones if that's your thing as do Linear amongst others. However these wouldn't be my first consideration. If you could get proper uPVC Tilt and Turn windows with triple gasketed sashes, thermally broken frames and triple glazed panes with warm edge spacers I would go that direction. Like wise don't skimp on the hardware. Here's a shot from the distance of our VEKA 82 Softline profile windows. White uPVC T&T. €16k in 2020 inc VAT for 20 units including 2 x tilt and slide units..


-
Sorry if that's hasn't helped you. Lazy architects speccing a difficult to build house with very expensive insulants from a company who continue to be lax with the truth hit a nerve with me. My number 1 advice. 1. Send the insulation back. Widen the cavity to 200mm and use EPS beads or Mineral wool batts. 2. If you can't widen the walls change build methods to something more lightly to perform well in real life. For example: 100mm brick 35mm cavity 60mm PIR 11MM OSB tapes as airtight layer 95*44mm studs @400cc with mineral wool insulation. 12.5mm plasterboard and skim. A realistic U value of 0.21. for the same width of wall with excellent thermal bridging characteristics and airtightness prospects. 3. Get really really fastidious installing the Kooktherm boards. 1. Build the inner leaf to lead the external by 3 courses. Very carefully scrape and brush away any mortar so you can pin the boards tightly to the inner leaf and each other. All cutting will need to be done accurately too. Use a jig or a table saw. 2. Foam the perimeter of each board in a continuous bead as well as and "X across the middle before pressing it home to the inner leaf. This is to prevent any air movement behind the boards that will render it ineffective. Similar to how this EWI job is being done https://youtu.be/i98oKu5EGH4?si=Lf3SsdtxpO2h_MeO 3. Use low expansion foam with a long life span to join all boards and seal tightly around the penetrations allow the foam to mushroom out between joints. When it dries carefully trim it back and tape with a foil backed tape. This will obviously need to be done in dry weather. 4. Ensure that that any exposed cuts ( like at the corners) are sealed with foil tape at the edges to reduce gas migration from he boards over time reducing their insulative effects. This won't be don't by brick layers as they work in a market where sadly almost all clients are uninterested in real world performance. You'll probably need to be on site yourself if you want this level of attention to detail.