Iceverge
-
Posts
4462 -
Joined
-
Last visited
-
Days Won
32
Everything posted by Iceverge
-
 To make sure the roof leaks in future I imagine. 😮💨
 -
Yup over here.
-
An "AA" battery would probably not hold enough juice Seriously though you're buying a battery either way. A "heat" battery in the form of concrete/UVC or an " electric" battery . Concrete stores about 0.5kWh/m3/K so if you have 10m3 in your floor and heat it 5 degrees you hold about 25kWh for the cost of concrete about £1250 so £50/kWh of storage. Batteries by comparison are about £600/kWh at the moment.
-
I'd advocate this approach but just with a cheap willis heater to start. Give it 3 years and the house will really have settled down and you'll have good data to make an informed decision.
-
I didn't put in any central heating in our passive house. None. These are the reasons. 1. Believed the evangelical true believers that seems to think energy is like magic. 2. Stubbornness driven by a desire to outsmart everyone else. 3. Complete confusion with the range of options. 4. The outrageous prices charges for ASHPs by plumbers who can't count their own fingers. 5. Option to fit an A2A was always there. We use a single resistance heater now . It works fine the rooms are all comfortable but it's dear to run. About €700/year I think. I put extra infrared heaters in the bathroom for comfort. I had expected it to be cheaper but we can't bank enough heat overnight on a TOU tariff. Also electricity is after triplling in price since 2019. Time over again I would ..... Fit UFH with a willis heater and the option of an ASHP like @TerryE with electric UFH in bathrooms too. Or install an A2A from the start with electric UFH in the bathrooms.
-
Yes. Been there done that. You need if you want a warm house you need a heat source. Perpetual energy machines don't exist.
-
Sit joists on wall plate or use hangers?
Iceverge replied to flanagaj's topic in Lofts, Dormers & Loft Conversions
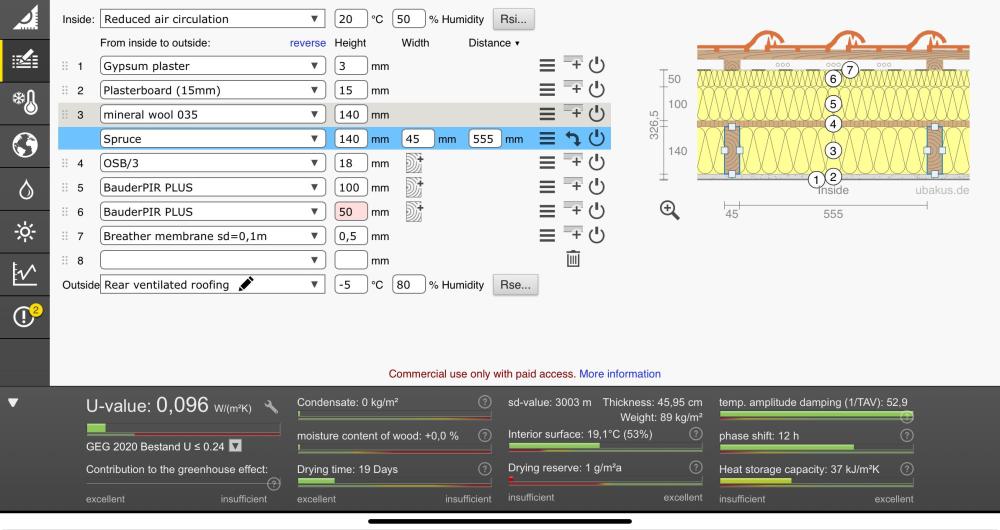
Heres a rough sketch, 1. Fix your 100*75 wall plate as normal. 2. Put blue membrane in place as shown. Something like a good woven external breather membrane would do best. VP400 maybe. 3. Add a 100*25 board on too to protect the membrane. 4. Roof as shown with no rafter tails. 5. Screw 18mm osb on top of the rafters as you aritight layer, tape all joints and tape the wall palte membrane to it to complete you AT layer. 6.Add 100mm rafter tails as shown and insulate in between them with 100 mm rigid insulation. EPS or PIR. 7. Add a second layer of 50mm rigid insulation to reach over the tails and cover the top of the cavity. 8. Add 50mm timber to the top of the rafter tails to make level with the insulation. 9. roofing membrane. 10. counterbattens 11. tile battens 12. tiles 13. Below the OSB add 150mm flexible insulation. 14. Allow the cavity wall insulation to join up to the underside of the 50mm top layer of insulation too.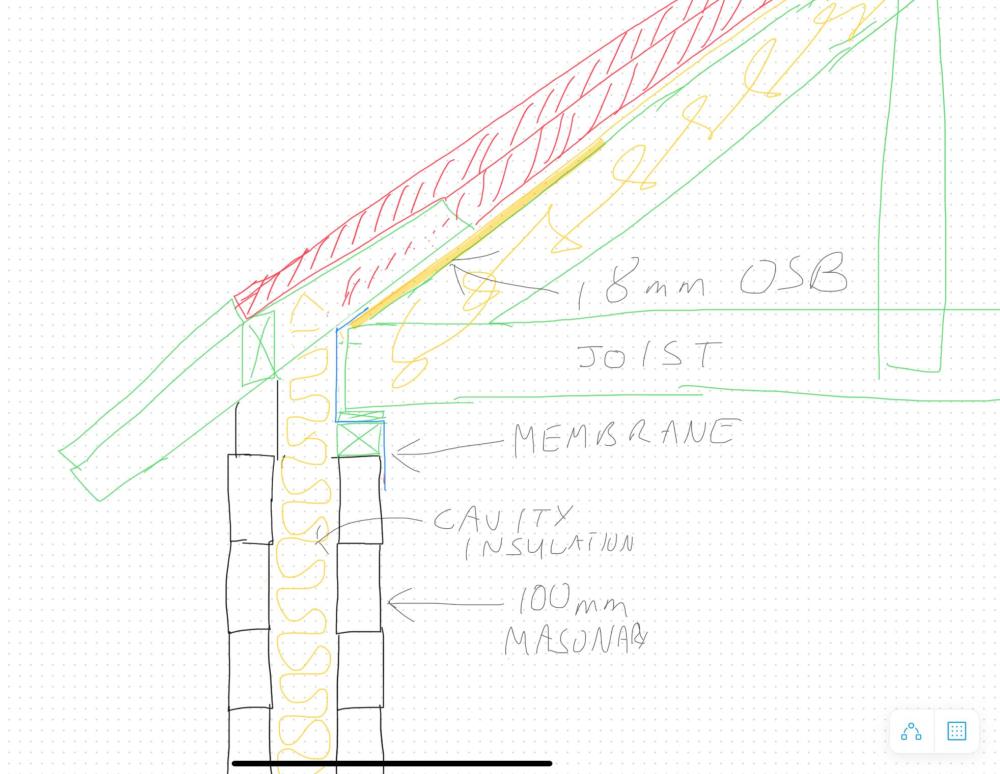
-
This reads like an AI passage.
-
Sit joists on wall plate or use hangers?
Iceverge replied to flanagaj's topic in Lofts, Dormers & Loft Conversions
Ok I see where you're at. Not a simple junction re airtighness to do as drawn. My preferred way for this would be to take the airtighness layer up the inside of the wall, across the top of the wall to the outside plate and up the top of the rafters. Then insulate between and above the rafters. You'll need to screw on rafter tails on top of the rafters. This way you've no timbers breaching the airtighness layer which makes it far far easier to construct. I'll do a sketch in the next hour or two if I get a chance. -
Sit joists on wall plate or use hangers?
Iceverge replied to flanagaj's topic in Lofts, Dormers & Loft Conversions
I'd have thought you would have needed a structural connection between the joists and the rafters. Otherwise your rafters will end up like jean Claude van damms legs in that truck advert. -
Squaring off existing arched patio doors
Iceverge replied to Marko127's topic in RSJs, Lintels & Steelwork
-sucks through teeth----- twitches in discomfort -------inner engineering purist sobs-----------!!!!! The arch is such an elegant solution. In fact a beautiful one in my mind. Seems a shame to hide it. On a more pragmatic note bi-folds are notoriously poor for airtighess. I think @nod has some in his last house that were quite draughty. Would you consider a set of wider french doors? They'd be cheaper to boot. -
Welcome welcome. Passivhaus made from stuff that used to be plants with some renewables is the end point for buildings. There's a million ways to skin a cat but ultimately that is the finishing line. Anu sketches or ideas to share are always appreciated.
-
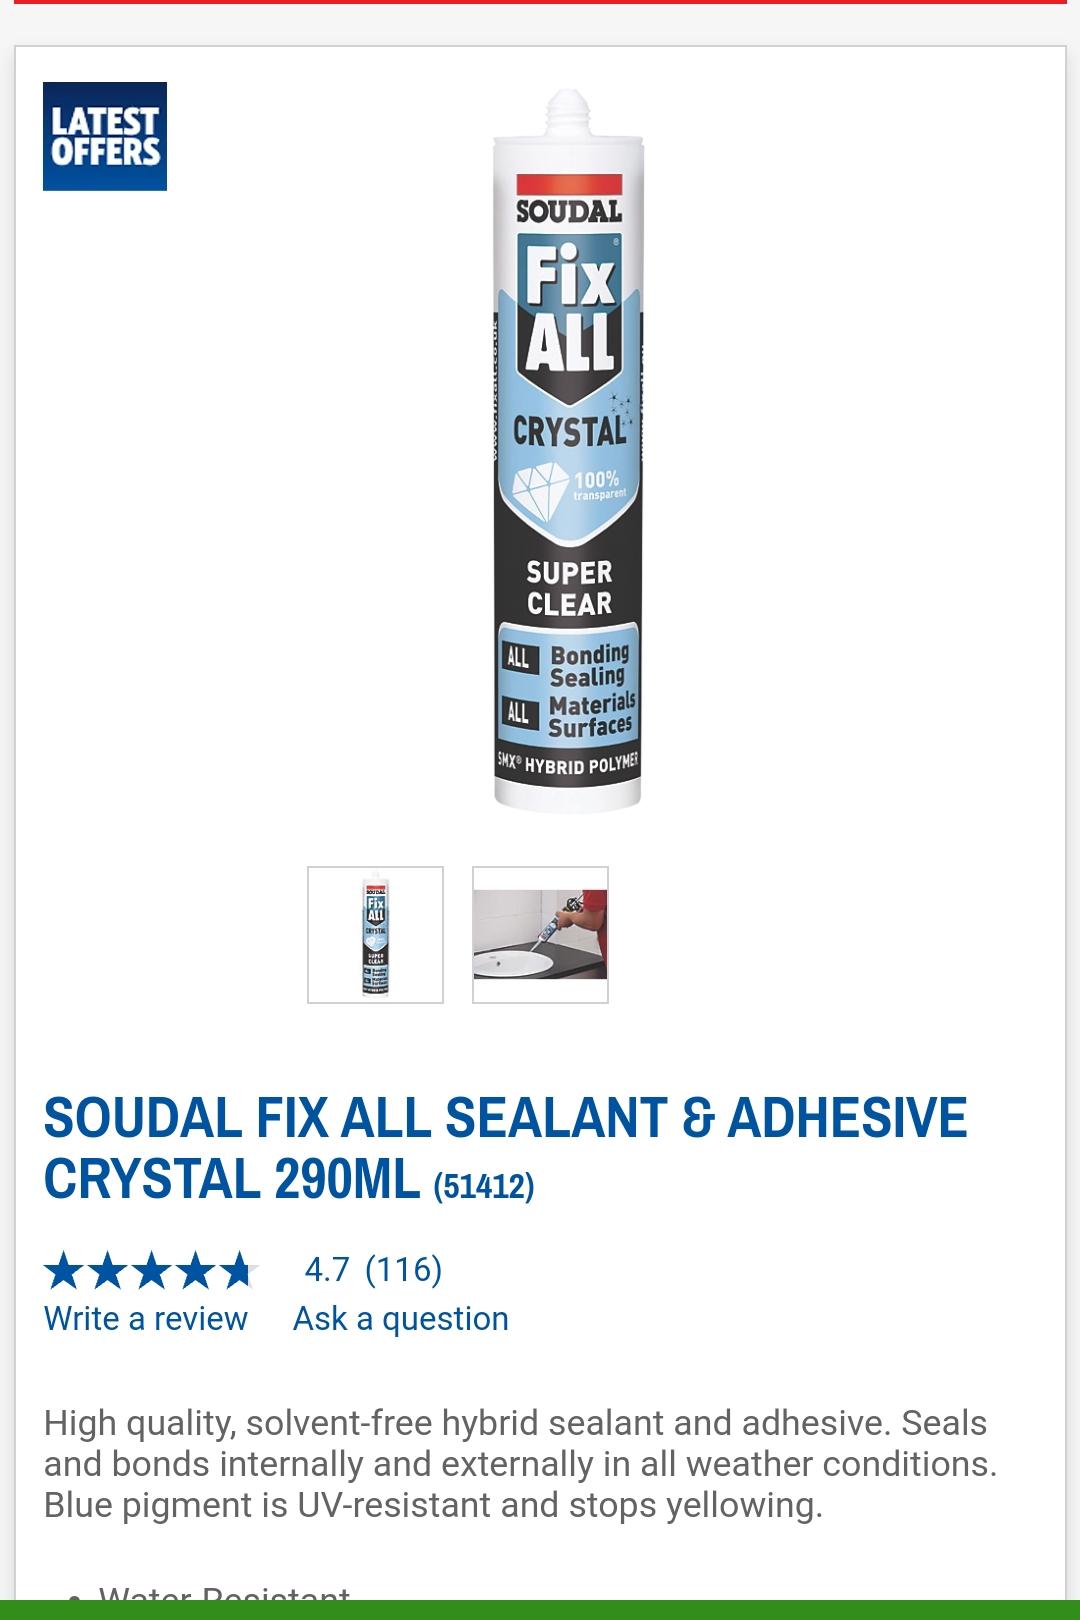
There's no rocket science to applying sealant. Infact it's very satisfying once you get the knack. I would practice first if you're not familiar. Get one of theses. Some of this And one of these Have go first with some scrap timber or something. Mask off the areas you don't want to cover. Then the trick is to apply too much sealant and smoothly in one pass wipe away the excess with the scraper. Clean the scraper with baby wipes. You'll end up binning lots of sealant until you can finely judge it. It's a skill every diyer should have really for every kitchen bathroom etc. I'm not an expert on silicone treatments but Google gave me this.


-
Would the same £85 be the same for a monoblock do you think or is it only the split gas system you were interested in?
-
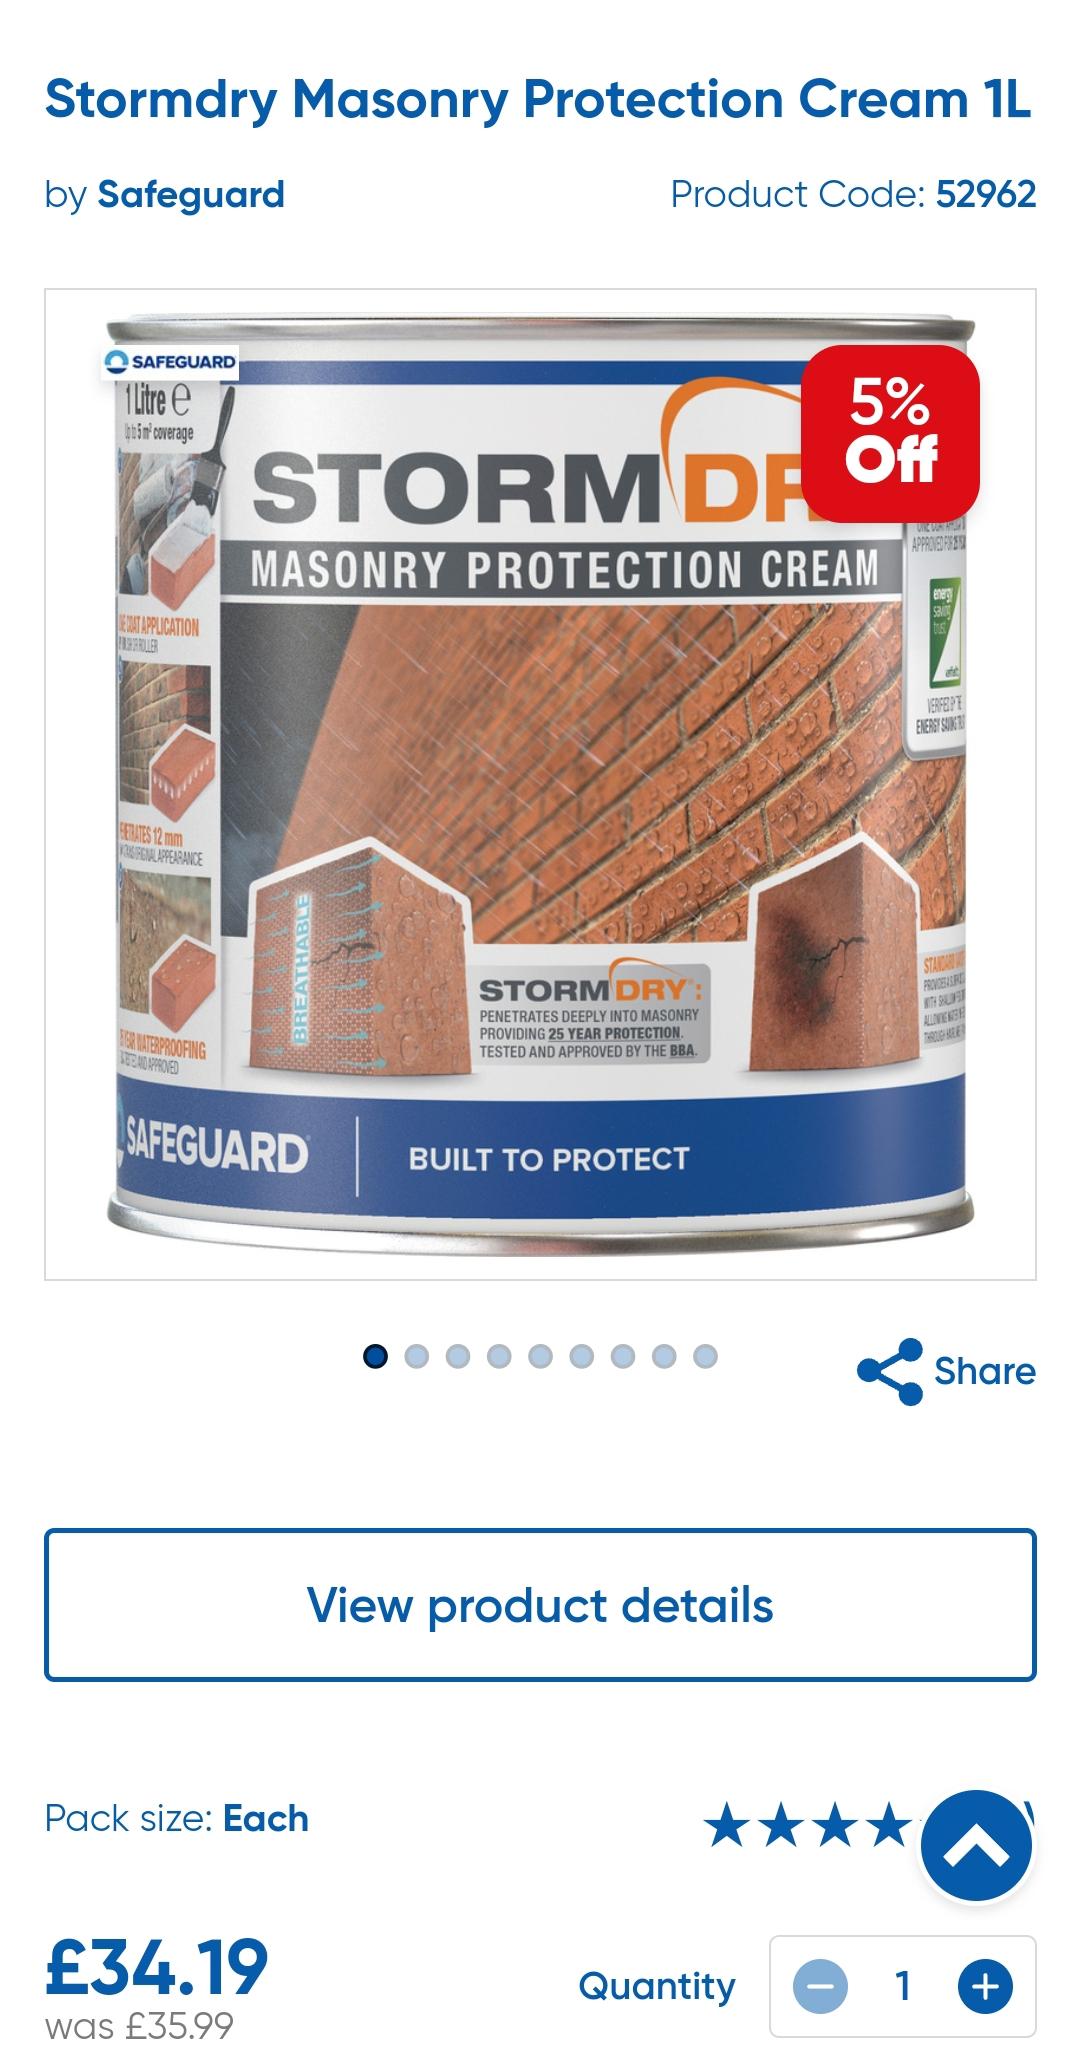
Brush in a solution of bleach first to kill any crud growing threre. Then try a pressure washer. From a distance at first and get closer gently. Stop if you notice it damaging the render. A thin dam of clear silicone on the edge of the tile might be enough to make the rain to run down the steps. To keep it clean you can get a brush on silicone based sealant . Perhaps someone else would know a good brand.
-
Out of interest, how much is a typical annual service? Often things like G3 can be hidden in UVCs and filters in MVHR which often have a very large % impact in annual costs, especially for efficient users.
-
Good product. A monoblock is a more straightforward proposition I would say.
-
Self Build Mortgage - 100% timber house and deposits
Iceverge replied to NJLJ2024's topic in Self Build Mortgages
Welcome. A nice project. I'm a fan of small houses. I like the metal over wood aesthetic but be conscious of how you plan to weather the wood in our damp climate. It might go rather green rather quickly if you don't have a plan. I would be careful of roof lights in the bedroom. It's ok of you can reach the blinds but invariably they're too high and you'll wake at 5am in summer to a very bright room. I'm not familiar with your local planning restrictions but at the moment it looks rather more "shed like" than "house like". It might be a factor for consideration and the temperaments of planners. Over all good luck, nice to see a project kicking off. -
More insulation is always better. Better fire and noise protection.
-
Me too, without personal comparison I'm led to believe the rigid ones are better. I think it's worth the investment if you have good hearing.
-
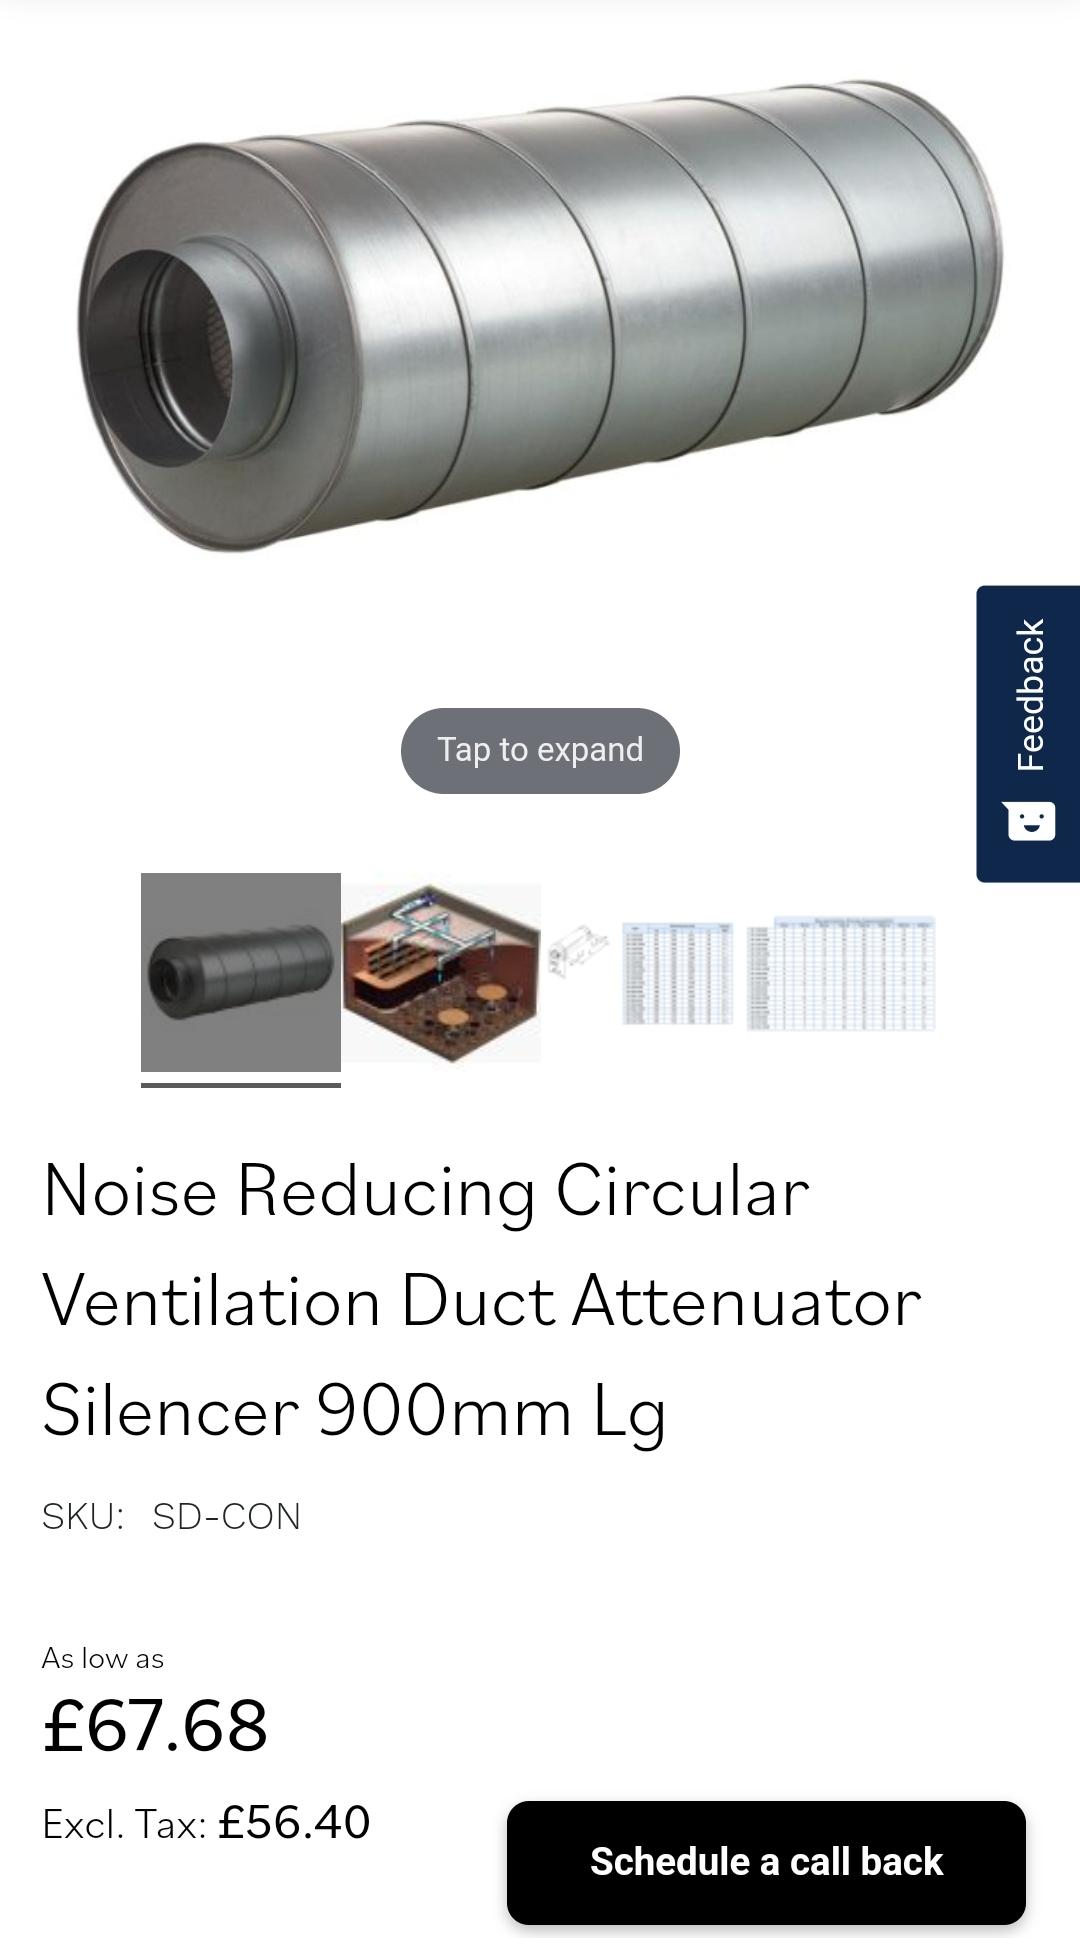
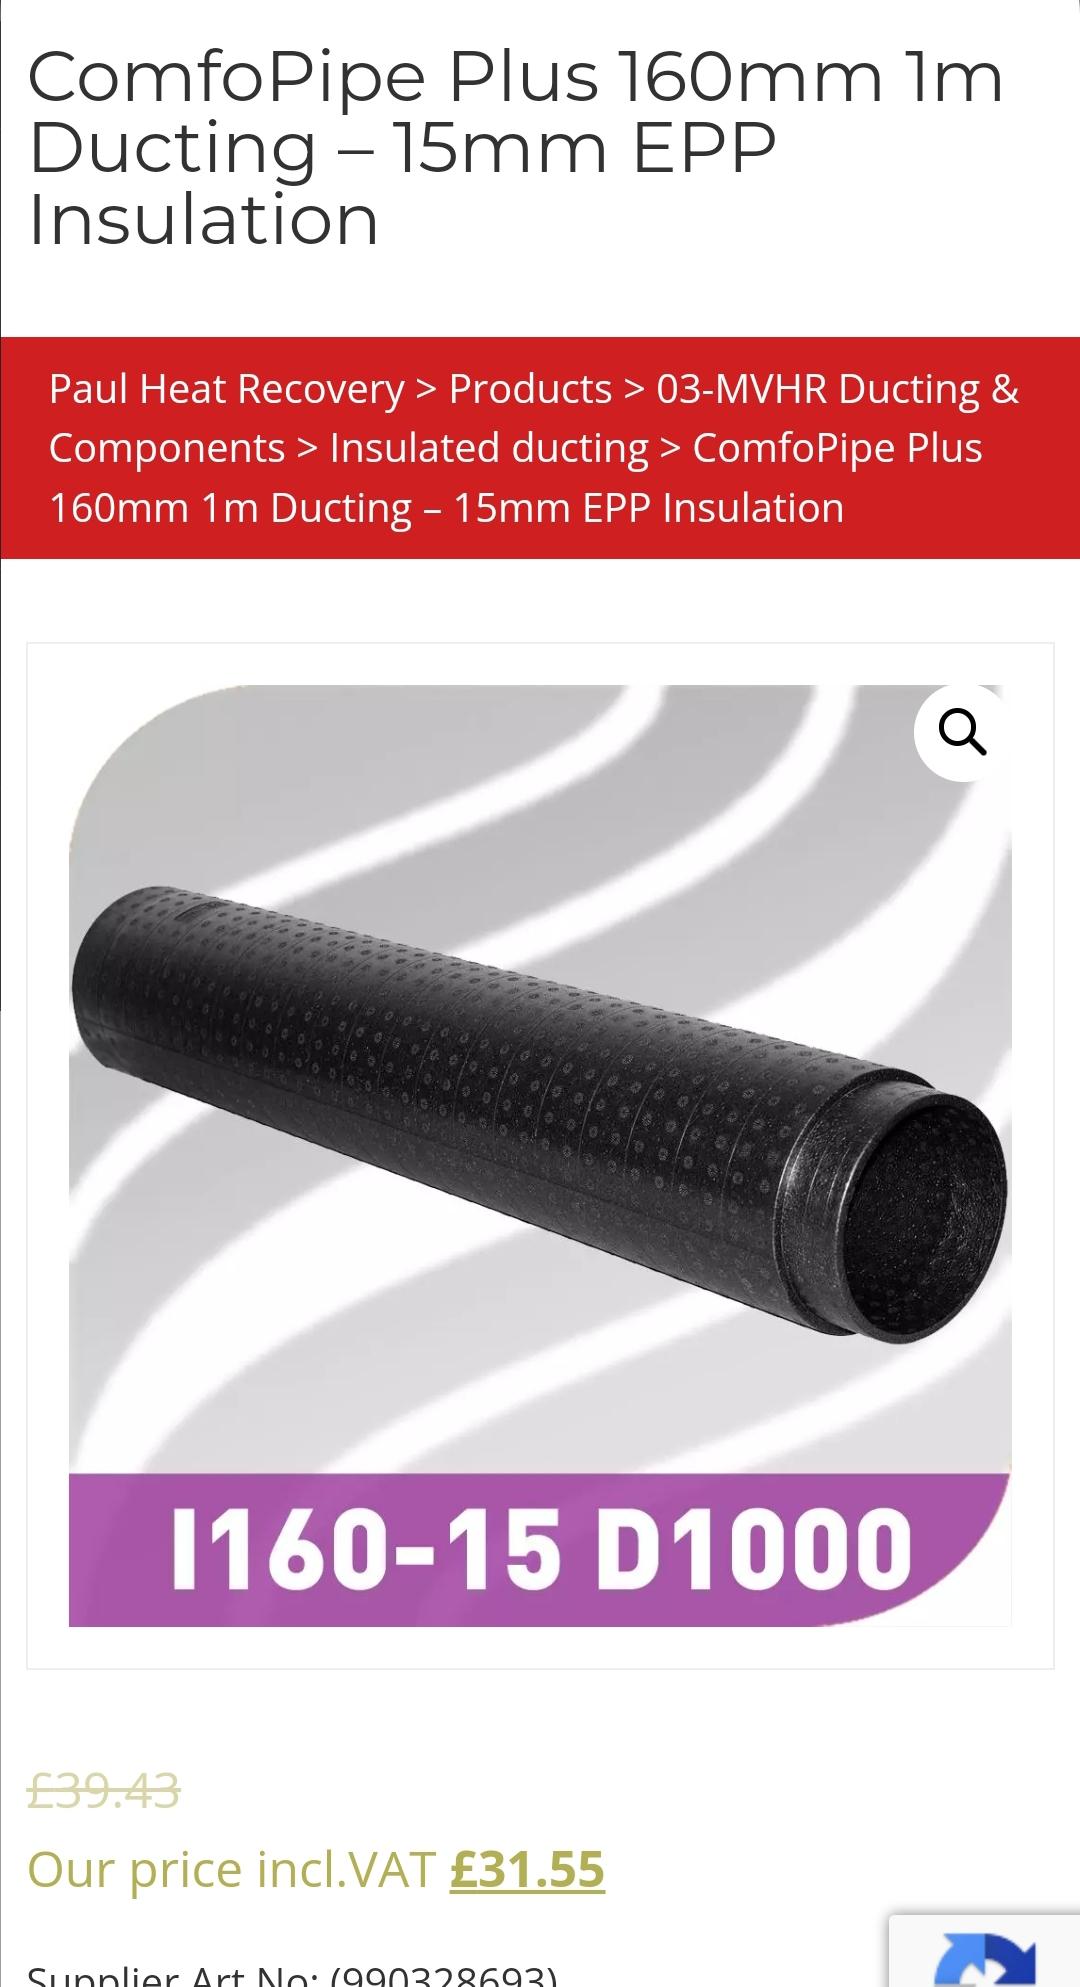
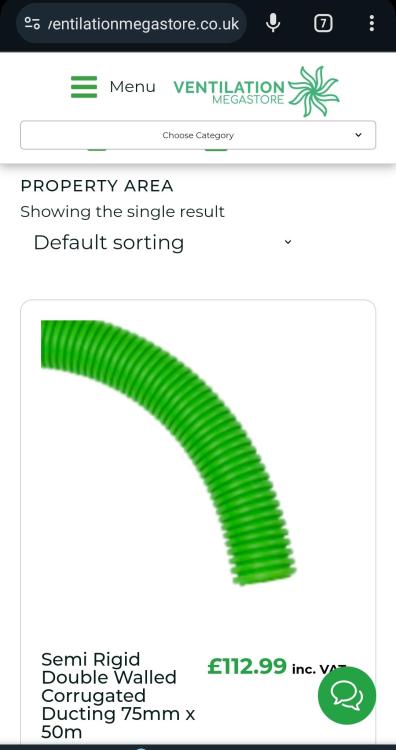
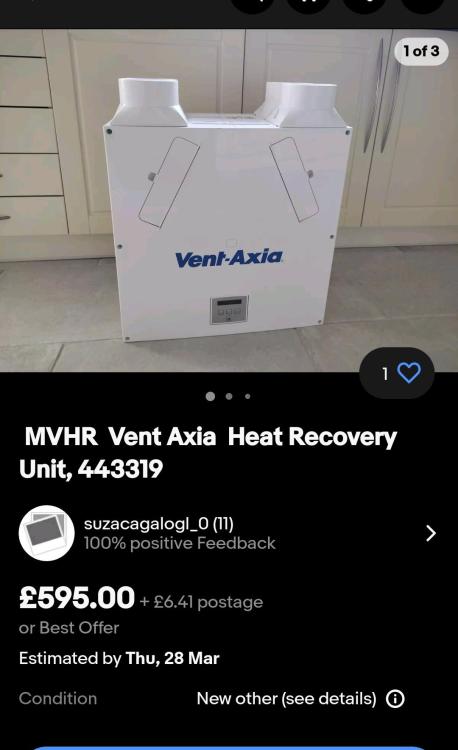
You can calculate and design it pretty easily. 75mm rigid ducting is ok for 2.5m/s flow speed so 28m3/HR. Assuming normal ceiling heights and a desired ACH of 0.3 then each pair of 75mm ducts will supply 37m2 floor area. So if you have a floor area of say 35m2 that'll be ok with one 75mm supply and one extract. If you have a floor area of 300m2. Then you'll need 8.1 pairs of supply's and extracts. Manifolds only come in 8 or 10. I would be happy with 8 in this instance as it's pretty close. Then sketch out on your plans one duct to each supply and extract room. Double up extracts for the kitchen and then for the dampest/furthest room until all the ducts are used up. Similar process on the supply side. Easy. Keep sketching until you can draw it without any ducts over lapping. That'll make it easy to install. As for materials, It's all much the same stuff. I would buy the cheapest. About £113/50m roll at a quick Google. Leave space for two of these between the mvhr unit and the manifolds. Install your supply plenums opposite the room door, usually over a window. Install the extracts close but not directly over the source of steam. Say 1-2m away and again opposite a door if possible. These ones are cheap and work fine. For the larger ducting to outside I like the rigid insulated stuff. Nice and tidy and doesn't leak as much heat as the metal. Finally site the MVHR unit inside the heated envelope, with short runs to outside for the inlet and exhaust, where it won't cause noise or vibration issues and can be serviced easily . I wouldn't skimp in the unit or buy something too obscure as you'll need parts in future. Aim to have one with a headline M3/HR of about your house volume. That way at normal rates the fans run at about 30-40%. Bargains can be had. This one is ok for about 120m² floor area. If you post your plans I'm sure we could collectively design it for you in about 15 mins.


-
I don't think what your aiming for is actually possibly without having one million joints in the rigid ductwork. It'll have to go back. Semi rigid radial ducting is lightly your only option. Some companies are a little precious (read snobby) about this but so long as you put adequate silencers and size the ducts appropriately it's idiot proof. I would say 95% of DIYers use it.
-
Roof buildup for 1 3/4 storey house.
Iceverge replied to LiamJones's topic in Lofts, Dormers & Loft Conversions
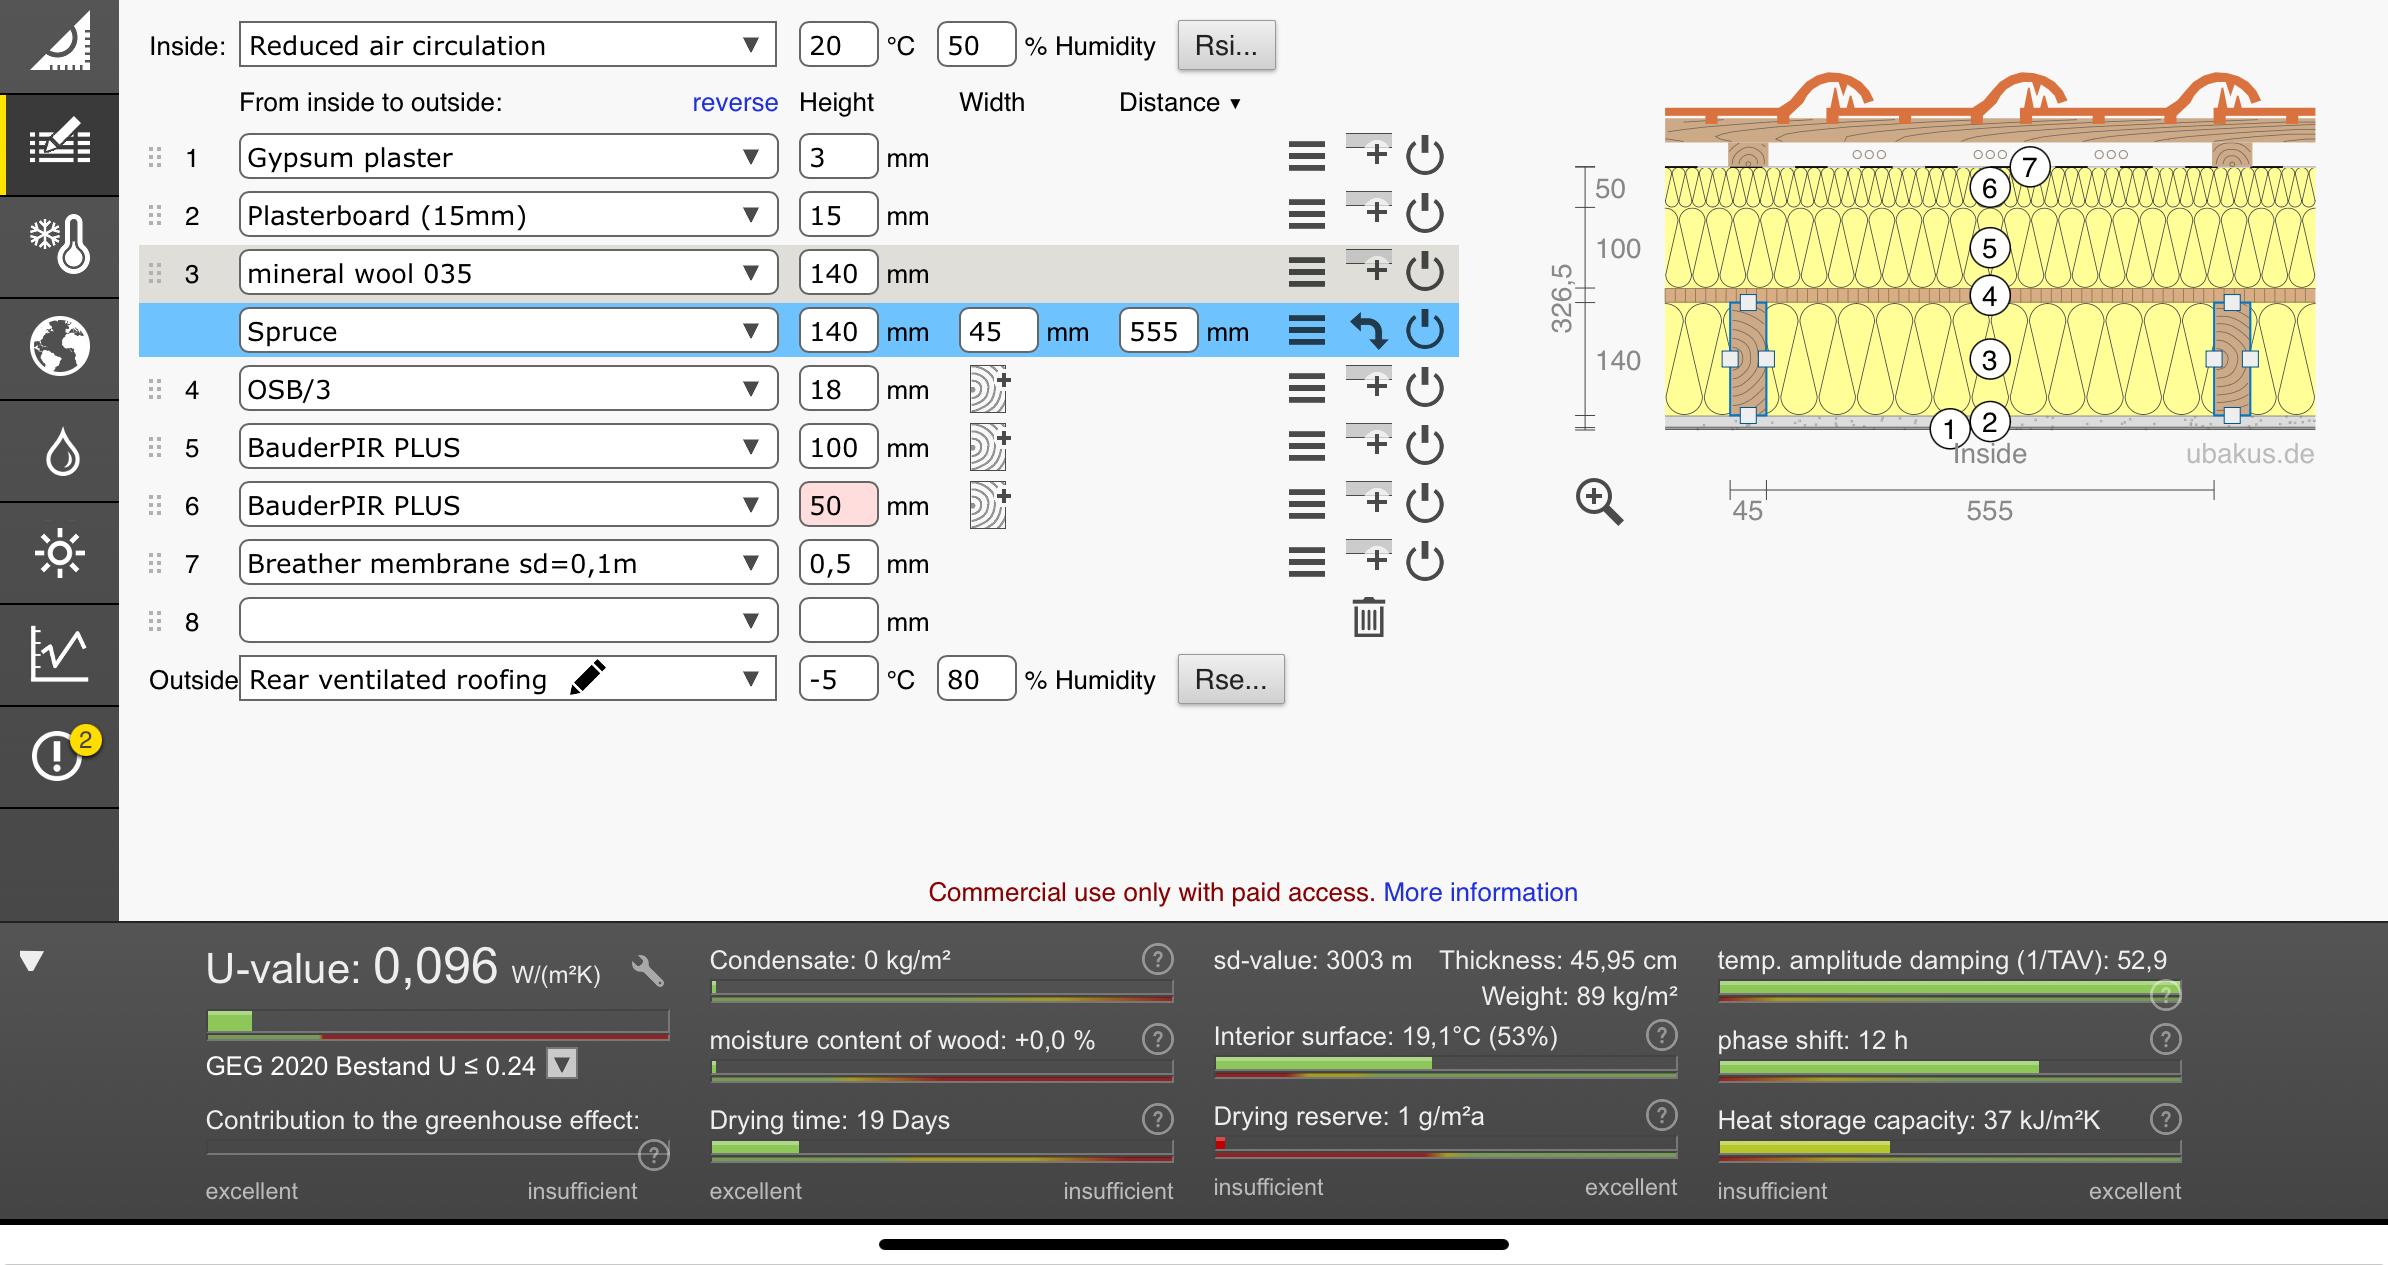
Should work fine so. No need to be completely fastidious about any small gaps between the boards and the cellulose will fill them Just make sure that it's a proper full fill. Airtight tape the holes to finish. An alternative to a separate airtight layer might be to tape the PIR face. I think @Thorfun did internal PIR. Maybe they have more tips. You could always put a counter batten above the Airtight membrane and bin the PIR. The cellulose would then be under the rafters too, breaking any thermal bridge. So many ways to skin a cat. @600cc you'll be better off with 15mm PB. £105/m³ plus vat. That's a good price. Whatever my next project is I think I'll try to have 100% blown in insulation. So much less hardship and waste. -
Roof buildup for 1 3/4 storey house.
Iceverge replied to LiamJones's topic in Lofts, Dormers & Loft Conversions
Breather membrane is what 's going there. Glidevale VP400 is good from screwfix. Obviously pro clima and Siga products are too but they're ££££. That buildup will make it hard to blow in the cellulose. I would ditch the PIR. A membrane below would be better as per the above drawing. What is your maximum roof thickness and target U Value? I'm still stuffing rockwool between the rafters of my garage when I get a spare minute. It's a pain in the neck. Wish I'd done cellulose. What rough price did you get? -
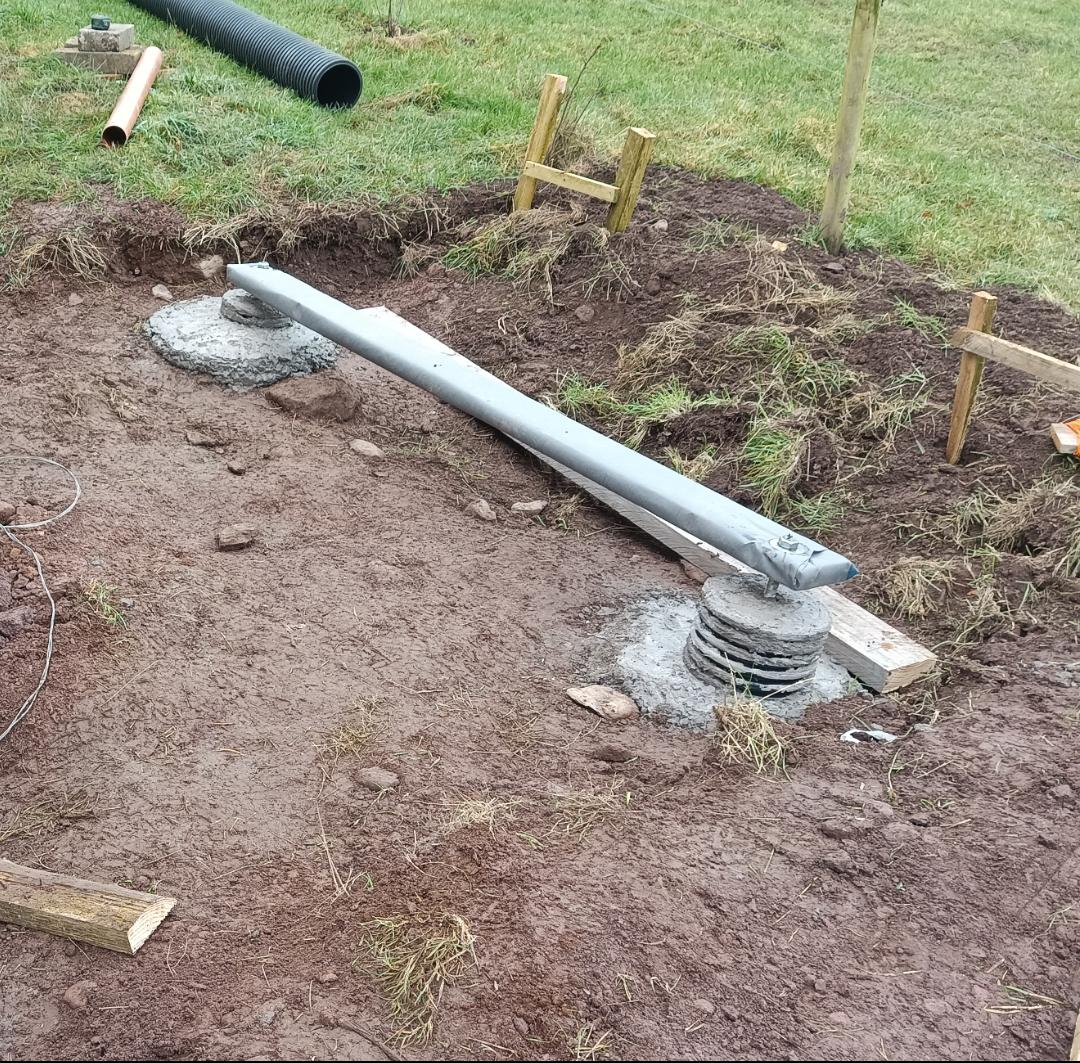
If you want to have a durable low profile foundation you are stuck with masonry of some description. I built a small pumphouse by burying tyres in the ground and using them as the formwork foundations for piers that eventually held some M24 threaded bar to hold a suspended timber floor. The whole thing ended up very high up though.