AdamSee
-
Posts
158 -
Joined
-
Last visited
Everything posted by AdamSee
-
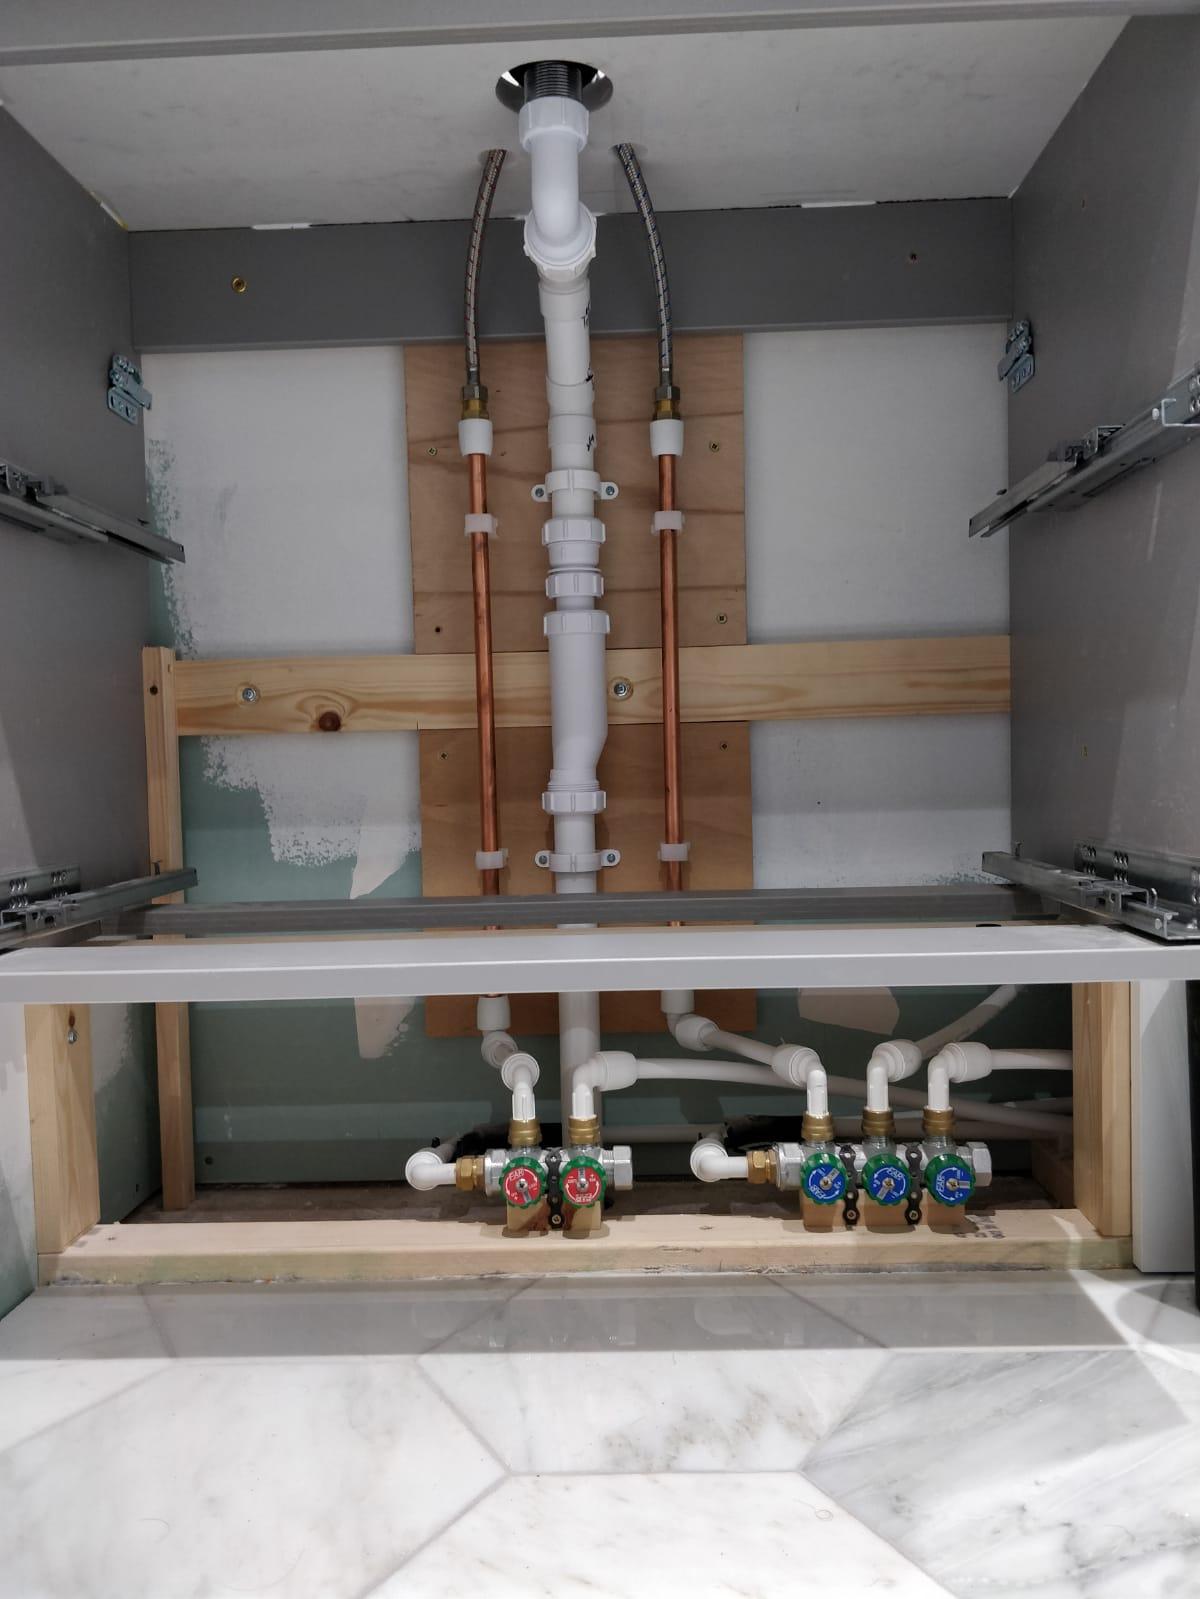
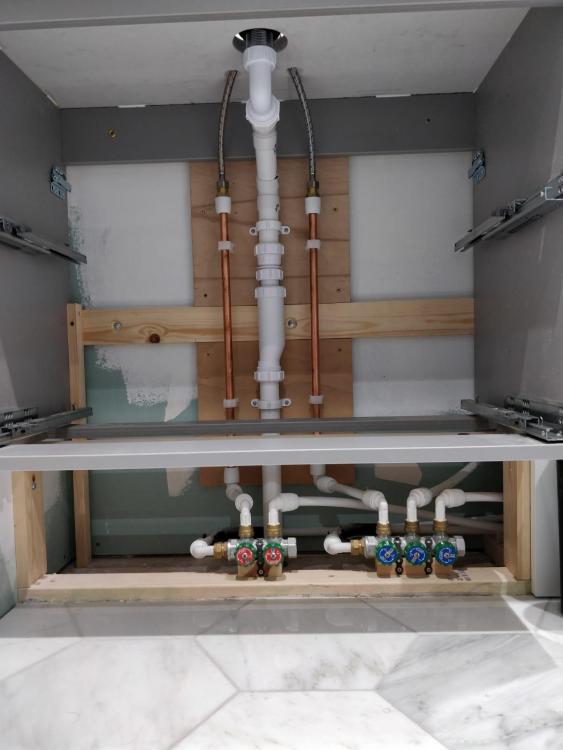
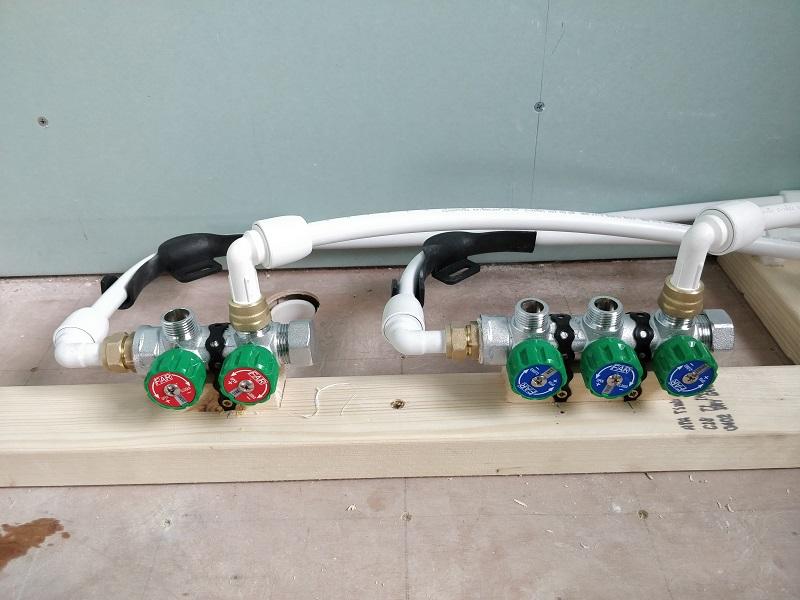
I used the abacus manifolds for the bathroom. There were quite expensive for what they were and you can buy a bracket that hold them flush to a wall. But i just used a steel banding that you screw through. I particular like how each knob has colour face plates and a pre set list of appliances that there connected to (Sink, Toilet, Shower, etc). Its great because when I hand write a description, it looks like a child did it. Annoyingly they need a huge amount of ptfe tape to not drip and the feed in. Hoping the hard water in the area eventually clogs the tiny dip coming off of it.
-
Upstairs bathroom UFH - above or below floorboards?
AdamSee replied to BMcN's topic in Underfloor Heating
I guess under the other option, you could use Omnie Tor Floor, its 22mm chipboard with groves routed for 12mm pipe. Once you've laid the floor and pipe you glue and screw down 6mm ply and put down the appropriate floor. I've got it everywhere upstairs, it works reasonably well. The heat distribution is good on laminate, but due to the proximity of the pipes to the surface of the tiles you can feel where the pipes are pretty easily. I keep meaning to do a write up on it.....but I've been real lazy and having a slight issue with it at the moment. -
What ya building.
AdamSee replied to Russell griffiths's topic in General Self Build & DIY Discussion
Is there a option for "I'm making a mess.....Slowly"? -
I would leave it to and if they ask, you say this "its part of the building", especially if its fixed down somehow Don't risk cutting it in the loft with a grinder, its so easy to start a fire using one. Jig saw or reciprocating saw would be safer but still too risky.
-
You may be able to re-prime the door and paint over the top with the water based paint....I would ask the manufacture if in doubt. I know its not always piratical to sand off every last bit of paint.
-
Just use a good quality water based gloss paint. I'm not sure whats best brush or roller, but because its quick drying don't over brush it as it dried or it will gain a "grain" effect. Just brush on and leave it to level out. I don't know if what you used previously was oil or water based paint, but I know that oil based stuff yellows over time as that oil comes back to the surface. Just look at how it separates in the tin and you have to mix that surface layer back in.
-
A good smoke bomb can be made from a pingpong ball or two. Cut balls in to small flakes. Make a foil ball, Fill with the fore mentioned flakes. Pierce several holes in foil and set alight through said holes. Lob in toilet and wait for the fallout action to happen. Useless advice for the day. Sorted!
-
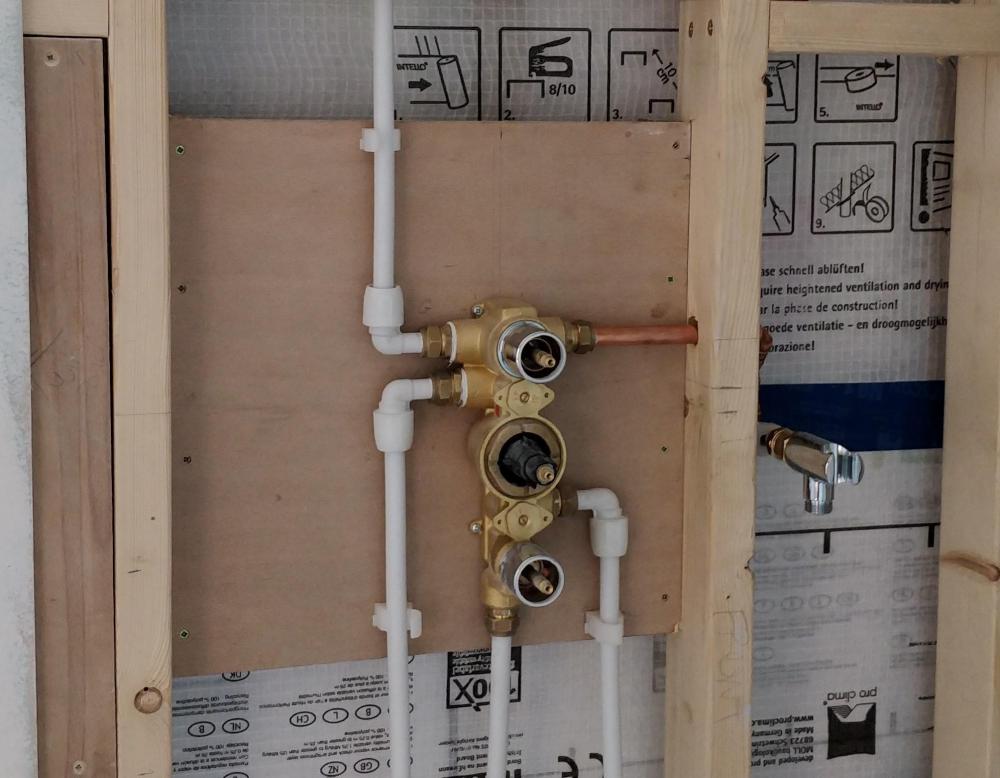
Looking back at it....that would have been a good alternative....But i liked the possible option of doing it all in copper pipe. I don't understand why they still use 3/4" fittings on the valves. Im pretty sure the plumbers rule of thumb is "never use a compression somewhere you cant access it" and here it is with 6 in the wall. Although I've seen that Aqulisa now do entire valves and shower connectors that accept 15mm plastic straight in. No brass wear at all.
-
I found this issue to when doing my shower valve. So i used 15mm to 3/4 male brass compression fittings which I attached to 15mm hep2o spigot elbows. Make sure you use copper olives when attaching to the spigots and a bit of ptfe tape as shown in the hep2o manual.
-
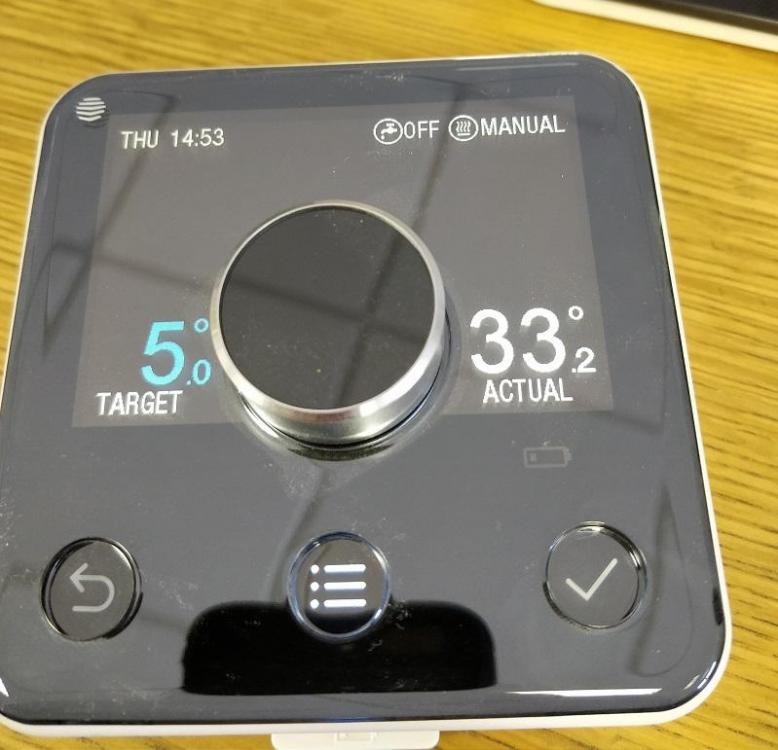
Although it hot here in the office. I just keep thinking how bad is must be at some of our suppliers. Foundry's and industrial painters can both expect to see the thermometer to hit 50oc pretty easily.
-
Behold!!!! My office temperature. At this moment in time im pretty sure that if i peed myself it was actually be cooler.......but equally as damp.
-
Hmm.....is that sand that your trying to put the post in to? If so digging is actually going to be really easy / difficult. It just in one of of pictures it looks looks like sand, but that could be just be the photo. If it is, I can see why your asking.
-
I guess it depends what your hanging from the ceiling. Is it a light weight item or is it going to be in the 75 - 150kg range?
-
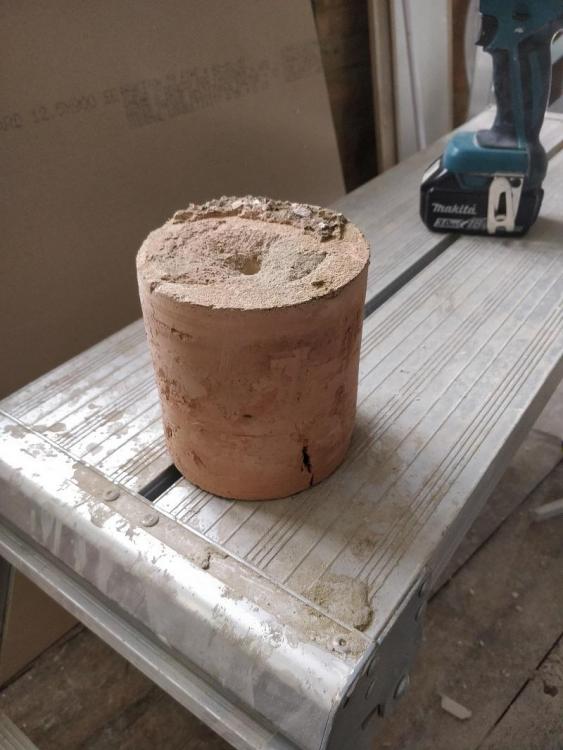
Unfortunately I couldn't get to it from the outside to do the drilling. Had to do it all internally. They get easier as you get the hang of it. Will probably find that by the end of it each one only takes 20 mins.
-
Ahh I see I feel your pain, don't worry. I was pretty chuffed that the last time I did one I managed to not blow the render outside the house.
-
Congratulations you've done it! So how long did it take to do one? Just out of curiosity....why do you need to do another 18 holes? you making a weird crazy golf setup of something?
-
I've had to do a few like yours, right up by a ceiling. There the worst kind to do. You need a buddy to take over when you get tired. Just don't push it too hard, it really wont help. Keep it square to the wall and fast, You could chain drill it, and then core it. out. Never done it like that before so I don't know how easy that is to do. We had some done at the work recently to get soil samples from below the warehouse foundations. Guy turned up with a 10/12" bit. Made light work of 14" of concrete. It was a big system and bolted to the floor. Wish I had one
-
I've had to do a few core holes now. My advice is 1- get someone else to do it or 2 - You start with a pilot hole using drill bit of same size as the core bit pilot. Then using a drill with a clutch but without a hammer setting, push firmly, try to keep is going fast and it will start to cut a sharp line. once about 10 - 15mm in. Take out the drill and remove the core pilot bit. Then carry on as you were. If it start to jam when you get deeper it will be because you've gone off on the piss slightly. Best bet there is to withdraw the drill and slowly go back in regrinding the surface slightly larger/straighter. Aim to keep the drill going fast at a low pressure rather than slow with high pressure. You get a knack for it after a while.
-
I've got the abacus manifolds for my bathroom so that I could isolate the hot and cold for everything in there easily from under the sink unit. There good, but pretty pricey.I guess there must be much cheaper options around. But would definitely use them again in places like the utility. I did look for the Hep2O system, but apparently they've ceased production of that item now and couldn't find any stockist of it. (I was mid way through plumbing when I took the pic) Two thing that I particularly like about these, is that one - you can restrict the flow as much as necessary on each item, which is great if you don't fancy wiping down the floor every time your nephew opens the tap full blast into a shallow sink. and two - there's a little grey disc under the coloured ones that specifies what item its isolating. I like to label all my sockets and isolators....but hate my own handwriting.
-
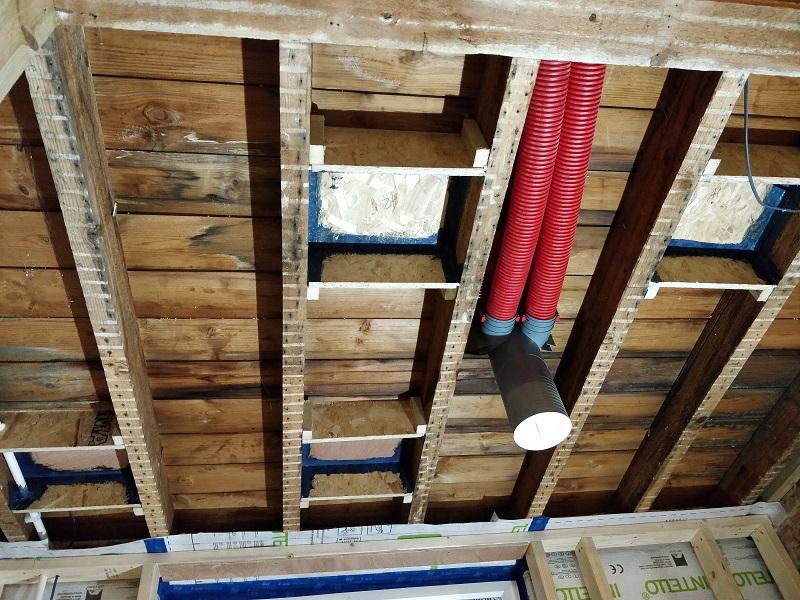
I had a similar issue in my bathroom. Its a flat roof with Joists were 100mm deep with a additional piece on top to give it a slope for water drainage. After I had it insulated above you could clearly see the foil PIR through the gaps in the old roof boards. So i made some chipboard boxes and painted the corners with blowerproof and fitted a piece of EPDM as a makeshift cable grommet. Not only did it give me a bit of peace of mind that any heat wouldn't affect the foil, but it also allowed me to tape the VCL under the joists and into the boxes to maintain air tightness in the bathroom.
-
Is there such a thing as a top entry manifold?
AdamSee replied to Triassic's topic in Underfloor Heating
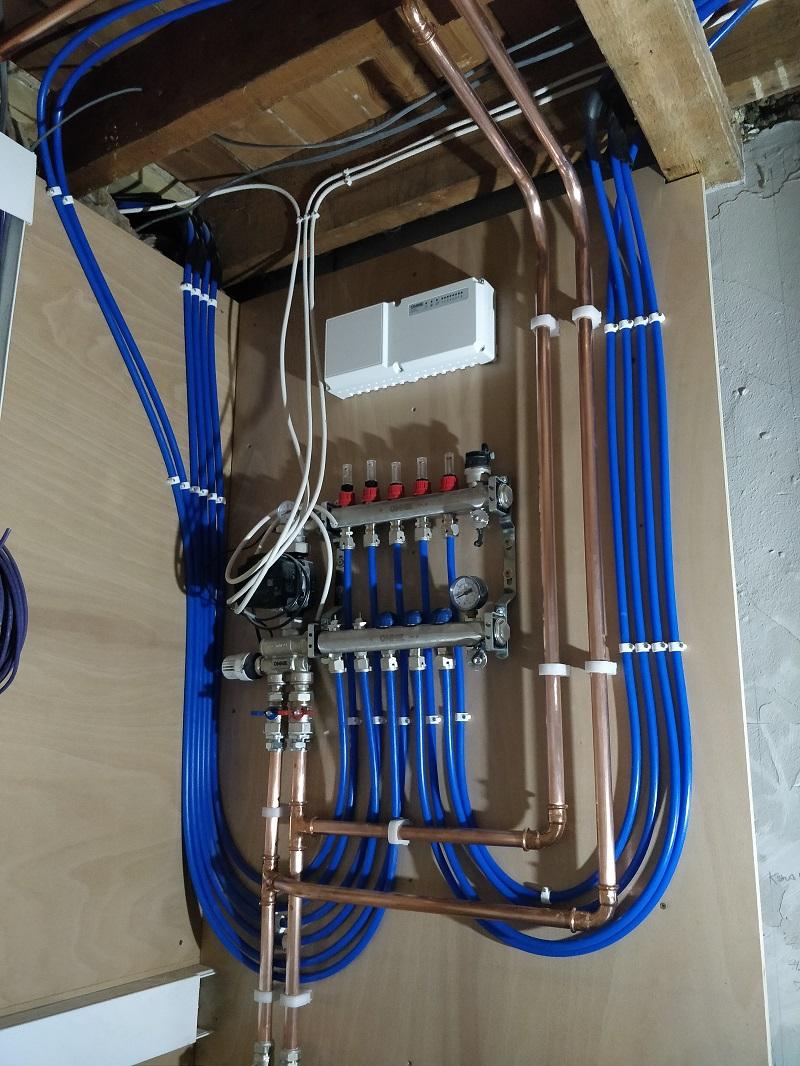
There actually accessible from the alcove space behind them. At the time of that photo I had only cut the hole for one of the vents. But you can now walk/crouch in to the alcove and open a small hatch and service them. There pretty good the way they work. You just open the side valve and you hear the air escape but it doesn't seem to let the water out with it.....unless you open the bicycle looking valve on the very top. Just finished the entire upstairs UFH installation now and hopefully next week it will be up and running. I know its sad...But I'm pretty happy with how this setup looks, seems a shame to have to hid it in a cupboard.....but if one of my nephews sees that lovely valve and decides to open it, the entire system will get dumped into my living room.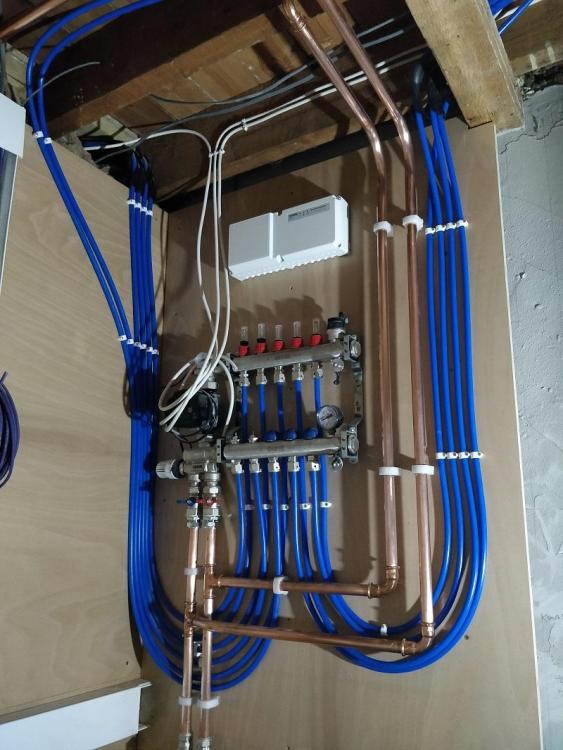
-
We had the aluminium soakers put in on our dormer when it was retiled. They look great around the window, much better cement pointing that some of the others have done. Wish I had known about the oiling of lead flashing prior to this point. Mines left a horrible white stain on the new clay tiles. Can it be removed in any way?
-
Is there such a thing as a top entry manifold?
AdamSee replied to Triassic's topic in Underfloor Heating
I've got the Omine Torfloor system and was advised that I needed the auto air bleeding vents because of the manifold being downstairs and as others have mentioned, theres not enough of a flow rate to flush out the air. There pretty easy to put in, but in hindsight. I really should have put the manifold in upstairs, which ironically would have been right next door to the new boiler. Live and learn I guess.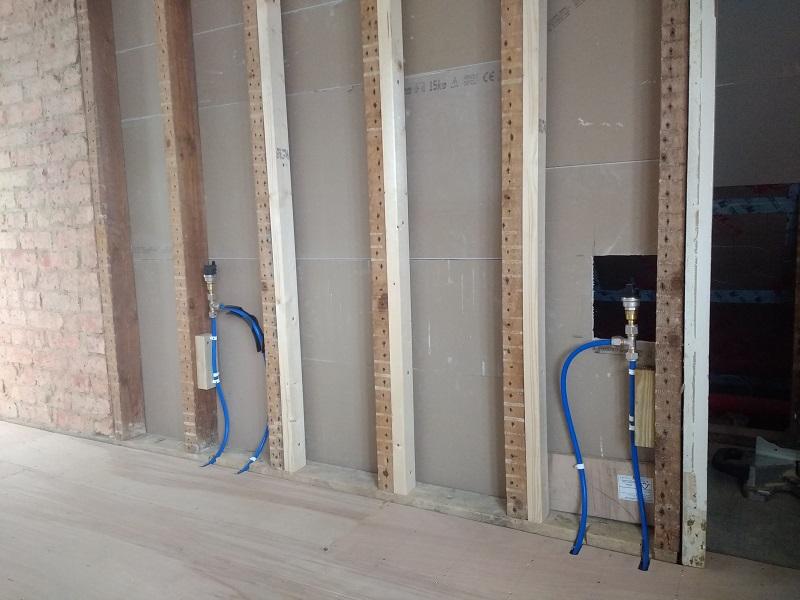
-
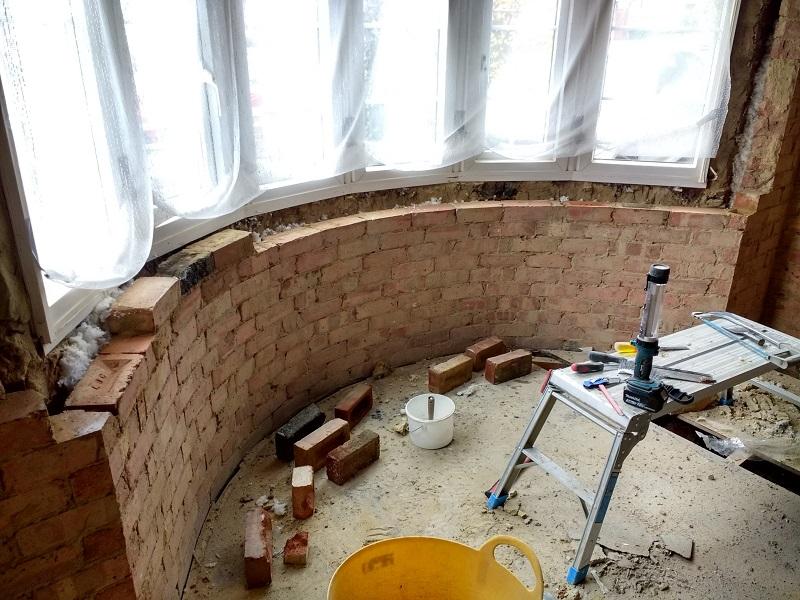
From looking at the picture of your bay window I would assume that it is a cavity wall. Mine was the same, even though you're looking at the end of the bricks, the builders have most likley cut the bricks in half so that they can make a small cavity. Here's pics of mine, end of bricks showing outside. Side of bricks inside and cavity insulation within. Its not much of a cavity at 50mm.

-
This is pretty much the same as the windows in my place. We have two bays one on top of the other at the front. The upper window is holding up the roof and the lower one is supporting the floor and wall above it and the window....so there's a fair bit of weight in it. So in between each window frame there's a small aluminium acrow prop which passes through the window seal and sits of the brick work. It looks pretty sturdy. They are upvc windows made by Rehau, probably not what you wanted, but they come in a variety of colours, triple glazing etc. I cant see how the angle of each one makes it difficult to shop for, usually the factory just cuts the necessary angle and glues the bits together. Ill try to add a pic of them later on. My previous windows were not load bearing, and in so it had caused the bay window wall upstairs to pull away from the house slightly and crack either side. The window company said it was a long way from the worst they had seen.