Leaderboard


Popular Content
Showing content with the highest reputation on 06/08/16 in all areas
-
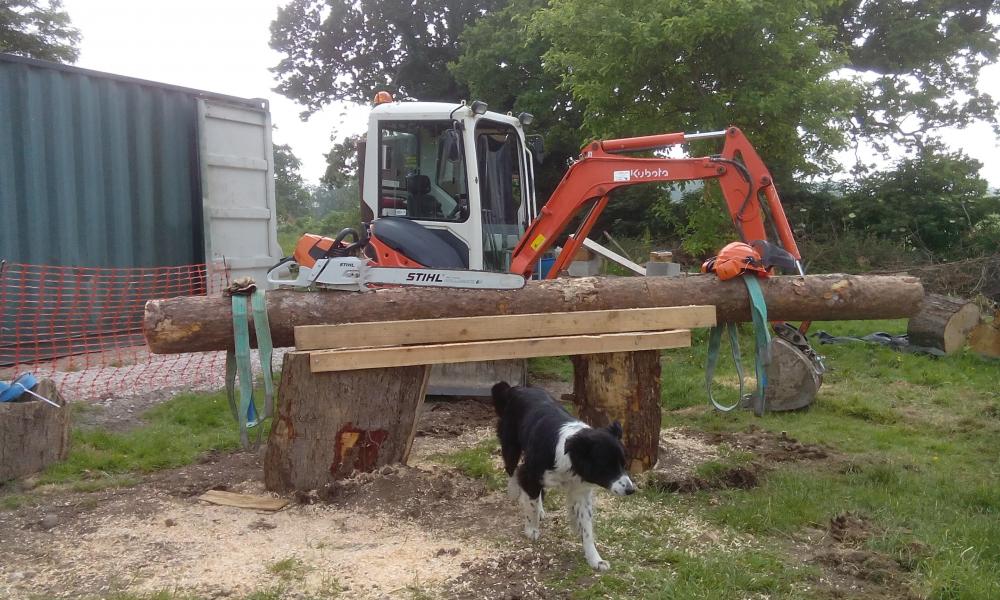
Just to illustrate my point earlier in the thread have a look at this.... The 'pillars' were inserted by using the digger - the holes dug, the hemlock tree sawn in two and 'posted' into the holes - both back-filled by the digger , the cedar tree off loaded from the trailer (at full 3 meter stretch) and dropped onto the rails (4 by 4s). All on my own with no help. And I thought diggers were for digging holes. And that's Tess, the Chicken Dog. She spends all day rounding up chickens and herding them into the branches of a Bay tree. Yep, I dunno why either.
 2 points
 -
And the otherside matches
 1 point
 -
No chance of a digger whacking in fence posts here. Clay & flint. 3' long auger on the tractor pto and even then there'll be a shear pin to replace somewhere along the way! Big flints, roots etc. Scary when the auger binds up!1 point
-
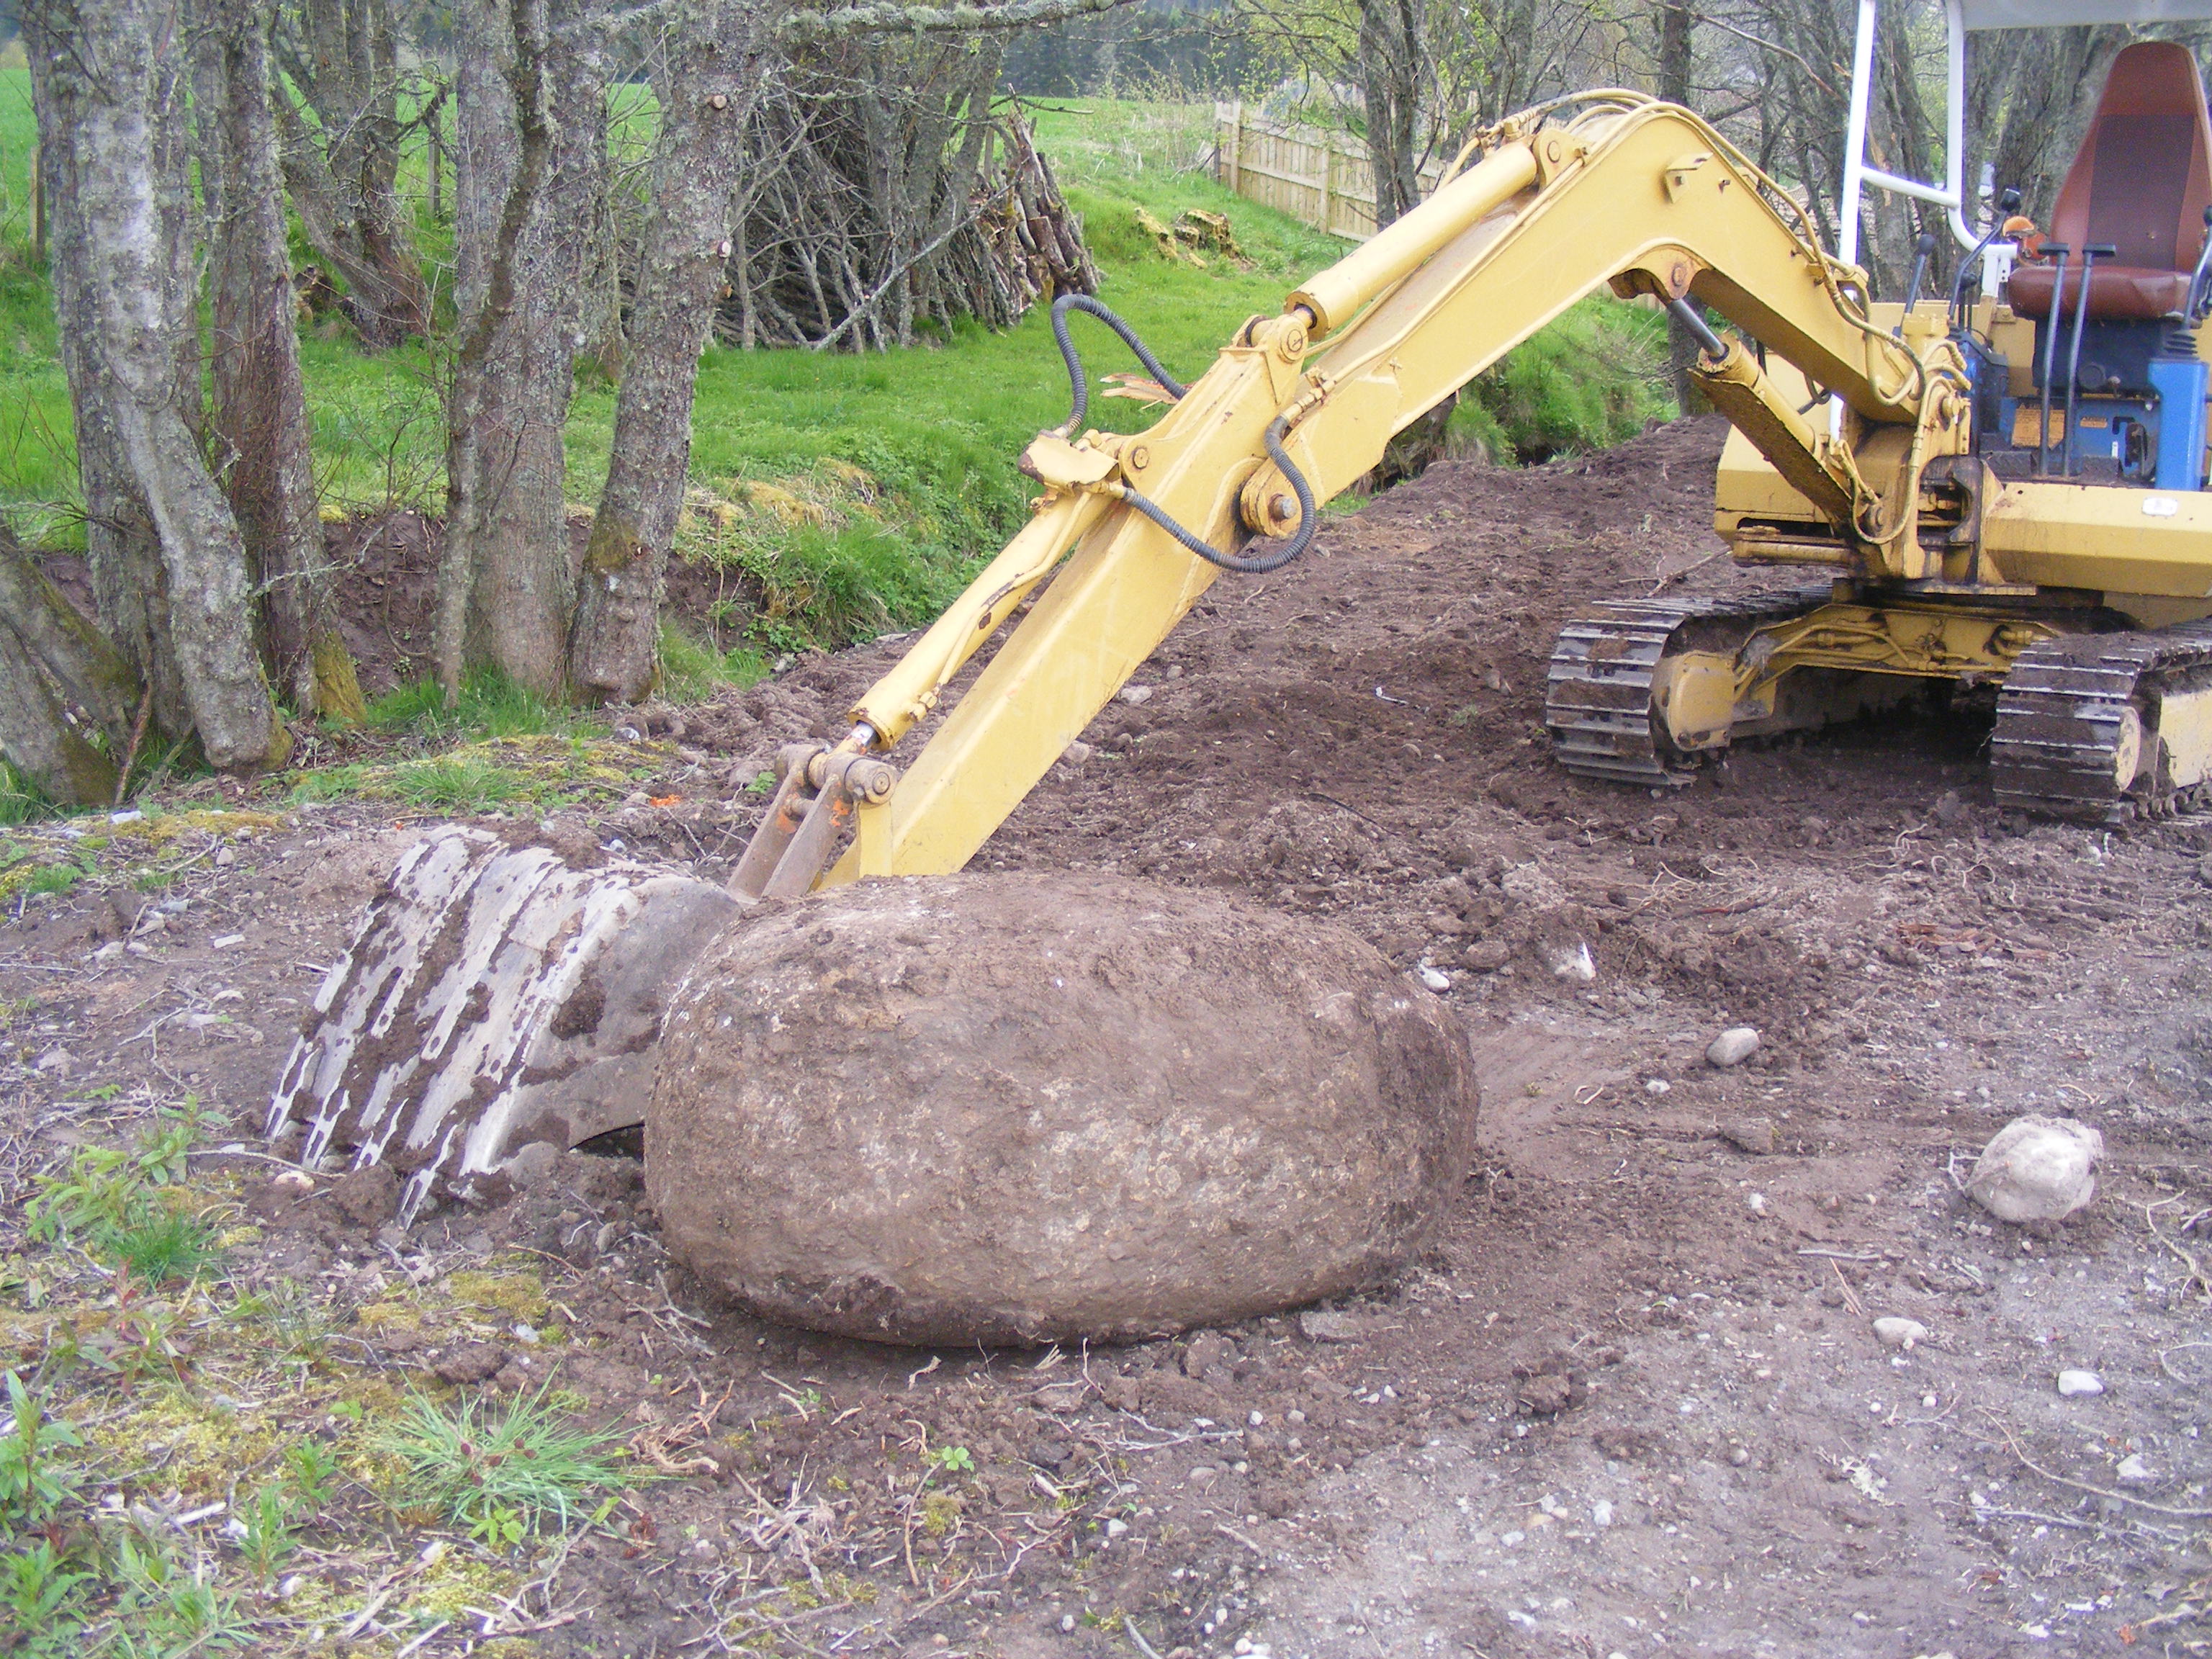
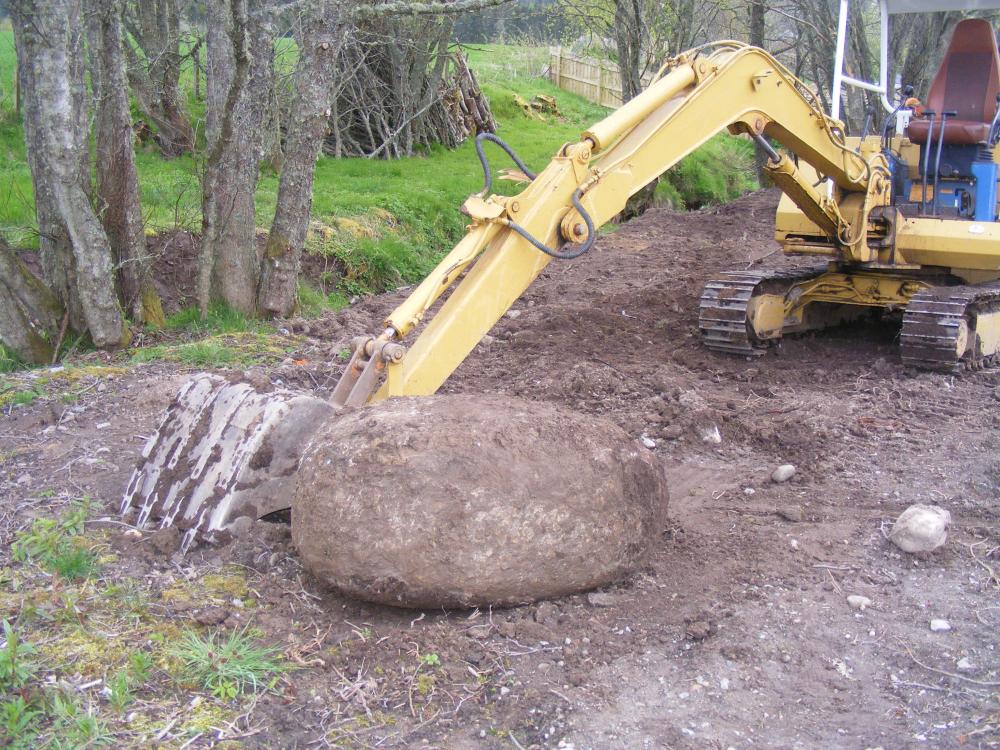
Has anyone mentioned diggers are great for putting in fence posts. Position the post, get it level, a couple of taps with a sledge hammer so it's in a little bit and won't fall over, then push down with the digger bucket and one post securely in the ground. And back to the size question. Are you expecting to find any rocks in the ground? I pulled this little pebble out of the ground when digging my foundations, I am not sure a smaller machine would have lifted it
 1 point
 -
We went for symetry and our doors are 1.2 and they are fine for everday use.
 1 point
 -
I'm not grey, I'm silver, silver, OK?1 point
-
Okay I am going to ask a VERY daft question. Can the ecologist not go INTO the loft space and have a look for any bats BEFORE you strip off any tiles? Remove any bats present or declare than none are present, then let the roofer strip the roof on his own. Why make things complicated?1 point
-
Young people these days don't know they are born... I wonder if we will get regulations that can be understood without spending £500 on a specialist solicitor after BREXIT? https://www.fginsight.com/vip/vip/negotiating-the-load-towing-legislative-minefield070111-960 Ferdinand (*) Have to admit that made me think of a certain incident allegedly involving Gillian Taylforth, her alleged fiance, and an alleged Range Rover.1 point
-
If the TV with the separate power supply really runs on 12V DC from that power supply, then it's far better to run it direct from the battery. Using the inverter to boost 12V DC to 240 VAC will waste around 10 to 15% and then using the power supply unit that comes with the TV to convert 240 VAC back to 12 V DC will waste another 10 to 15%, so you could be wasting 20 to 30% of you battery energy by using the 240 V inverter. Before running the TV from 12 V, best check that the power supply does put out 12 V DC. Some seem to run on laptop supplies, and they are often around 18 to 19 V DC.1 point
-
We are up there all the time. Family use it too...it's a bit of a party hut! Had 14 sleeping over one night. And the kids love it, got the kayak out now the weather is good and its only 30m down to the lochside??1 point
-
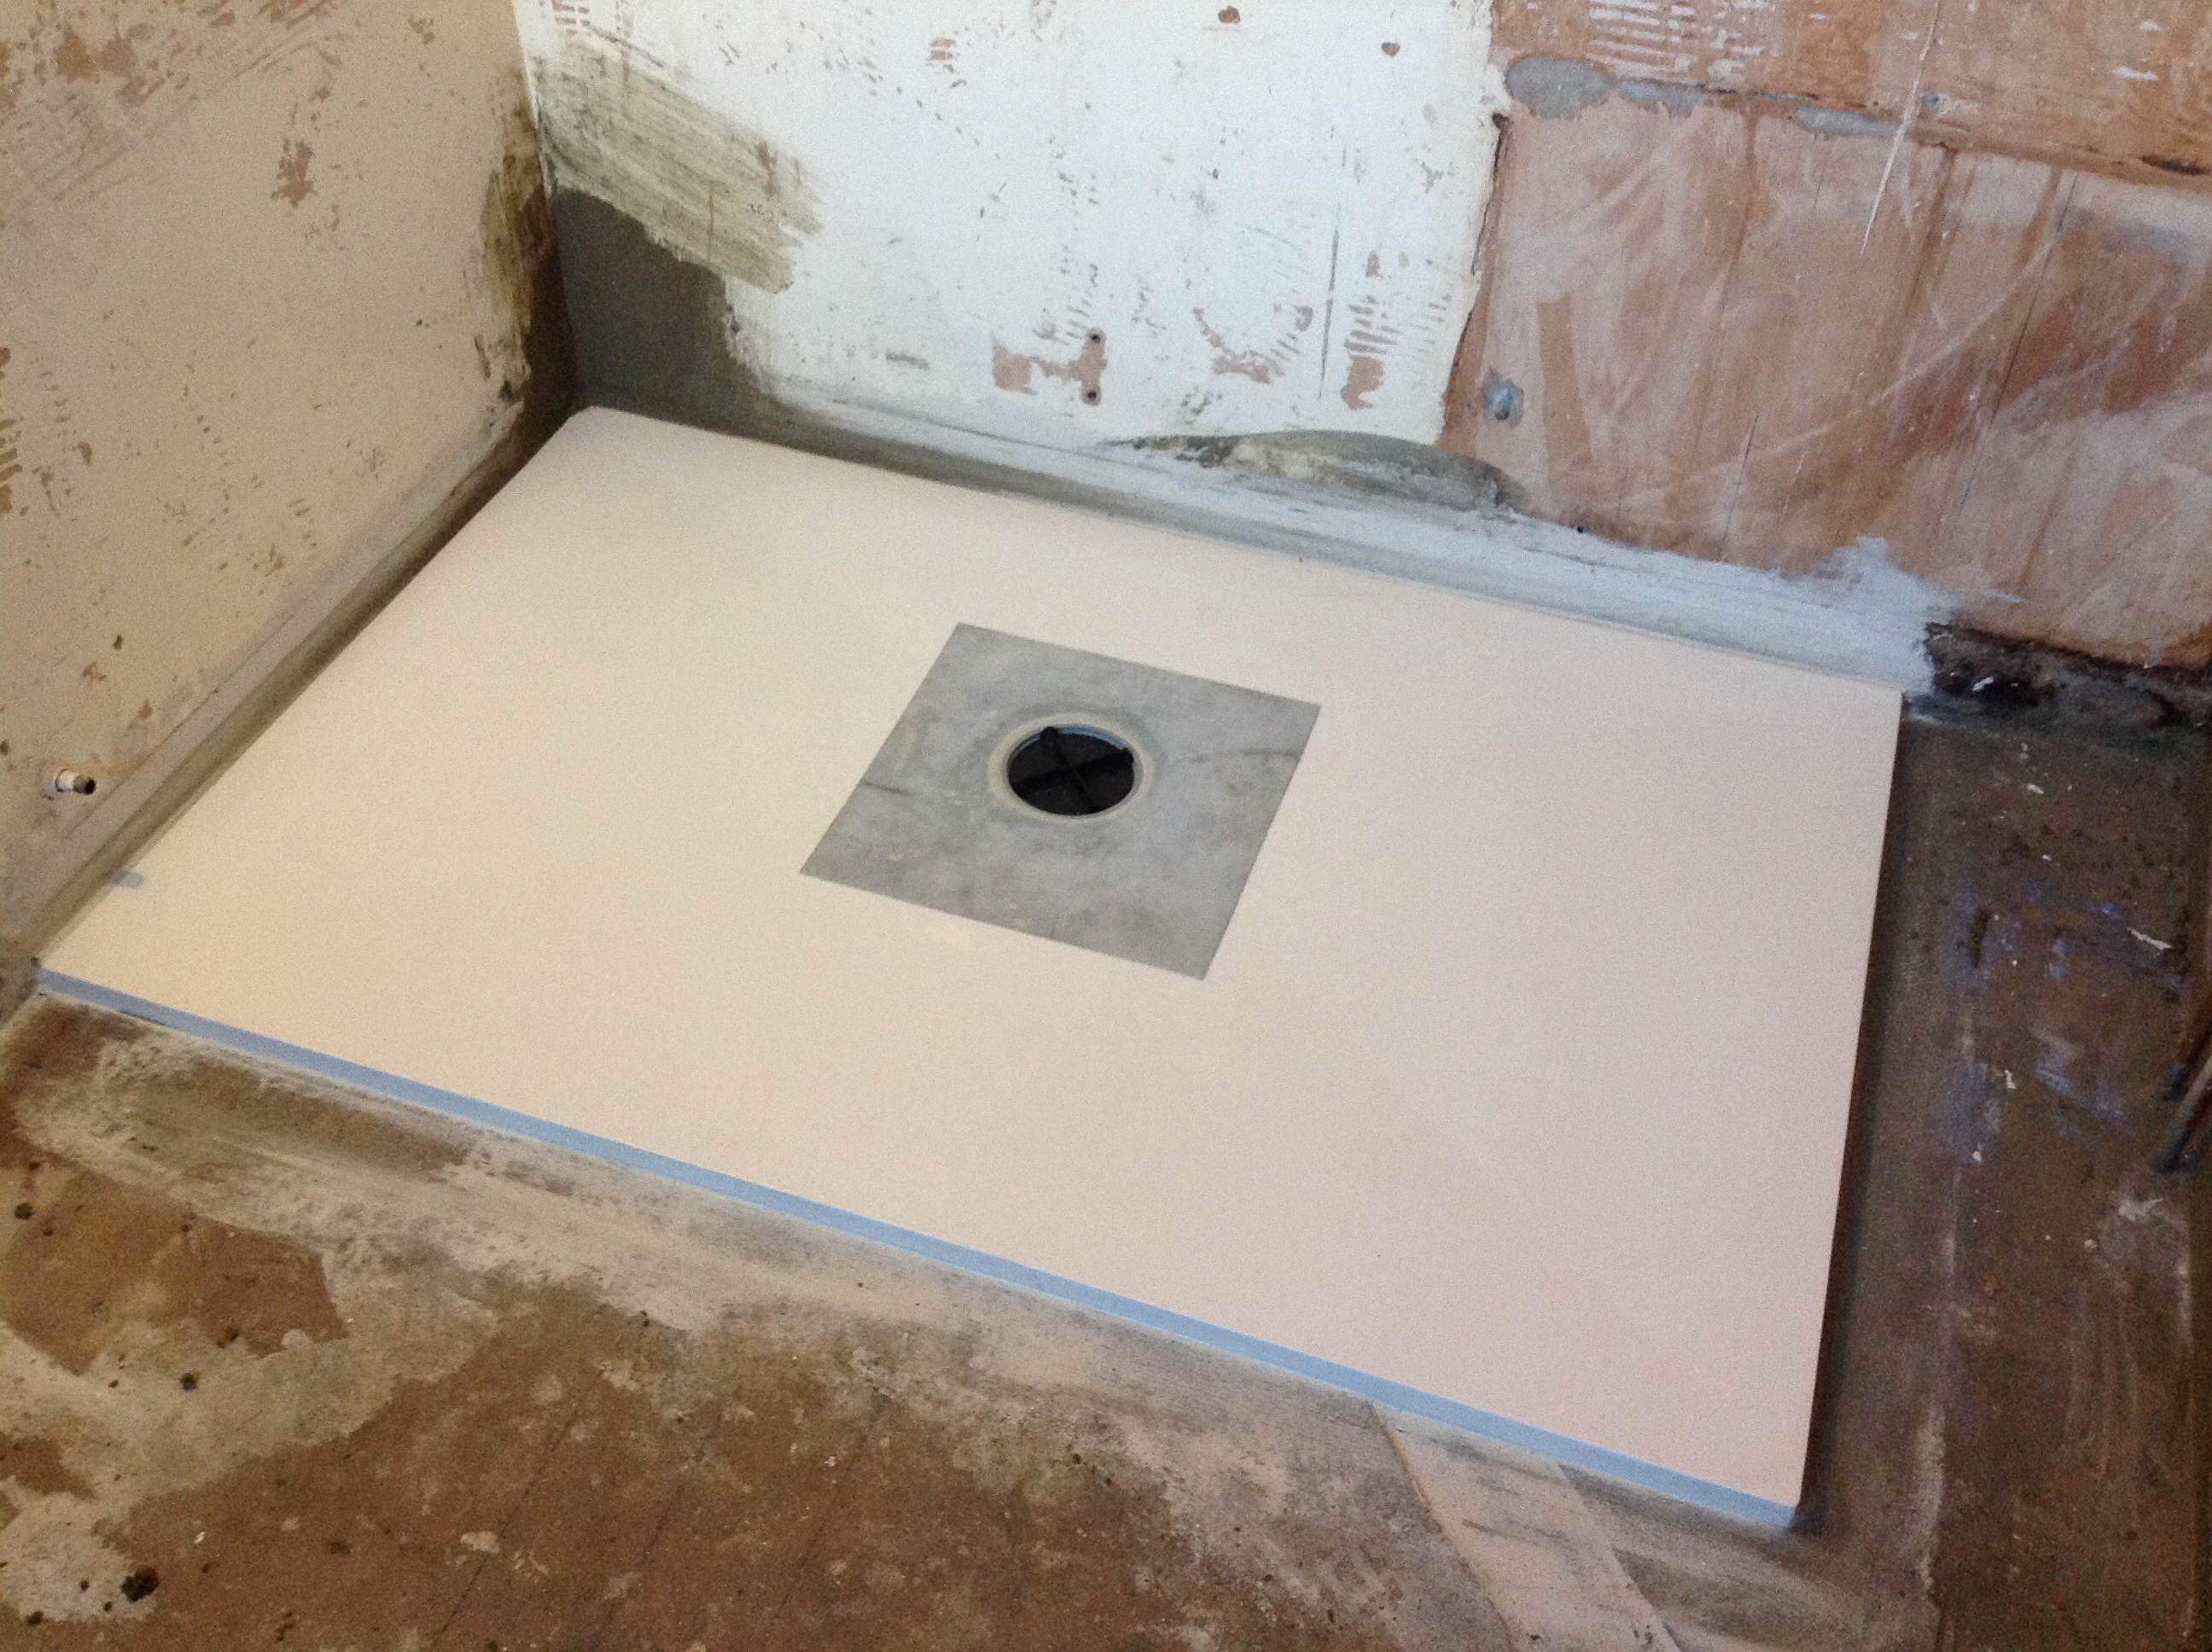
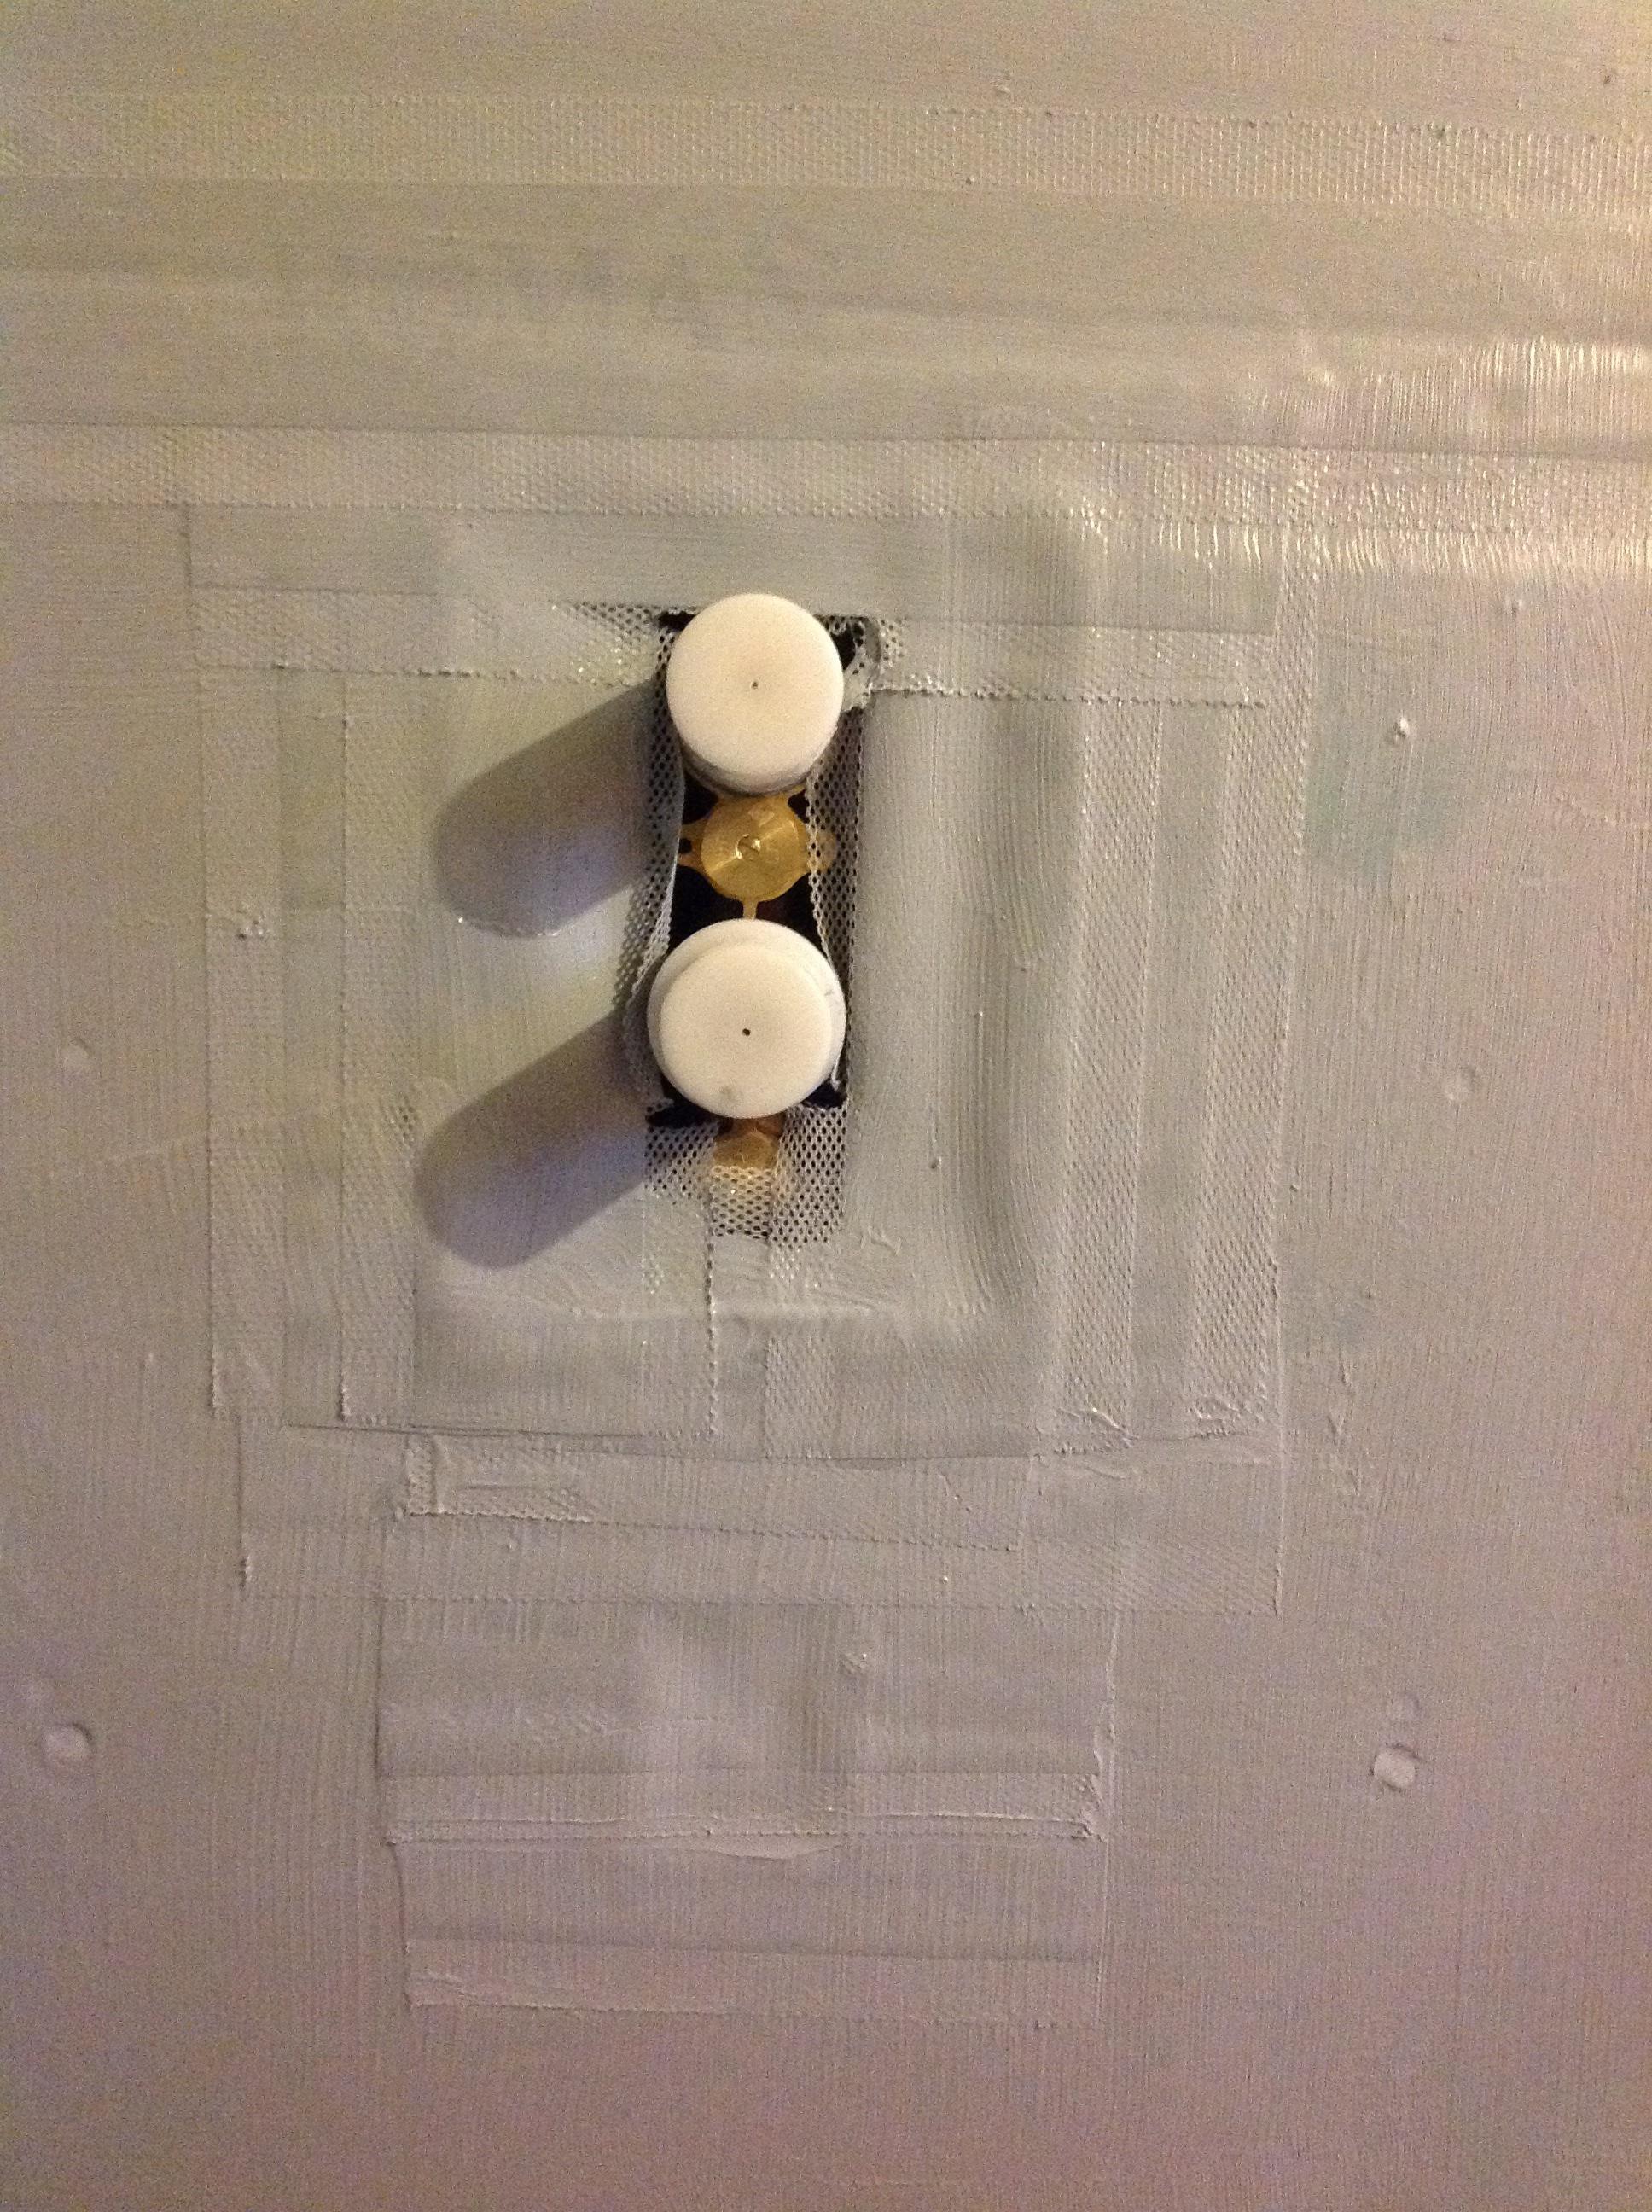
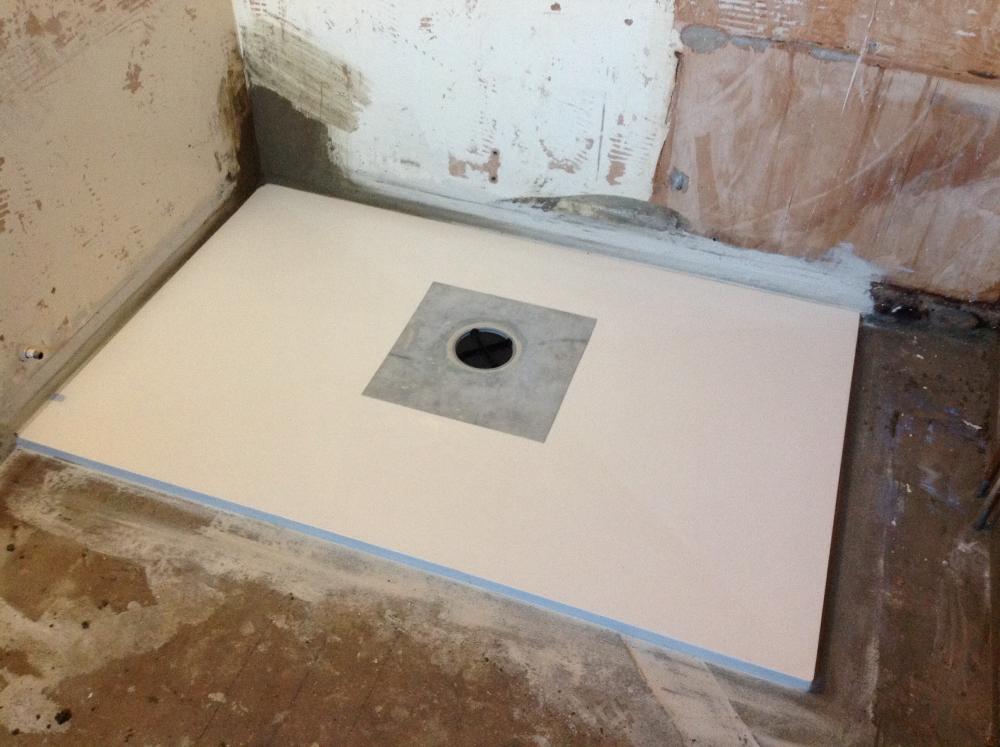
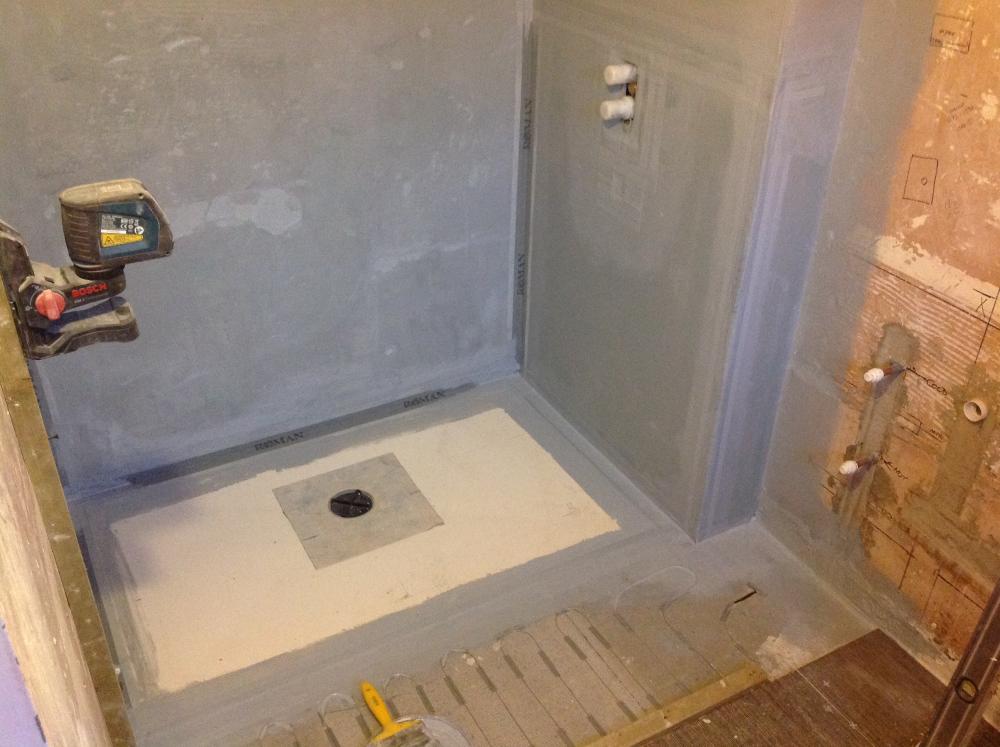
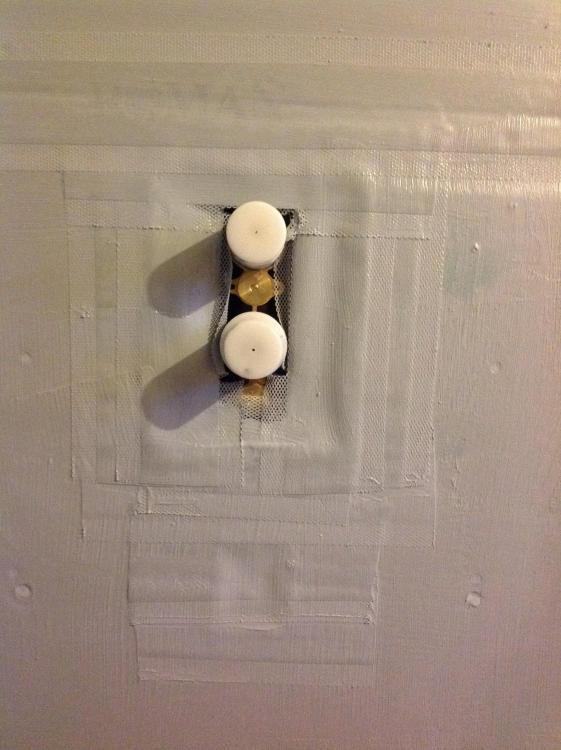
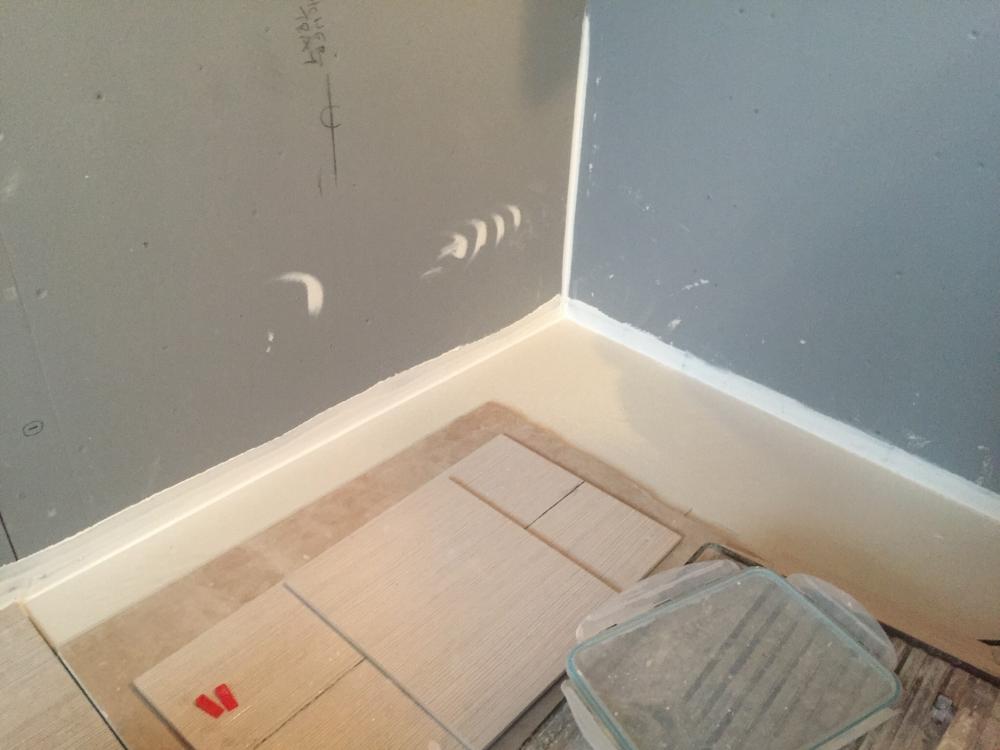
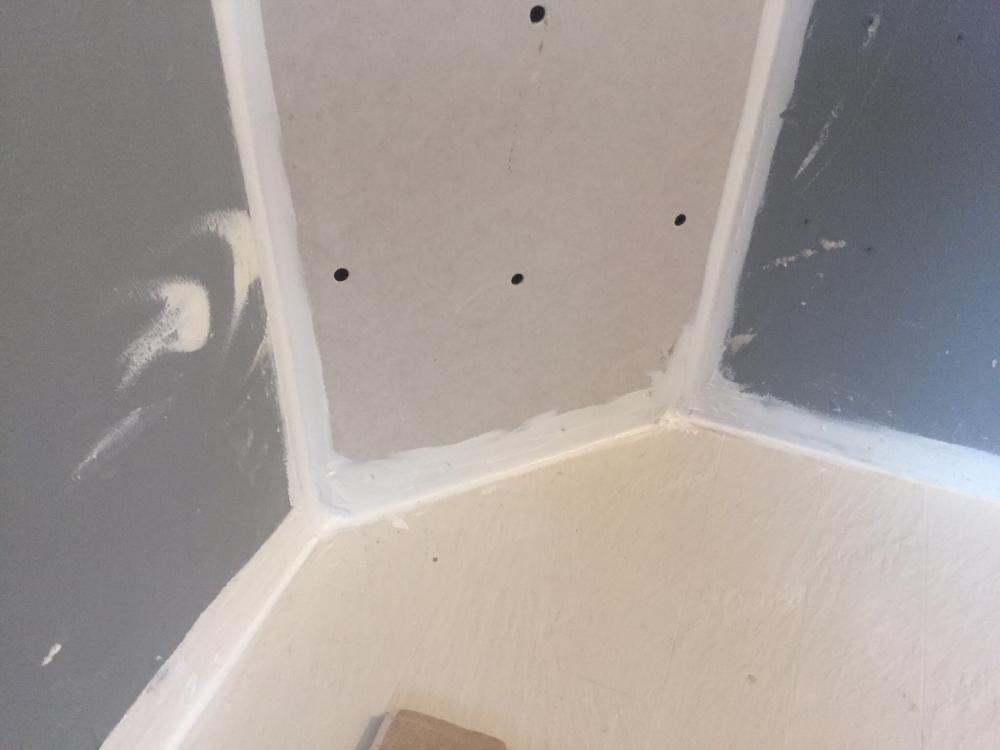
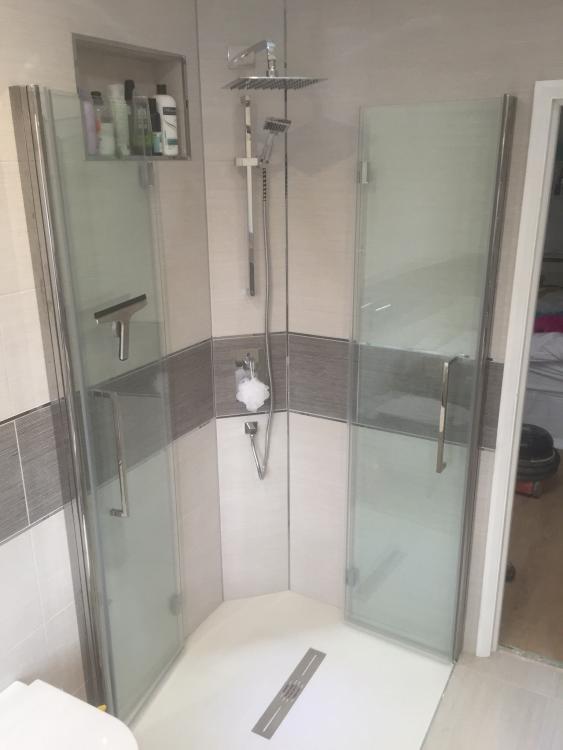
This is a former I'd just laid. The corners made up in sand and cement where an old pipe went through. The light grey stuff is the tanking primer which I cut in prior to fixing the tray into position. That just gave me a nice clean surface to bond the tray to. This shot shows the stud wall in place, blame the bathroom showroom for not having the tray the full width, and with the first coat of tanking applied. After the first coat was tacky, I then applied the 4" strip ( as seen with Roman written on it ) into a layer of wet tanking. That then gets brushed quite firmly to remove excess tanking from behind the strip to ensure it's as flush and flat as possible so as not to hinder tiling. The strips run between the former and the insulation backer boards on the floor ( insulation boards as this had undertile heating on a ground floor ( concrete )), in all the internal angles both horizontal and vertical, and around the turn of the boxing in eg the external also. Leftover strip used around the shower valve. Belt and braces, aka OCD. Finished article prior to grouting. Note the shower valve is dead centre of the border tile ribbon, and also there are two same size tiles either side equally intersecting the shower valve. That's gives the same size cut of tile around the entire valve plate. Aka OCD All of the above can also be observed when fitting a shower tray, just the only difference being that you can't use the strip between the shower tray and the wall. As the tile will only cover 12-14mm of the edge of the tray, you can't have the strip showing so another change of discipline is needed. The next one is a one piece shower tray, so basically you just tank the walls prior to the tray being fitted, which gives an excellent surface for the adhesive ( mastic type ) to adhere to when bonding the tray into its final position. What the picture doesn't show is the masking tape that I put onto the tray to allow me to get a neat edge to the sealant where it sits on the tray edge. That junction is quite important as it's the last line of defence against any water getting behind the tiles. What I do I these circumstances is to pump a load of mastic ( sikaflex for these is best as it's non silicone based and also doubles up as a sealant as well as an adhesive ) between the tray and the wall and then push the tray against the walls thus displacing any excess above the tray edge. This is when you'll be glad you masked it up first . Get a plastic spatula and then spread the excess sealant, whilst still wet, against the vertical wall face. Do this so you get an up-stand of sealant forming a 'skirting board' which is continuous between the tray, the wall, and vertical face of the wall, preferably all in one application. I set the masking tape around 5-6mm in from the edge of the tray so I know I'll get a straight line, and also a bead of sealant that's has a decent purchase on the tray, which then transfers to the wall. The action of tooling the sealant with the spatula pushes it against the tray itself thus forming a good / strong bond to both. After the horizontal sealant has cured, next run a bead up the internal angle for at least 600-900mm up the corner. With the fundamental sealing done, in goes the 45'd shower valve & pipework frame sections which them get plasterboarded and sealed, plus tanked prior to tiling. Roberts your mothers brother The end.

 1 point