Leaderboard


Popular Content
Showing content with the highest reputation on 05/25/16 in all areas
-
Would-be selfbuilder, Midlander by birth but doing missionary work in Devon. This site, and its forerunner, is a mine of information, not to mention frequented by some nice people! Writer by profession, though always looking to improve practical skills/knowledge.2 points
-
Hi all, First off I would like to say a big thank you to everyone that managed to get this off the ground. Ebuild was such a wealth of information and I (like most I'm sure) was saddened to hear off its closure. Anyway, we are in the planning stages of our build on the outskirts of edinburgh and all being well hoping to start early 2017. many thanks Ross2 points
-
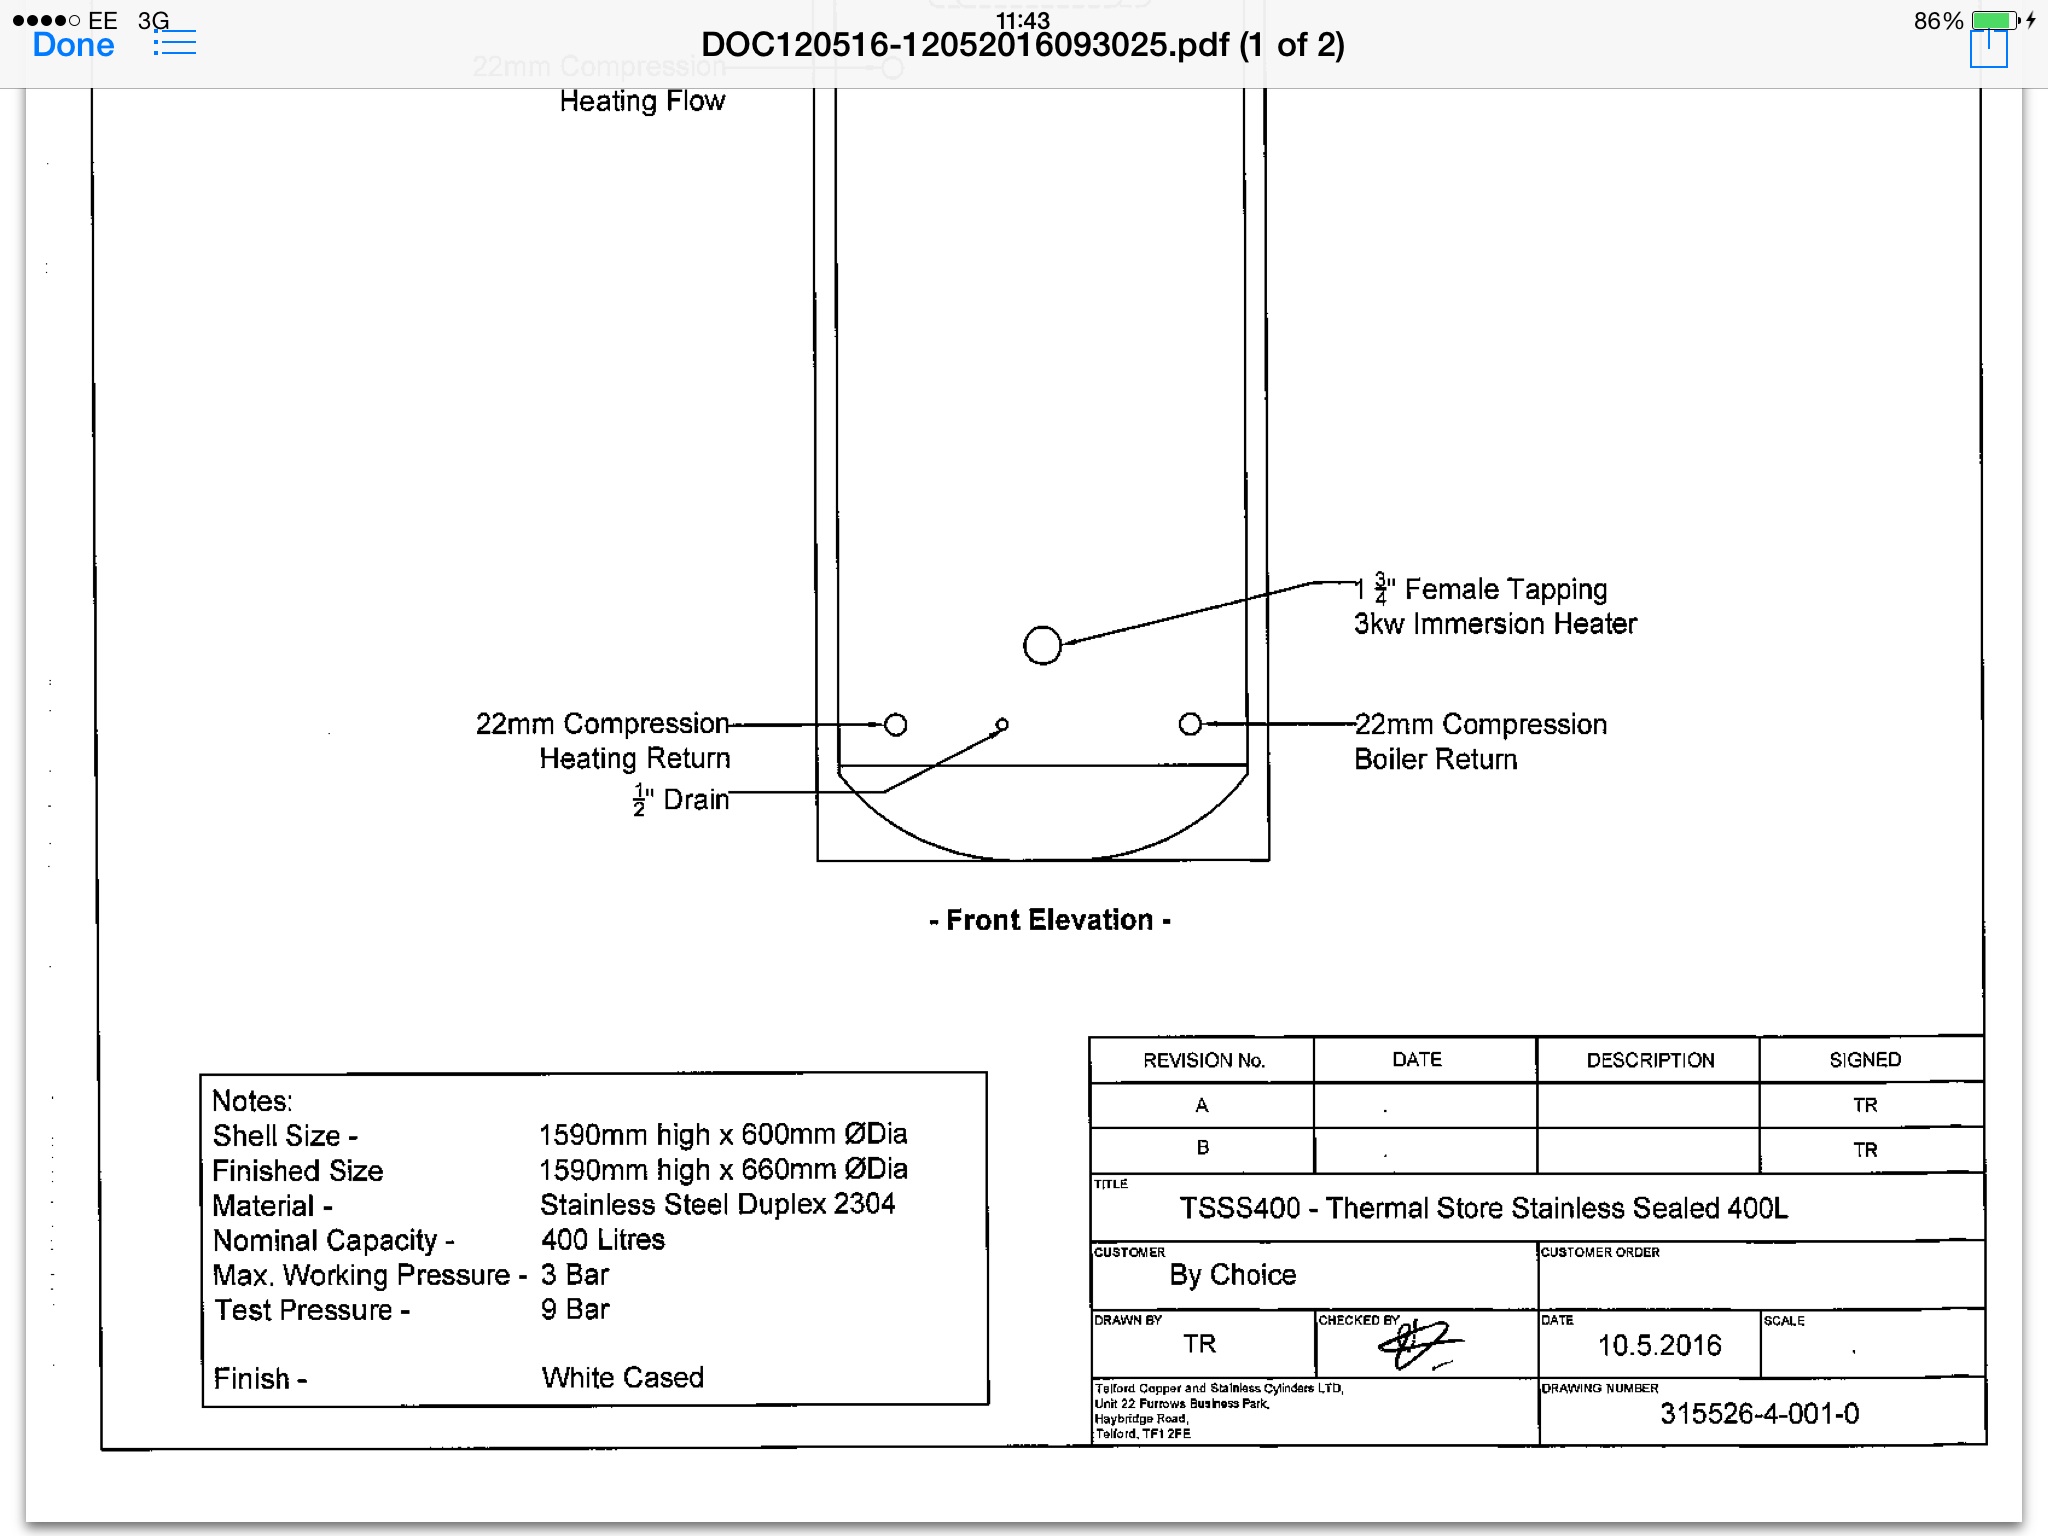
possibly the best technical drawing I have seen only thing i would suggest is making the tool shed bigger.... e.g big enough for the bikes and then keep the tools in the big shed2 points
-
I'm sometimes accused of overthinking stuff. And I'm a little weary of it. Here's why. Expert status in many areas is thought to develop after about 50,000 hours of practice. And one of the common characteristics of expert status is the reduced need to think about the hard-learned craft or subject. It (irrespective of subject matter) becomes hard wired. Take my digger. Just bought it a few weeks ago and while using it in the first couple of hours I was like a cat on a hot tin roof. My shoulders ached, my jaw was locked, my concentration fierce. And then I remembered my flying lessons. 'Think it, and it'll happen, lad' growled the instructor. And when the fear had dropped a bit, I allowed myself to relax and reduce the control inputs. Suddenly I wasn't dancing all over the sky like the proverbial in a pot. On the digger, I reduced the control input and slowly the swing was not so large, not so jerky. Then Ed (Construction Channel) said it would take about 4 hours to get a basic understanding. He was right. That was a fortnight or so ago. Now, I couldn't tell you what I do to hook a self-hitch bucket, Now I get annoyed at myself for 'clangy' bucket movements. Slowly I have stopped thinking about it. I just feel it. The next step is over-confidence (pilots call it the Death Zone -about 200 hours into their training). Now, I don't think I'm going to die while using a digger, but I'm going to be extra vigilant in a month or two. After many hours of practice, experts (it's a well-documented phenomenon) simply don't remember that they had to learn stuff. And sometimes are just a little puzzled by someone who asks apparently naive questions. And then -with kindness and reassurance at the root of their response- reply that the questioner is over-thinking it. No, all the questioner is doing is sharing their worry, their lack of expertise, their lack of practice.1 point
-
At last back up and running David from Kent, first time self build, timber frame, roof's on, windows in, brickwork to front completed, renderboard to the rest... going on as we speak Looking forward to all the interesting posts. Thanks to all who got this up and running.1 point
-
Hi Folks, New forum looks good. In theory we finished our self build in 2007 but one day it really will be finished. Regards Colin Watters (aka Temp).1 point
-
That's exactly my conclusion, every time I've had an issue it's been the "unknown unknowns" that have caught me out. Our borehole saga is the classic, well over a year trying to find the cause of the problem based on assumptions that the spec we'd been given (and paid for) was accurate, only to find in the end that the hole had been drilled 17m short and the supposed problem of the bottom of it being full of packed sand that I'd been trying to solve for over a year didn't exist. Added well over a year to our build, that little saga did. I've just spent two hours copying and formatting the 9 page thread from Ebuild into a pdf that's now in part 31 as part of a blog entry: http://forum.buildhub.org.uk/ipb/applications/core/interface/file/attachment.php?id=2641 point
-
So you must have seen the videos showing scythe v strimmer, with the scythe finishing first (& that's not even considering that it would be much faster to collect the trimmings)? Usually they are straight races, i.e. winner is the first to cut a given area, but there's an especially good one at a British country fair where the test includes going round saplings and finding objects that have been left in the grass. With the scythe I can leave a foxglove standing in splendid isolation, trying doing that with a strimmer! For cutting in and around the bases of our willow windbreak (3 rows with 60cm between the trees) I find having a very short blade is handy.1 point
-
1 point
-
Welcome! What you're doing is still considered a self-build by most definitions (including mine, since I only did about 5% of the actual work on our build). Don't underestimate the amount of input you'll end up having, even going the main contractor route.1 point
-
If the grass you need to cut is that flat & level you just don't understand the issue. Think alpine meadow. I can't speak for Crofter's garden, but we have a plot that is ~50m x 50m. The top (North) corner is 10m above the bottom (South) corner. In places the slope is 1 in 4 or steeper. In theory our mower is "self-propelled", but on rough ground like that it's a euphemism for 'power assisted", & not much assistance at that! I don't aim for a fine sward. My No.1 aim is that the area all looks green over winter (a real contrast to the surrounding fields & moors), my secondary aim is that it looks tidy throughout. To achieve that I have some areas I cut only once a year (the steepest bank), others I cut 2-3 times, and a small area that gets cut every 1-2 weeks (that bit is the closest we have to what some might call a 'lawn').1 point
-
For those that don't know, when we conceived this forum I made some comments about summat and Ian replied "if I wanted to hear a sparrow fart", and then he hacked my profile and applied this 'artwork'. Git1 point
-
Hi Alistair, I say Edinburgh but the plot is actually nearer Linlithgow. Our offer to buy is subject to planning so not actually ours yet. We just sold our house in Chesser, not far from you and have moved into a flat in Dalry that a family member owns (bit of a shock moving back into a flat!!) I know Colinton well as I grew up not far from there, its a lovely area. We actually put an offer in for a bungalow in Craiglockhart last year but didnt get it so made the decission to start looking further afield. Would love to get a look round your build sometime to put my mind at ease.............I have renovated a few properties but this is a whole different ball game!! Thanks Ross1 point
-
Just started building in Edinburgh. Porotherm walls with PIR insulation. Concrete first and second floors. MVHR. Triple glazed. Hoping for low running costs but also a very quiet house that feels very solid. Plan to live there for the next 40 years. Hopefully I get those 40 years to enjoy it!1 point
-
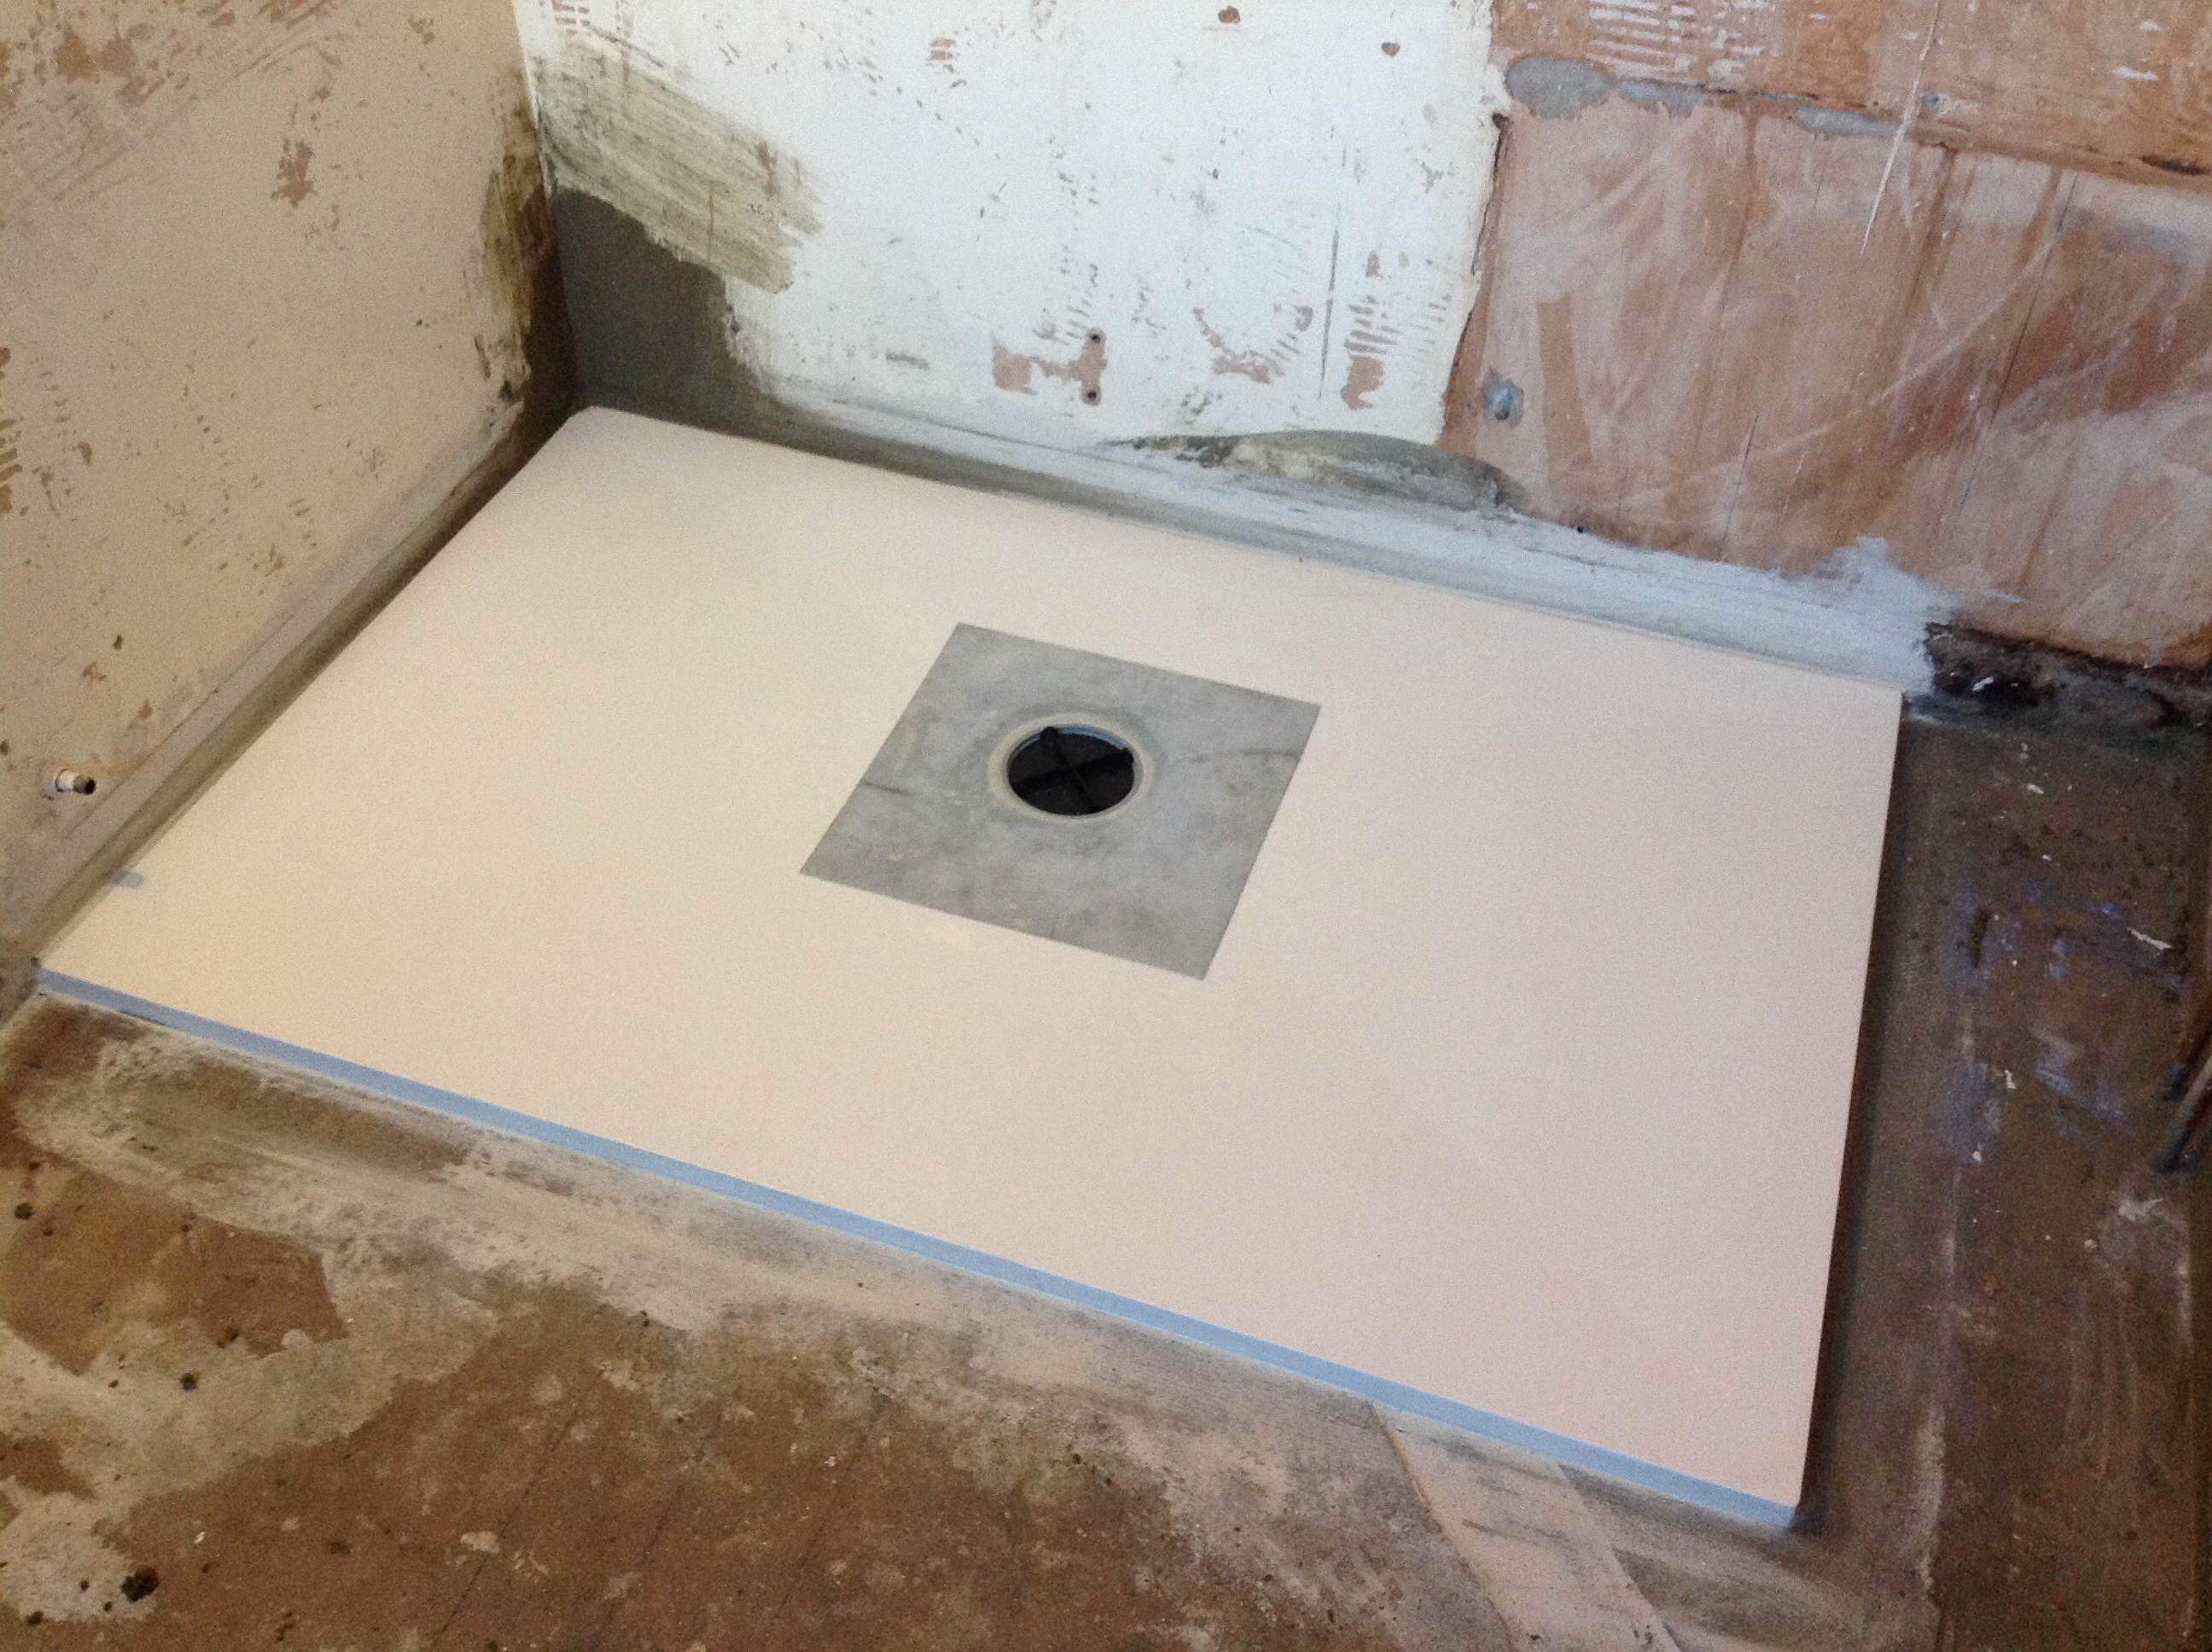
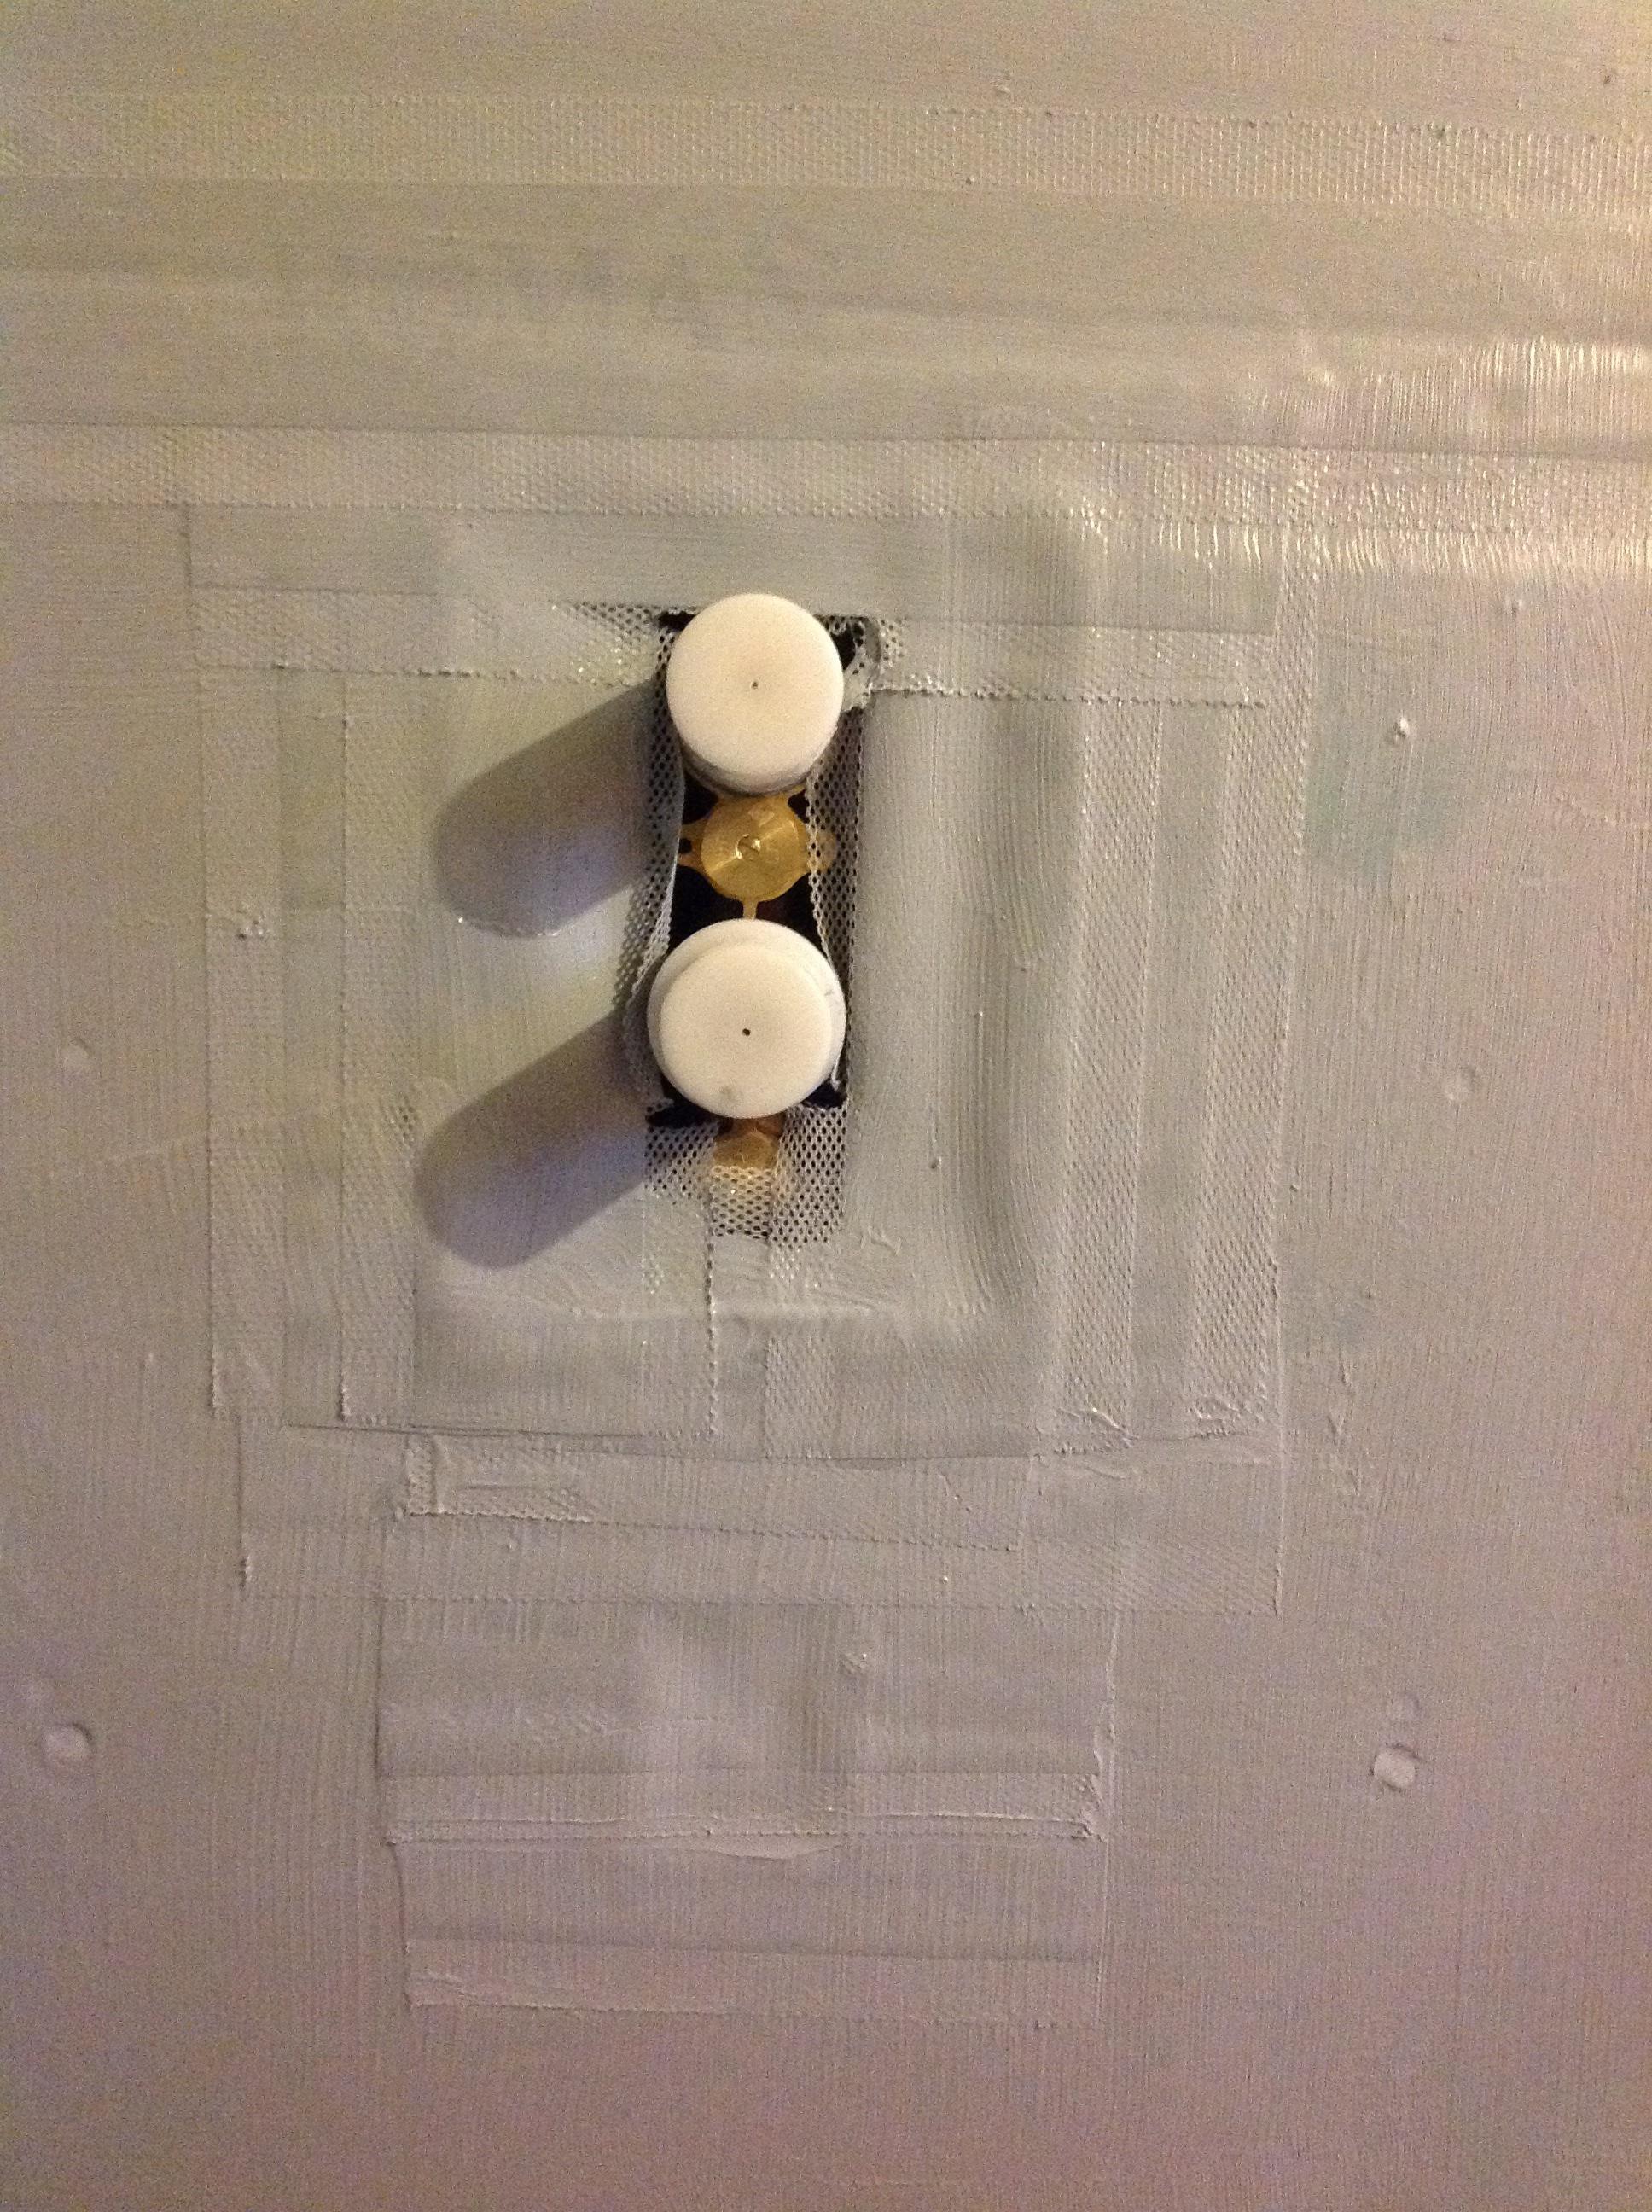
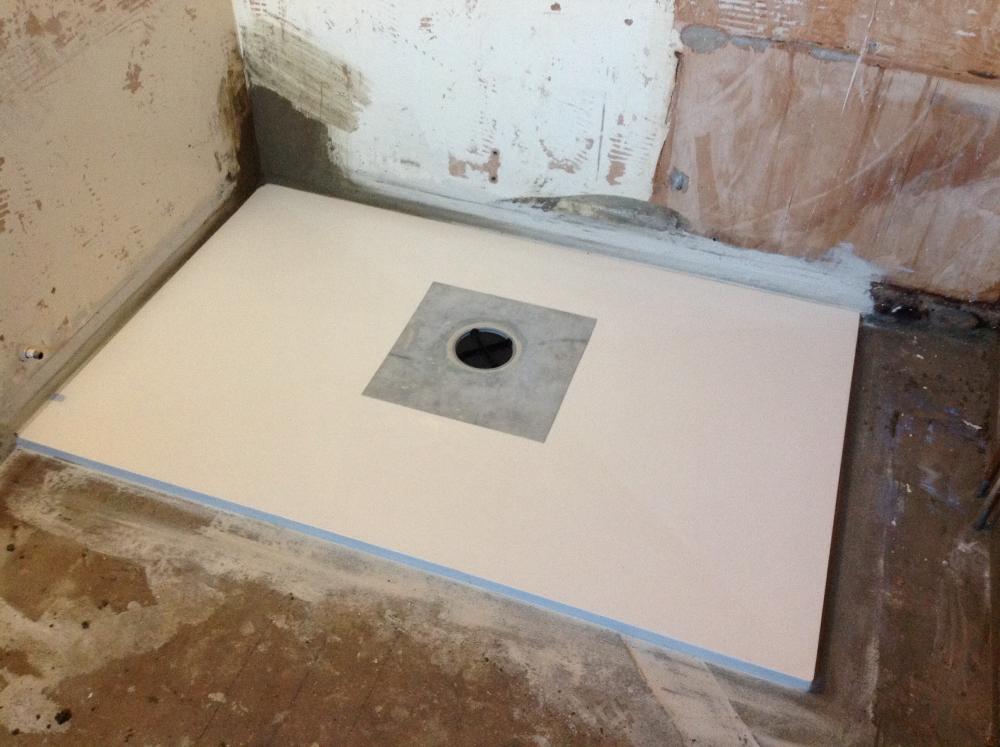
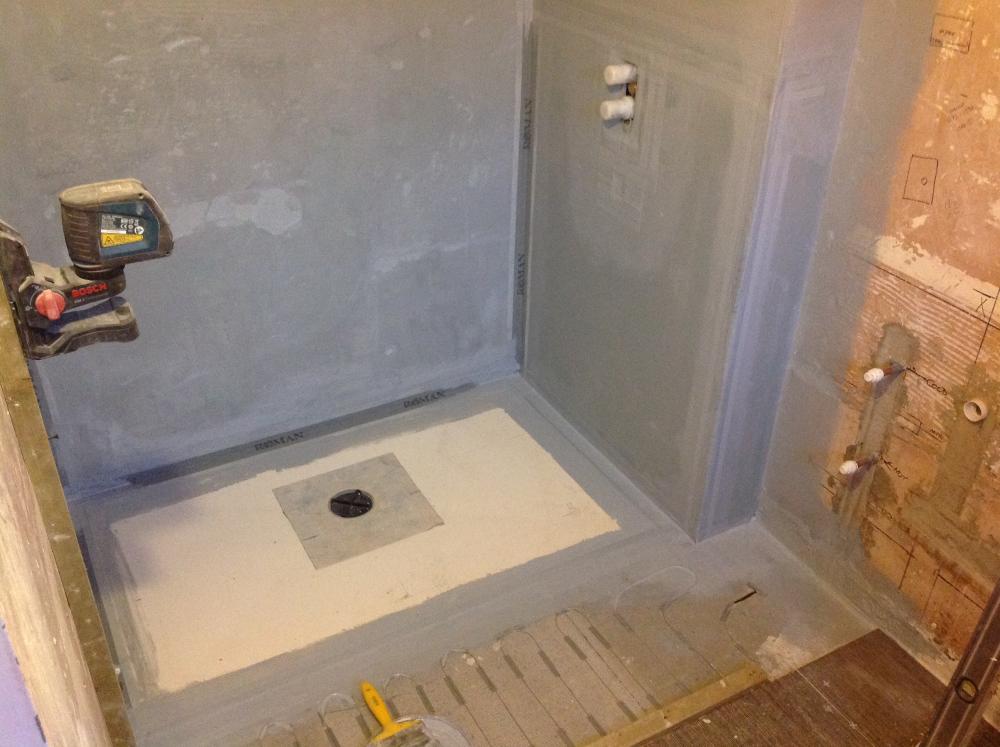
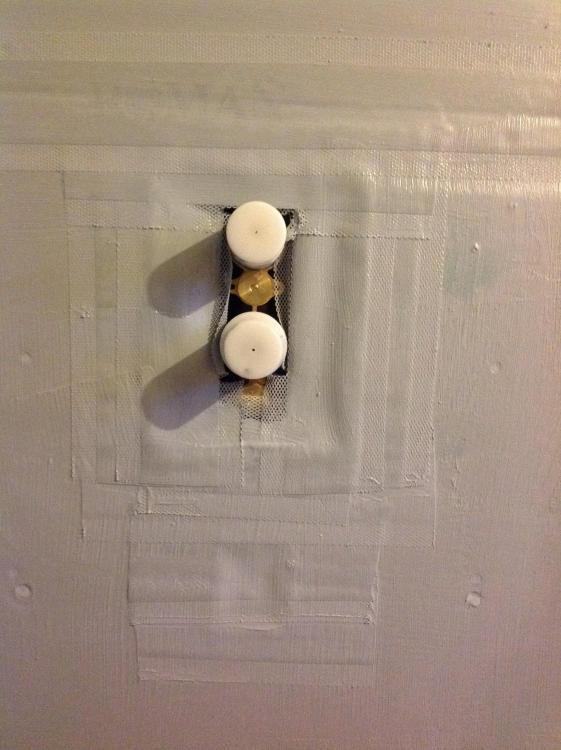
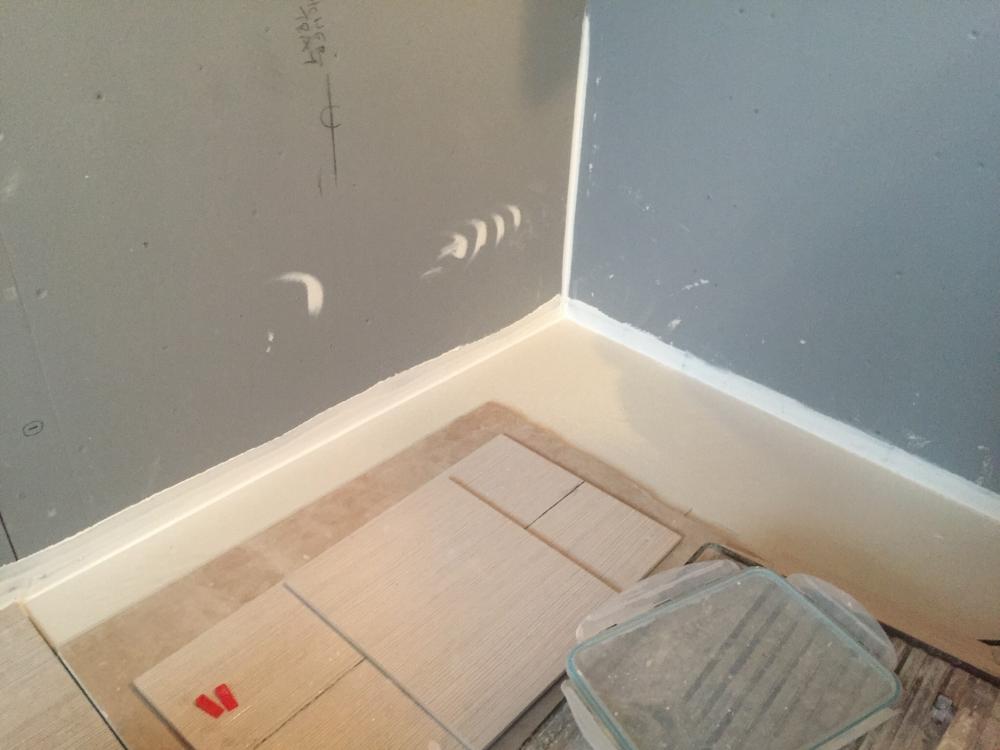
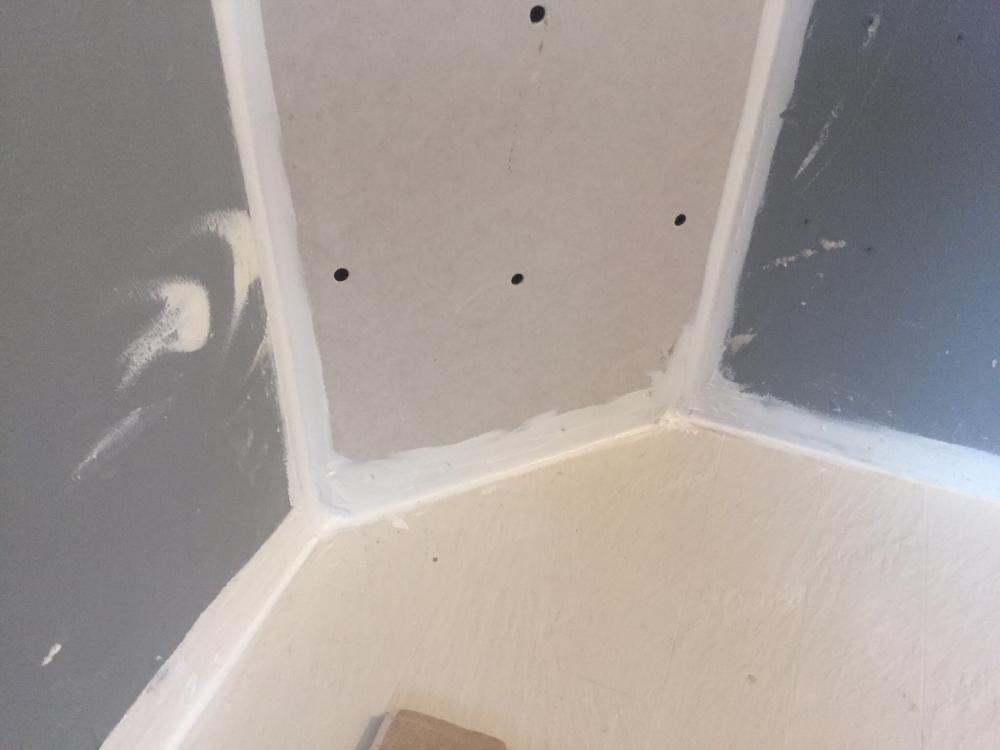
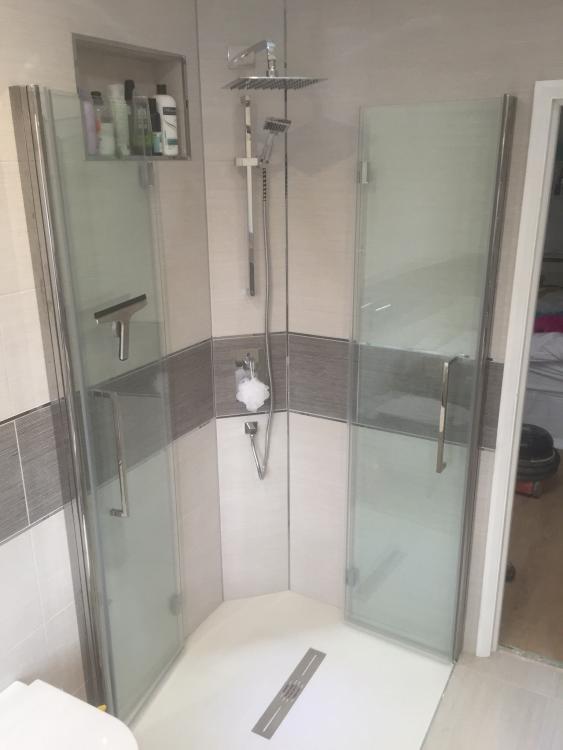
This is a former I'd just laid. The corners made up in sand and cement where an old pipe went through. The light grey stuff is the tanking primer which I cut in prior to fixing the tray into position. That just gave me a nice clean surface to bond the tray to. This shot shows the stud wall in place, blame the bathroom showroom for not having the tray the full width, and with the first coat of tanking applied. After the first coat was tacky, I then applied the 4" strip ( as seen with Roman written on it ) into a layer of wet tanking. That then gets brushed quite firmly to remove excess tanking from behind the strip to ensure it's as flush and flat as possible so as not to hinder tiling. The strips run between the former and the insulation backer boards on the floor ( insulation boards as this had undertile heating on a ground floor ( concrete )), in all the internal angles both horizontal and vertical, and around the turn of the boxing in eg the external also. Leftover strip used around the shower valve. Belt and braces, aka OCD. Finished article prior to grouting. Note the shower valve is dead centre of the border tile ribbon, and also there are two same size tiles either side equally intersecting the shower valve. That's gives the same size cut of tile around the entire valve plate. Aka OCD All of the above can also be observed when fitting a shower tray, just the only difference being that you can't use the strip between the shower tray and the wall. As the tile will only cover 12-14mm of the edge of the tray, you can't have the strip showing so another change of discipline is needed. The next one is a one piece shower tray, so basically you just tank the walls prior to the tray being fitted, which gives an excellent surface for the adhesive ( mastic type ) to adhere to when bonding the tray into its final position. What the picture doesn't show is the masking tape that I put onto the tray to allow me to get a neat edge to the sealant where it sits on the tray edge. That junction is quite important as it's the last line of defence against any water getting behind the tiles. What I do I these circumstances is to pump a load of mastic ( sikaflex for these is best as it's non silicone based and also doubles up as a sealant as well as an adhesive ) between the tray and the wall and then push the tray against the walls thus displacing any excess above the tray edge. This is when you'll be glad you masked it up first . Get a plastic spatula and then spread the excess sealant, whilst still wet, against the vertical wall face. Do this so you get an up-stand of sealant forming a 'skirting board' which is continuous between the tray, the wall, and vertical face of the wall, preferably all in one application. I set the masking tape around 5-6mm in from the edge of the tray so I know I'll get a straight line, and also a bead of sealant that's has a decent purchase on the tray, which then transfers to the wall. The action of tooling the sealant with the spatula pushes it against the tray itself thus forming a good / strong bond to both. After the horizontal sealant has cured, next run a bead up the internal angle for at least 600-900mm up the corner. With the fundamental sealing done, in goes the 45'd shower valve & pipework frame sections which them get plasterboarded and sealed, plus tanked prior to tiling. Roberts your mothers brother The end.

 1 point
 -
Since getting the scythe our place is tidier than it's ever been in all our over 20 years here. Cutting the grass is still a task, but it's no longer a chore. One thing that makes it particularly handy for here is that if anything having the grass a bit wet is an advantage[1] - it makes the grass a little stiffer and lubricates the blade slightly - so you can cut on days that you'd certainly not mow & probably not even strim. One of the big advantages of the Austrian[2] scythe over the classic British is that it's half the weight! The cut grass is left in a (fairly) tidy swath that's easy to deal with. I tend to use it as mulch under shrubs and in places where I'd like to suppress grass & weed growth (e.g. around & under the bird feeders). Some I even make into a small amount of hay, which I use for covering layers of kitchen waste additions to the compost heap in winter. If you follow the link there are loads of 'inspirational' videos. [1] Traditionally you'd get up to catch the dew, but I'll leave that for others! [2] Really the two main styles are more a case of SE Europe & NW Europe, but Austrian scythe seems to be the commonly used term, even though some of the really good "Austrian" style blades are Italian!1 point
-
How do! welcome 'back'.1 point
-
Welcome back.1 point
-
Have you really forked out nearly £50,000 before you actually start the real work?1 point


.jpg.c21f3ac78c9b7efd90cbdcb312744dc5.thumb.jpg.7adcad4c0e384f5ecd7d56b0618df6e5.jpg)