ProDave
-
Posts
30688 -
Joined
-
Last visited
-
Days Won
424
Everything posted by ProDave
-

Grand designs: off site construction
ProDave replied to Post and beam's topic in Property TV Programmes
I briefly did some work for a passive house building company here. I was not allowed to drill a hole through the external wall of the building (i.e. through the air tight layer) If I needed a hole, I had to discuss it, and one of the joiners would drill the hole in the agreed place (not always where I wanted it) and they would then seal the cable penetration afterwards. -
MVHR & wet room windows… any thoughts on fixed vs opening?
ProDave replied to fatgus's topic in Windows & Glazing
How did you even get that past Building Control? Means of escape? -
Grand designs: off site construction
ProDave replied to Post and beam's topic in Property TV Programmes
It is supposed to make the build more precise and more controlled. But the price. £800K for the build, not including the plot (another £650K) Eye watering figures for me, both of them. And I don't recall them saying how many square metres. Also no details of insulation levels, heating system etc. And in spite of it being built in a factory, it appears the plumbers got no thought in the design and they still had to work out pipe routes and drill all the holes just as they would in any other build. -
And this is why I dislike "plastered on the hard" forcing cables to be chased in. Much better with a timber batten service void and plasterboard.
-
When I have been wiring a new house for the client, the first thing I do is go round with a tape measure, a big black marker pen and put a cross on the wall where all the sockets etc will be according to whatever drawings I have been provided with. Then I walk round with the client and discuss their needs, wants and preferences. Invariable most of the socket positions get changed as do lighting positions. As to kitchens. I have yet to see a new house built with the kitchen layout shown on the plans, another thing that gets changes as things evolve so don't even start the wiring for that until the kitchen is on order. What I am saying is don't get over excited about drawing plans. Unless you are the unusual client where nothing changes when you see the building for real.
-
Electric cables in a wall must run in a safe zone. Broadly speaking a safe zone is horizontally or vertically from an electrical accessory, e.g. a socket, or within 100mm of the corner of a room or ceiling. If you want to run electric cables around a room then do so at socket height, and ensure each wall has at least one socket to create that safe zone, and that is where all your mains cables can correctly run around a room.
-
BUT electric cables must tin in safe zones. So to ensure this the electric cable tray must be within 100mm of the ceiling all the way across the room. The data cable tray can be at any height you want.
-
Call that a Beech? Nah,

-
https://www.toolstation.com/universal-top-fix-seat-bung-kit/p46310
-
Post a picture of the other nut. It will be possible to buy another one (probably sold as a pair)
-
Yes LPG gas. Turn off at the bottles. Back to the subject of isolator switches for kitchen stuff. I put mine in the back of the cupboard above the ovens. I can inform our learned readers, it is an absolute mare terminating cooker sized cables in a switch box at the back of a cupboard when you are working on a step ladder reaching into the back of a cupboard so working at arms length. I do question is it really necessary, particularly for an oven. If there was a fault is is probably quicker to go the consumer unit and turn off the clearly labelled Oven rcbo than pull the stuff out of the cupboard to get to the switch.
-
Water and gas off when we go away. Leccy stays on for the fridge, and for the PVR to record stuff while away.
-
Make the plywood a very snug fit and glue the edges to the walls of the cabinet frame as well.
-
Good call. My neighbour had a huge tree right next to his bungalow, it would have flattened the bungalow if it had fallen onto it, and if you were in the bedroom next to it, it might be your last nights sleep. But also across the road was the 11KV overhead line. SSEN removed it for free when he pointed out if it fell down it would break their overhead line.
-
I would cut a sheet of 10mm ply to be a snug fit in the recess behind the cabinet, fixed there with your favourite gap filling adhesive. Fix the cabinet with the official fixings into plasterboard fixings, then two screws through into the studs one top one bottom, going through the flimsy back and your 10mm ply
-
If the flimsy back it recessed a bit as is often the case, fix a more substantial backing board behind it.
-
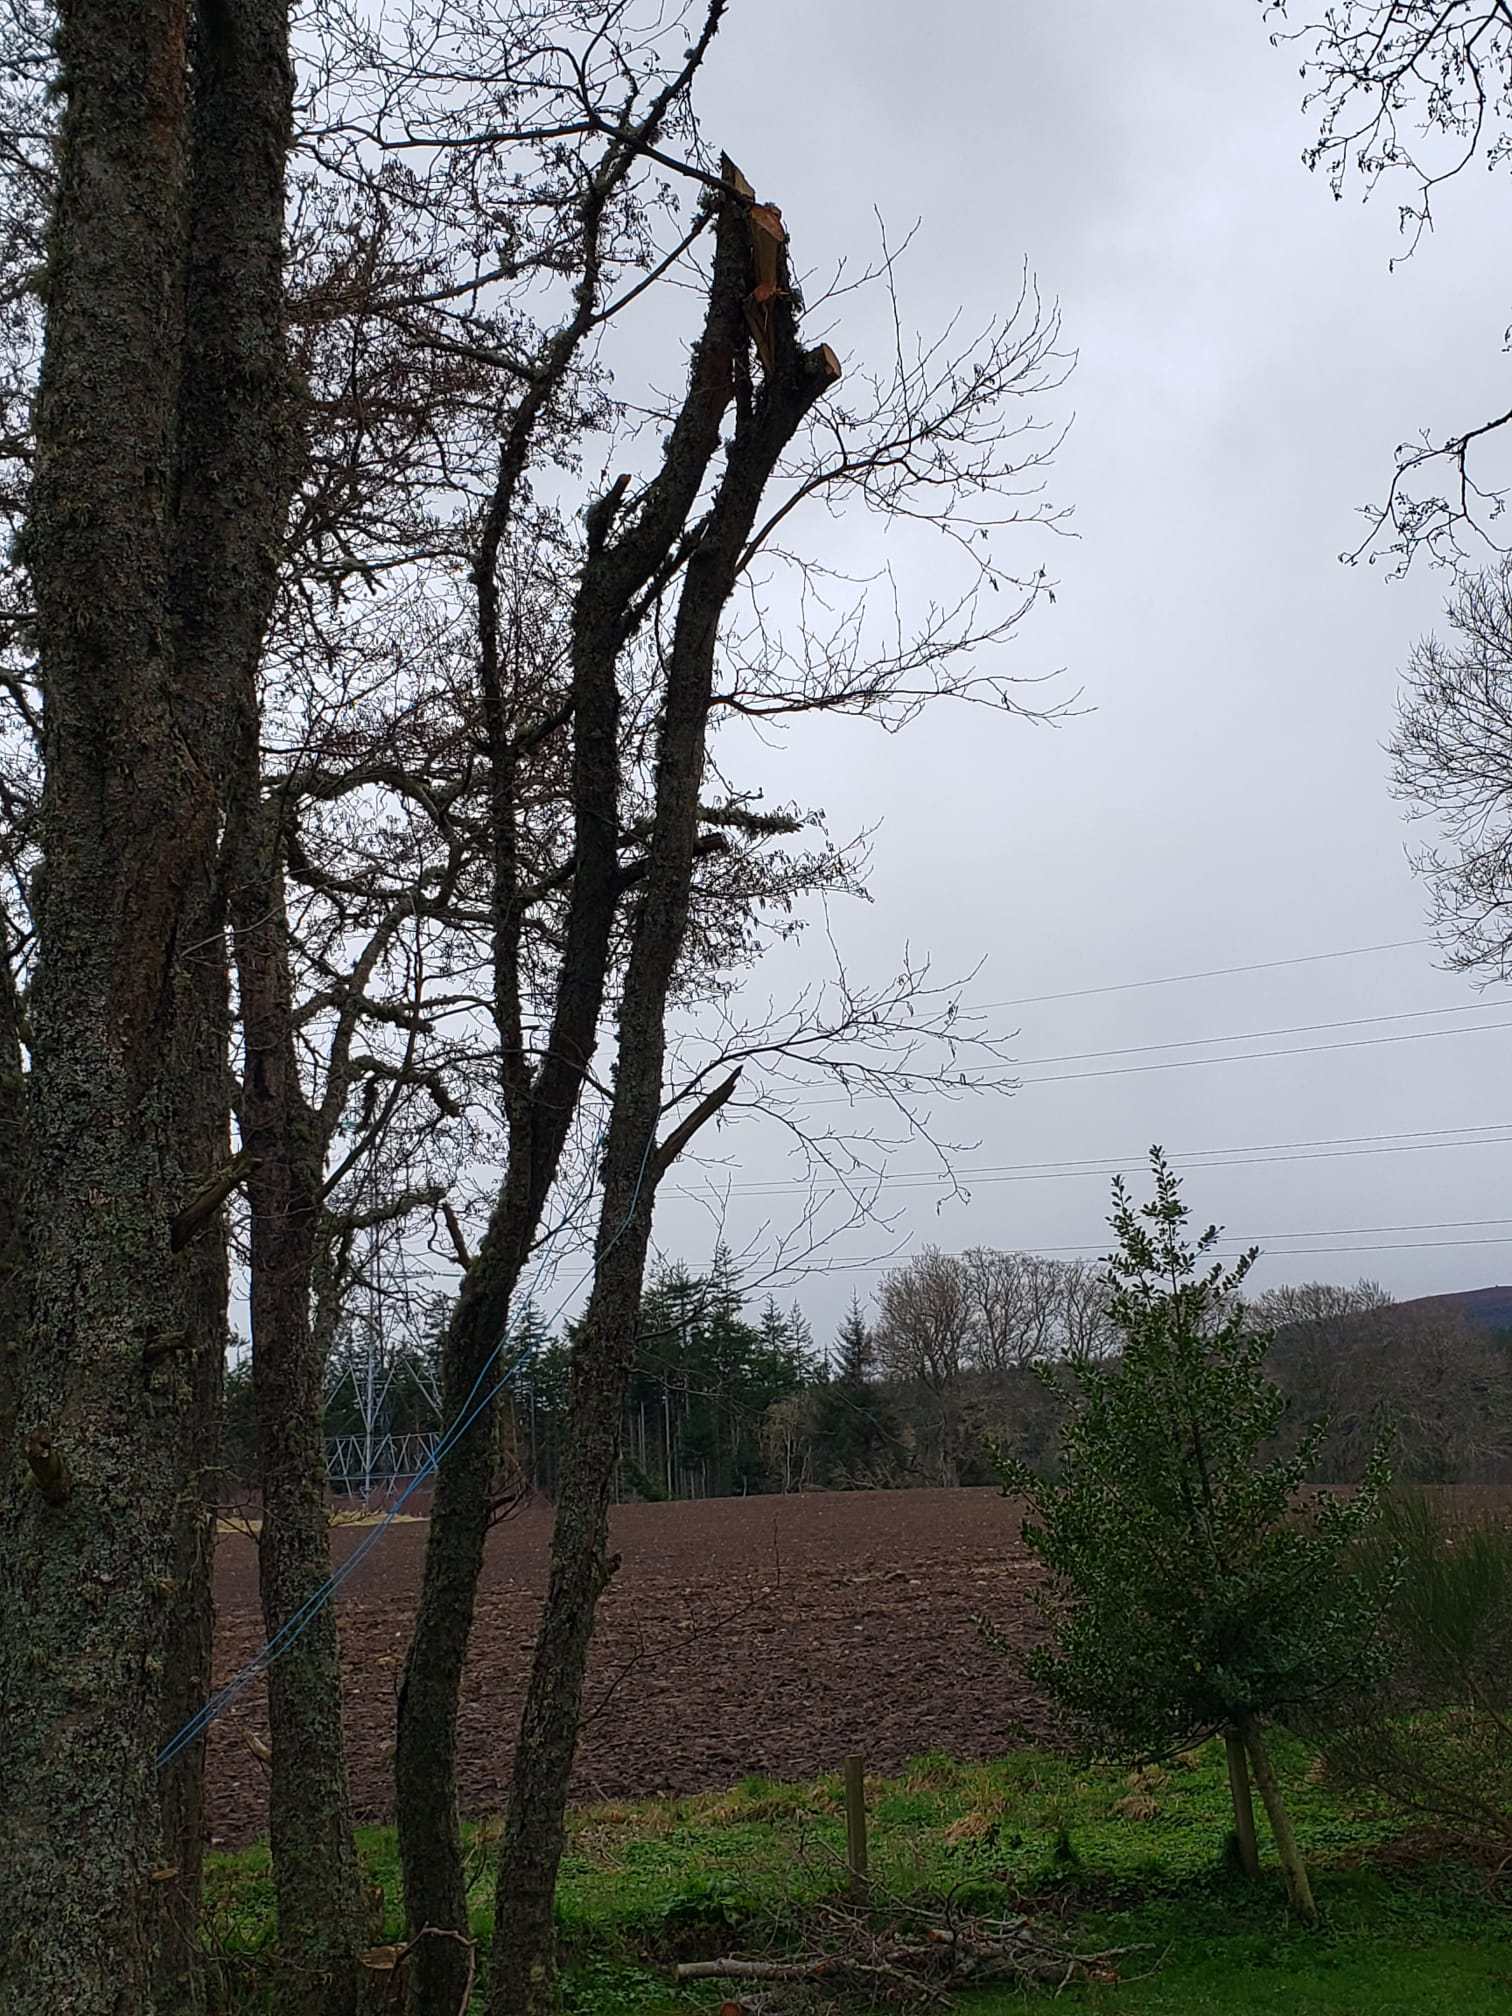
Just an example of my inventive DIY tree felling. These 2 trees, the right hand one had failed at the roots and was leaning over onto it's neighbour. All the tree men that looked seemed to suck air through their teeth, but all agreed both need to come down. I suspect none really knew how to do it. To fell them in one go, it was likely the tops would reach the house or static caravan. I suspect nobody wanted to climb a compromised tree to take the tops off. My inventive solution was put up a scaffold tower next to the trees and working from that with my extended pole saw I cut the tops off. That now just leaves the two mostly bare trunks to fell. Now short enough that they won't reach anything they can harm. Again not advice, just how I did it myself. I would really really love a mini spider cherry picker for this sort of work, but silly money for something I would use once in a blue moon, so the scaffold has to do, even though it is a lot of work to put up for a 15 minute job then take down.
.thumb.jpeg.f9690a6b9650ee5dd5576825af739467.jpeg)

-
Find the location of the studs. Unless it is a very small cabinet, it is very likely at least one stud will be behind the cabinet. So I would fix the cabinet with plasterboard fixings, AND one or 2 screws directly through the cabinet (additional holes drilled for this) straight into a stud. I have done this for kitchen cabinets and they have not fallen down yet.
-
Must check to see if Artemis is really going to launch today or is that a victim of the date?
-
Best of luck finding a tree man. I had 4 look at mine, all gave a price and then did not answer their phone again or one kept giving a date to come and do the work and cancelled. I am doing mine myself now. With an 8" single handed electric chainsaw with extending pole to strip the upper branches off, then felling the now mostly bare trunk. It's easy if you have somewhere for them to drop, you can fell them whole. The tricky ones were the ones without room and had to be dropped in sections. Only do this yourself if you are comfortable, or as I was, desperate. Best of luck finding a tree man. As I gave a WBS none of it goes to the chipper. Everything larger than a finger diameter gets used for burning or the thin stuff for kindling, only the really small stuff got burned on a bonfire.
-
I am sure the plan is frame to both side walls, AND further timbers spanning between these at no more than 600mm centres or better still 400mm centres.
-
With controls remote from the shower, I would (I did) put the controls on the left hand wall, so you can reach in and turn the shower on without the cold water in the pipes spraying on you.
-
Riser rail for me, that is more obvious if not centred.
-
So you also need to box in the bit up the stairwell where the pipes go up, but only that bit otherwise you will narrow the stairwell. Up to where the newel post would be my suggestion.
-
Best way to fix this mess
ProDave replied to Alwayslearning22's topic in Consumer Units, RCDs, MCBOs
From that link the best bit is Implications for the customer If the DNO or MOP need to attend a domestic or similar premises and encounter equipment other than that used for supply or metering purposes within an approved meter enclosure, this may prevent work activities such as: ● the replacement of lifetime-expired equipment; Great way therefore if you don't want a smart meter, to make sure there is no free space to fit one.


.jpeg.0c370ed13de726cdc0e43c07cd223e3a.jpeg)