
Weebles
-
Posts
399 -
Joined
-
Last visited
-
Days Won
1
Everything posted by Weebles
-
iBox sealing cuff - what to stick it on with?
Weebles replied to Weebles's topic in Bathrooms, Ensuites & Wetrooms
Ta dah ? thanks @PeterW tiles arrive today so hopefully the tiler will arrive soon too.....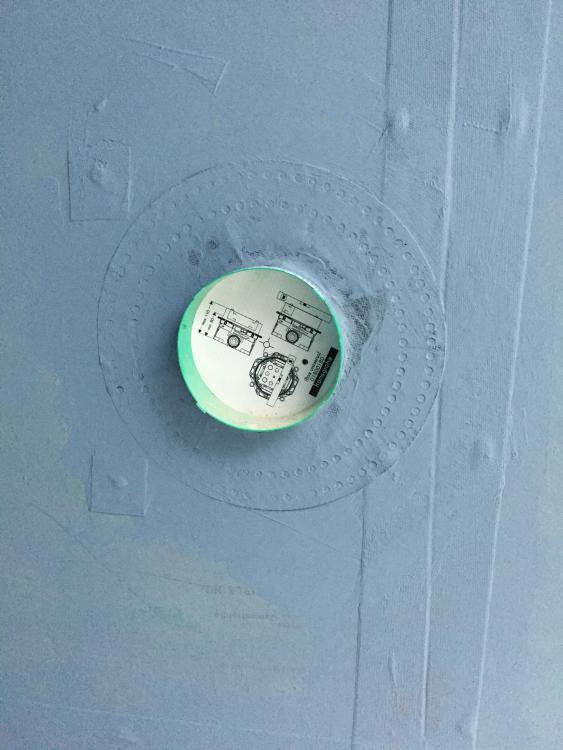

-
Delayed reaction to this post. Been stupidly busy. We have Eclisse pockets. All have ply then plasterboard and feel very solid with the double layer and a skim. They are a bit hollow sounding but the space saving convenience is worth it. All on en-suite bathrooms so hopefully noise won’t be too much of an issue and will be personal to the occupants of the bedroom / bathroom. ? We were advised to put the ply layer on so that we could fix things to the wall. Its a bit stronger with the extra layer.
-
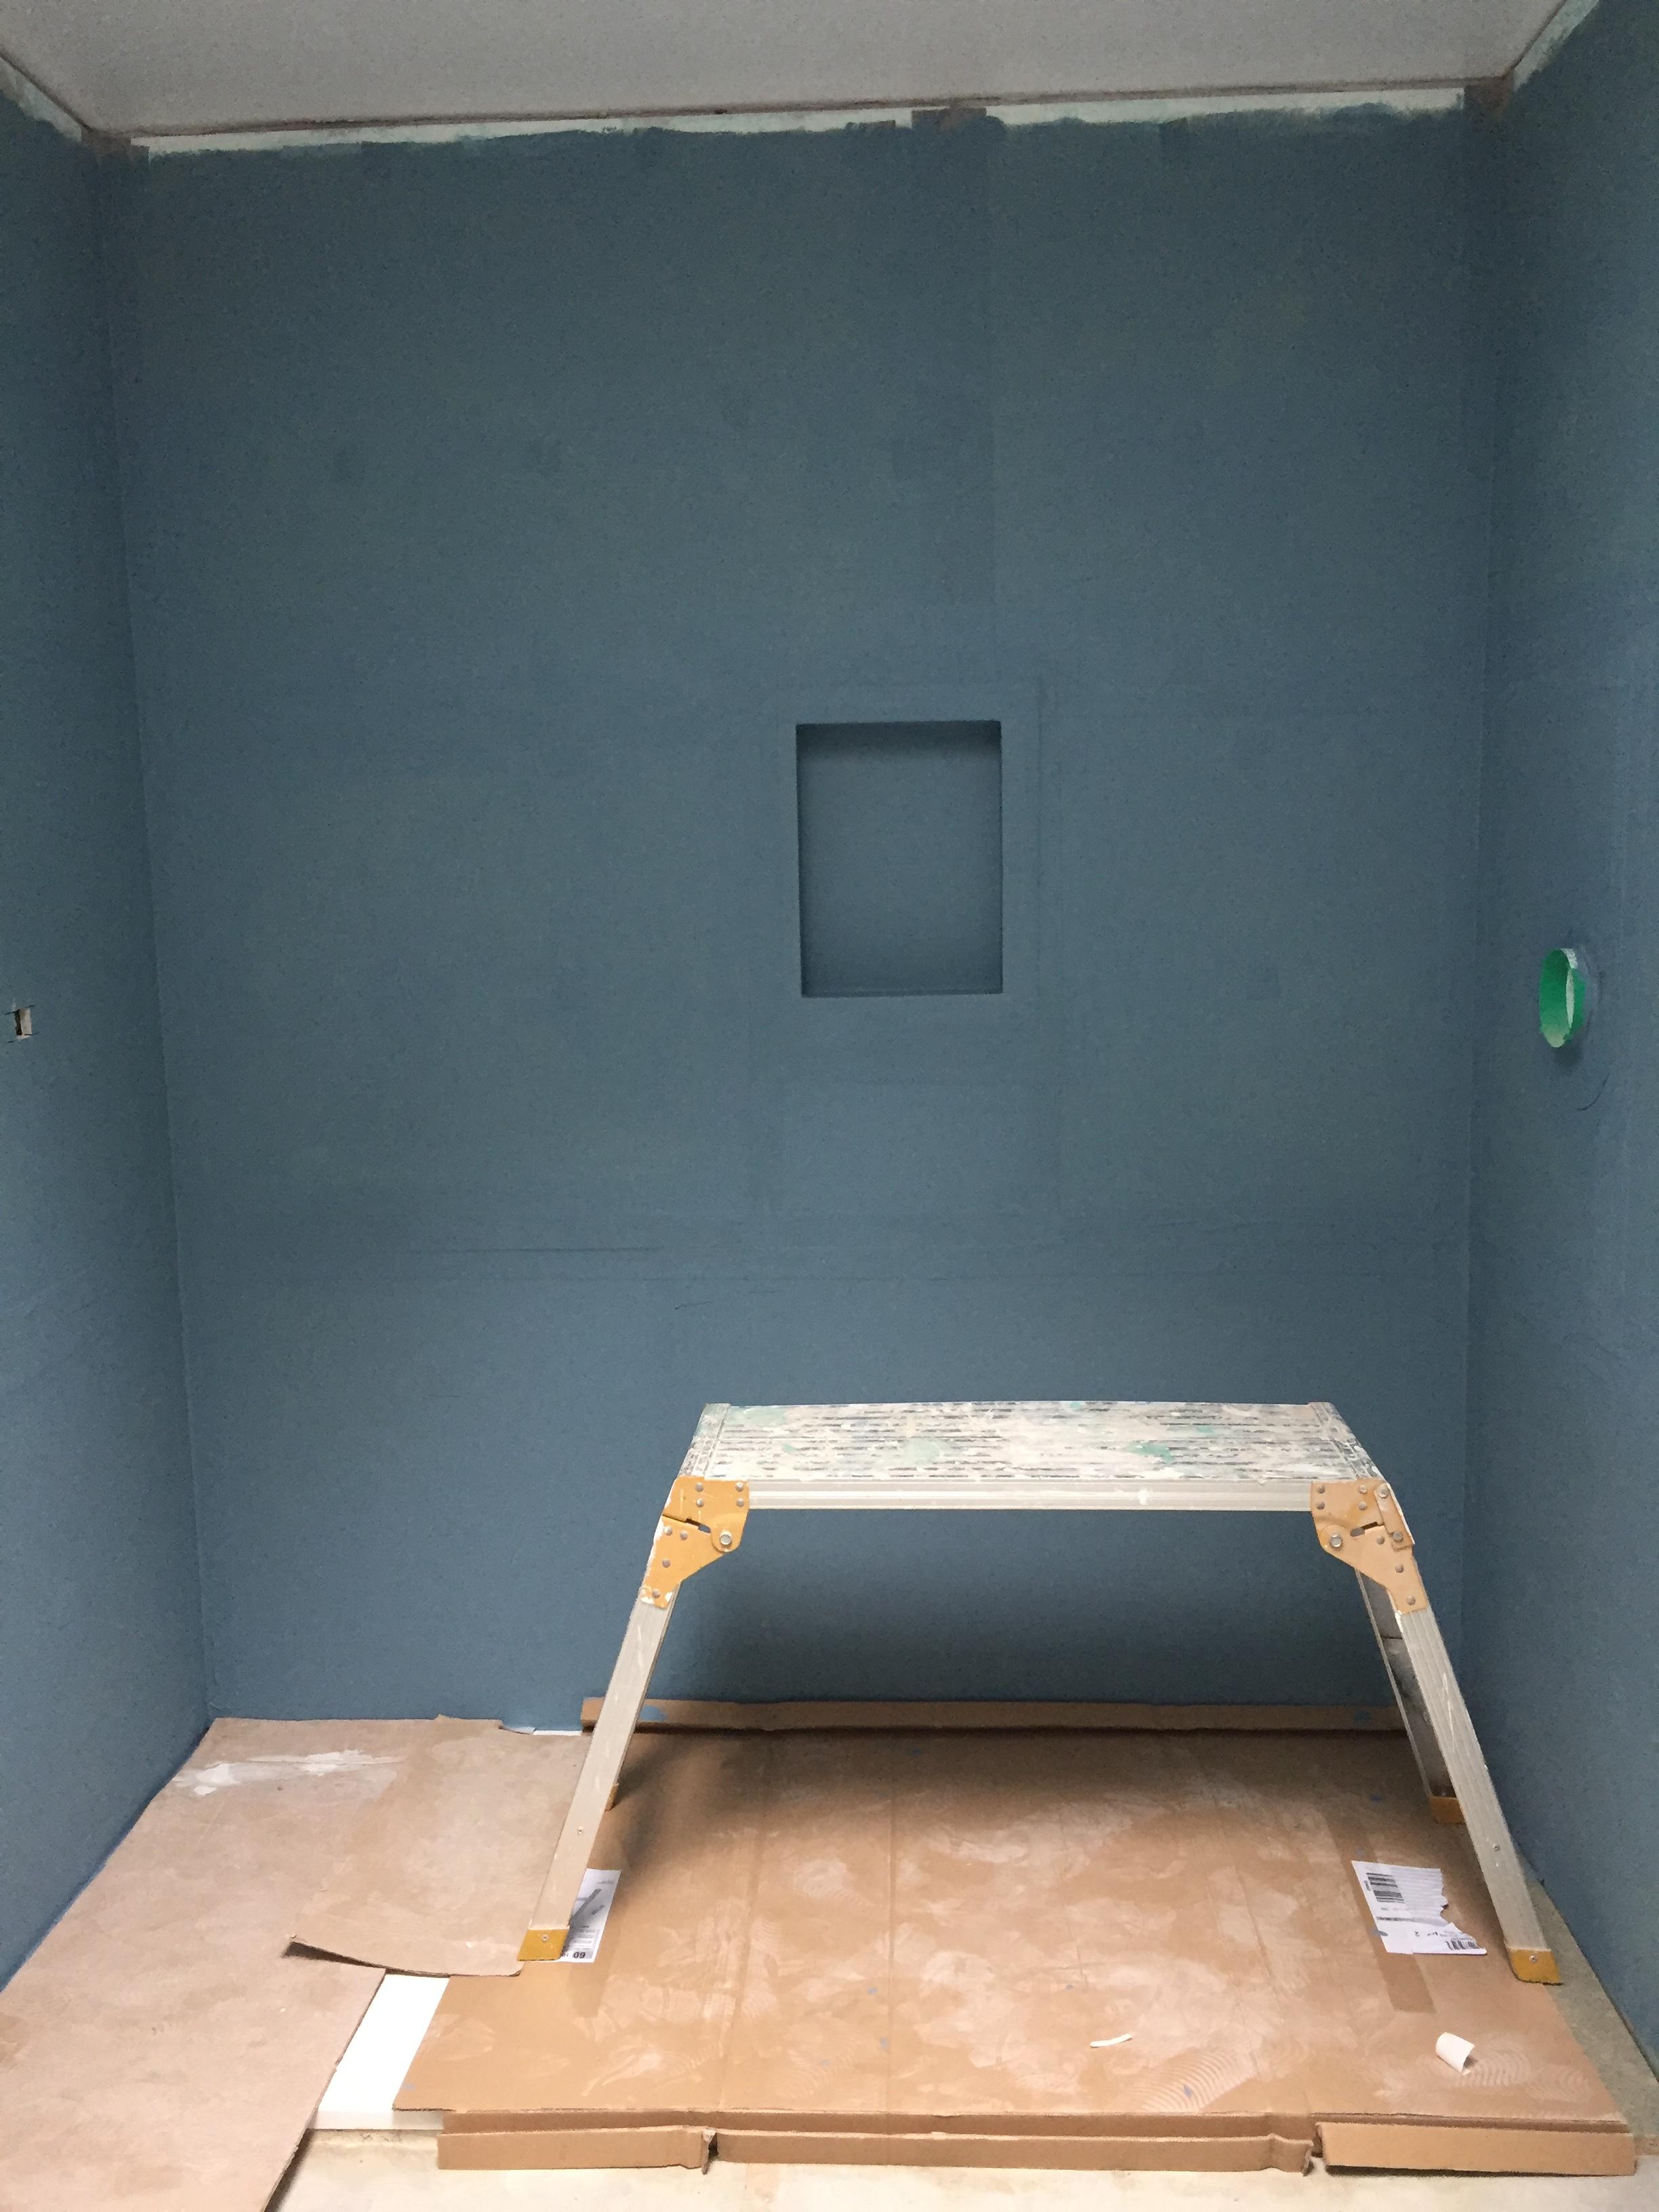
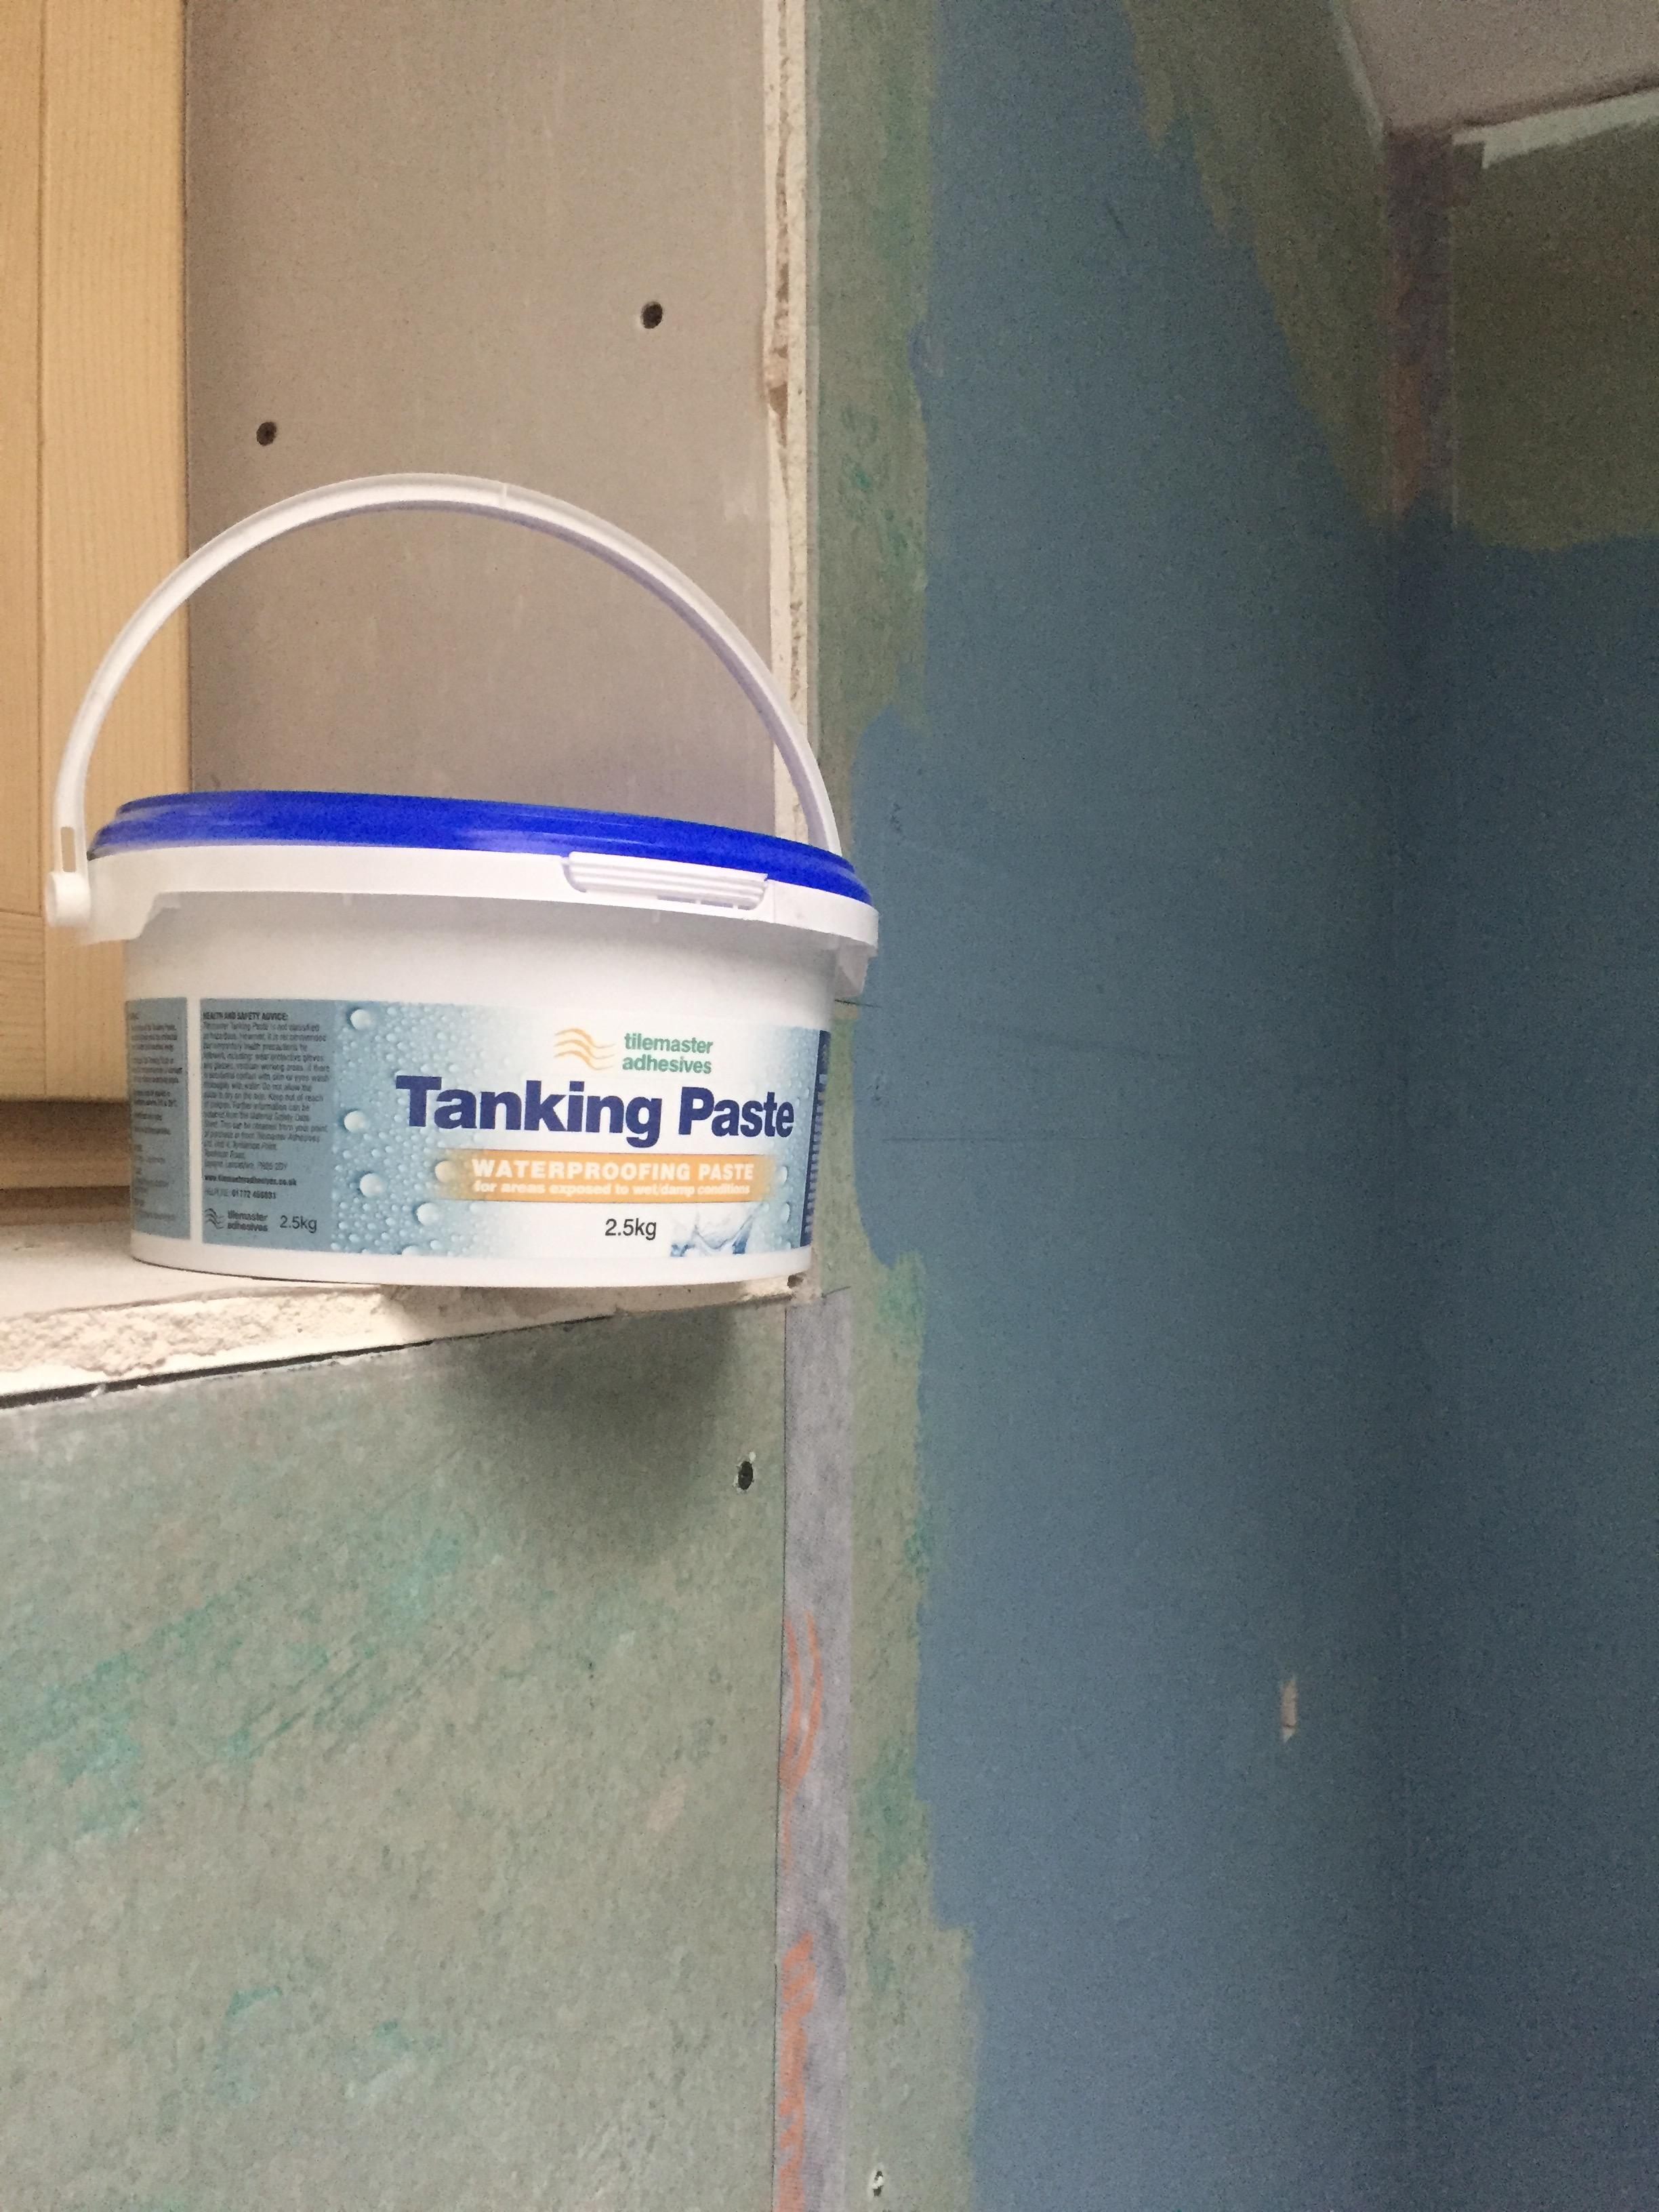
The sealing cuff that comes with the Hansgrohe iBox needs to be glued to the wall (a Hardie backer board). Can I “glue” it on with my tanking paste? And then tanking paste over the top too? And is the tight fit (going to have to stretch it / cut it to fit over the unit) expected? Thank you.


-
I don't know yet as we aren't living in it but the electrician has actually extended the run of 4 spotlights into the zone between the island and the table so there should be a bit of residual light from those. And the pendants over the table run left to right now. I imagine we will be OK with just the wall lights in the family area, for chatting, reading and watching TV. Quite a bit of natural light flooding through in the day. Anyway, we will see, and a standing lamp of some sort might be needed which would be fine.
-
All the choices you have to make.. and when?
Weebles replied to puntloos's topic in New House & Self Build Design
This week’s decisions are: tiles for bathroom grout colour adhesive for tiles washers to sit behind a vent in our larder And where to source them all from luckily I have already bought the bathroom insulation board and screws and the UFH mat also need to decide on skirting board, glue to stick it on with, paint to paint it with at the same time as continuing to paint, taping joints prior to tiling walls, installing said insulation board and UFH mats And that is just this week. I am trying not to think about ordering the stairs, contacting the plumber, planning the foul waste drainage works, installing the MVHR unit, windowsills.....And my full time day job ? I choose to be doing this ? and it’s mostly great. my advice is to make as many decisions as you can before it really gets going. -
Would you caulk at the same time as glue-ing, i.e. apply caulk to the top edge and then wipe off any excess that squeezes out? Or caulk after?
-
The plaster may be pushing it out a little. So you would expect it to touch the wall, cleanly? Good to know I asked our carpet people and they were the ones that said to put skirting up first. I had thought like you that the gap would be helpful, assuming there is a gap. They said that the carpet gripper rods would just be fitted in front of the skirting. I will double check with them though.
-
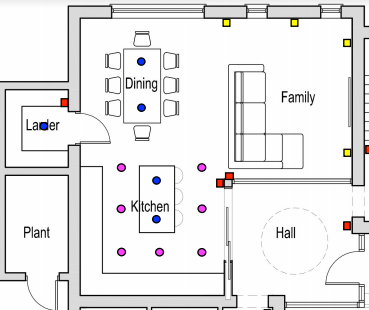
FWIW this is our electrician's initial plan for our kitchen / family area. We actually have gone for 3 lights above the dining table and it is rotated 90 degrees. And we have ended up with 12 ceiling spots - 3 rows of 4 - above the island. No pendants over the island (my choice). We also will have some under wall cabinet lighting. And just wall lights in the family area. The LED spots are dimmable. Seems OK so far but the room is still unfinished so don't know for sure yet.
-
Skirting seemed so simple until I started looking into it. All help appreciated please. We were thinking of some pre-primed MDF skirting (like the image of the sample just received) which we could then paint (gloss / eggshell) and fit ourselves. Any thoughts on that plan? And for fitting, would you glue to the wall? If so, with what? A "No More Nails" type glue? And what would you do about the slight gap at the top (where it joins the wall) and the bit at the bottom (where it sits on the tiles / wood floor)? Lastly, upstairs we are having carpet which we need to fit after the skirting apparently. Would you fit the skirting slightly off the current floor level to try to get the same skirting depth look throughout? Thanks
-
savings to be had
Weebles replied to selfbuildaberdeen's topic in General Self Build & DIY Discussion
We are still painting (more than 2 months now, on and off) so the lesson is one of time vs cost saving. If you have time, then do things yourself to save money. If you have money, then you save time. The other part of the cost-time-quality triangle is the bit that is variable. We reckoned we could probably paint and do most joinery that wouldn't be seen i.e. ply on stud walls, temporary stairs, box outs but there are some skills we don't have that would be very obvious i.e. plastering and tiling. For those we have the pros in and the quality shows. I tell myself that taking longer is OK as we are saving money. But actually, there is a cost to taking longer. In our case there are no rental costs as we are living in the van but there is a cost to relationships living in such close proximity to teenagers ? Lastly, there is the genuine fun in doing things yourself and learning new skills. That said, if I got given £100K tomorrow I couldn't move faster to a drainage contractor, joiner and landscape gardener...... Until then, those jobs are ours...... -
Not yet. But I remain optimistic. I will update when I have firm details.
-
Put in some compriband in. Hopefully that will do the job. Thanks everyone.
-
Thanks @craig. I have messaged our fitter to see if he happens to have a short length lying around. if he hasn’t, given our time frame, is there anything else we can do?
-
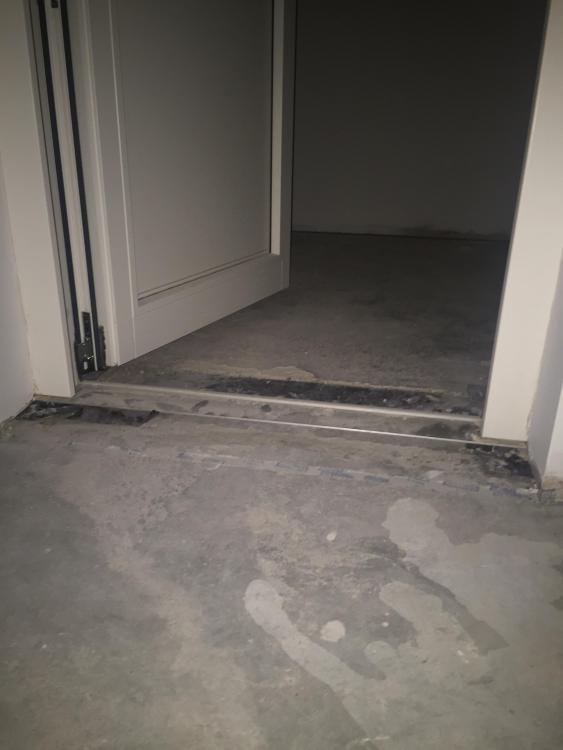
Noticed a small problem tonight. Our larder door has been fitted as requested with a 20mm gap under it (20mm gap to allow for floor tiles). But it is an external door (the larder is outside the passive envelope) and the door hasn’t been sealed against the floor/threshold . It’s basically a gap of 20mm letting outside air in (our air test was done with a temporary door in place). Our floor tiler is coming on Friday. So this problem is a bit pressing. How shall we fill this gap? We are passive standard (but not getting certified). Any advice welcomed. thank you.
-
Thanks @nod. Worked a treat. Mould remover spray (had some handy as we are living in a caravan ?) and hot wet cloth. Cleaned off easily and now dry with no sign of it. That room was plastered in Jan and it has been cold, no heating in there and an accumulation of building materials etc against walls. Mistake on our part. Live and learn. ?
-
Plastering is all done. Looks great. And much of it is now painted (wash coat at least). But I got to the final room to wash coat it this weekend I noticed some mould on a couple of walls, where we had leaned some cardboard boxes (containing shower panels) against the walls. My guess is this has just resulted in a restriction in air circulation whilst the plaster wasn't quite fully dried out (though it did look dry and had been a couple of weeks). Does that sound right? My question is: what do we do? Clean it off with a mould remover, let it dry and then paint over it? Or something else? (we have obviously removed the shower panel boxes)
-
We wanted to have a rainwater harvesting tank (garden and car washing only). Have spent ages wondering if we can economically build our own as the kits are above £2.5K and I can buy alot of water (at current rates) for that money. Have concluded that a water butt off the back of the house is going to be the most economical. I think I can fit a pump to one of those to get the water to the veg patch in due course. It won't be flash but honestly will do what want to - water some plants. Those rainwater kits are ridiculously expensive.
-
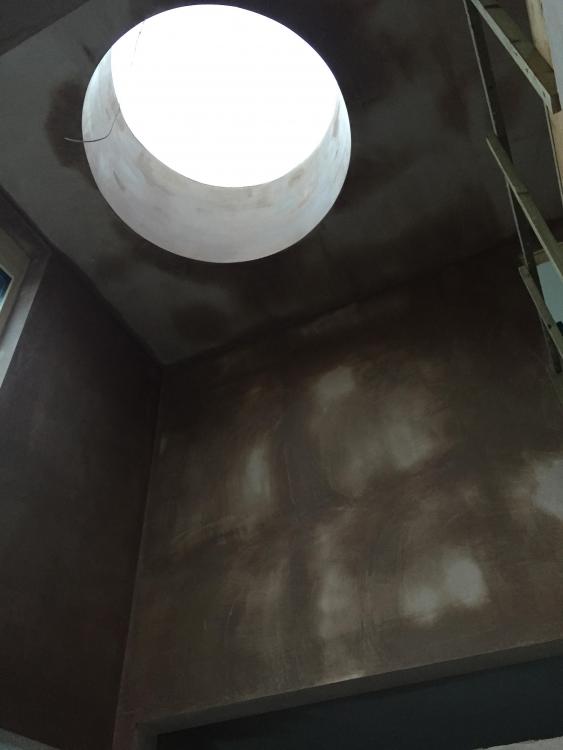
Thanks for all the positive comments. ? It’s nice to have something to feel good about (momentarily) whilst we feel bad about lack of progress elsewhere. All plastered now. It’s not bad at all. The eagle eyed (like HWMBO) might say it’s not quite circular. But it’s good enough for me. Going to take a while before we paint. The 6mm Flexi plasterboard needs PVA prior to plaster so will take longer to dry out. Off hired the tower scaffold. Will get it back for painting. Will get a higher platform to avoid the step ladder issue ? Meanwhile back to mist coating with my Aldi sprayer. Bring on the long weekend......
- 47 comments
-
- 1
-

-
- roof lights
- upstands
- (and 1 more)
-
+1 for Screwfix. We must have now bought thousands of Goldscrews from there. Seem very good value.
-
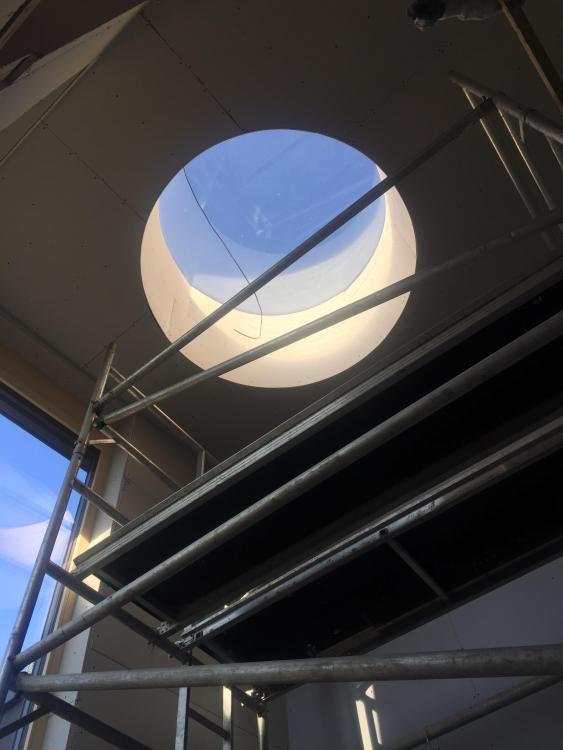
And here it is fully boarded. Plastering of it starts Monday. So far so good.....
- 47 comments
-
- 3
-
-
- roof lights
- upstands
- (and 1 more)
-
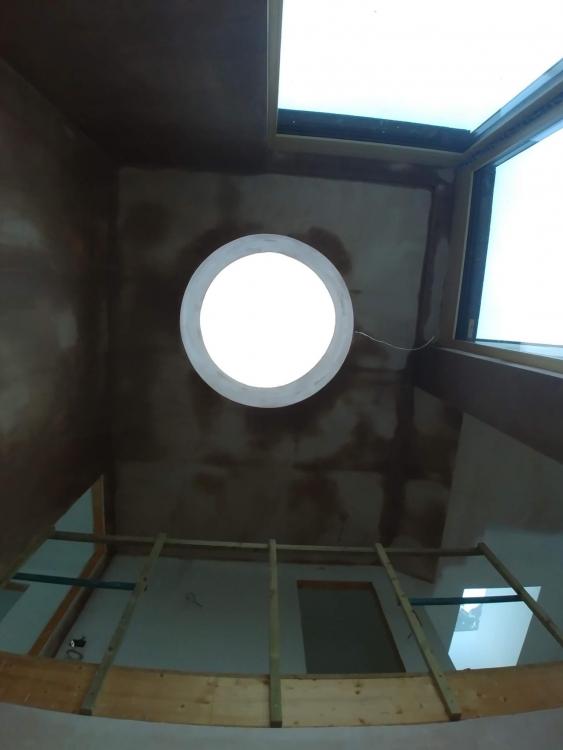
Things take a while when you are self building don't they? So, back to this circular rooflight internal finishes joinery. I thought you'd all like an update, particularly @Onoff who I was expecting on site back in November ? Here is what has been done. Firstly, there was a slight thermal bridging issue with the metal frame for the roof light being inside the thermal envelope. Got some drips earlier in the year when plaster was drying out and condensing up there. Not a huge amount we could do easily but I have at least stuck some aerogel (left over and lying around) on those areas. Those are the silver triangle pieces. Hopefully there will be less moisture (than plaster drying out) when we are living in it. Back in Jan the tackers said they would have no problem with that rooflight meaning that HWMBO was left with stud wall construction only. And this week was the week for them to do it. They turned up with a flexi 6mm board (that they also said was moisture resistant). They used some plasterboard to batten out slightly from the square bits of the hexagon, some 25mm battens a little bit further out and then some creative battening across the corners and then they bent the 6mm board into shape and fixed it. Today they did the top bit (no photo, too dark when I got home). But they have left the plasterboard about half an inch short of the glass and made sure that the black edge is covered (in case the finished skim isn't quite circular - otherwise the absolutely circular black edging would show it). I'll post again after the plasterer has been in on Monday - hopefully he'll have no issue with it. But so far so good. Did have to hire a huge tower scaffold though. Ours only goes up about 3m and they needed the platform for this work at over 5m. Its still pretty hairy standing on a step ladder on top of the platform but even I can reach the roof light from the top. Bodes well for painting.
- 47 comments
-
- 4
-
-
- roof lights
- upstands
- (and 1 more)
-
How Often Does Your Building Inspector Visit?
Weebles replied to Triassic's topic in Building Regulations
We have had two visits so far. The first visit was at our request when we discovered we had no clay so wanted a view on foundation depth. At this point there was nothing to see bar a big hole, nothing in it. The second (different person) was when the timber frame was completed. In between we had a Facetime call on the morning of the concrete slab pour. Since then they have chased me multiple times saying I need to keep them updated as the next inspection is drainage. I message back each time and tell them that we haven't got round to any drainage yet but we have done insulation (sound and thermal). They request that we take photos. They haven't said as much but I suspect the "you're building for yourself, you won't cut corners" argument applies to us too. We are taking loads of photos so we can evidence everything. They have an order to inspect in. The fact that we are not building in that order is irrelevant to them. That said, if we ask a question, they do respond. Private building control, not local authority. Connected to our warranty. So I wouldn't worry. But I would take loads of photos and send regular update emails. -
Ian, that is such a kind offer. Thank you. Today, the uk distributor sent me a full copy in English so now all I need to do is learn the language of glazing ?
-
Less splatter than a roller. There is some element of control over volume coming out. But you can get close to edges without spraying over the edge. So going up to the underside of a window cill (with no cill at present) ends up spraying the window. It has quite some reach, I reckon 2m for odd bits that go astray. But if you are just spraying a wall, it’s brilliant. Use a roller / brush for the bits requiring accuracy. It doesn’t drip onto the floor which is good. So @Bitpipe your floor should be safe. Prob best with a bit of plastic anyway though.....Refill it somewhere off your floor too. that Lidl one seems like an even better deal. Same sort of kit. Wish I’d seen that and saved £15 ? I am sure the Aldi one will have the same issue @vivienz notes ie only one nozzle works for paint - the biggest one.
-
My paint is pretty well mixed but only with a stick of ply (no whisk on a drill yet - might need that for top coat emulsion) As @recoveringacademic points out, it must be clean to work. I am taking it apart and cleaning it religiously with hot water (sometimes washing up liquid too) after each use. Even if I down tools for an hour it doesn’t perform as well for the rest of the day. Luckily I am only doing 2 hour stints in the evenings. For me it’s worth £40 even if it just does the mist coat (2 coats on each wall - 10 rooms plus hallway)